
Hi, this is Takazudo. I’ve been gradually adding products, and given the nature of these products, I felt the need for comprehensive explanations and introductions to modular synths as text content. So I’ve decided to write such articles as “columns” on this website.
So here’s Column #1. Today’s topic is Synth DIY and DIY Kits.
This is written for those wondering: What does synth DIY mean? I can’t imagine building one myself… — that kind of audience.
- Me and Synth DIY
- Why I Recommend DIY
- What Exactly Is a DIY Kit?
- DIY Kit Precautions
- Through-Hole and SMD
Me and Synth DIY
Let me start with a bit about myself and synth DIY.
I created this web shop around September 2023, and at that time I had absolutely no experience with soldering or working with electronic components. However, once I started exploring modular synths, I noticed there were people who build them themselves. I imagine most people who buy and enjoy modular synths have a similar level of awareness.
After I started selling synths, I met @regenb0gen303 through Discord, who expressed interest in trying DIY. We decided to give it a shot together — could we build and sell them? And so we started building various things. He still builds many of the DIY products we sell today. That was around November 2023, and since I’m writing this in August 2024, my DIY experience is roughly over half a year.
I’ve been building various things since then, and starting DIY has been meaningful in many ways. I’ve met different people through DIY, and I’ve come to understand synths at the component level. How should I put it — for example, when looking at synths sold at our shop or music stores, before DIY, the normal perception is “a finished electronic instrument.” But once you start doing DIY, your resolution increases. You start being able to sense things like what characteristics a module has, whether it’s digital or analog, why it’s priced the way it is, and so on. I think the way someone who has done DIY sees electronic instruments is quite different from someone who hasn’t.
Since then, I’ve been looking at BOMs (parts lists) of open-source modules and buying parts individually, and occasionally studying circuits.
Why I Recommend DIY
With that context, our shop carries many DIY kits that bundle the necessary components. You do need to gather tools first, but once you have them, you can buy these DIY kits and assemble synths yourself by soldering the components. I, Takazudo, strongly recommend trying synth DIY. That’s why we carry DIY kits.
1. Deeper Understanding and Attachment to Synths
As I mentioned earlier, the first reason I recommend DIY is that it deepens your understanding of and attachment to synths. For example, say there’s a module for 39,800 yen — you’re kind of interested, you buy it, play with it a bit, don’t really understand it, and sell it. Doesn’t that happen quite often?
I used to buy and sell synths like that too, but since starting DIY, that frequency has decreased. I’m not entirely sure why, but probably because when you DIY a synth, you connect every circuit by hand, sometimes things don’t work, and you naturally end up understanding each function. Then it becomes a well-known tool that you want to keep close. Yes, it’s not a 39,800 yen product anymore — it’s something you made yourself.
This won’t apply to everyone, but Takazudo believes that building things with your own hands creates understanding and attachment toward synths.
2. The DIY Process Itself Is Fun
The other reason is that DIY itself is a different kind of hobby from playing modular synths or using them to make music. And this hobby is quite enjoyable.
Before starting DIY, I thought of it purely as a production process. Since I was also thinking about selling as a shop, I was calculating material costs and profit margins. But once I actually tried it, I realized the DIY process itself is fun.
Playing modular synths has a quality close to meditation — I get a sense of immersion. DIYing synths also gives that feeling of focused immersion. My day job is web app development, and it’s similar to how programming has a purpose, but the process of programming itself is enjoyable. Your soldering skills improve with practice, and while you might make mistakes or fail to complete things at first, those issues gradually decrease.
This varies by person, but I sometimes solder for hours while watching anime or videos on the side, and that’s quite enjoyable.
3. Get Modules at Lower Cost
Another point is that you can get modules at lower cost. For example, the AI Synthesis Stereo Matrix Mixer below is sold as a built unit for 47,800 yen versus 22,800 yen as a DIY kit. (As of August 2024.)
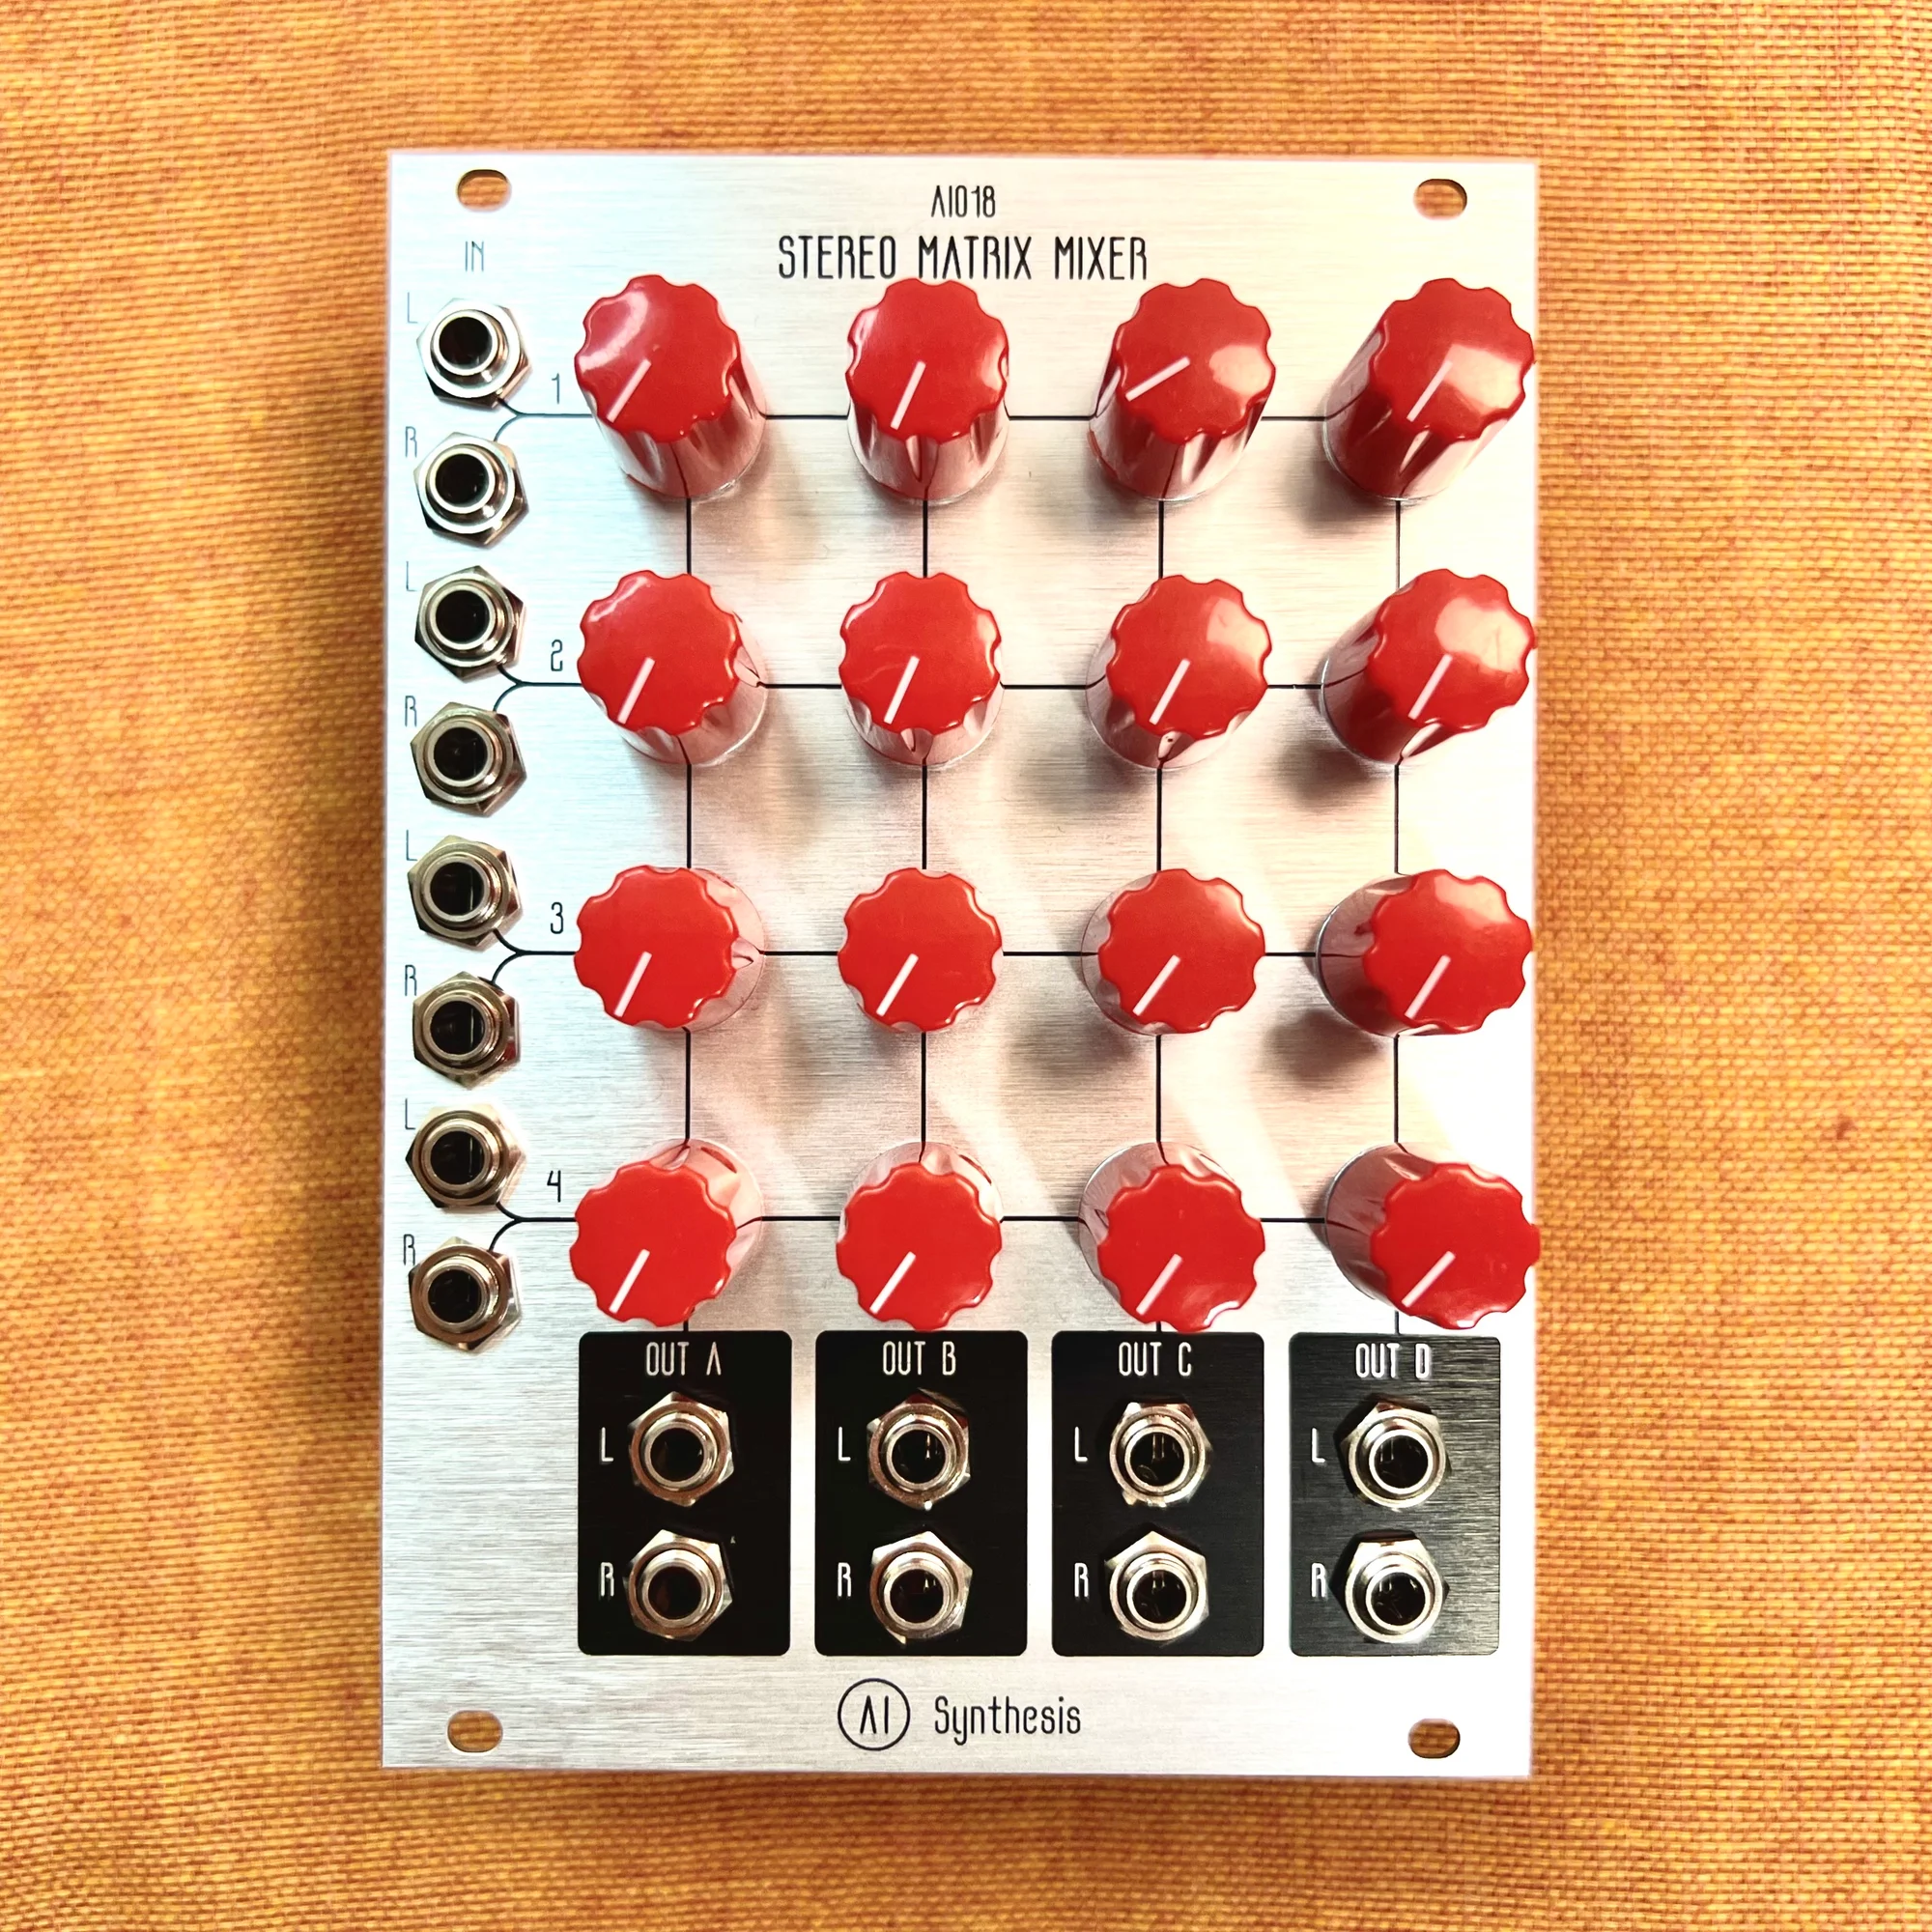
This pricing is based on wholesale prices from the manufacturer — I’m not making it cheaper because I personally want to recommend it. The DIY kit is inherently about half the price. Since the only difference is whether it’s assembled or not, building it yourself is a great deal.
I assembled this module myself, and even with experience, I’d estimate it takes about 2-3 hours. For the manufacturer, building 10 units would take about 20 hours, so the price difference essentially represents that labor time.
Not all DIY kits are dramatically cheaper than built units, since packaging kits also requires some effort. But generally, the more labor-intensive a module is to build, the larger the price difference between DIY kit and built unit.
However, if a built unit doesn’t work, you can request a return from our shop. With DIY kits, if you can’t get it working or accidentally short-circuit something, it’s at your own risk. The price difference accounts for this, but for those who want to take on the challenge, DIY kits are recommended from a cost perspective.
What Exactly Is a DIY Kit?
So I’ve been saying DIY is great for various reasons, but what exactly are these DIY kits that we carry? Let me explain in a bit more detail.
A modular synth DIY kit is a package containing all the parts needed to complete that module. Basically, with the kit plus tools like a soldering iron, you can build it yourself.
Contents of a DIY Kit
A DIY kit typically contains the following parts:
- Front panel
- PCB (printed circuit board with component numbers printed)
- Rack mounting screws
- Power ribbon cable
- Knobs
- Potentiometers
- Small electronic components (resistors, capacitors, ICs, etc.)
Here’s a video I recorded while building the Stereo Matrix Mixer mentioned above. You can see the unboxing at the beginning showing these components:
How to Assemble a DIY Kit
So the DIY kit comes with a complete set of parts, and in most cases, the manufacturer provides an assembly guide. For example, the Stereo Matrix Mixer’s assembly guide is available here, with step-by-step instructions on where to place each component:
AI Synthesis particularly promotes DIY, so they also provide build videos like this:
Additionally, while this particular Stereo Matrix Mixer didn’t have one, people often upload videos of themselves building DIY kits on YouTube. You can use such videos as reference while soldering one component at a time.
It’s natural to feel anxious when doing this for the first time, but the basic approach is to follow along with these videos and photos.
DIY Kit Precautions
I see, that’s how it works — if you’re interested in trying it, I’ll introduce what tools you’ll need next time. But first, here are some important points to keep in mind.
Not Making Mistakes Is the Most Efficient Approach
When assembling DIY kits, I recommend always keeping in mind to verify each step and avoid mistakes as much as possible. For example: Is this the right place for this component? Is the orientation correct? Resistors don’t have a specific orientation, but diodes and LEDs won’t work if oriented incorrectly. Components with directional requirements usually have different lead lengths or visual indicators showing the correct direction. Minimizing such placement errors is critical.
The reason I’m emphasizing this is that if you install a component incorrectly, detecting the error is extremely difficult. Using too much solder or not making a clean joint isn’t a major problem. But if you install the wrong component, the module won’t work, and finding the cause requires understanding the circuit — which requires technical knowledge. The correction work itself isn’t like reassembling LEGO — you need to remove soldered metal connections…
You’ll end up comparing with completed photos, looking for cold solder joints, and re-soldering. Such work can take much longer than the assembly itself. If the circuit shorts, ICs can be destroyed or resistors can burn. Then you need to buy replacement parts, and determining which component failed is also difficult.
Additionally, PCBs have soldering points (pads/lands), and when removing incorrectly placed components, these pads can lift off. If that happens, you need to scrape the board to expose alternative connection points or use jumper wires — which obviously requires understanding the circuit.
So carefully verifying each step and avoiding mistakes is the most efficient approach, even if it takes more time at first! First-time DIYers, please remember this.
DIY Kits Are Not Always Perfect
Another thing to be aware of: DIY kits are not always perfect as complete component sets.
What I mean is that DIY kits sometimes have missing parts or printing errors on the PCB. You might think “that’s the quality of a product for sale?!”, but I’ve personally encountered many such cases…
Why does this happen? Partly because these DIY kits don’t have a huge customer base, so when there are mistakes, buyers often use spare parts they have at home, and the issues rarely get reported.
Once you start buying individual parts yourself, you intuitively understand that with many small components, packaging mistakes are bound to happen.
Also, the “manufacturers” selling DIY kits are mostly operating at an individual level. They’re completely different from large companies like Roland or Yamaha. They don’t have large factories with careful quality checks, many operate as side businesses, and sometimes emails go unanswered…
Being aware of this background, I was quite cautious about selling DIY kits at our shop. But what we sell has reliable support, and we only carry kits with trustworthy guides and quality. If there are specific assembly notes, they’re listed on each product page.
For questions about assembly, missing parts, or leftover parts, we provide support through Discord, so please feel free to use it.
Through-Hole and SMD
But isn’t it really difficult…? While I can’t guarantee everyone can do it, it’s generally not that hard. This is because DIY kits are often designed with relatively large, hand-solderable components.
DIY components are broadly divided into two types: through-hole and SMD (Surface-Mount Device). Through-hole components have leads that pass through holes in the PCB and are soldered to metal areas called pads on the board. SMD components, on the other hand, are soldered directly to the board surface, enabling miniaturization.
The process of mounting SMD components on a board is called SMT (Surface-Mount Technology). It’s a bit confusing, but SMD and SMT are often used somewhat interchangeably.
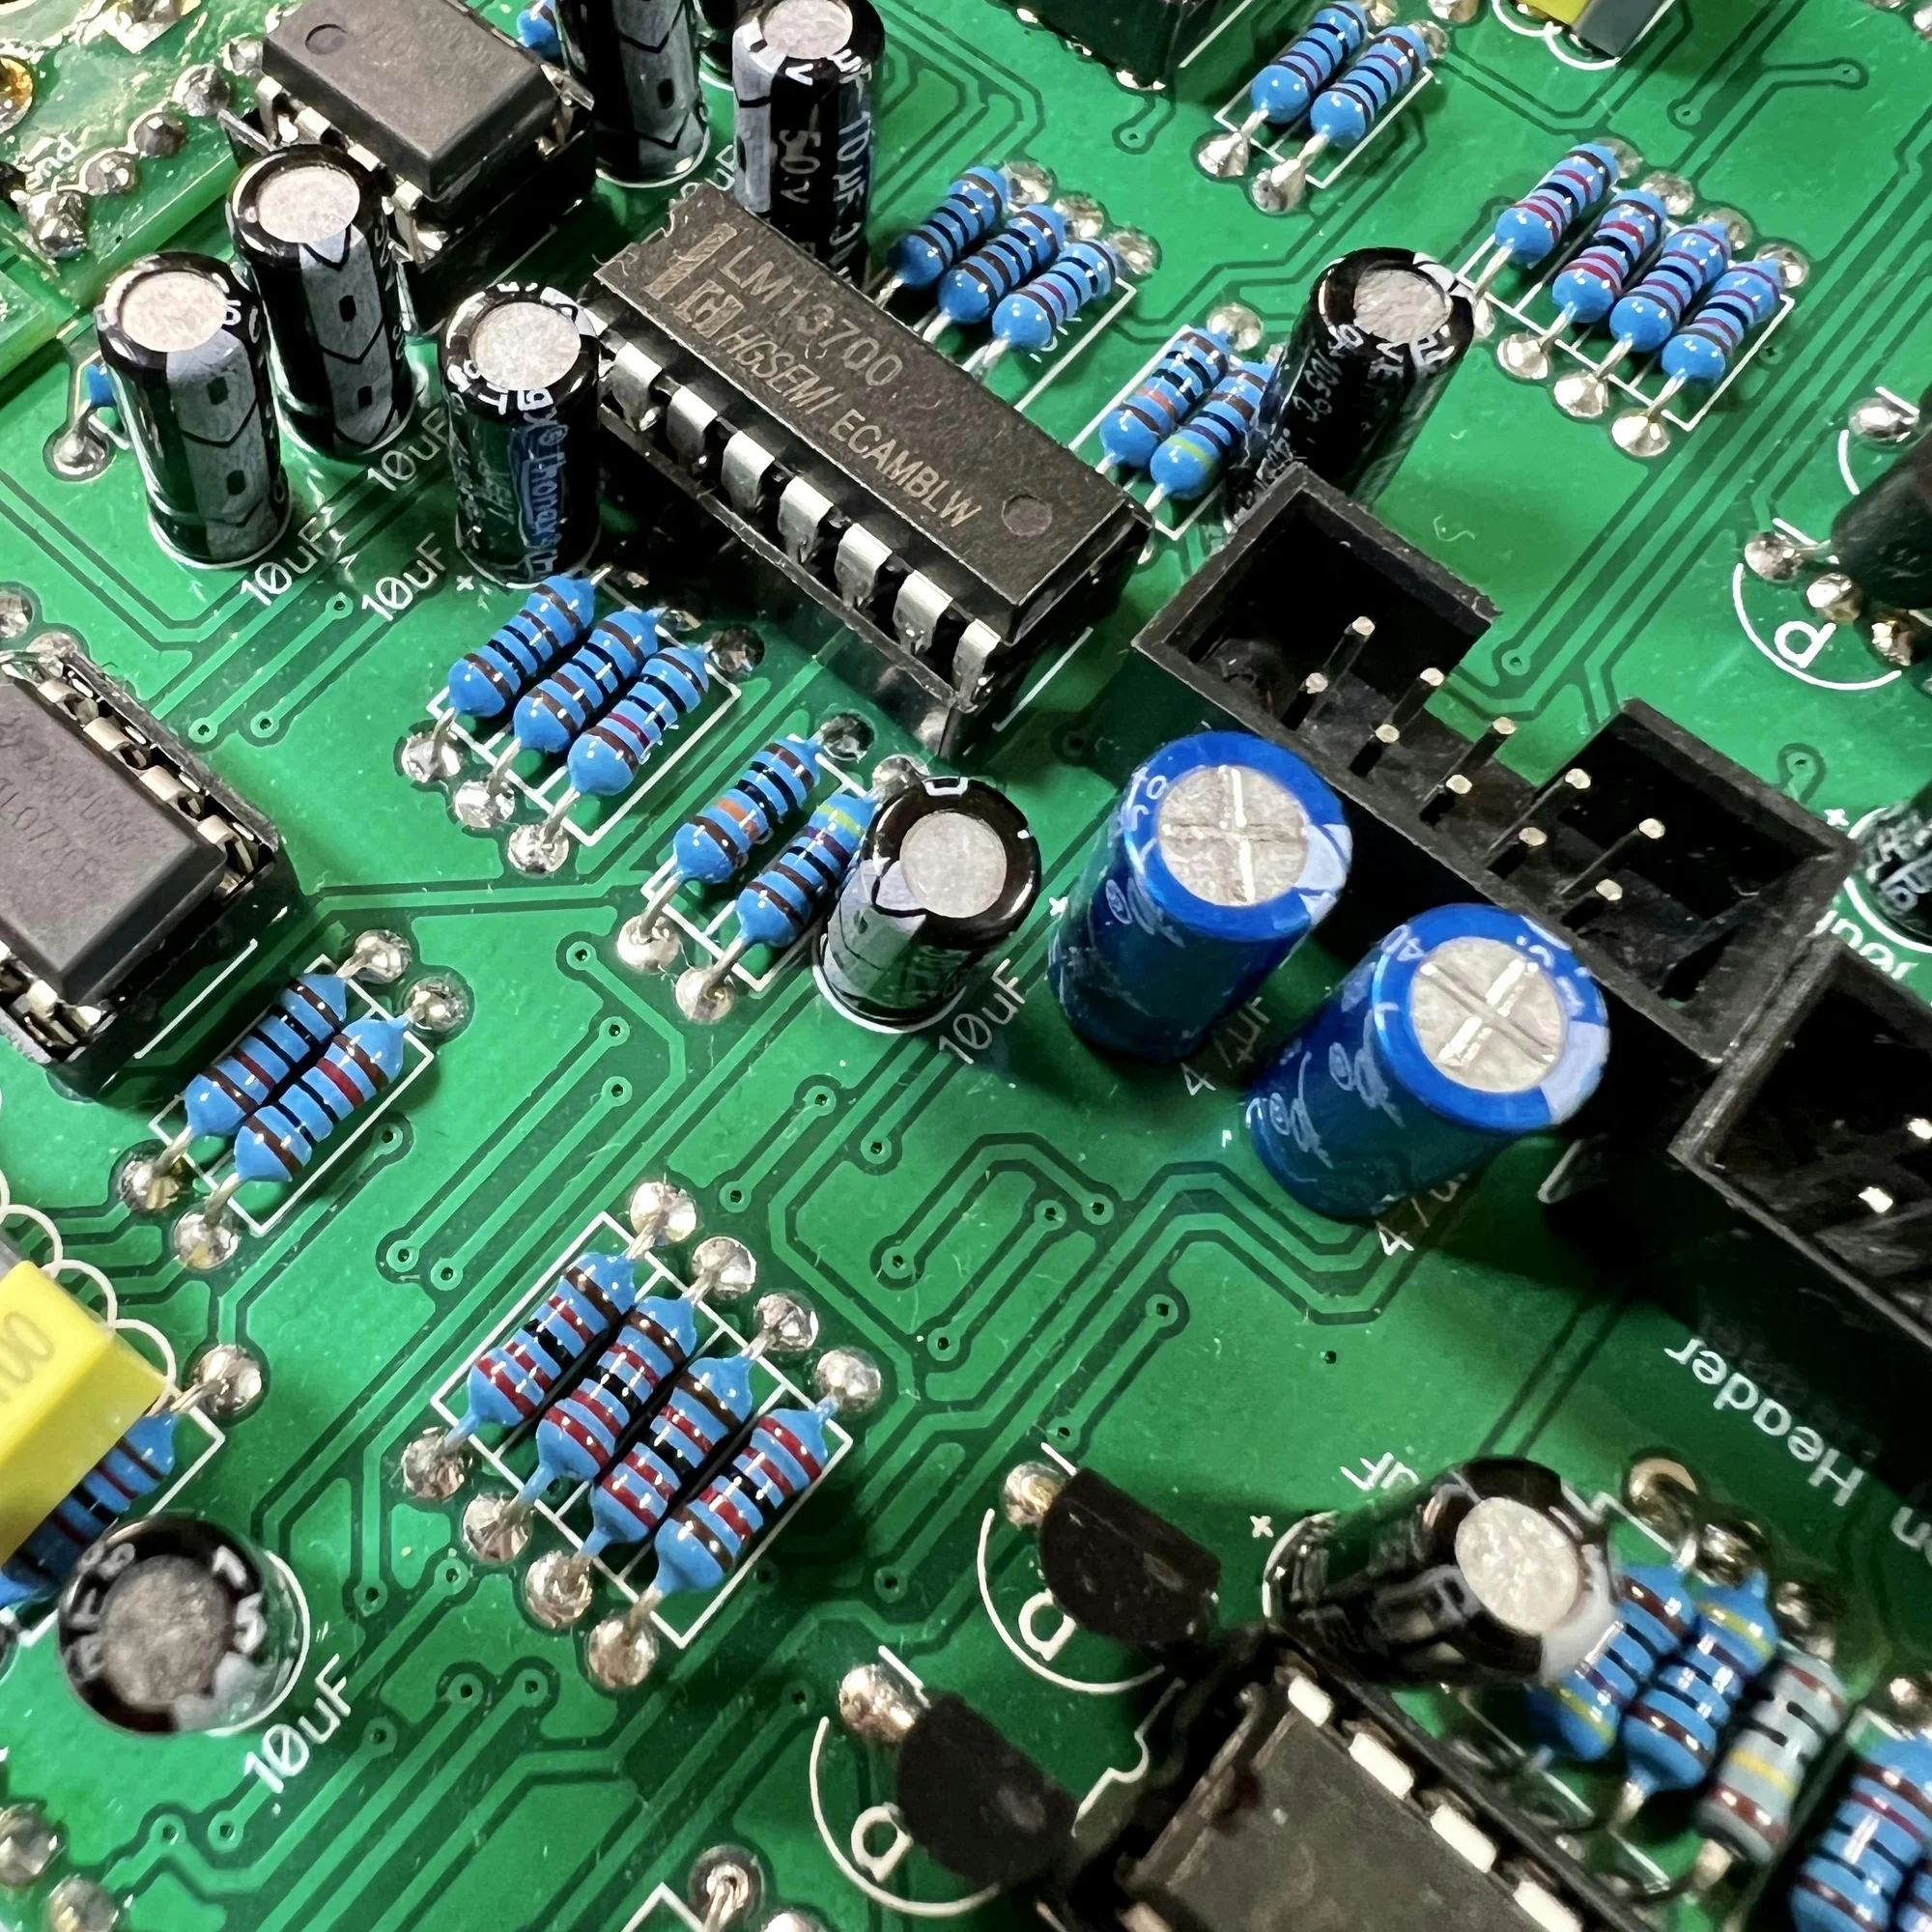
The photo below shows through-hole components. You can see the holes in the PCB where component leads pass through and are fixed with solder.
SMD component mounting, by contrast, involves small metal areas called pads arranged on the PCB surface. Components are placed on these pads and fixed with solder. SMD components are smaller than through-hole components, making them more difficult to work with. Nowadays, there are many services where you can create CAD data and have a factory machine-place components at specified locations, enabling relatively affordable mass production of compact modules. If you look at the back of a module and see lots of tiny components on the board surface, those are SMD components mounted using SMT.
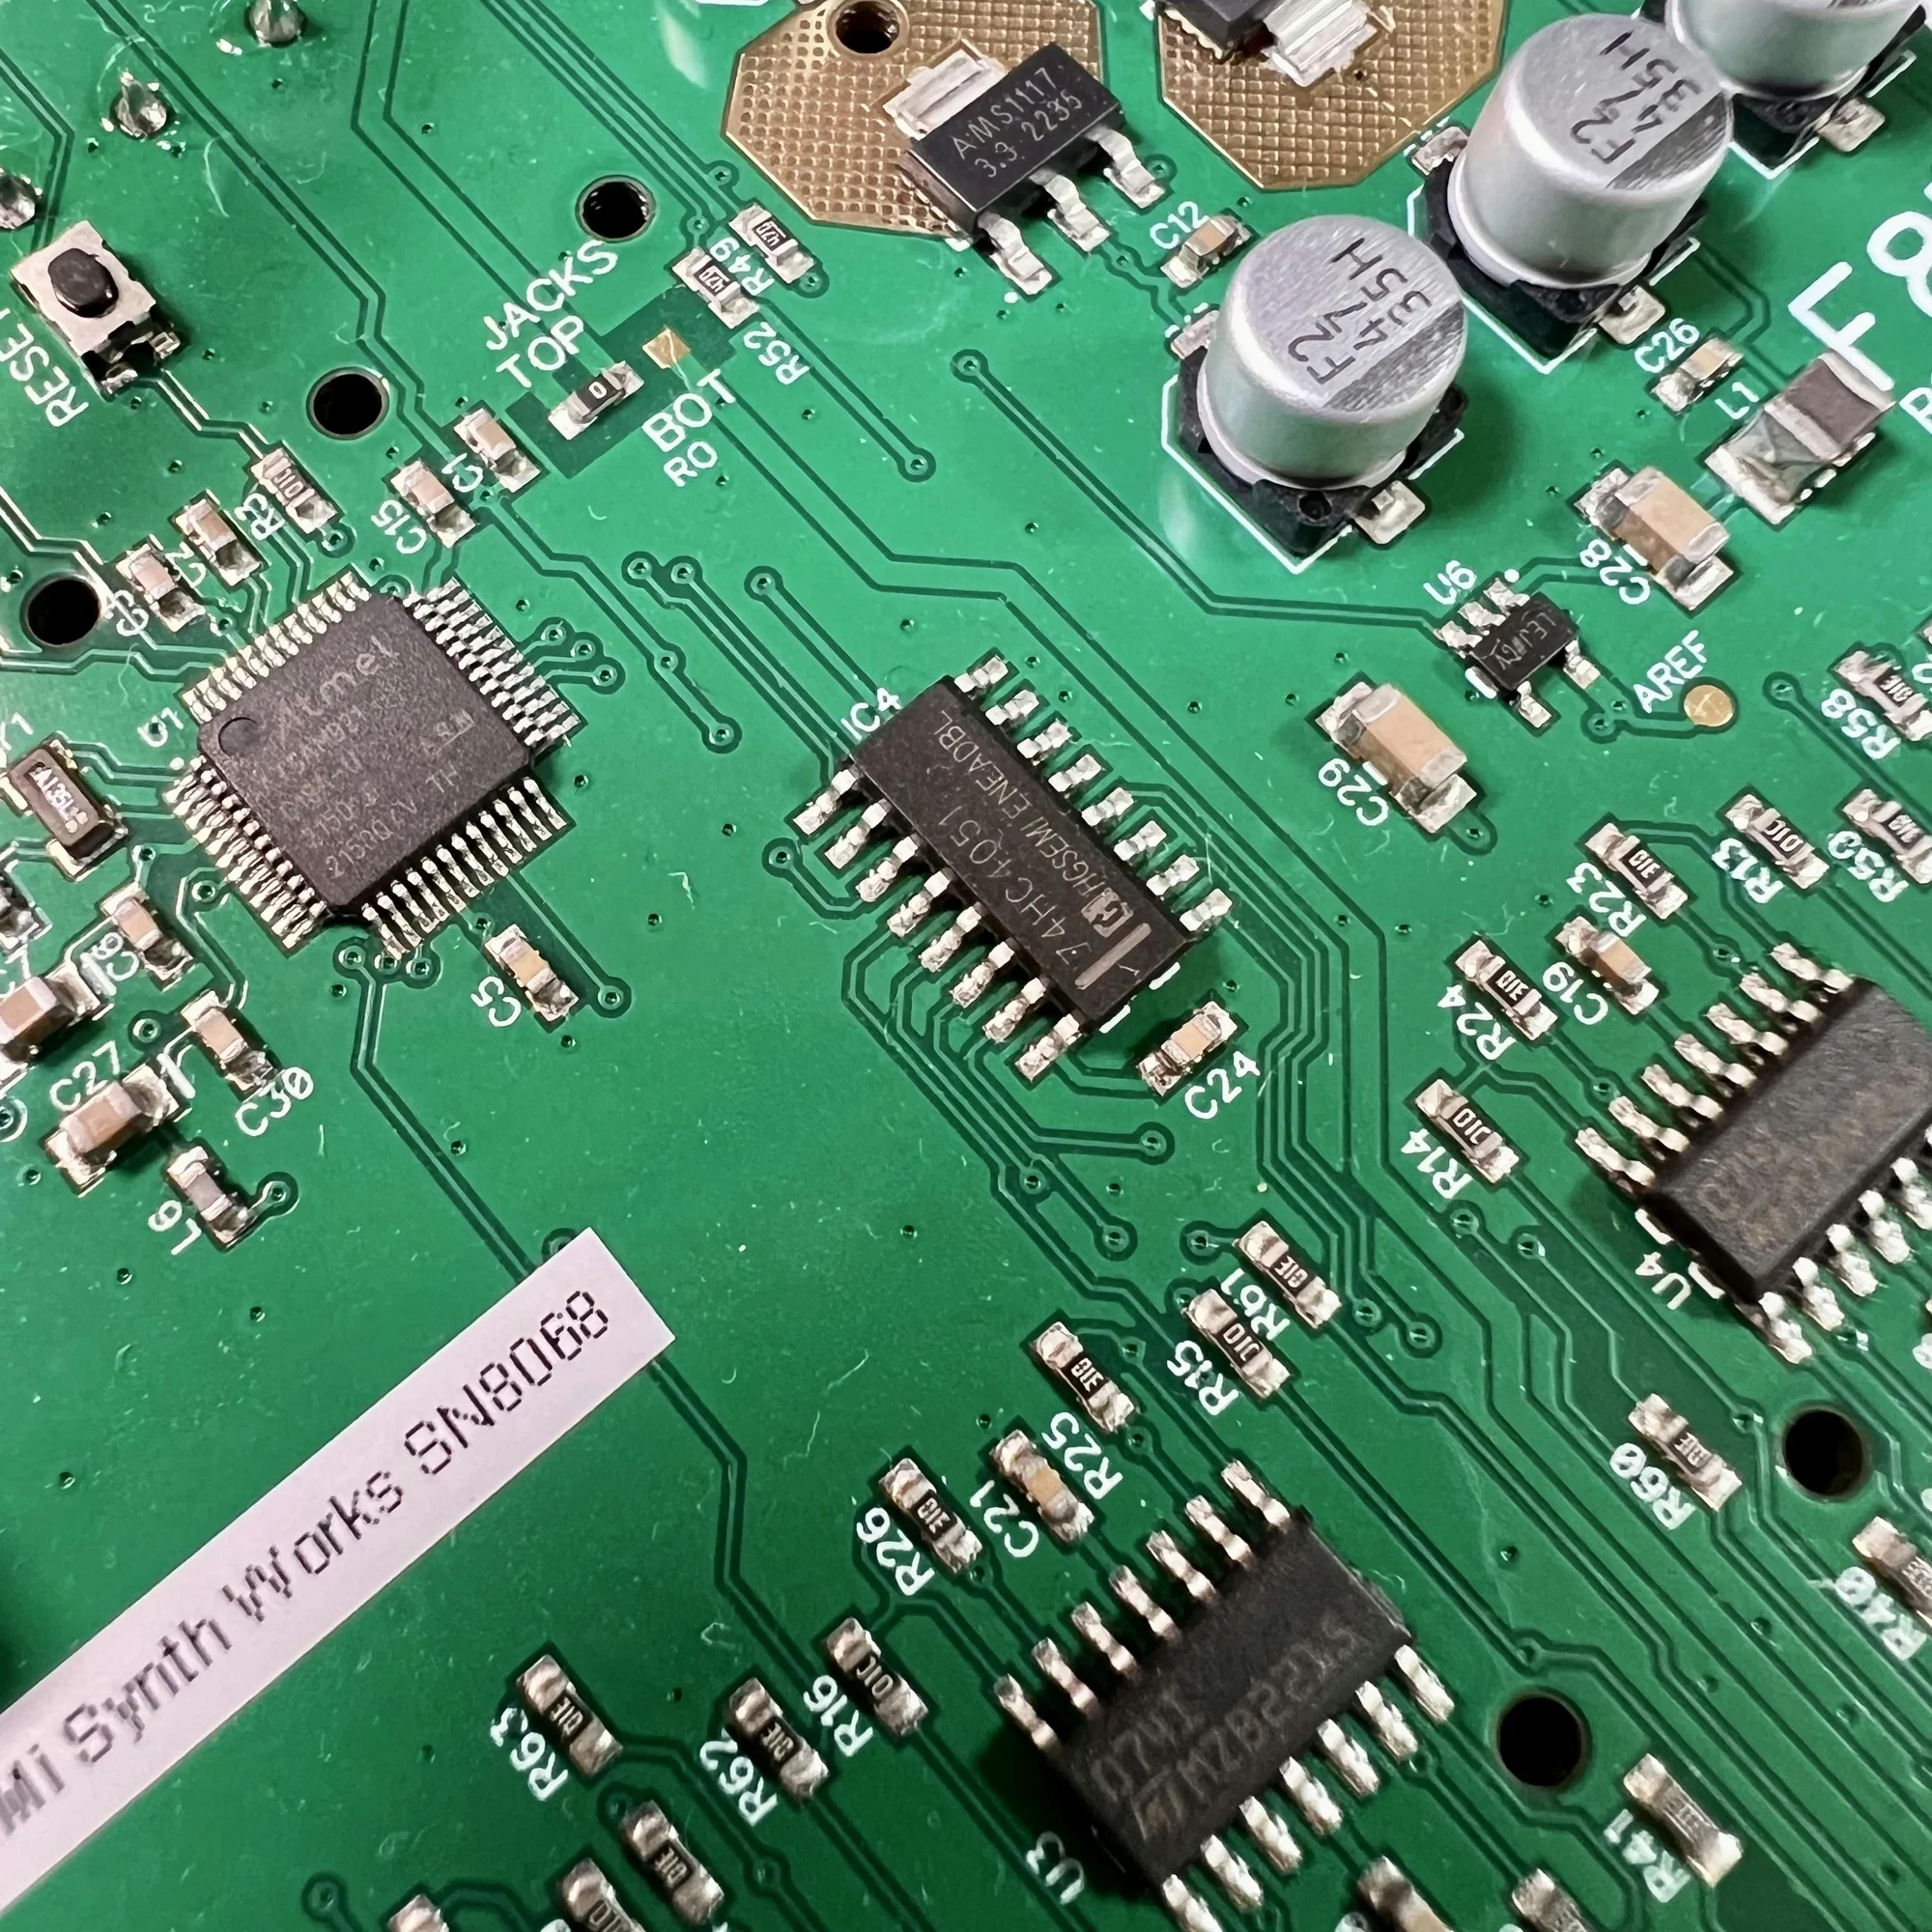
The photo below shows SMD components. There are no holes in the board for these.
Coming back to DIY kits — many DIY kits come with fine ICs and resistors already pre-mounted on the PCB, and you just need to attach the larger components (potentiometers, jacks) yourself to complete the module.
Manufacturers understand that extremely difficult DIY kits would be too challenging for casual hobbyists and difficult to support, so many kits are designed to be beginner-friendly. For kits in our shop that are more challenging, we note this on the product detail page for reference.
I set out to write about DIY tools but ended up finishing before getting there.
Next time, I’ll introduce the tools needed for DIY.
2024/08/07: Continuation published. Part 2 is here: