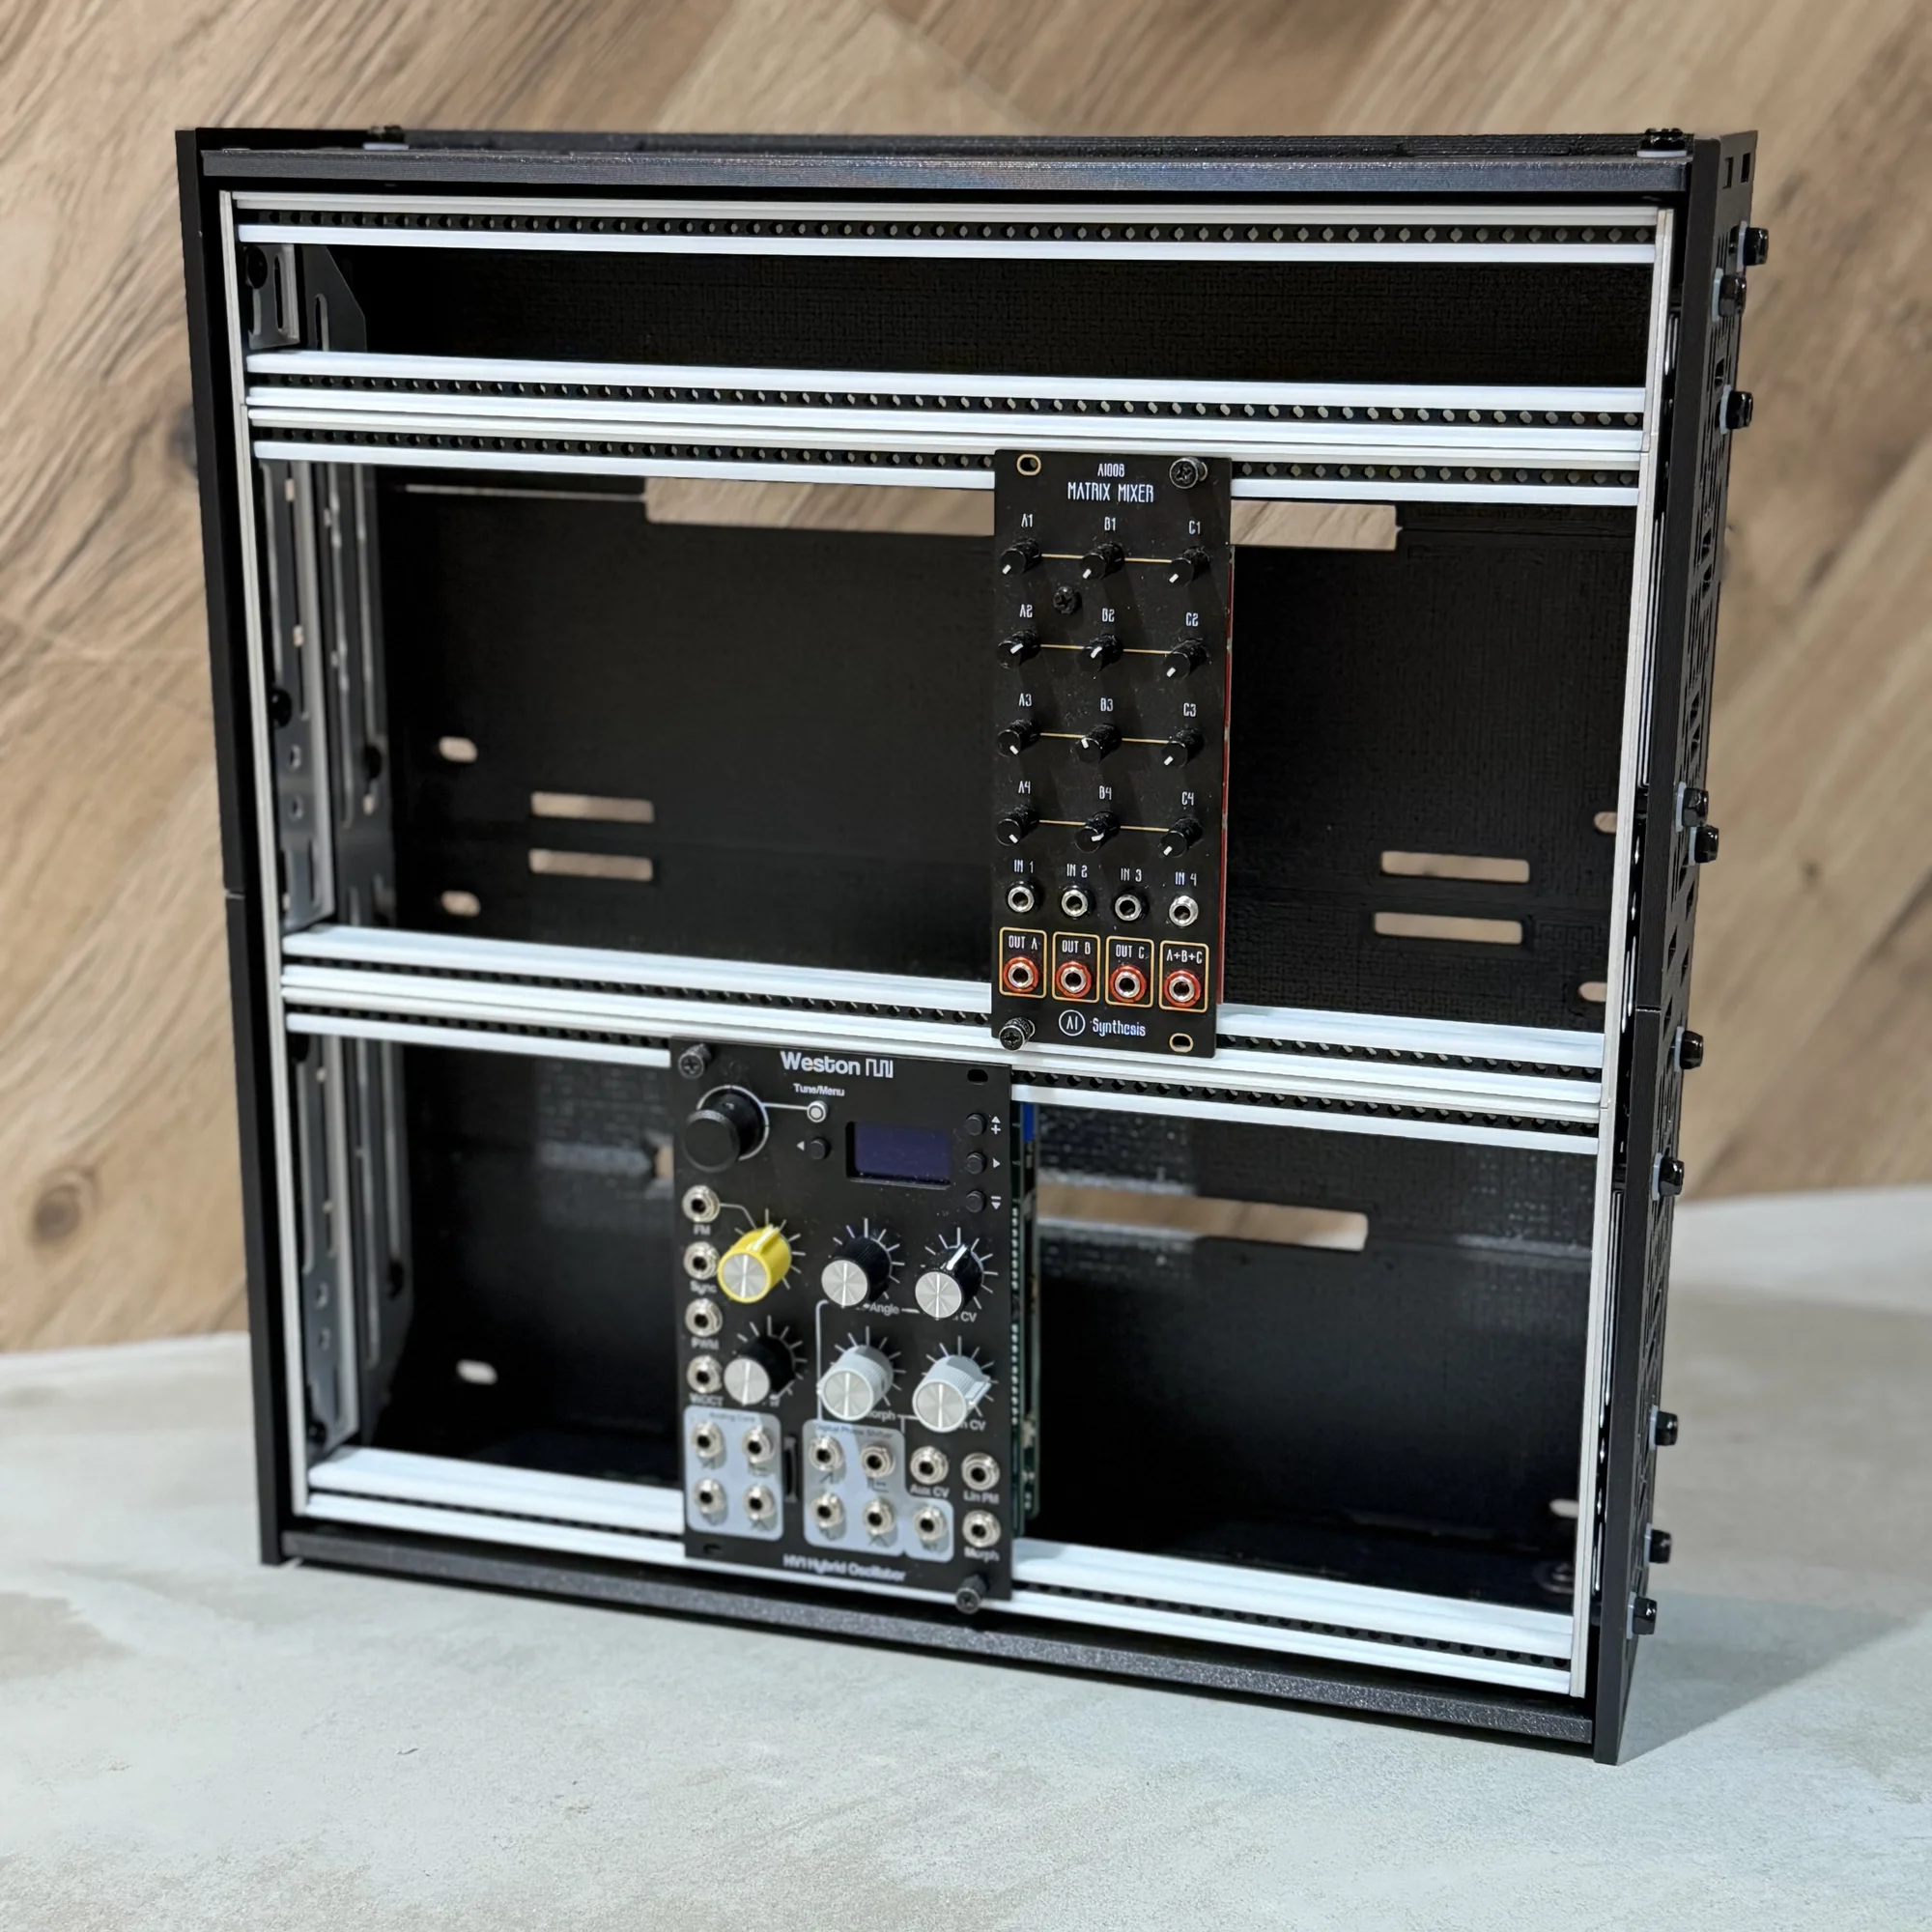
This article explains how to assemble the zudo-block 7U.
The zudo-block 7U is a case in the zudo-block series, available for pre-order on Takazudo Modular: Panels. Its defining feature is a 7U configuration combining 3U + 3U + 1U rails.
- Required Tools
- Assembly Overview
- Step 1: Rail Assembly
- Step 2: Outer Box Assembly
- Step 3: Securing the Rails to the Outer Box
Required Tools
The following tools are needed for assembly. Please have them ready beforehand.
Wrench 🔧 (e.g., Amazon: Mini Wrench Set)
Phillips screwdriver 🪛 (e.g., Amazon: Screwdriver Set)
Assembly Overview
The assembly is broadly divided into the following three steps.
Step 1: Rail assembly
Step 2: Outer box assembly
Step 3: Securing the rails to the outer box
Step 1: Rail Assembly
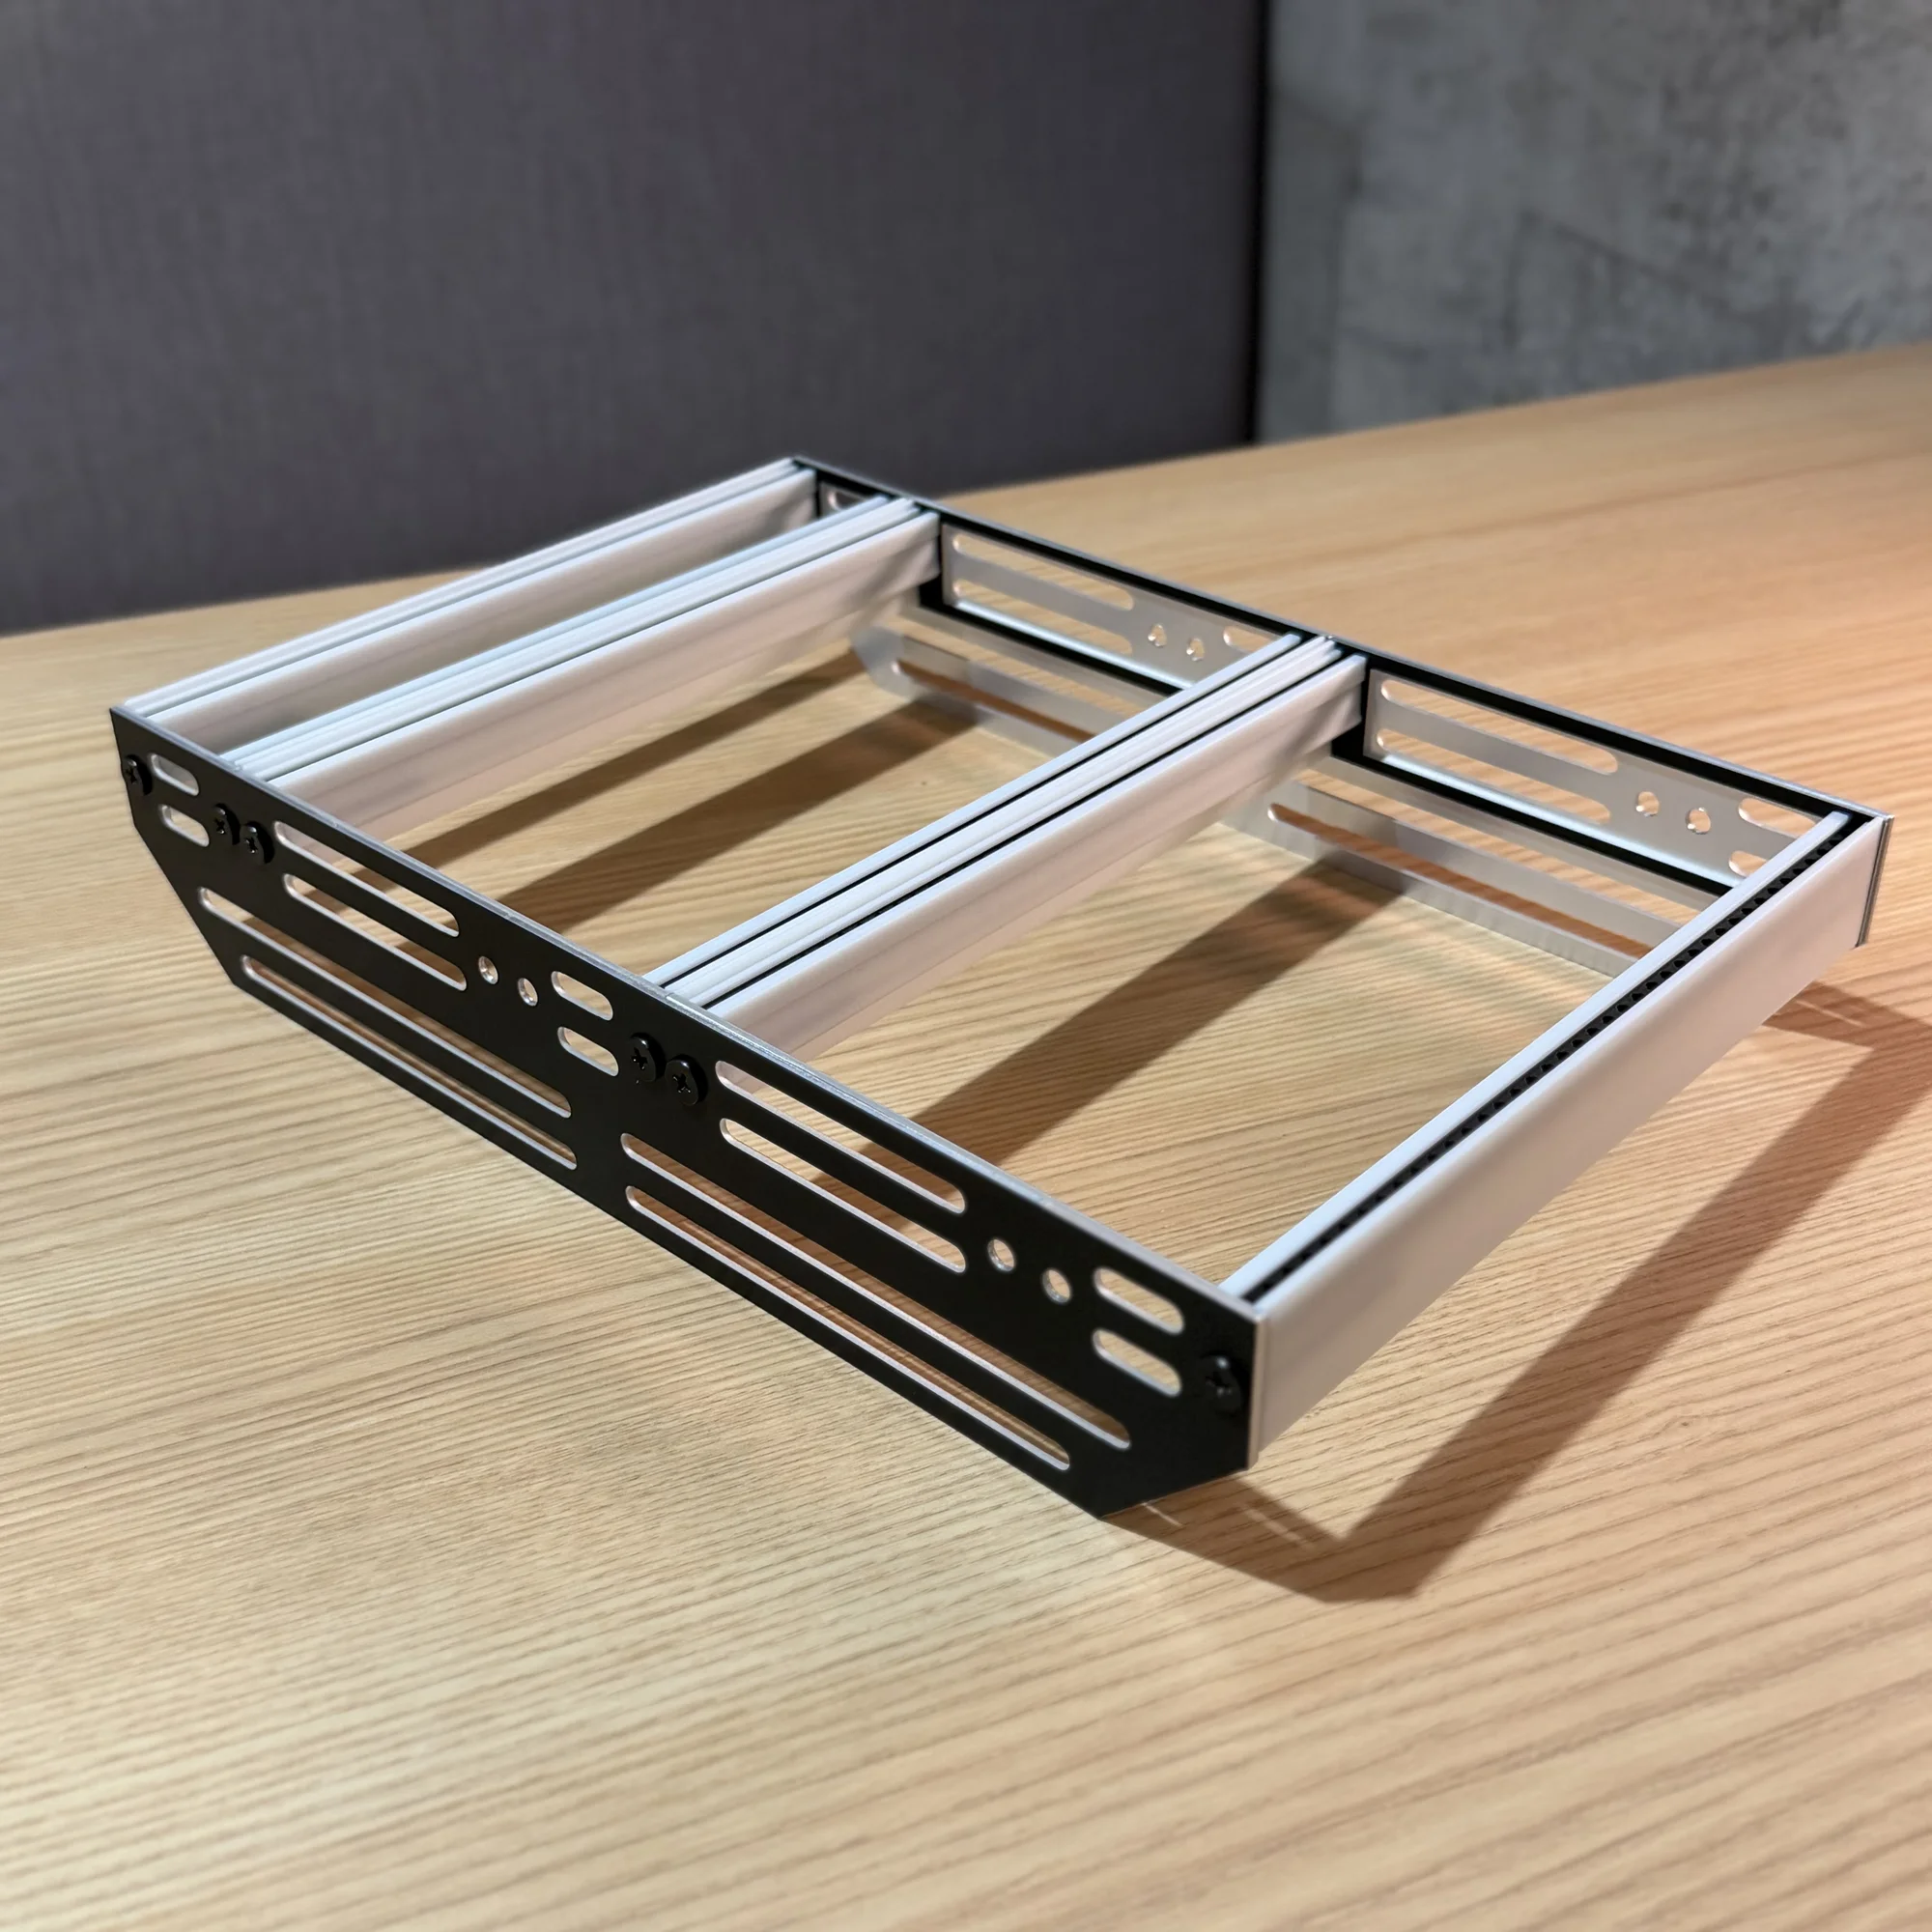
First, assemble the rails on their own. Below is a completed rail set (40HP version).
Choosing the Rail Set Order
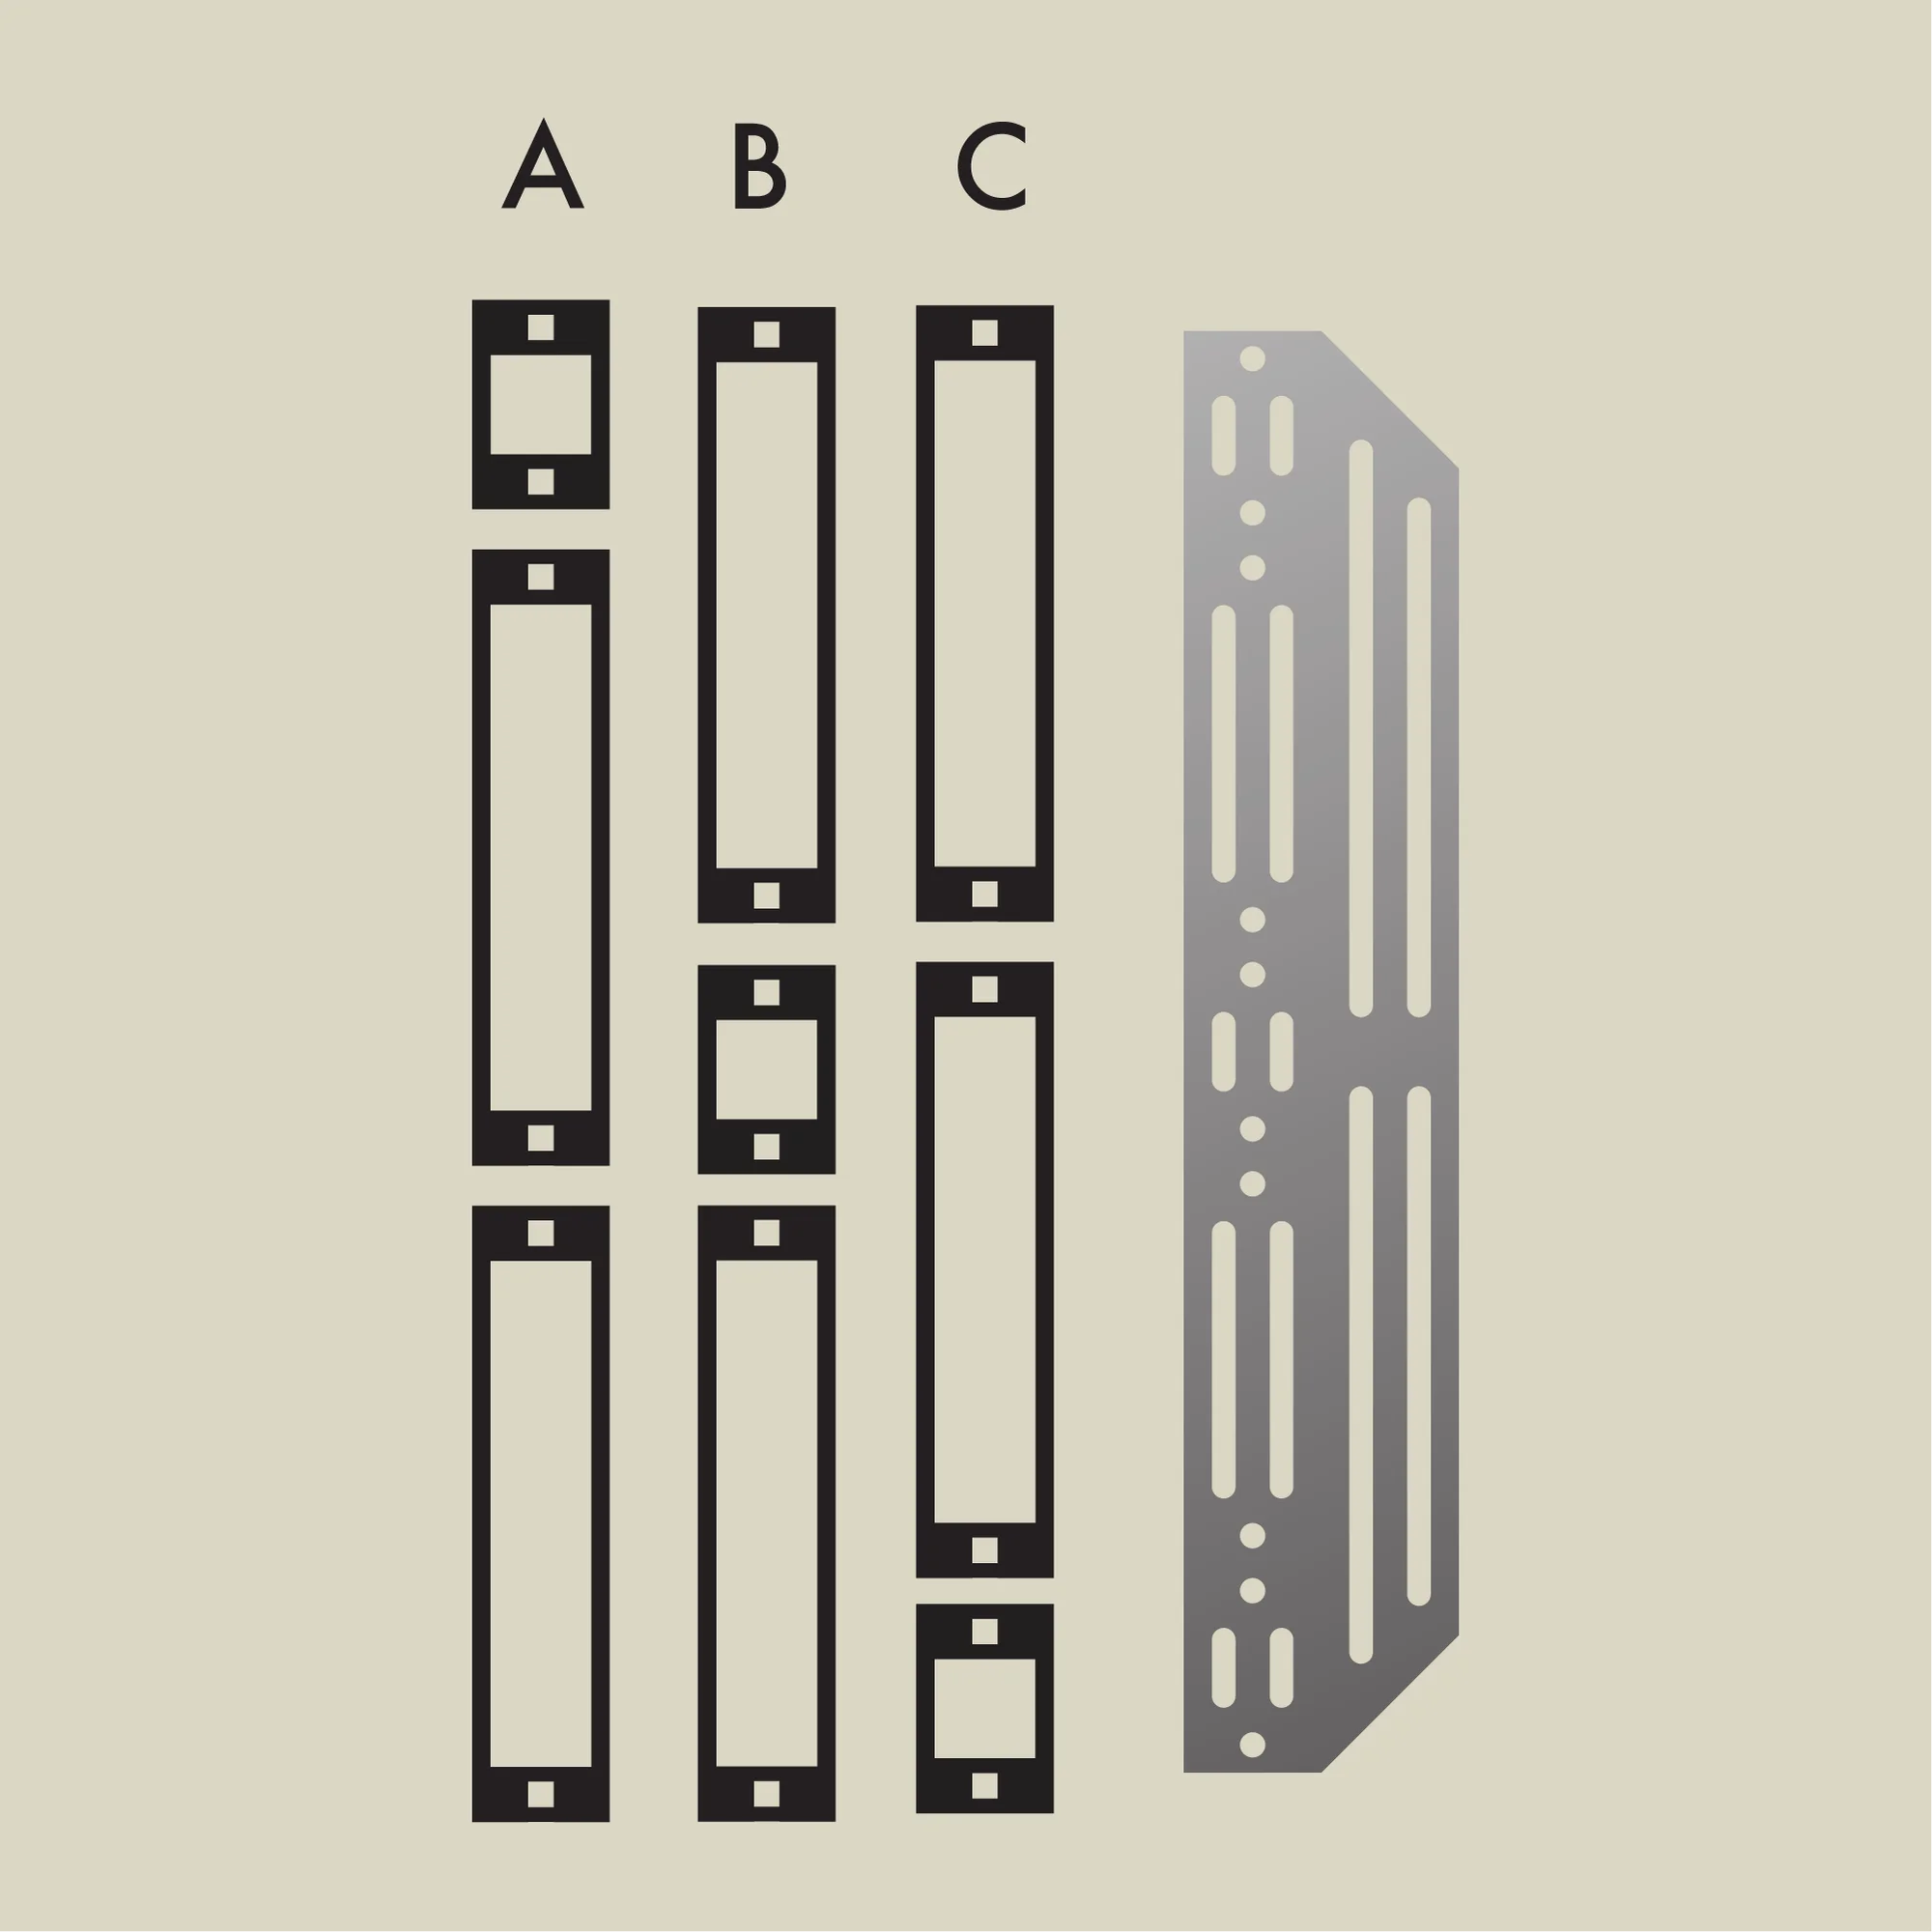
The 7U consists of three rail sets: 3U + 3U + 1U. You are free to choose the order in which they are arranged. Specifically, you can pick any of the following three patterns.
A: 1U + 3U + 3U
B: 3U + 1U + 3U
C: 3U + 3U + 1U
Any order you prefer is fine. From here on, this article assumes you have chosen order A.
Checking the Side Aluminum Panel Parts
The following aluminum panels are included as parts. Please first confirm that they are all in the package.
Large 7U aluminum panel: 2 pieces
3U aluminum panel (the taller one): 4 pieces
1U aluminum panel (the smaller one): 2 pieces
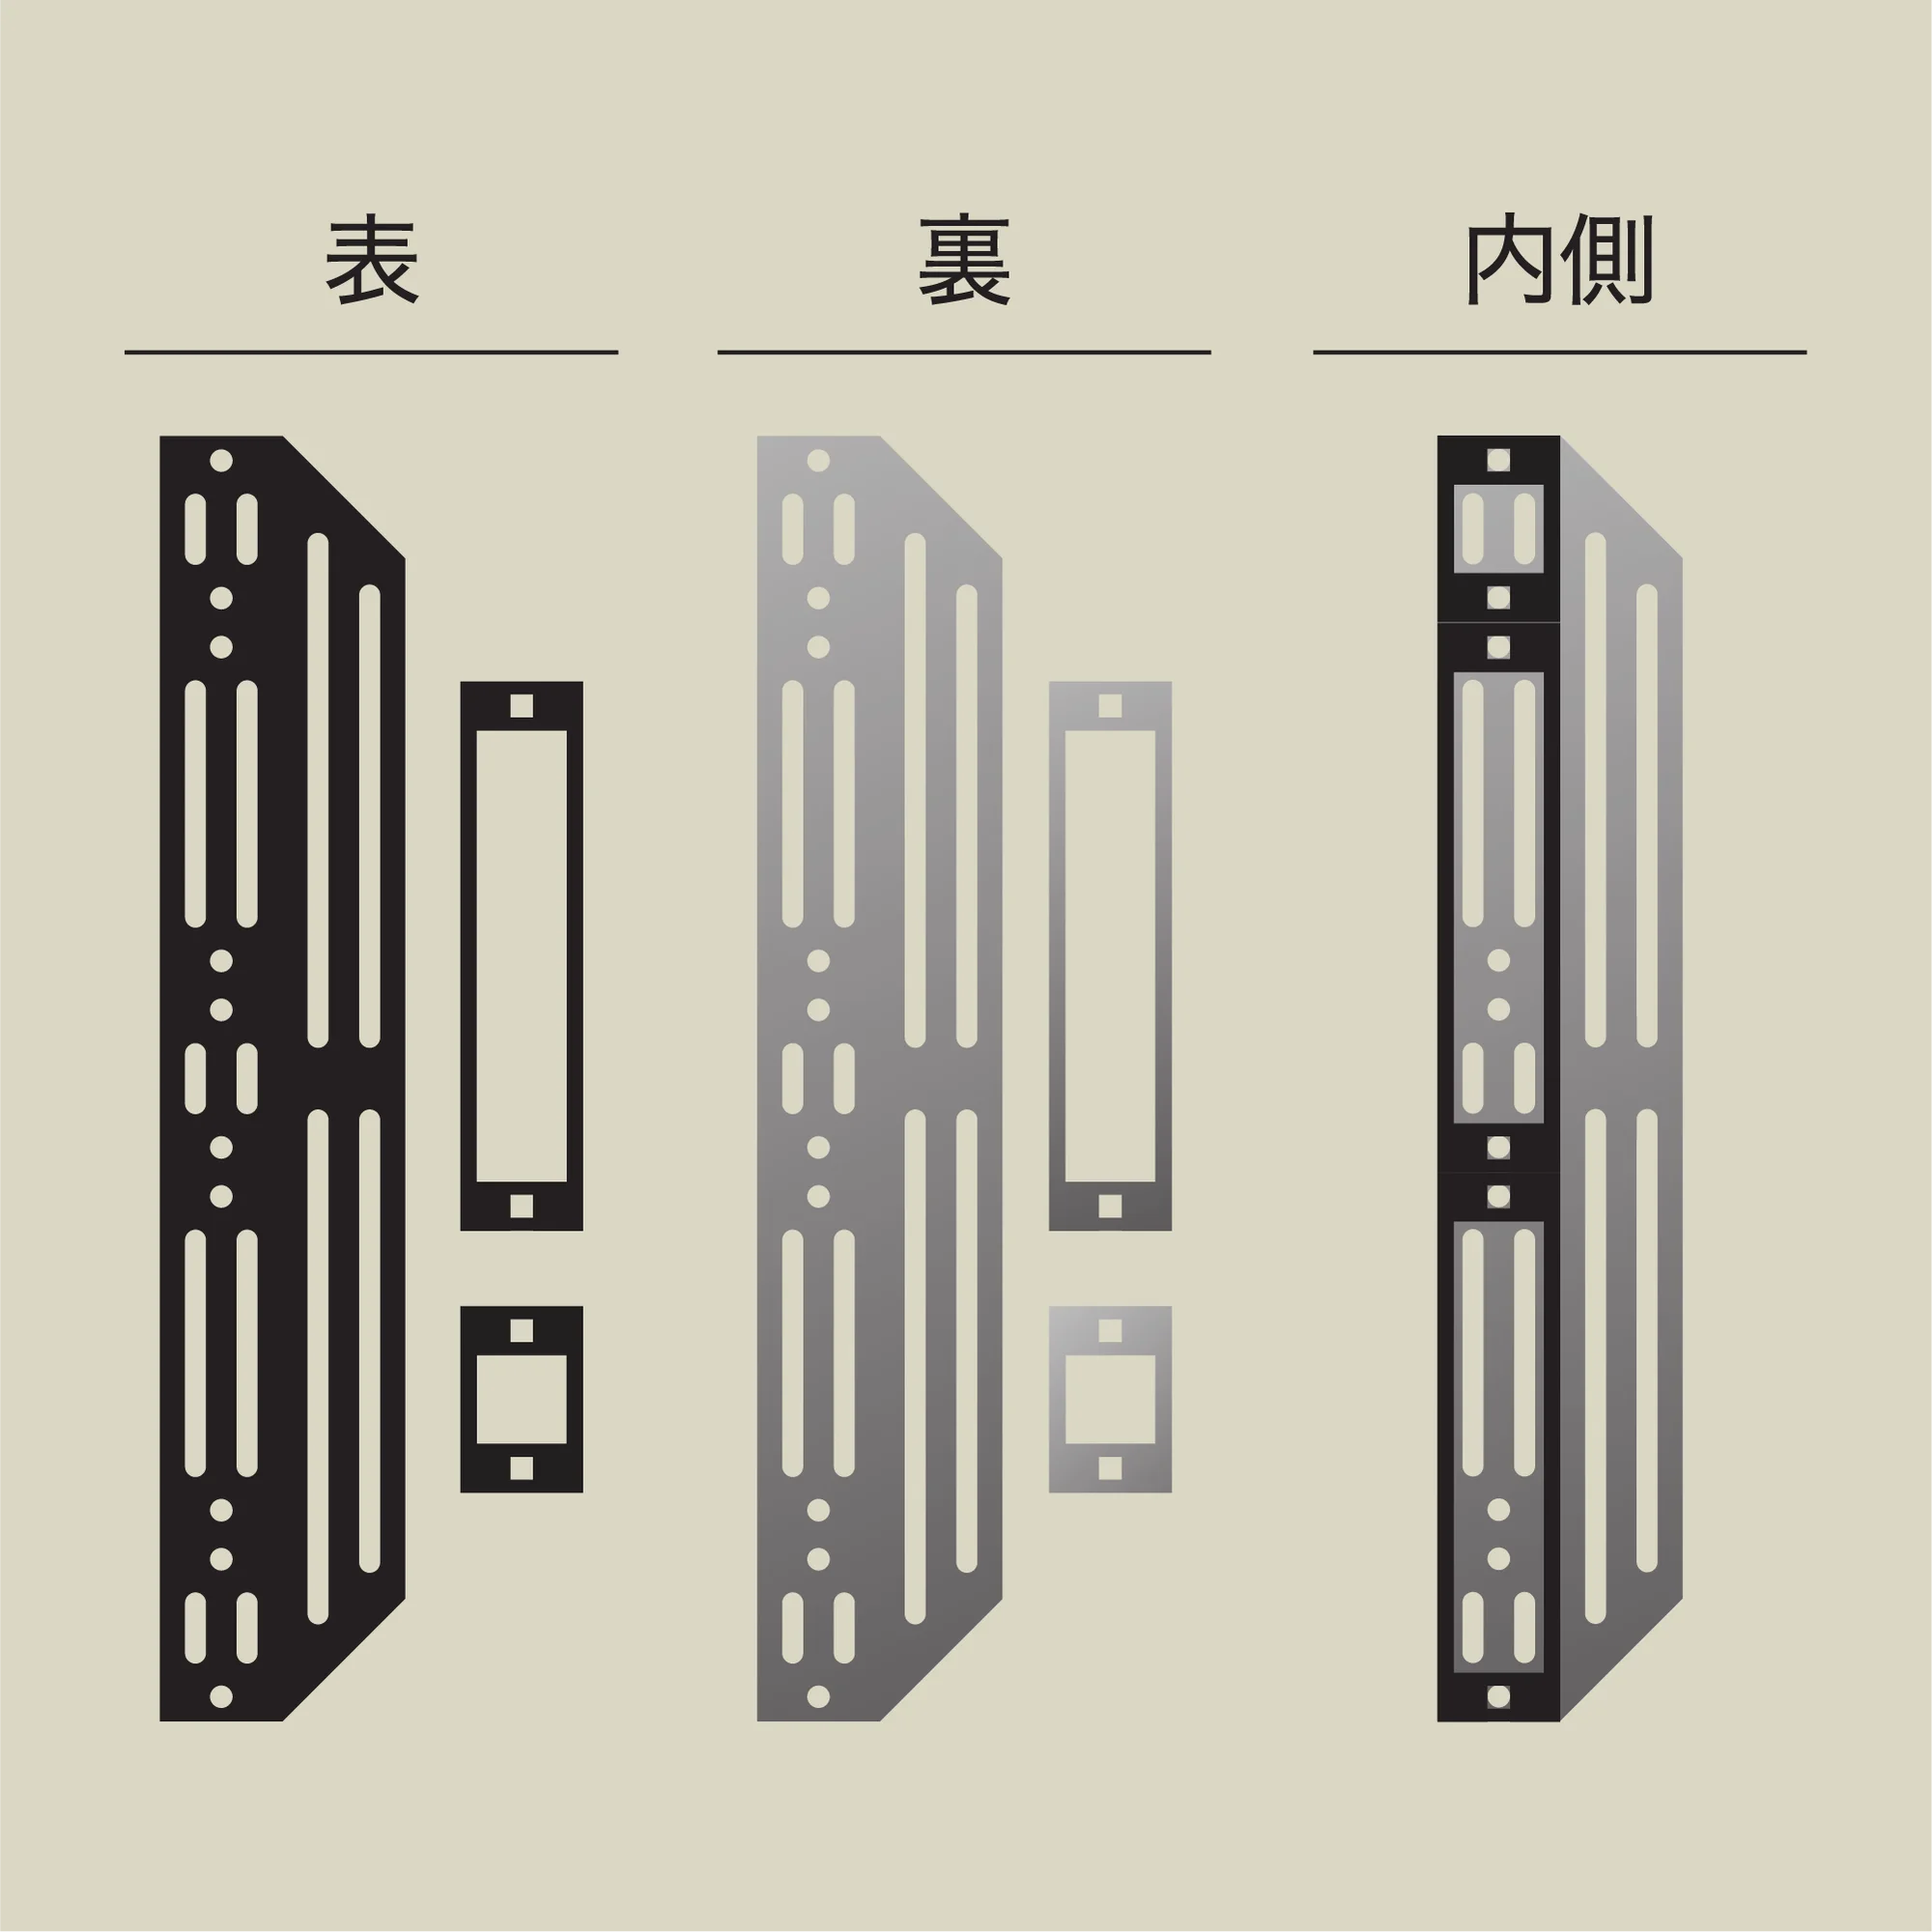
These are used on both sides of the rails. The panels and the rails are connected with the long large screws (40mm).
Every aluminum panel has a front side and a back side. As a rule, the black side is the front. You may use them facing either direction, but placing the black side outward may look better.
On the back of the large 7U aluminum panel, you place two 3U aluminum panels plus one 1U aluminum panel. These 3U and 1U panels prevent the screw heads from contacting the modules inside. (This will make sense as you assemble, so there is no need to worry about it at this stage.)
The important thing here is to arrange these panels in the order you chose in the previous section. Since we chose A, arrange them in the order 1U → 3U → 3U as shown in the diagram. The 7U side aluminum panel has many holes offering plenty of flexibility, so it can accommodate any of the ordering combinations.
Connecting the Panels to the Rails
Next, connect the side aluminum panels to the rails. Honestly, this is the step that requires the most force in the entire assembly. The other screw-tightening tasks require no force, but please be aware that this step alone is a bit demanding.
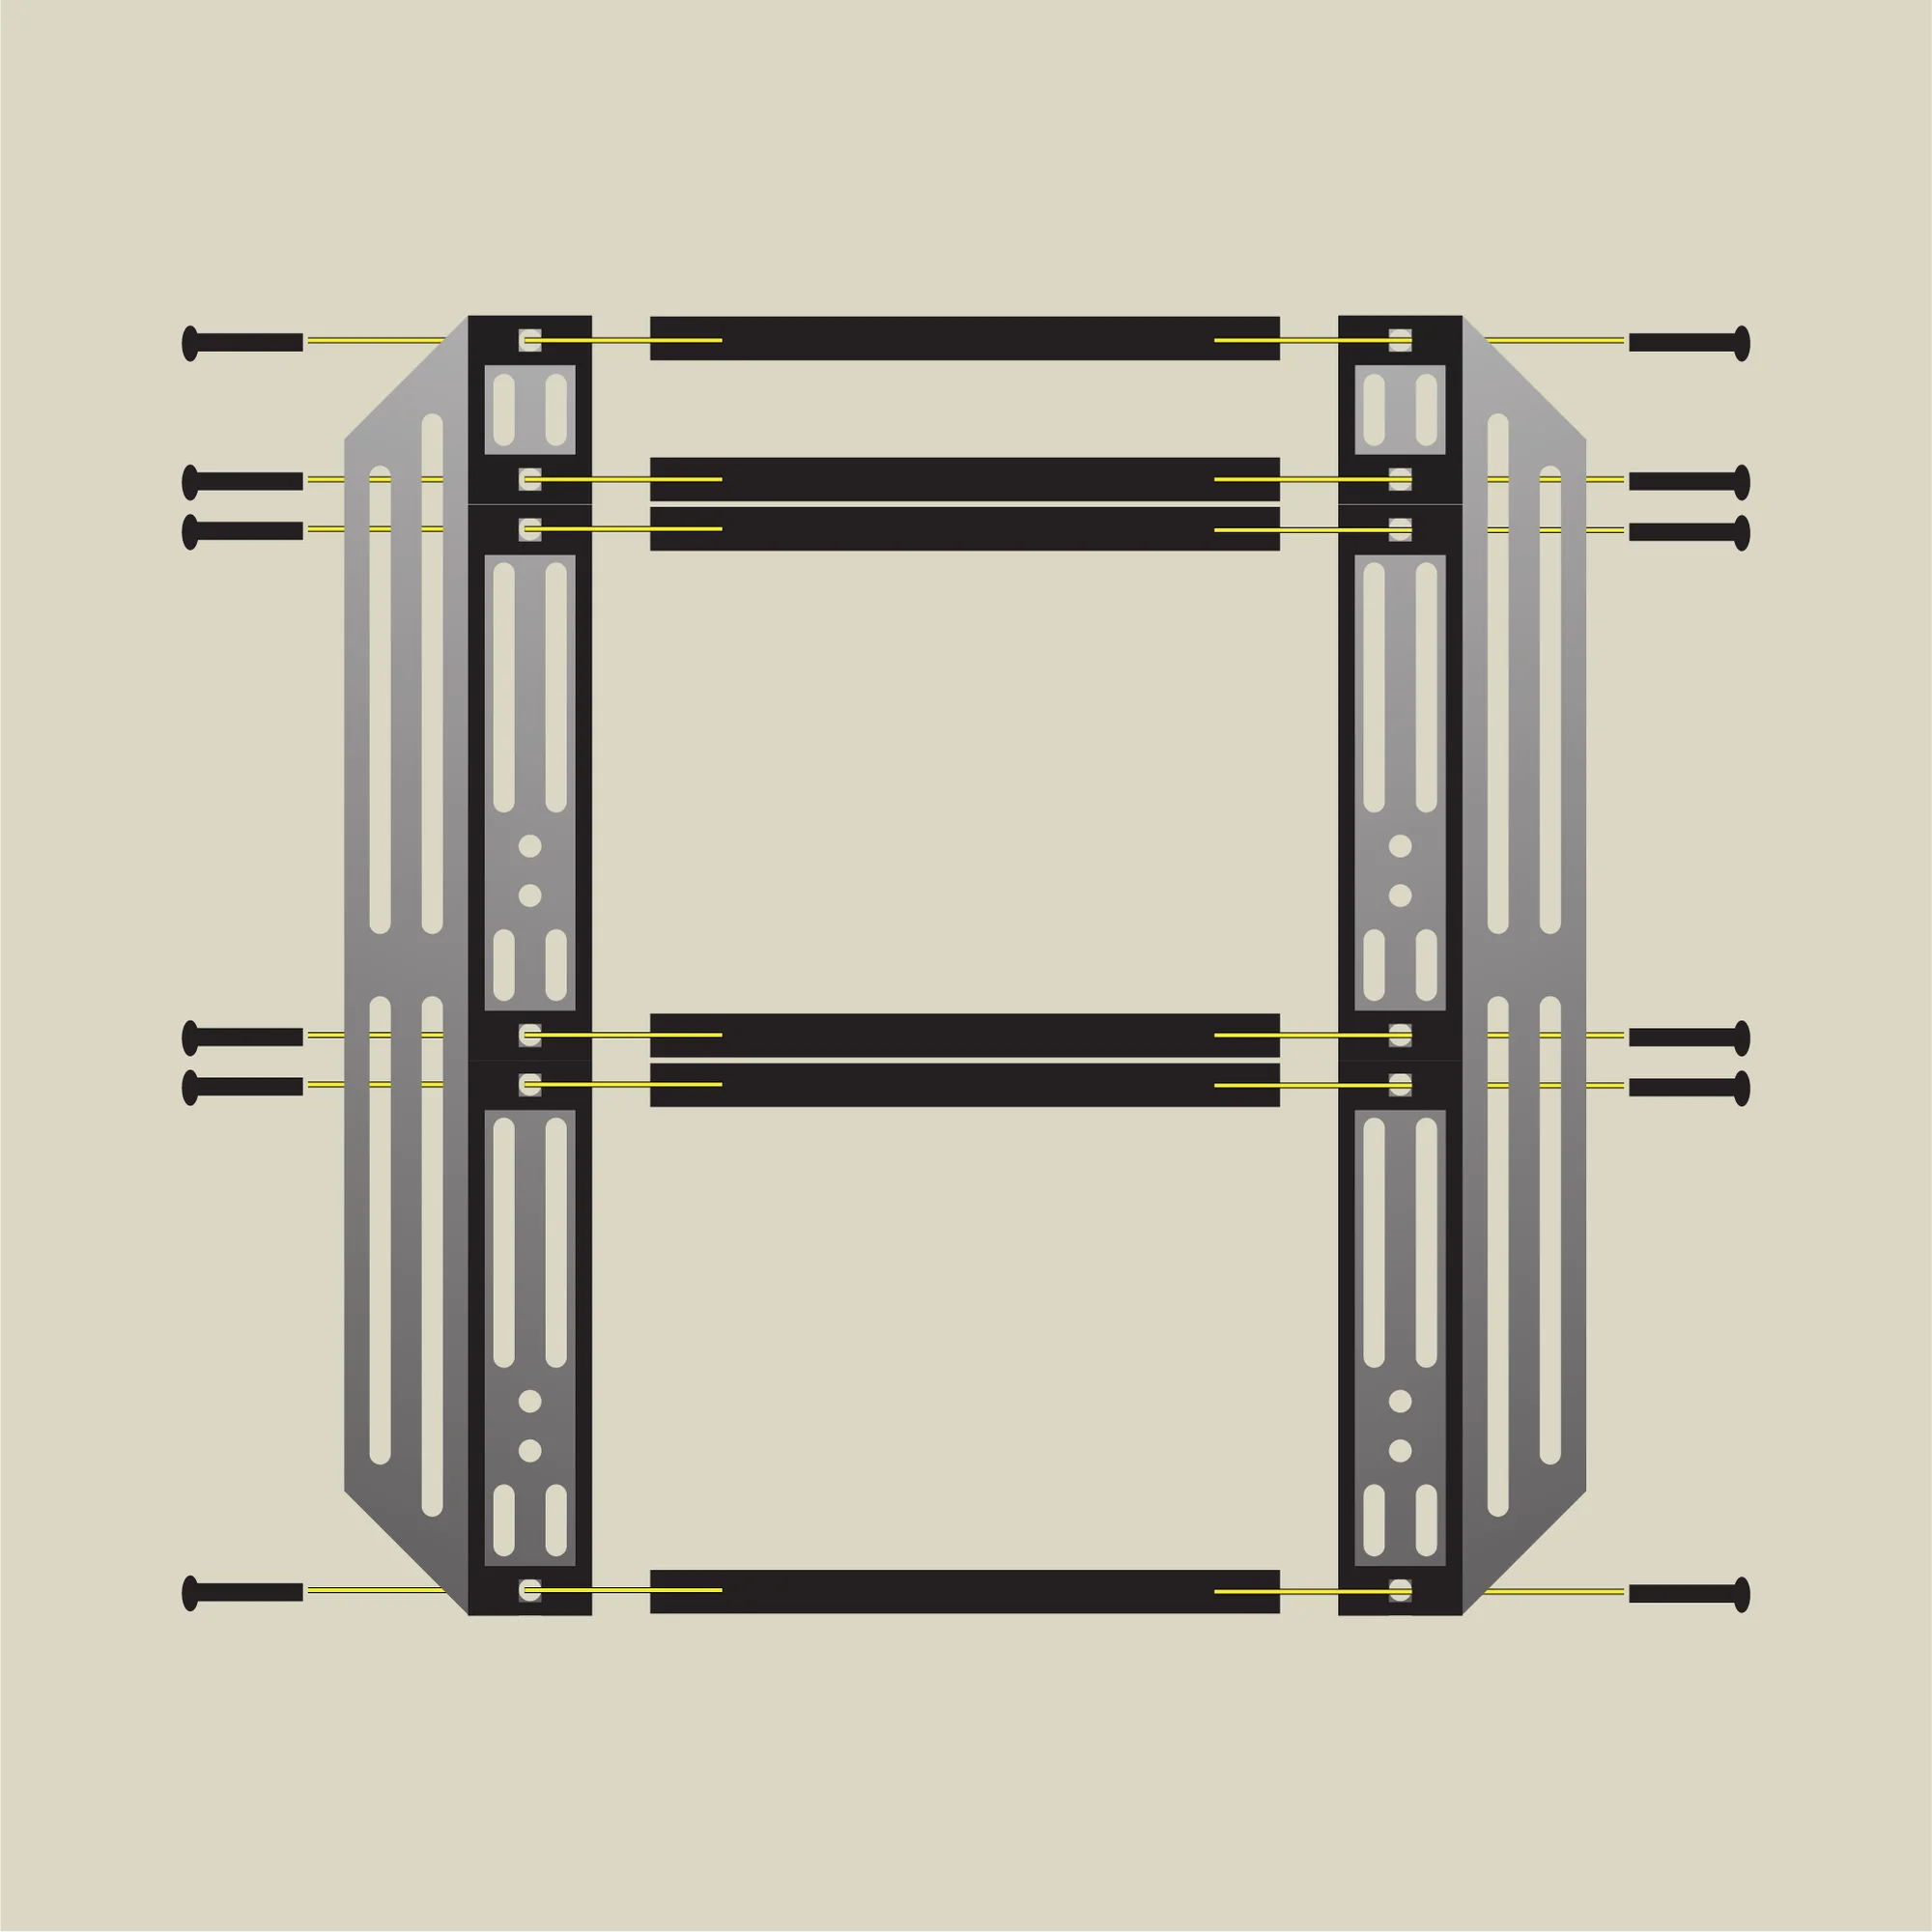
Before starting the rail assembly, open the parts bag labeled "for rails." This bag contains the parts needed to assemble the rail sets, as well as the parts for connecting the rails to the case's outer box.
This step uses the long screws (40mm, the larger ones). From the outside inward, pass the components in the following order as you tighten.
Screw head
7U aluminum panel
3U or 1U aluminum panel
Rail
At this point, please pay attention to the orientation of the rails. The rails have a direction: one side has a guard wall for securing modules. Make sure this guard wall side faces the outside of the module mounting area.
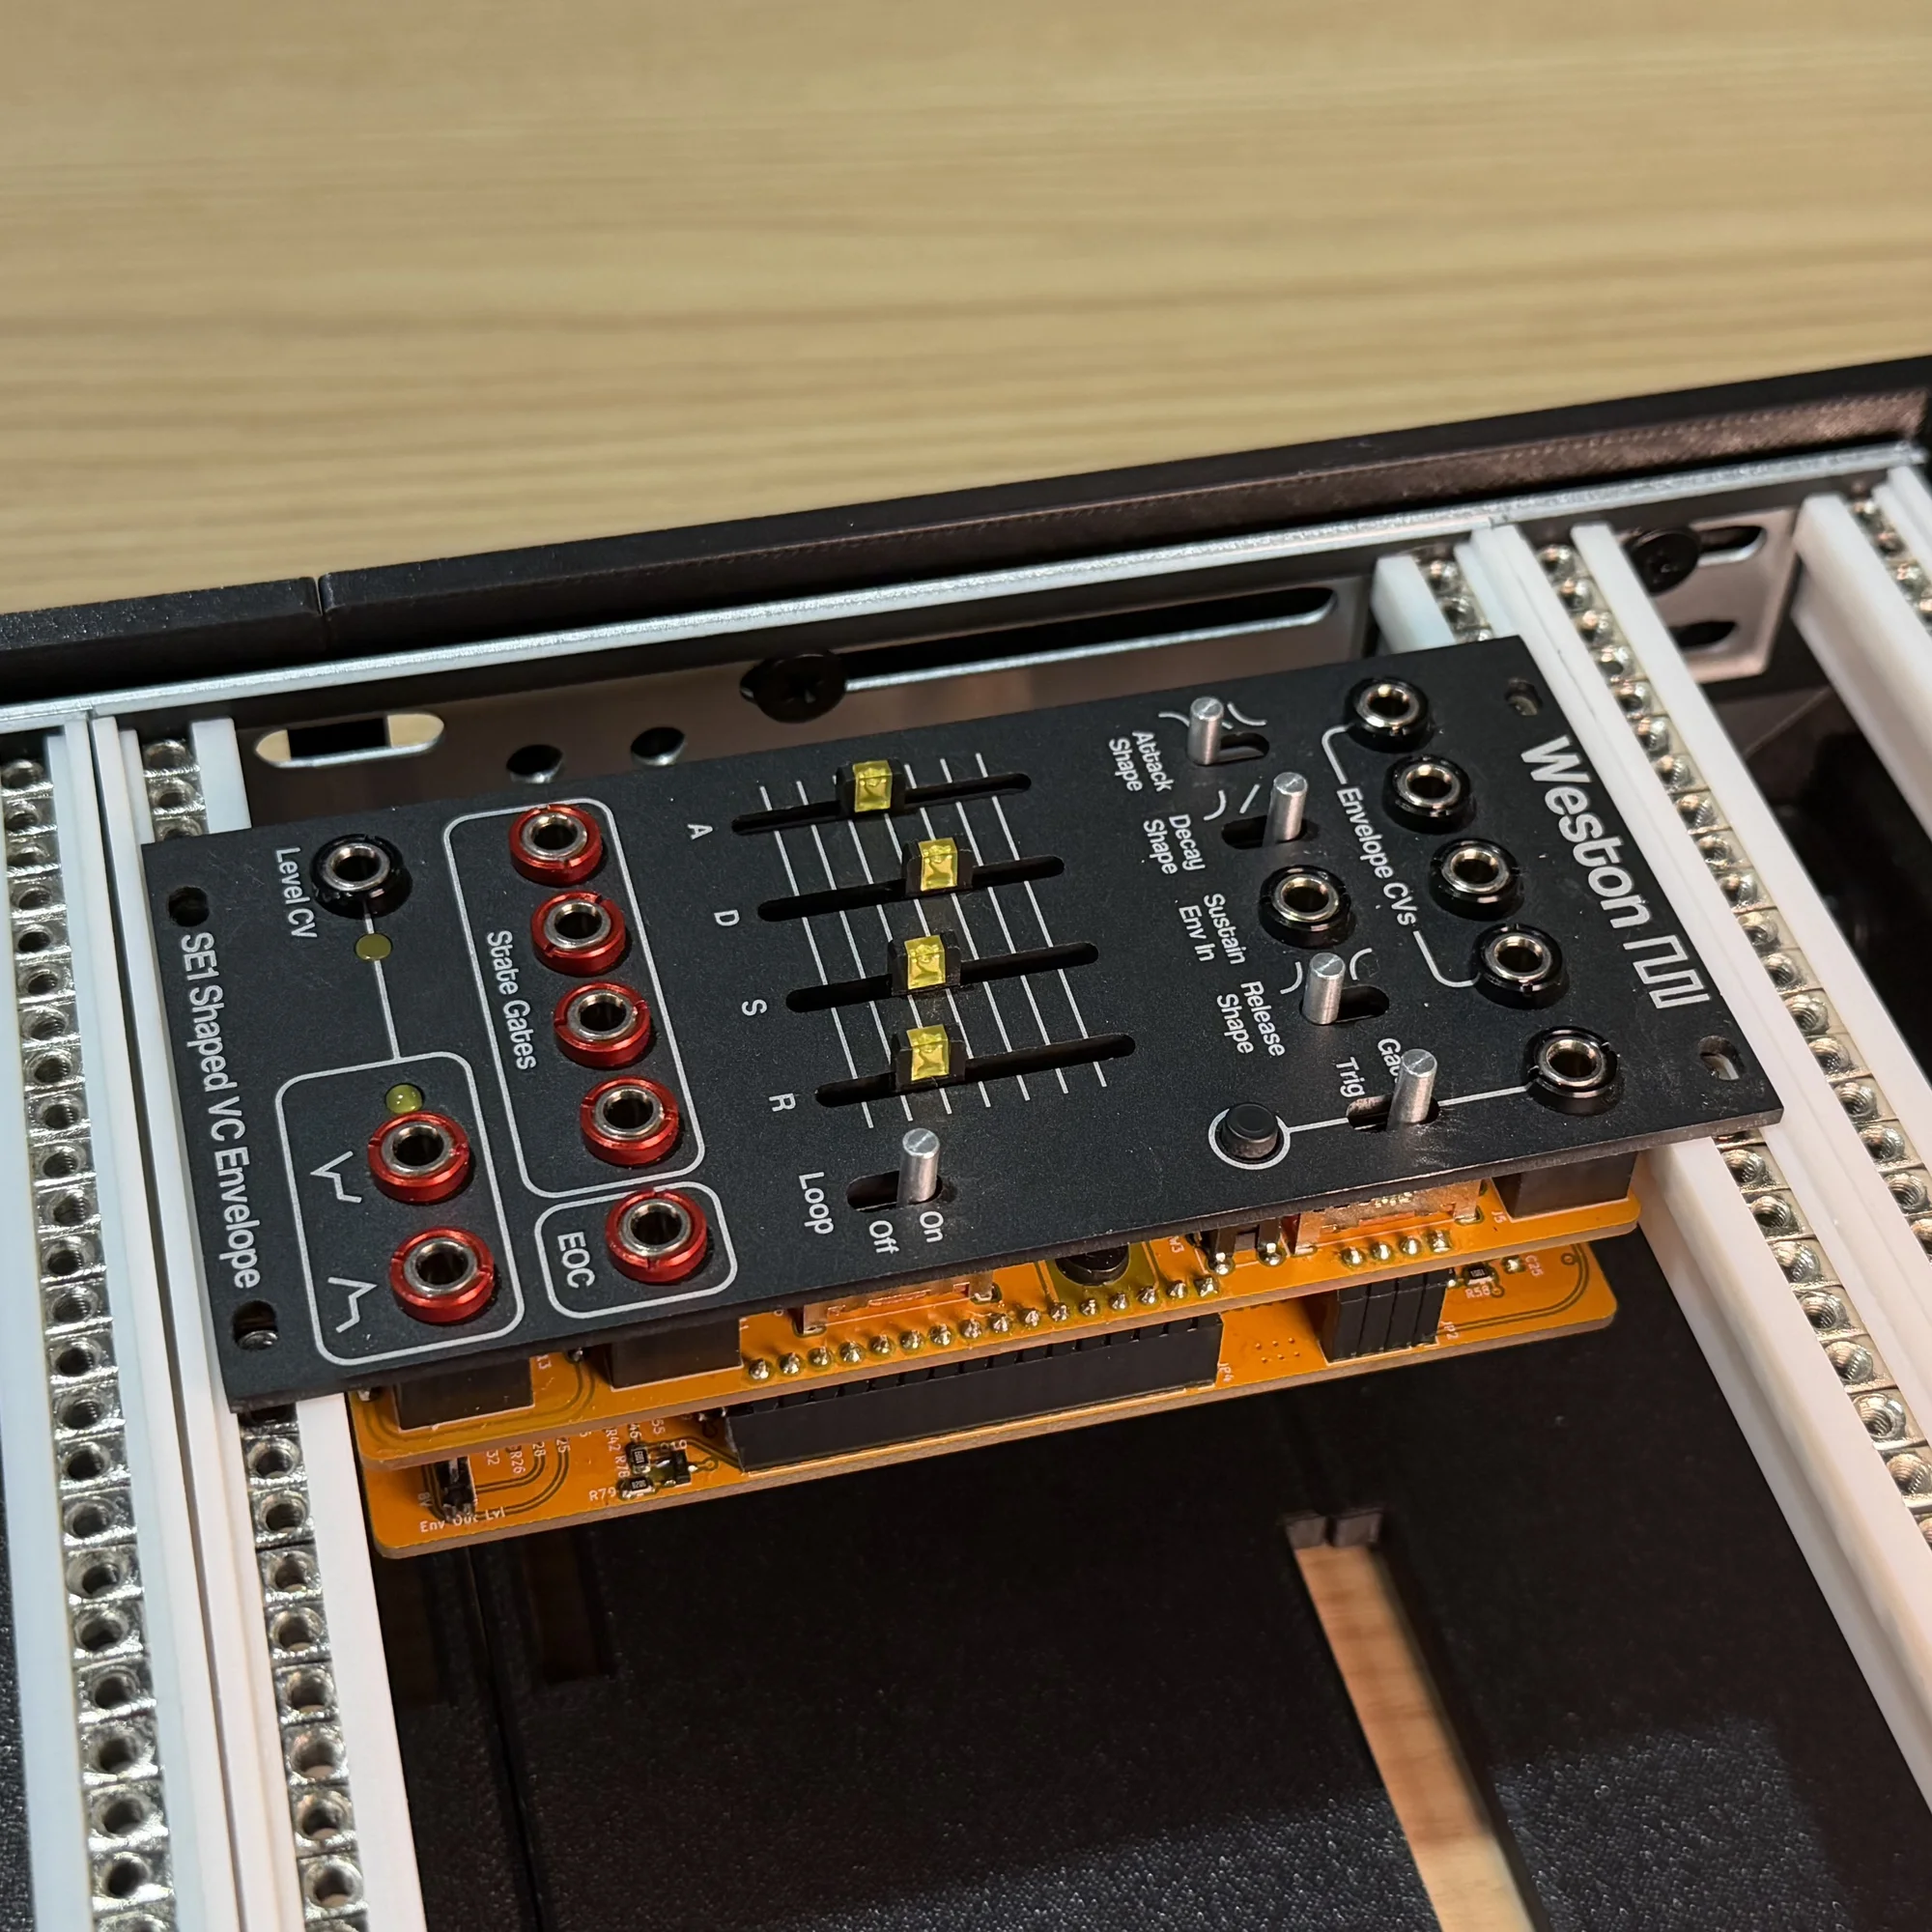
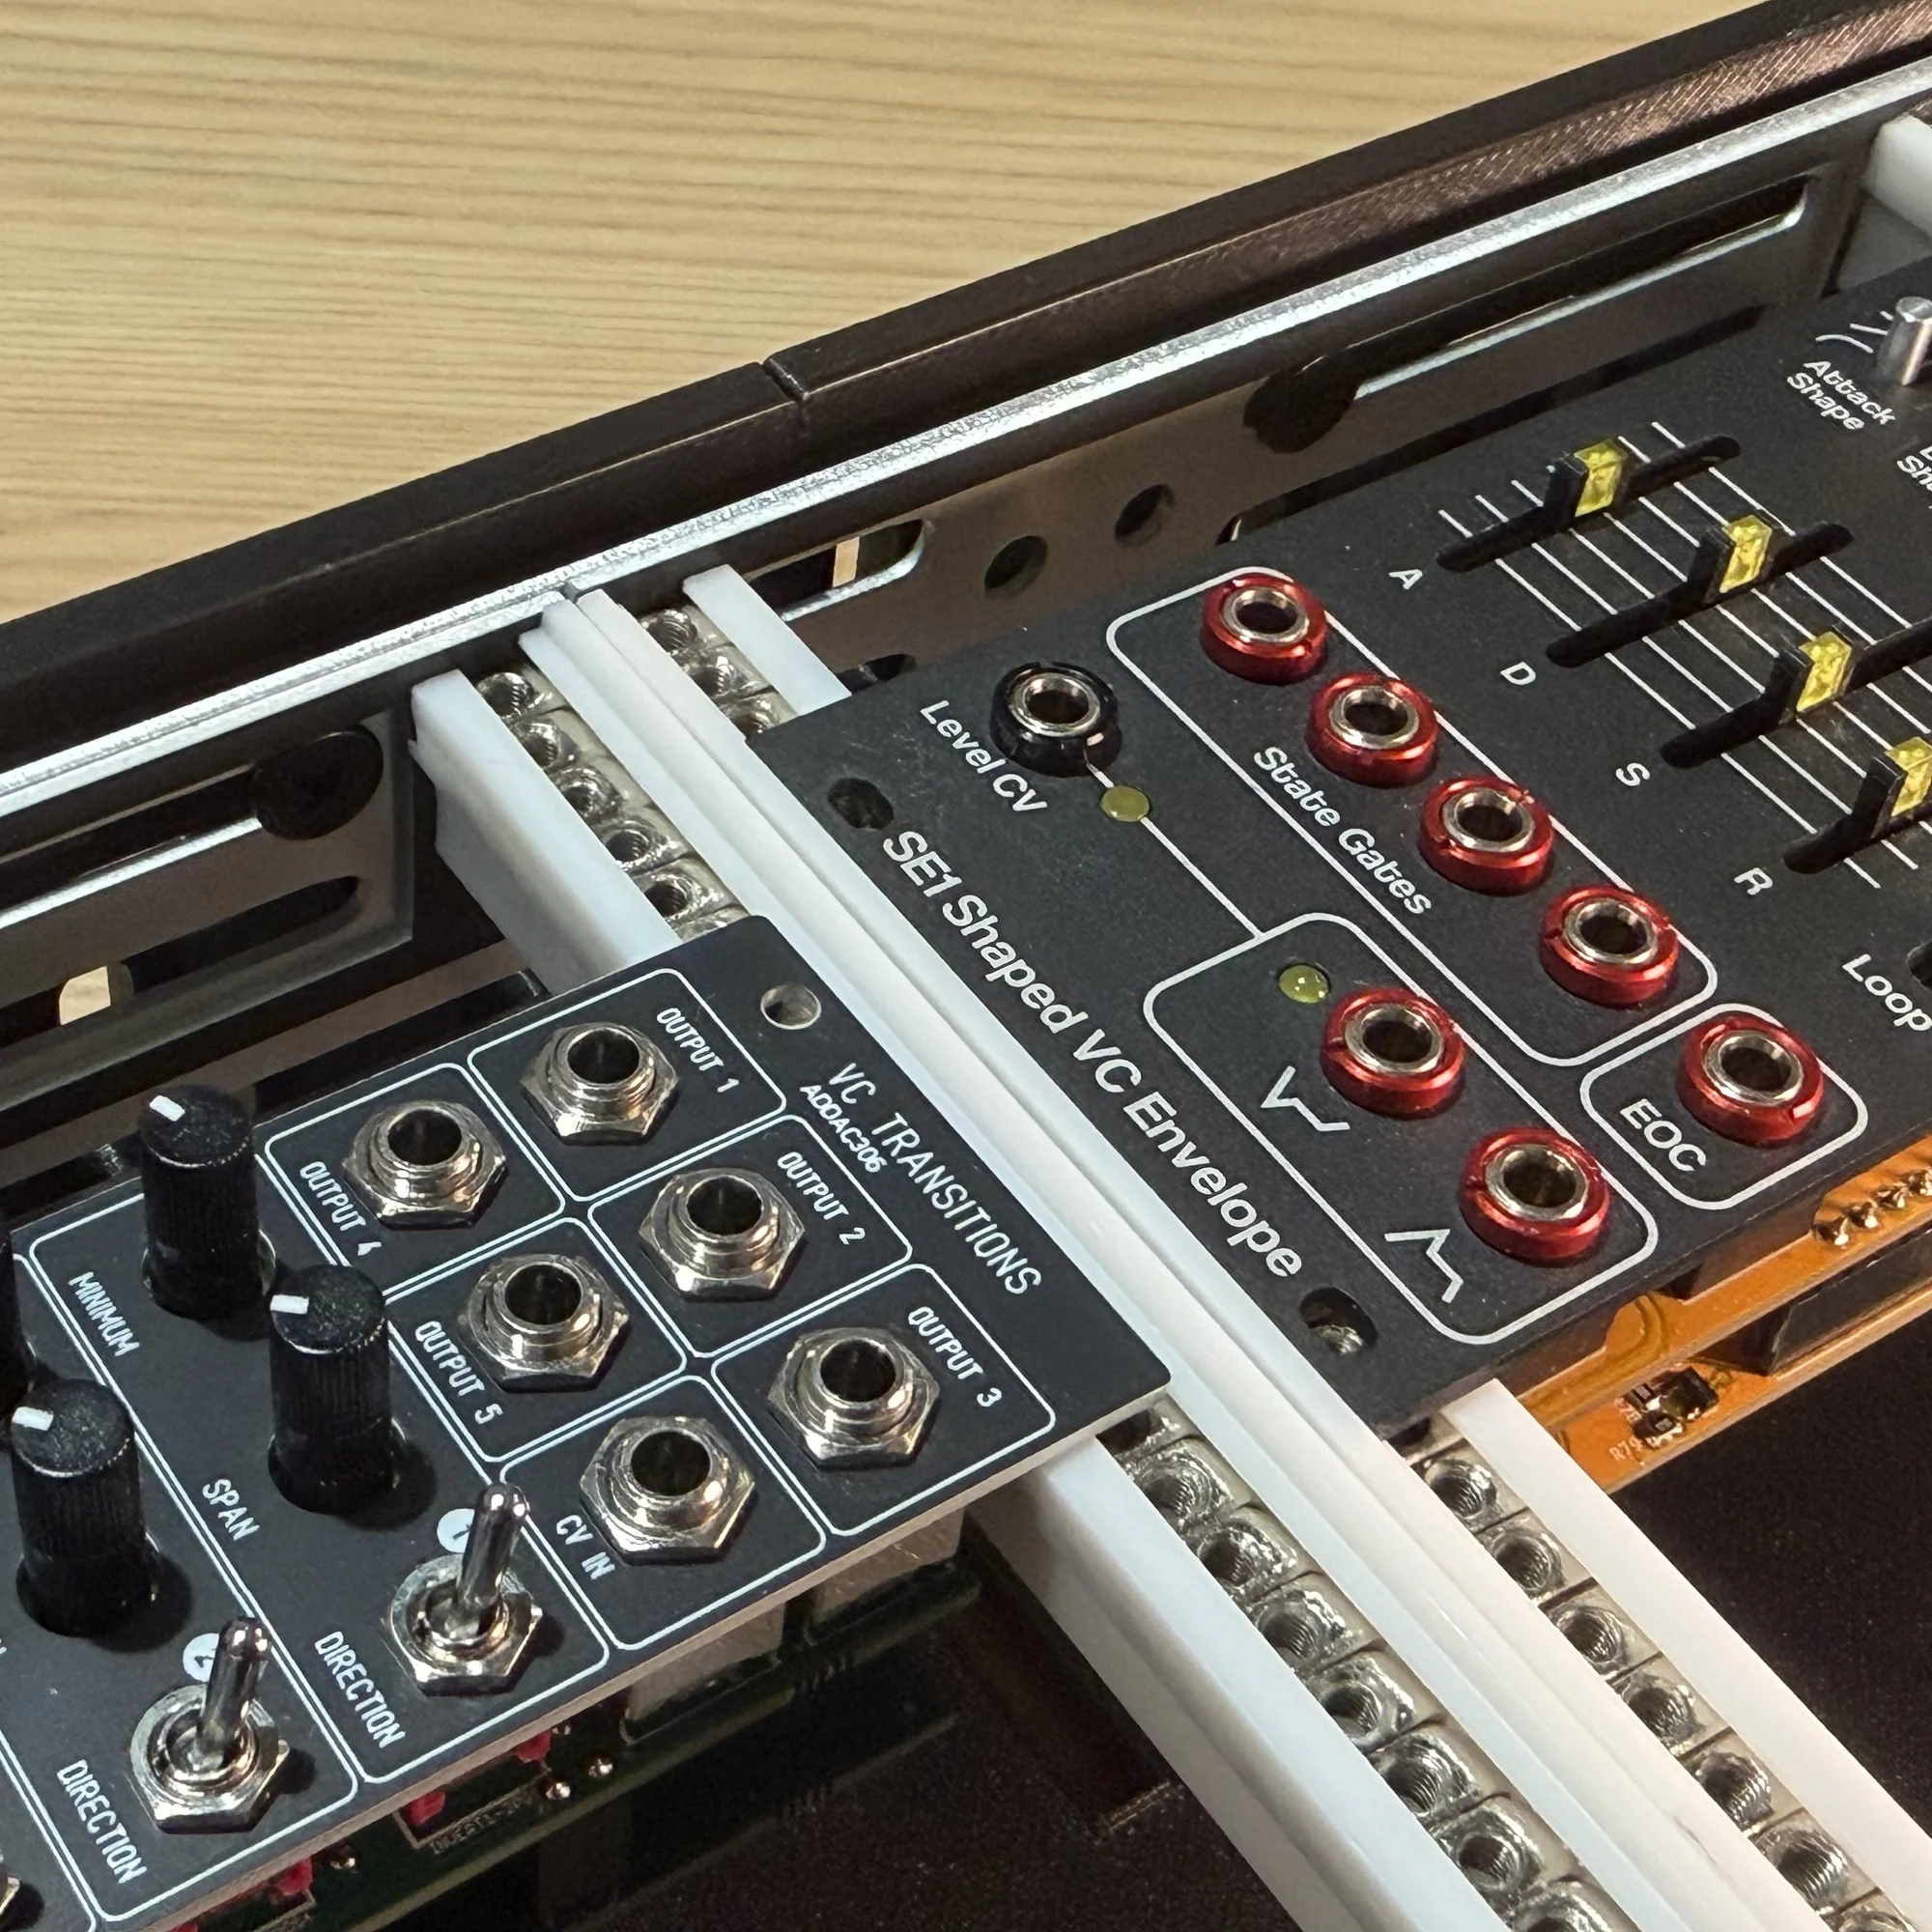
The rails come in two variations: the nylon version and the nuts version. In either case, you will need to pack in bar nuts or slide nuts afterward, so at this step attach the aluminum frame on one side only. The result is a state where the rails sprout from the aluminum panel on just one side.
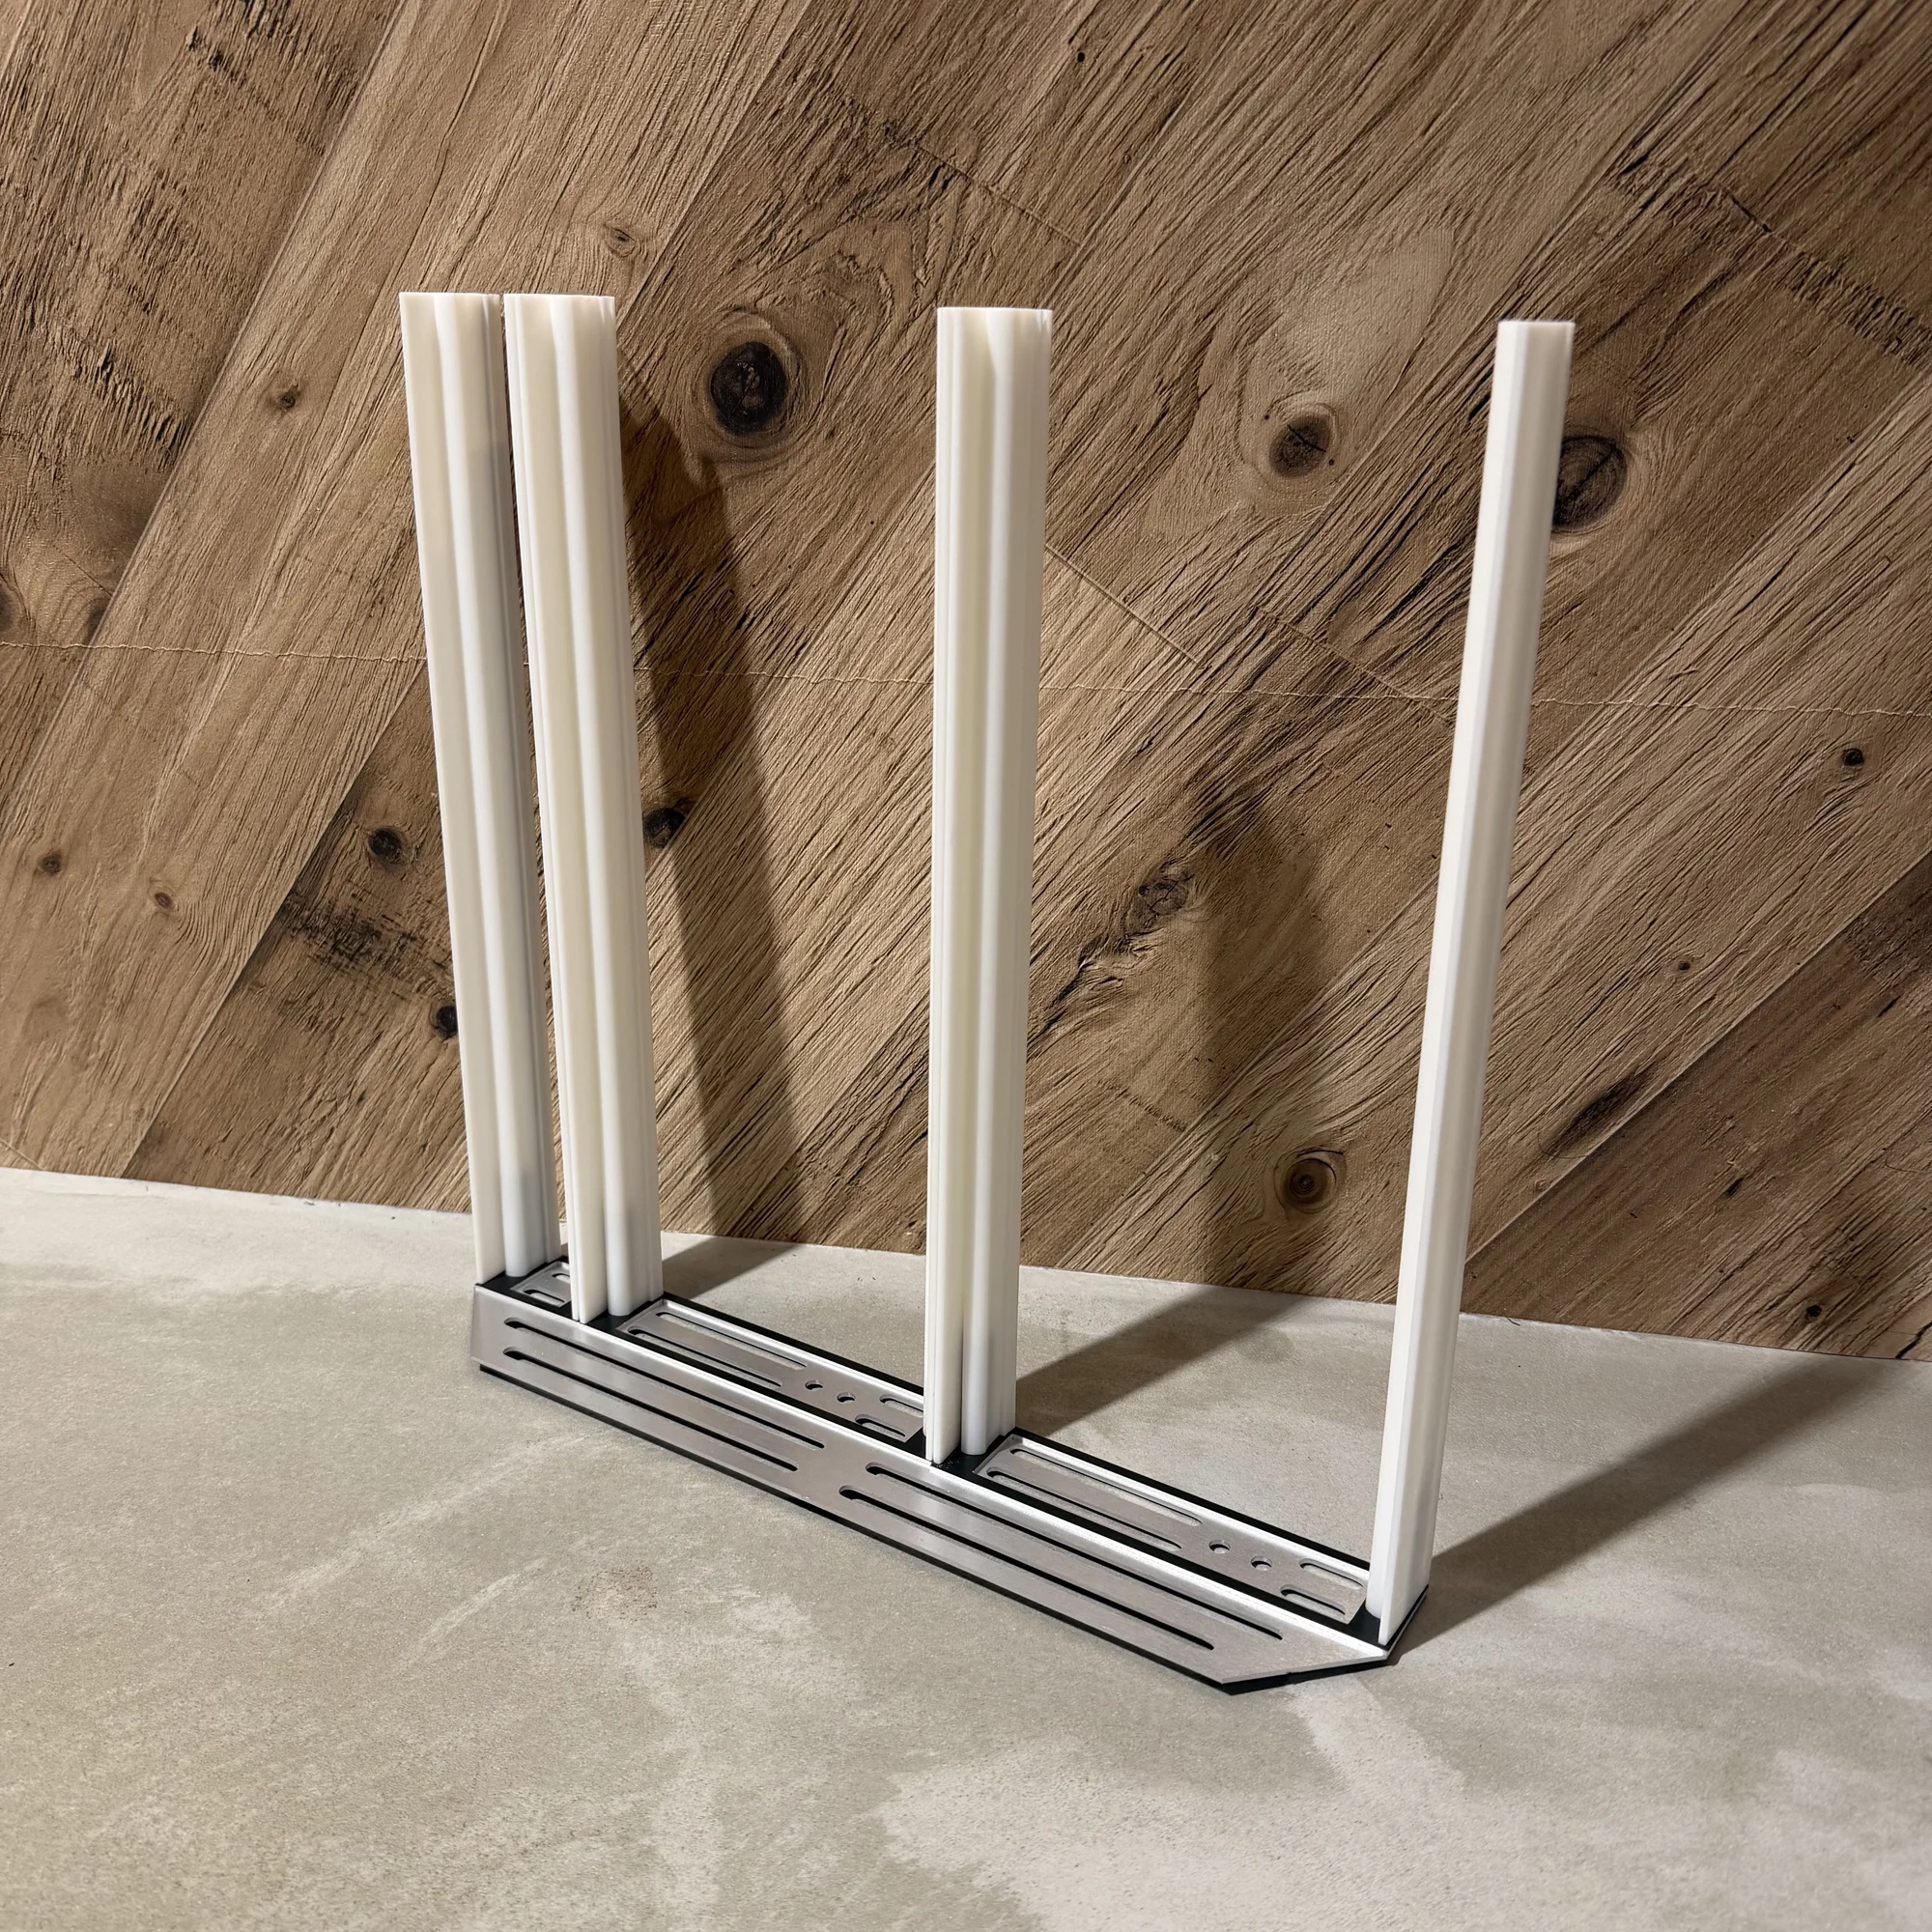
Packing In the Nuts
Once the long screws are tightened, the next task is packing in the bar nuts or slide nuts.
With the nylon version rails, this is easy. Place the black bar nut inside the rail, tighten the other aluminum frame, and you are done. Skip this section and proceed to the outer box assembly.
With the nuts version, you need to pack the nuts inside the rail. This is a time-consuming task, so we recommend setting aside enough time before starting.
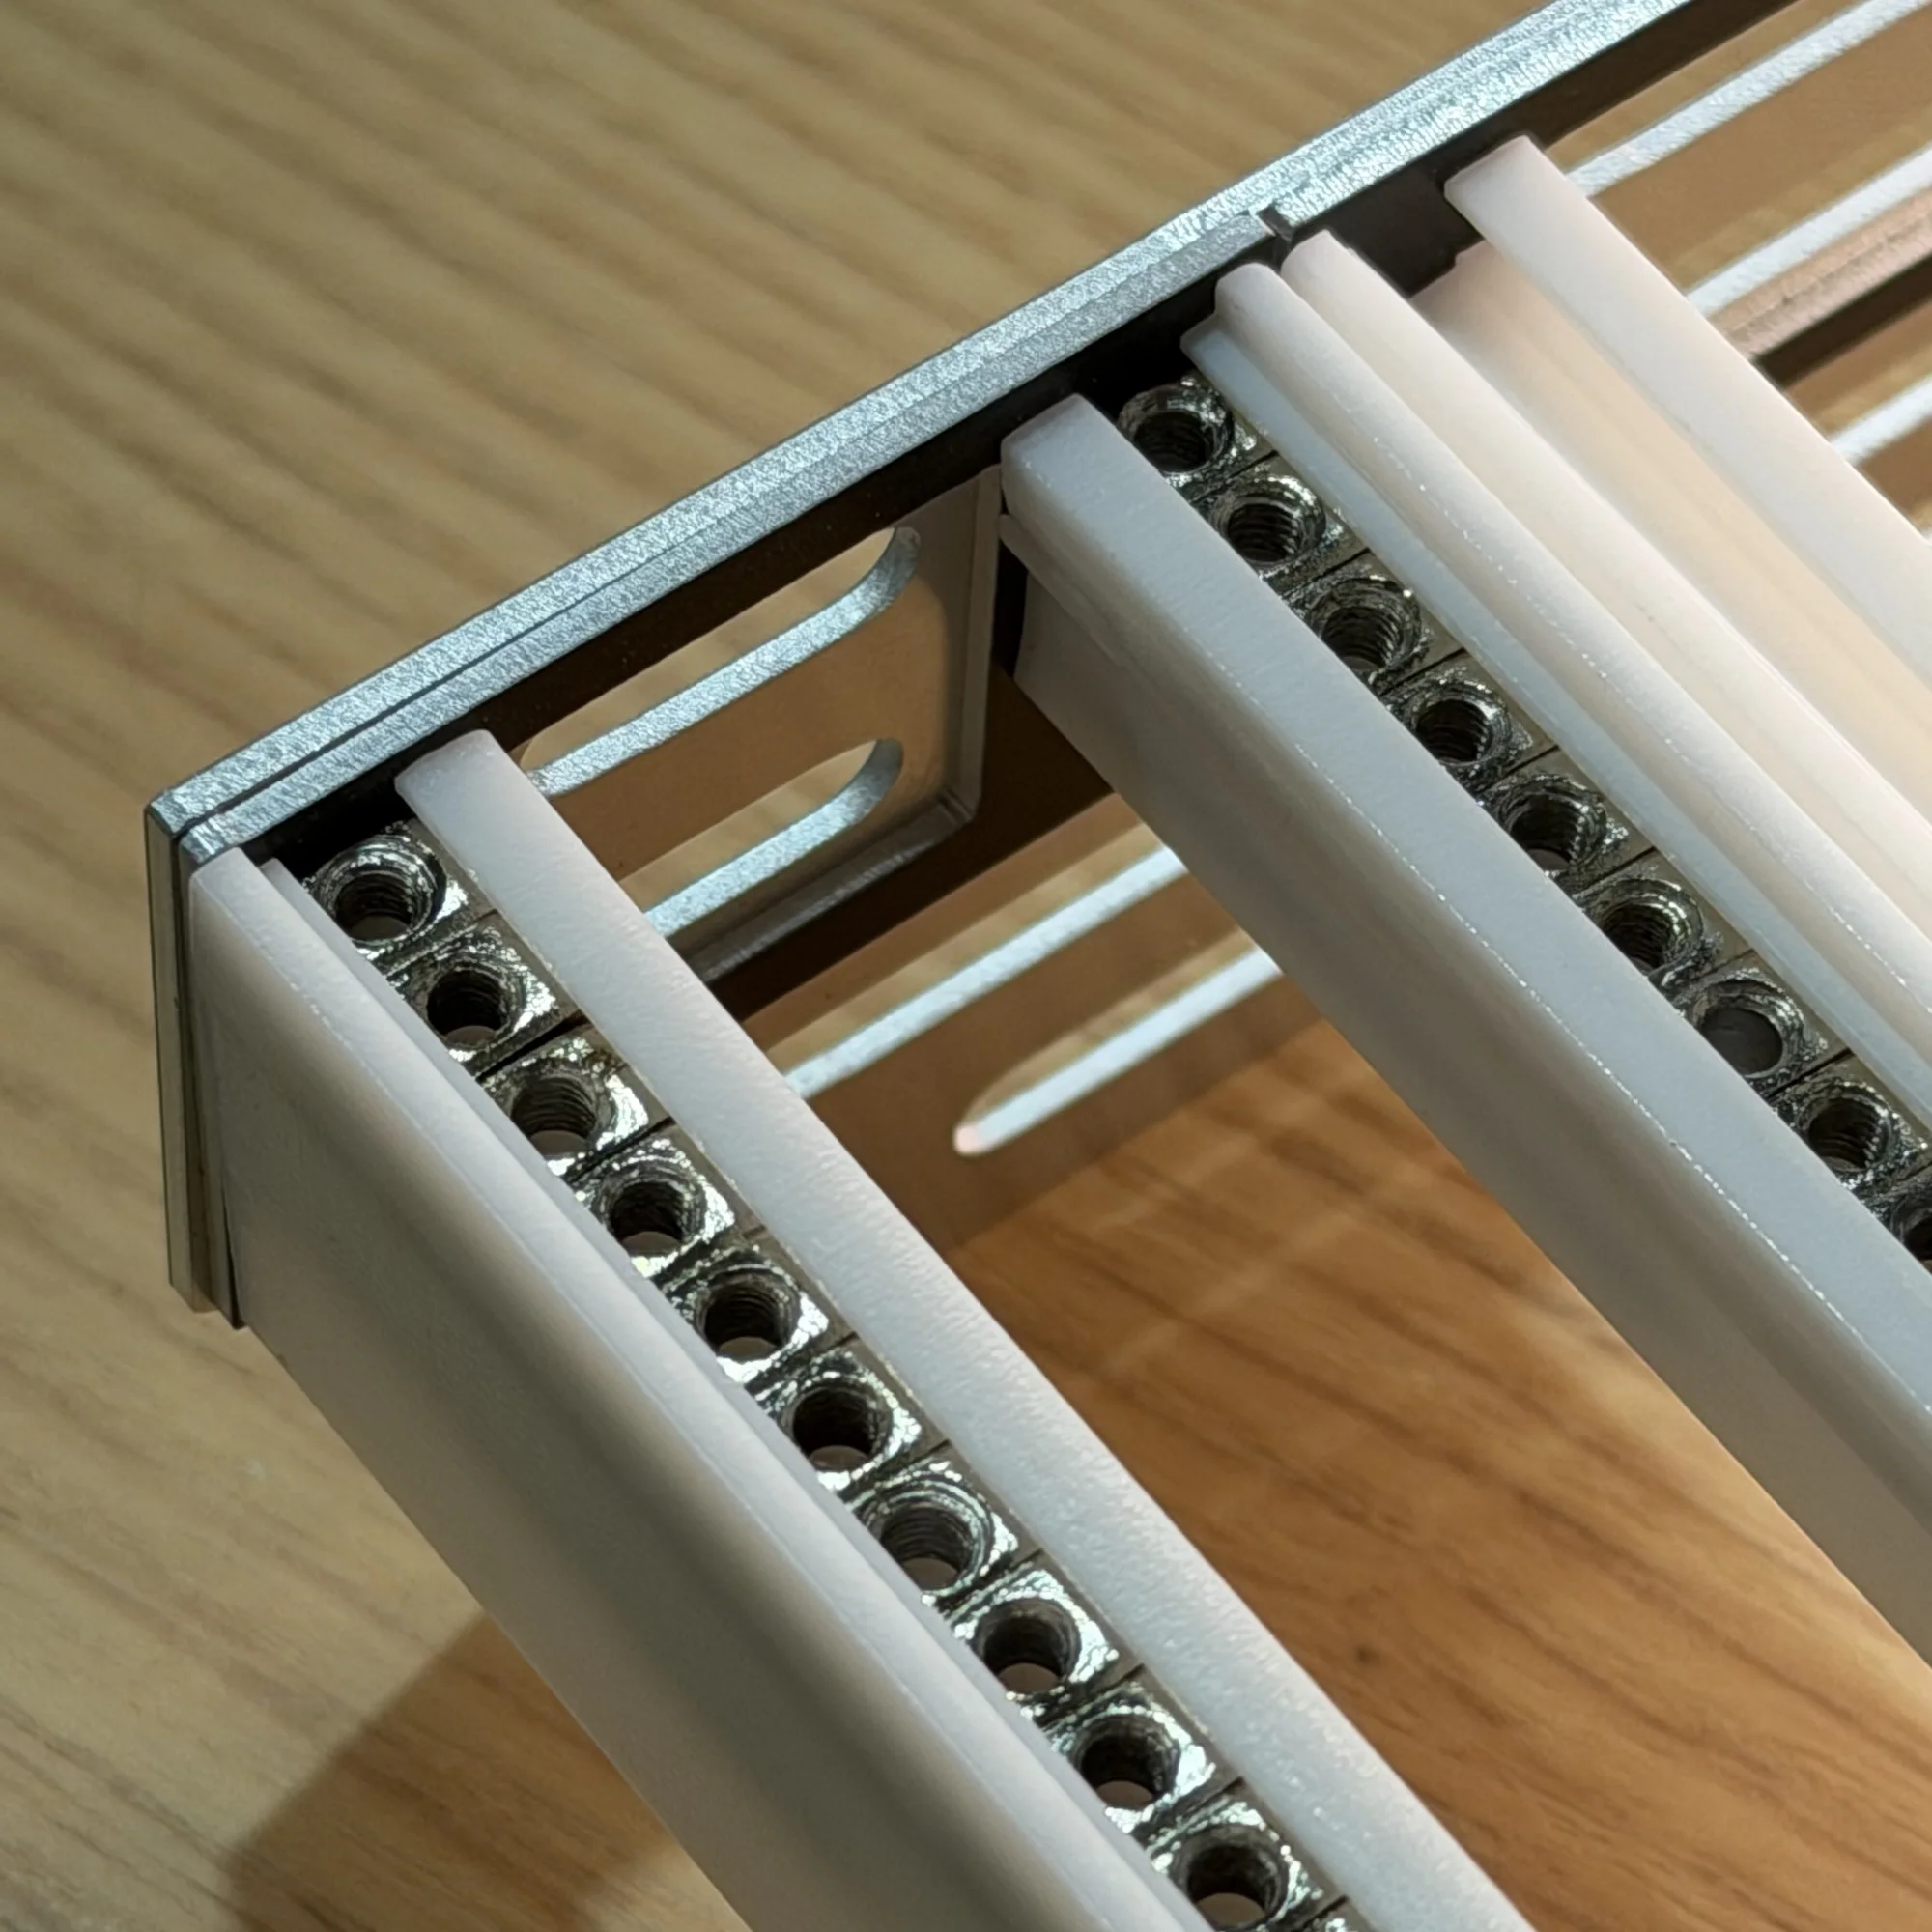
Slide nuts come 20 per bag. Each nut is roughly 5mm wide, which is about 1HP. So for the 40HP model you need to pack 40 nuts into a single rail, and for the 60HP model, 60 nuts.
Each bag contains 2 to 3 extra nuts as a safeguard against defective ones. (Defective nuts are covered in the next section.)
A helpful tip for packing: tilt the rail with the open end facing down and insert the nuts one at a time from the bottom. The nuts already inserted act as a weight (a stopper), which makes the next one easier to insert.
During this work, a nut may rotate inside the rail and end up sideways. If that happens, use a toothpick or similar to straighten it out.
Once all the nuts are packed in, there will be enough space left for about one more nut, but this is expected. After packing 40 or 60 nuts, count them one by one to confirm you have the correct number. It is possible to end up with one extra — 41 or 61 — but that would make things too tight.
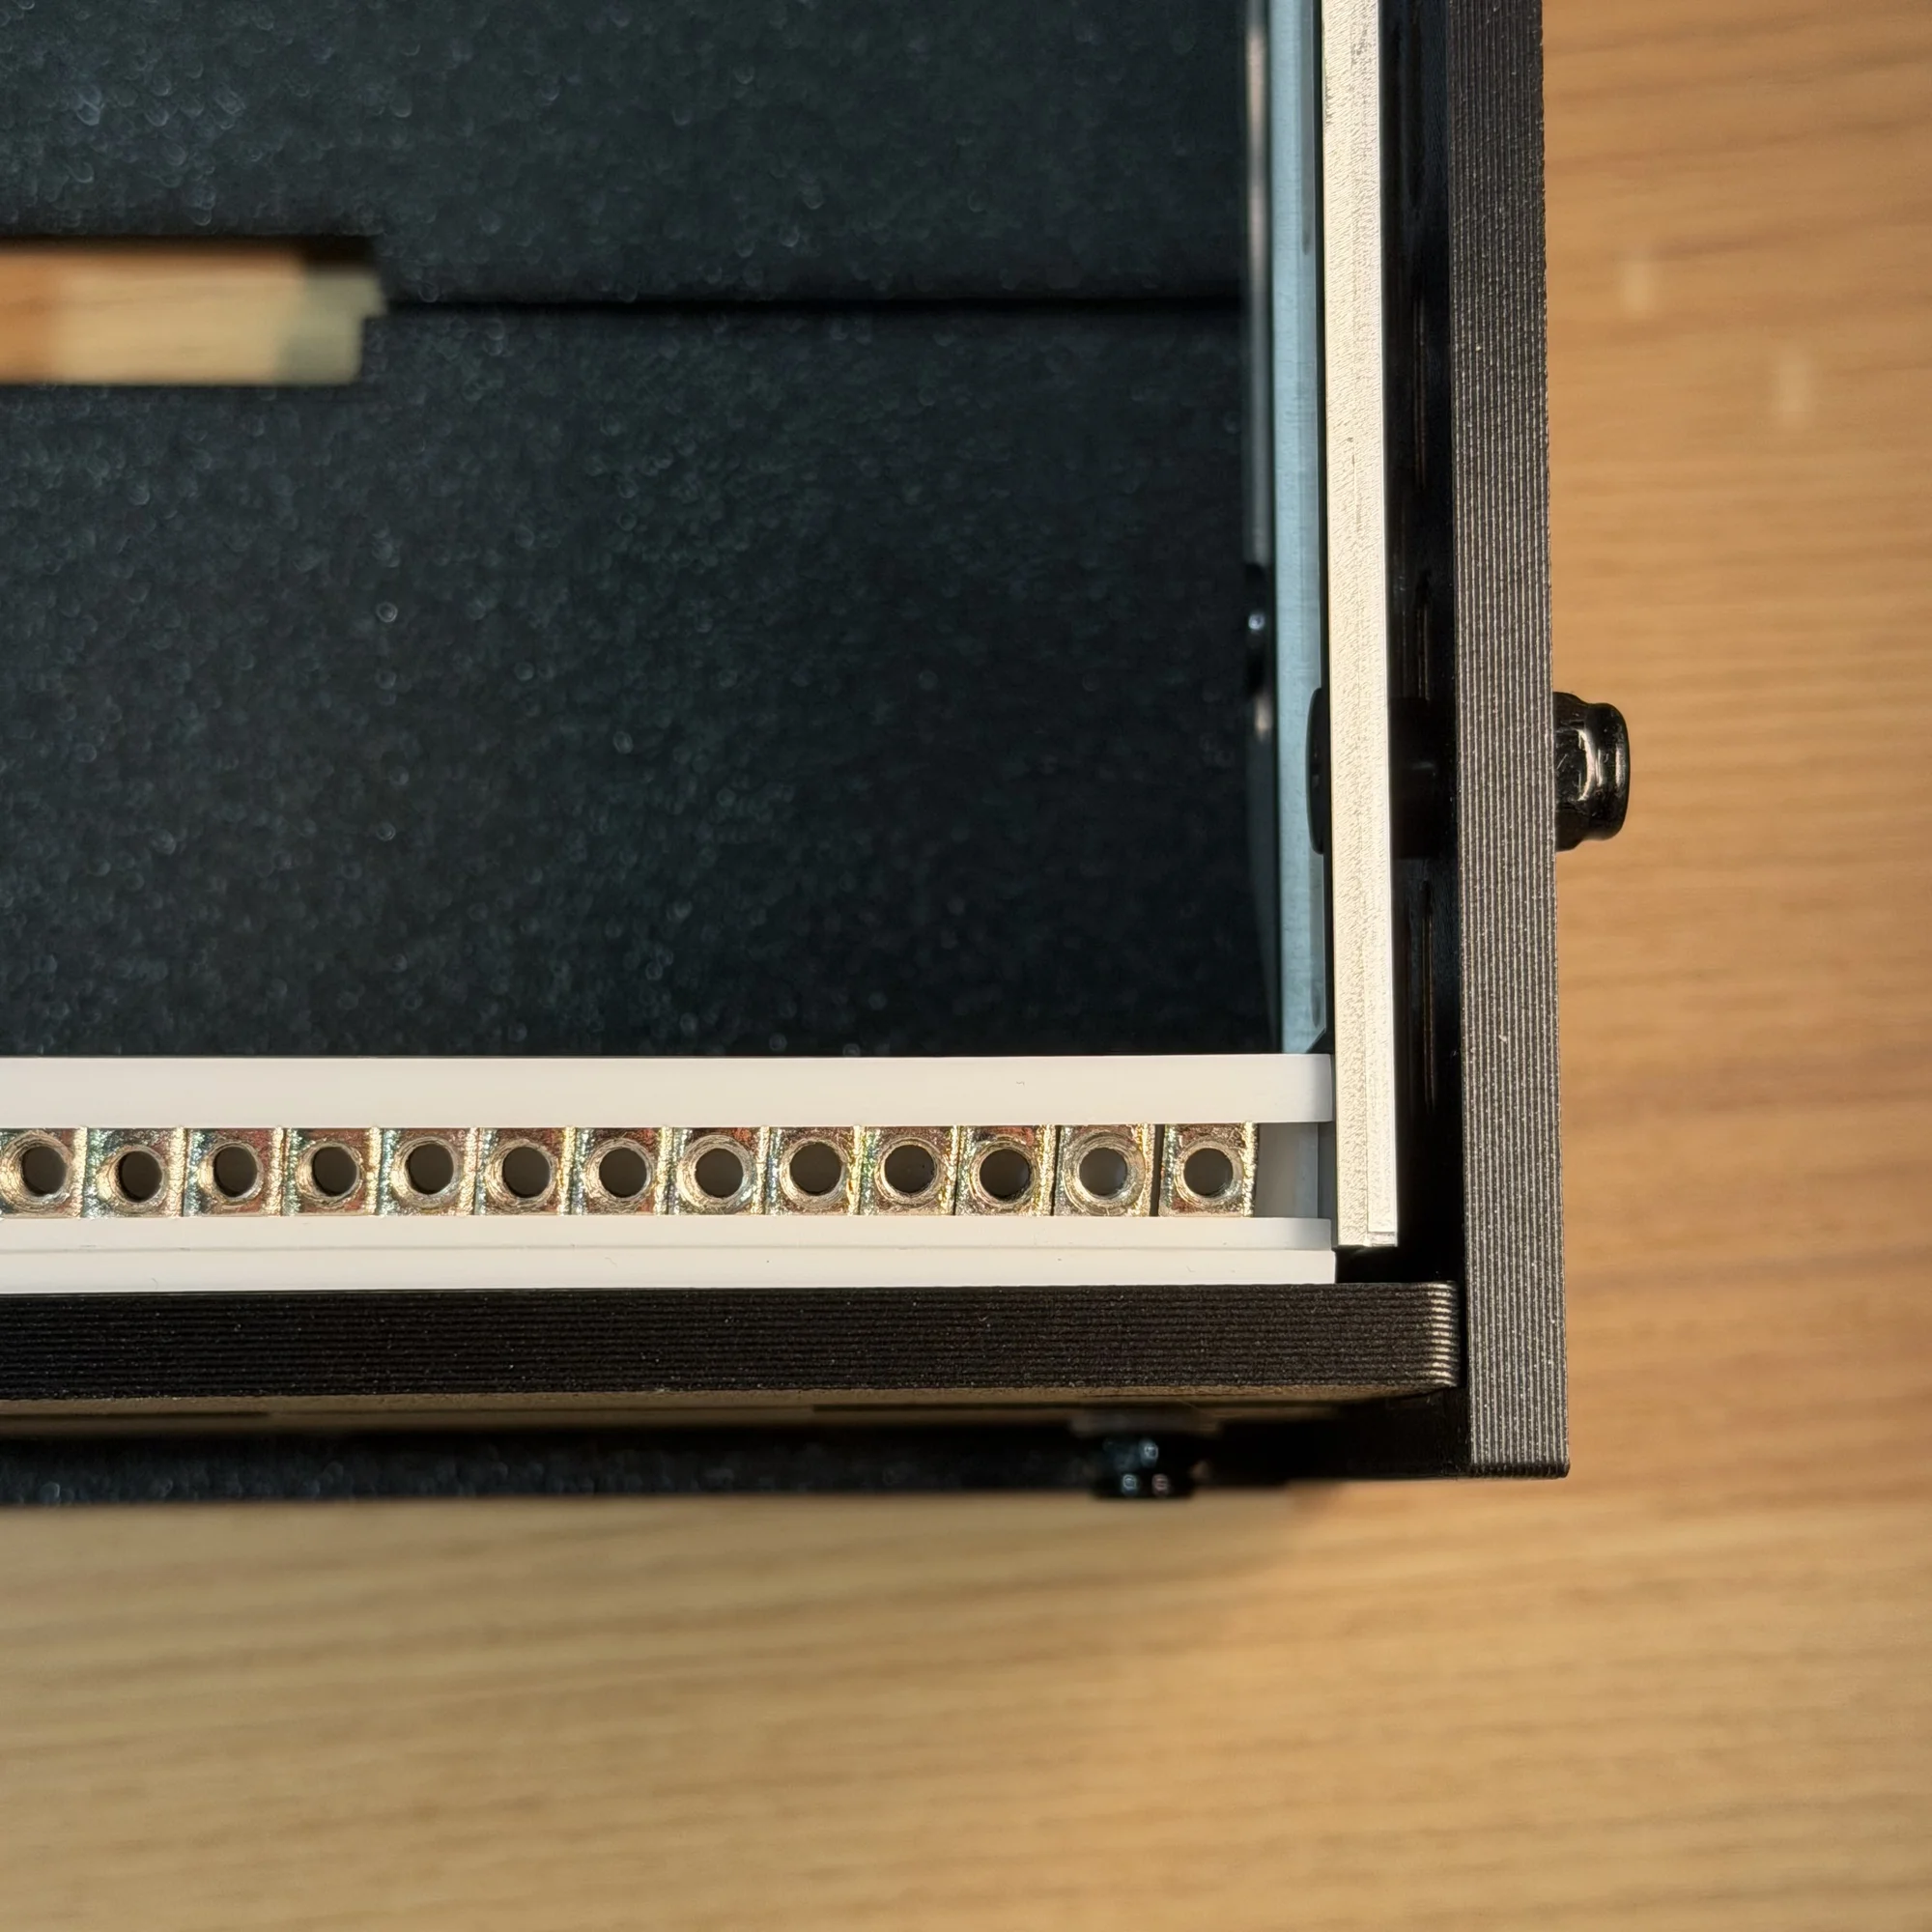
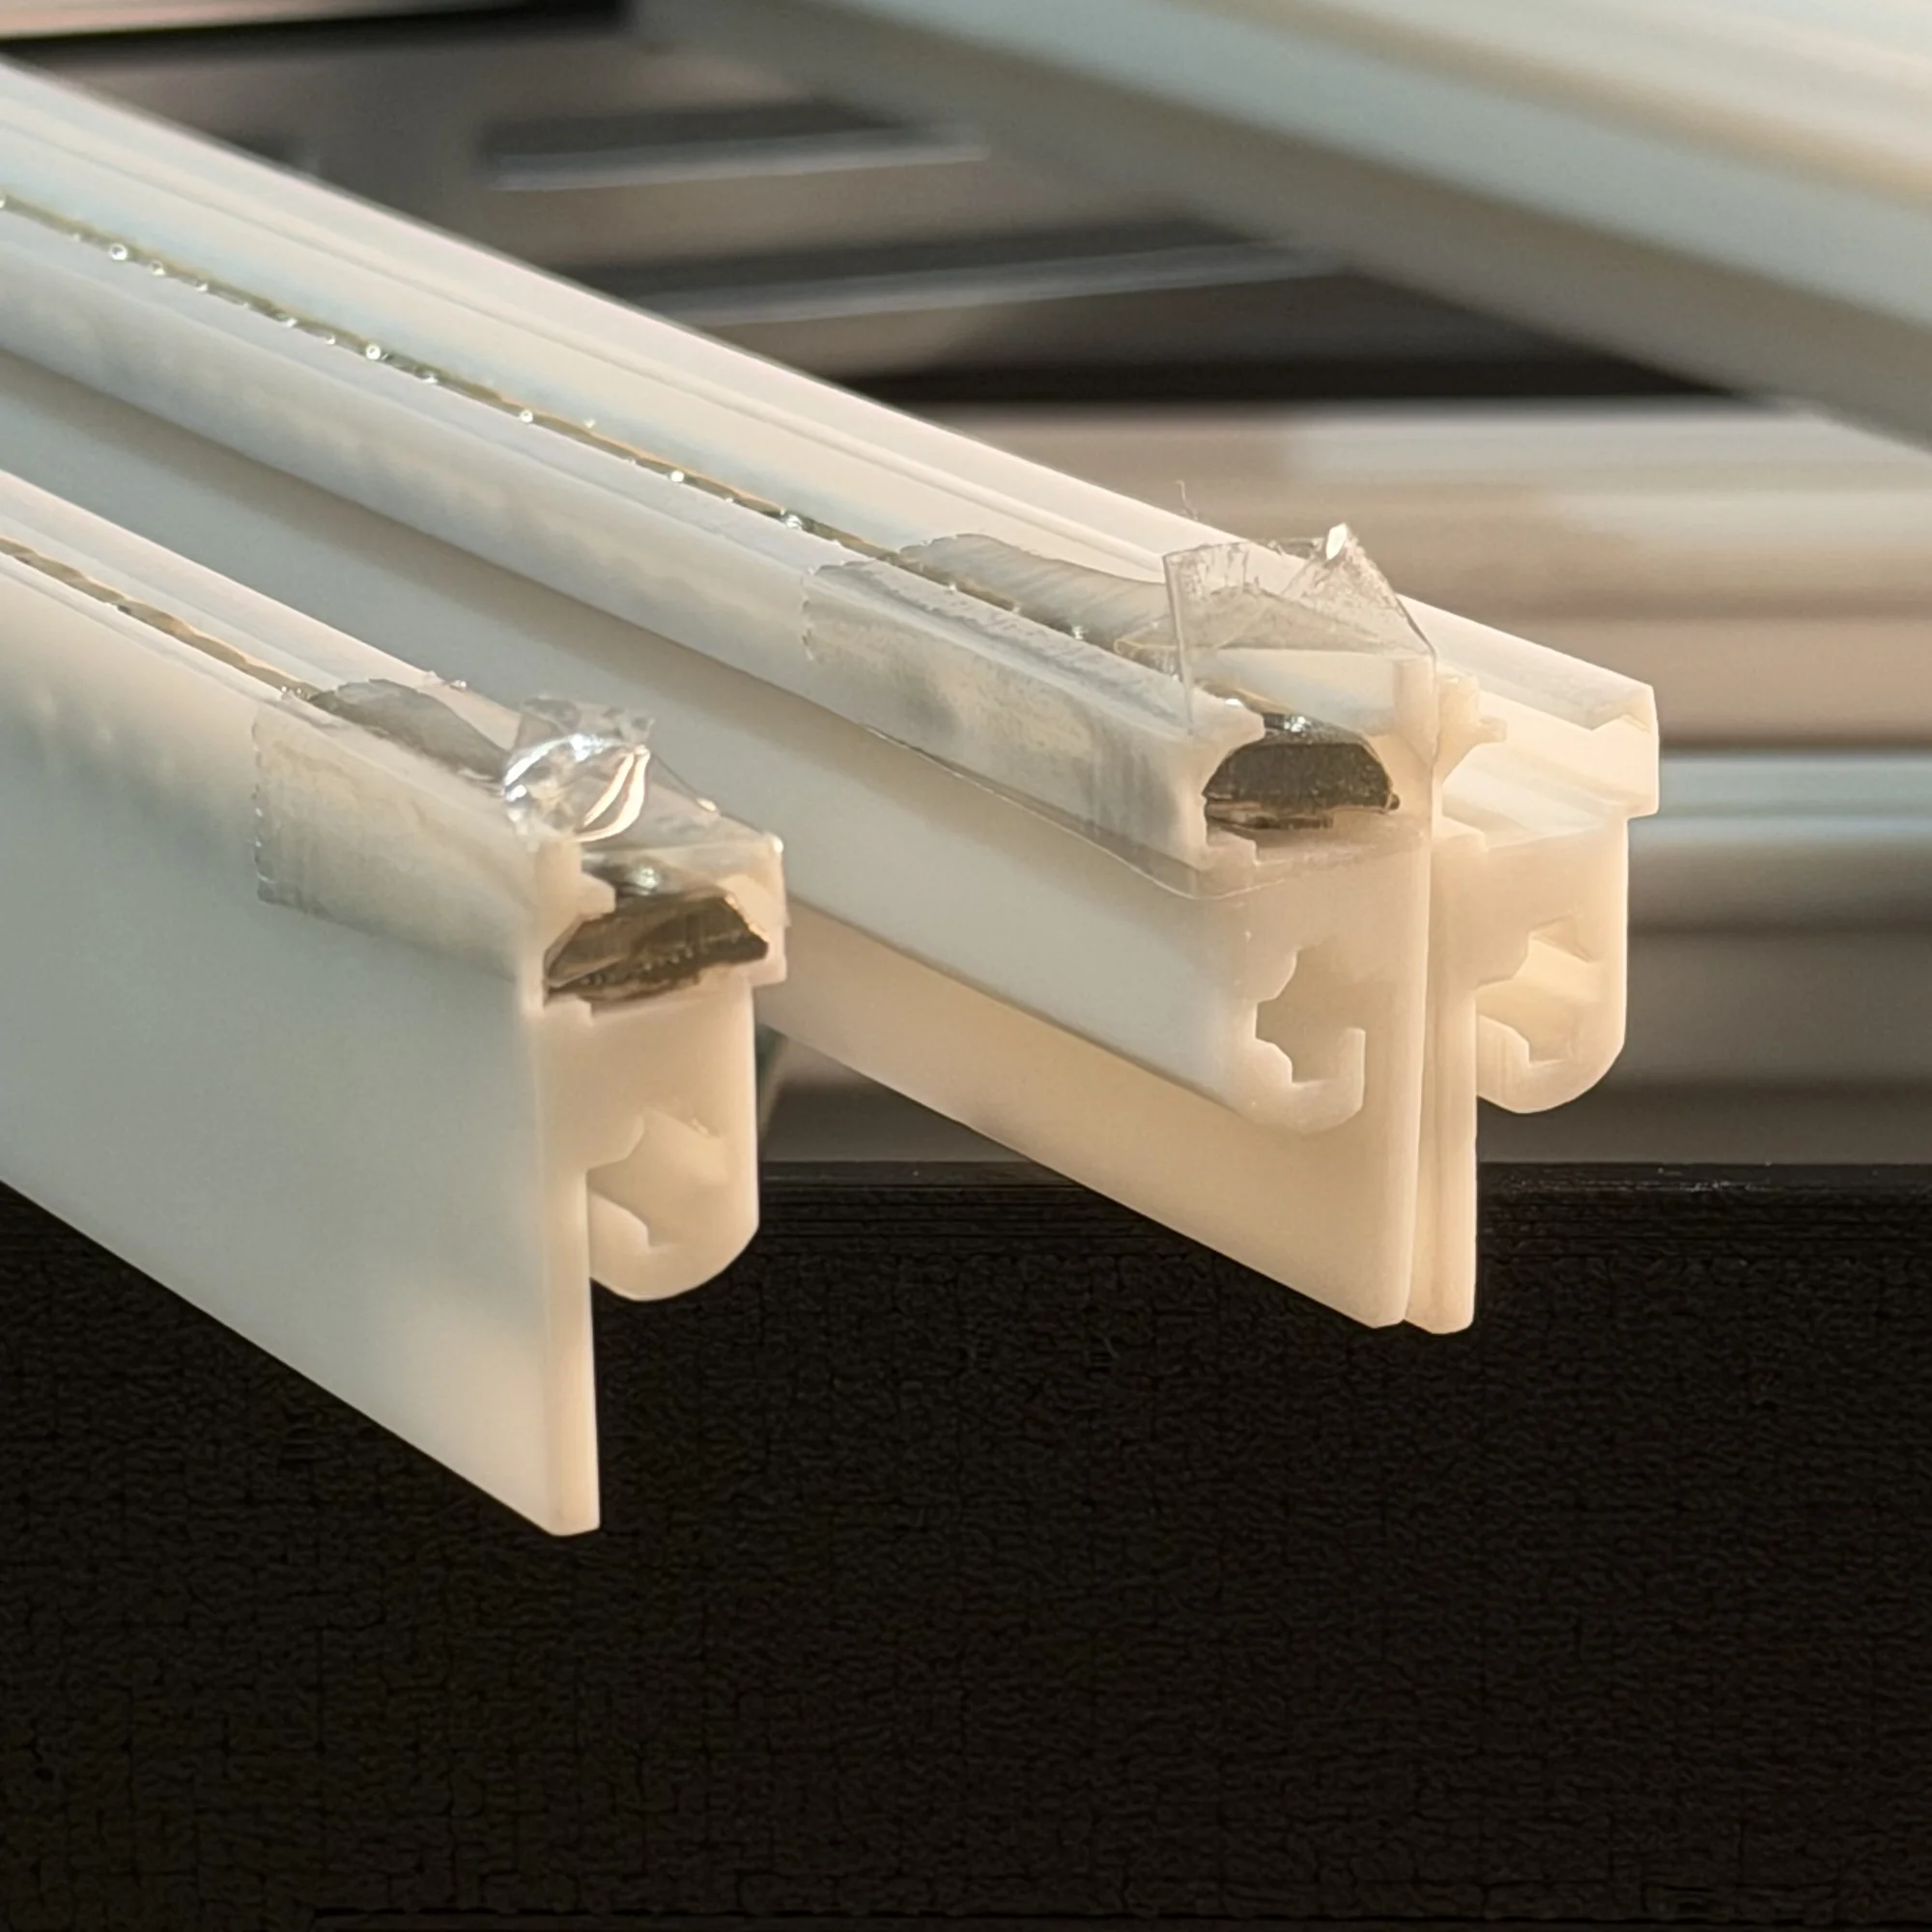
Once you have finished packing the first rail, repeat the same process for the remaining rails. However, when you move on to the second rail, the first rail still only has an aluminum frame on one side, so the packed nuts can easily spill out. To prevent this, it is reassuring to put a piece of tape over the open end of the finished rail to hold the nuts in place. Remove this tape after attaching the other aluminum plate.
Once all the rails are packed with nuts, fasten the other aluminum plate with the long screws (40mm).
About Defective Nuts
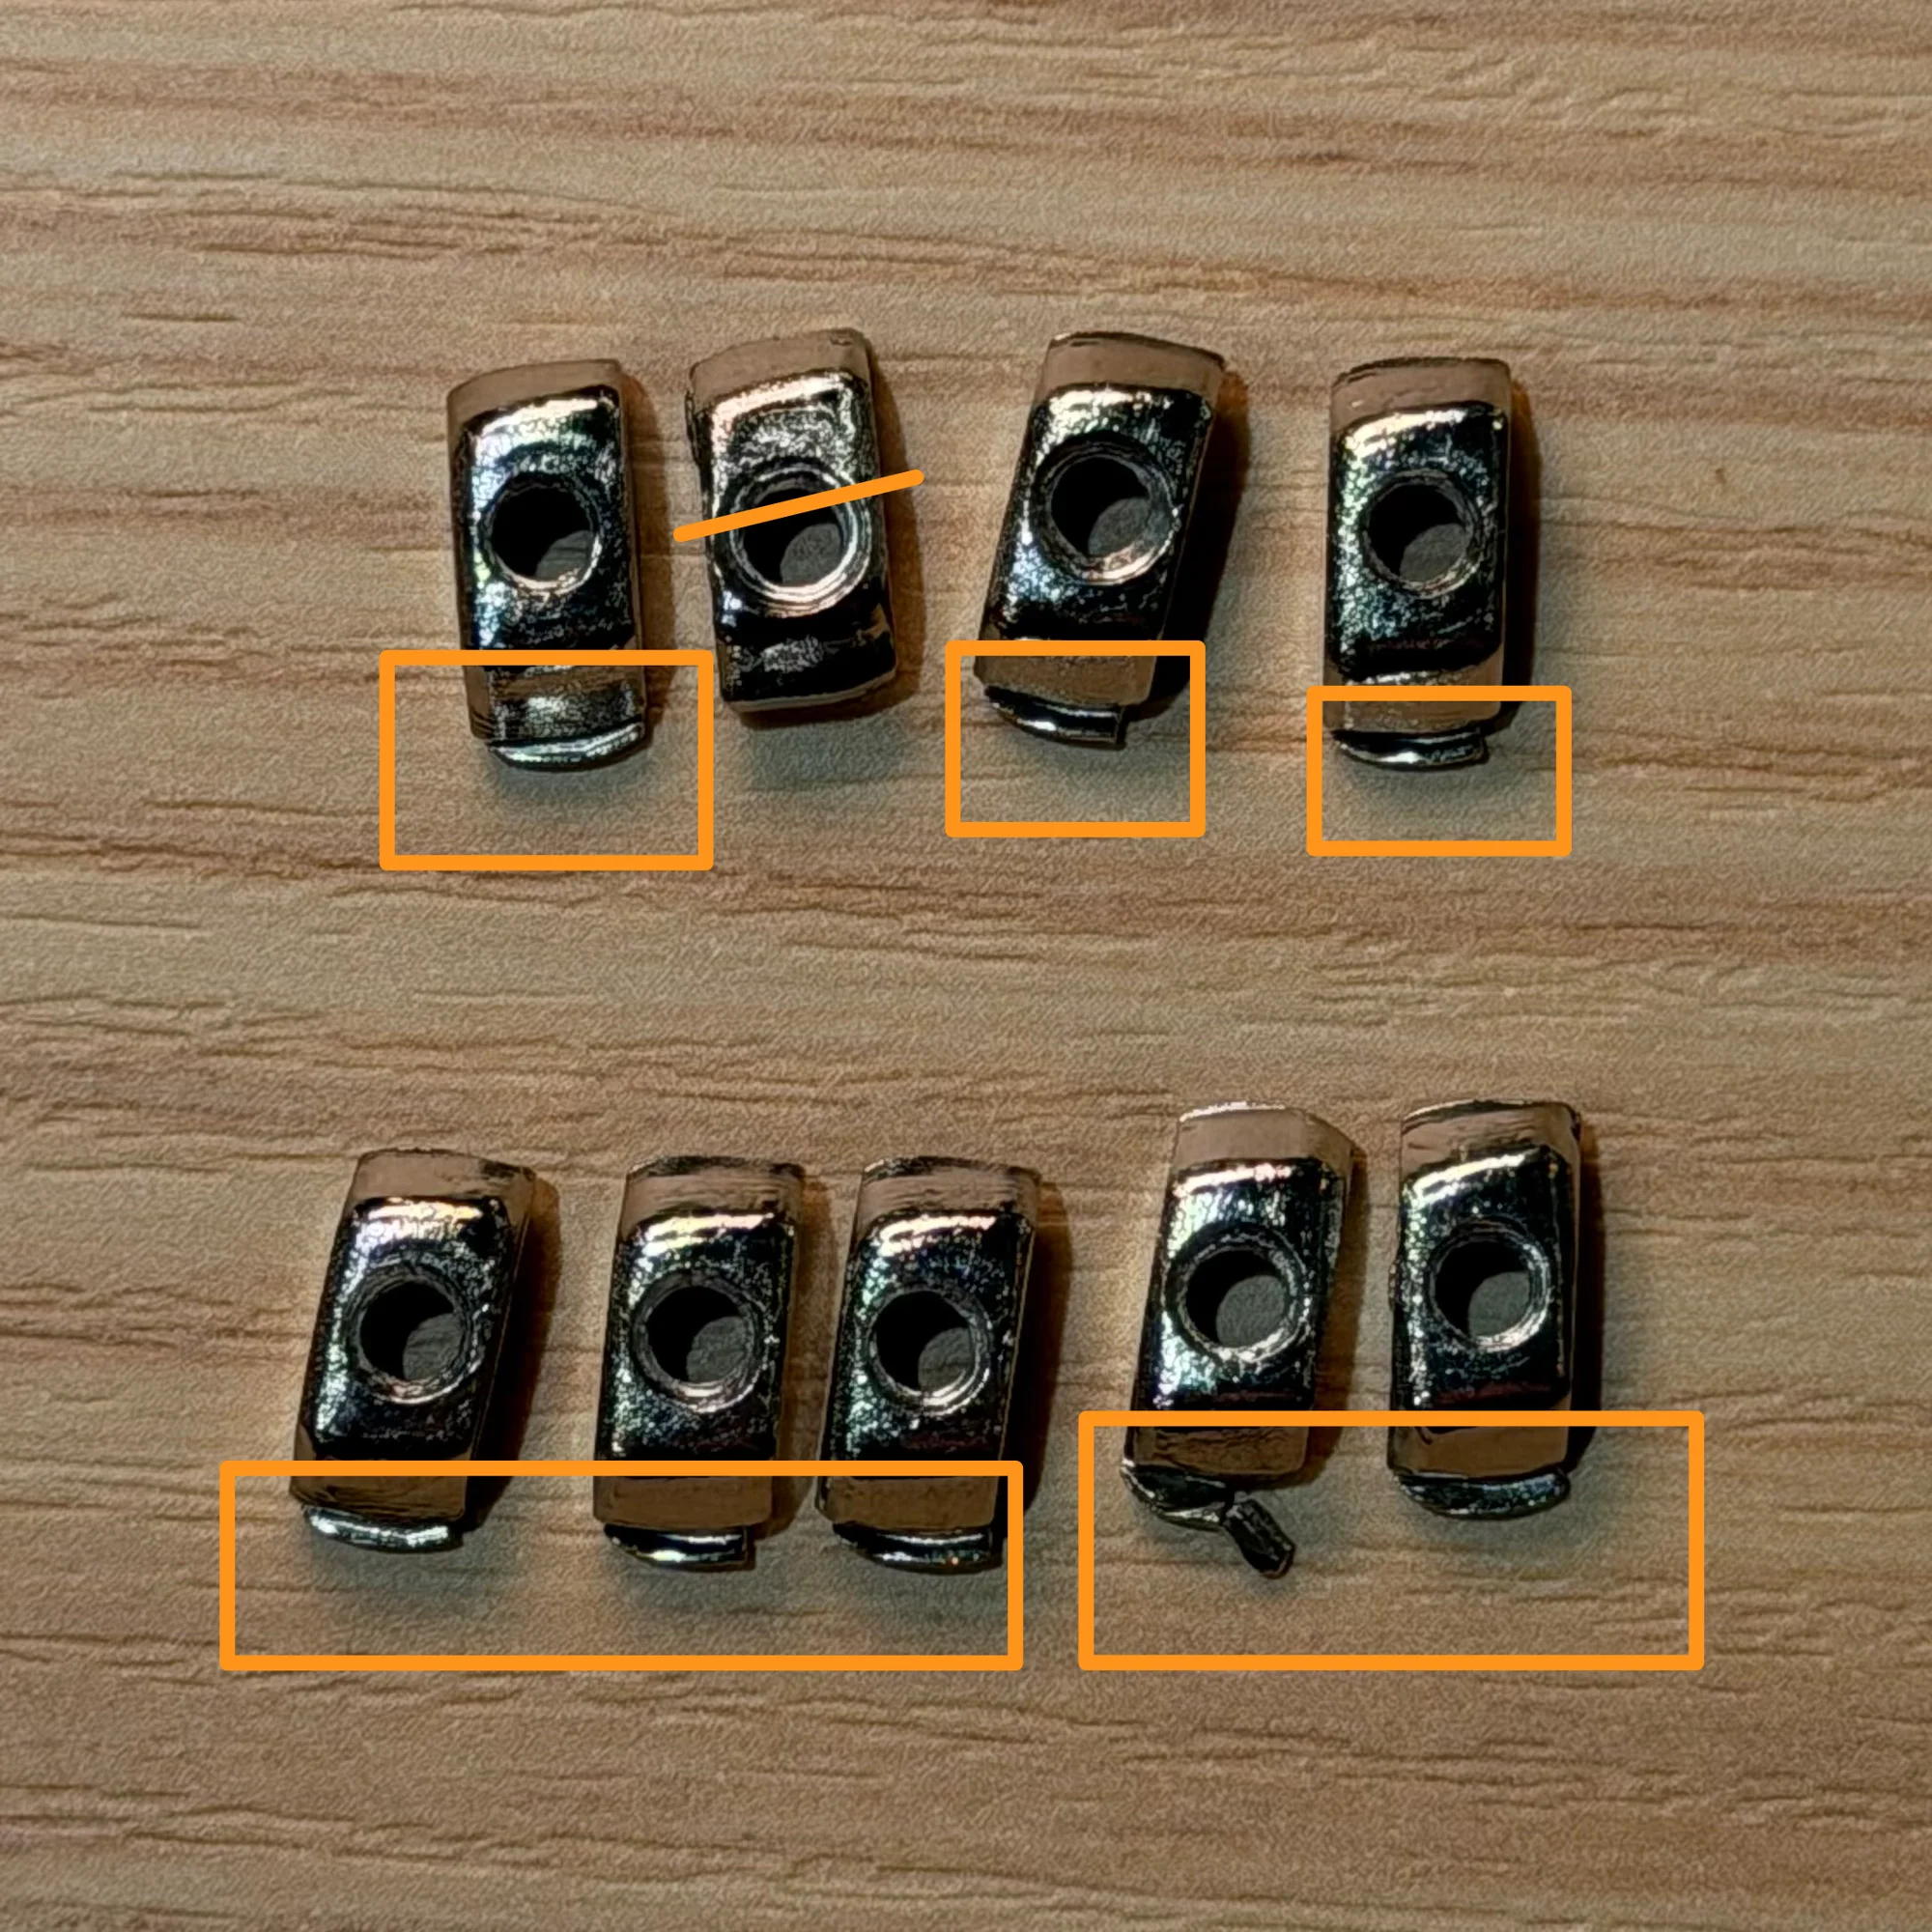
Slide nuts are mass-produced, so occasionally a nut that is larger than normal or has an off-center screw hole may be mixed in. We remove as many as we can during packaging, but if you find one during assembly, please avoid using it.
Step 2: Outer Box Assembly
Once the rail sets are assembled, the next step is building the case's outer box.
Connecting the Panels Together
Before starting the outer box assembly, open the parts bag labeled "for case." It contains the parts used in this step.
The outer box assembly itself is not difficult. There are only two things to do in this step.
Fit the panel tabs and slots together to connect them
Fasten the four corners with screws
As a premise, the outer box is not a structure that holds together on its own. The strength of the case as a whole comes from the rails and the side aluminum panels; the outer box only becomes stable once it is connected to those aluminum panels. So fitting the tabs and slots together does not secure it by itself.
The outer box is divided into two identically shaped open boxes.
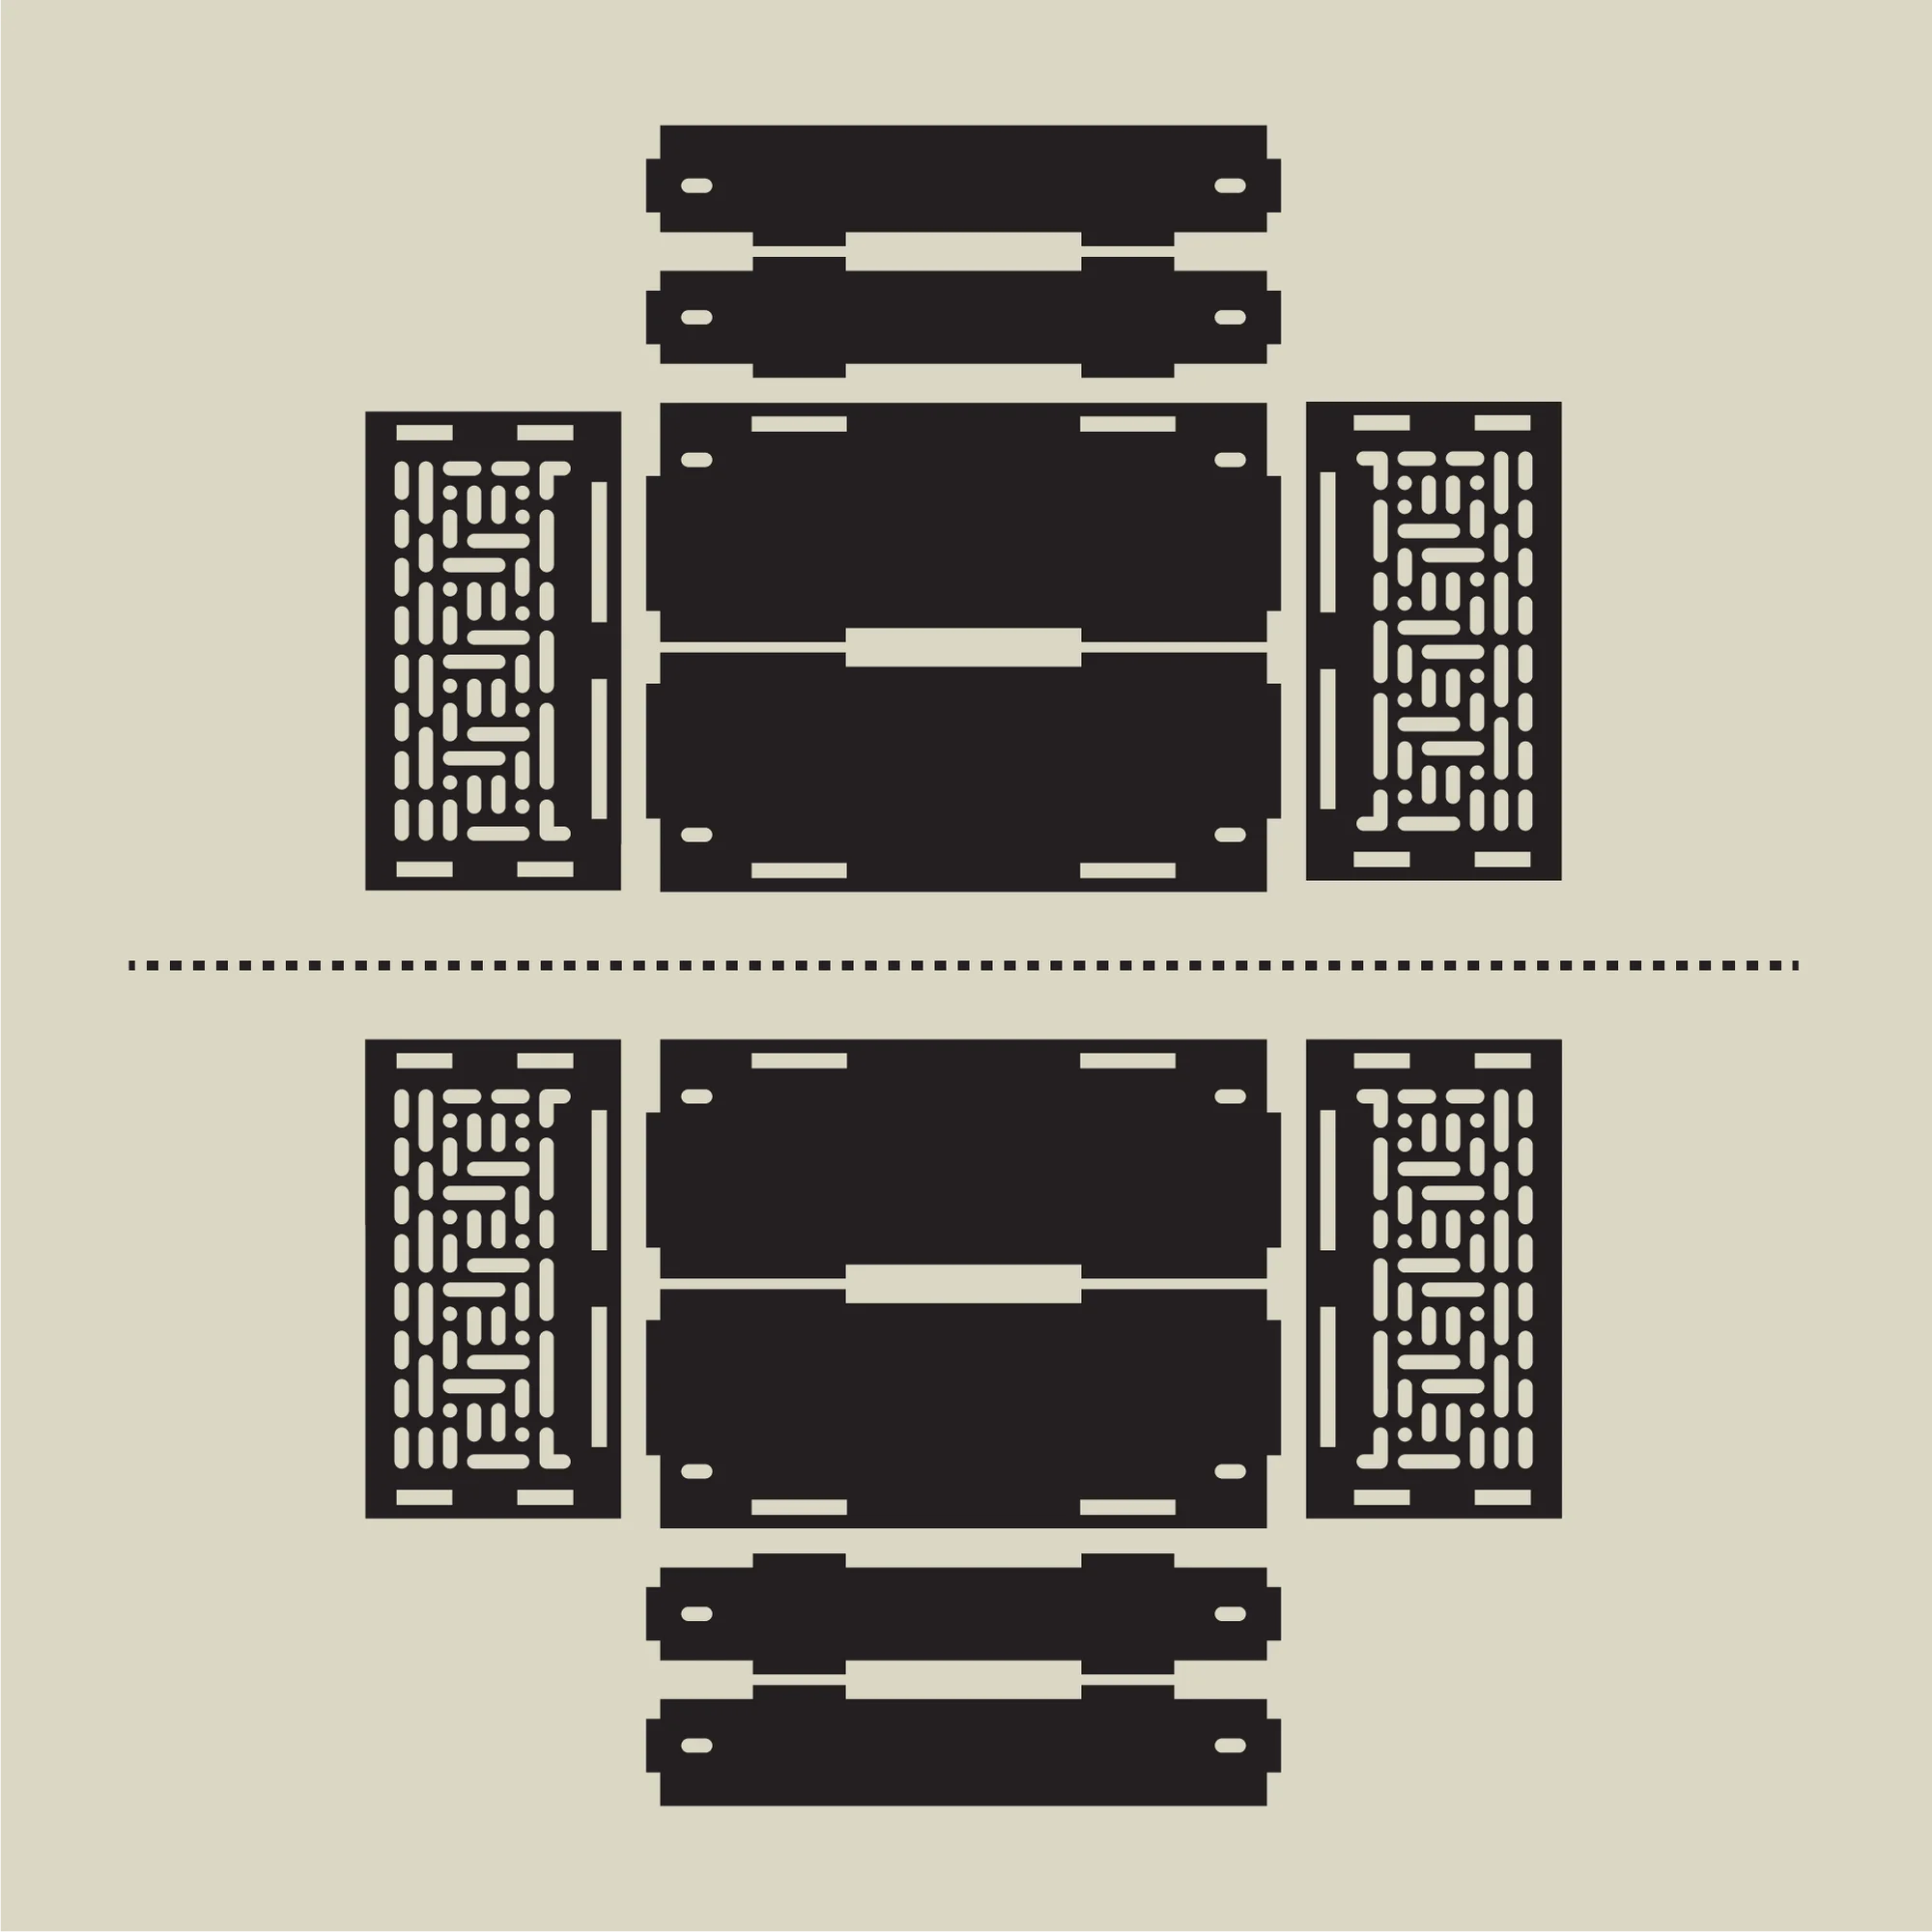
Each panel has rectangular holes at its edges, and the tabs of the adjacent panels are inserted into them to connect. Refer to the diagram below as you fit the panels together.
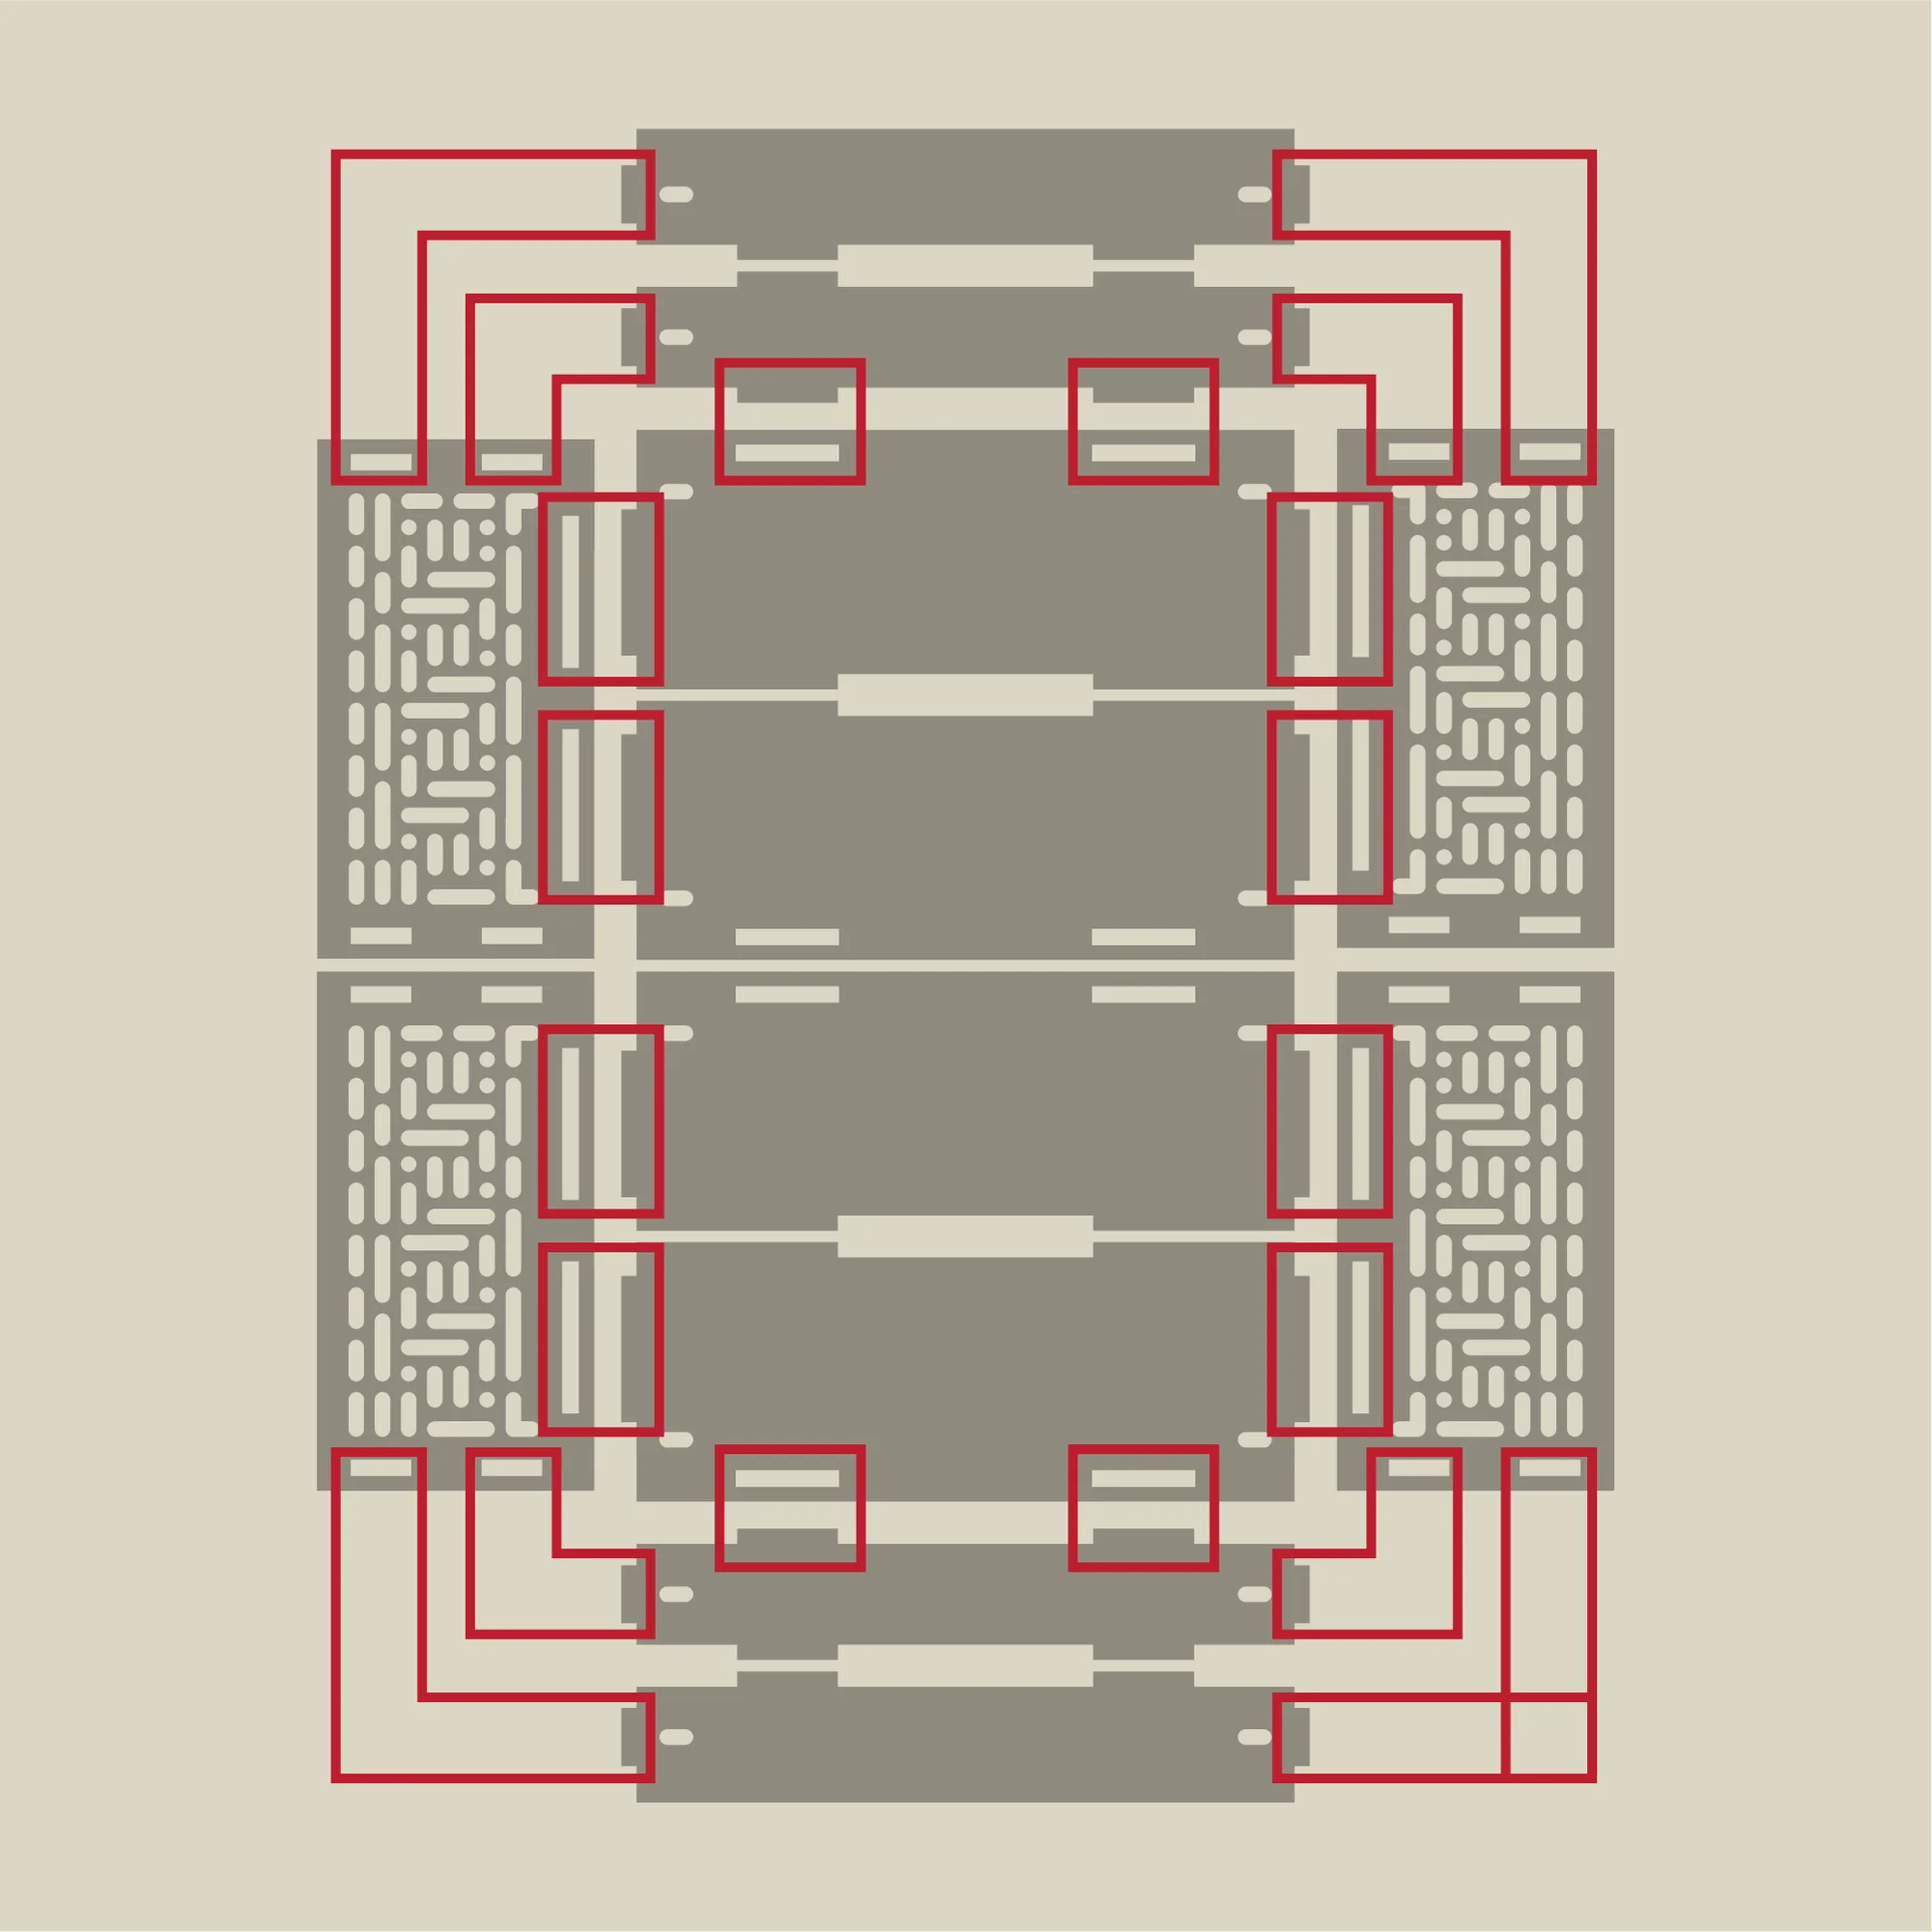
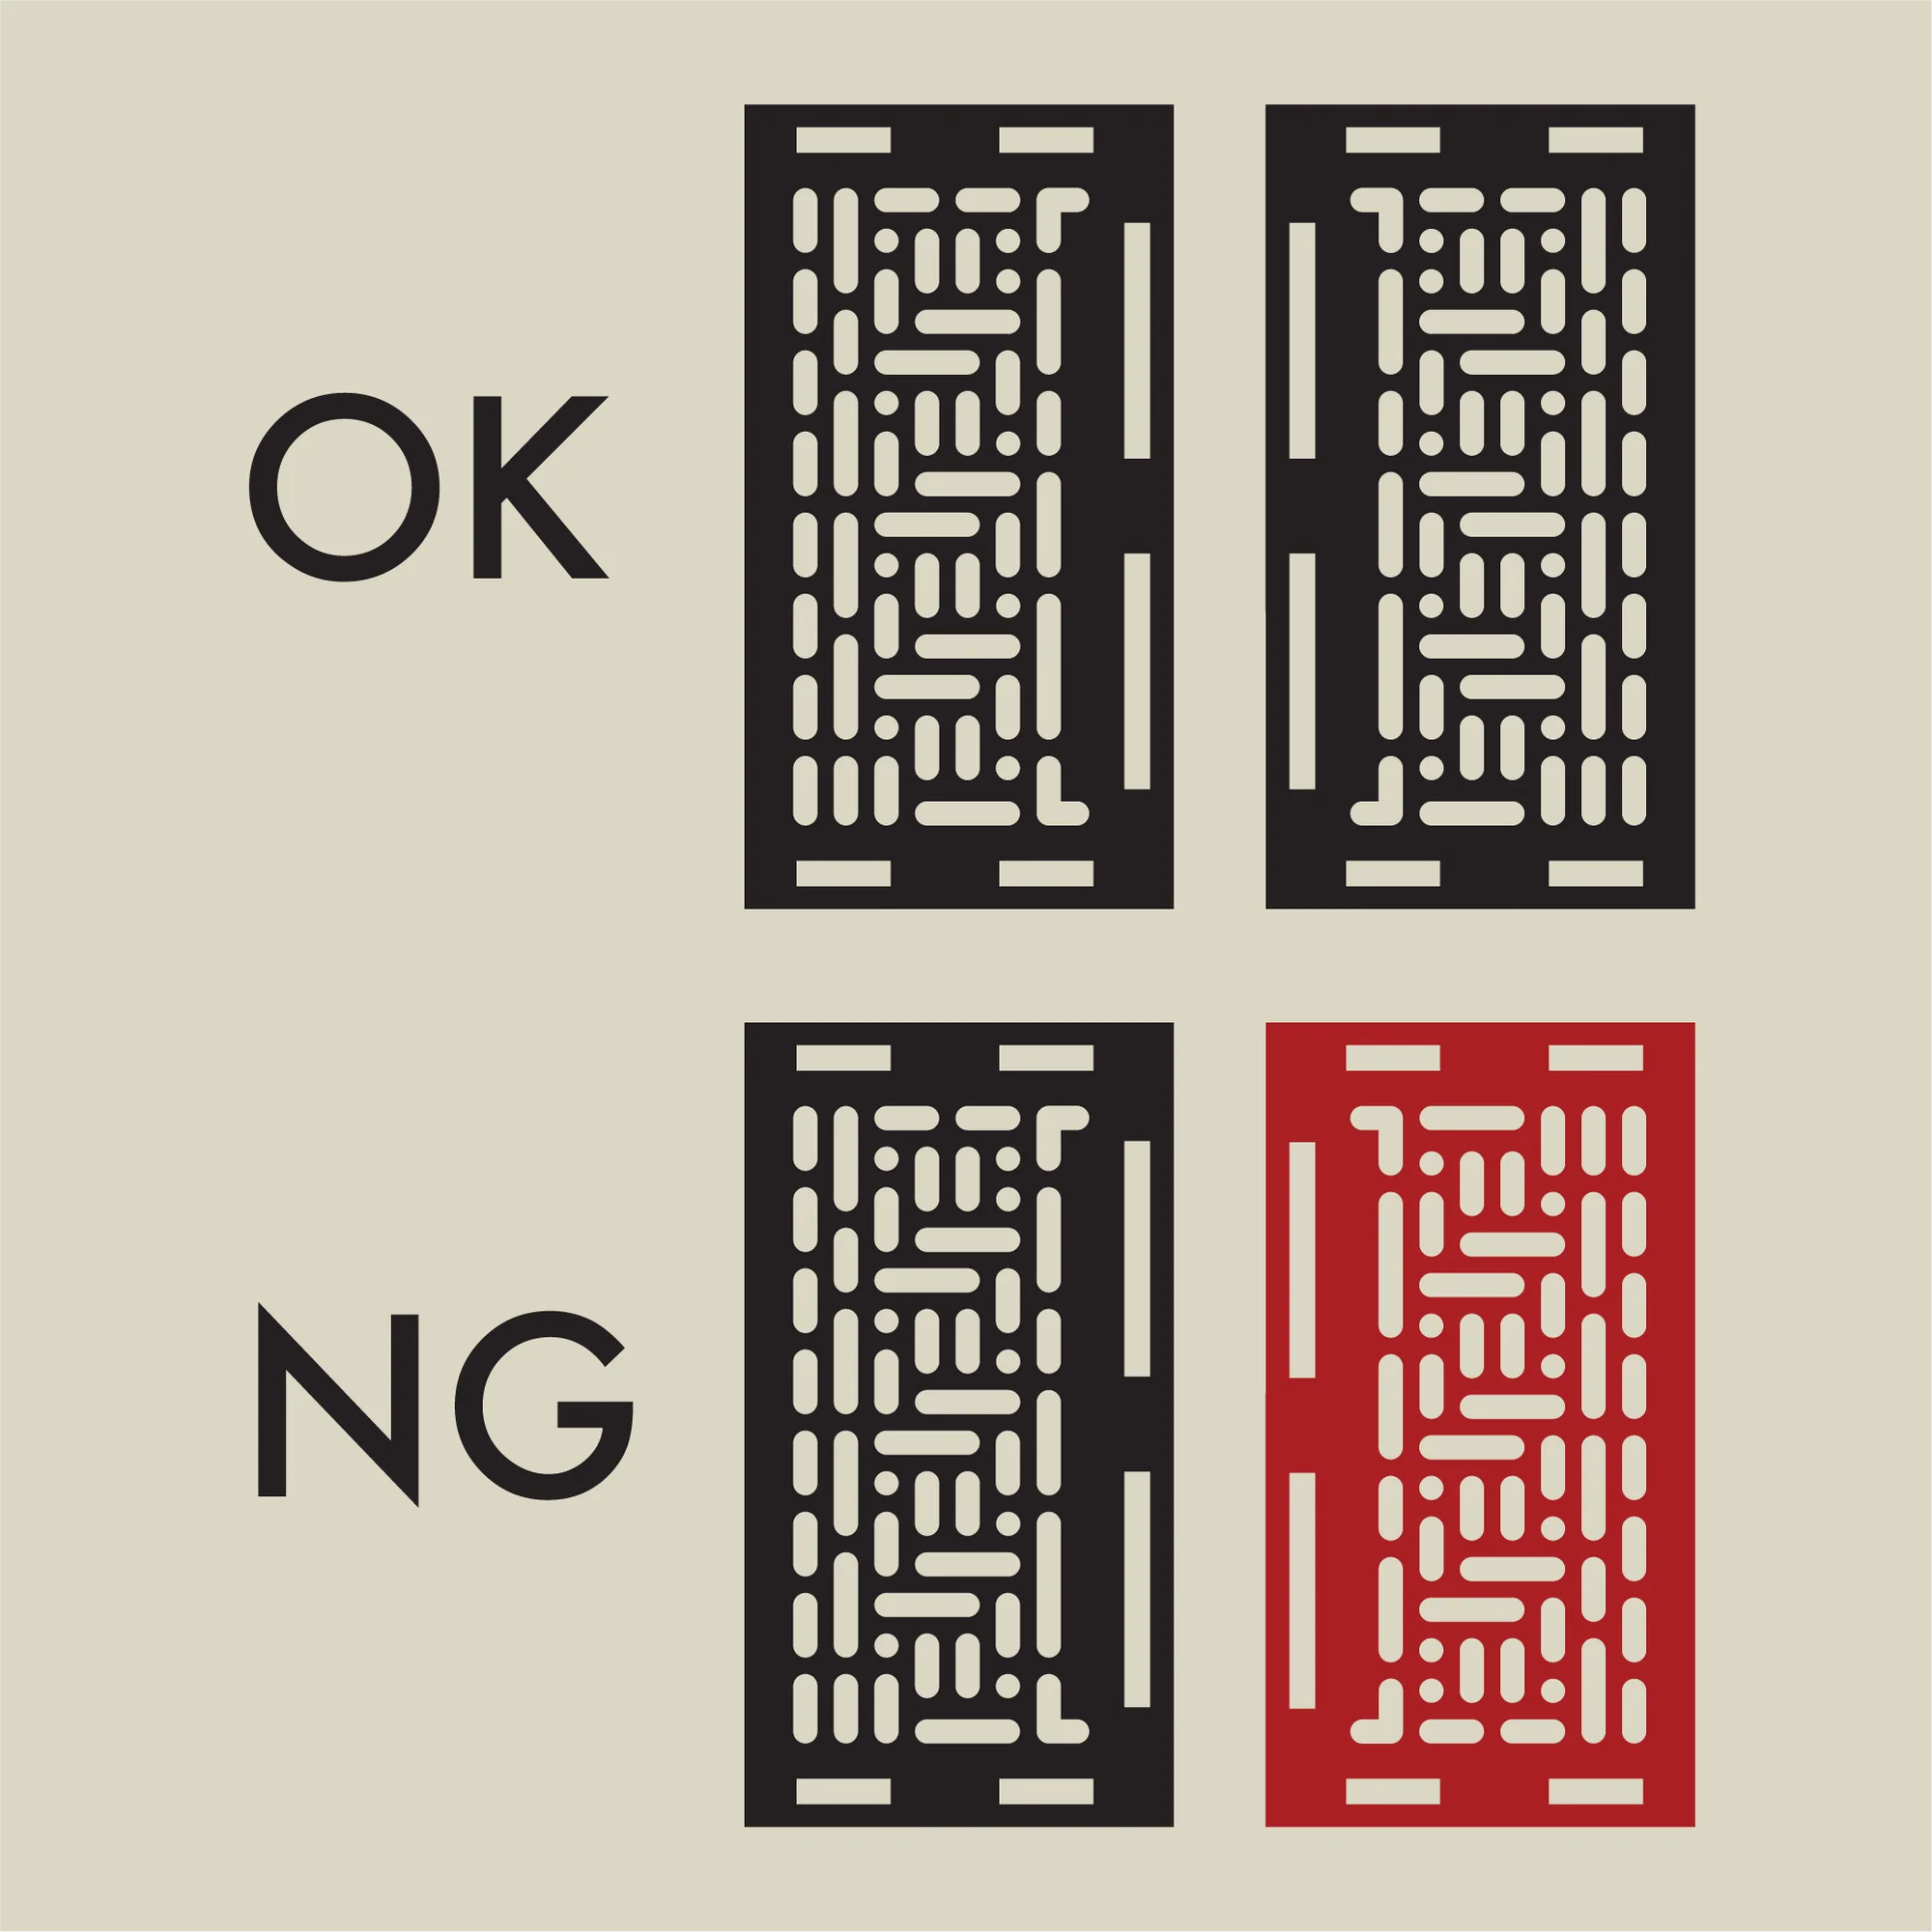
In this layout, please make sure the side panels are mirror images of each other. Comparing the hole patterns on the side panels lets you confirm that the left and right sides match.
Securing the Panels with Brackets
Once the panels are connected, secure the four corners using bracket hardware. This case allows brackets to be attached at several other locations as well, but please fasten them at the four positions shown in the diagram below, on the lower part of the side panels. This is because the 7U panels are large and would interfere with the panels at any other location.
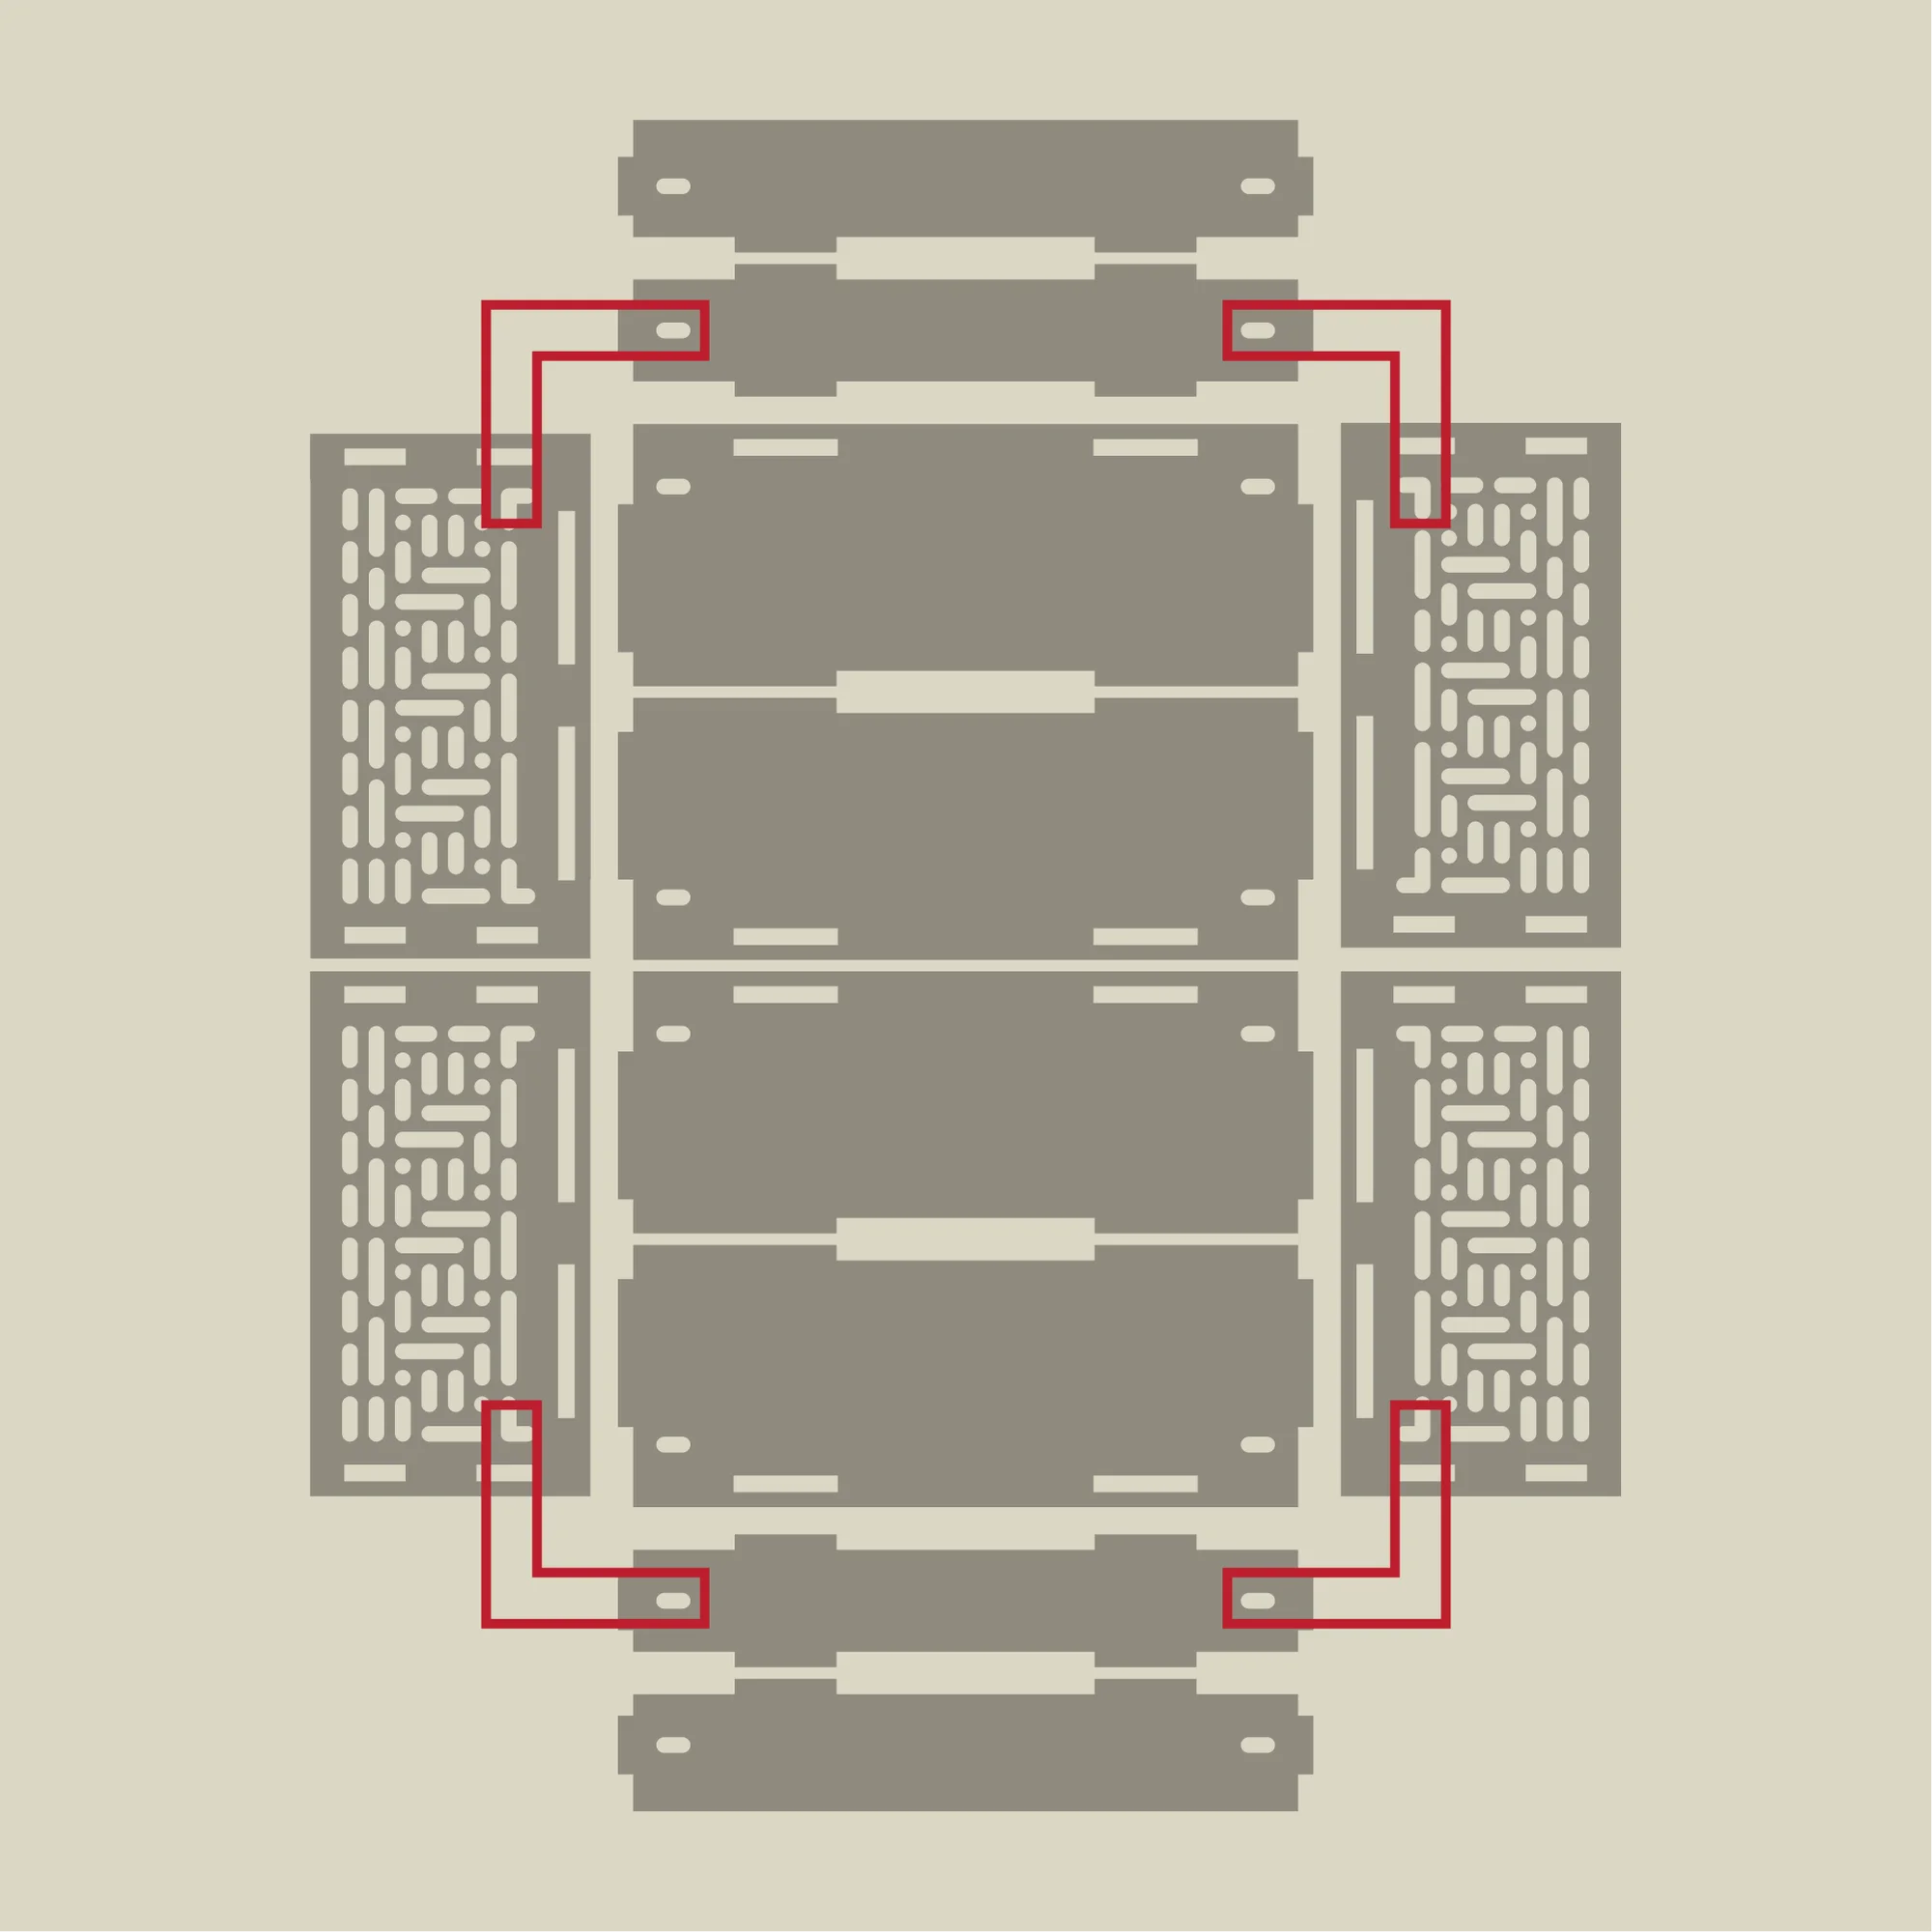
Each location uses 1 bracket + 2 M5 screws + 2 1mm-tall washers + 2 lock nuts. From the inside outward, pass the components in this order: screw head → bracket → panel → 1mm-tall washer → nut, using M5 12mm screws, and secure with the nuts.
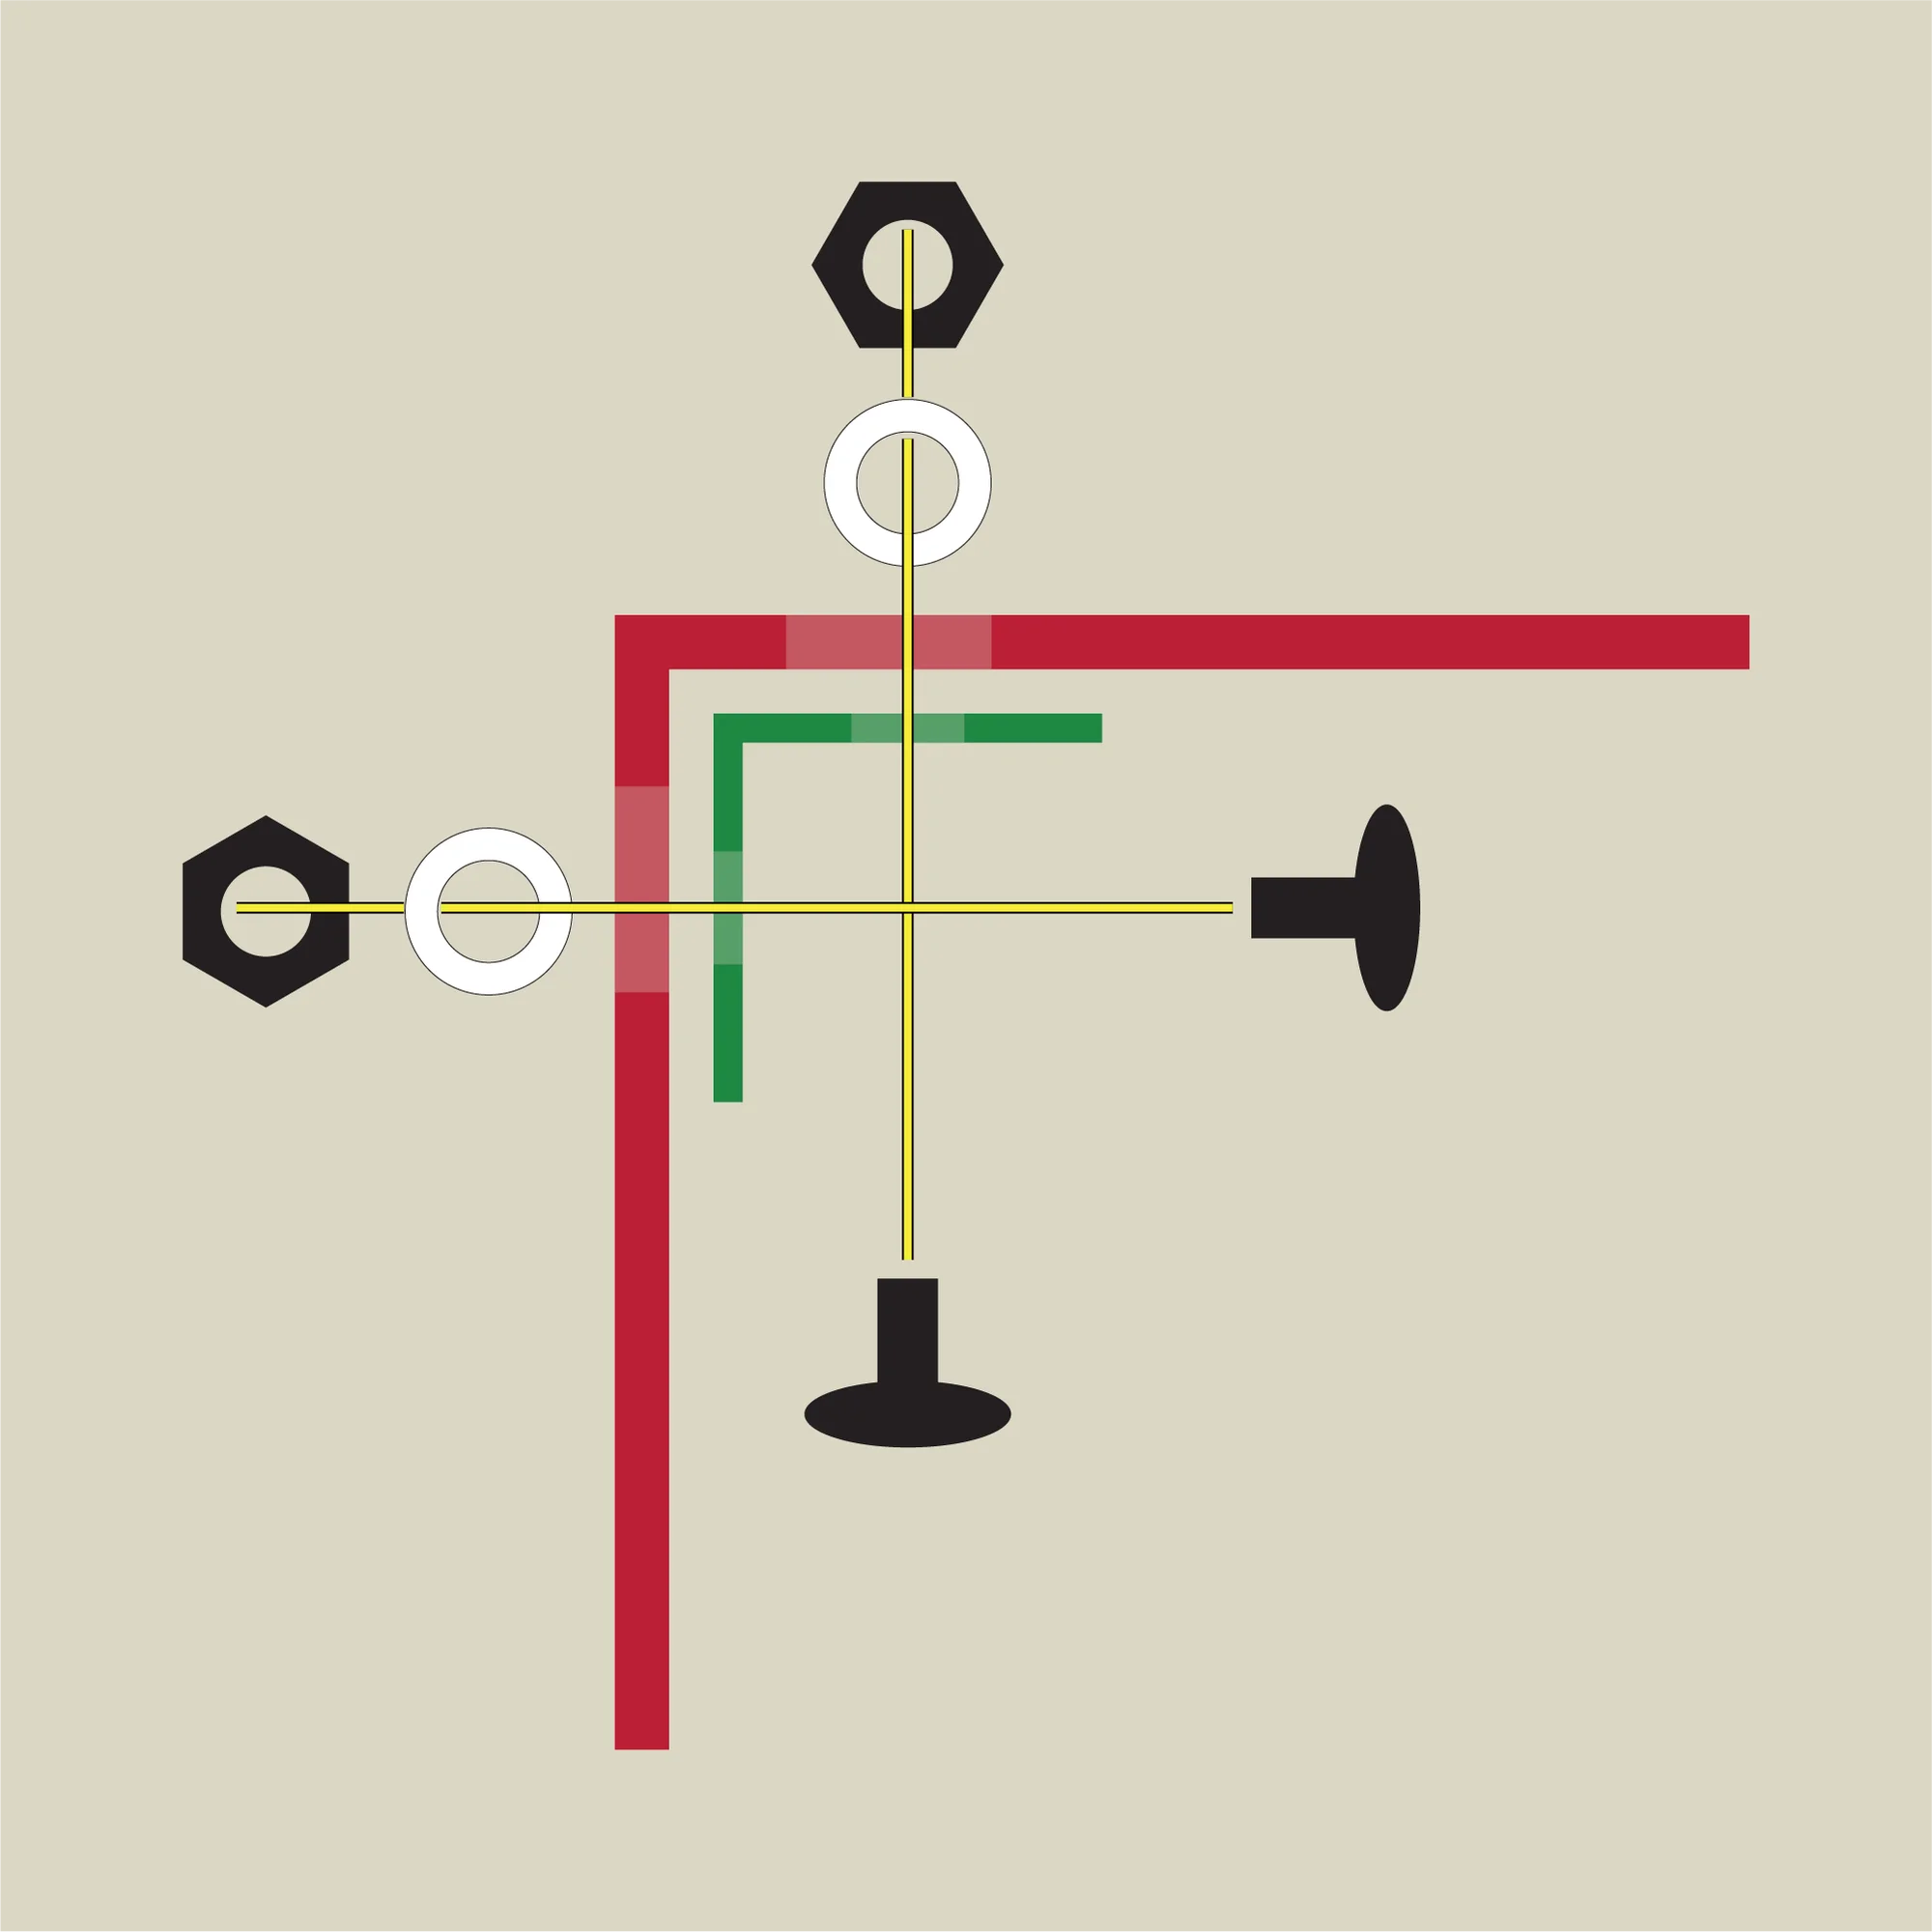
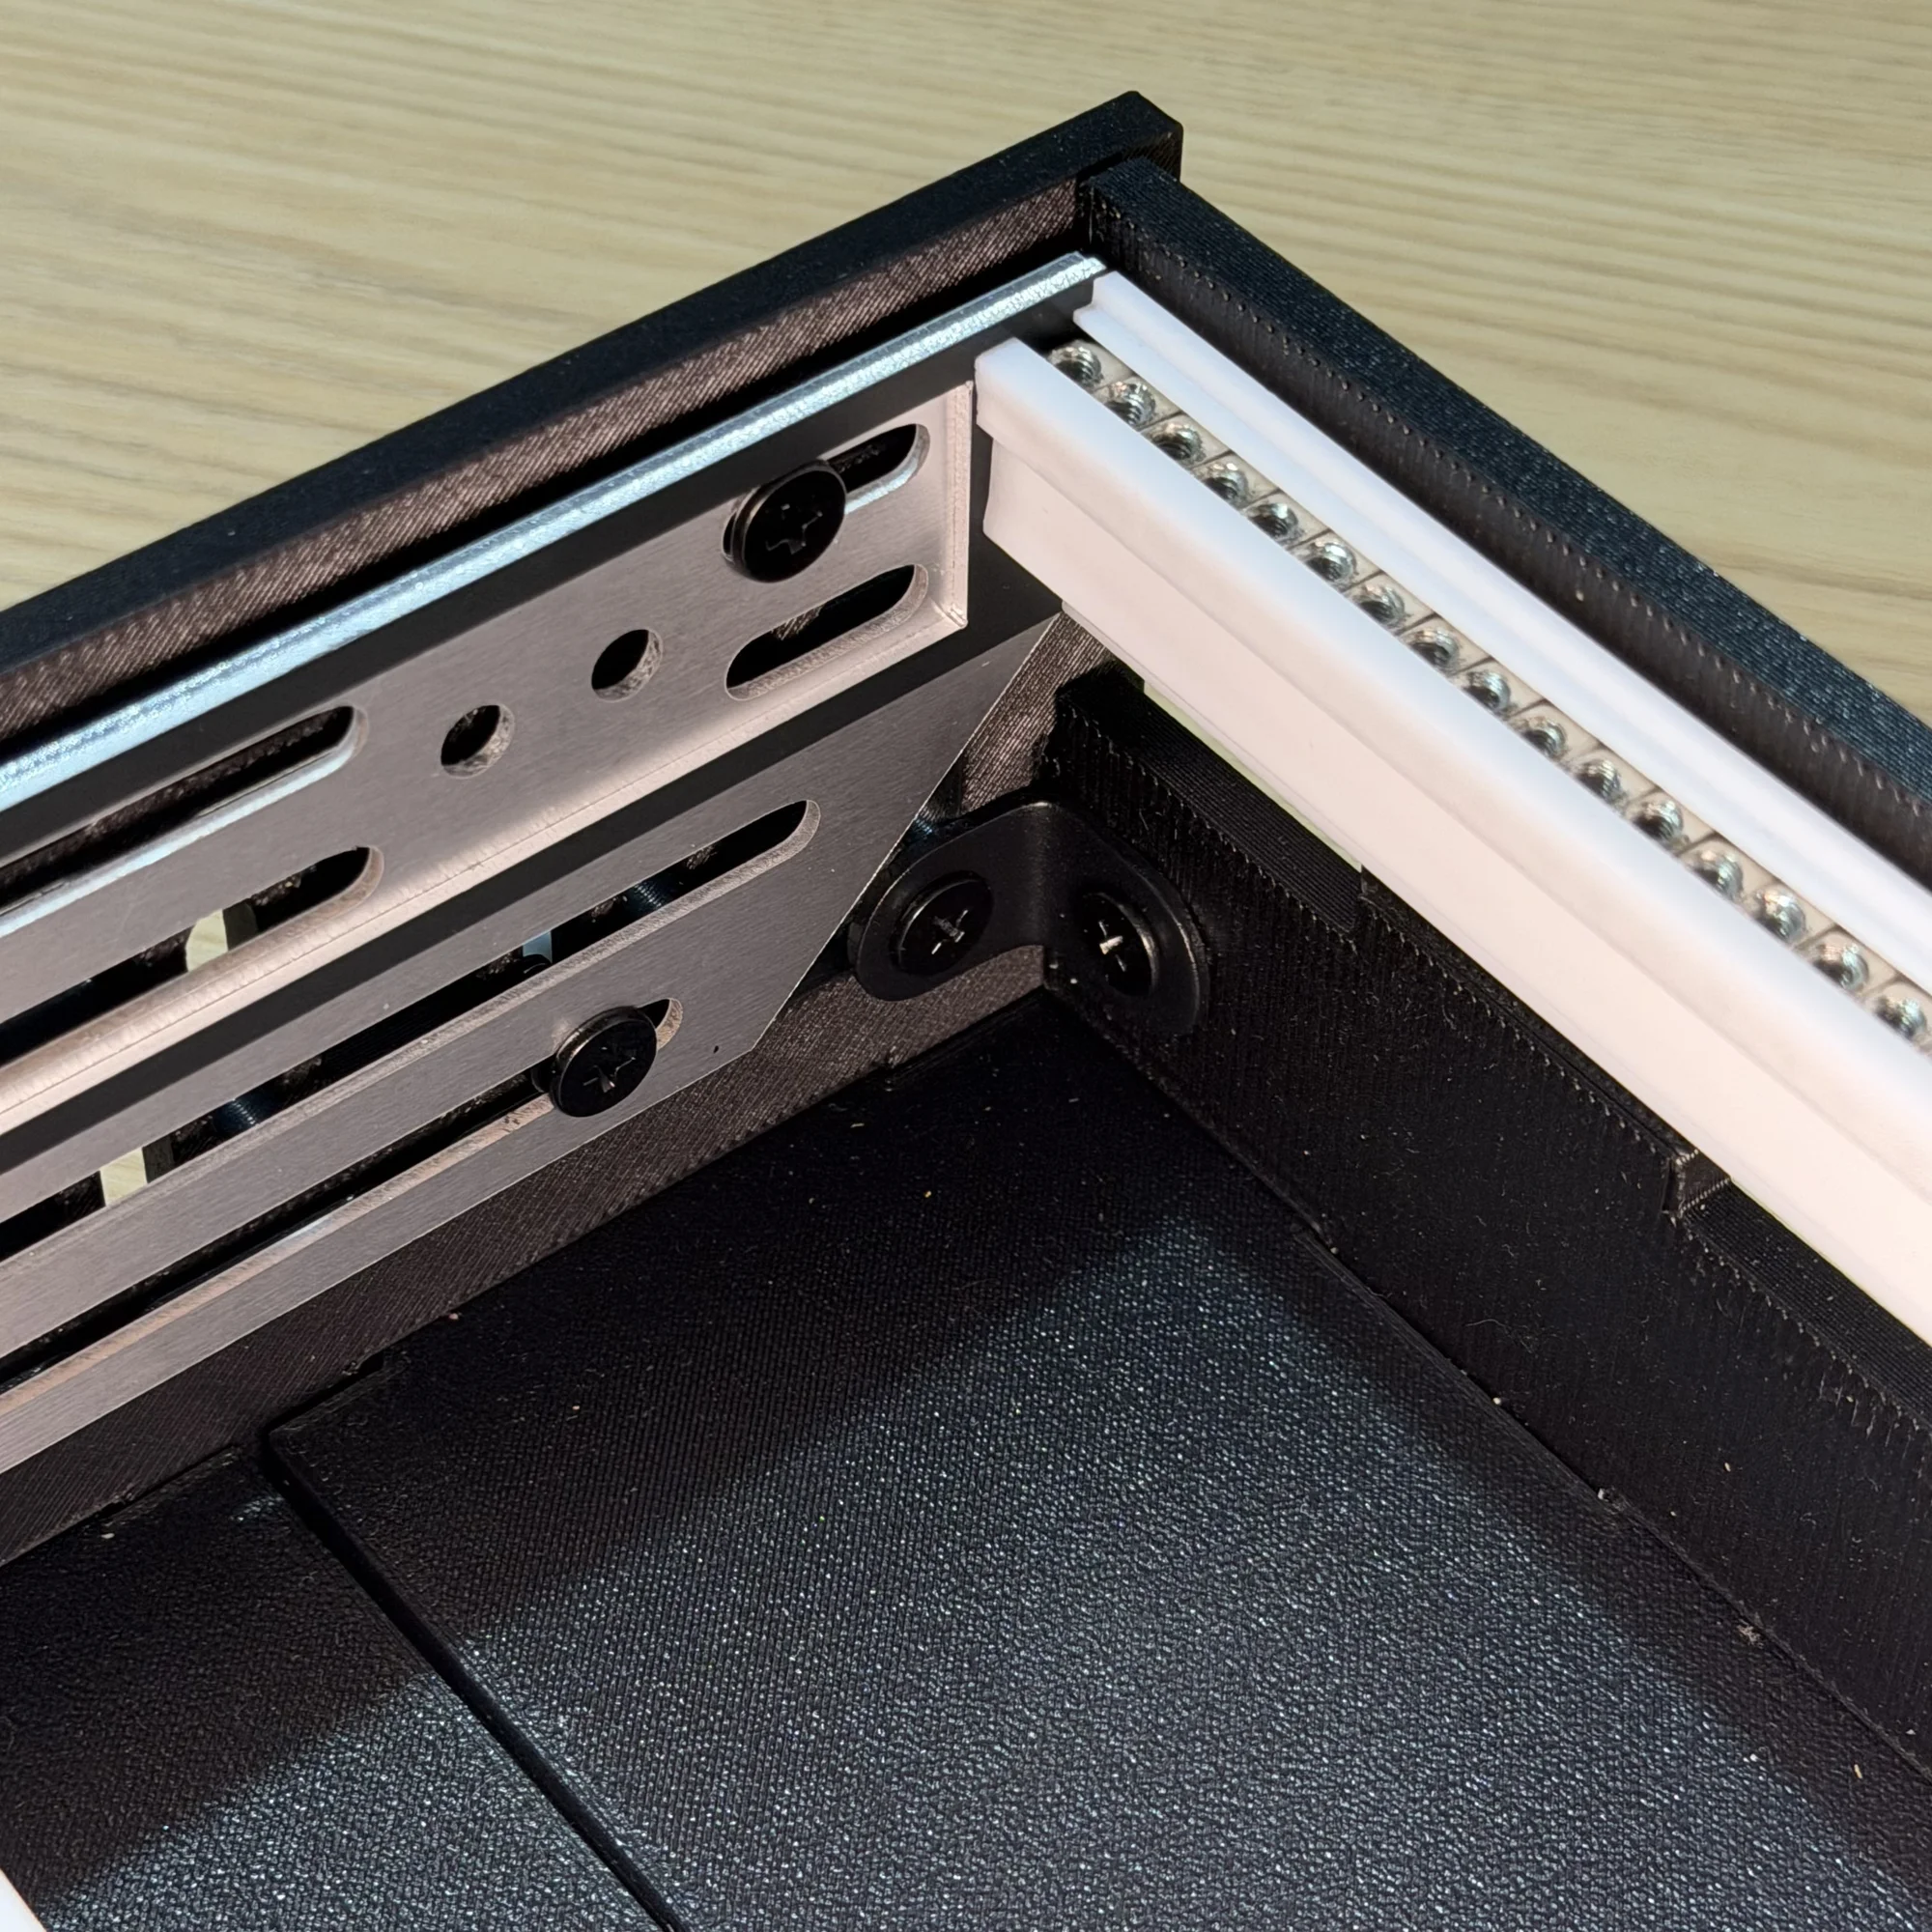
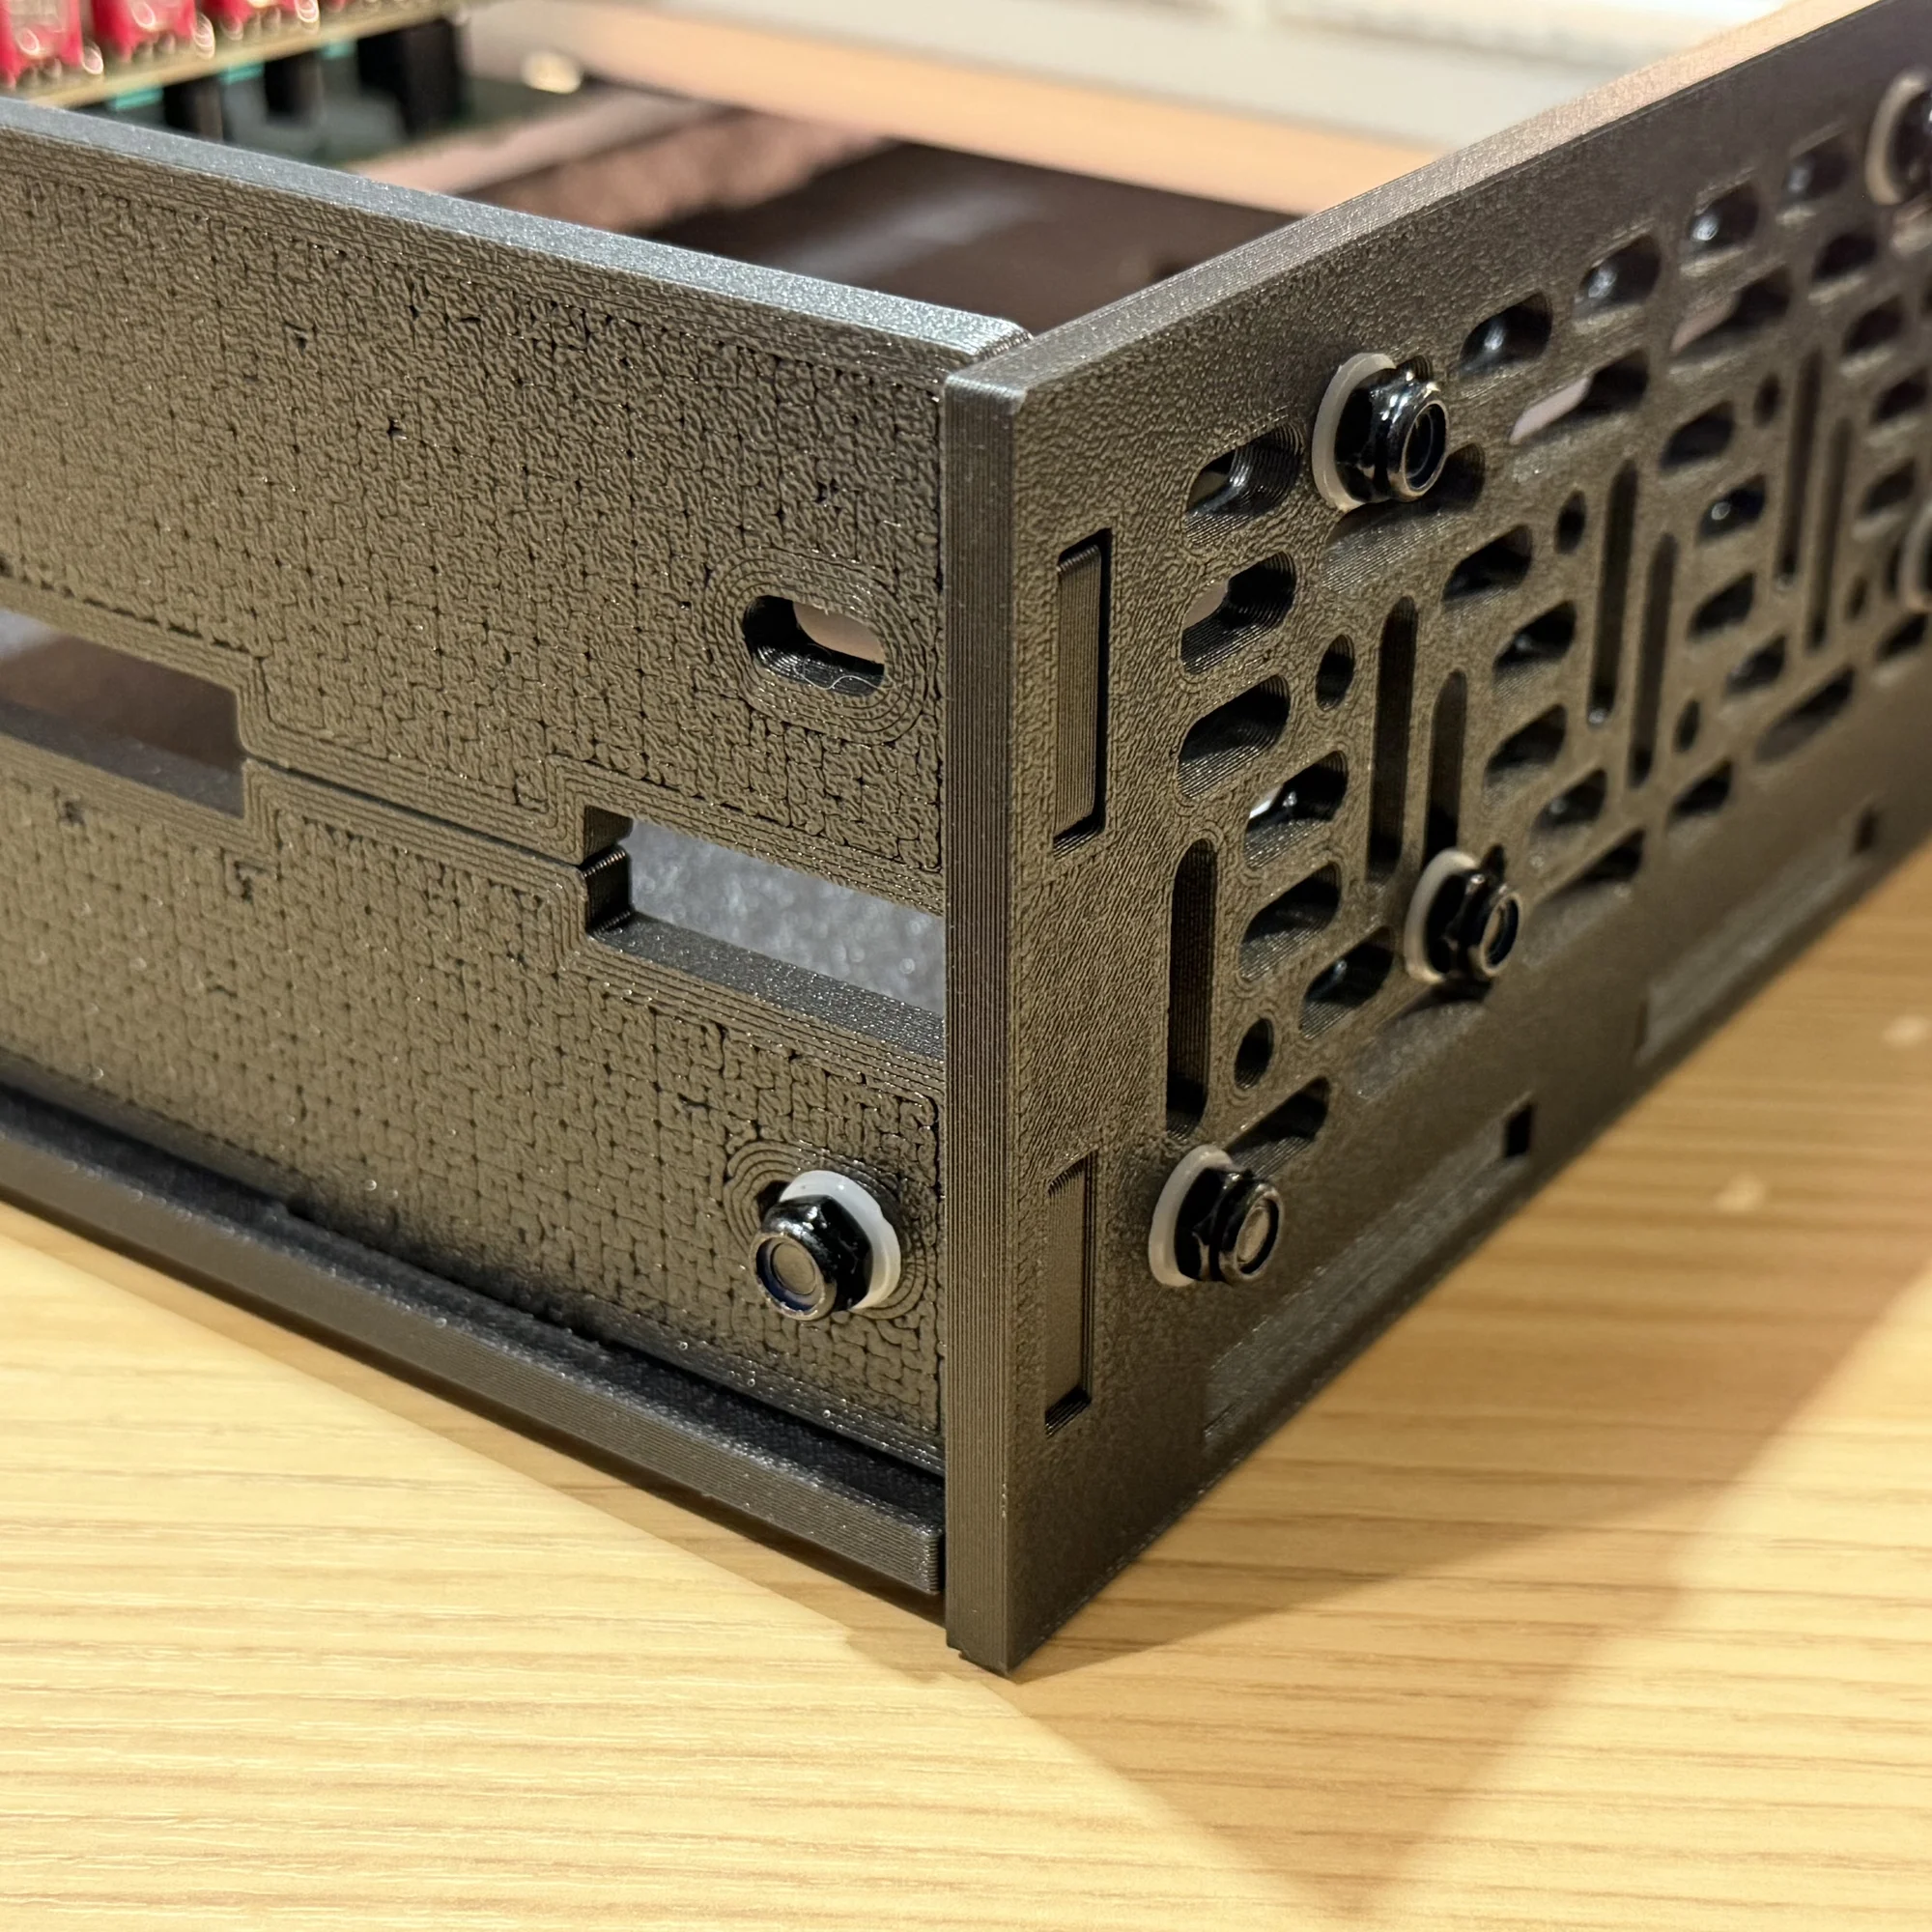
Lock nuts are difficult to tighten without a wrench, so please have one ready beforehand. They are harder to tighten, but once fully tightened they hold very firmly.
Step 3: Securing the Rails to the Outer Box
Once both the rail sets and the outer box are assembled, the final step is to fasten the two together with screws and nuts.
Aligning the Mounting Holes
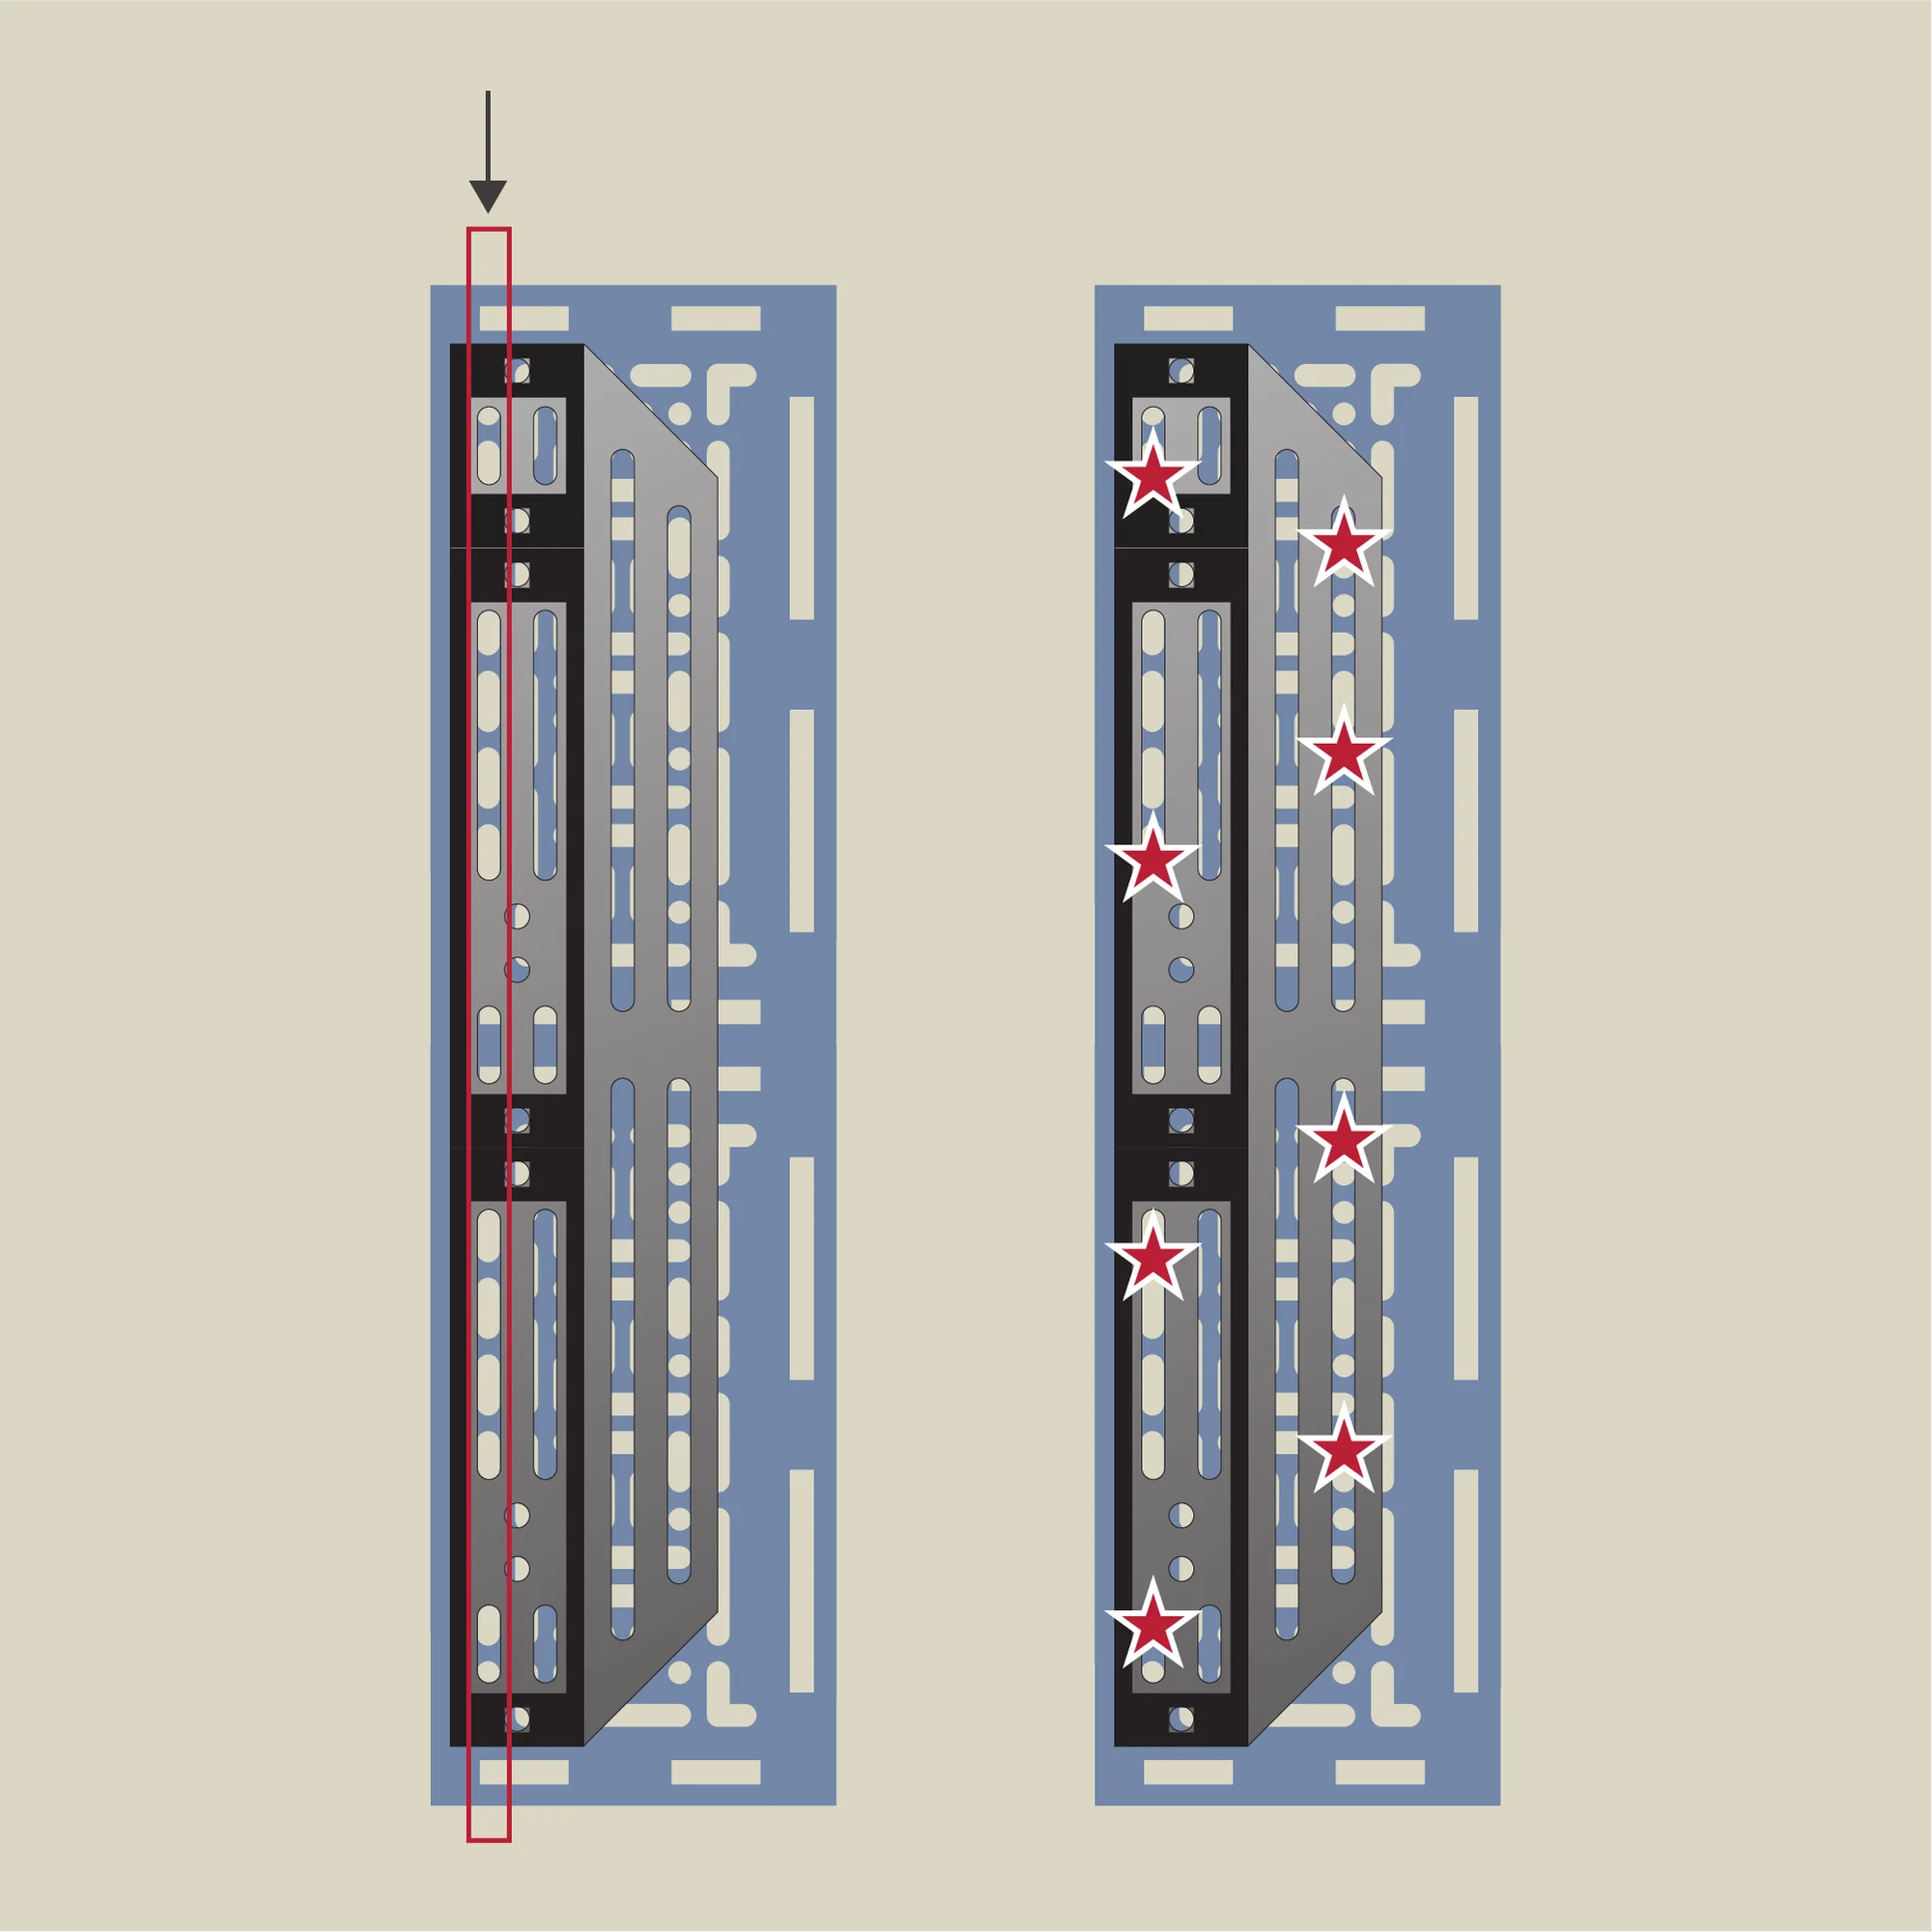
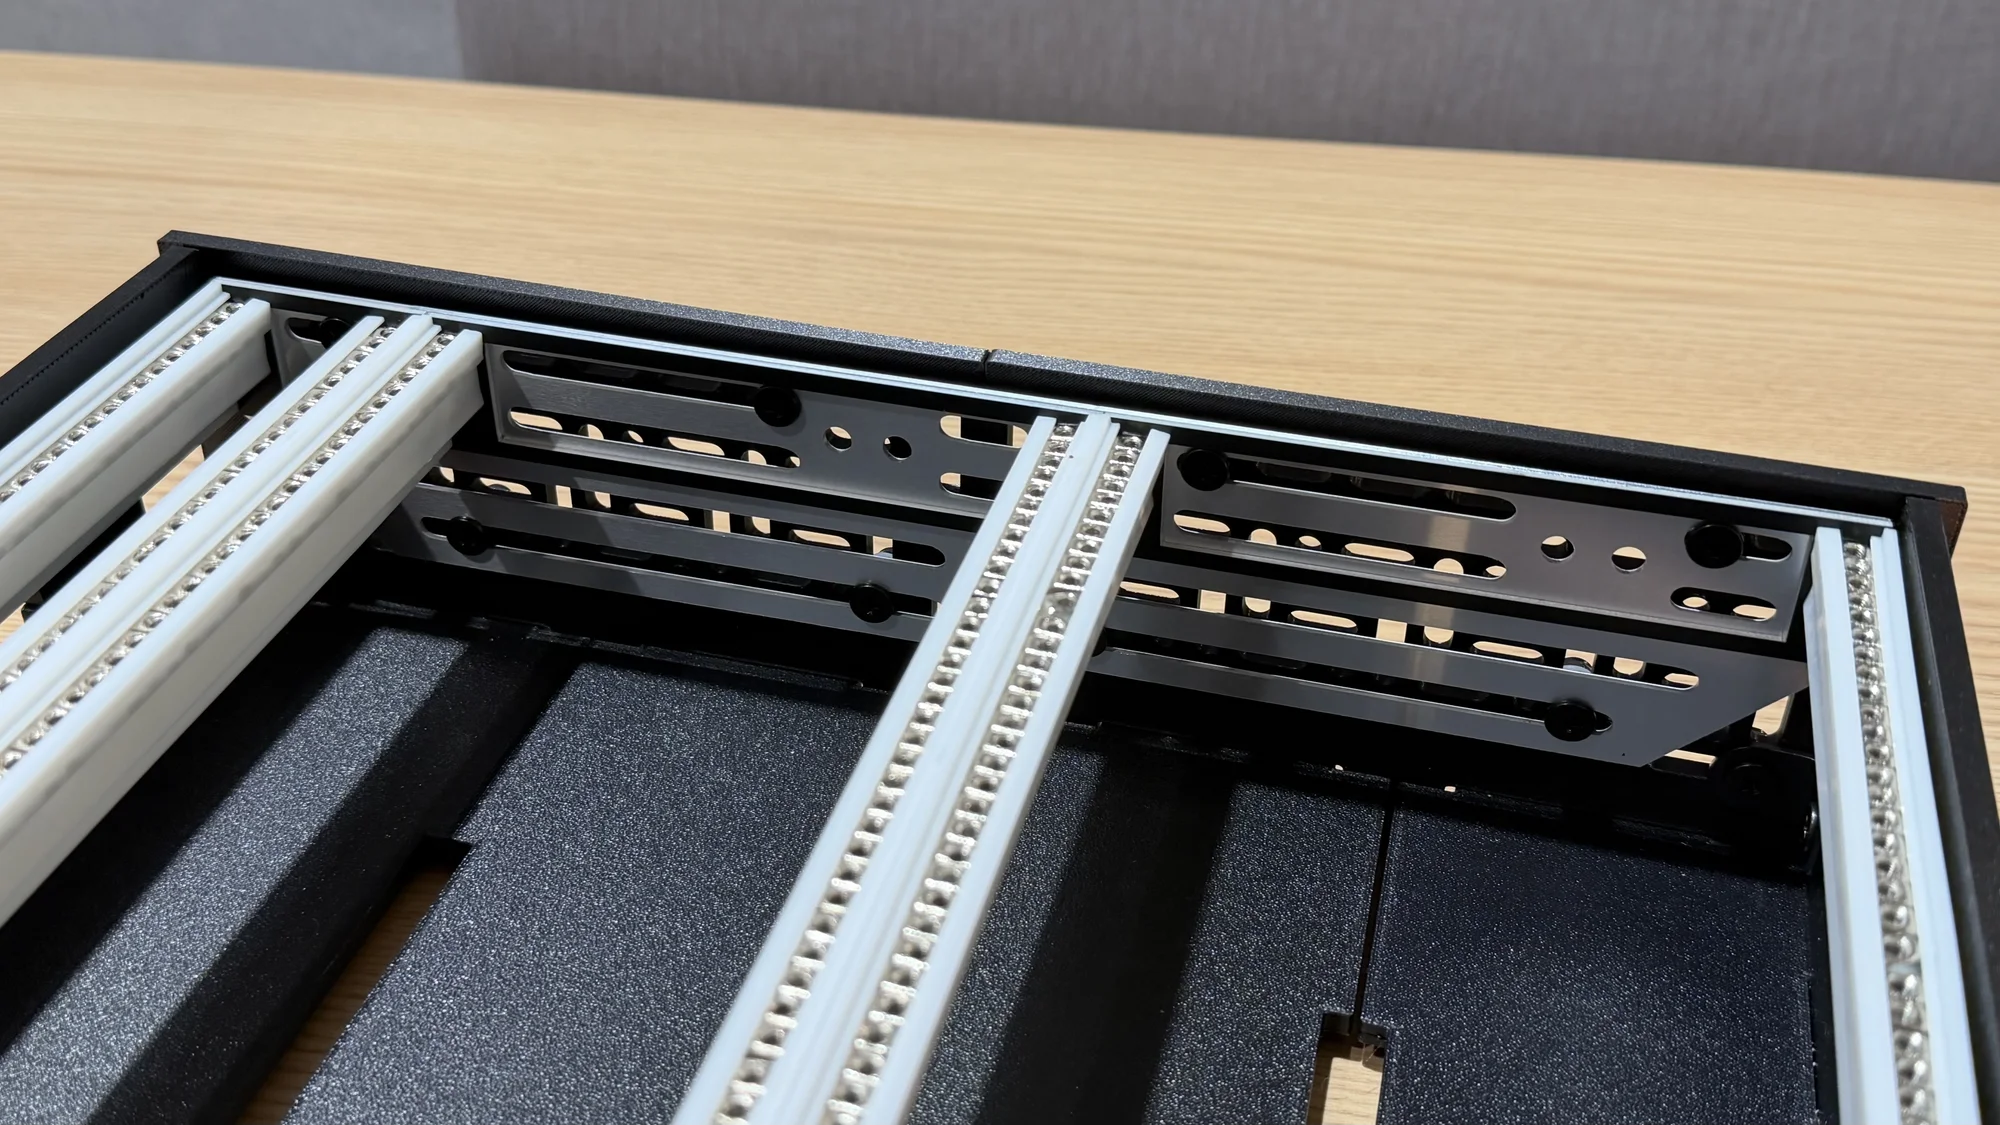
The 7U side aluminum panel is sized to fit snugly inside the outer box (slightly smaller than the box). Both the outer box side panels and the aluminum panels have many holes, so start by aligning the line of holes at the top edge.
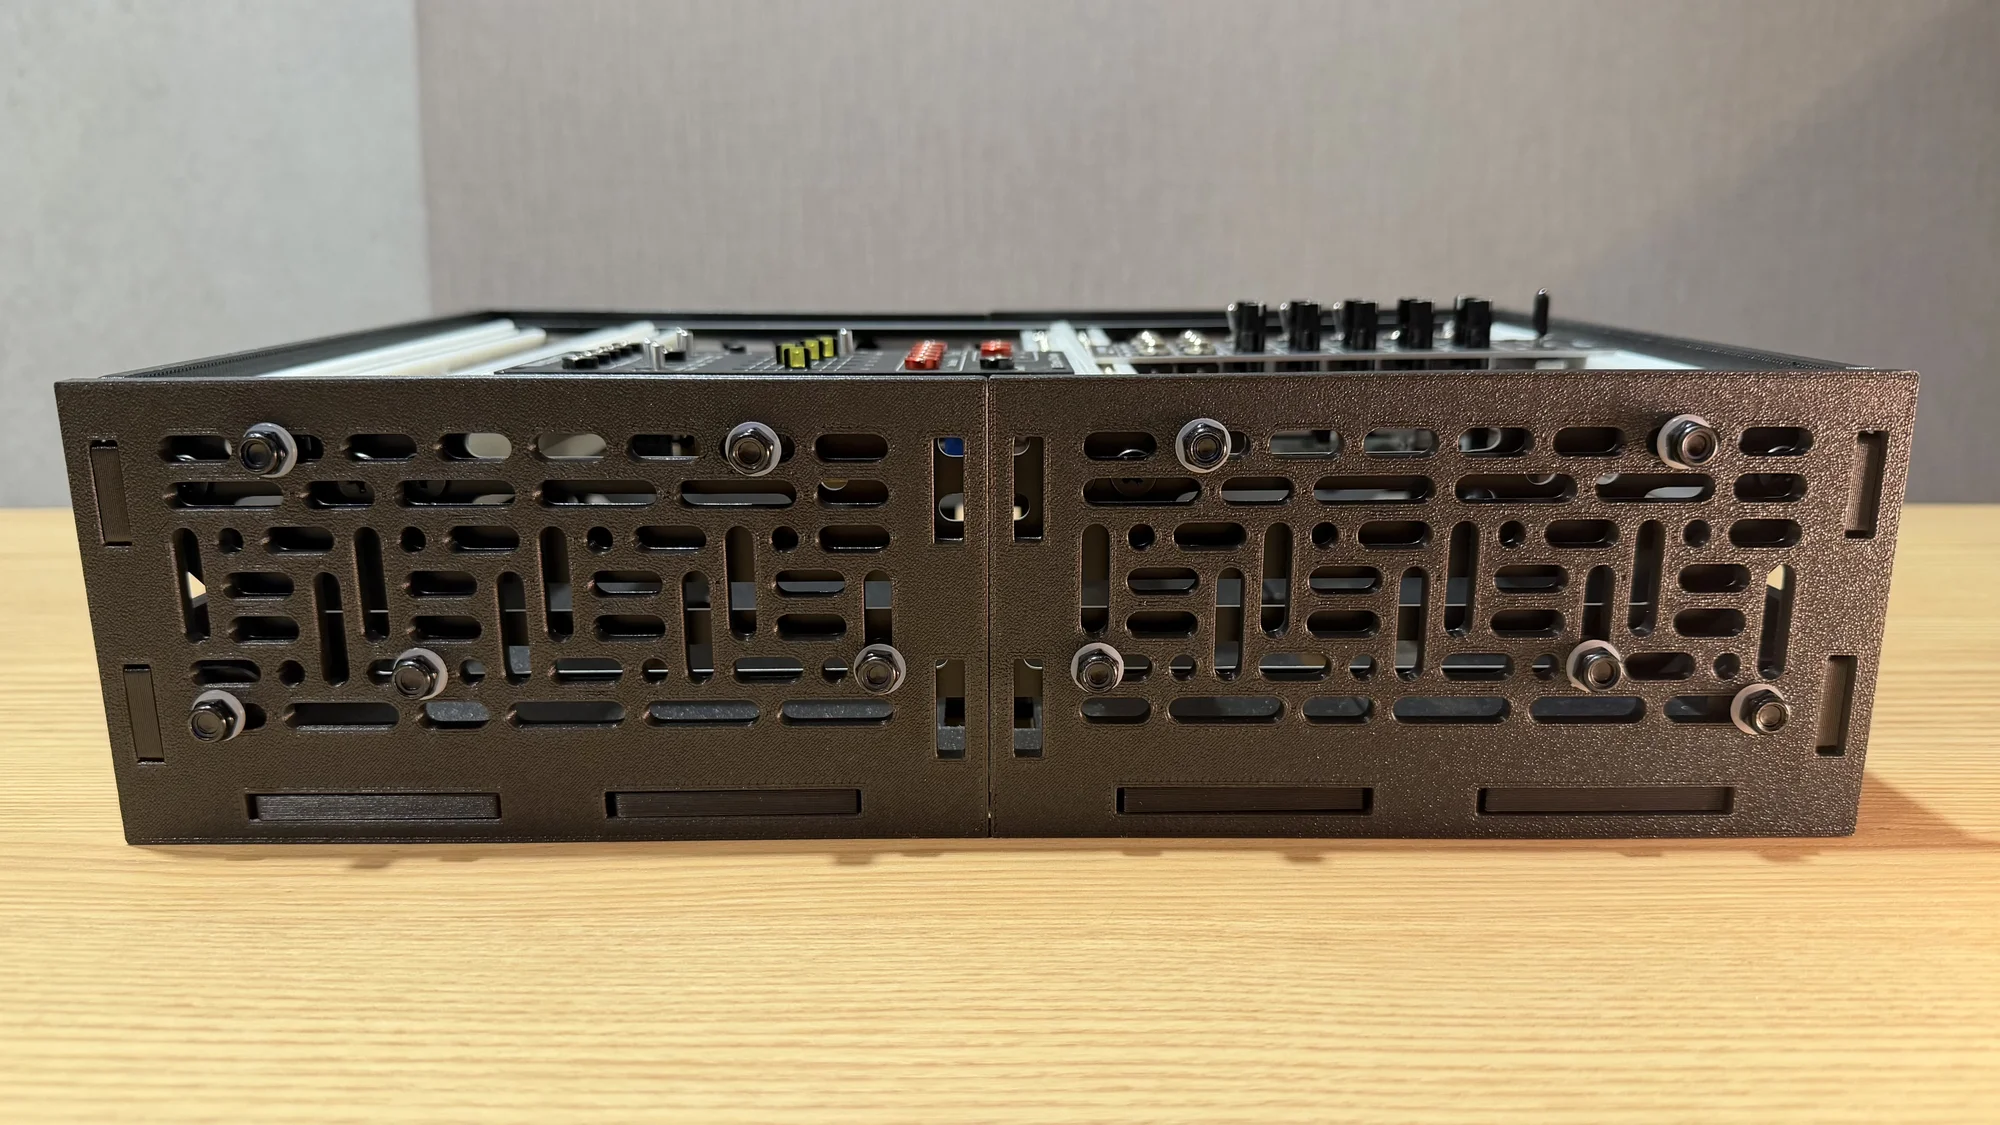
What you do in this step is fasten the rail-side aluminum panels to the outer box side panels with screws. The procedure is similar to the previous step, but this time you sandwich a 3mm-tall washer between the outer box side panel and the aluminum panel. Since both have many holes as shown in the diagram, the eight fastening points do not need to be exact. The stars in the diagram below are one example.
Fastening the Rails and Outer Box with Screws
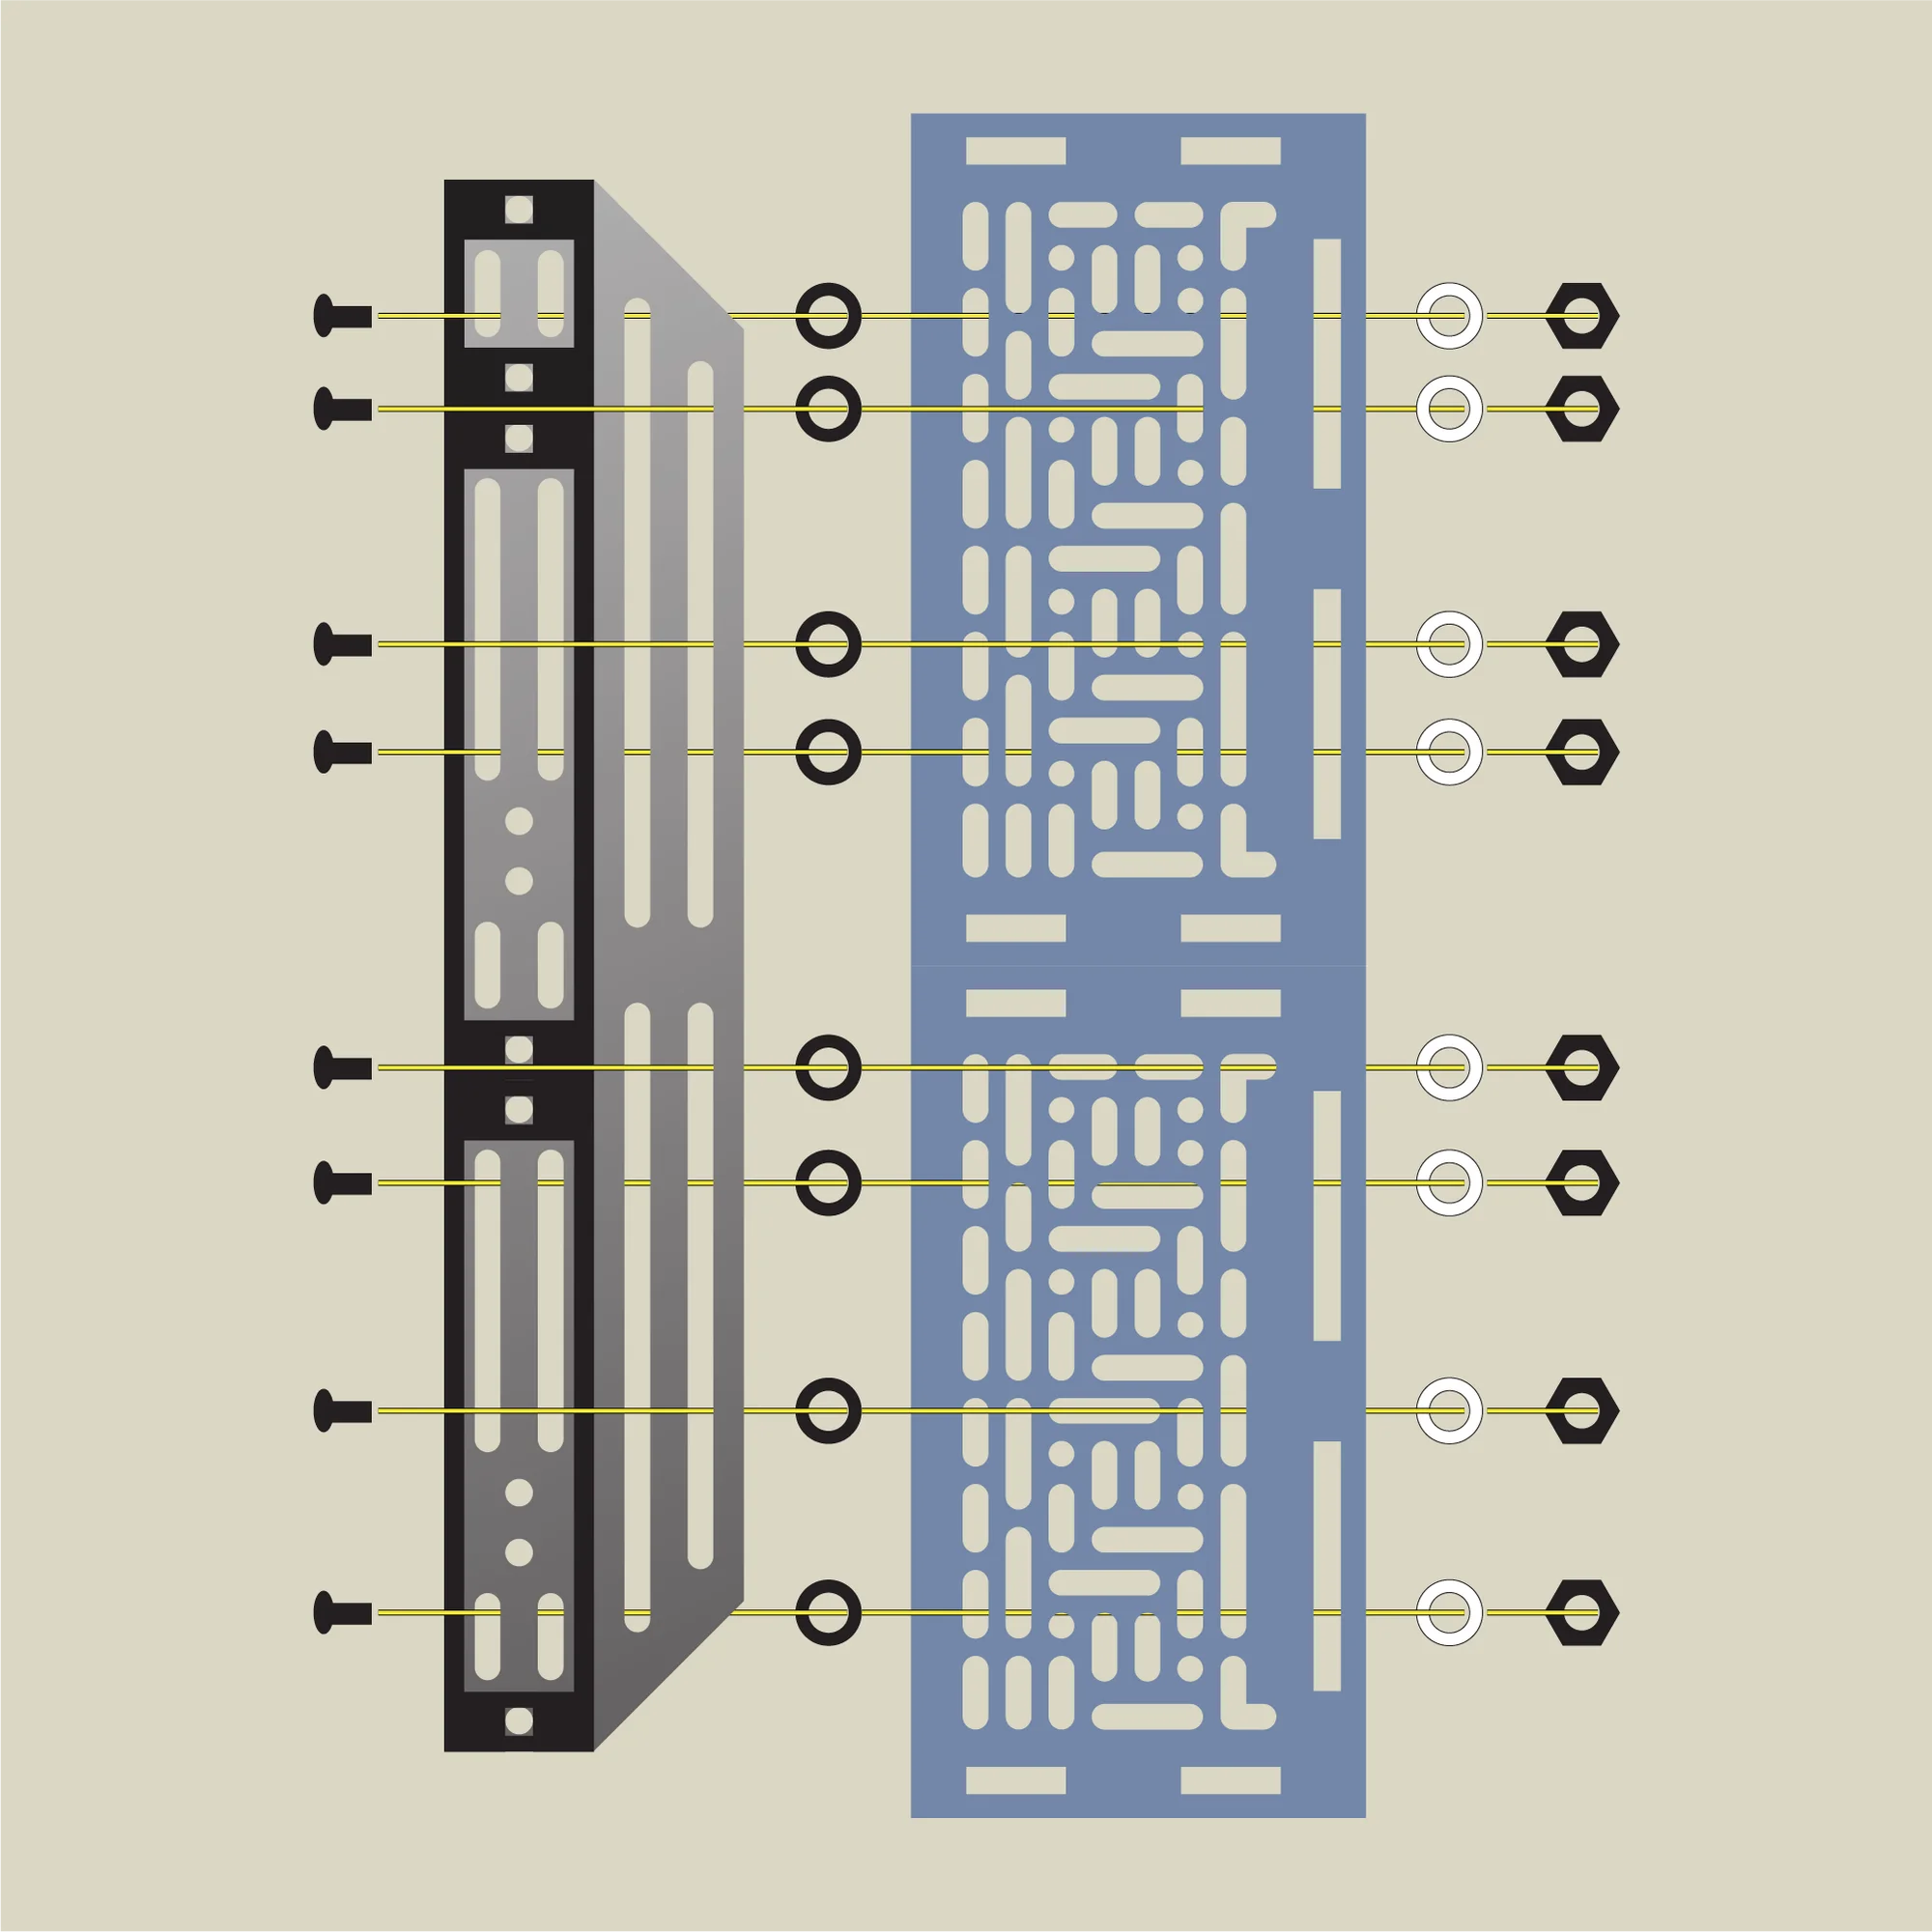
Place the rail sets into the outer box and tighten the screws from the inside outward. Here you use M5 14mm screws (the slightly longer ones), passing the components in the following order.
Screw head
Aluminum panel
3mm-tall washer
Outer box side panel
1mm-tall washer
Lock nut
The space inside the outer box is almost exactly the size of the rail set plus two 3mm-tall washers, so the 3mm-tall washers may feel a little difficult to fit in. Laying the box on its side with the outer box side panel facing down, placing the 3mm-tall washer on the aluminum panel, and then aligning the holes makes it easier to pass the screw through.
Eight fastening points on each side is ideal. Once everything is fastened, the case assembly is complete.
That concludes the assembly guide for the zudo-block 7U.