This guide explains how to assemble the zudo-rail series. It covers the assembly procedures for both 40HP and 60HP sizes, as well as the Lite, Nuts, Dual, and Metal rail types.
For product details, please refer to the zudo-rail Product Details page.
- zudo-rail Variations
- Required Tools
- ASA Rail Strength Notes
- 60HP Lite / Nuts / Dual Rail Assembly
- Connecting Rails to Mounting Panels
- Mounting Rails to an Outer Box
- Frame-to-Frame Connection
- Expanding the zudo-block
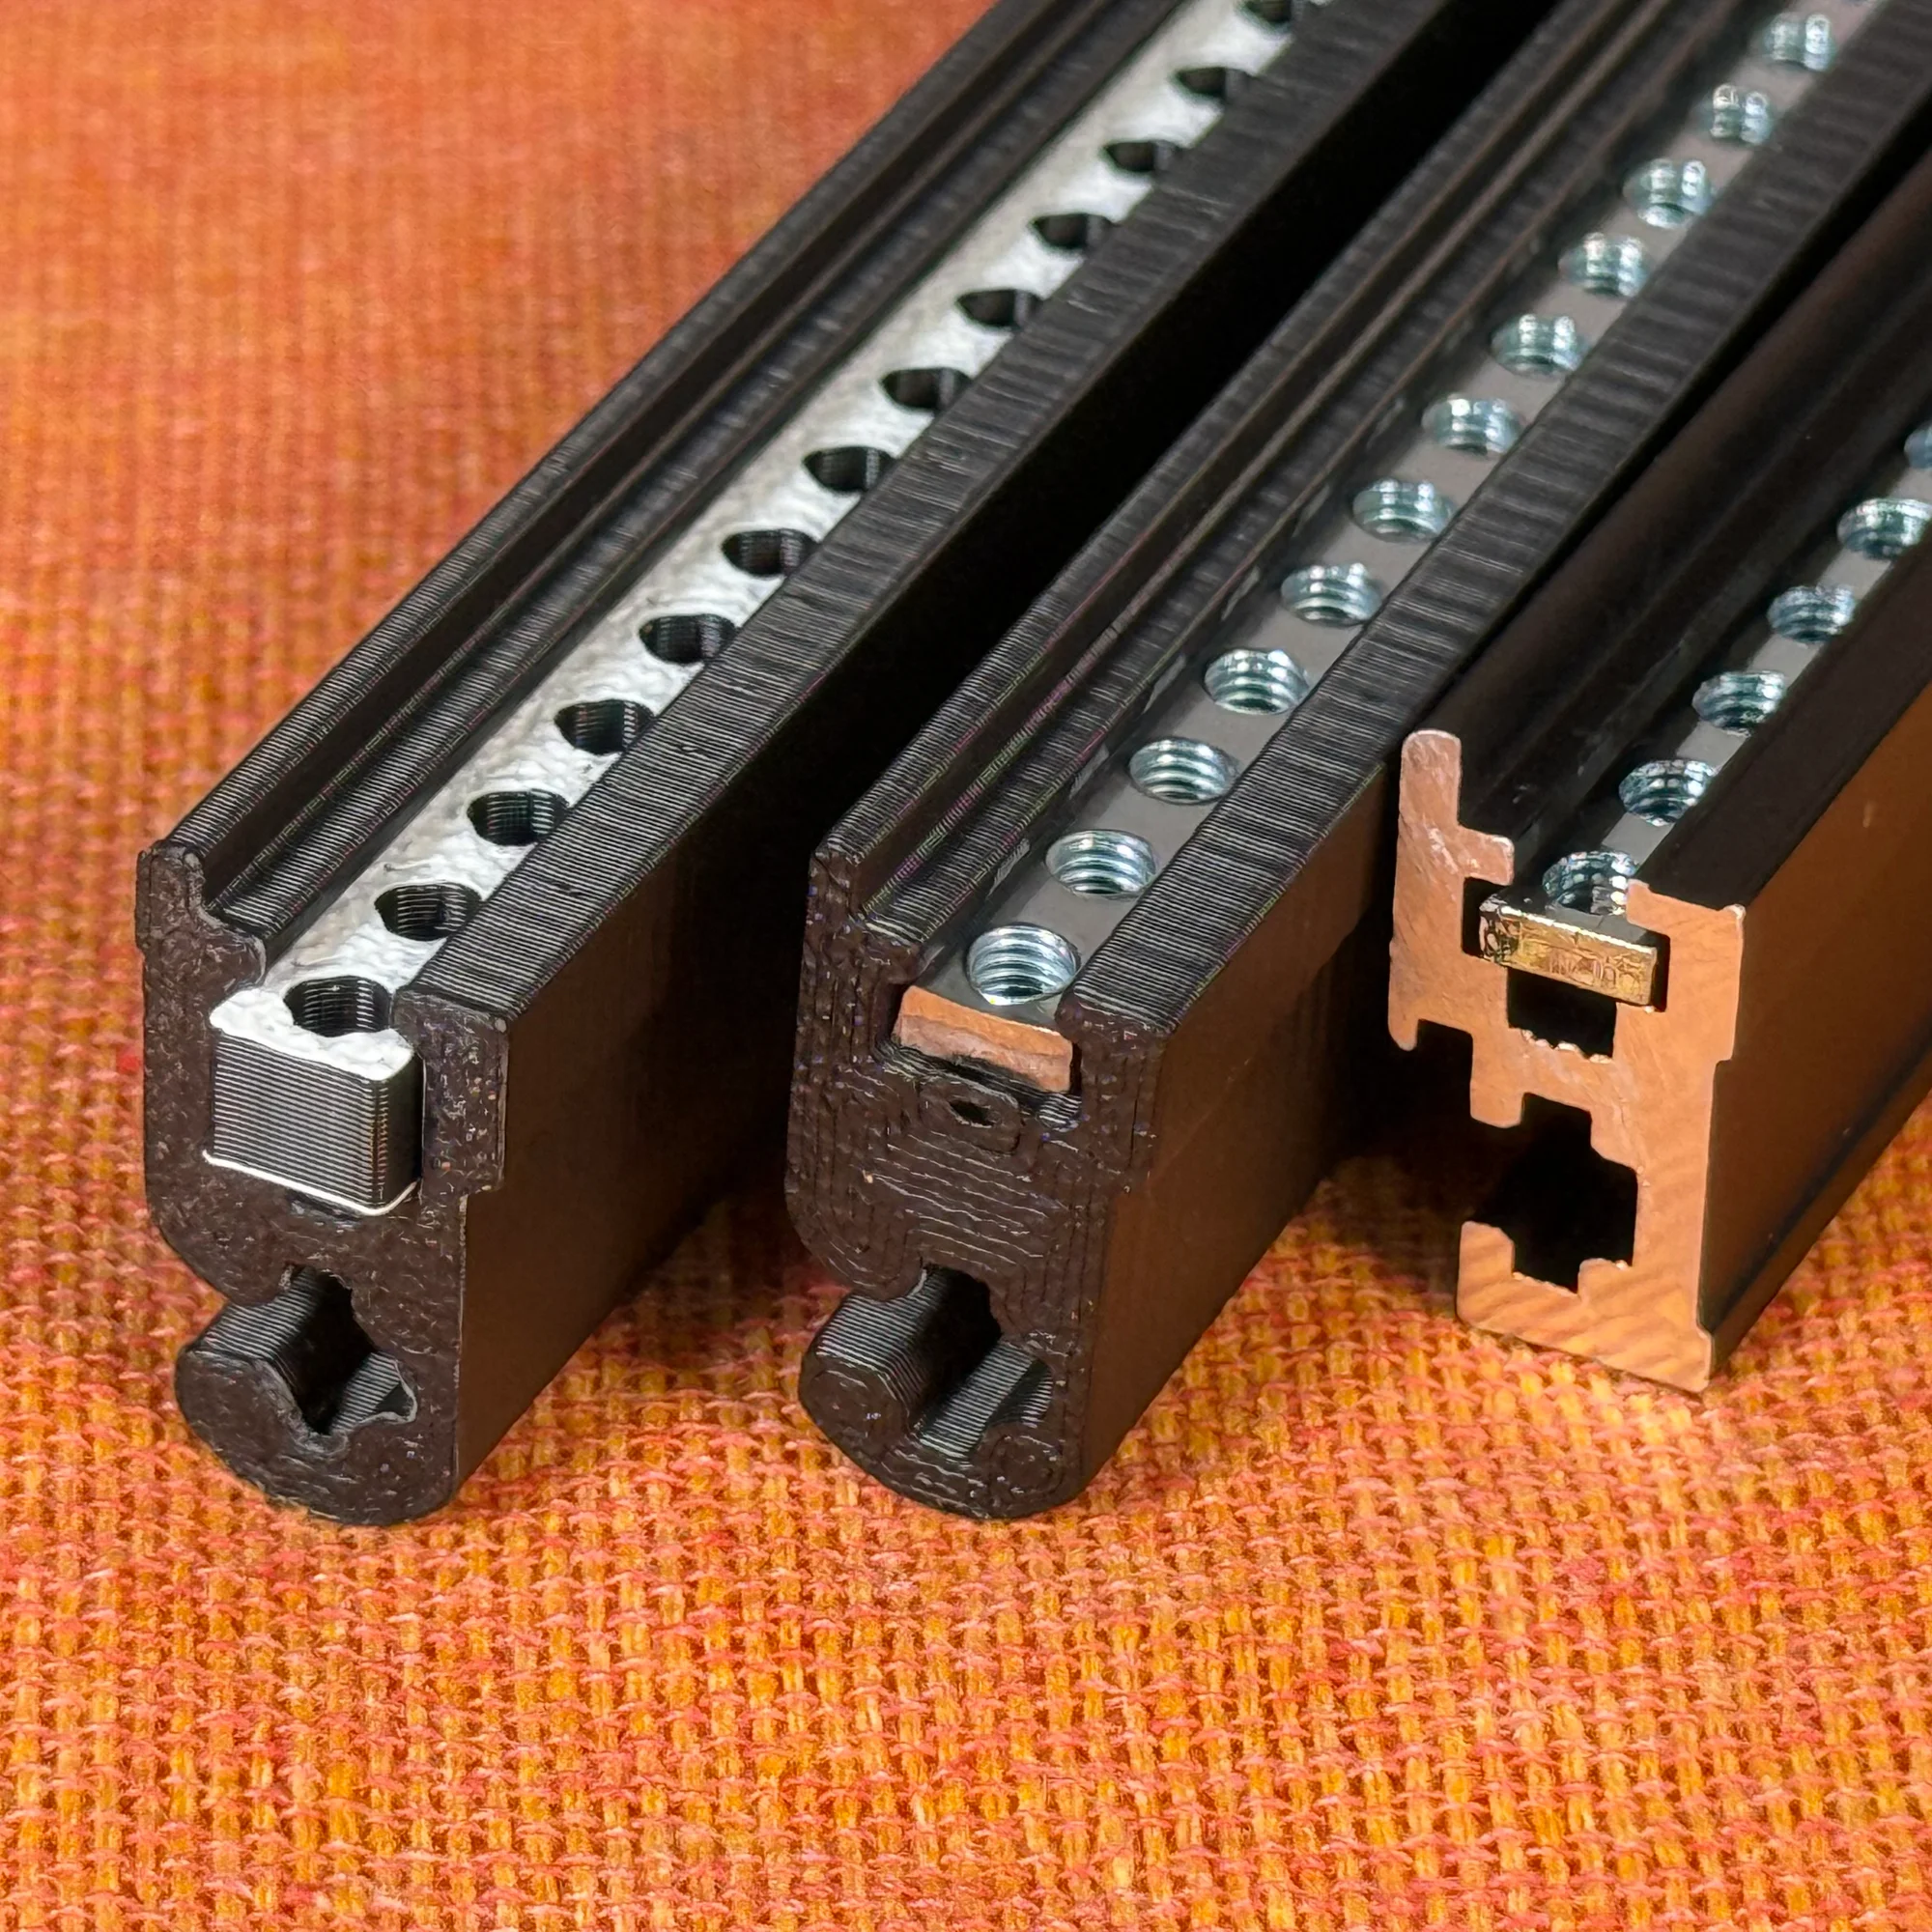
zudo-rail Variations
The zudo-rail comes in multiple variations with different sizes, materials, and assembly methods. Before starting assembly, please confirm which type you have.

Here are the differences for each rail type:
| サイズ | レール種類 | 商品構成 | 組み立て作業 |
|---|---|---|---|
| 40HP | Lite版 | 40HP ASAレール + 40HP ASAバーナット | 不要 |
| Nuts版 | 40HP ASAレール + スライドナット40個 | ナットを詰める作業が必要 | |
| Dual版 | 40HP ASAレール + 40HP 金属バーナット | 不要 | |
| Metal版 | 40HP 金属レール + 40HP 金属バーナット | 不要 | |
| 60HP | Lite版 | 30HP ASAレール×2 + 30HP ASAバーナット×2 | 付属のイモネジでレールを2本連結して完成 |
| Nuts版 | 30HP ASAレール×2 + スライドナット60個 | ナットを詰める作業が必要 付属のイモネジでレールを2本連結して完成 | |
| Dual版 | 30HP ASAレール×2 + 60HP 金属バーナット | 付属のイモネジでレールを2本連結して完成 | |
| Metal版 | 60HP 金属レール + 60HP 金属バーナット | 不要(そのまま使用可) |
Please keep the following key points in mind:
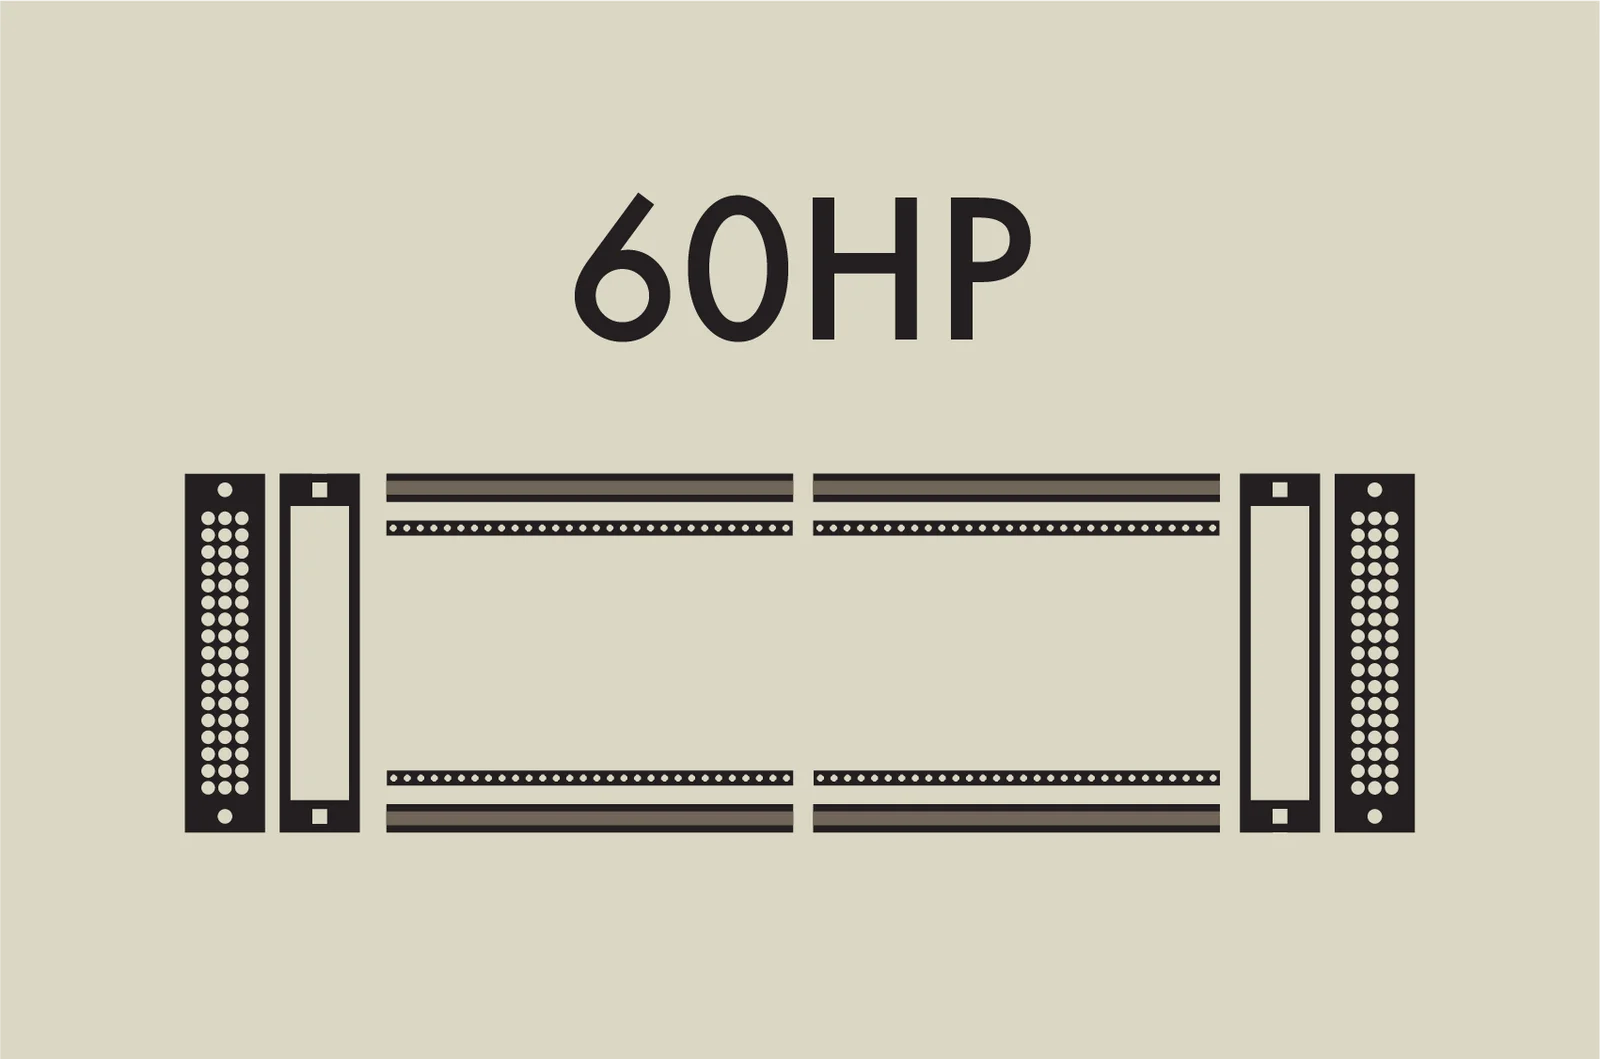
- The 60HP Lite, Nuts, and Dual rails are made by connecting two 30HP rails together.
- The Nuts rail comes with one slide nut per HP. You will need to pack the slide nuts into the rail.
Required Tools
The following tools are needed for assembly:
- Wrench (e.g., Amazon: Mini Wrench Set)
- Phillips screwdriver (e.g., Amazon: Screwdriver Set)
- Pliers (e.g., Amazon: Pliers Set)
- Hex wrench (if available) (e.g., Amazon: Hex Wrench 9-Piece Set)
ASA Rail Strength Notes
The ASA version rails (zudo-rail Lite / Nuts / Dual) are 3D-printed, so they are less strong than metal rails. However, this strength is not an issue during normal use. To give you an idea, they are roughly as strong as a bundle of four or five chopsticks — but if you try to snap them, they will break cleanly at the cross-section. (This is a rough personal analogy.)
The greatest force is applied to these rails during assembly. So once they are assembled, they should work fine as long as you don’t twist them abnormally.
Assembly tips noting specific points to be careful about are included throughout the instructions below. Please refer to them as you build.
60HP Lite / Nuts / Dual Rail Assembly
As mentioned above, the 60HP Lite, Nuts, and Dual type rails are made by connecting two 30HP rails. If you have other rail types, skip this section and proceed to the next.
Two 30HP rails are connected using a 50mm M5 set screw (a headless screw). The underside of each rail has a hole that accepts M5 screws. First, use a hex wrench or pliers to insert the set screw about 2cm deep.
At this point, if the screw is not driven in straight, leverage can apply strong force to the rail, potentially cracking it. Please be especially careful at the start of the tightening process.
Once the set screw is inserted about 2cm, thread the other 30HP rail onto the set screw by hand, then hold it with pliers at the end and tighten until the gap is closed.
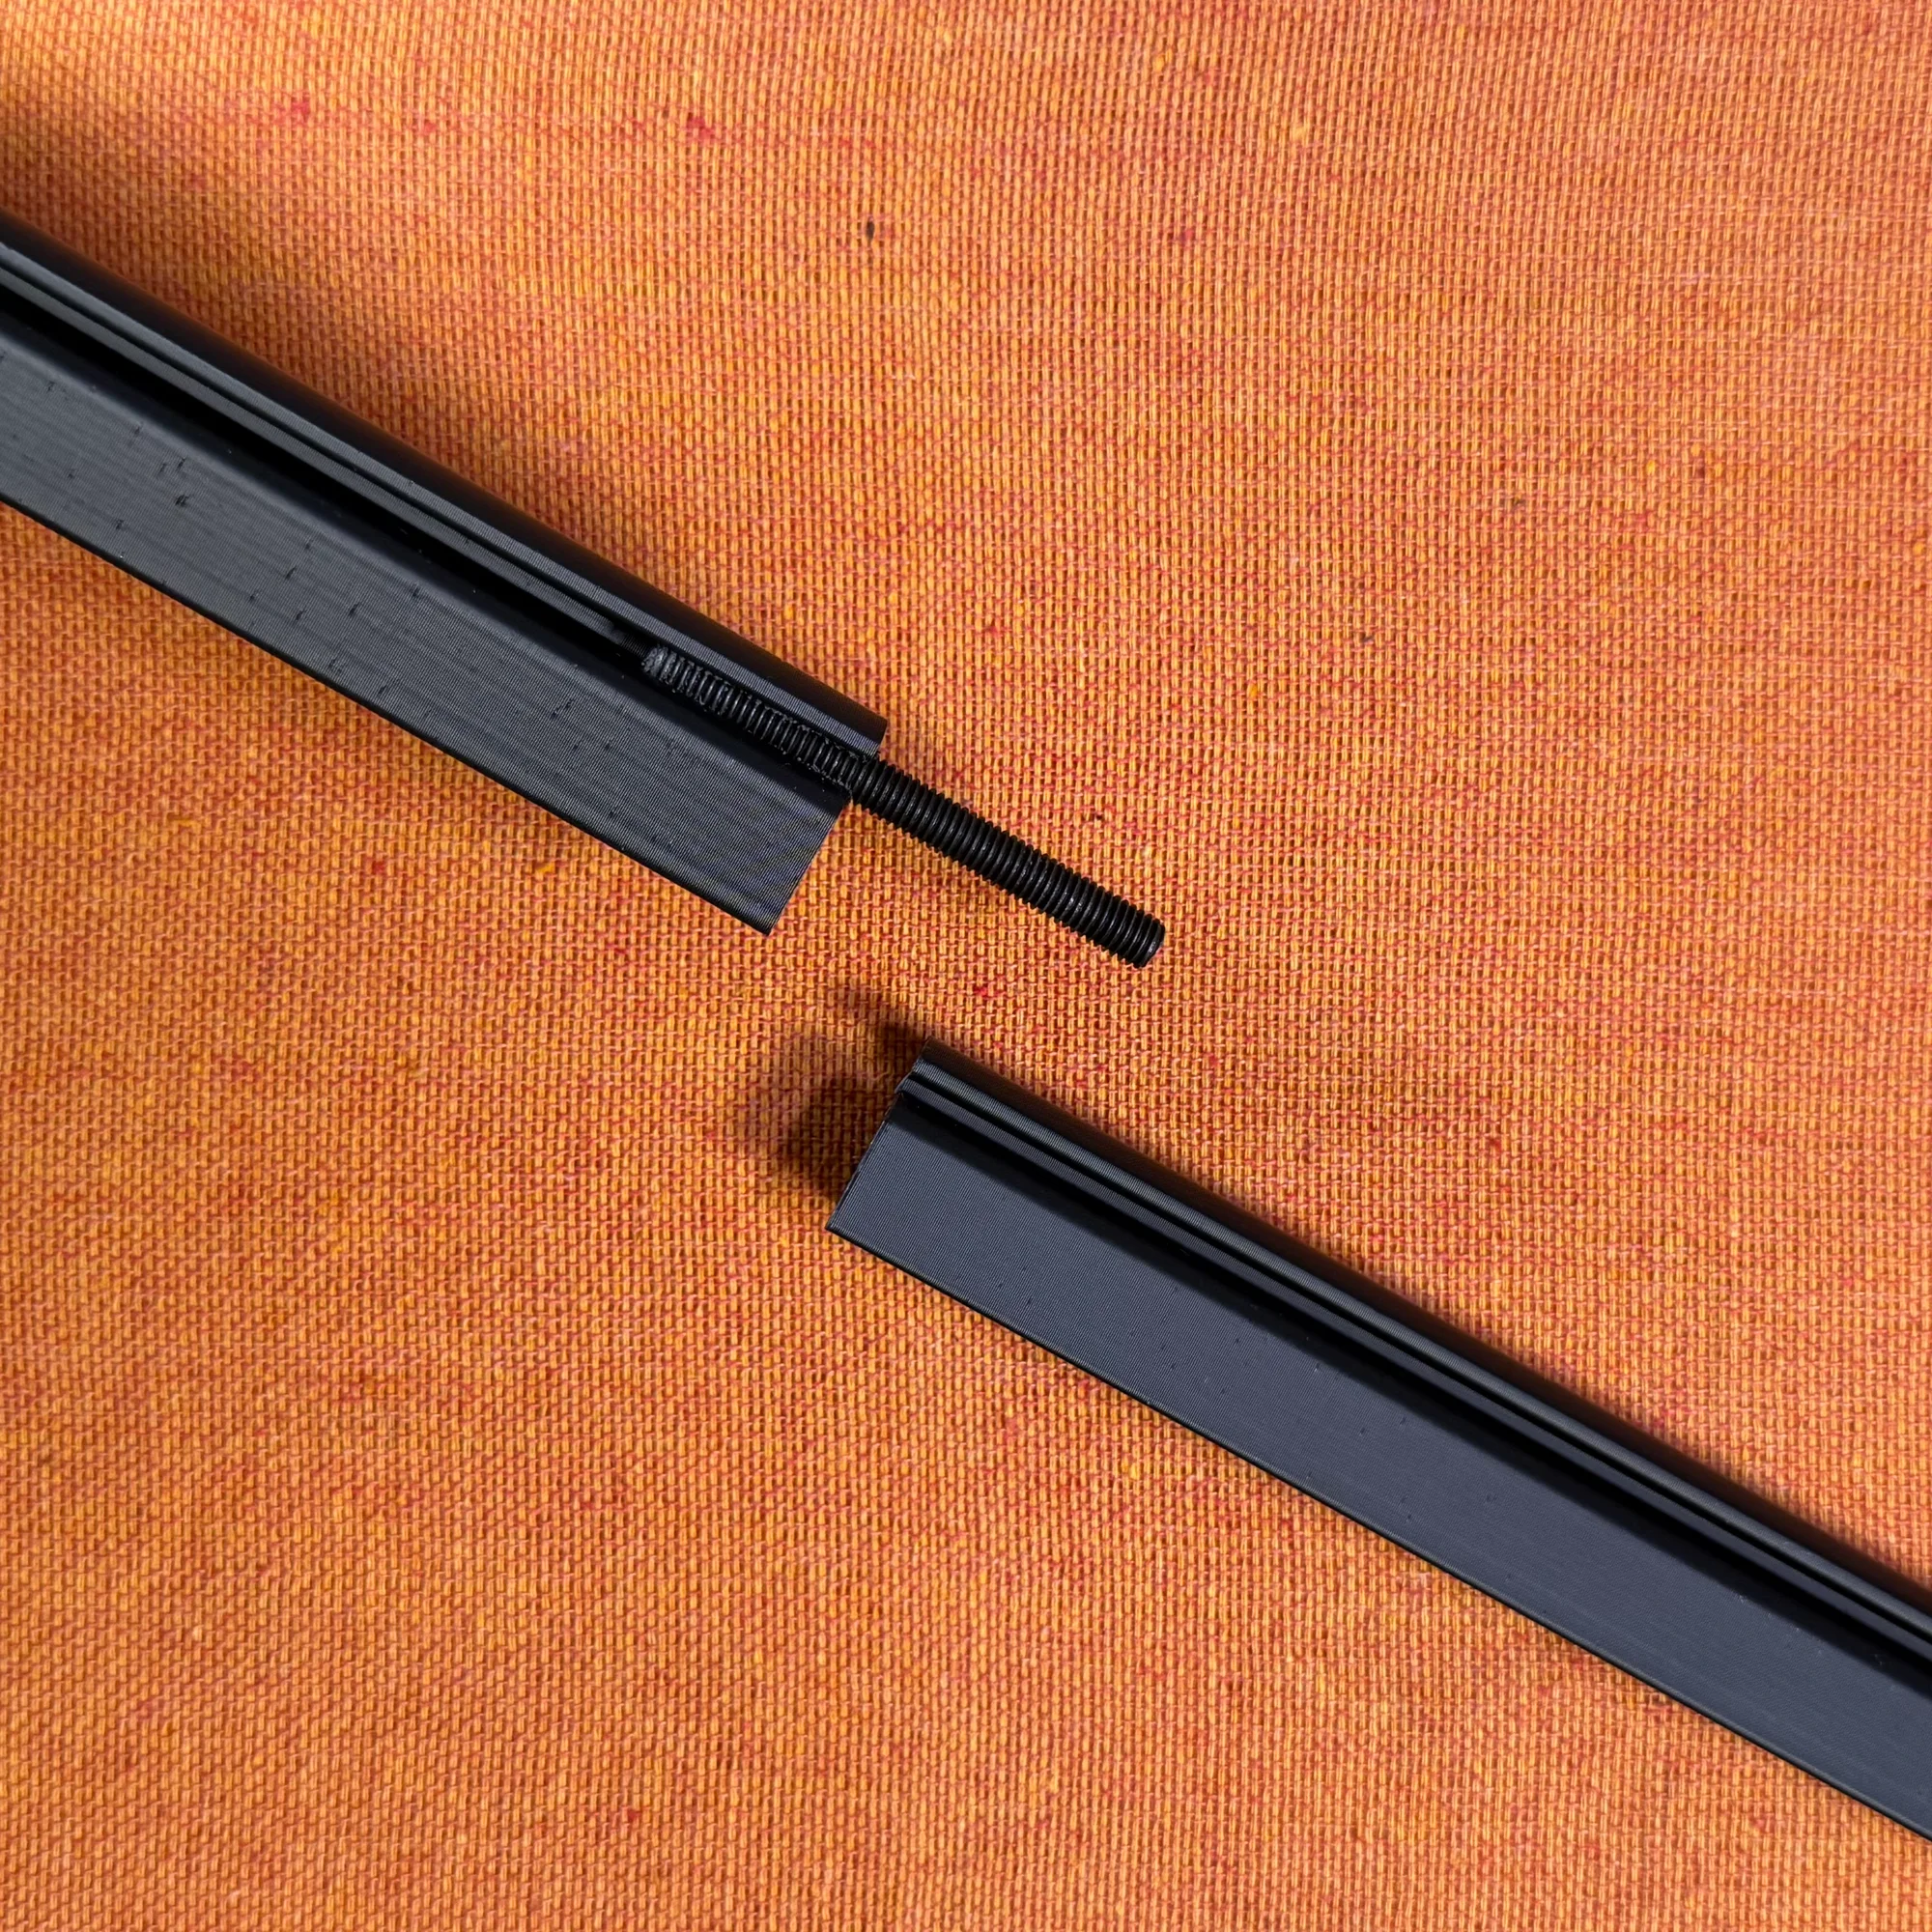
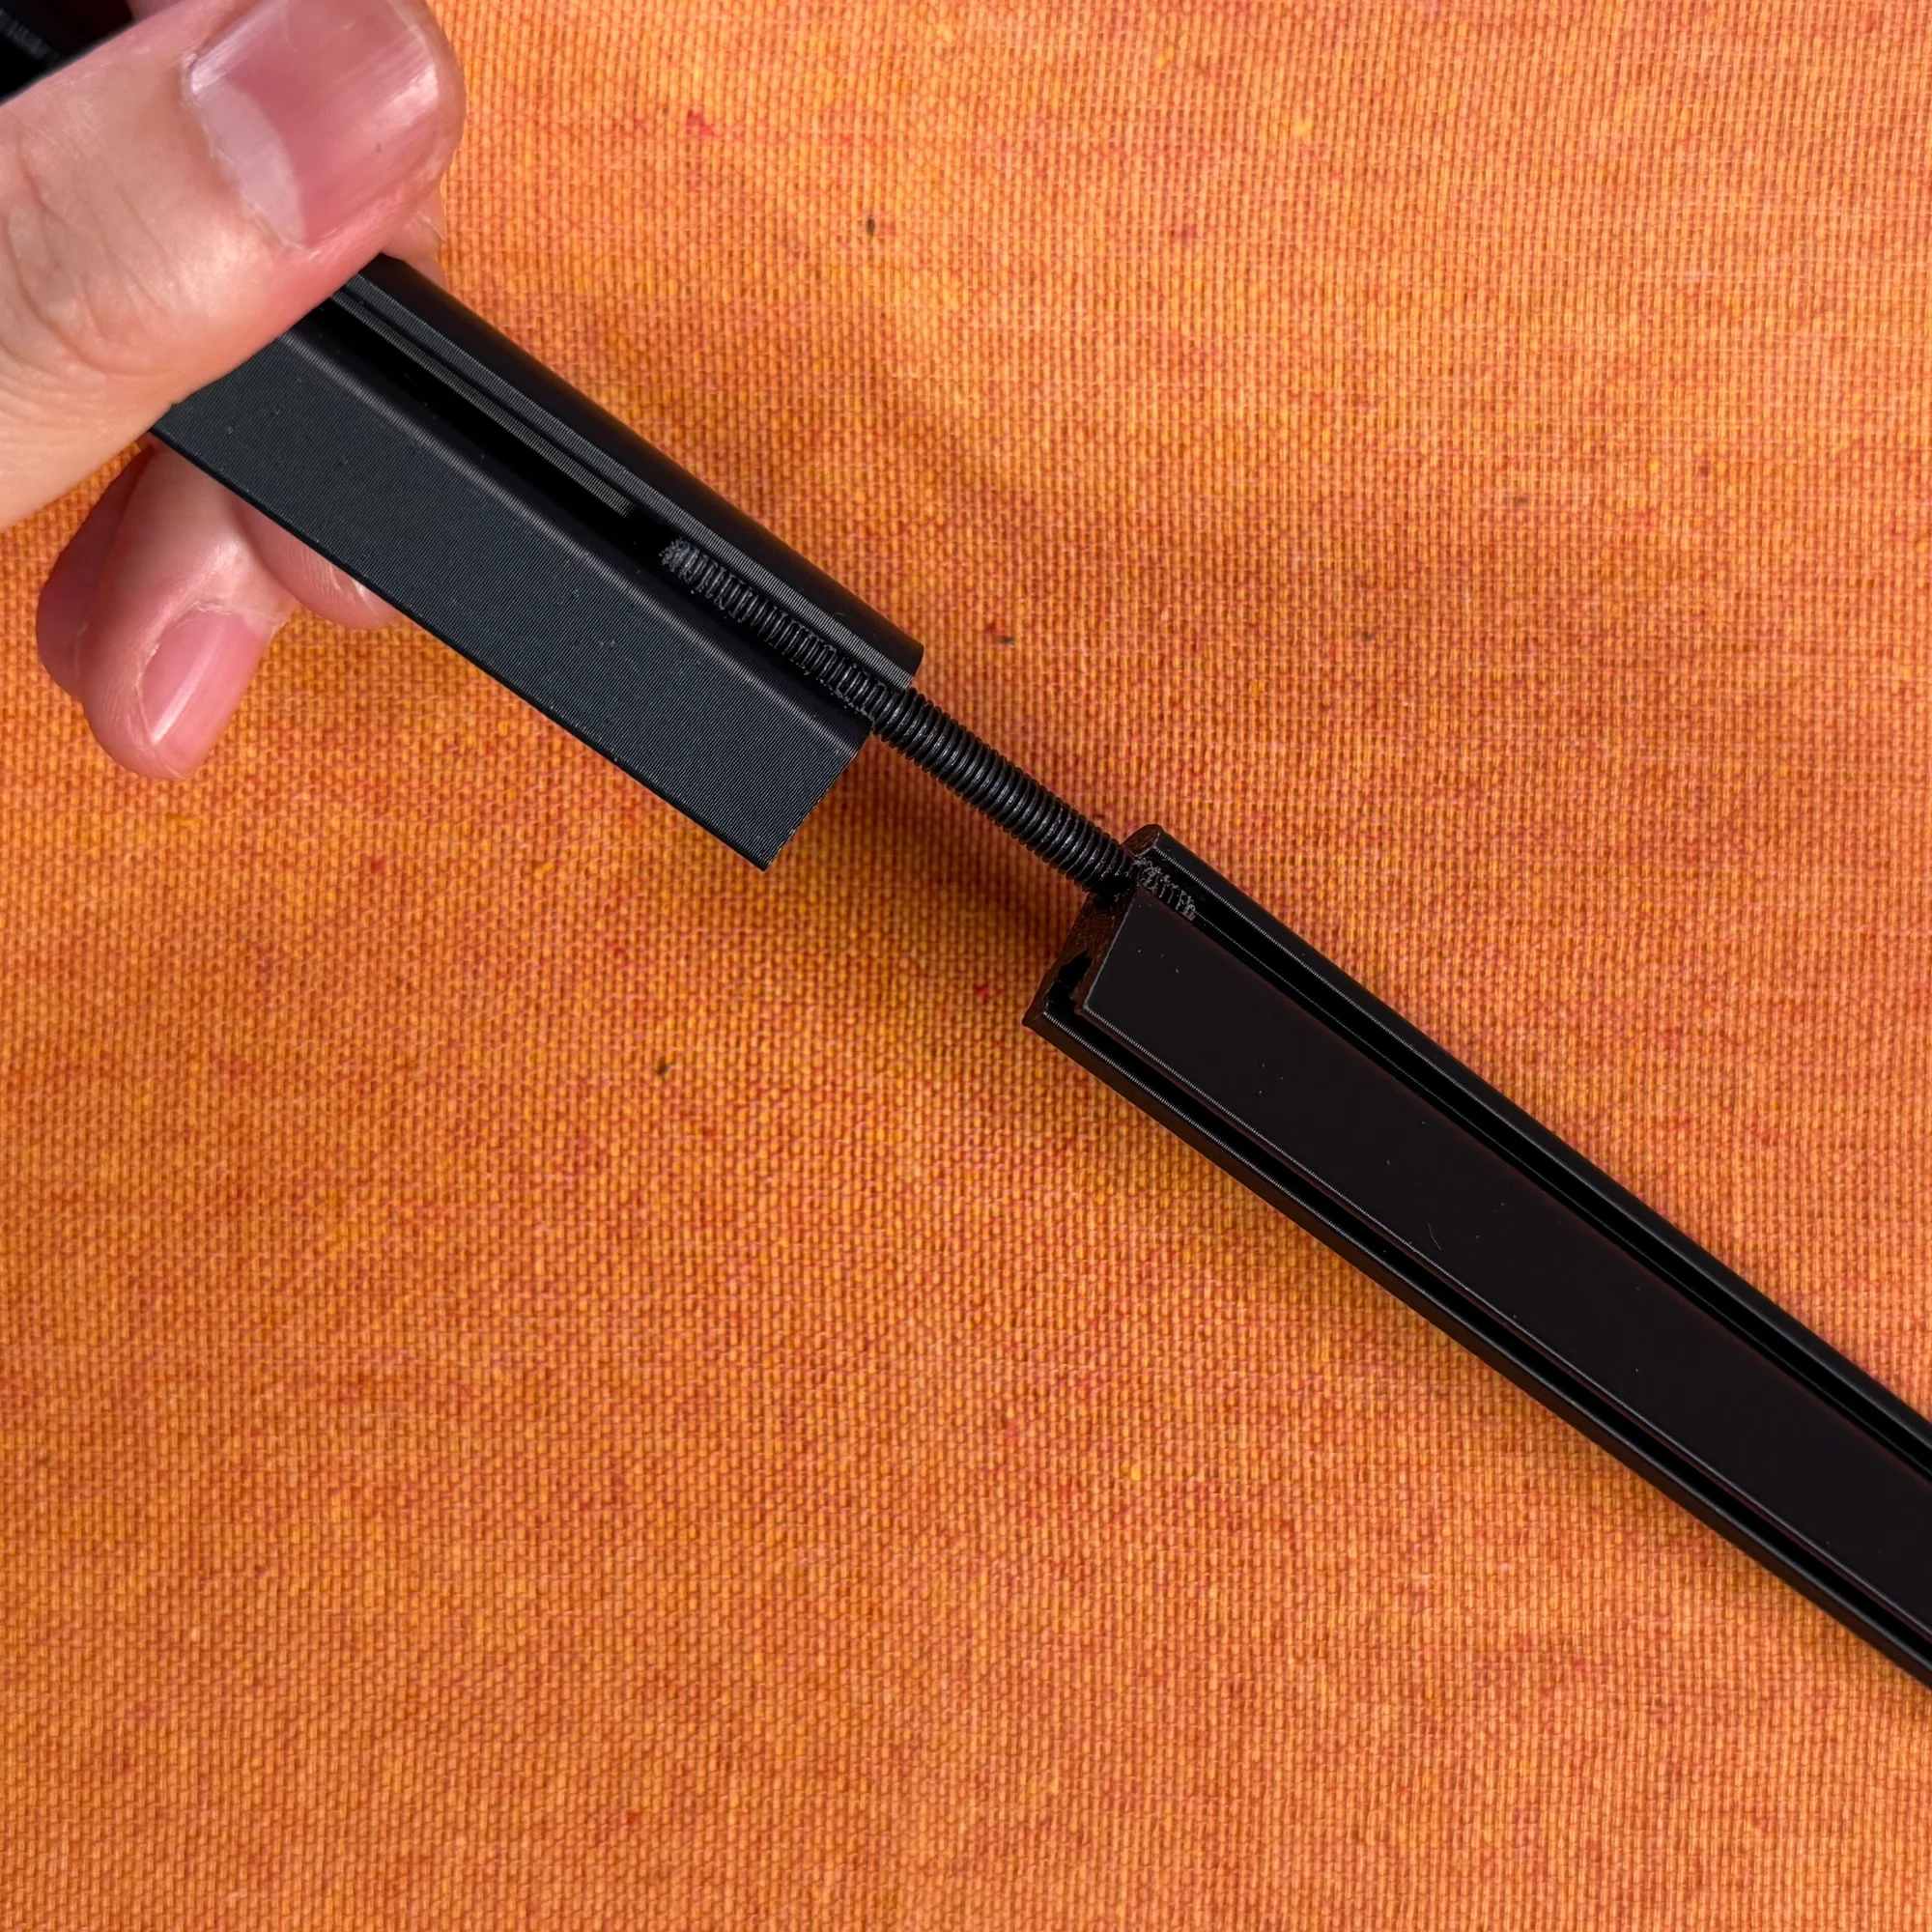
During this connection process, it is rare for the gap between the two rails to close perfectly. If you try to force it closed during the last turn or so, the rail may crack. If you have a gap of about 0.5mm remaining, that is perfectly fine — stop tightening at that point.
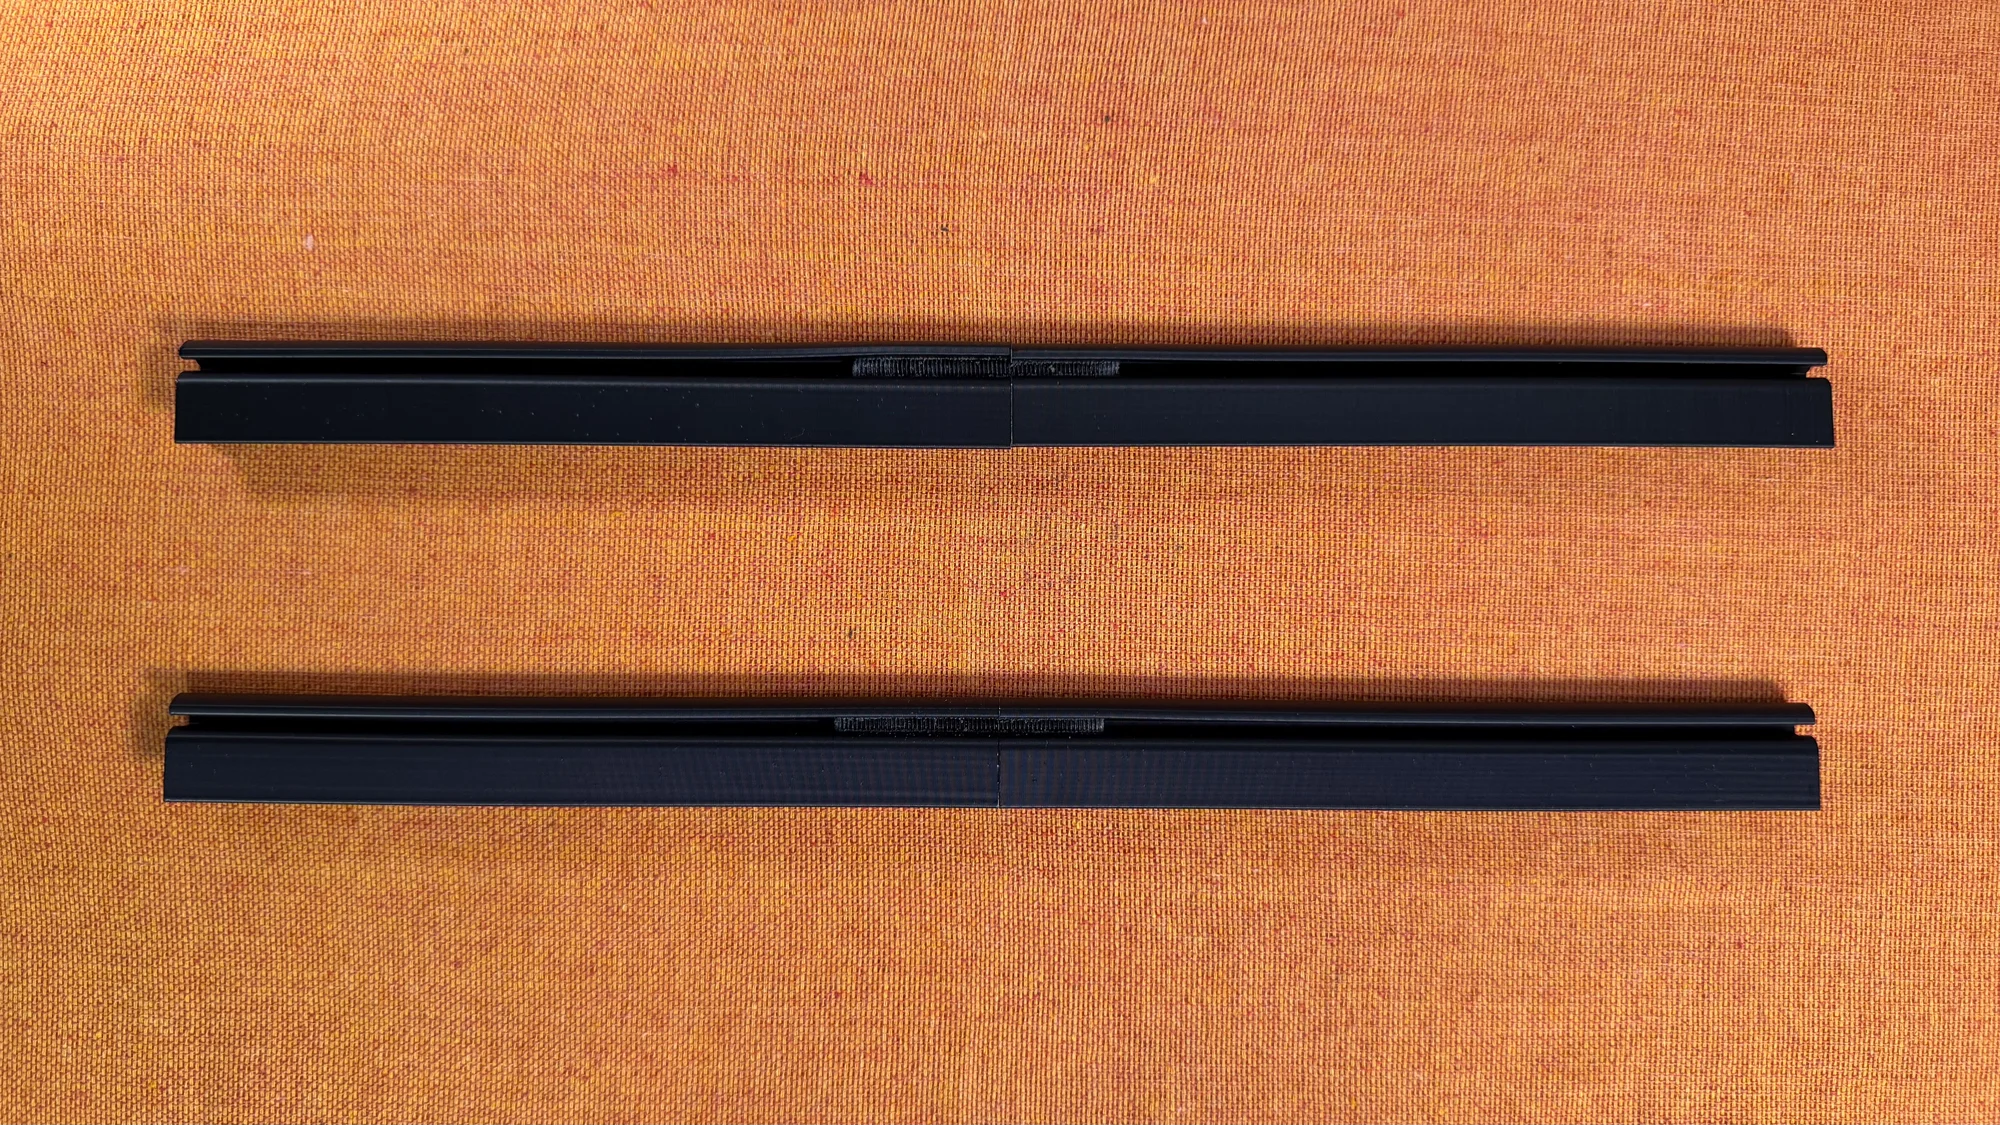
This completes one 60HP rail. Repeat the same process to make the second one.
Connecting Rails to Mounting Panels
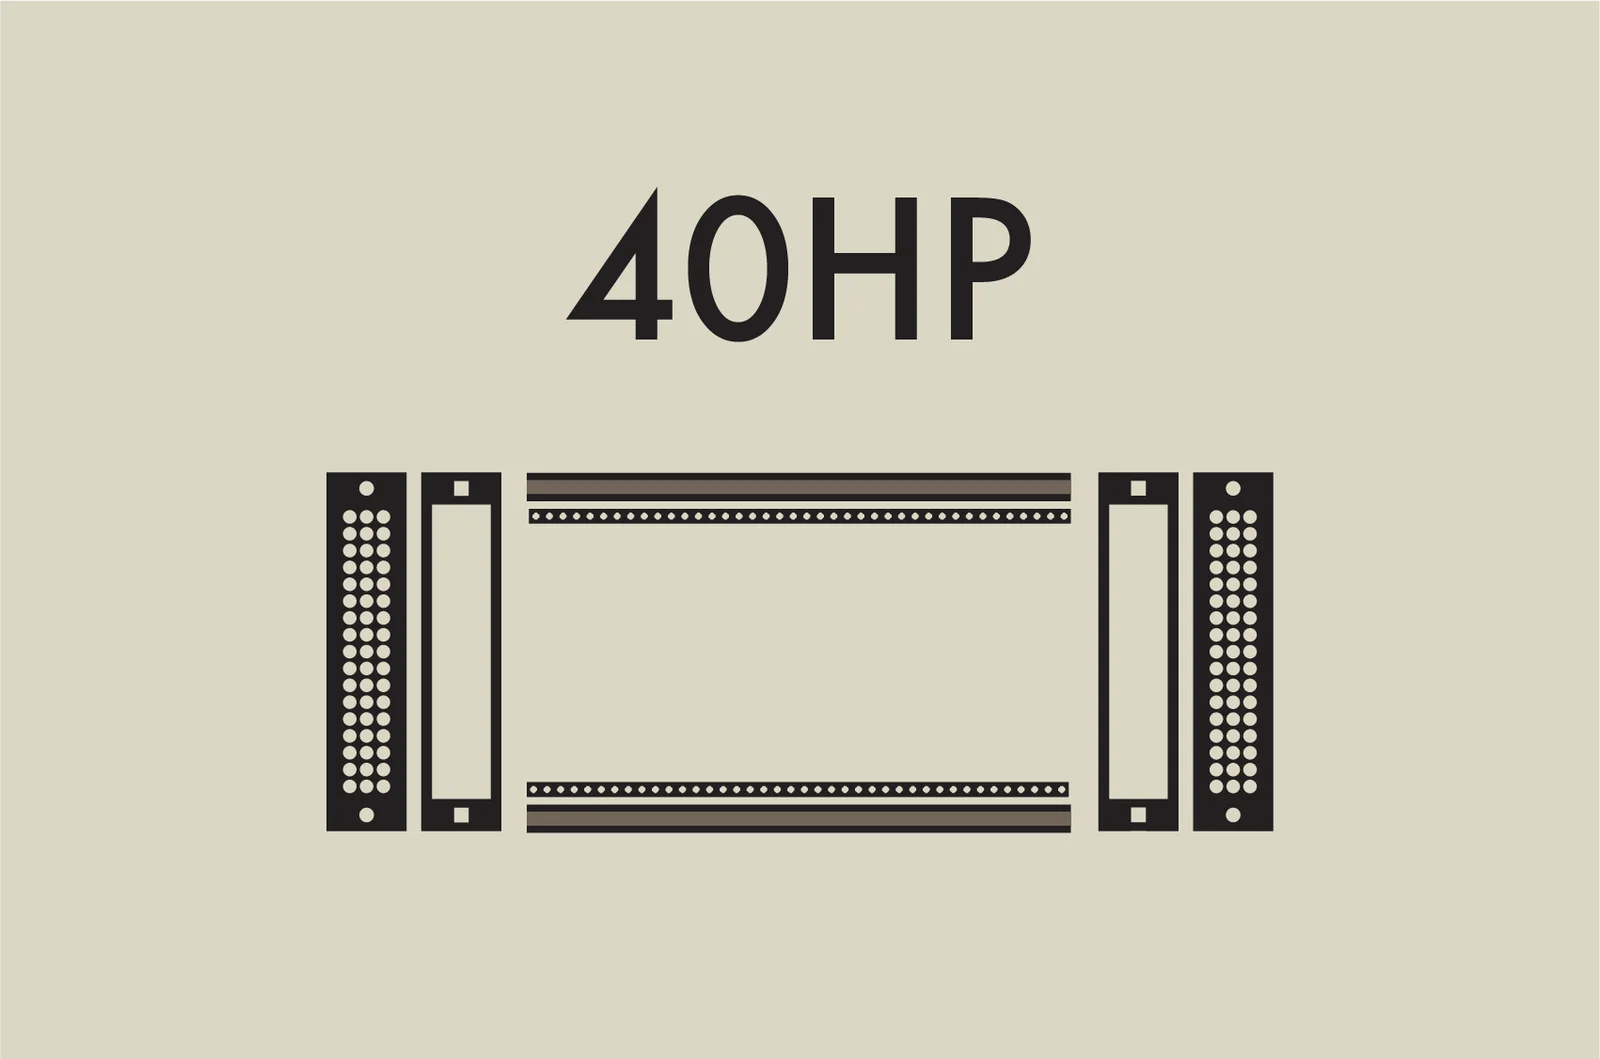
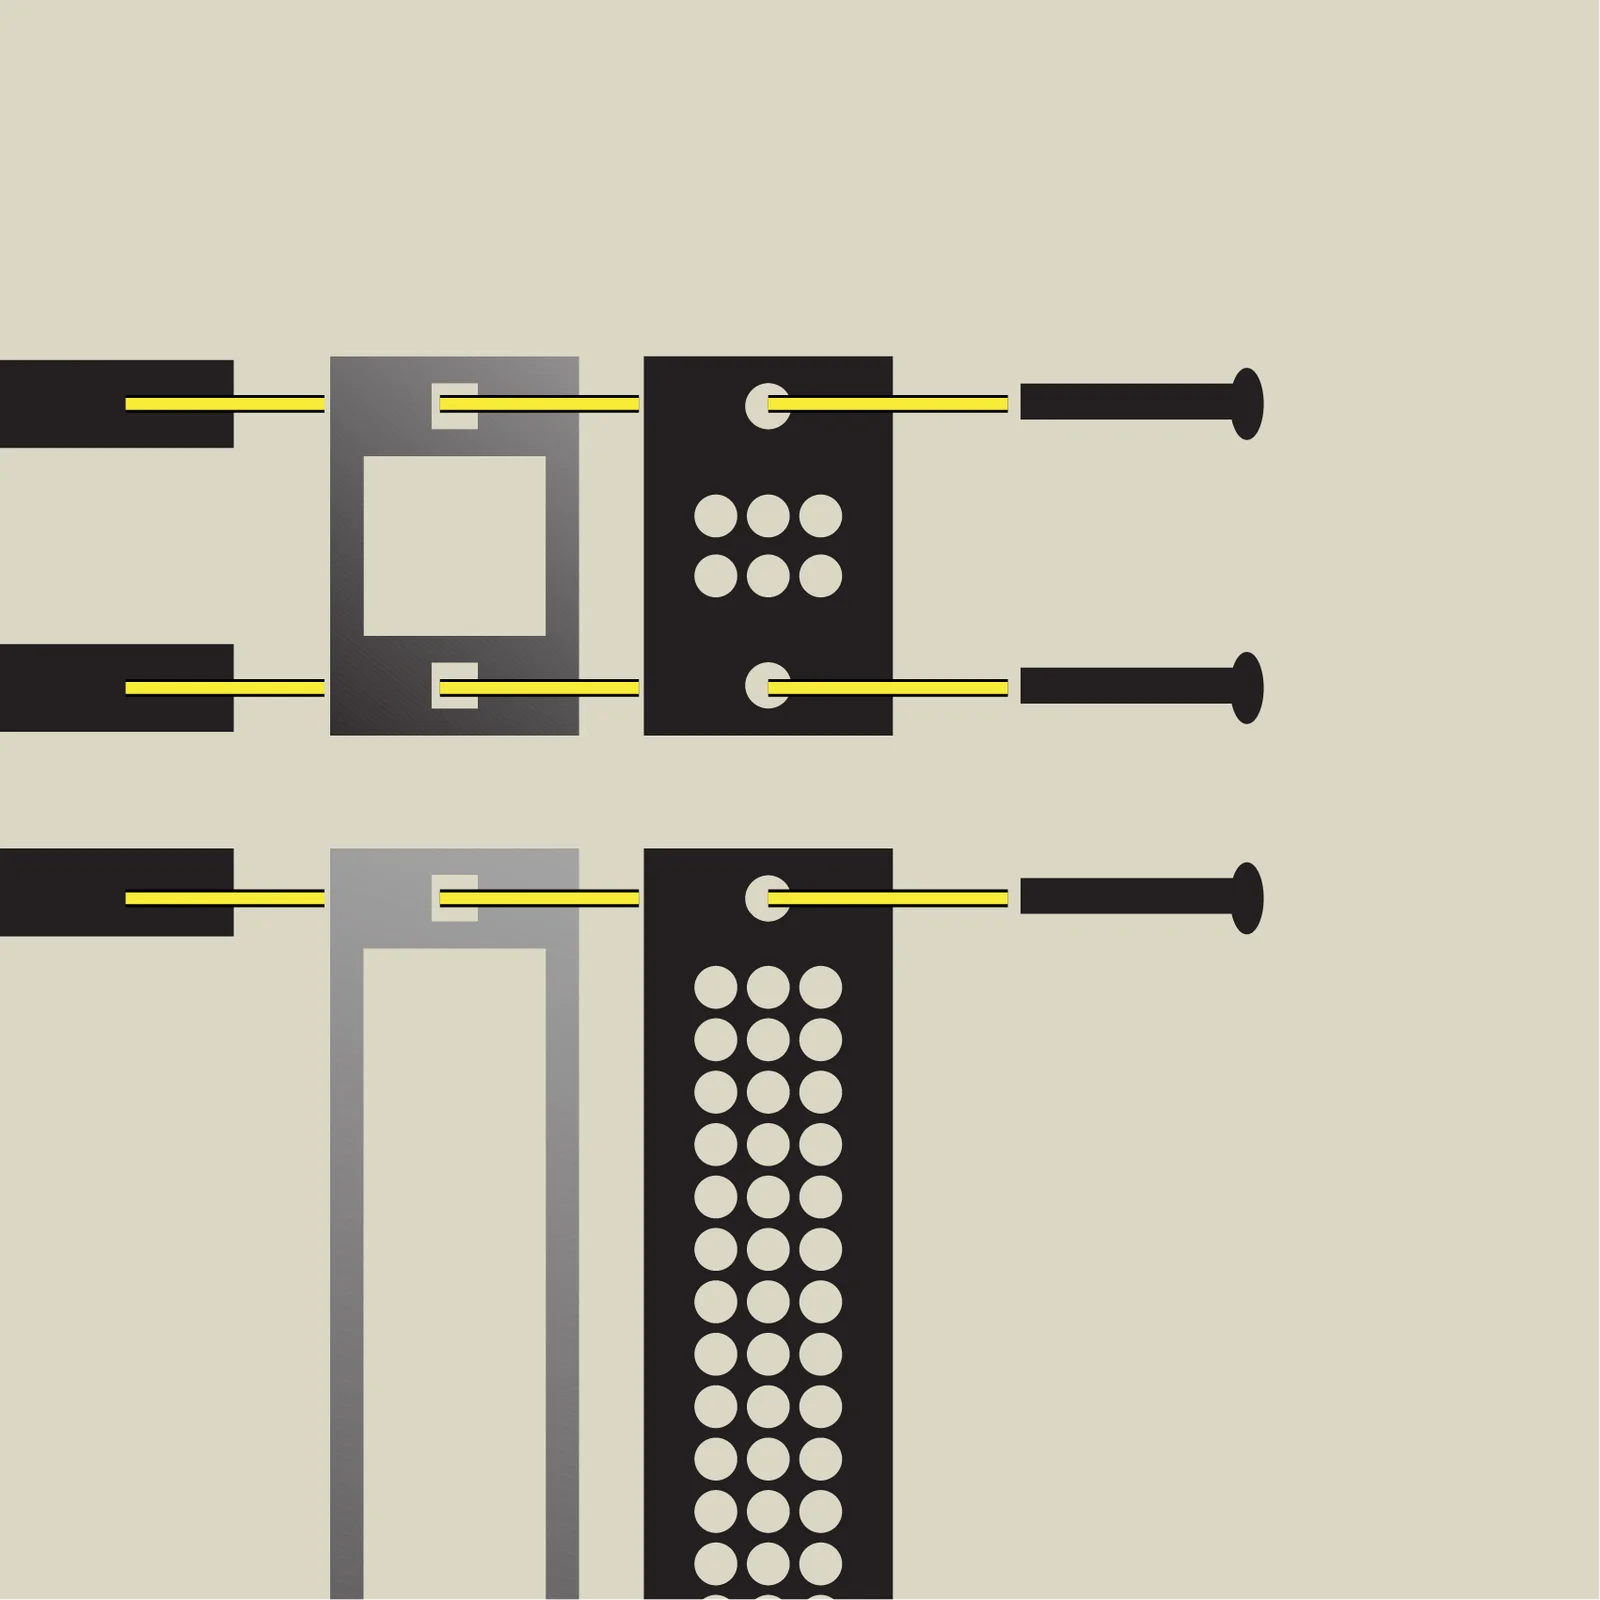
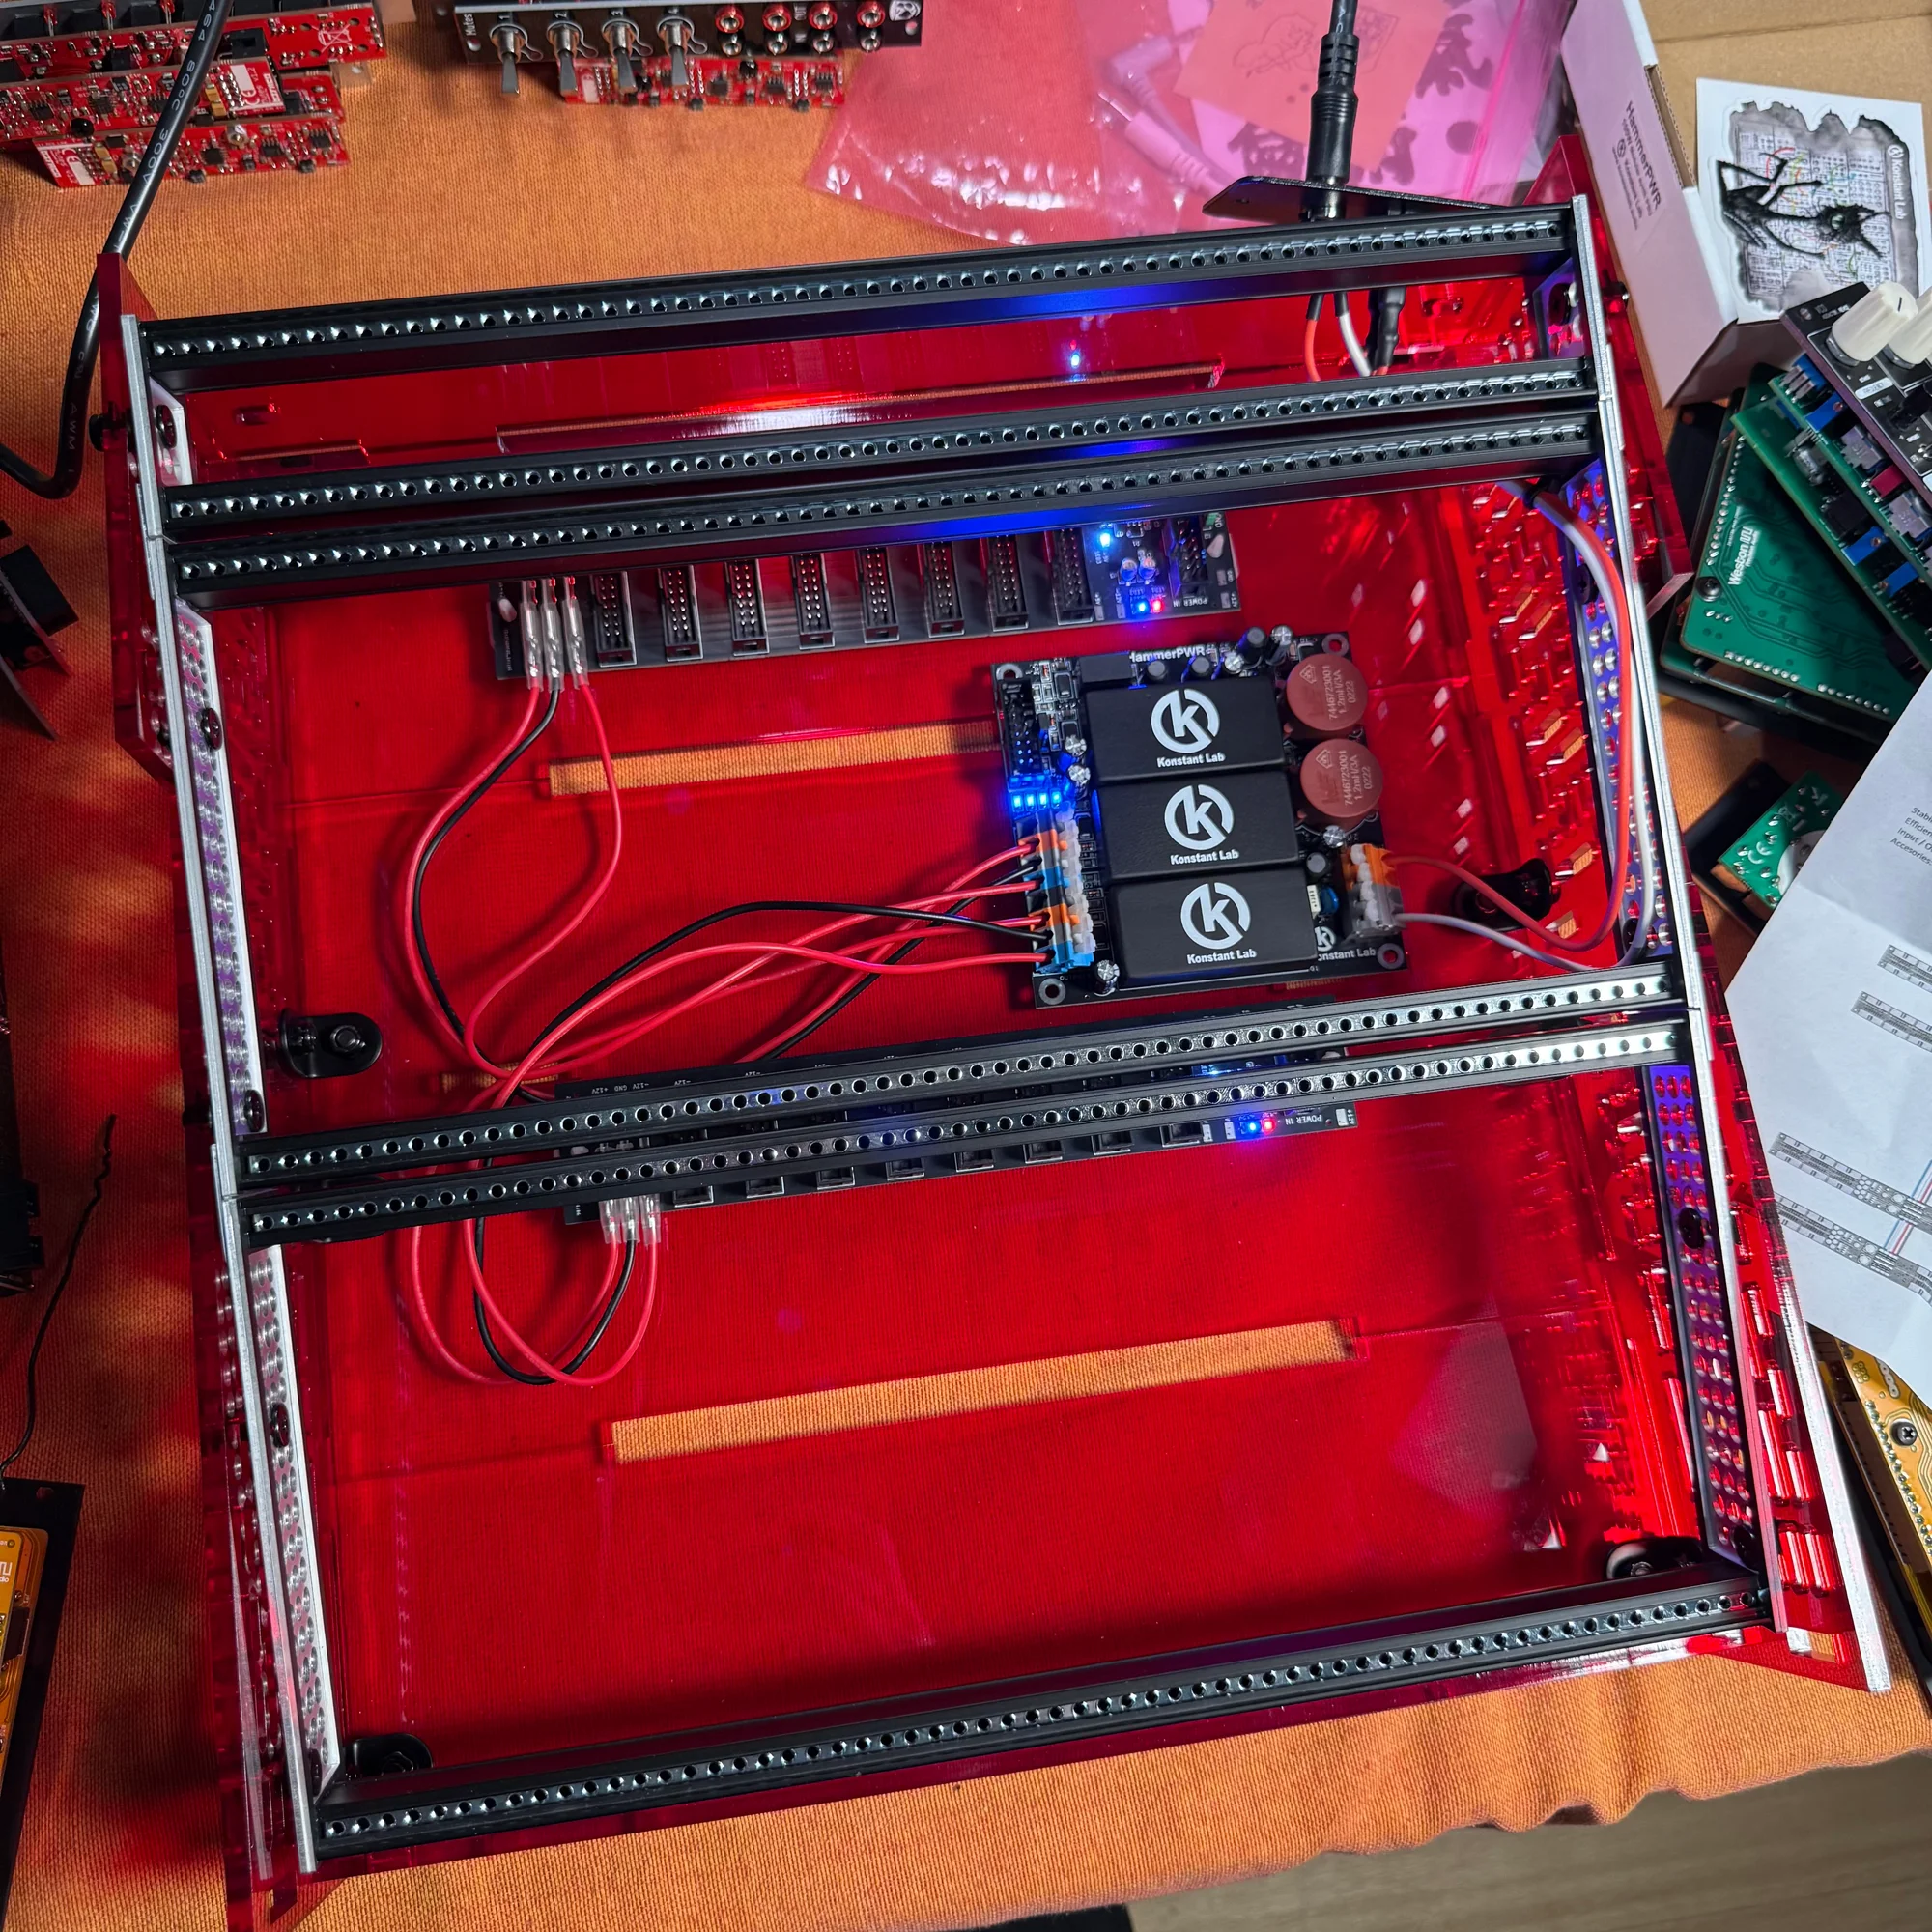
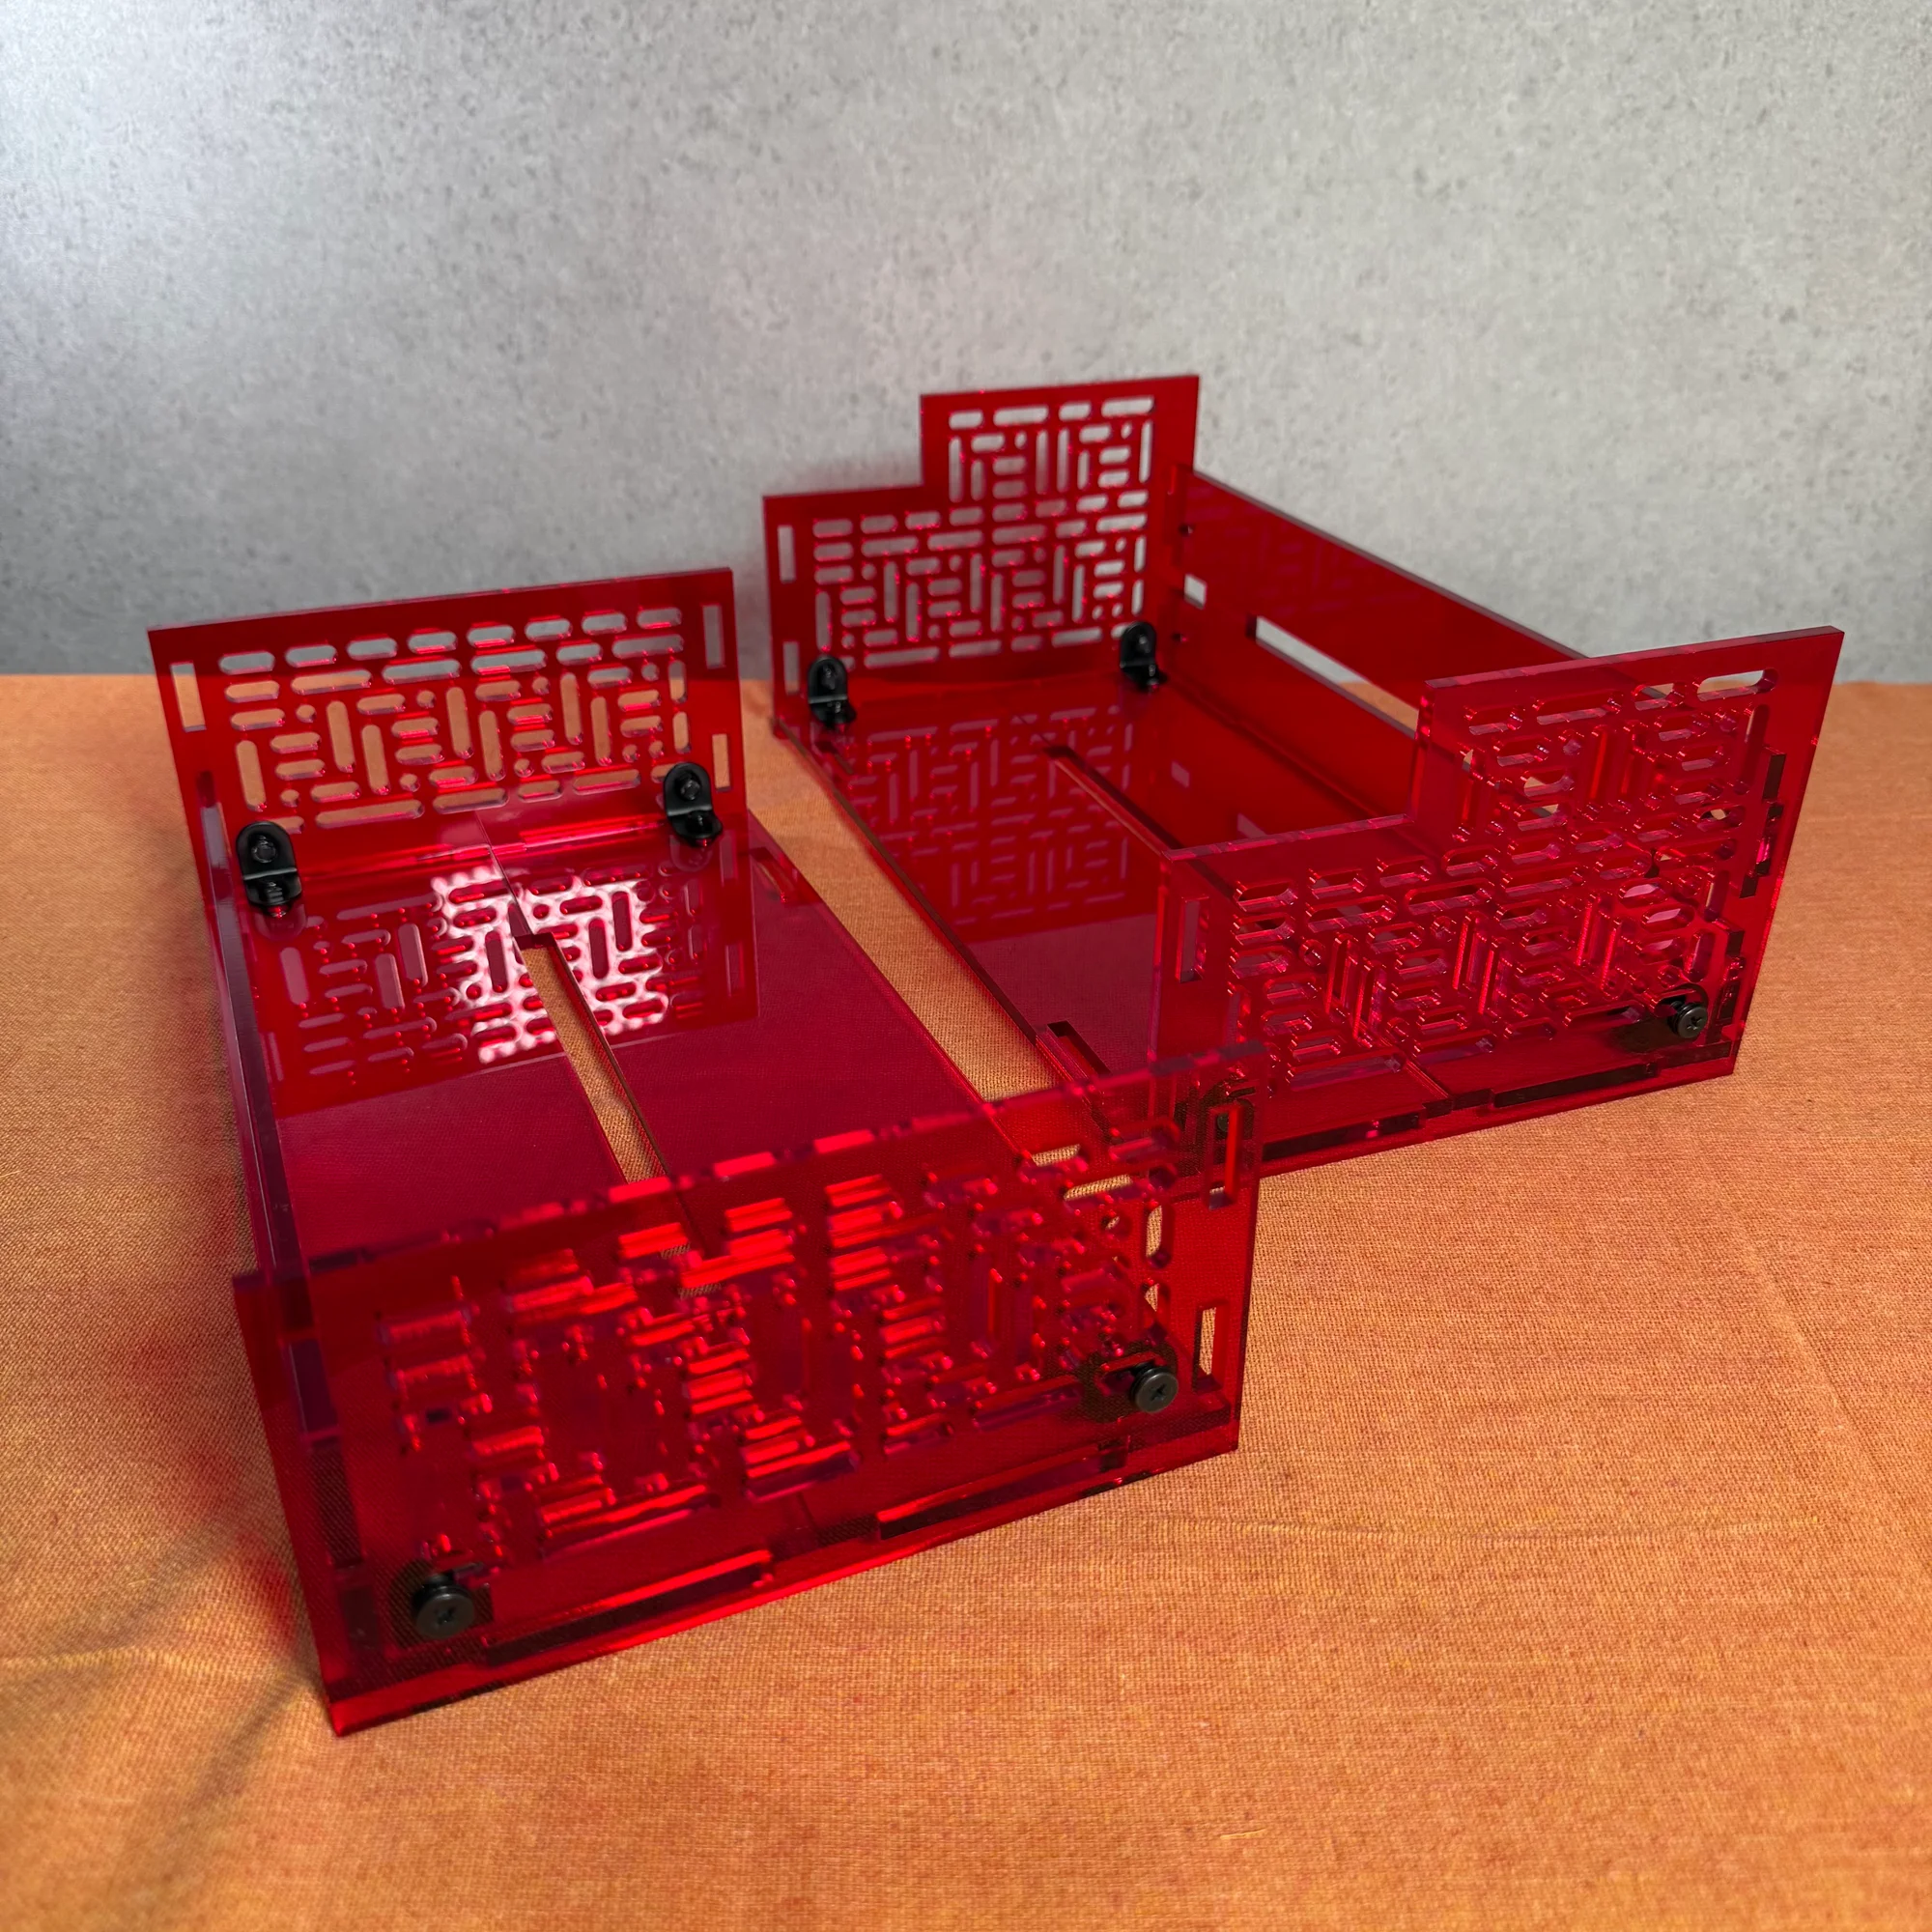
So far we have covered assembling the rail portions of the zudo-rail. By securing these to the left and right mounting aluminum panels, you complete the entire rail frame.
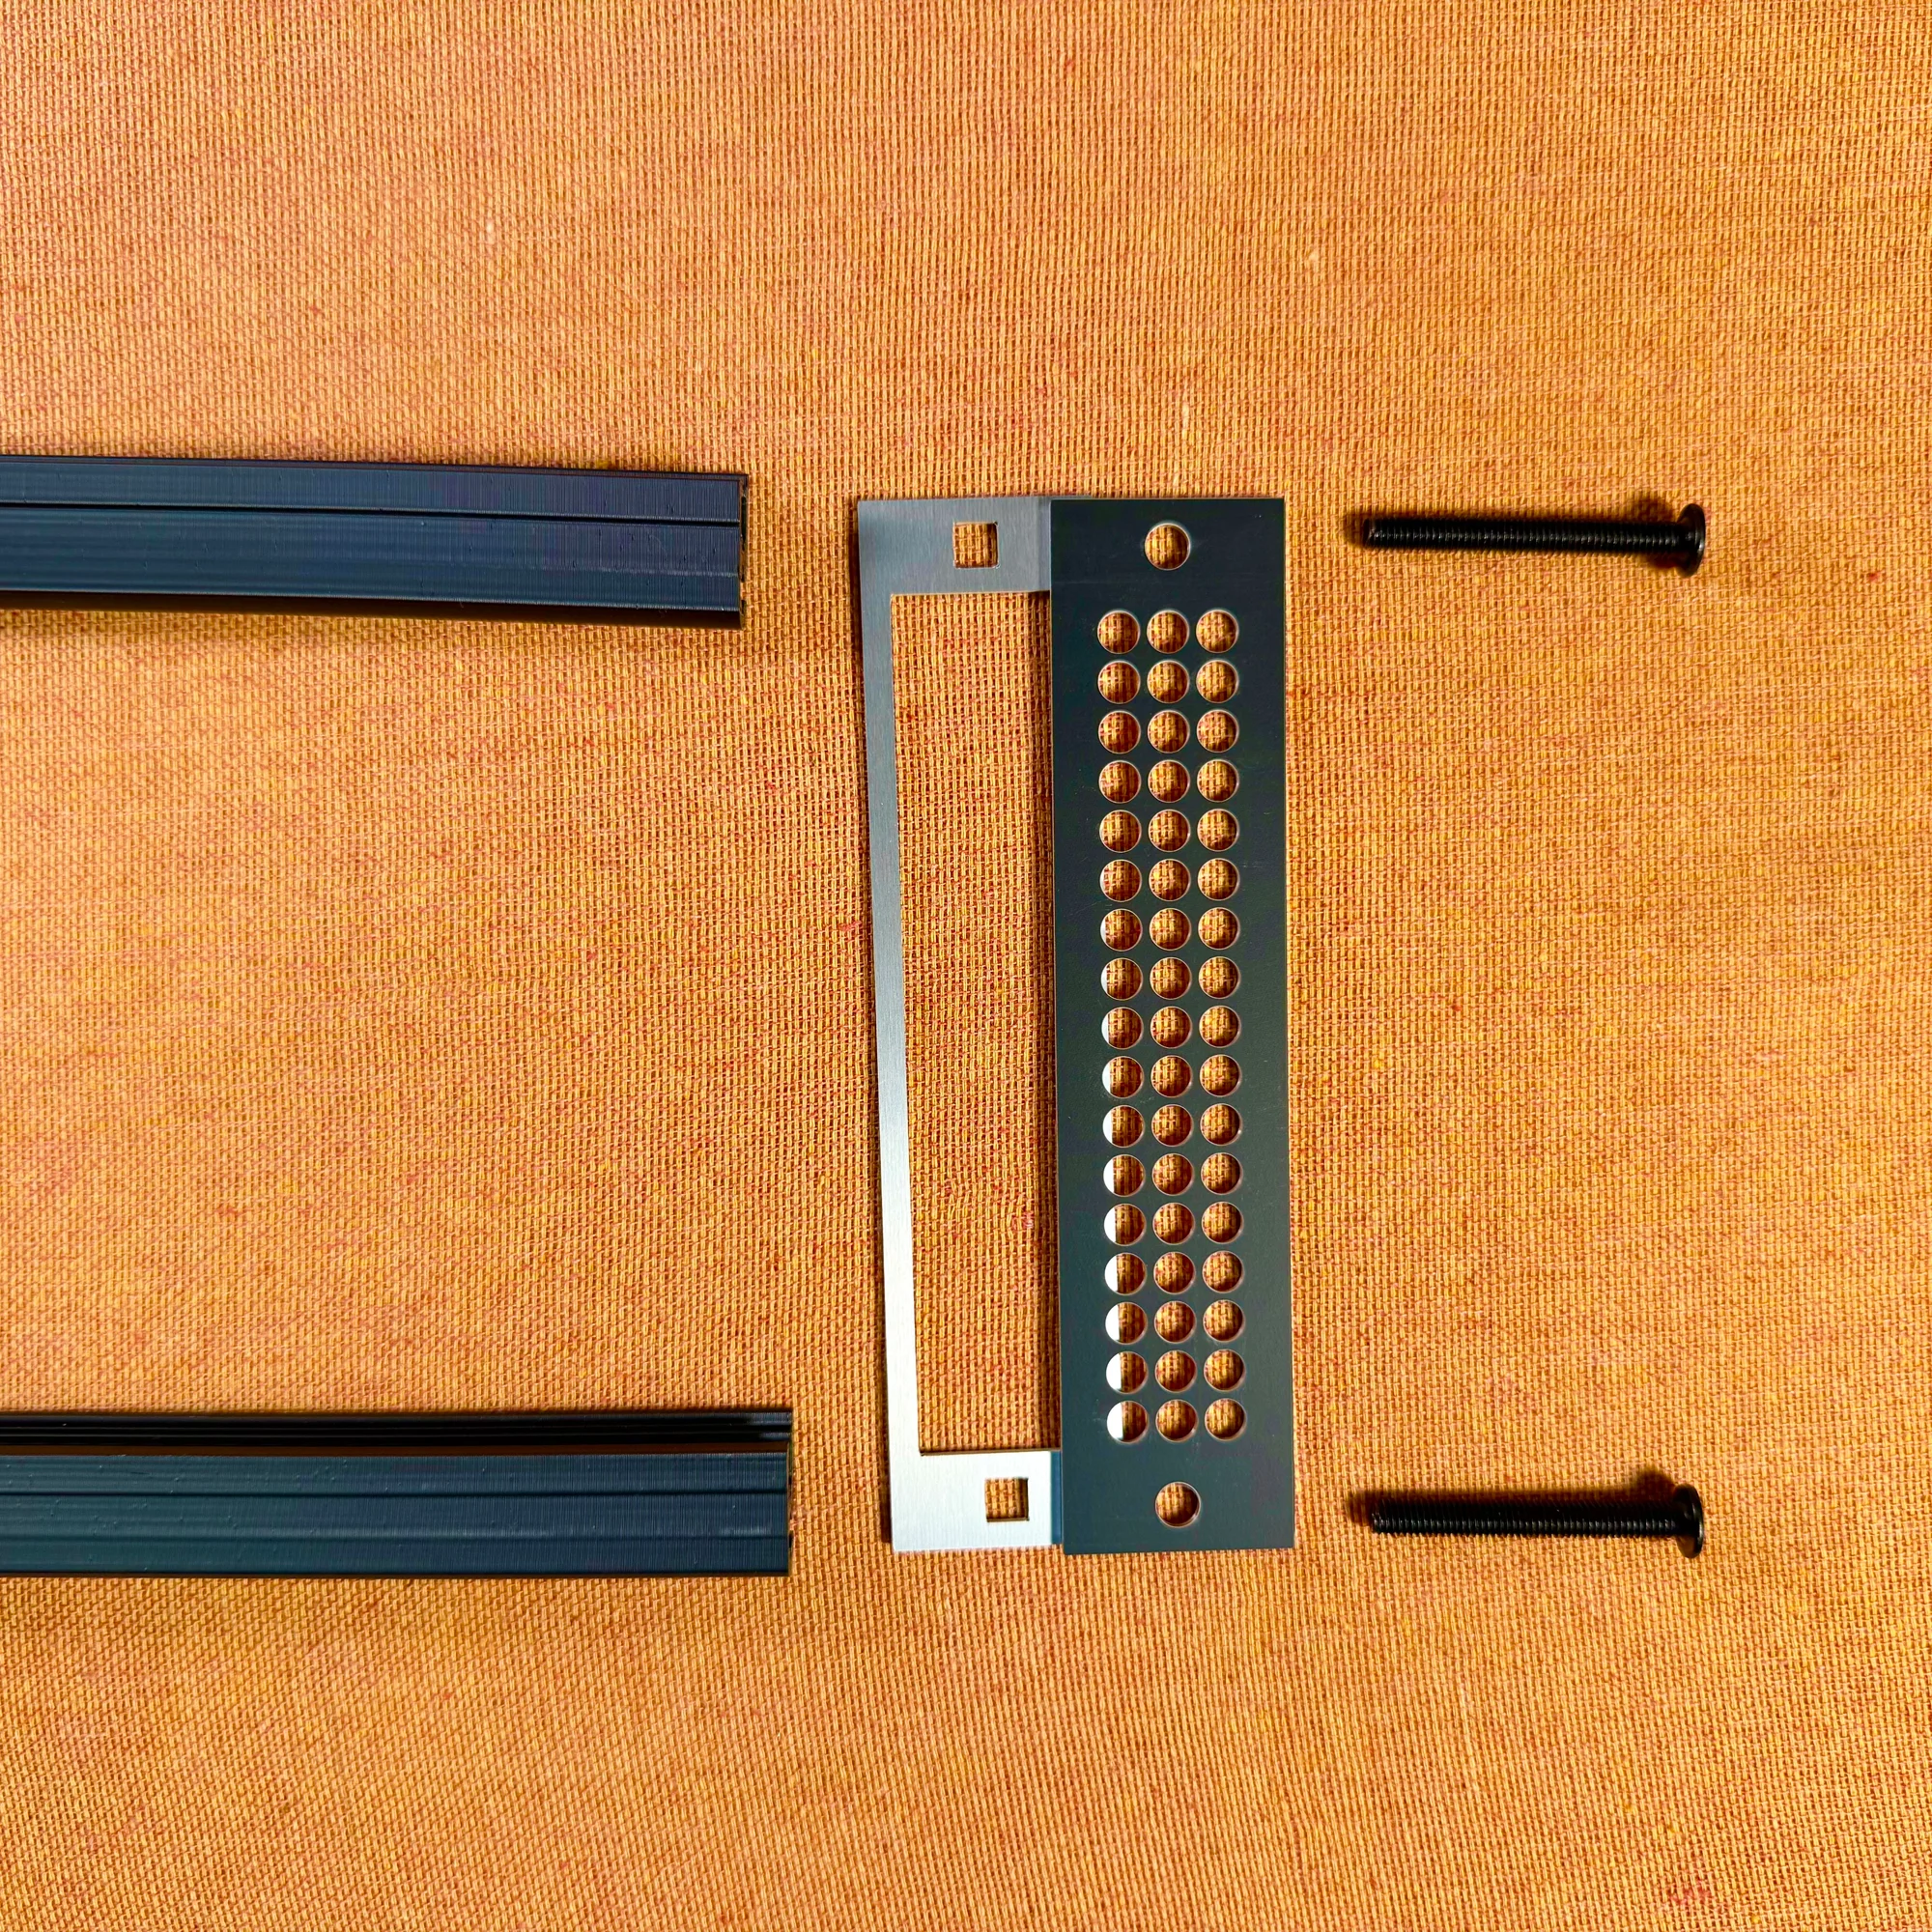
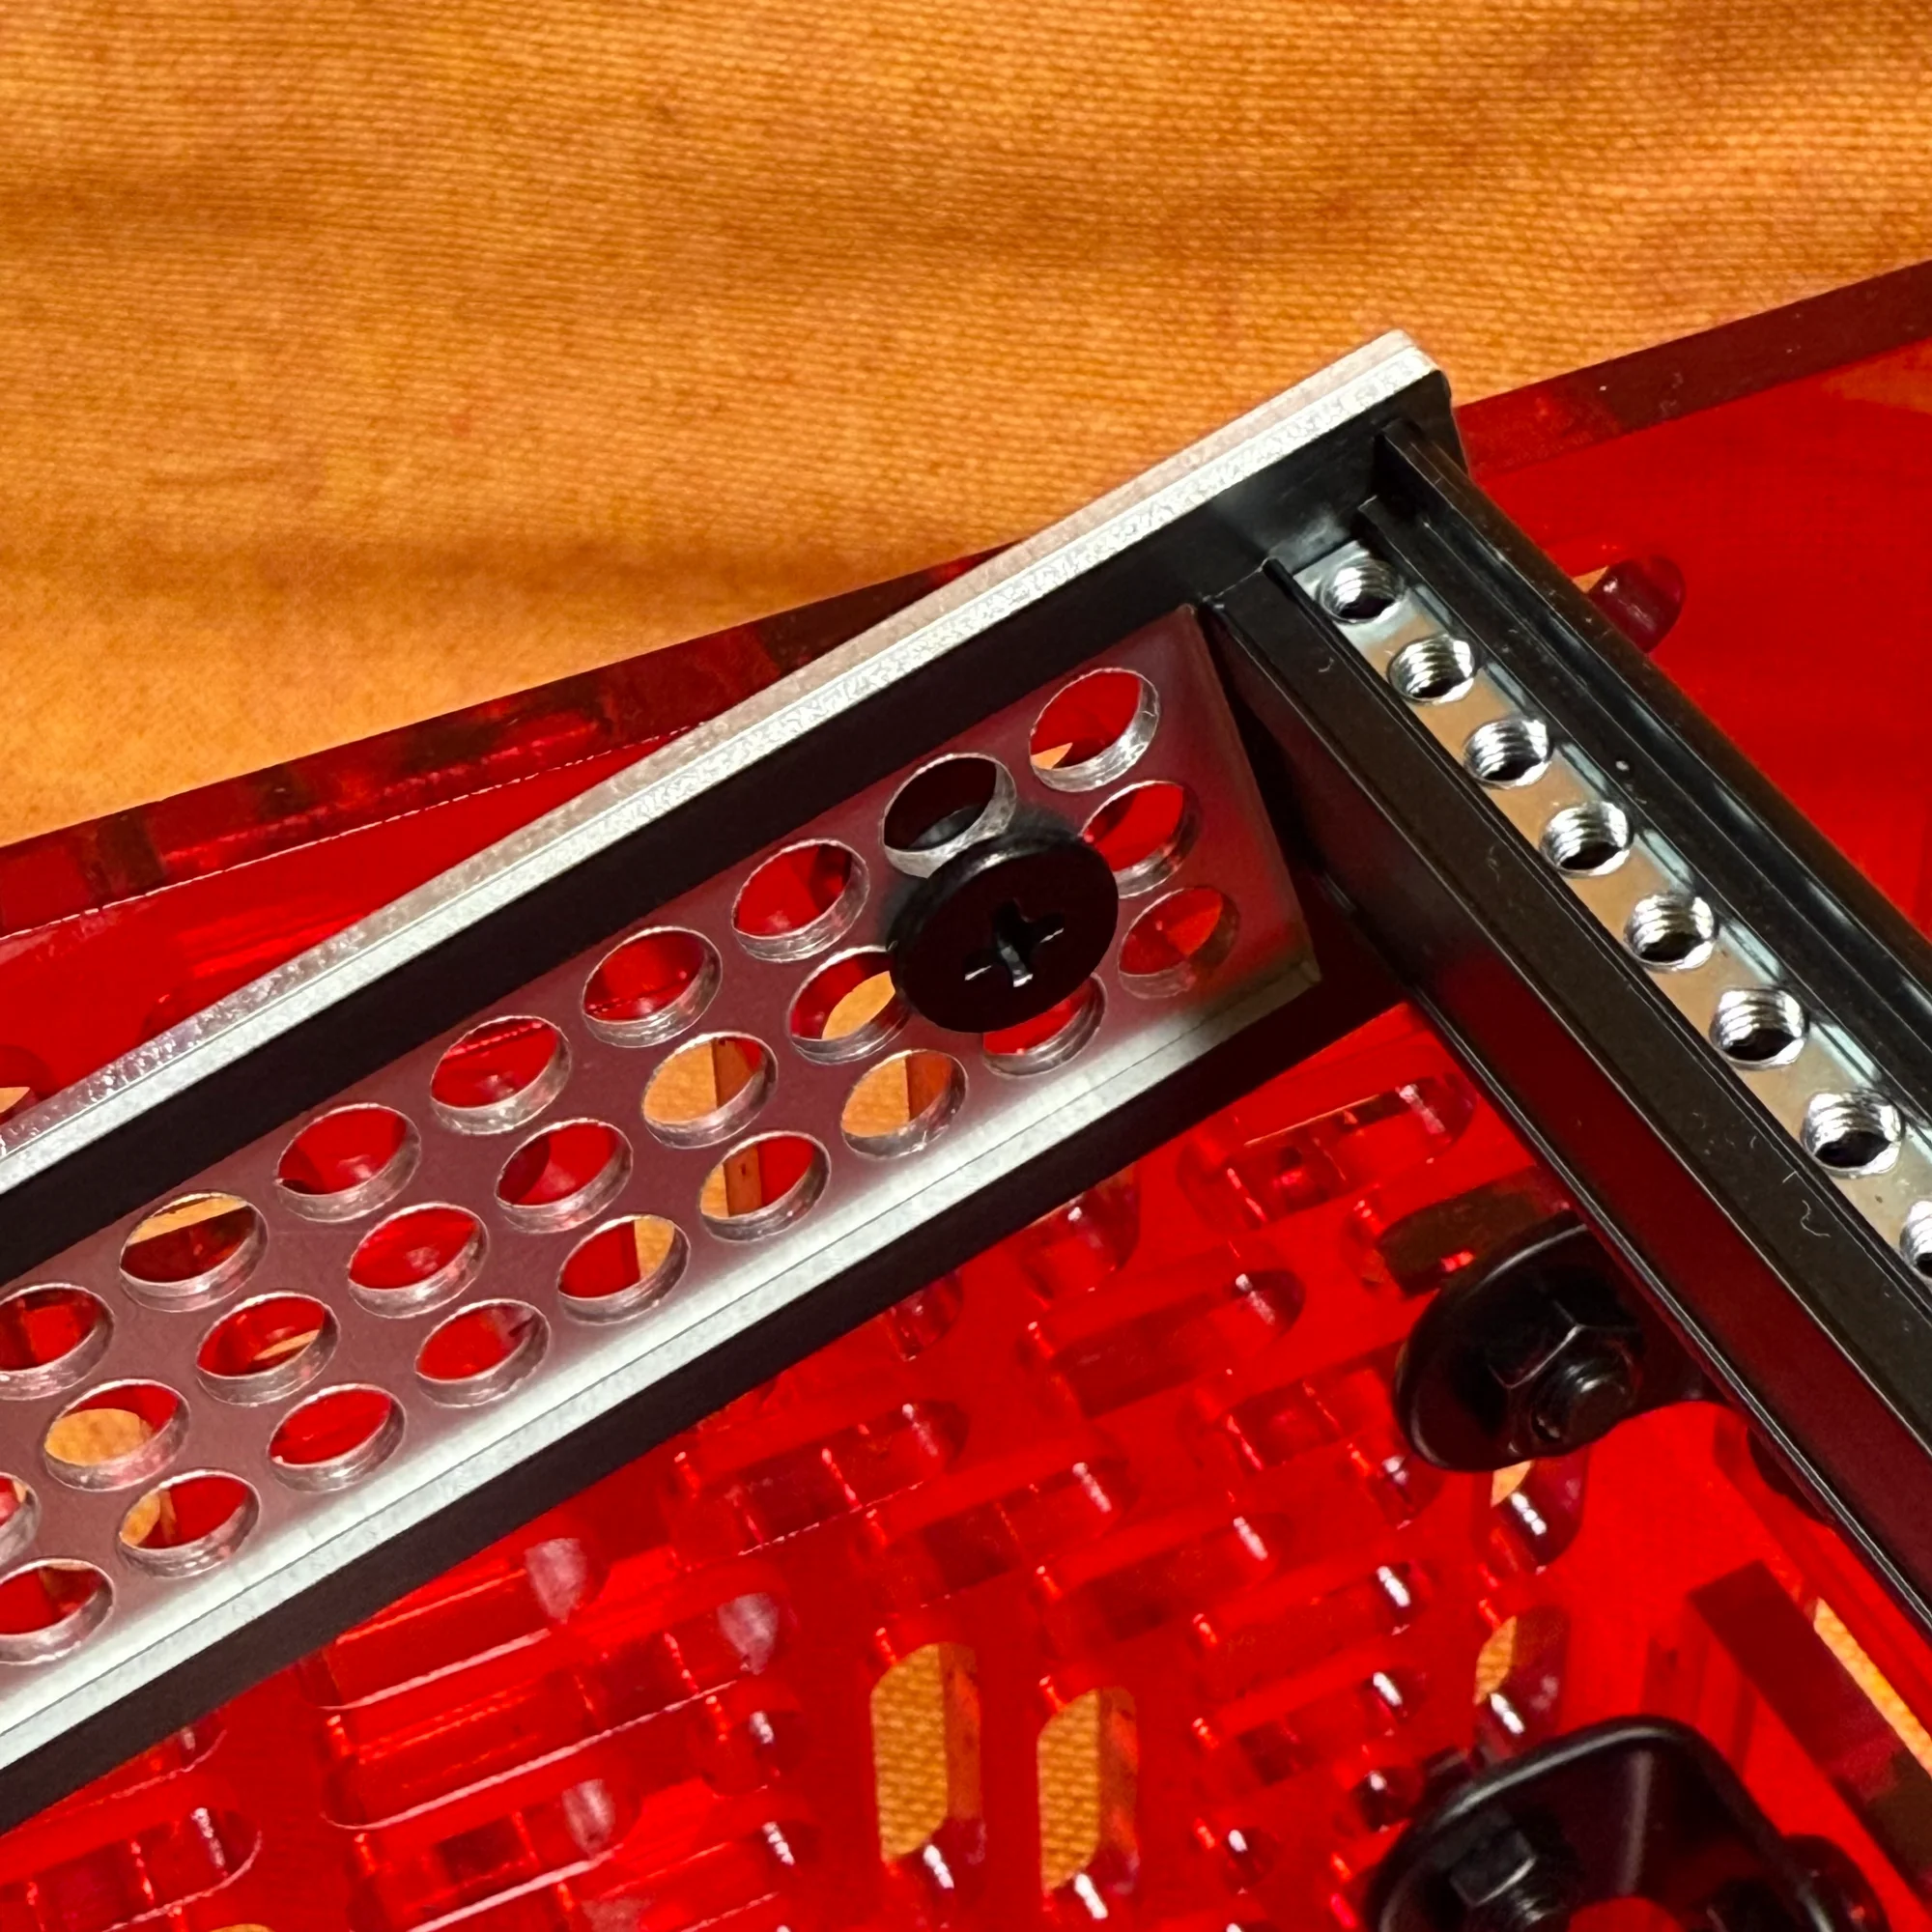
The rail mounting panels come as a set of two: one with large rectangular holes and one with many circular holes. Assemble so the panel with rectangular holes faces inward and the panel with circular holes faces outward.
Important: The rails have a lip/edge. Make sure the lip faces outward.
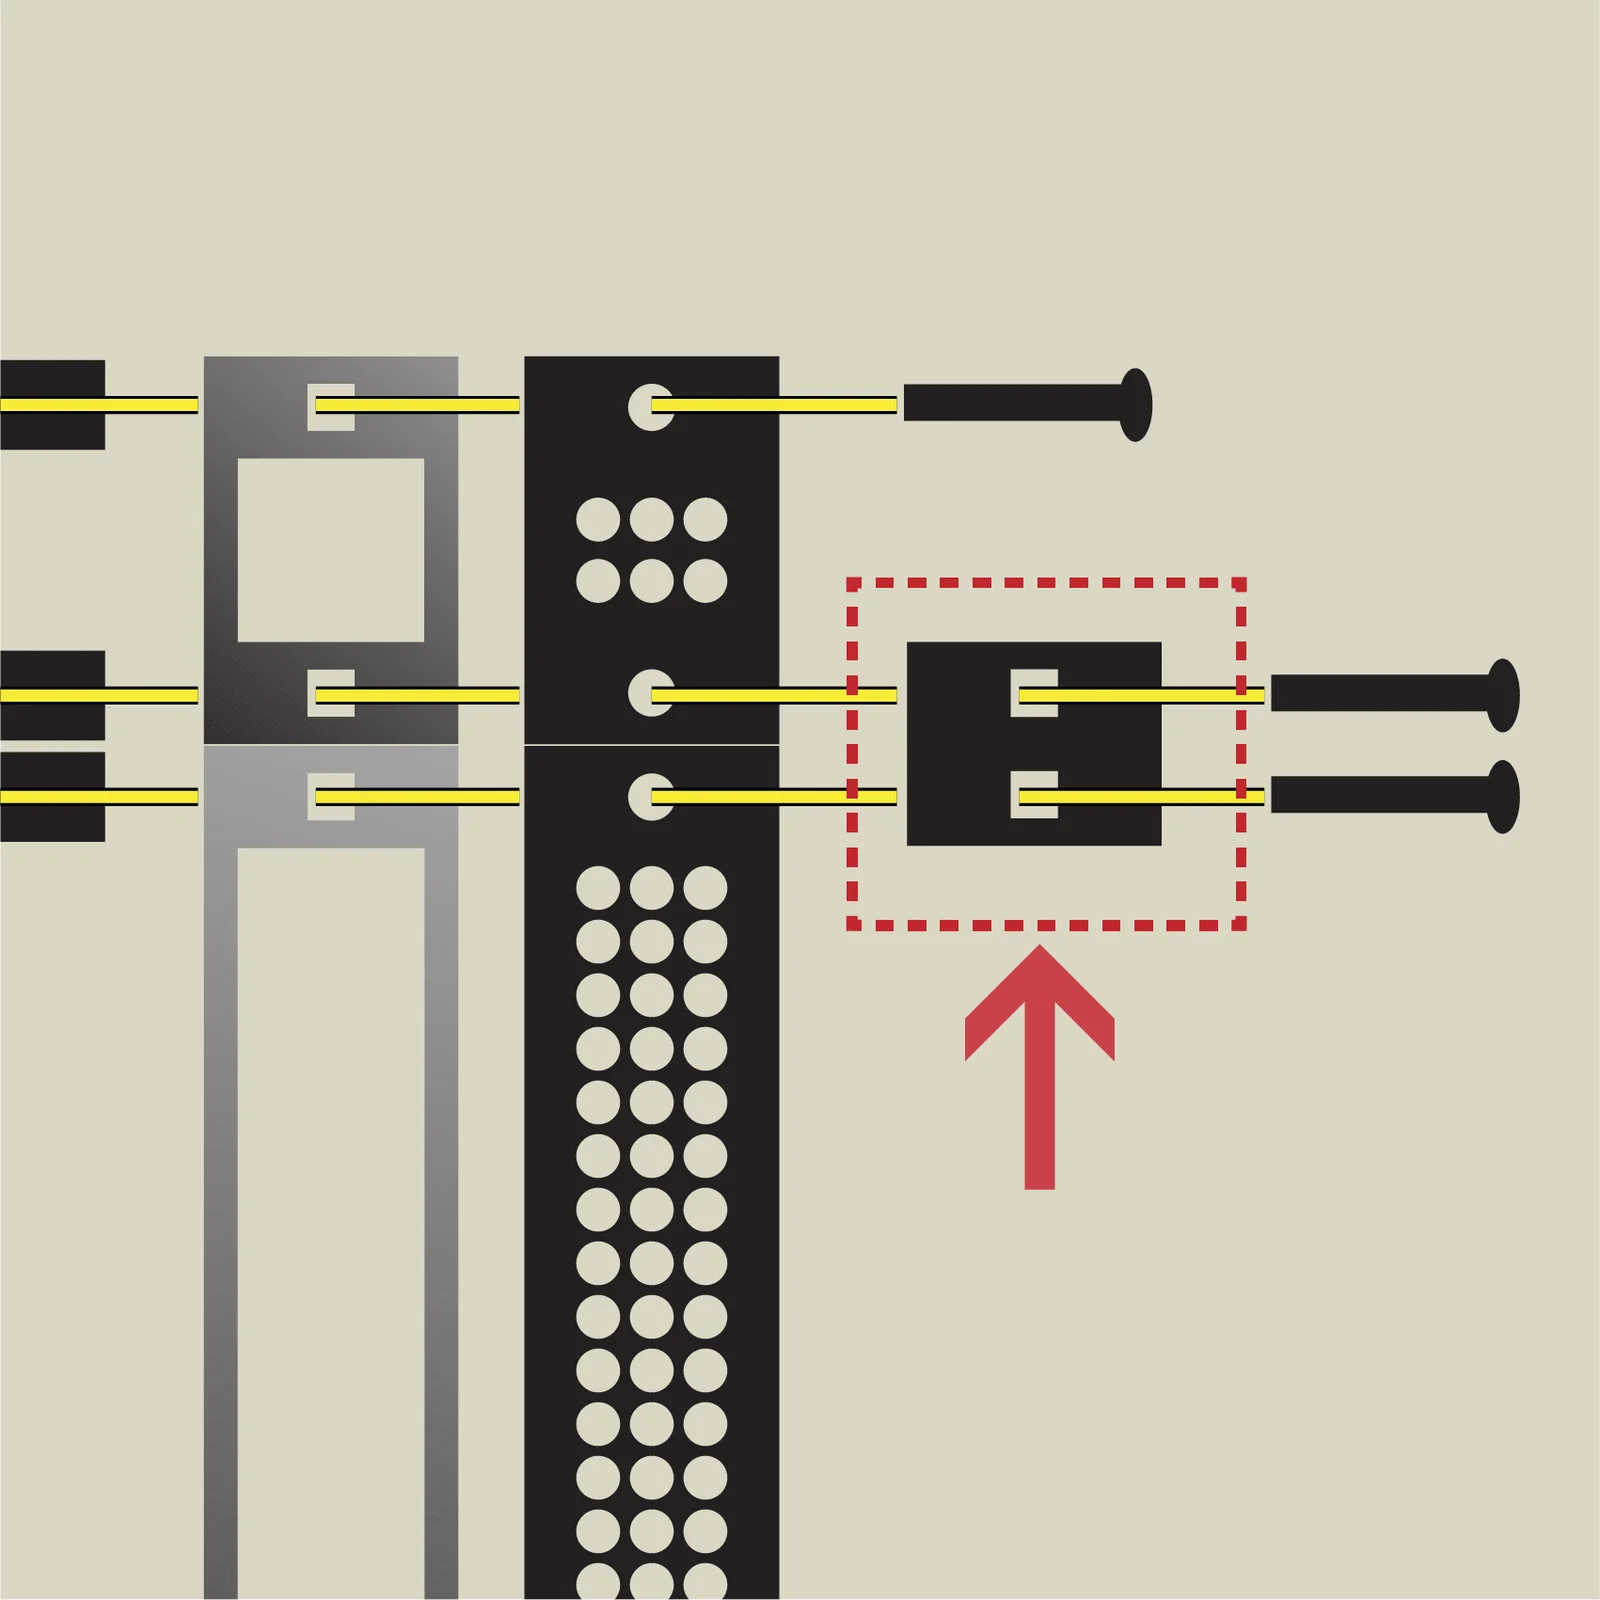
How to Connect Mounting Panels to Rails
The connection method is the same for all rail types, but there are the following differences:
- Metal version: Use M5 12mm screws (short screws). Before connecting, drive a screw in once to create threads, then remove it. This creates the screw threads. Then reattach with the mounting panel sandwiched in between.
- Lite / Nuts / Dual versions: Use M5 40mm screws (very long screws) for fastening. No thread creation is needed.
Start by loosely tightening the screws, then insert a module or blank panel between the rails to test the fit, confirm the spacing is correct, and then tighten the screws firmly.
For the Metal version’s thread creation step, it requires considerable force since you are creating threads in a tight metal area. If you feel unsure, you can refer to the beginning of the following zudo-block series assembly video, which shows this process.
The Lite, Nuts, and Dual versions use longer screws because the material is plastic and lacks the rigidity of metal. The 40mm screws provide a firm hold. However, if you continue tightening beyond what is already sufficiently tight, the rail itself may crack, so a moderate level of tightness is fine. Also, at the start of tightening, as mentioned in the previous step, leverage can apply strong force to the rail, so please be especially careful to drive the screw in straight.
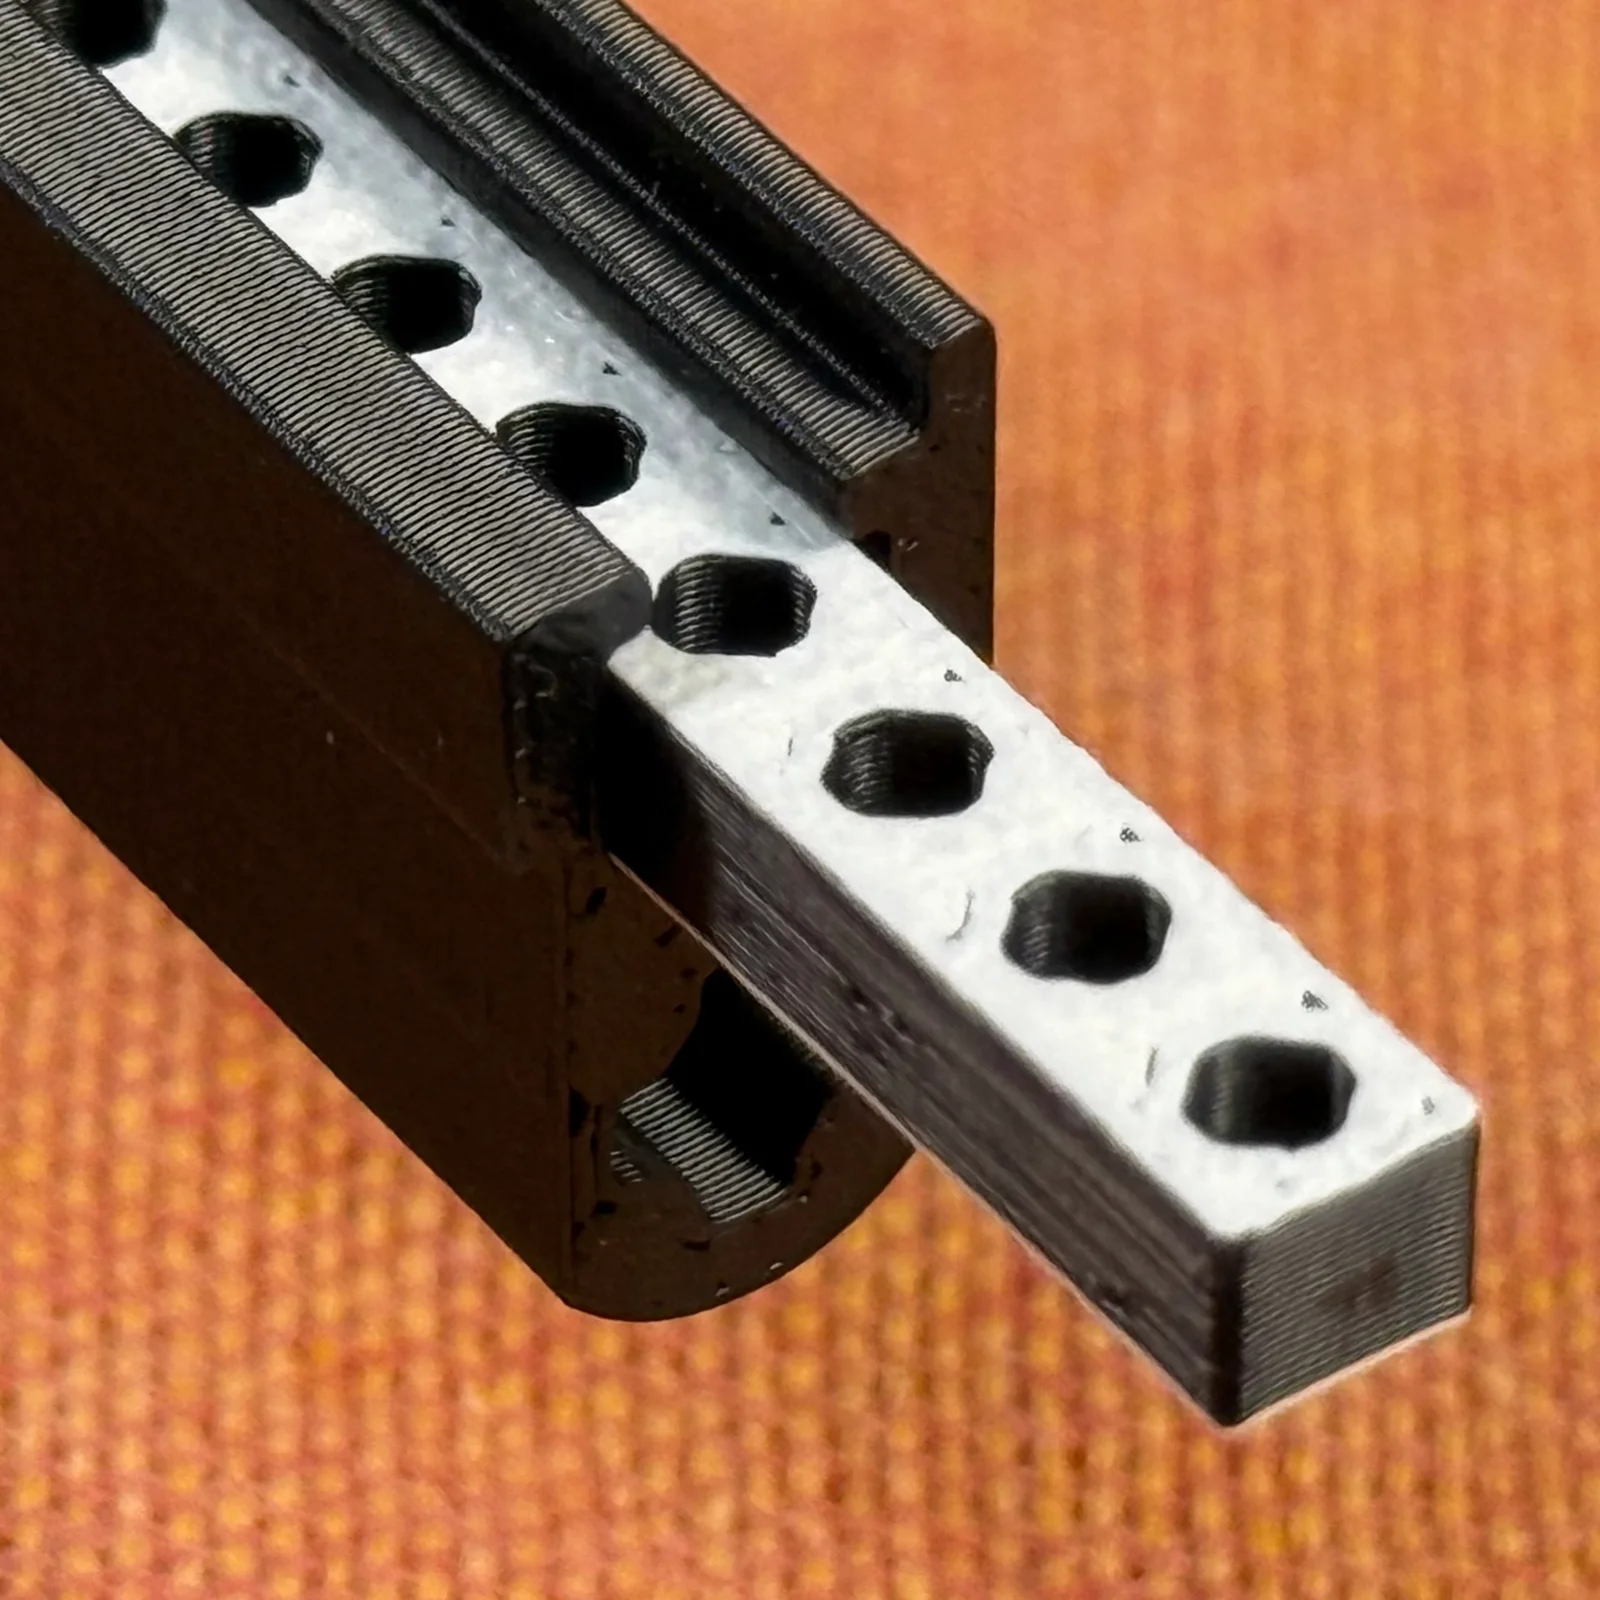
Nuts Rail Slide Nut Packing Method
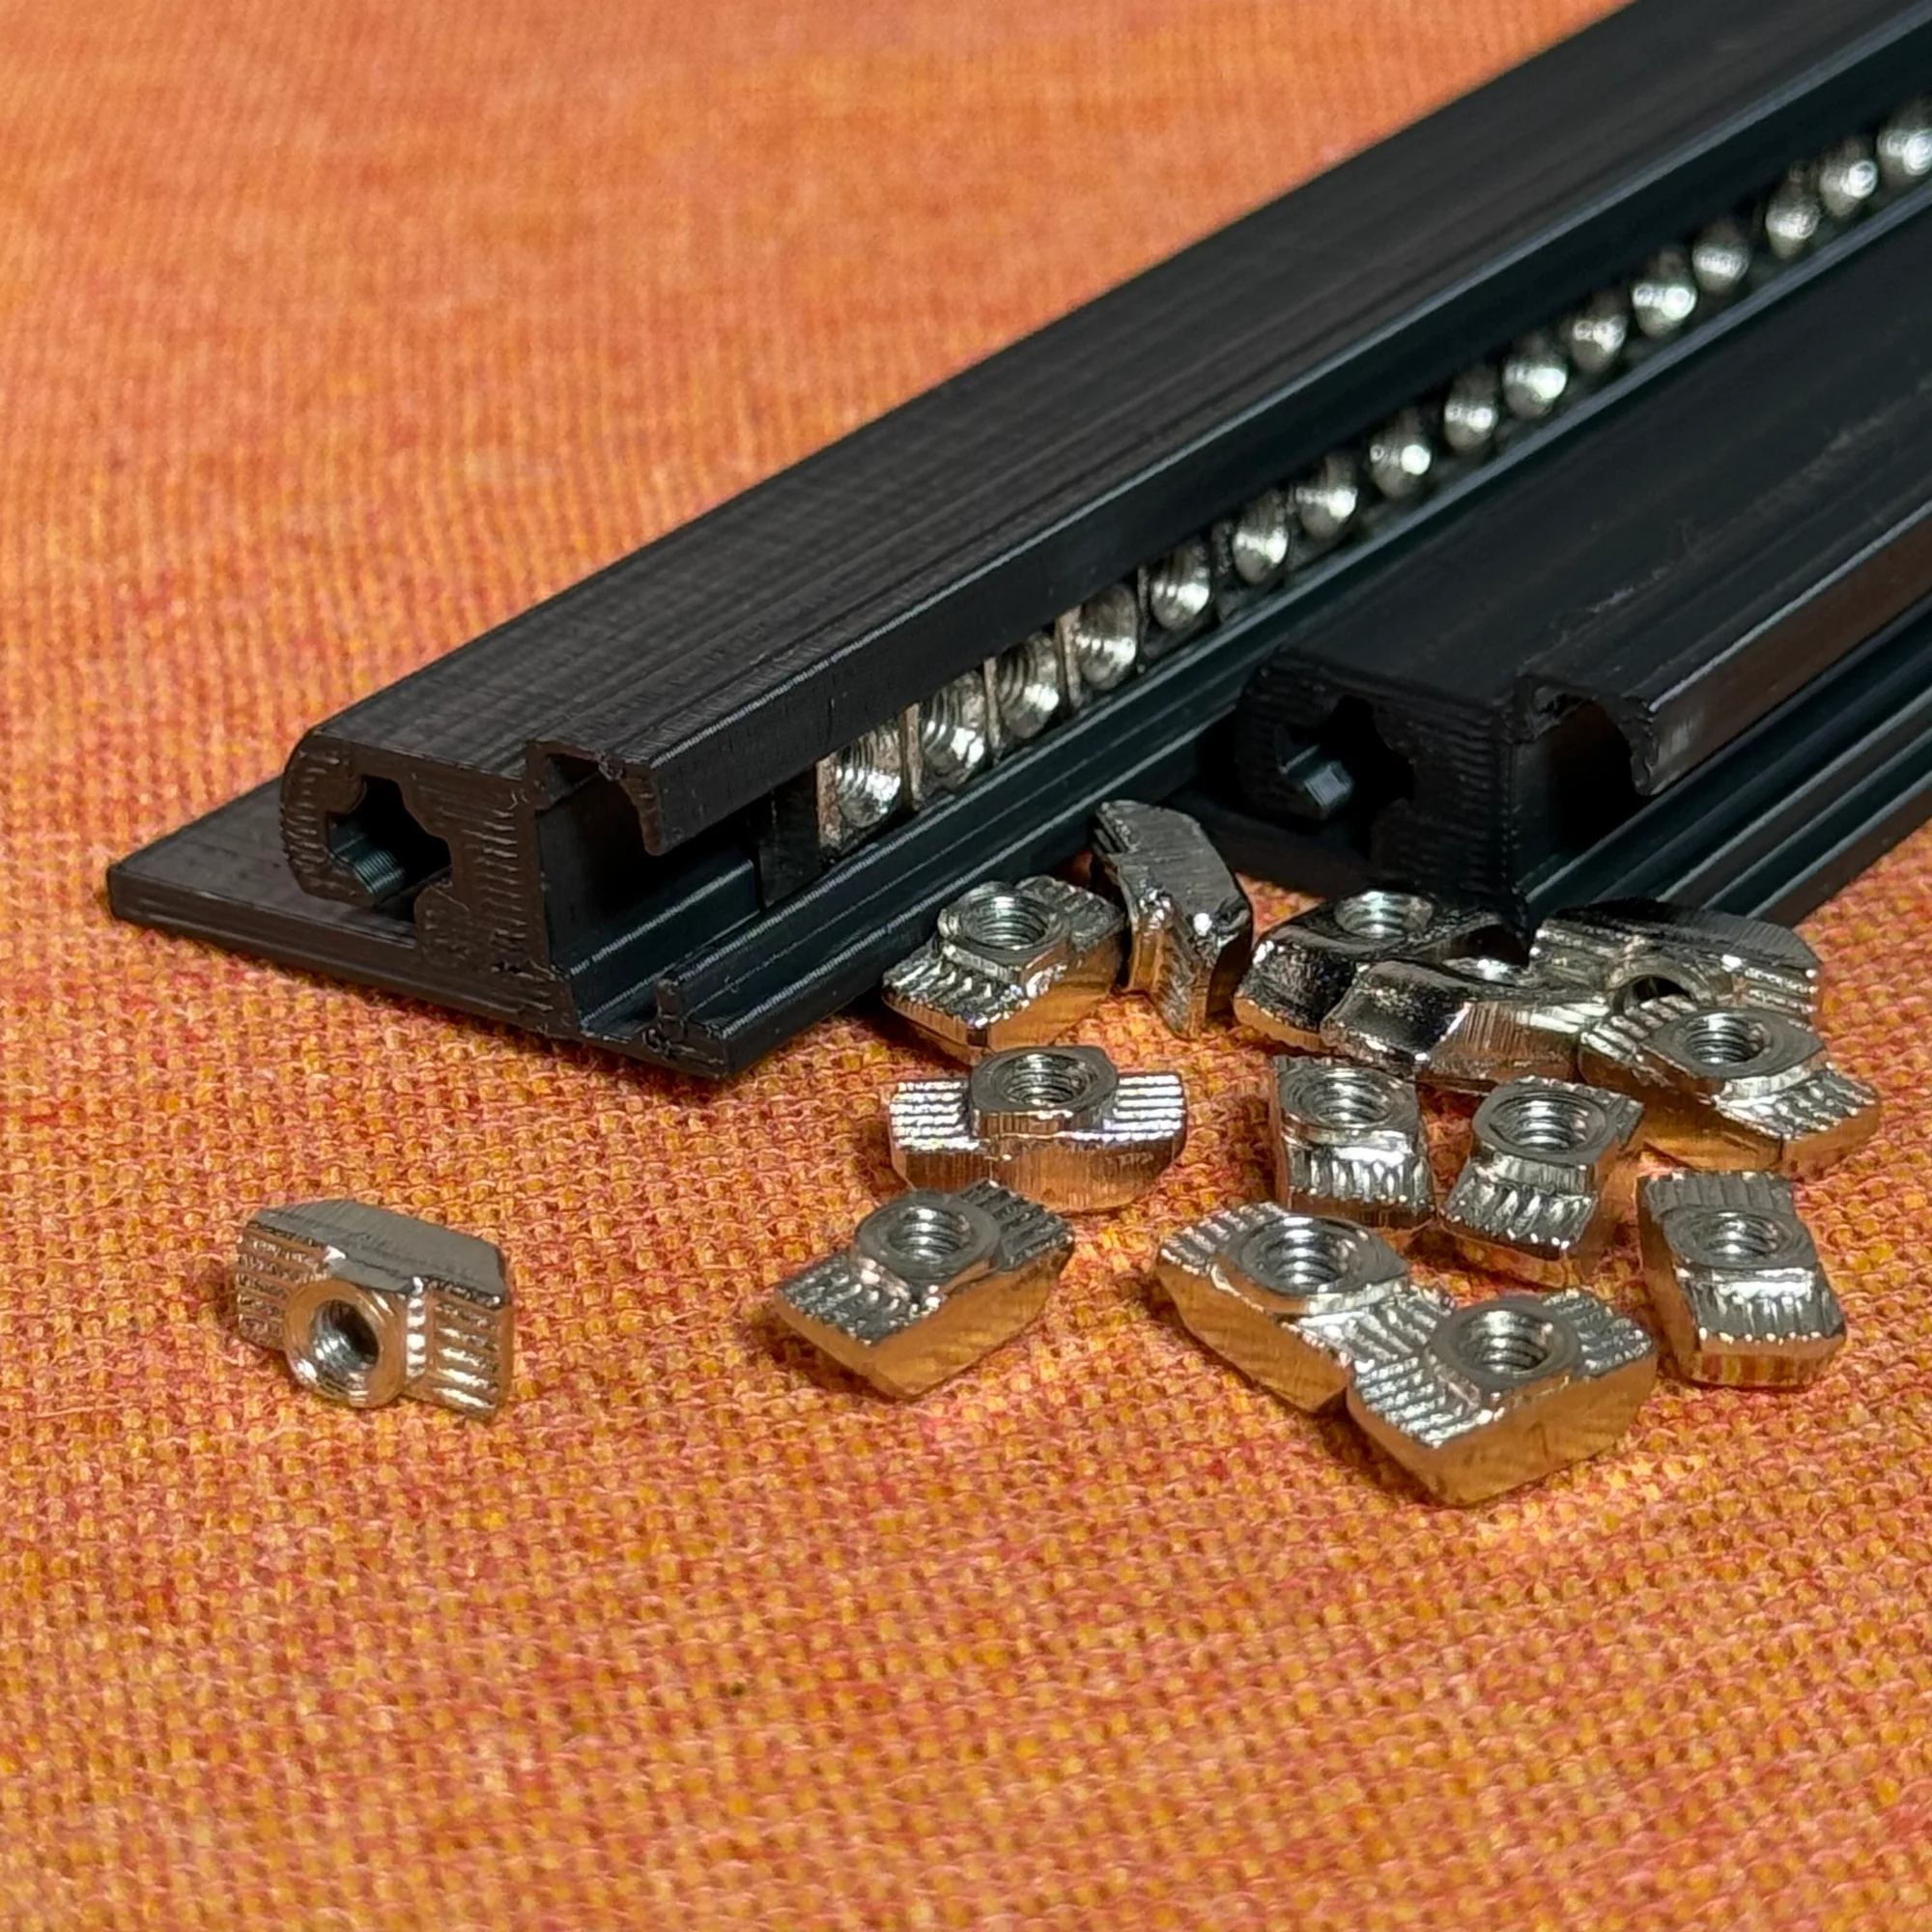
The Nuts rail comes with many small slide nuts instead of bar nuts — one per HP. You need to pack these into the rail.
Each slide nut is approximately 5mm wide, which is roughly the same as 1HP. So for a 40HP rail, you need to pack in 40 slide nuts, and for a 60HP rail, 60 slide nuts.
While packing the slide nuts, some may turn sideways. If packed sideways, all the nuts won’t fit, so in that case, remove the nuts, straighten them, and repack.
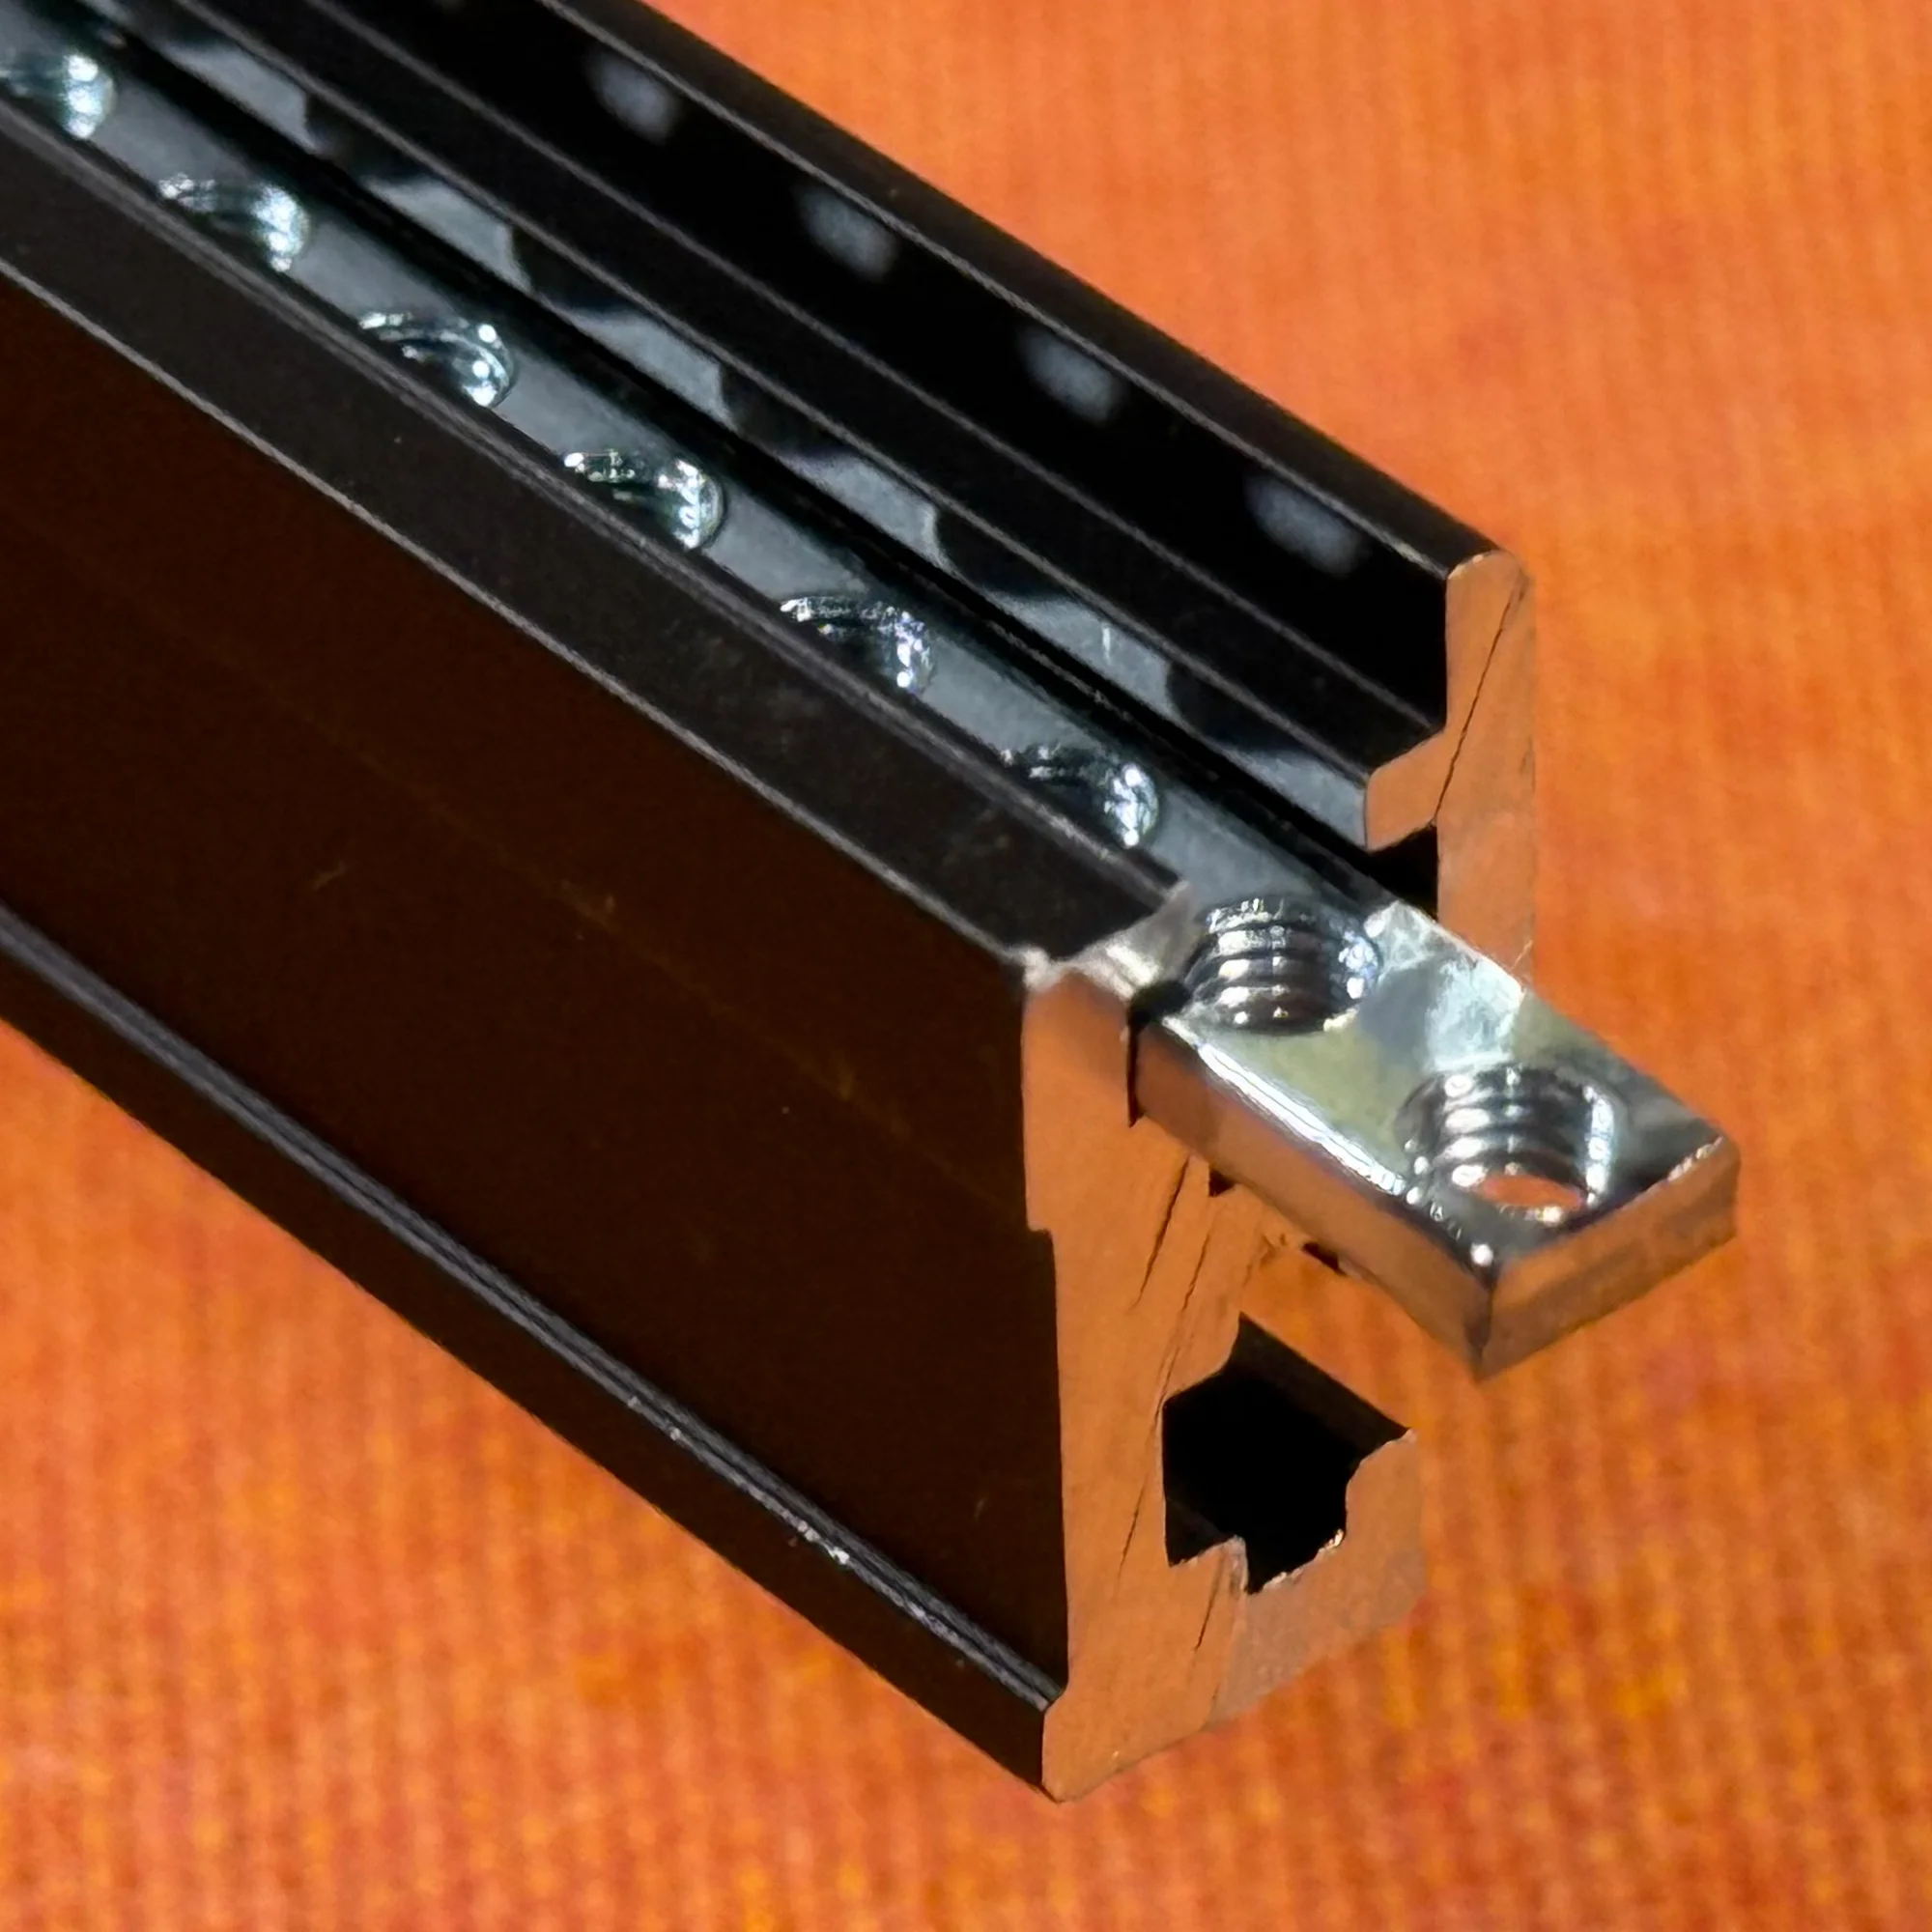
A helpful tip: tilt the rail at an angle and insert the slide nuts one by one from the lower end. The weight of the inserted nuts will help hold the next one in place, reducing the chance of them turning sideways.
Once inserted, the nuts will fall out if you tilt the rail, so it’s smoother to do this packing work with one mounting aluminum frame already attached to one side.
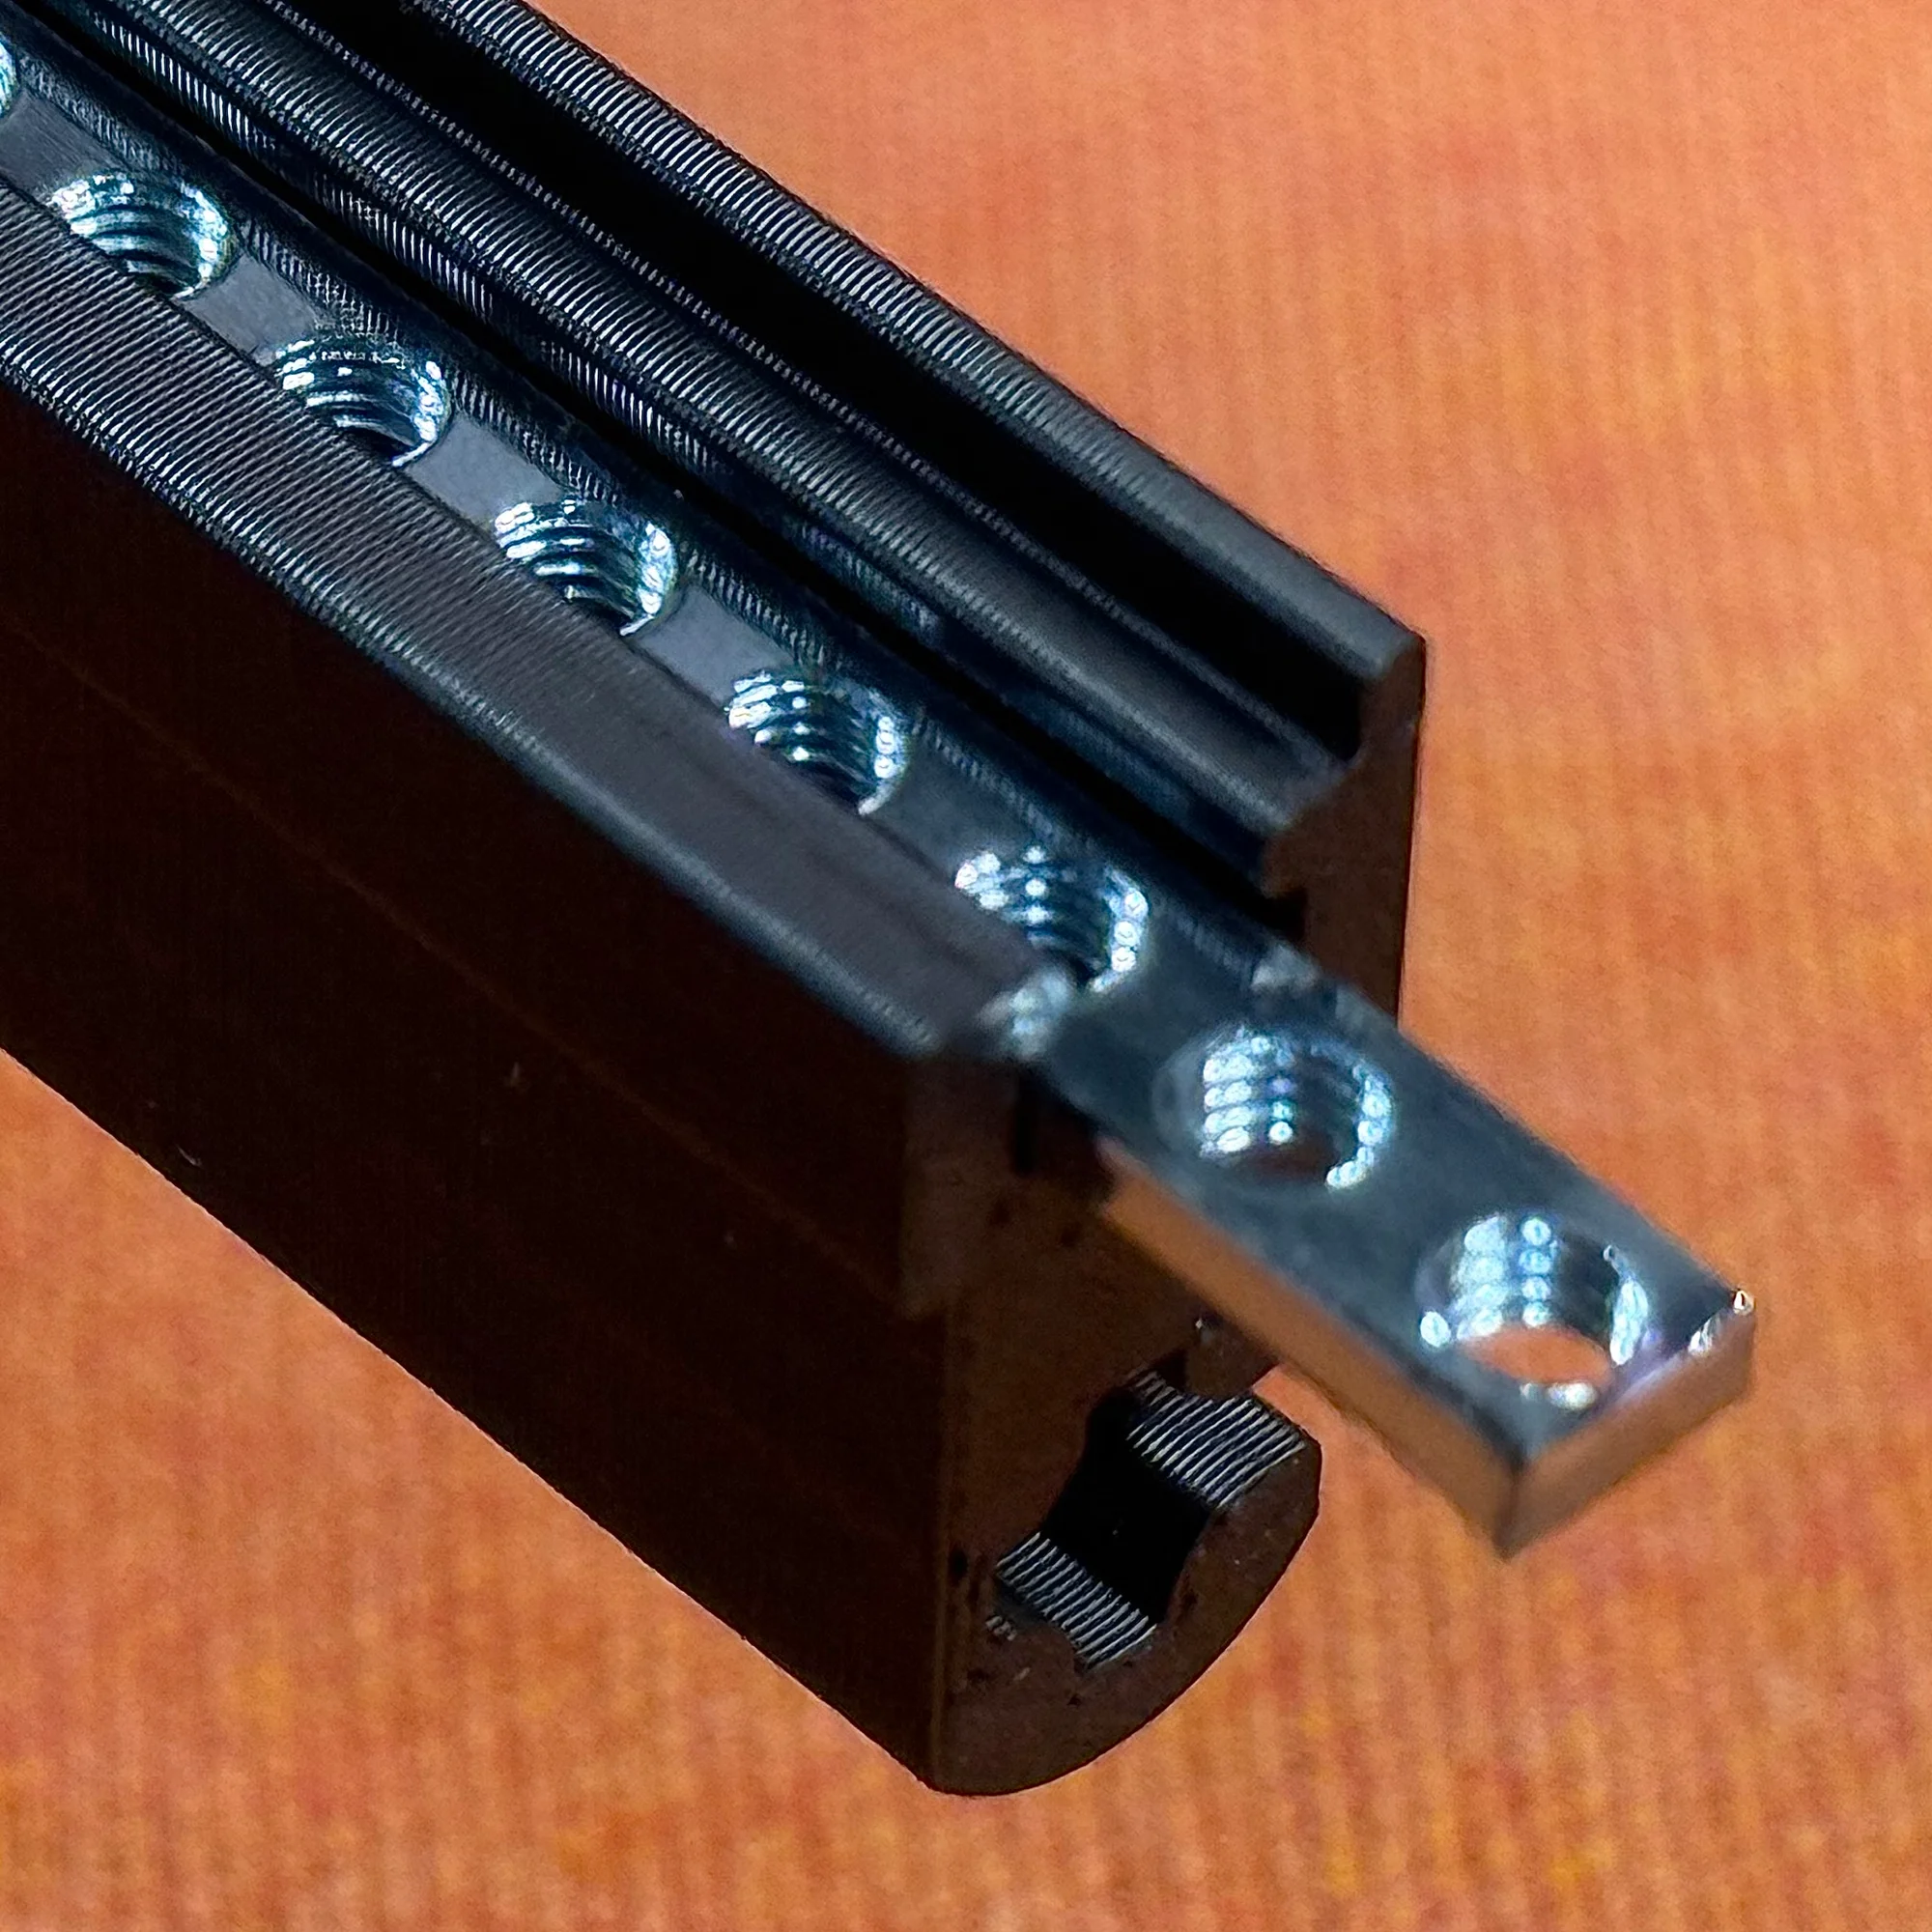
For both 40HP and 60HP, when fully packed, there should be room for roughly one extra nut. Once you’ve packed approximately that many, count them to confirm you have 60 (or 40) nuts.
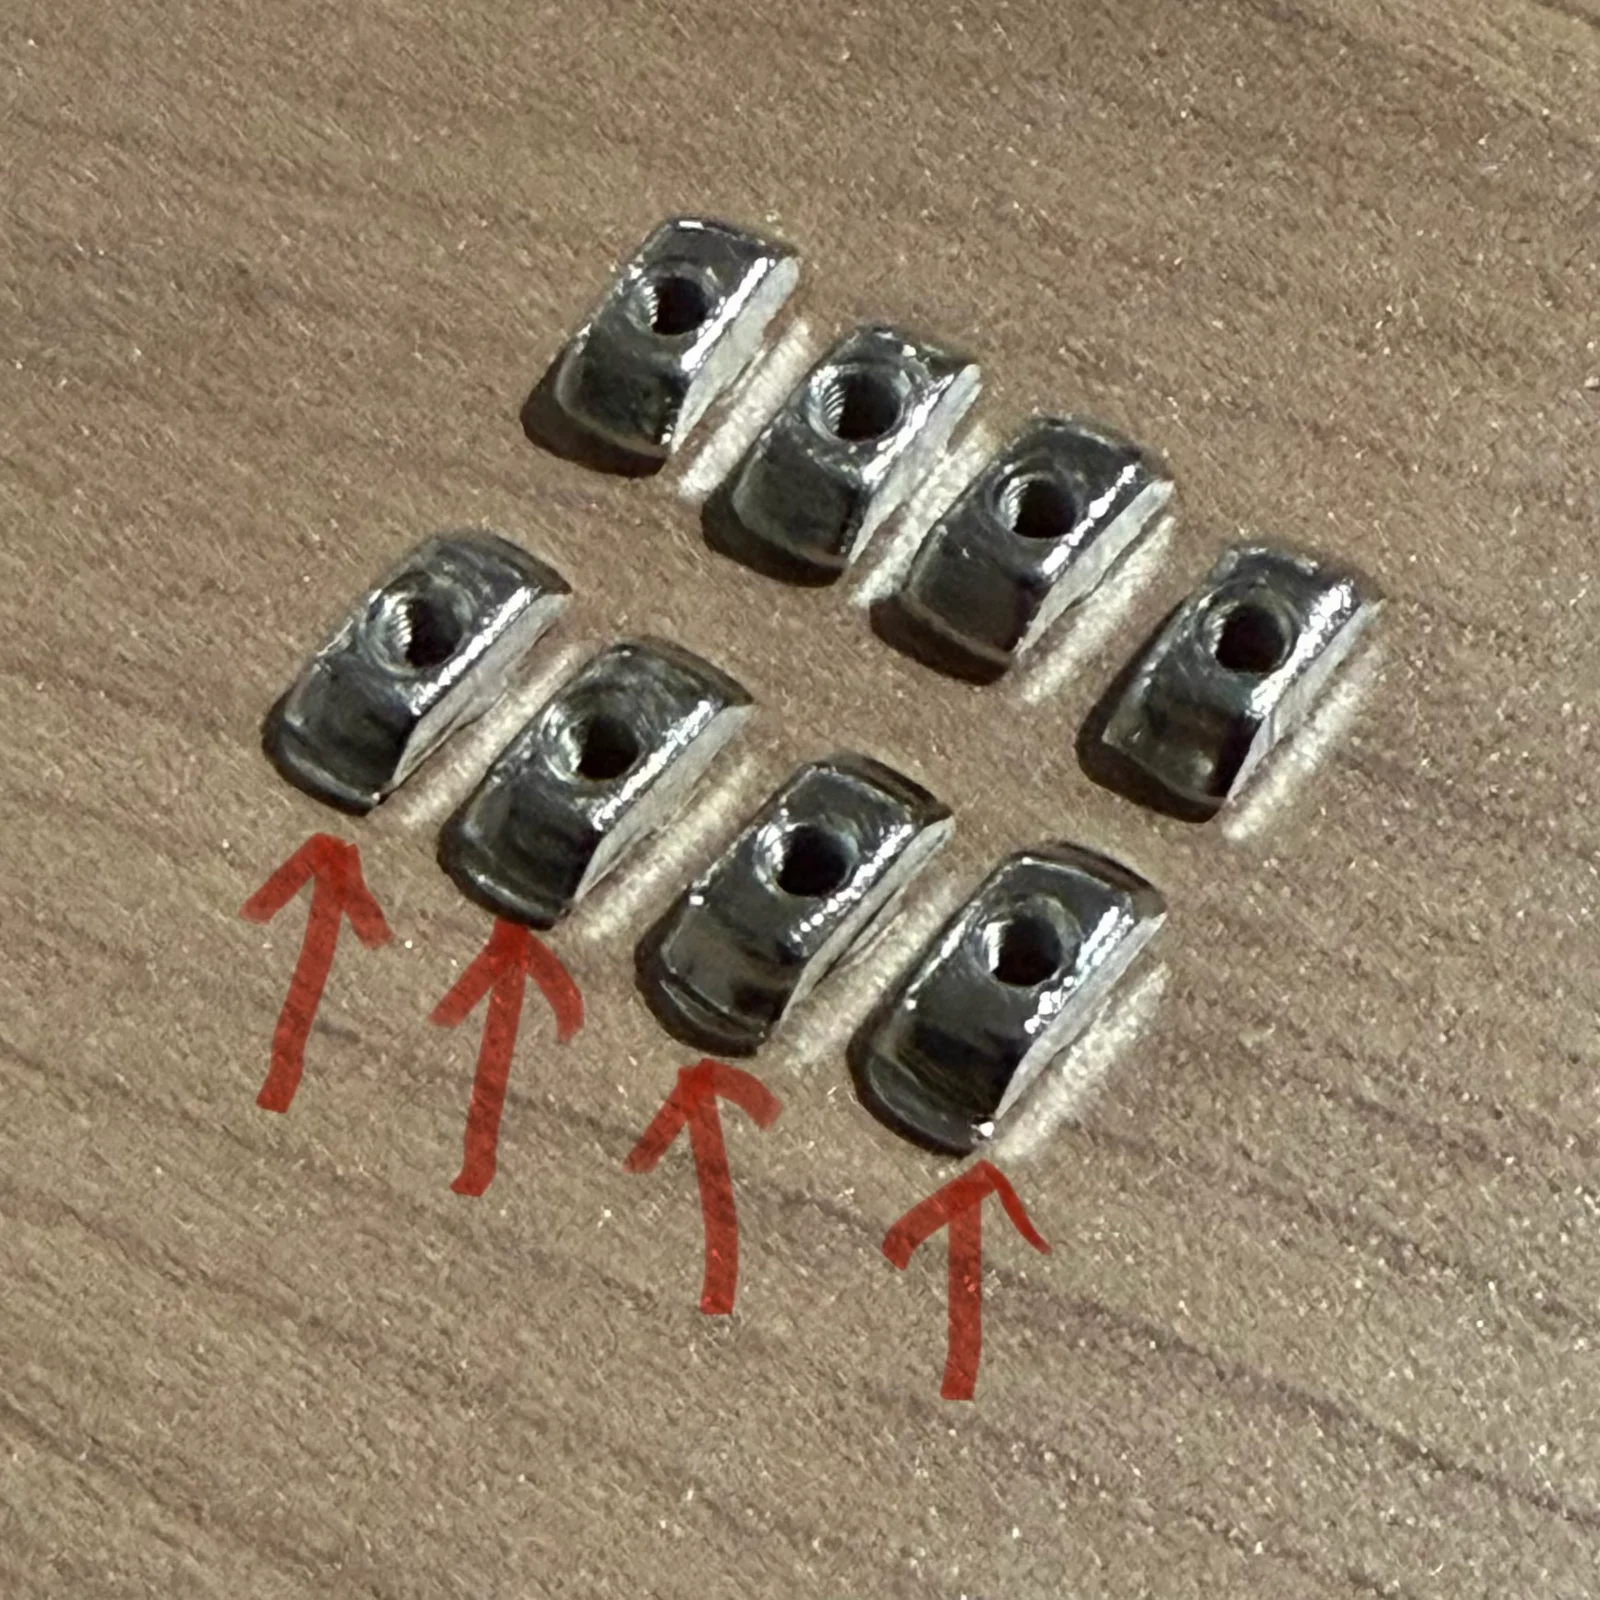
These nuts are mass-produced tiny components, so there is some variation in shape. Because of this, some slightly oversized nuts may be mixed in, which can be difficult to insert into the rail. Specifically, these are nuts with a small bit of excess metal protruding from the edge, as shown in the photo.
You can force them in since the rail is plastic, but if a poorly shaped nut ends up near the beginning or middle, subsequent nuts become harder to insert. This can lead to applying excessive force, which may cause rail breakage.
When packing the nuts, if you encounter a poorly shaped nut, set it aside or file it down slightly before use. Due to these considerations, we ship the nuts with a generous surplus.
If you purchased a zudo-block series case, please continue to the following assembly guides:
Mounting Rails to an Outer Box
If you purchased the zudo-rail as a standalone product and are planning to build your own modular synth case, you’ll need to figure out how to mount the rails to an outer box. This isn’t something the rail alone can solve, but for reference, this product includes mounting screws, nuts, and spacers sized for zudo-block series cases as a bonus, with the following quantities per set:
- M5 Flat Head Screw 14mm: 4 pieces
- M5 Nylon Lock Nut: 4 pieces
- M5 Spacer 3mm tall: 4 pieces
- M5 Nylon Washer 1mm tall: 4 pieces
For the zudo-block, from the inside, pass the components in this order: screw head, rail mounting panel, 3mm-tall washer, side panel, 1mm-tall washer, nut — using M5 14mm screws. Do this at two points per side. Think of it as placing the 3mm-tall washer in the space between the frame and the side panel.
If you’re building your own case, these dimensions likely won’t match exactly, so please obtain screws of the appropriate size separately.
If the distance between the frame and the box differs, you should be able to get a good fit by changing the 14mm screw and the spacer in between. The specifics are up to you, but we recommend using flat head screws for mounting. Screws with a raised head may interfere with the PCB of modules placed near the edges, so please be aware of this.
If you’re comfortable purchasing from AliExpress, you can choose different length variations on the screw pages linked above at an affordable price.
Frame-to-Frame Connection
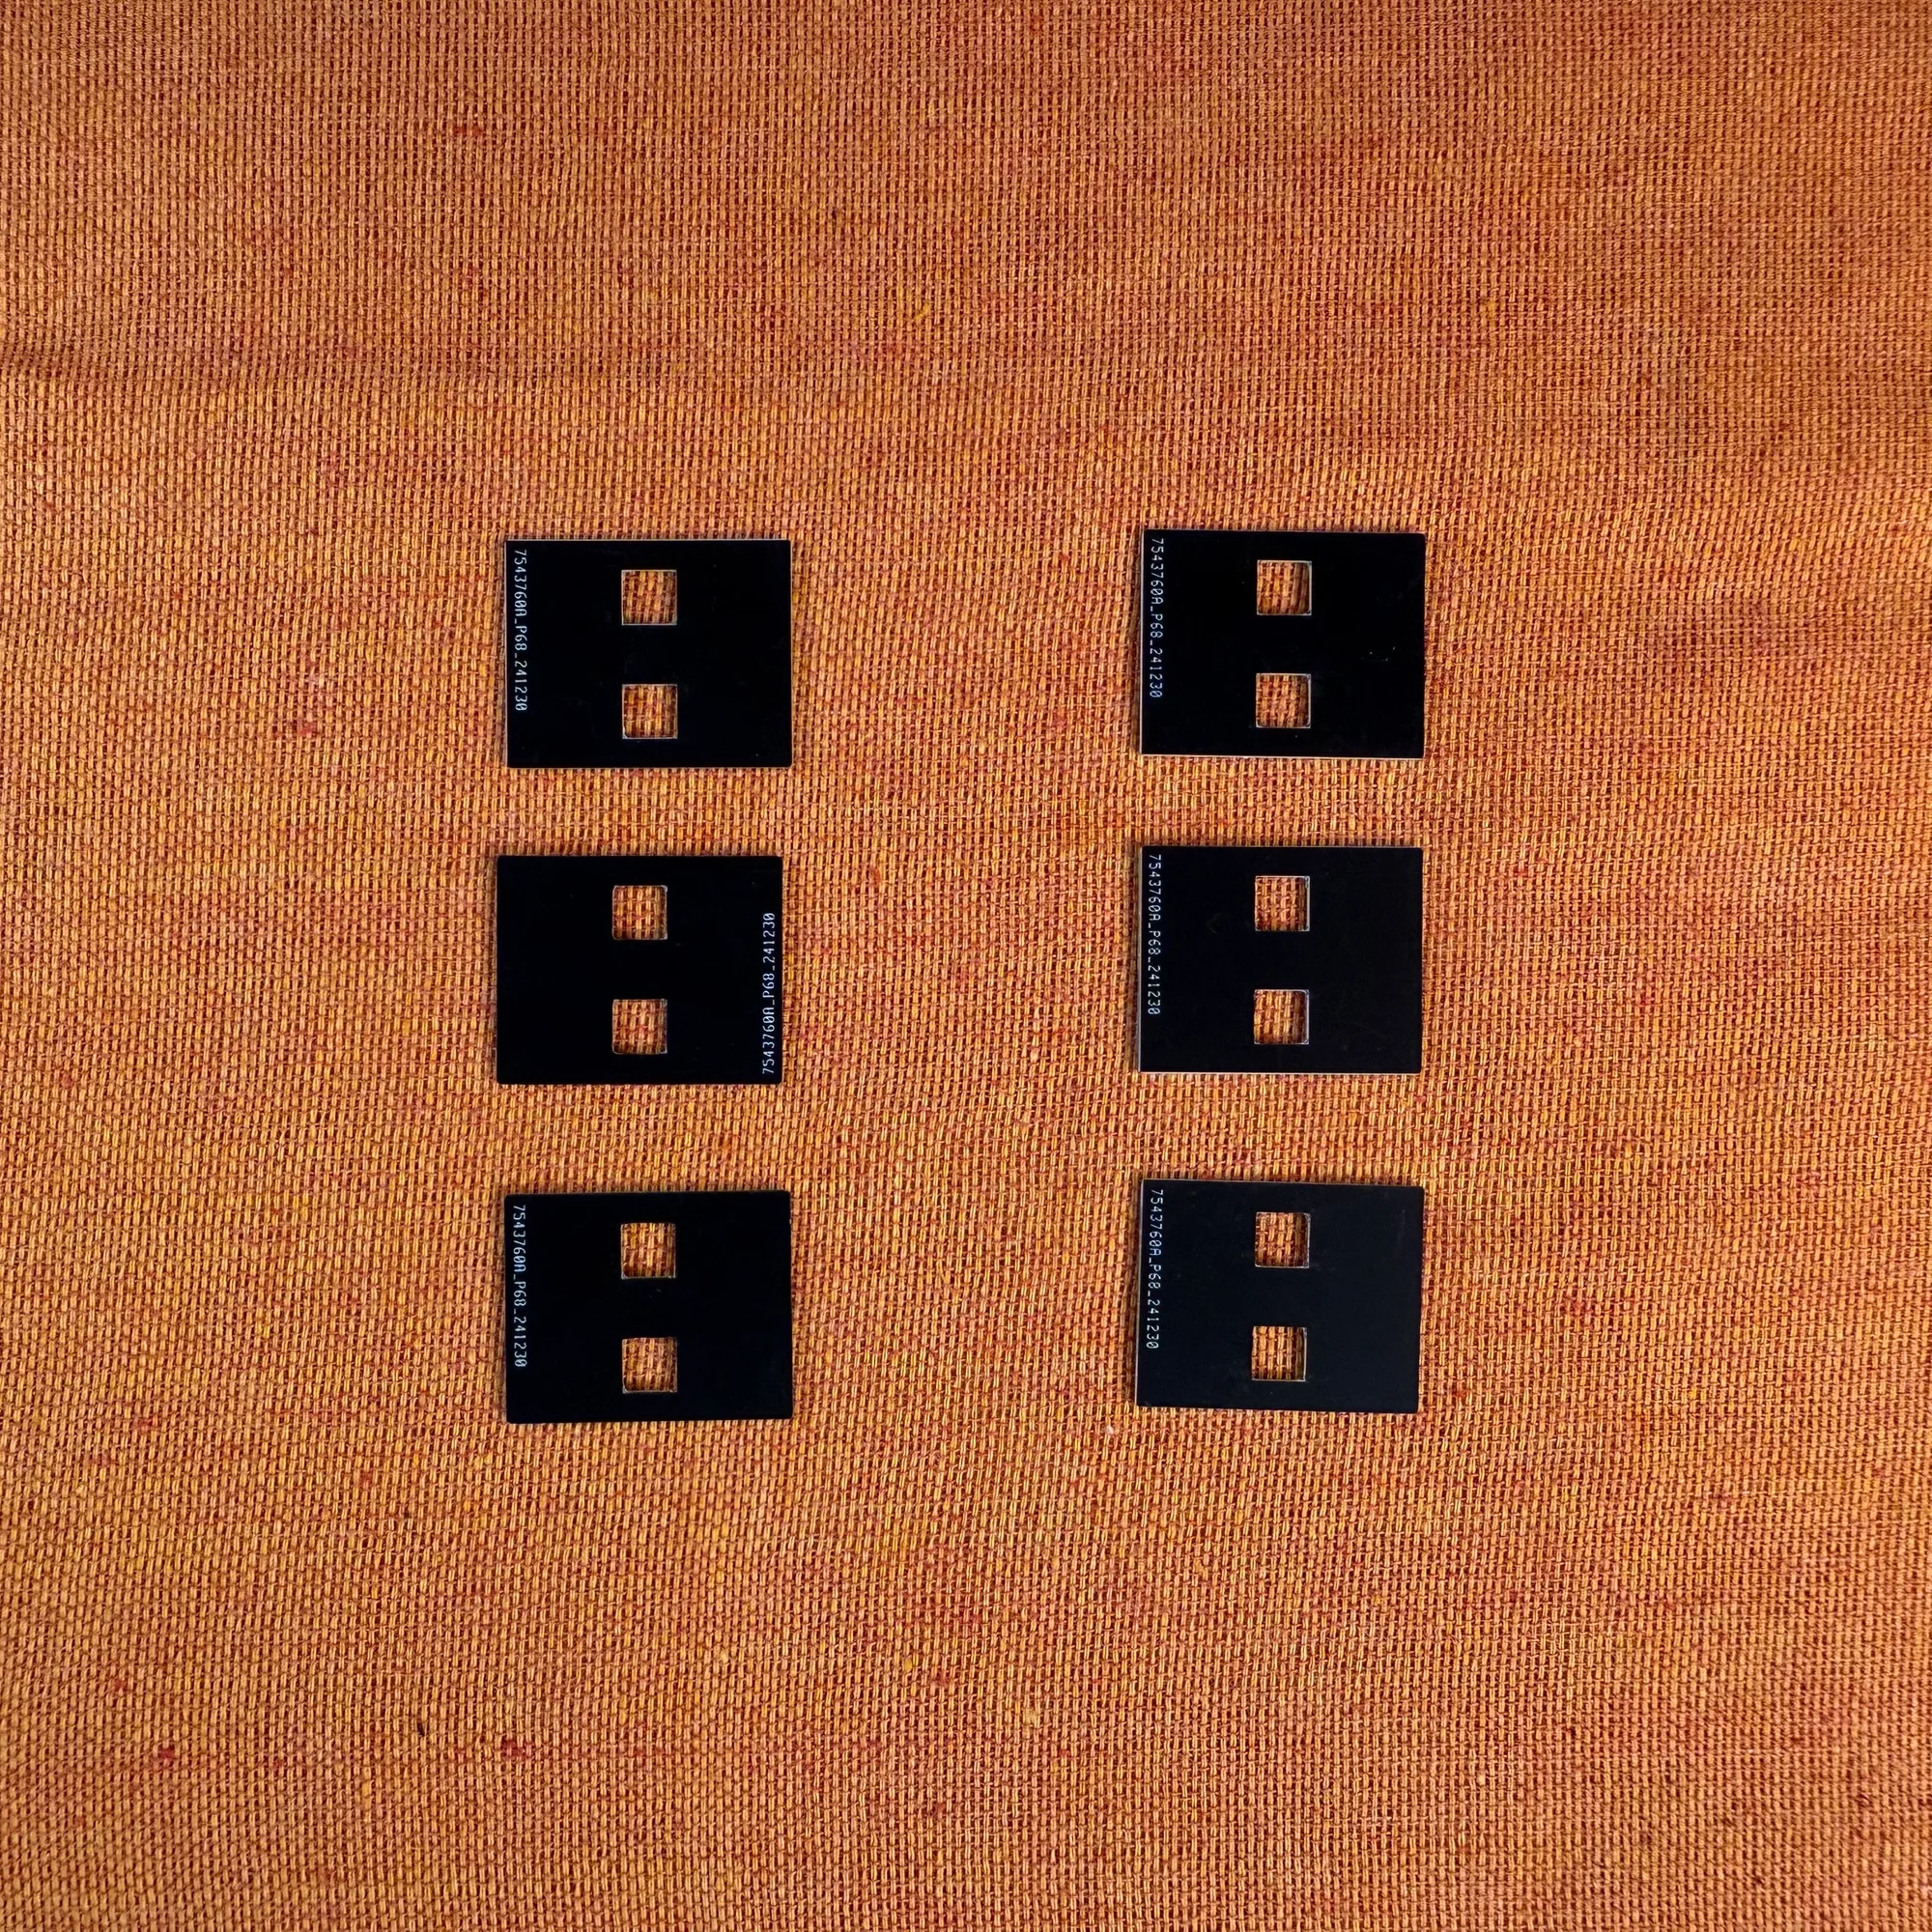
The zudo-rail includes connector panels. These allow you to expand the rail setup vertically. (The width itself — 40HP or 60HP — cannot be changed.)
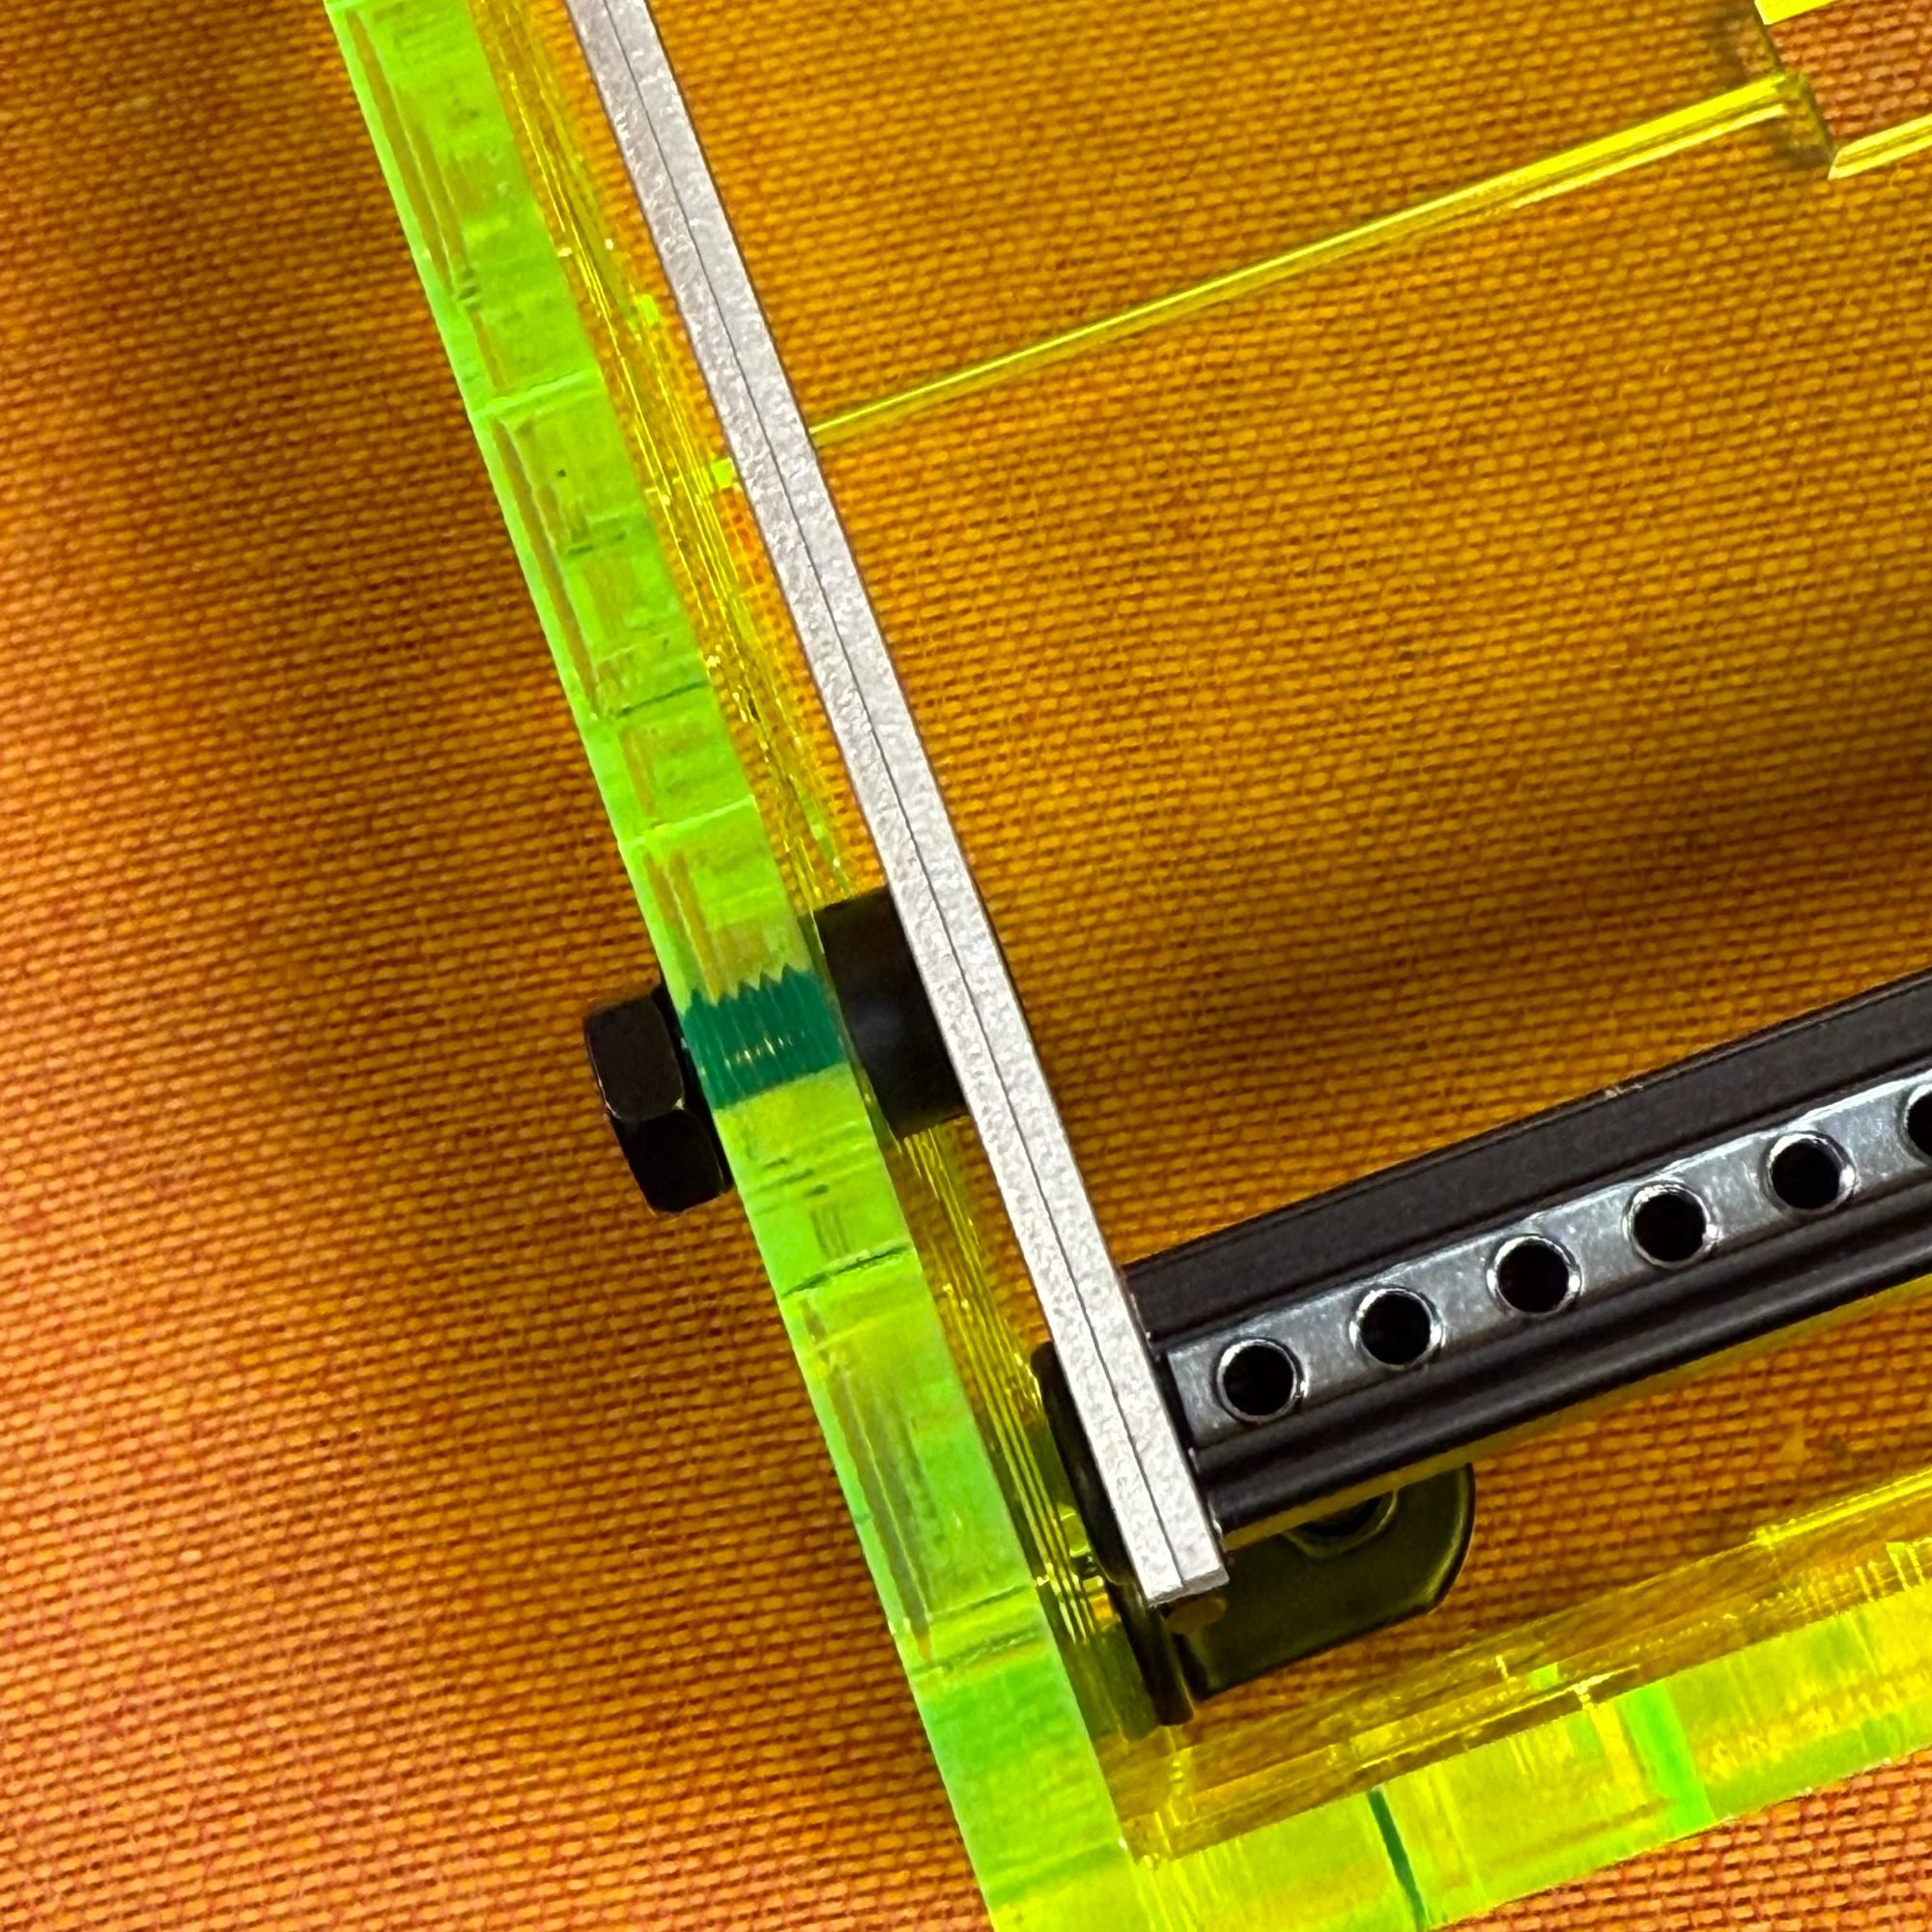
These connector panels are small panels that are sandwiched between rail frames, as shown below.

Using these panels is simple. When using a single set without connection, you fasten the rails and side panels with screws. When you want to connect frame sets together, add the connector panel on the outermost position and fasten with screws.
Each set includes enough connector panels to connect all sets, plus 4 extra. The number of connector panels included per set is as follows:
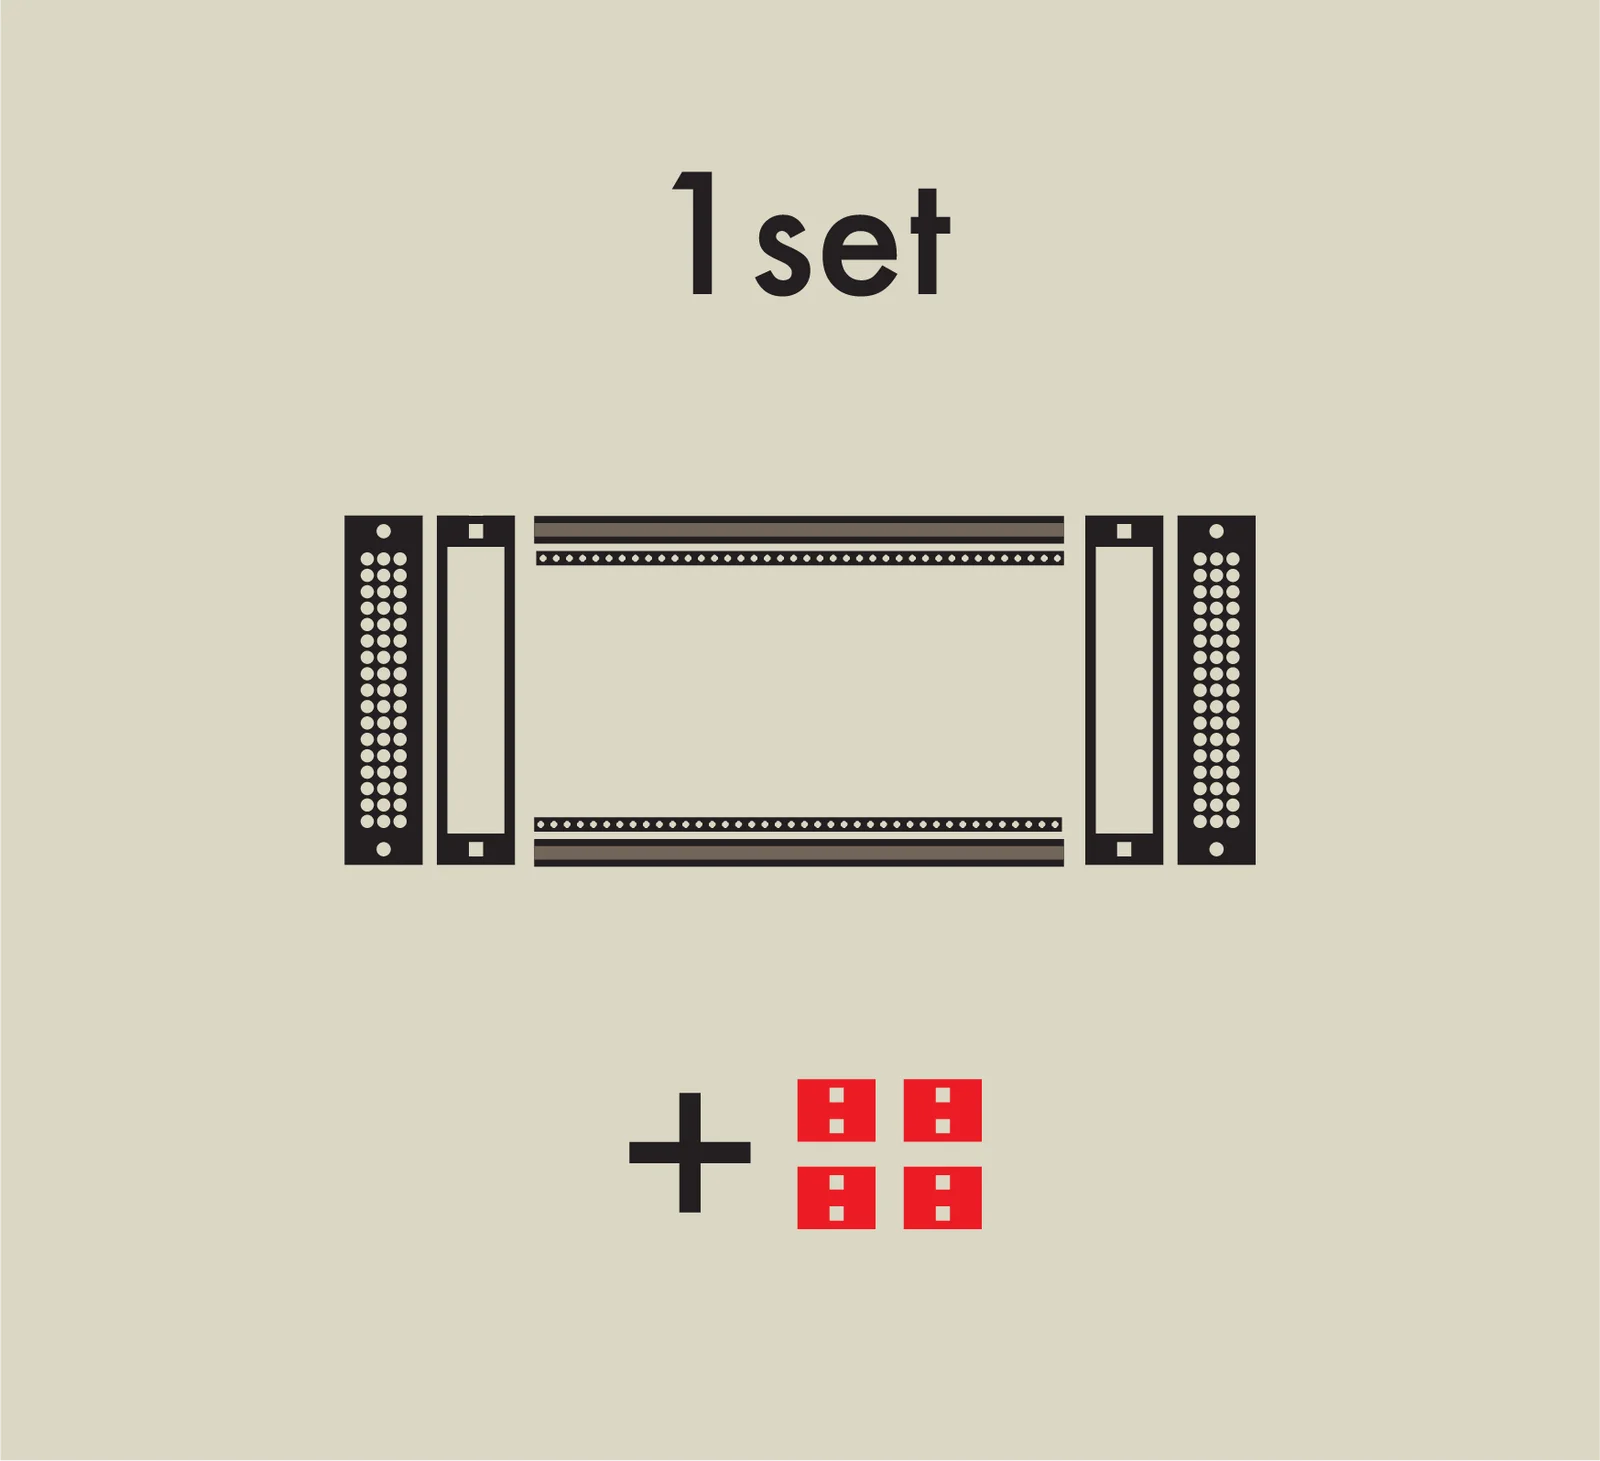
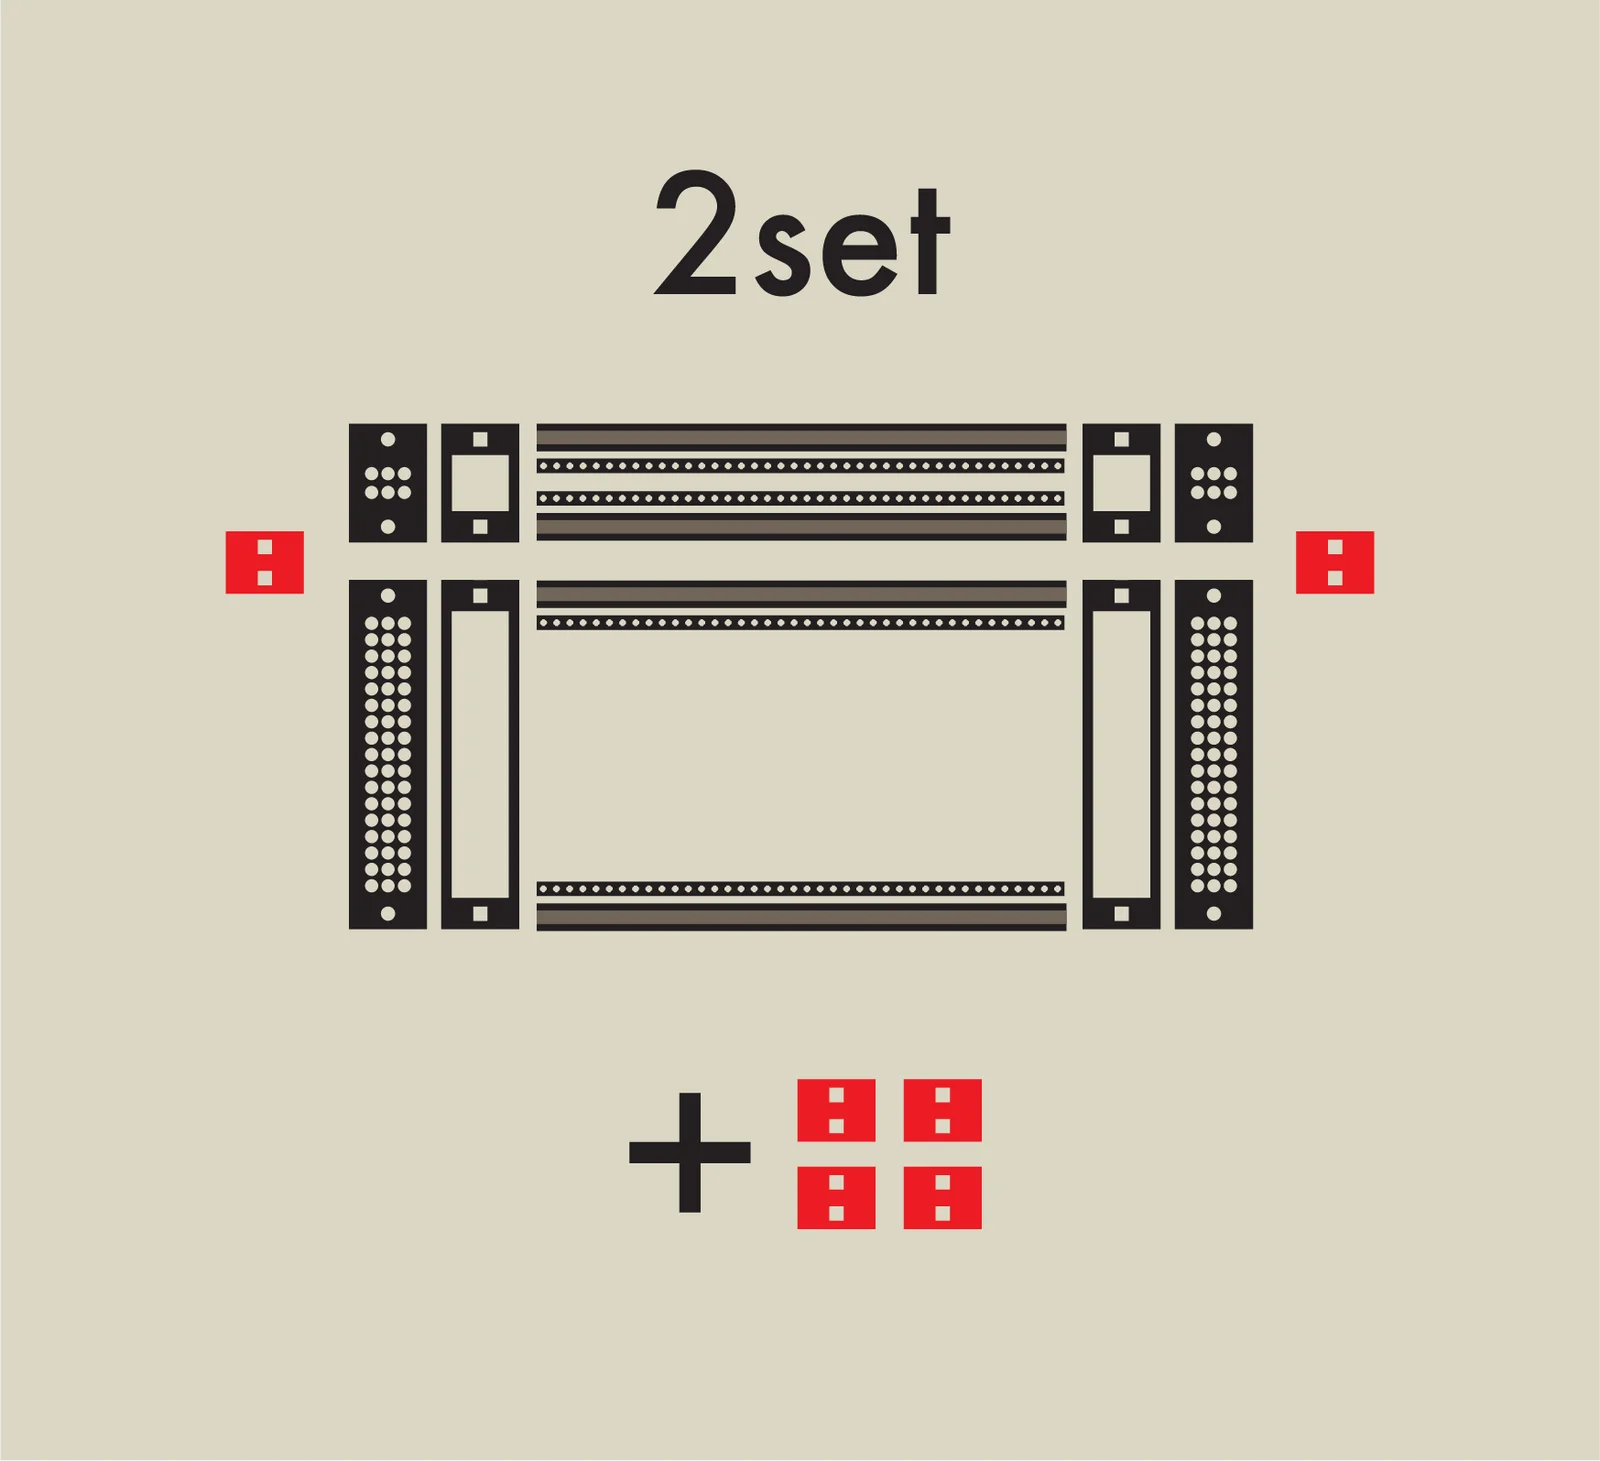
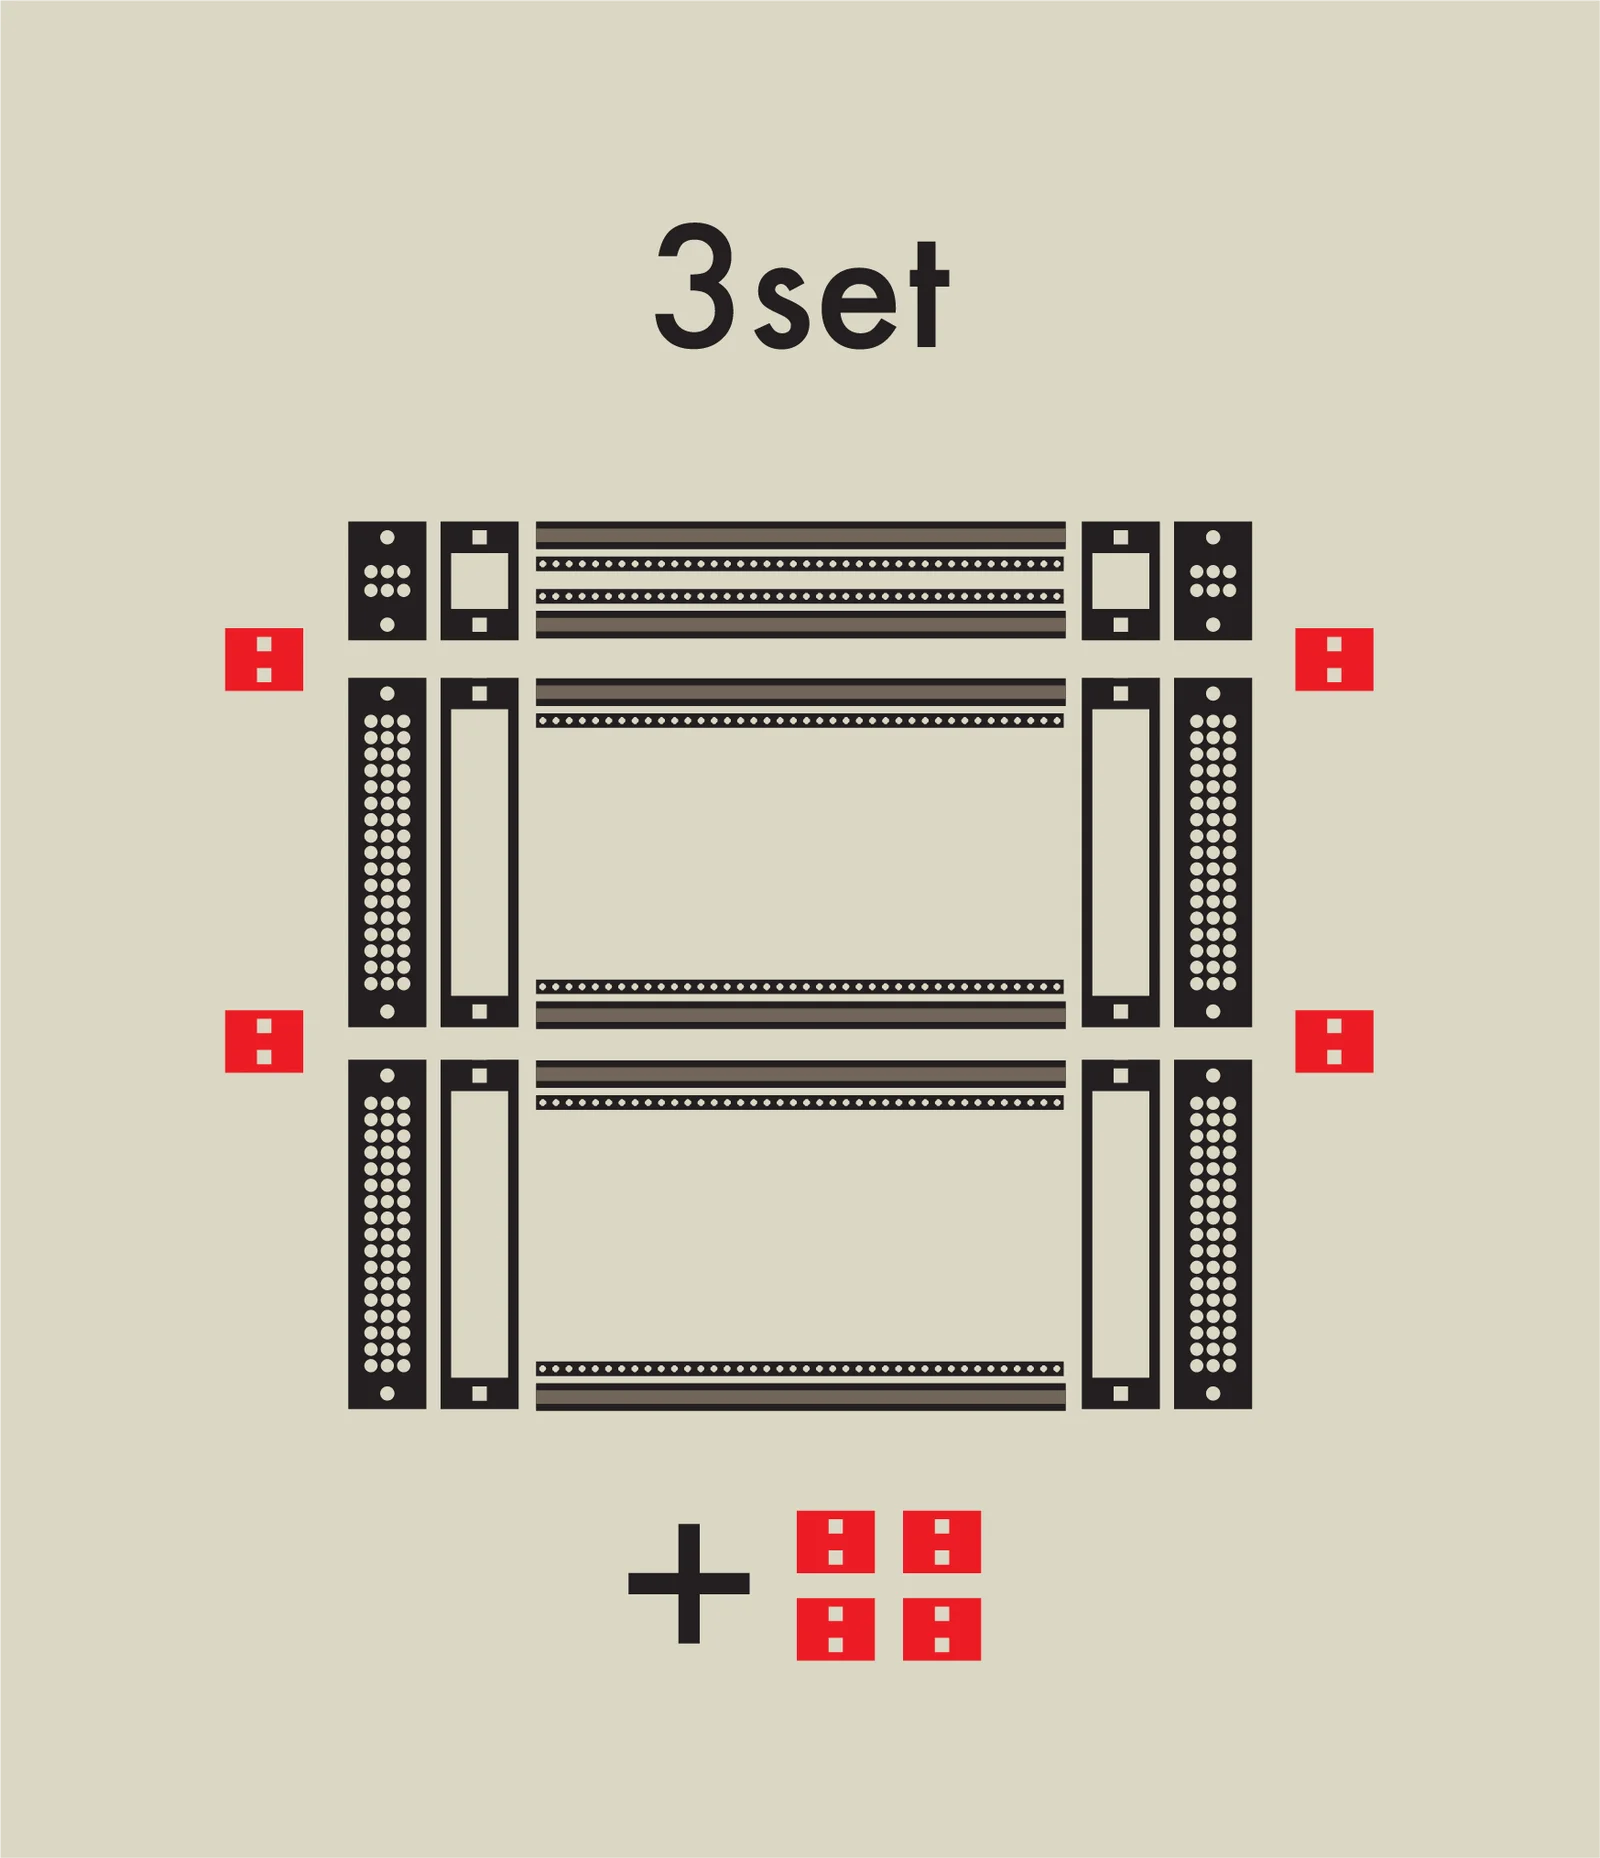

The extra 4 panels are included for customers who already own a zudo-block series case and want to add a zudo-rail to expand it.
Expanding the zudo-block
As mentioned above, the zudo-rail can also be used to expand zudo-block series cases.
Here are examples of:
- Two zudo-block-40 units + a 1U 40HP zudo-rail
- Two zudo-block-60 units + a 1U 60HP zudo-rail
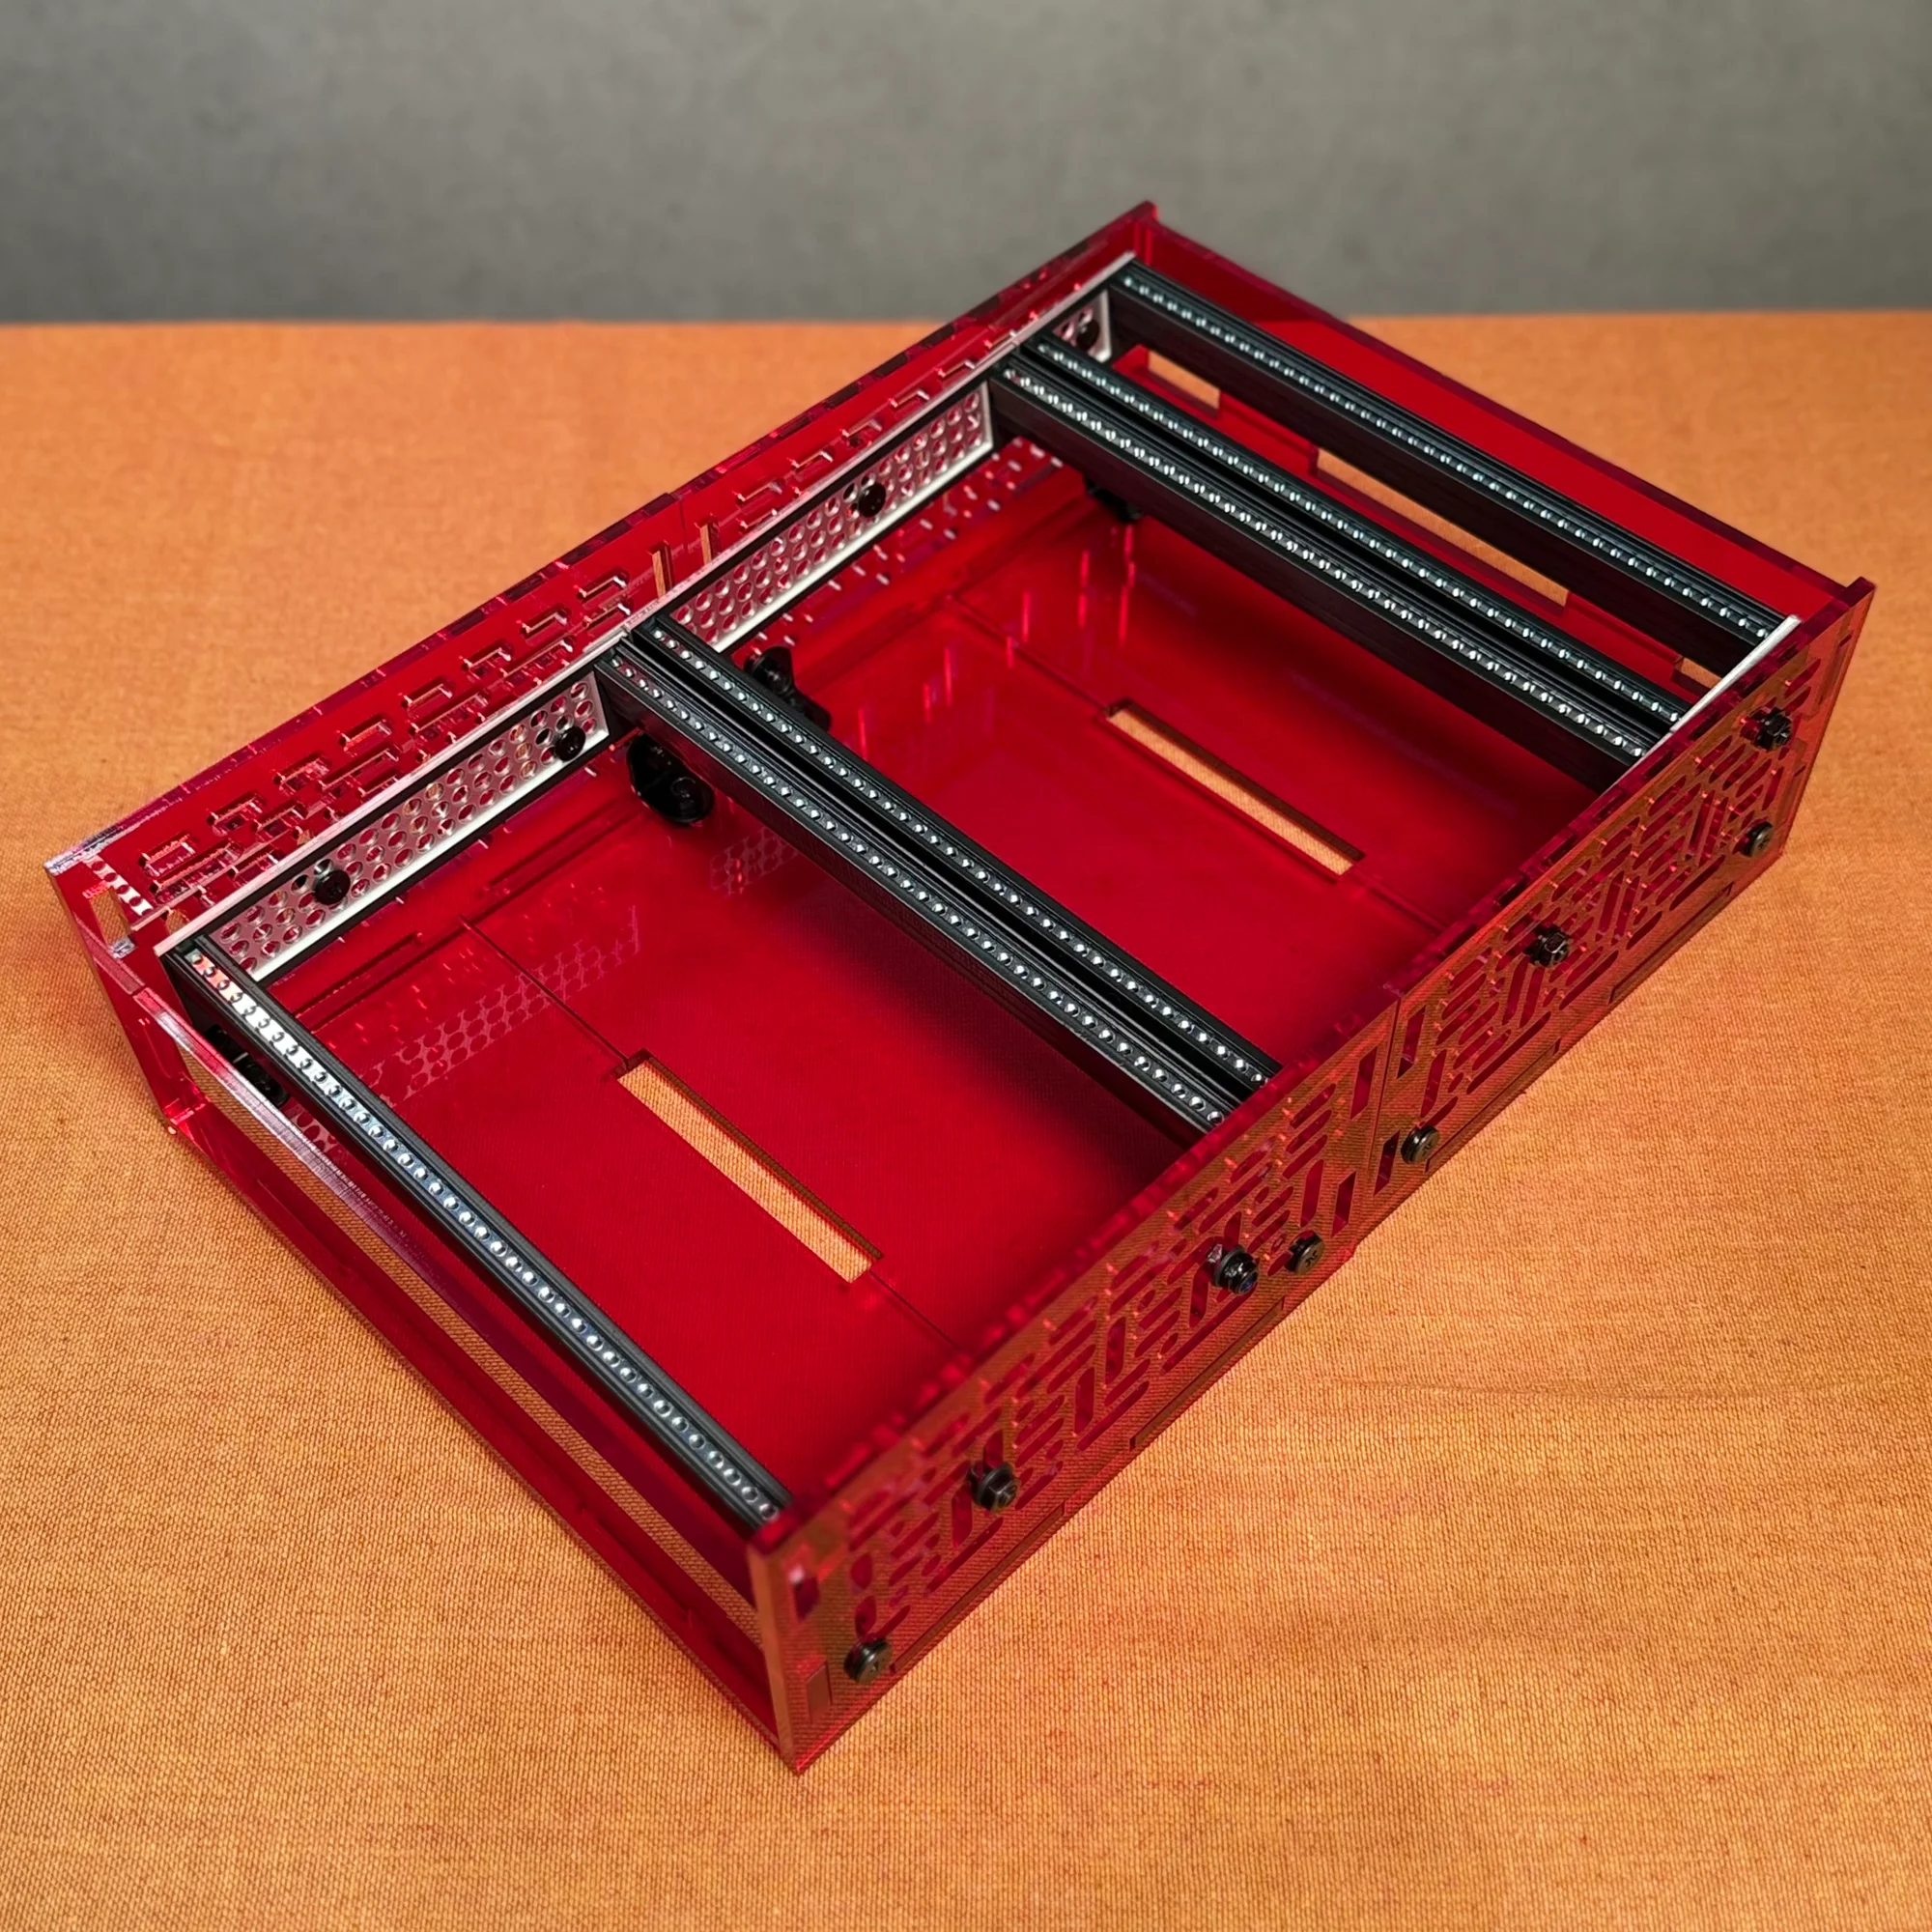
The 3D-printed Lite version has the same dimensions, so you can combine it with other types or connect two Lite versions together. This allows you to power up to a mid-sized case, making it easier to install your own bus board at the bottom, for example.
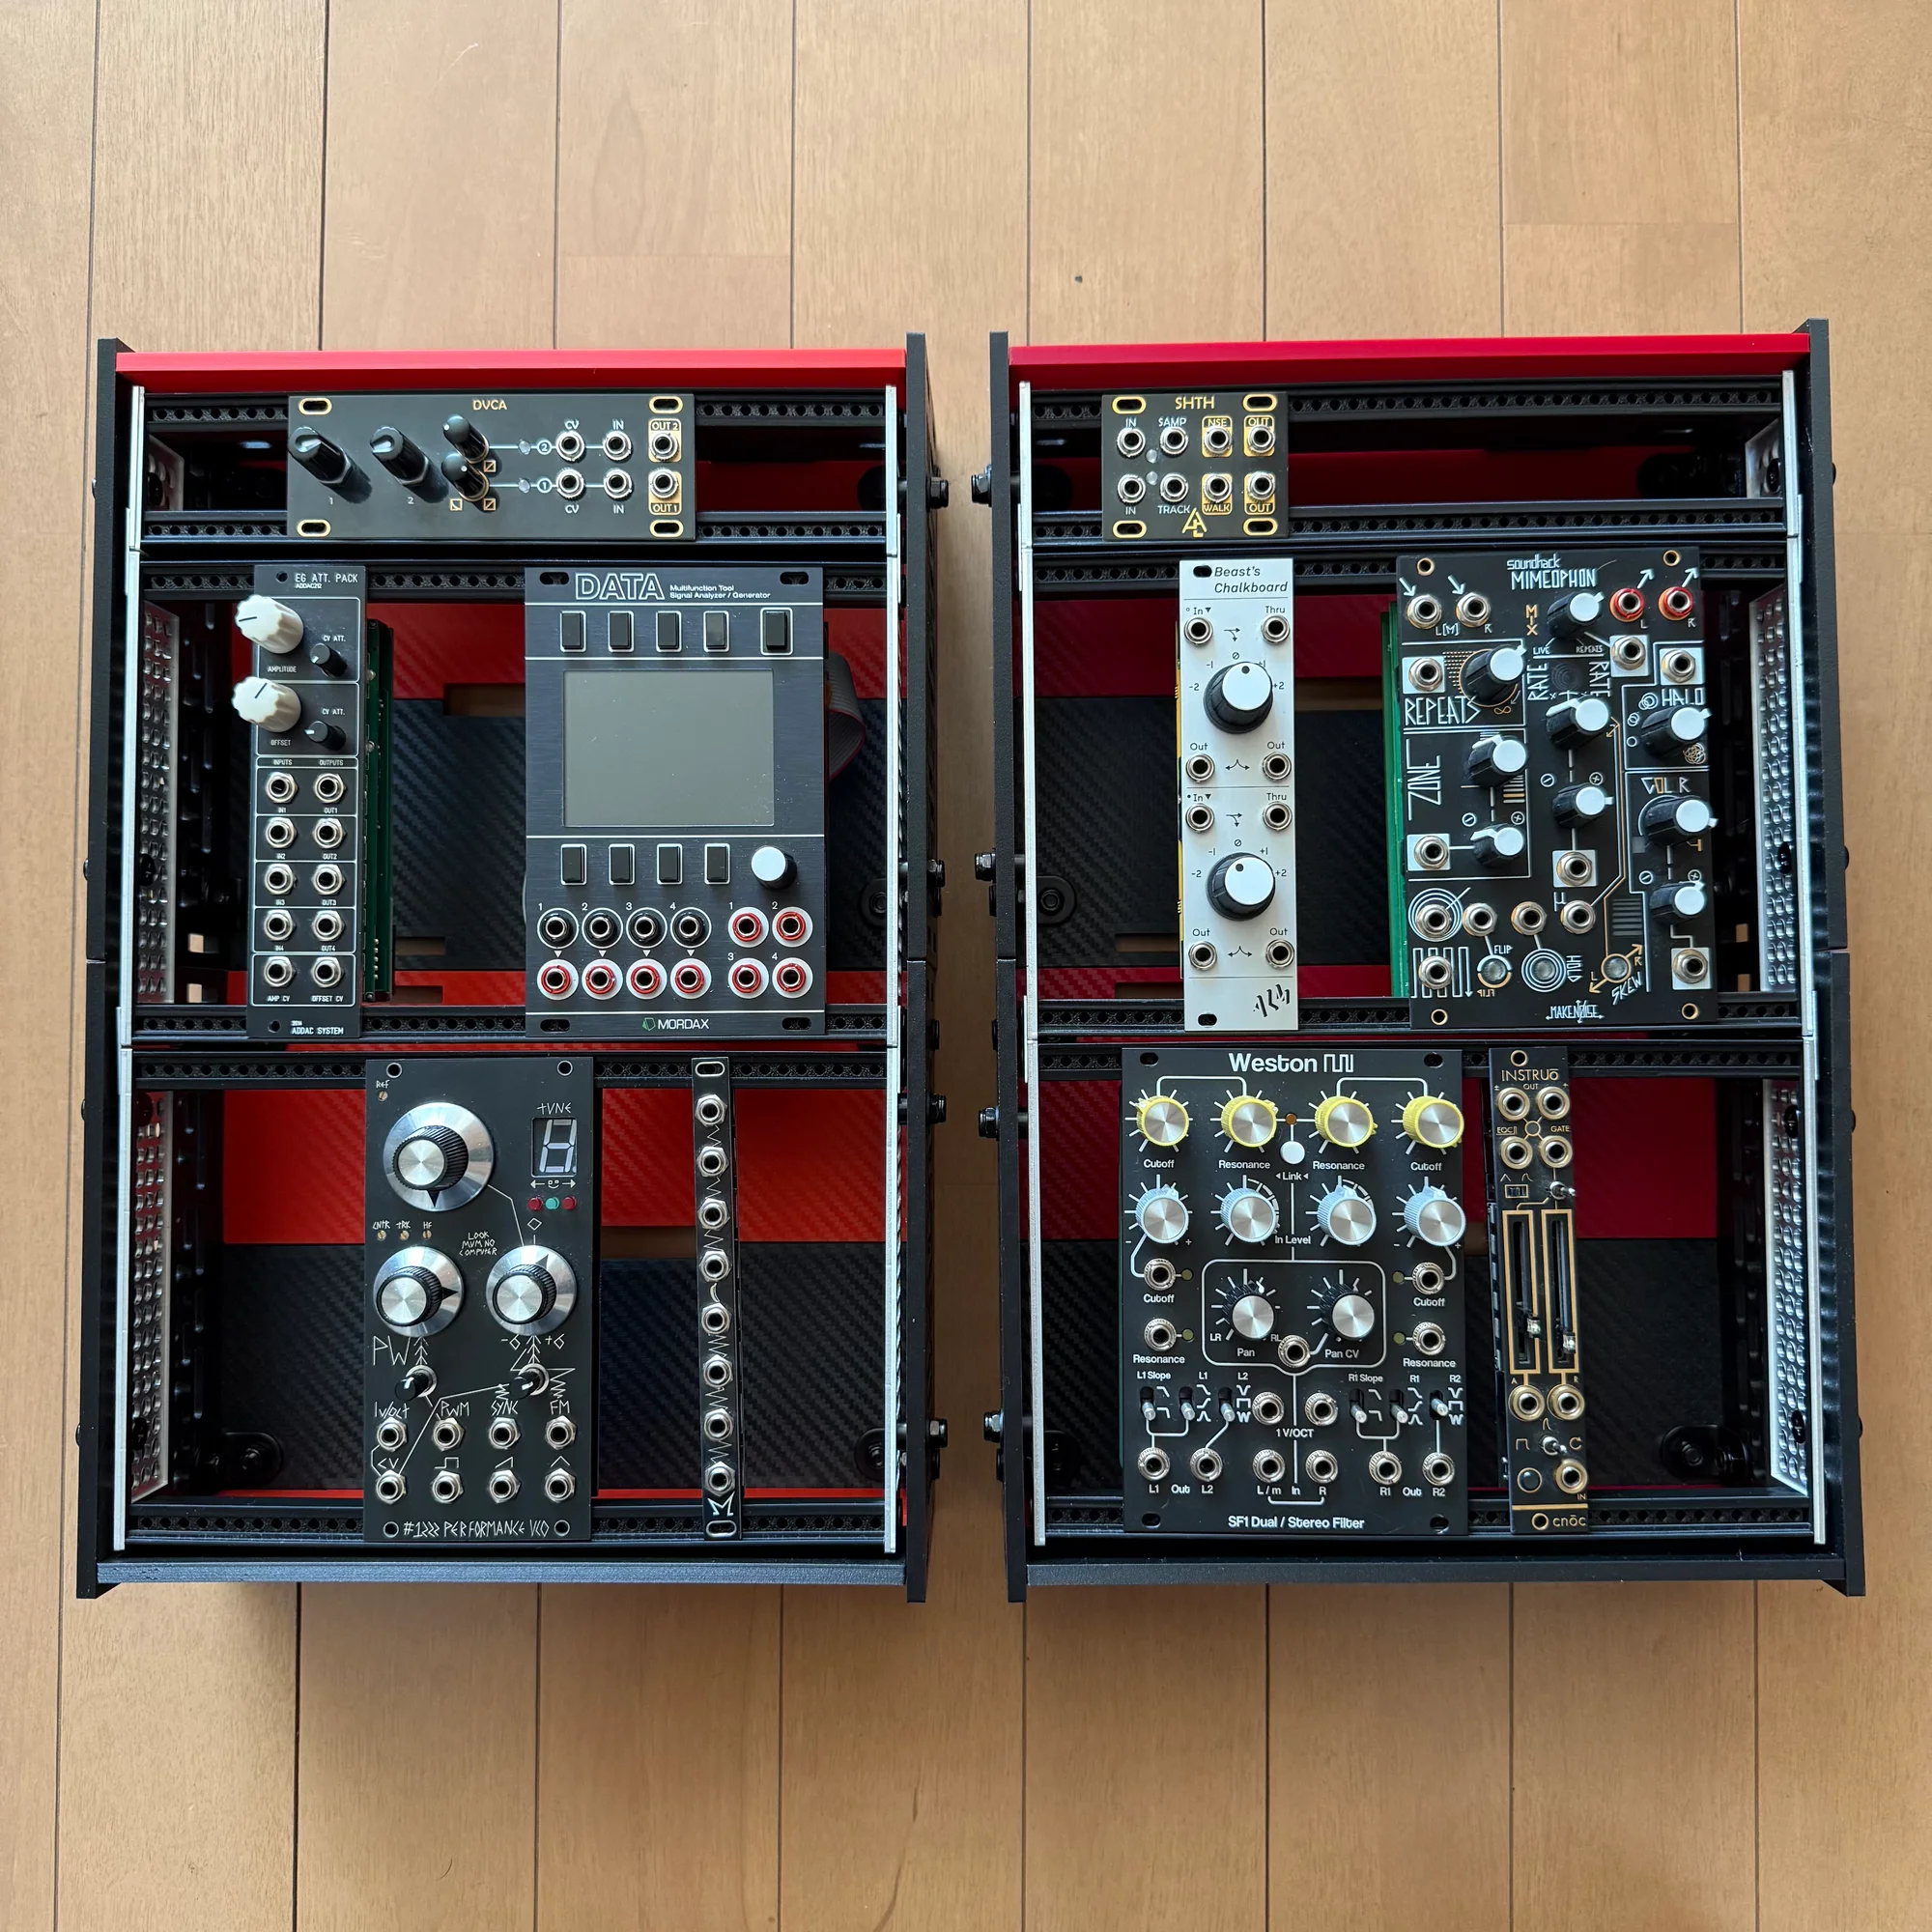
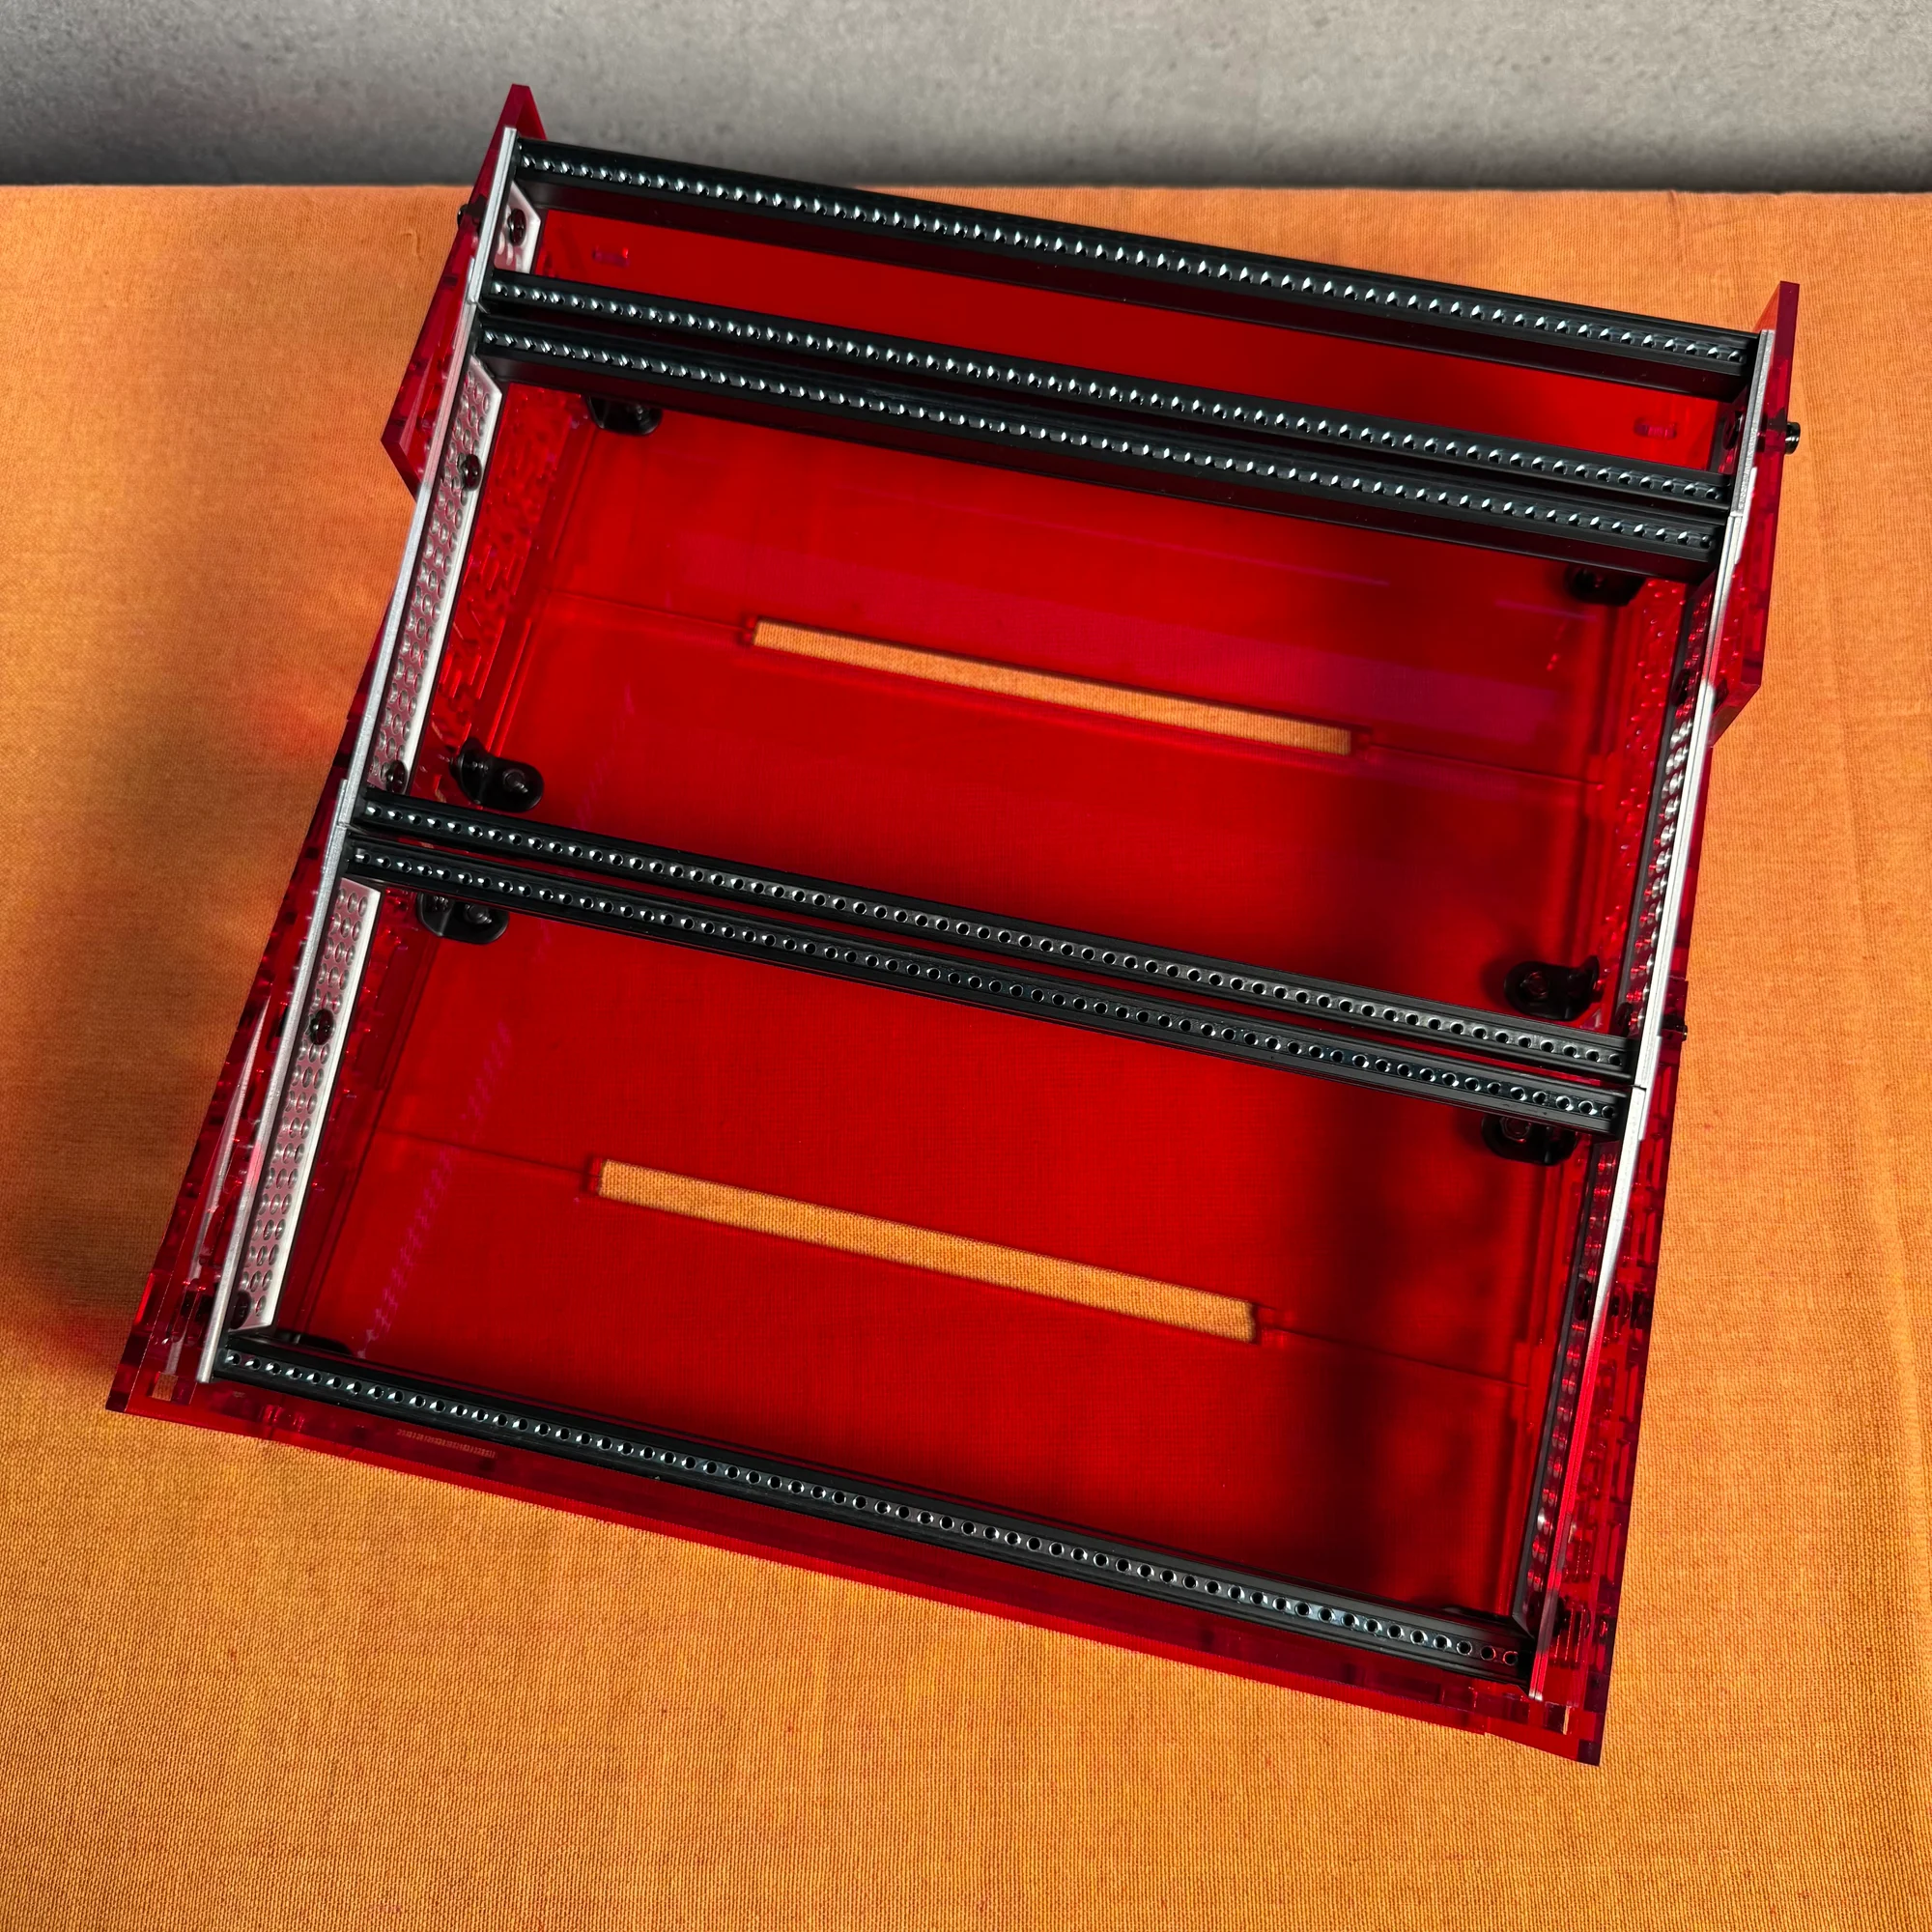
The method is simple. Line up two zudo-blocks and remove the panels between them.
With two zudo-blocks, you already have two sets of 3U rails. By purchasing a 1U rail, you get 4 connector panels included — enough to connect them all — completing the 3U + 3U + 1U case described above.
Takazudo has only tried this two-unit combination method so far, but fundamentally you can mount rails wherever the holes in the zudo-block side panels and the frame holes align. The connector panels have a slight amount of tolerance built in, so they aren’t so tight that you need precise measurements to get things to fit. It might be fun to try creating your own original case configuration.
That concludes the zudo-rail assembly guide. The procedure varies slightly depending on the rail type, but the basic flow is shared across all variations.
For details on each product, please refer to the following pages: