We’ve started carrying the OXI ONE at Takazudo Modular, so I’ve been writing a text-based guide series for the OXI ONE. This is the second installment.
The previous article is available here:
If you have any questions about the OXI ONE, feel free to join the Takazudo Modular Discord community linked below. I should be able to answer basic questions there.
In the previous article, I covered global settings and Mono mode operation. This article continues from where we left off.
- YouTube Guide
- Pages
- Init / End
- Time Division (Step Length) Changes
- Vertical Scroll Position
- Playback Direction
- Time Division Randomization
- Expand / Condense
- Directional Movement
- Step Chord
- Note Submenu
YouTube Guide
At the time of writing this article, I uploaded a video to YouTube where I walk through the OXI ONE with explanations. If you’re interested, please check it out alongside this article.
Pages
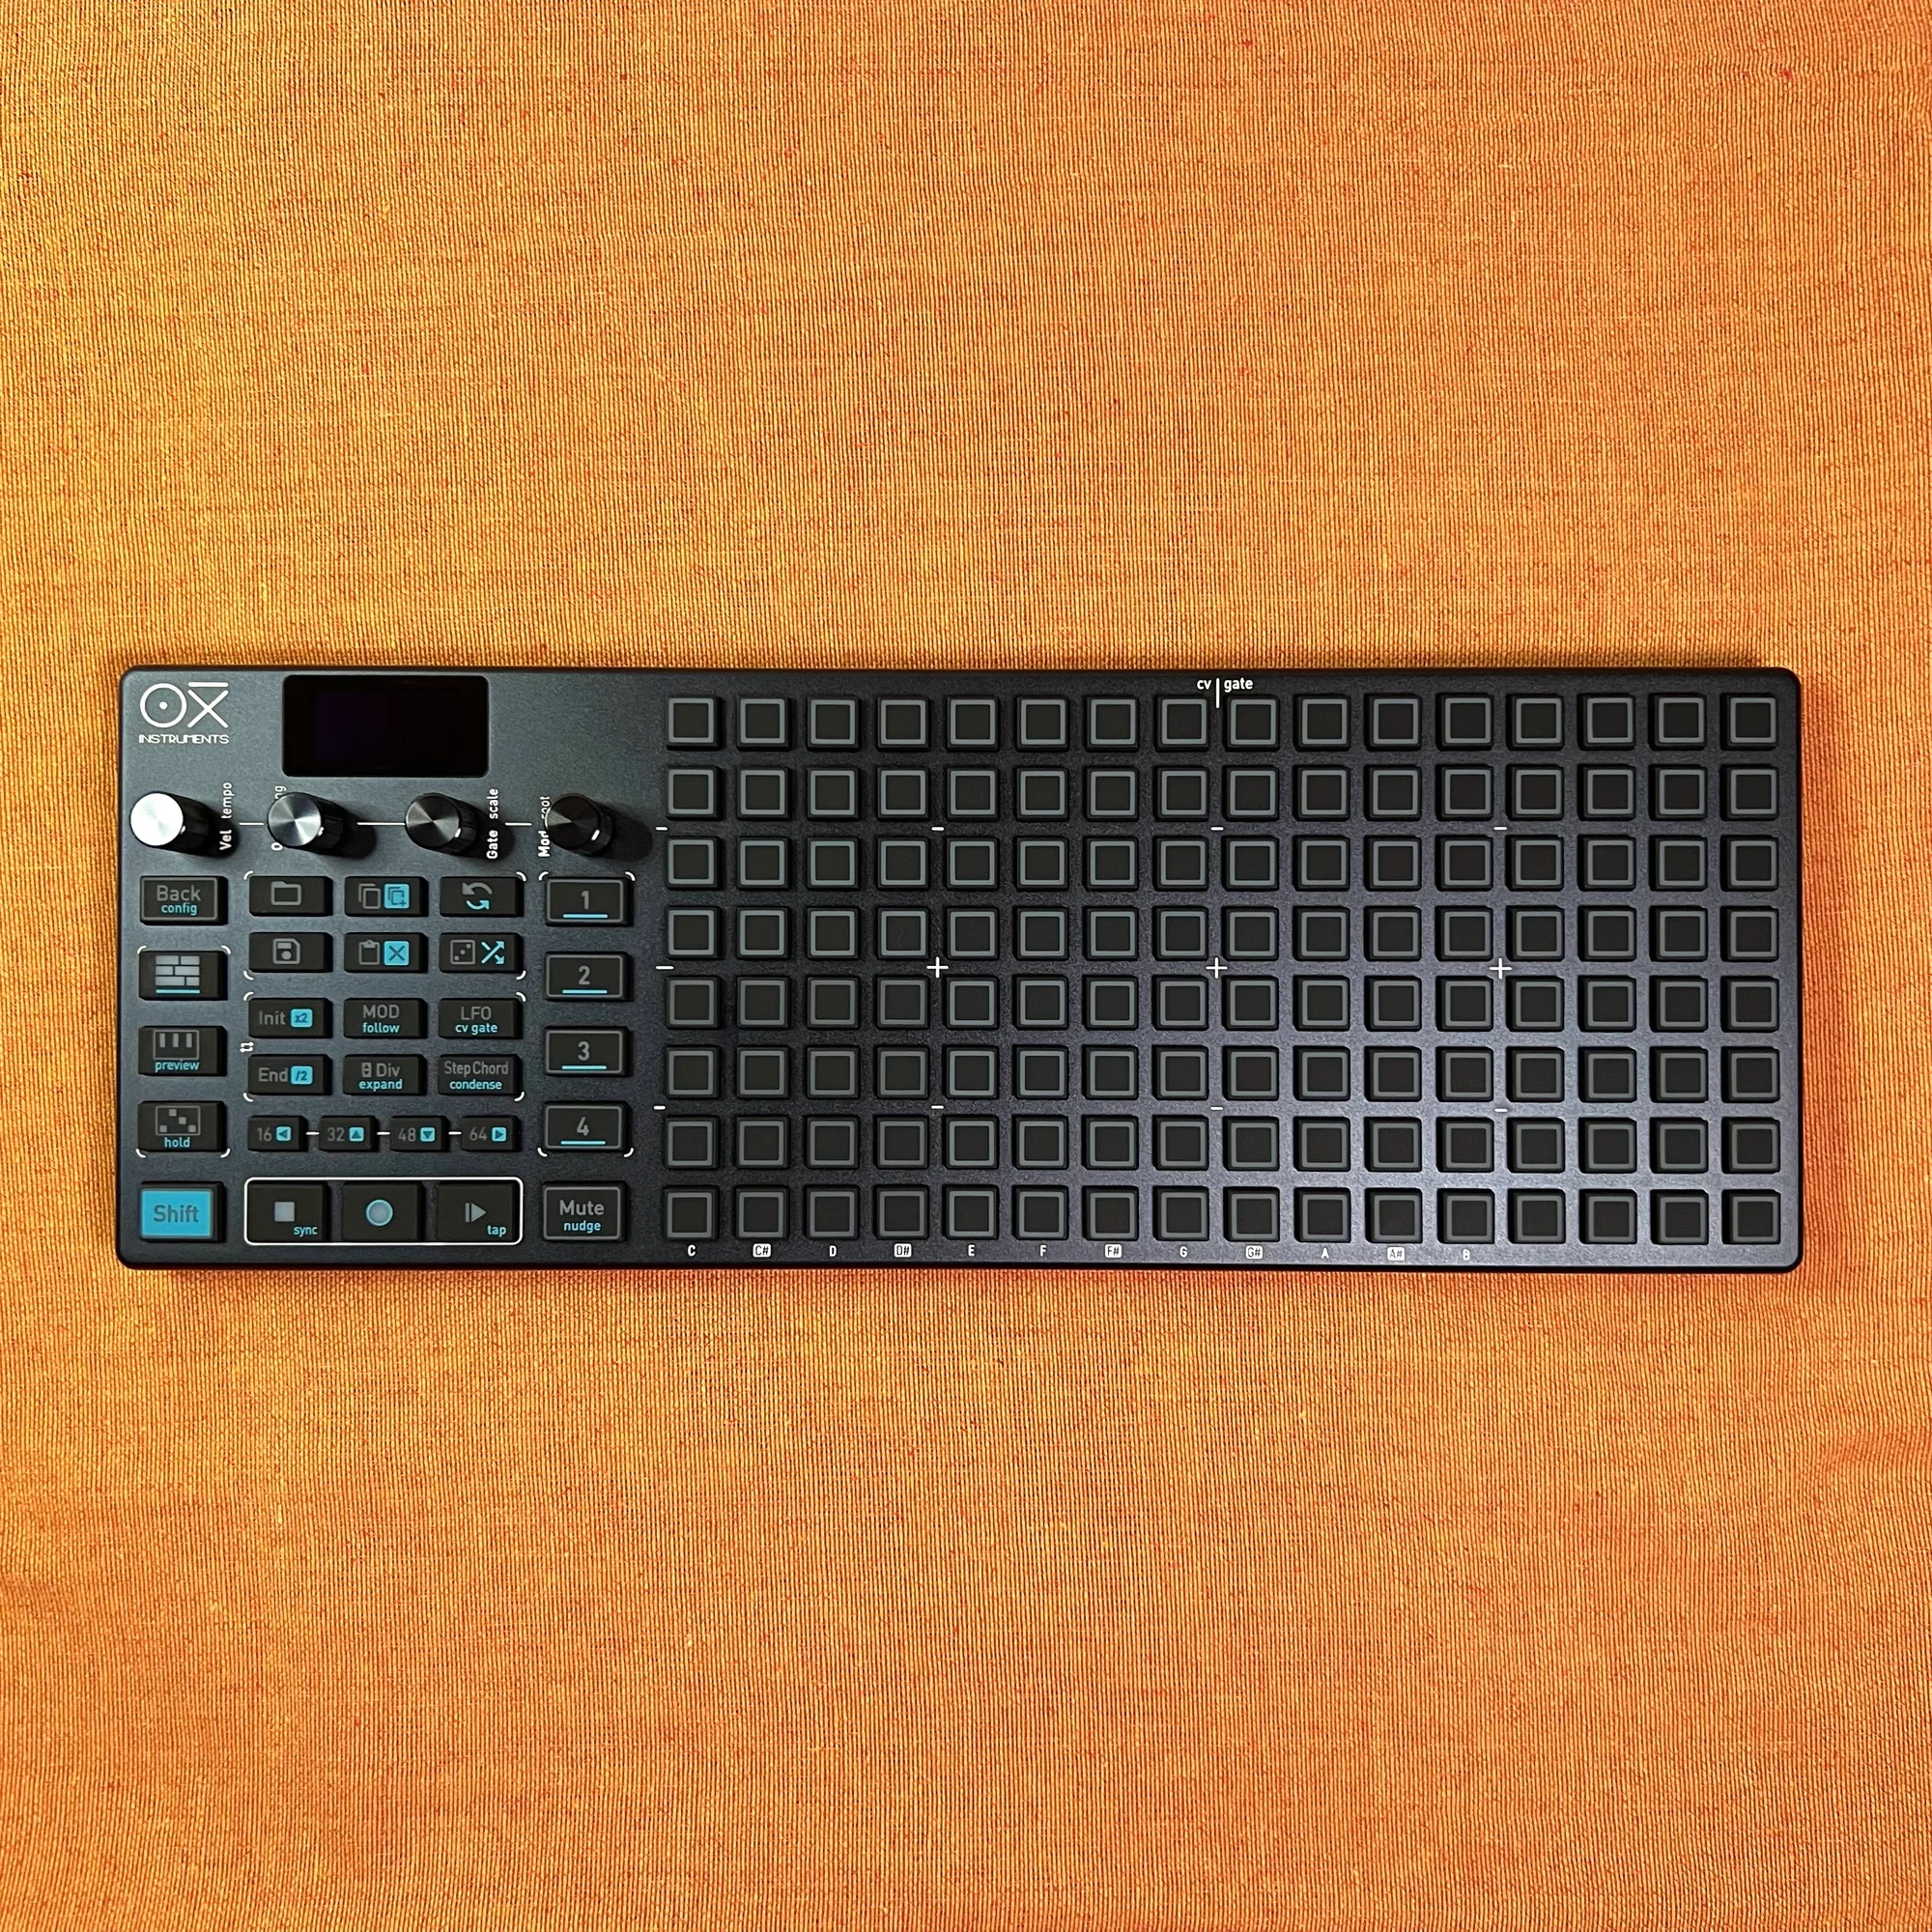
The OXI ONE has 16 pads along the X-axis, but you can create sequences longer than 16 steps. You can build sequences up to 128 steps long. For sequences longer than 16 steps, you use the concept of pages. Each page is 16 steps long, and you can have up to 8 pages, giving you a total of 128 steps.
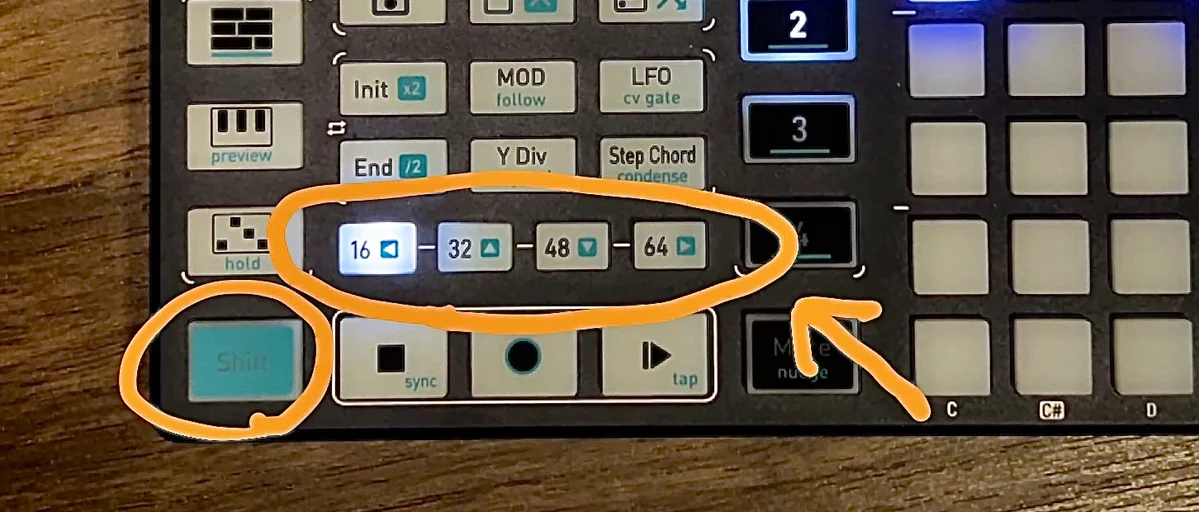
Page switching is done with the following buttons:
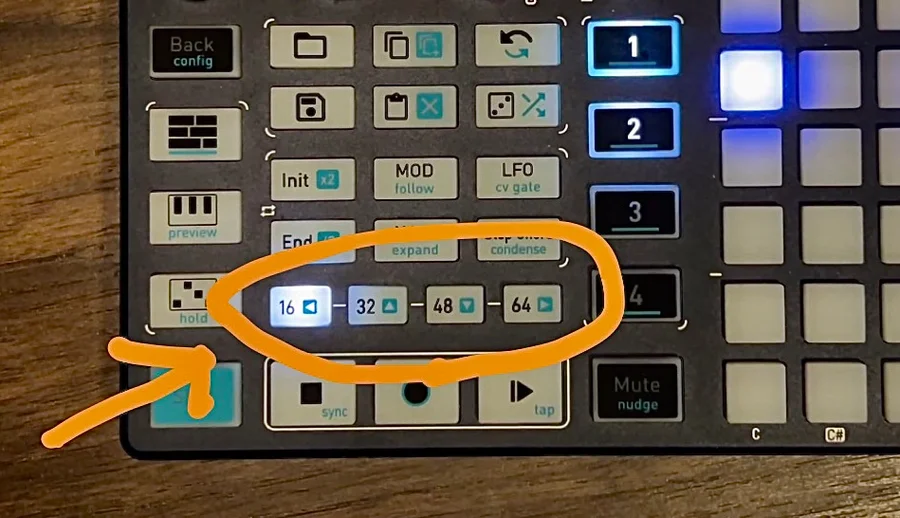
The illuminated button indicates the currently active page. In the state shown above, page 1 is active. When page 1 is active, the grid displays the information for steps 1 through 16. Pressing the other buttons shows the following step ranges:
16: Steps 1-16 (Page 1)32: Steps 17-32 (Page 2)48: Steps 33-48 (Page 3)64: Steps 49-64 (Page 4)
Pressing the already active page button causes it to flash. This indicates you’ve switched to pages 5-8 editing mode, where each button takes on the following roles:
16: Steps 65-80 (Page 5)32: Steps 81-96 (Page 6)48: Steps 97-112 (Page 7)64: Steps 113-128 (Page 8)
Pressing the active page button again stops the flashing and returns to pages 1-4 editing mode.
When you select page 2 or later, initially no notes are placed. After placing notes and switching between pages, you can see the notes you placed on each page reproduced on the grid.
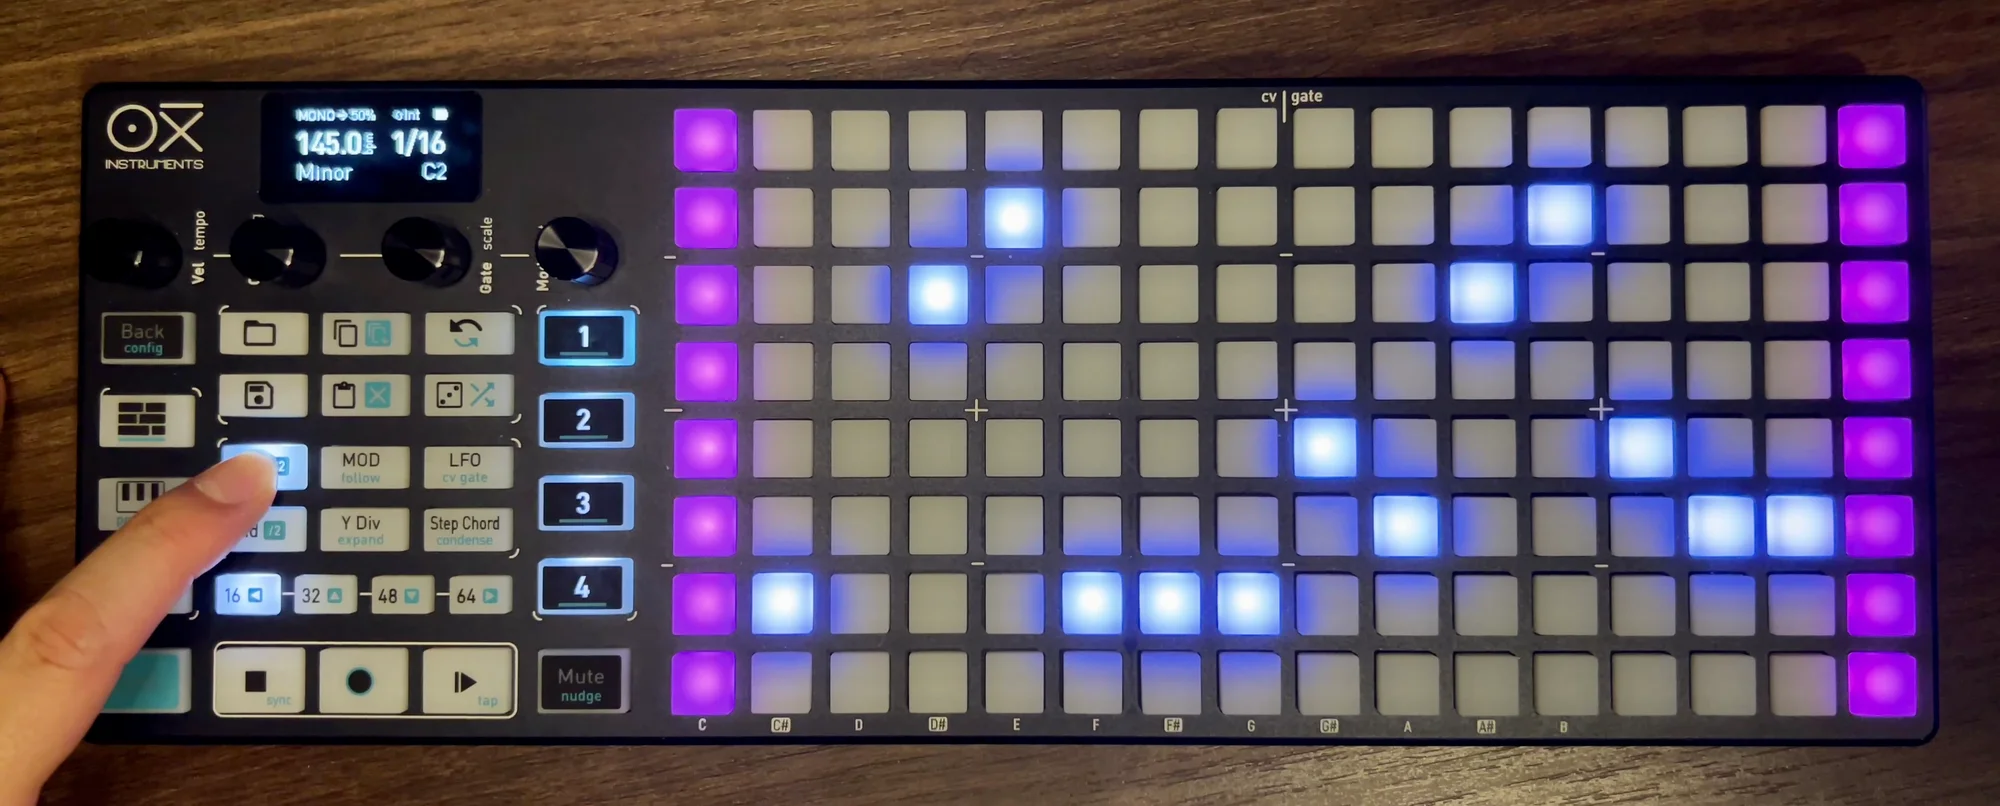
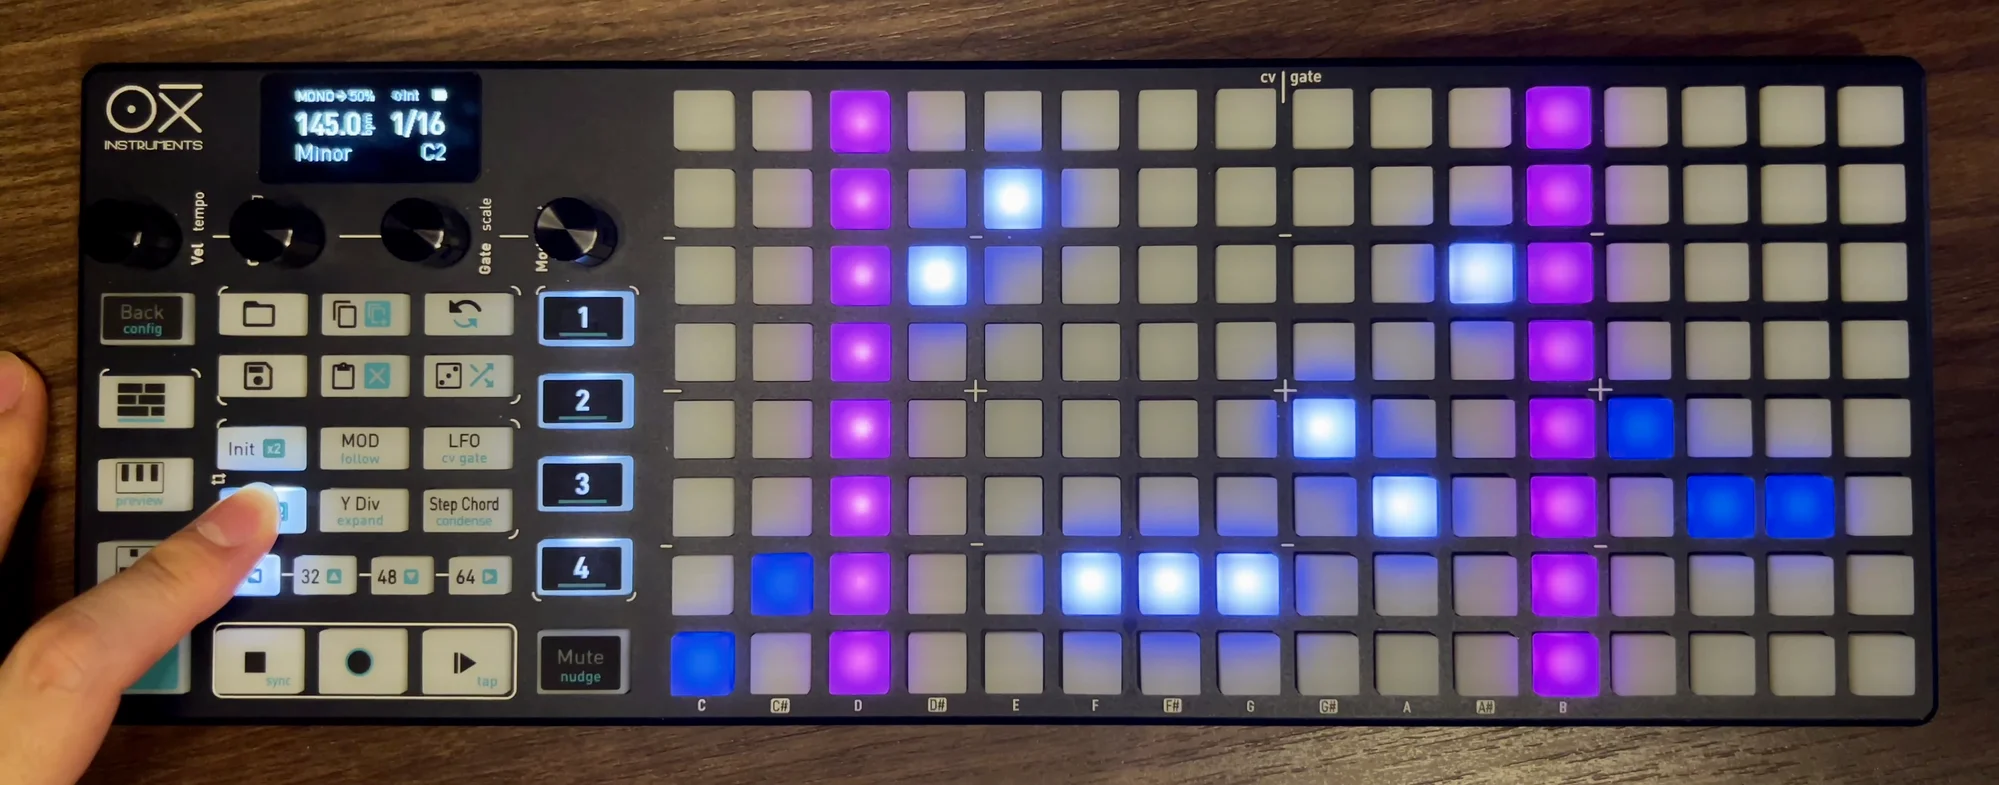
Below is an example of switching between pages 1-4, each with notes placed:

Init / End
You can switch between pages like that, but if you place notes on page 2 or later and press Play, you’ll quickly notice that the sequence never actually moves to page 2. It just loops through page 1’s steps 1-16. The settings that control this loop range are the Init and End buttons.
Setting Loop Start / End Positions
Press and hold either the Init or End button, and all pads in step 1 and step 16 will turn purple, as shown below. Releasing the button makes the purple disappear.
The steps highlighted in purple indicate the following:
- Loop start position: Init -> Step 1
- Loop end position: End -> Step 16
To change the loop start/end positions, hold the respective button and tap a pad on the grid. Holding Init and tapping a pad changes the Init position; holding End and tapping changes the End position. For example, setting the loop to steps 3 through 12 would look like this:
Init and End can be changed during playback as well, so just casually adjusting them creates interesting loop variations.
To play beyond page 1, set the End position to a step on page 2 or later, which extends the loop range accordingly. Setting End to the last step of page 8 creates a 128-step loop.
Below is an example with Init set to step 1 and End set to step 32 (the last step of page 2):

And here’s that configuration during playback. I switch to page 2 around when step 16 passes, and you can see the active step progressing into page 2:

Follow Feature
When using multiple pages, there’s a follow feature that automatically switches the page display to match the currently playing step. Follow can be toggled ON/OFF using the follow button (Shift + MOD):
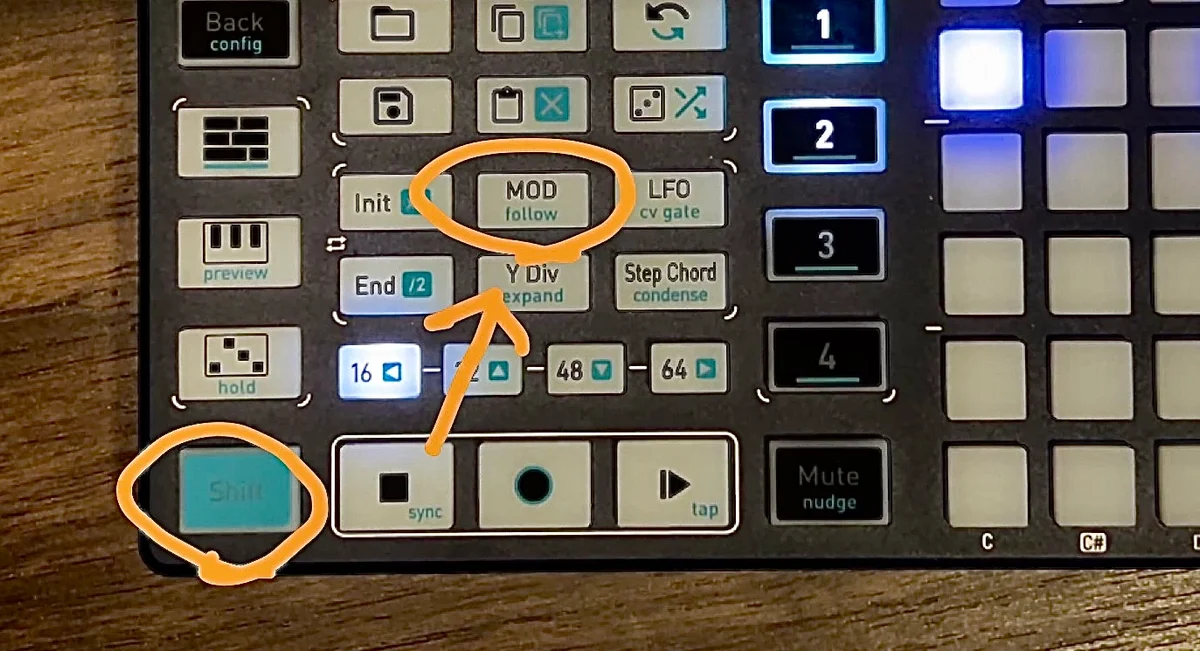
When follow is turned ON, the display automatically switches to the page containing the currently playing step.
In the example below, with End set to step 32 (the end of page 2), follow is turned ON before playback. Unlike the previous video, the page switches automatically here without pressing the page buttons:

When working with multi-page sequences, having follow ON makes it easy to track the current position. Conversely, when editing notes during playback, follow ON can be inconvenient since the page switches away from what you’re editing. Toggle it as needed.
Time Division (Step Length) Changes
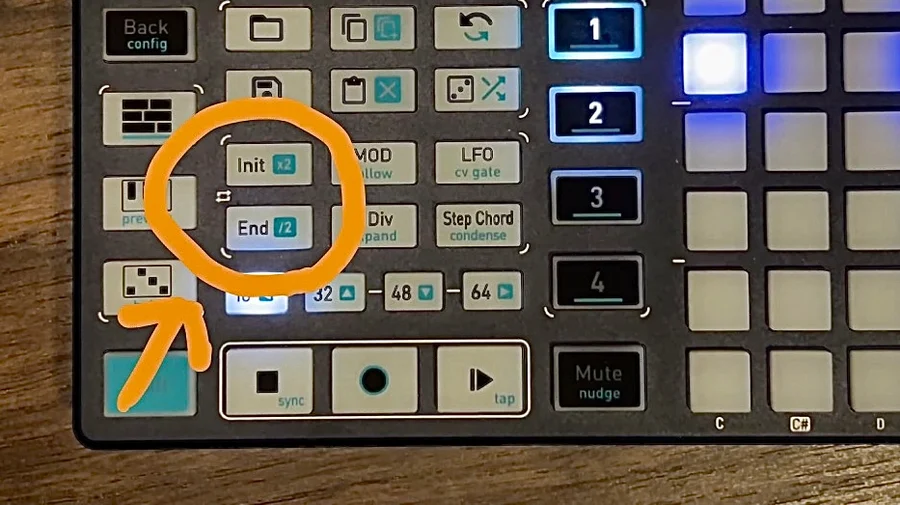
The discussion so far has assumed a time division (step length) of 1/16, but this can be changed. A quick shortcut to double or halve it is the x2 button (Shift + Init) and the /2 button (Shift + End):
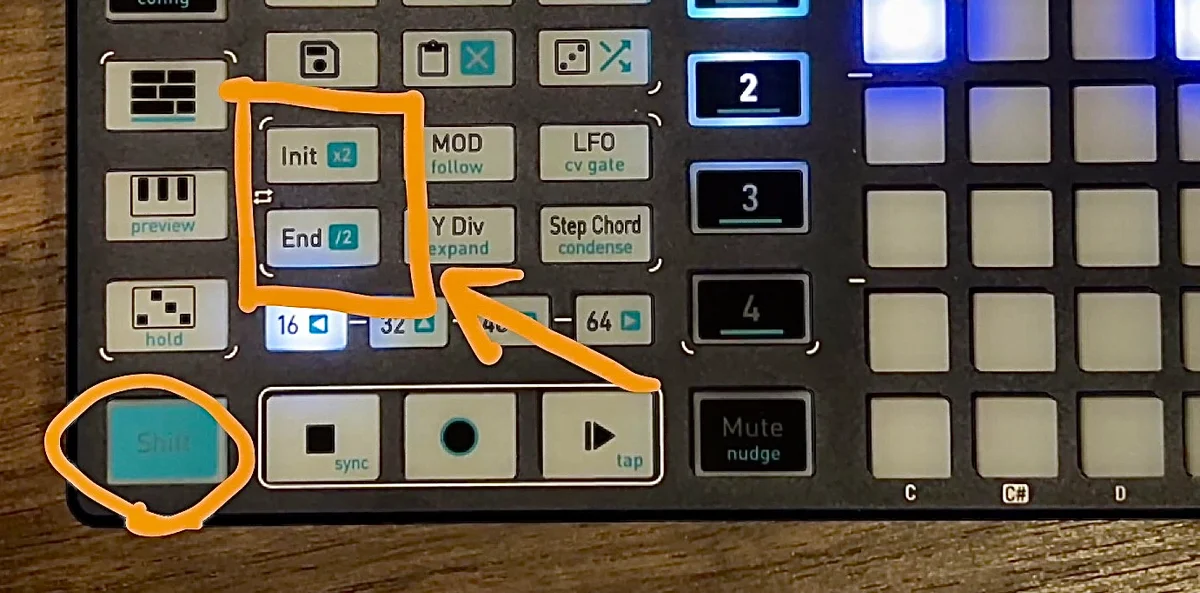
Pressing these buttons changes the 1/16 display to 1/8 or 1/32, and playing back confirms the step length has changed.
Additionally, pressing the Y Div button opens the Division menu for time division-related operations. The display changes as shown below, where the rightmost “Divis” indicates the current time division. As explained previously, you change Divis by turning the rightmost encoder.
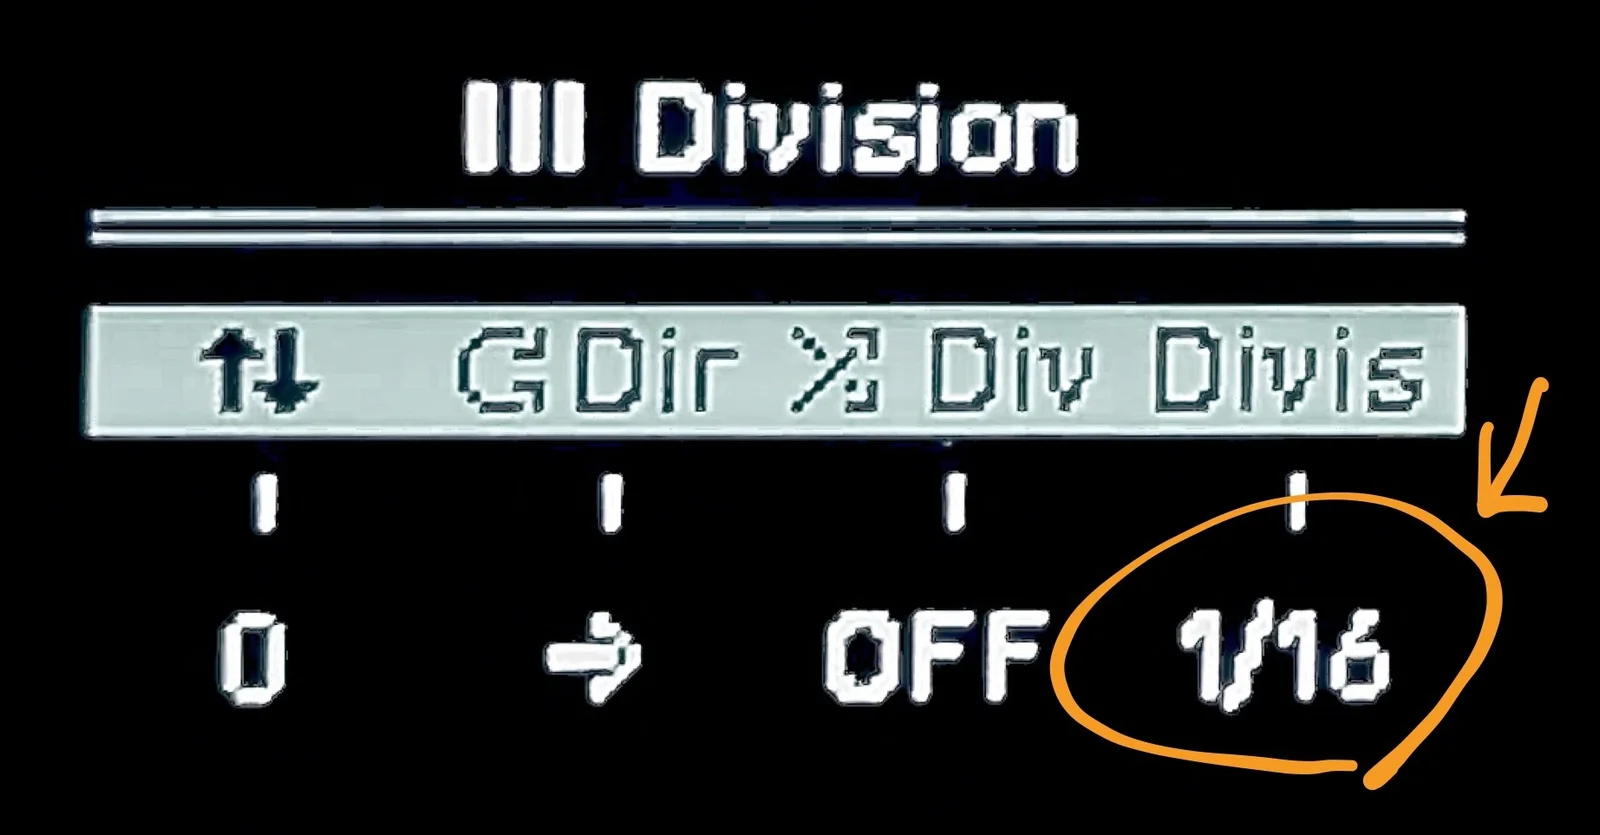
Pressing the encoder in resets to the default 1/16.
Vertical Scroll Position
While we’re on the Division menu, let’s look at the other division-related settings available when pressing the Div button.
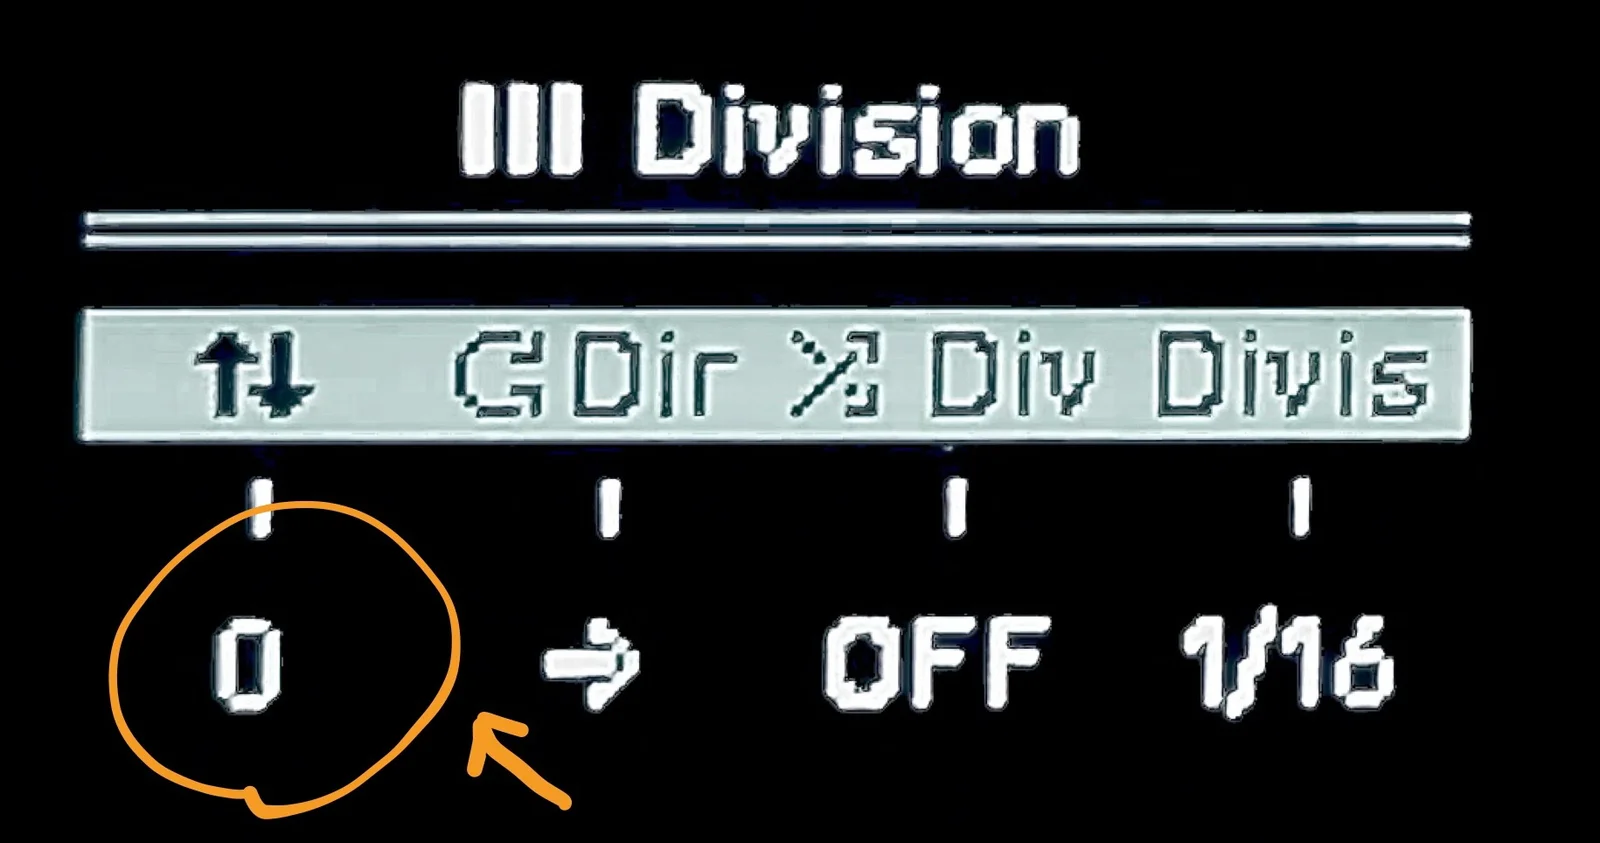
The leftmost item in the Div menu indicates the vertical scroll position of the grid display. It starts at 0, but turning the leftmost encoder scrolls the displayed pads up or down, as shown below:

This allows you to edit notes in higher or lower octaves. (As mentioned in the previous article, you can also do this by holding a note and changing the Oct setting.)
Pressing the encoder in resets to the default 0.
Playback Direction
The second item from the left, Dir, indicates the playback direction.
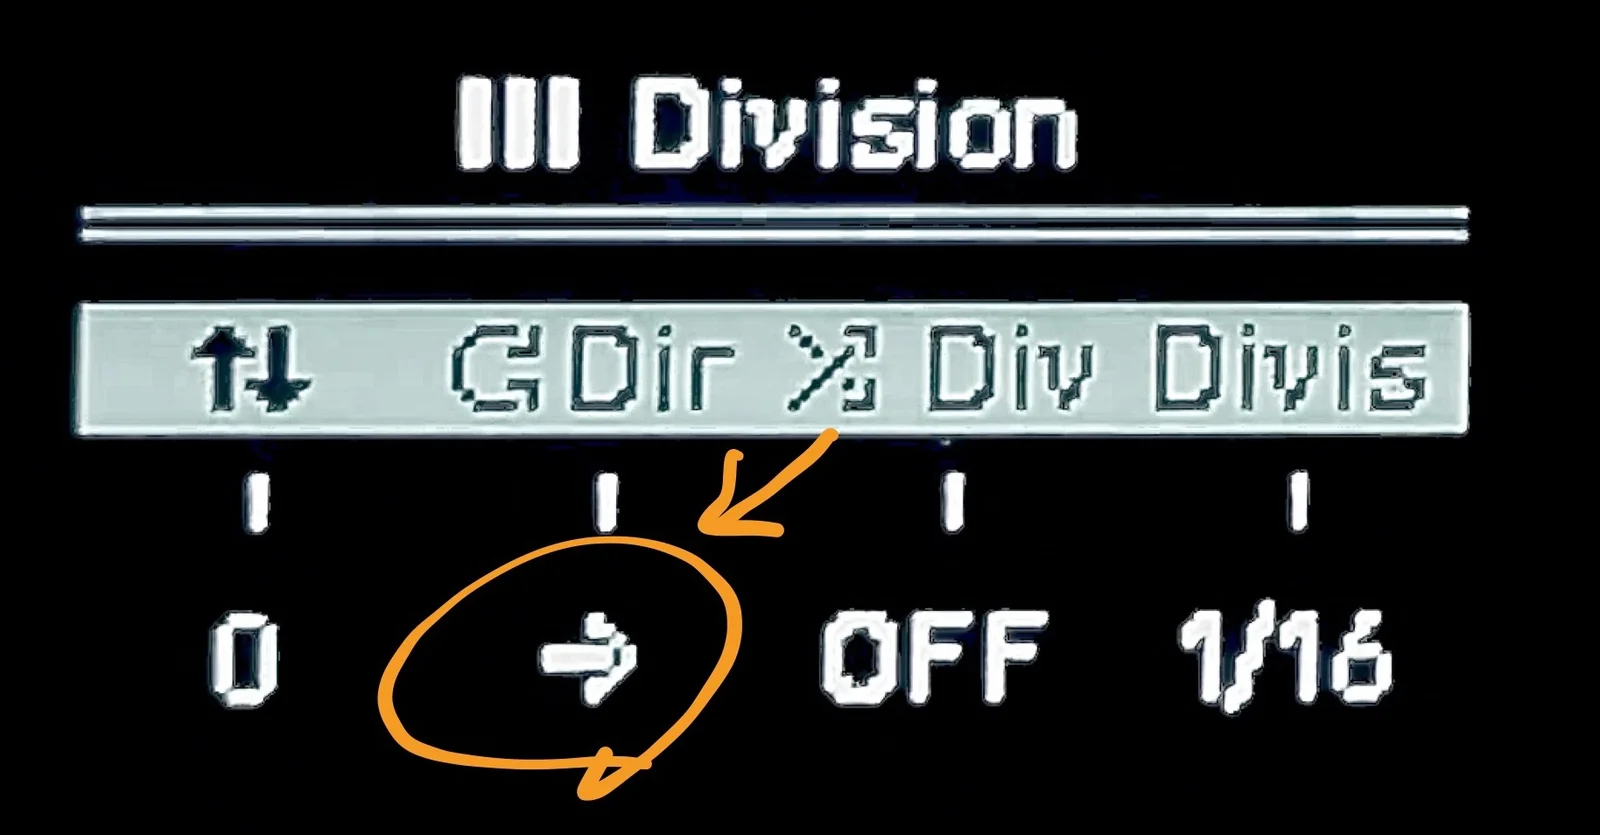
The options available are:
forward: Left to right (default)backward: Right to leftpendulum: Goes left to right, then right to leftrandom: Random
This is a fun feature — just changing the playback direction can create interesting sequence effects. Below is an example of random playback:

Instead of a long 16-step sequence, making it 2 or 3 steps and setting it to random creates a short sequence that feels like it’s constantly changing.
Pressing the encoder in resets to the default forward.
Time Division Randomization
The third item, Div (Division), indicates the probability of time division randomization.
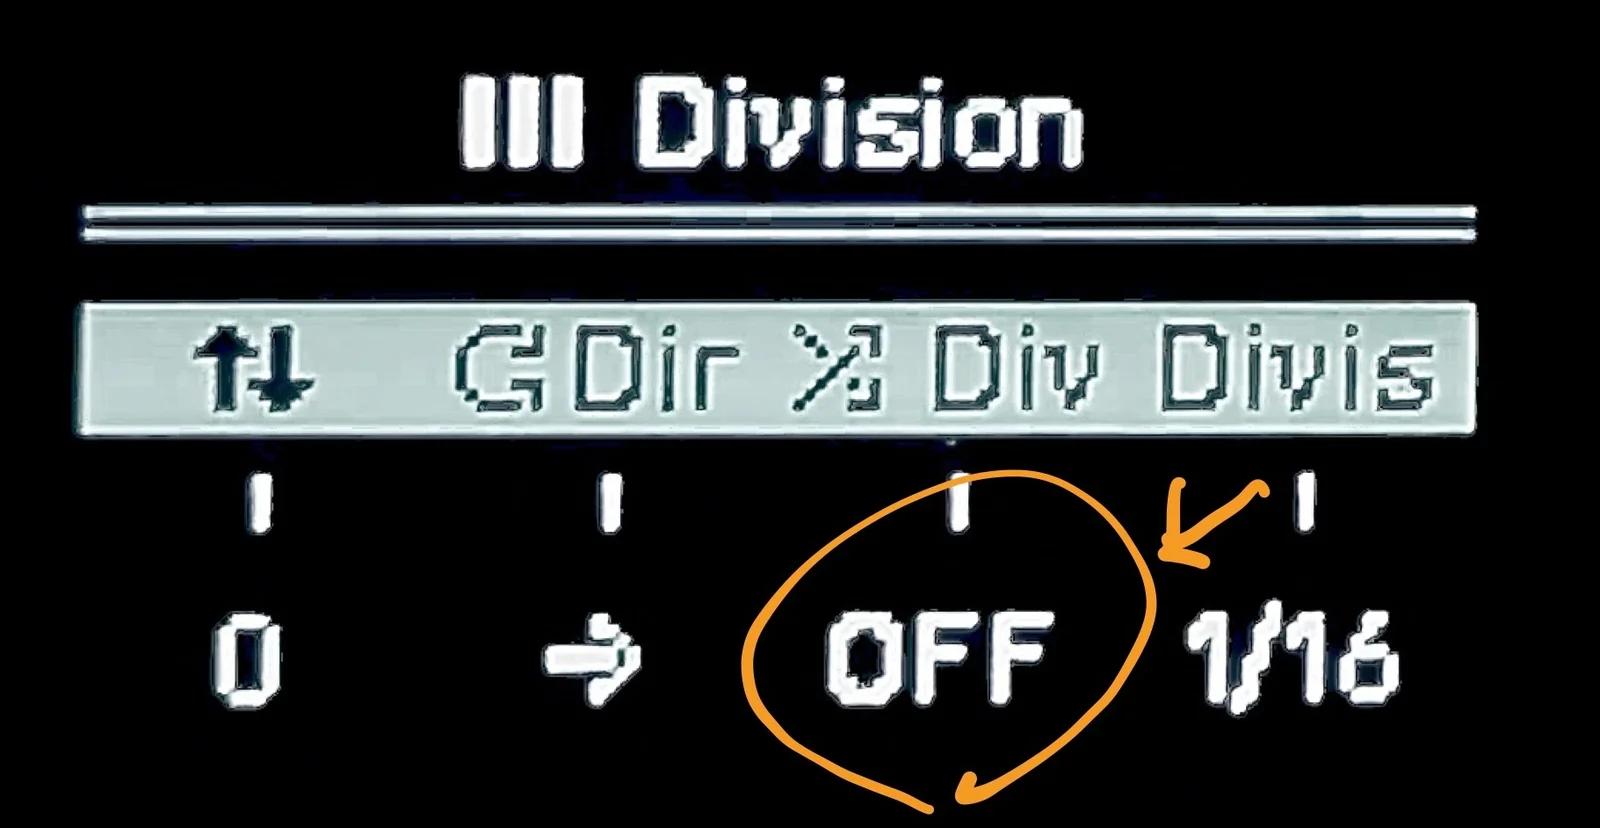
Turning the third encoder to the right increases the value: 10%… 20%… up to a maximum of 100%. Setting this to 1% or higher causes the time division to change with that probability.
For example, consider a time division of 1/16. If this Div value is set to 50%, a random check is performed each time a step advances. With a 50% probability — essentially a coin flip — the time division changes. From my testing, it seemed like the 1/16 either doubled to 1/8 or halved to 1/32. I haven’t done thorough testing, but it might also go to 4x or 1/4.
According to the manual, even when changes occur, the time division shifts stay tempo-relative, so it doesn’t become total chaos. In my impression, it’s somewhat tricky to use effectively, but it could be fun for percussive parts.
Pressing the encoder in resets to the default OFF.
Expand / Condense
Expand and Condense are zoom-like functions.
Expand
Expand is executed by pressing the following button (Shift + Y Div):
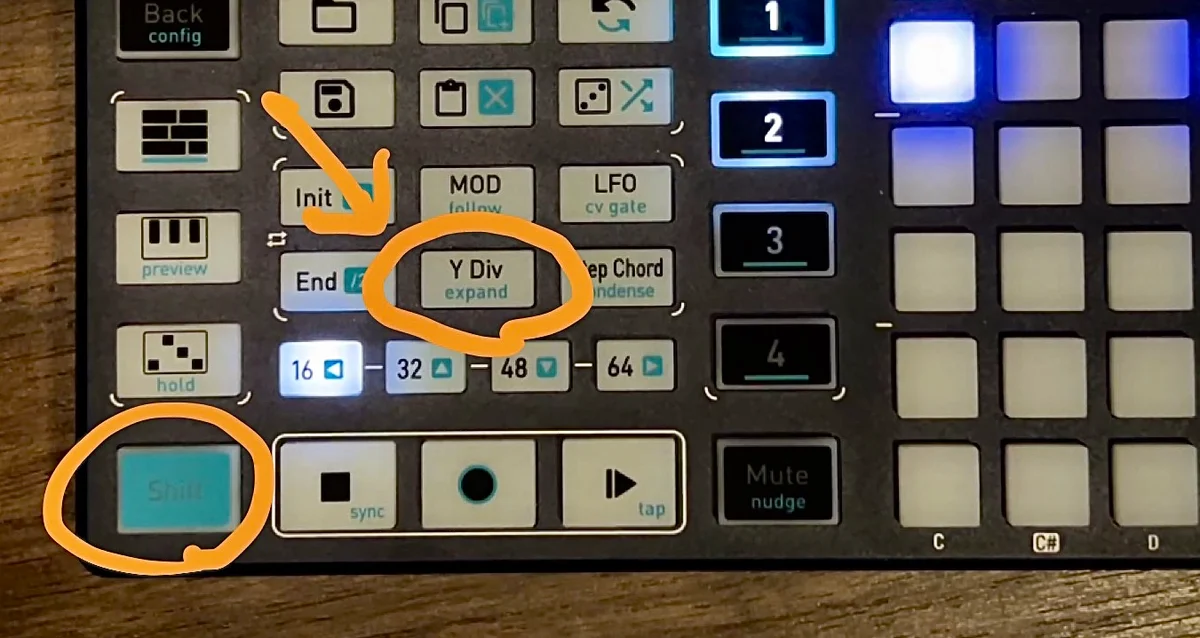
What happens when you press Expand? The played sequence sounds the same, but the time division is halved, all note gate lengths and intervals are doubled, and the Init-End range is also doubled.
For example, suppose the sequence is in the following state:
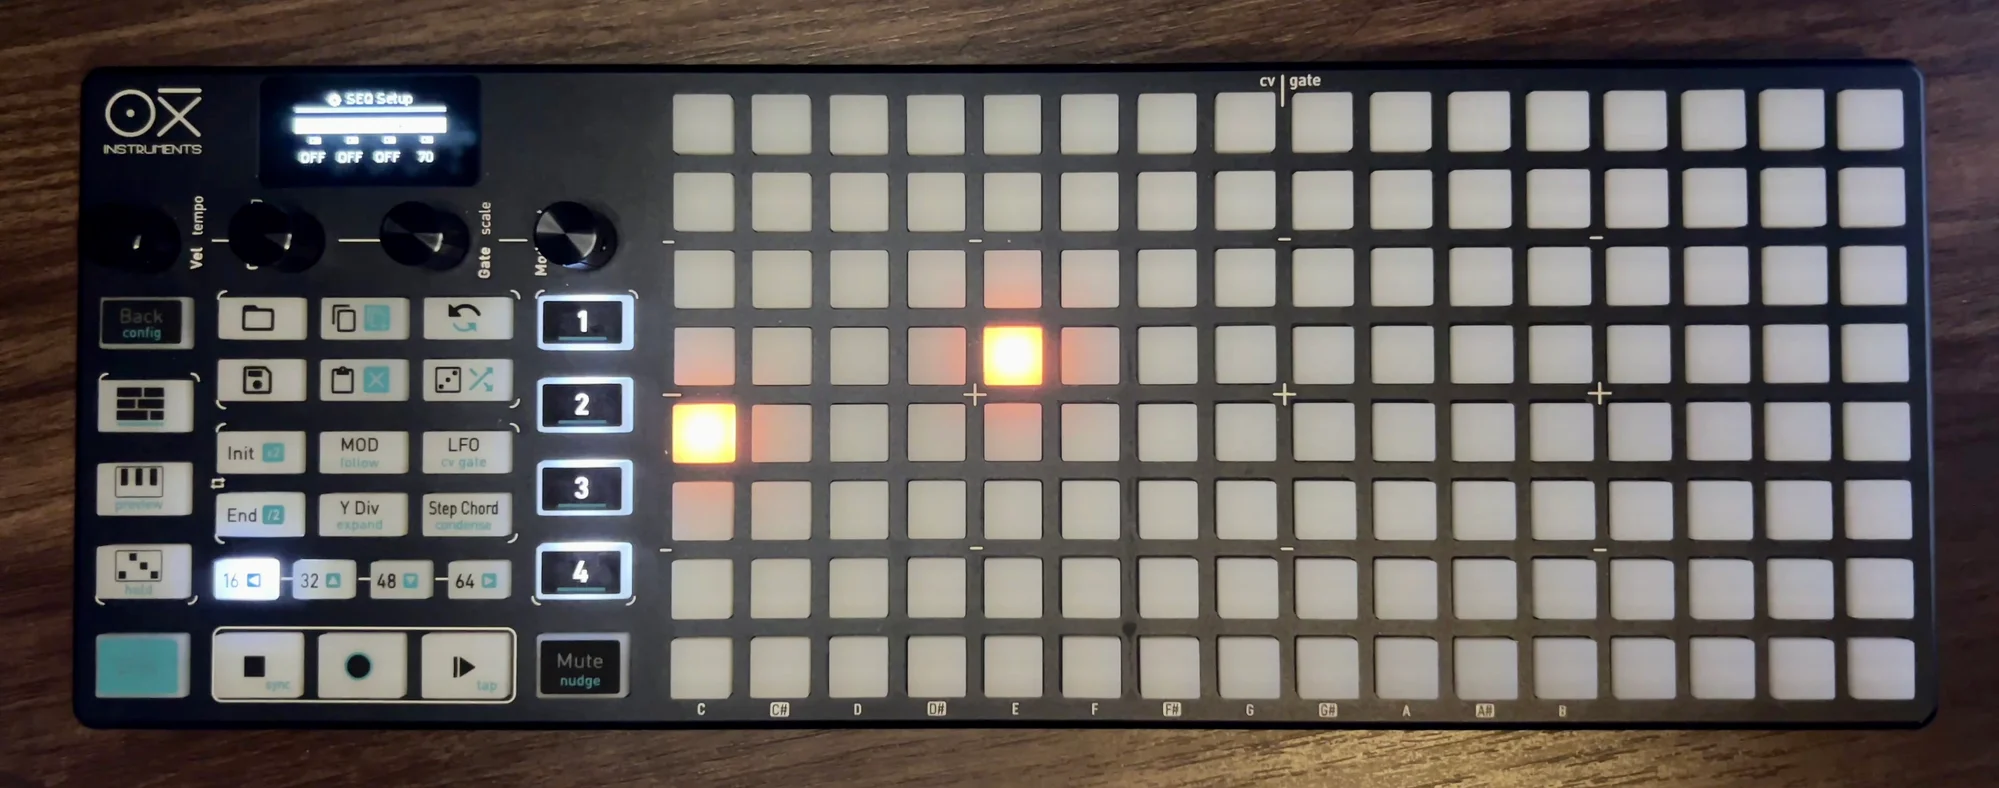
- Time division:
1/16 - Notes at steps 1 and 5
- Note length (gate):
50
Pressing the Expand button changes the sequence as follows:
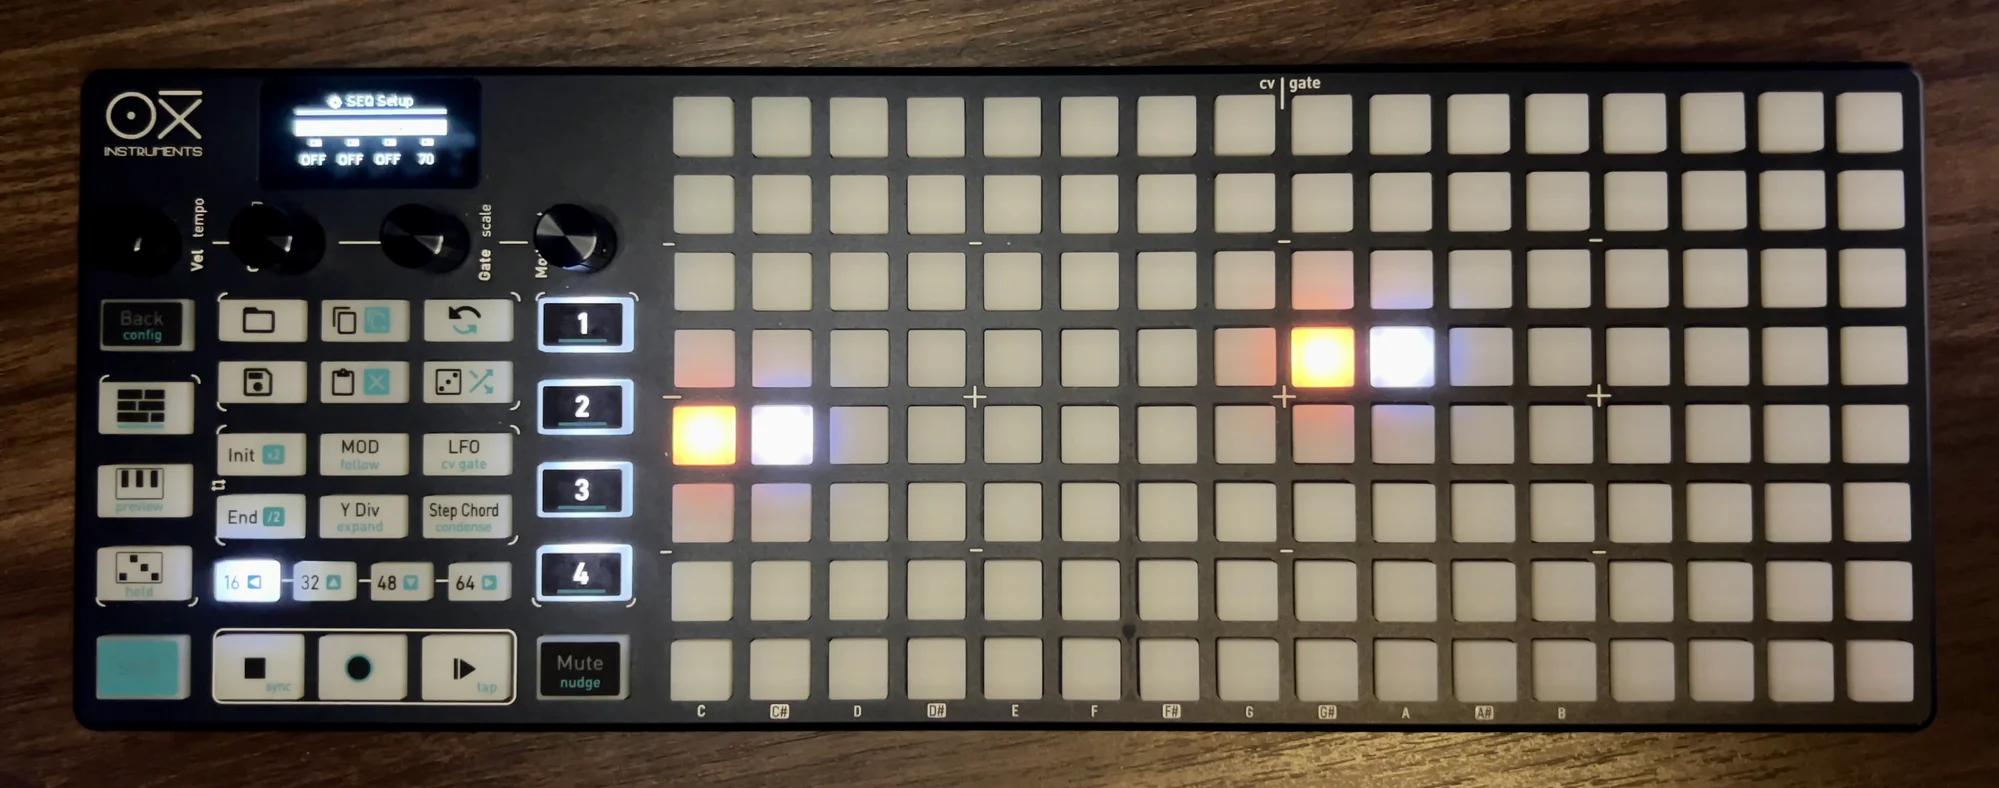
- Time division:
1/32 - Notes at steps 1 and 9
- Note length (gate):
TIE(so each note spans 2 steps)
The sequence’s intervals and gates are doubled, but since the time division is also halved, the playback result stays the same. In effect, it’s like a 2x zoom in — the sequence gets stretched out.
Condense
Condense is the opposite of Expand — a zoom out.
For example, if the sequence is in the following state:
- Time division:
1/16 - Notes at steps 1 and 4
- Note length (gate):
40
Pressing the Condense button changes the sequence as follows:
- Time division:
1/8 - Notes at steps 1 and 3
- Note length (gate):
20
Like Expand, the playback result doesn’t change, but the grid display appears compressed.
Note that when using Expand, the sequence stretches to twice its length. For example, steps 1-64 would expand to steps 1-128. Any data that previously existed in steps 65-128 would be pushed beyond the sequence boundary and lost, so please be aware of this.
Directional Movement
The arrow buttons (Shift + page buttons) move all notes within the Init-End range in the corresponding direction.
As shown in the video below, notes on the grid shift in the direction of the arrow:

The fact that the movement range is limited to the Init-End boundaries makes this feature quite practical.
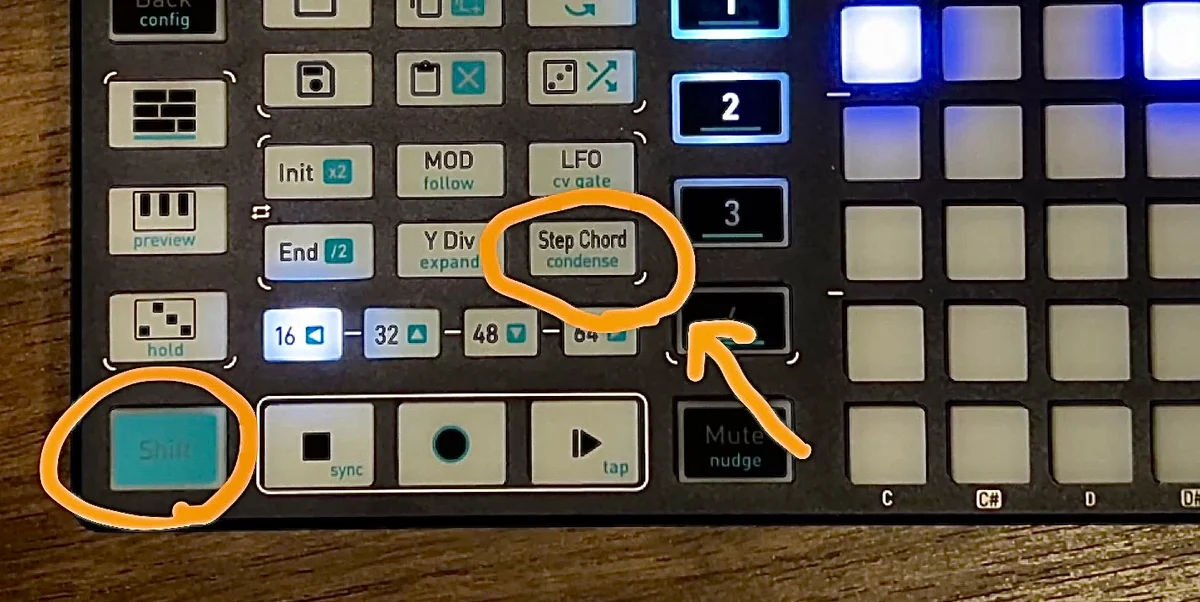
Step Chord
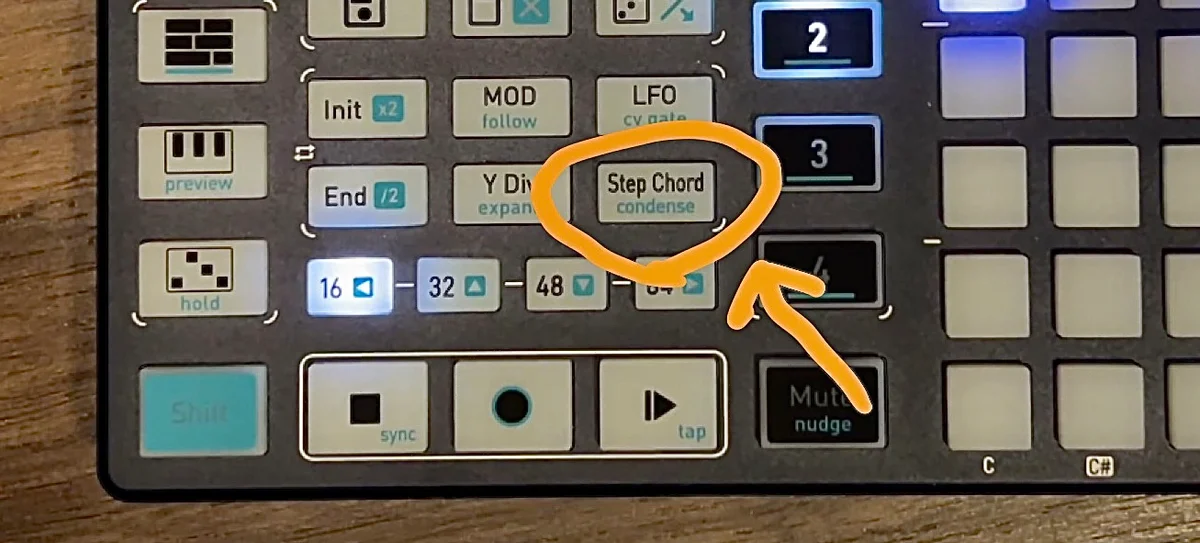
The Step Chord button is a toggle that switches ON/OFF:
In the previous article, I explained that pressing and holding a note brings up a display that lets you modify the note individually:
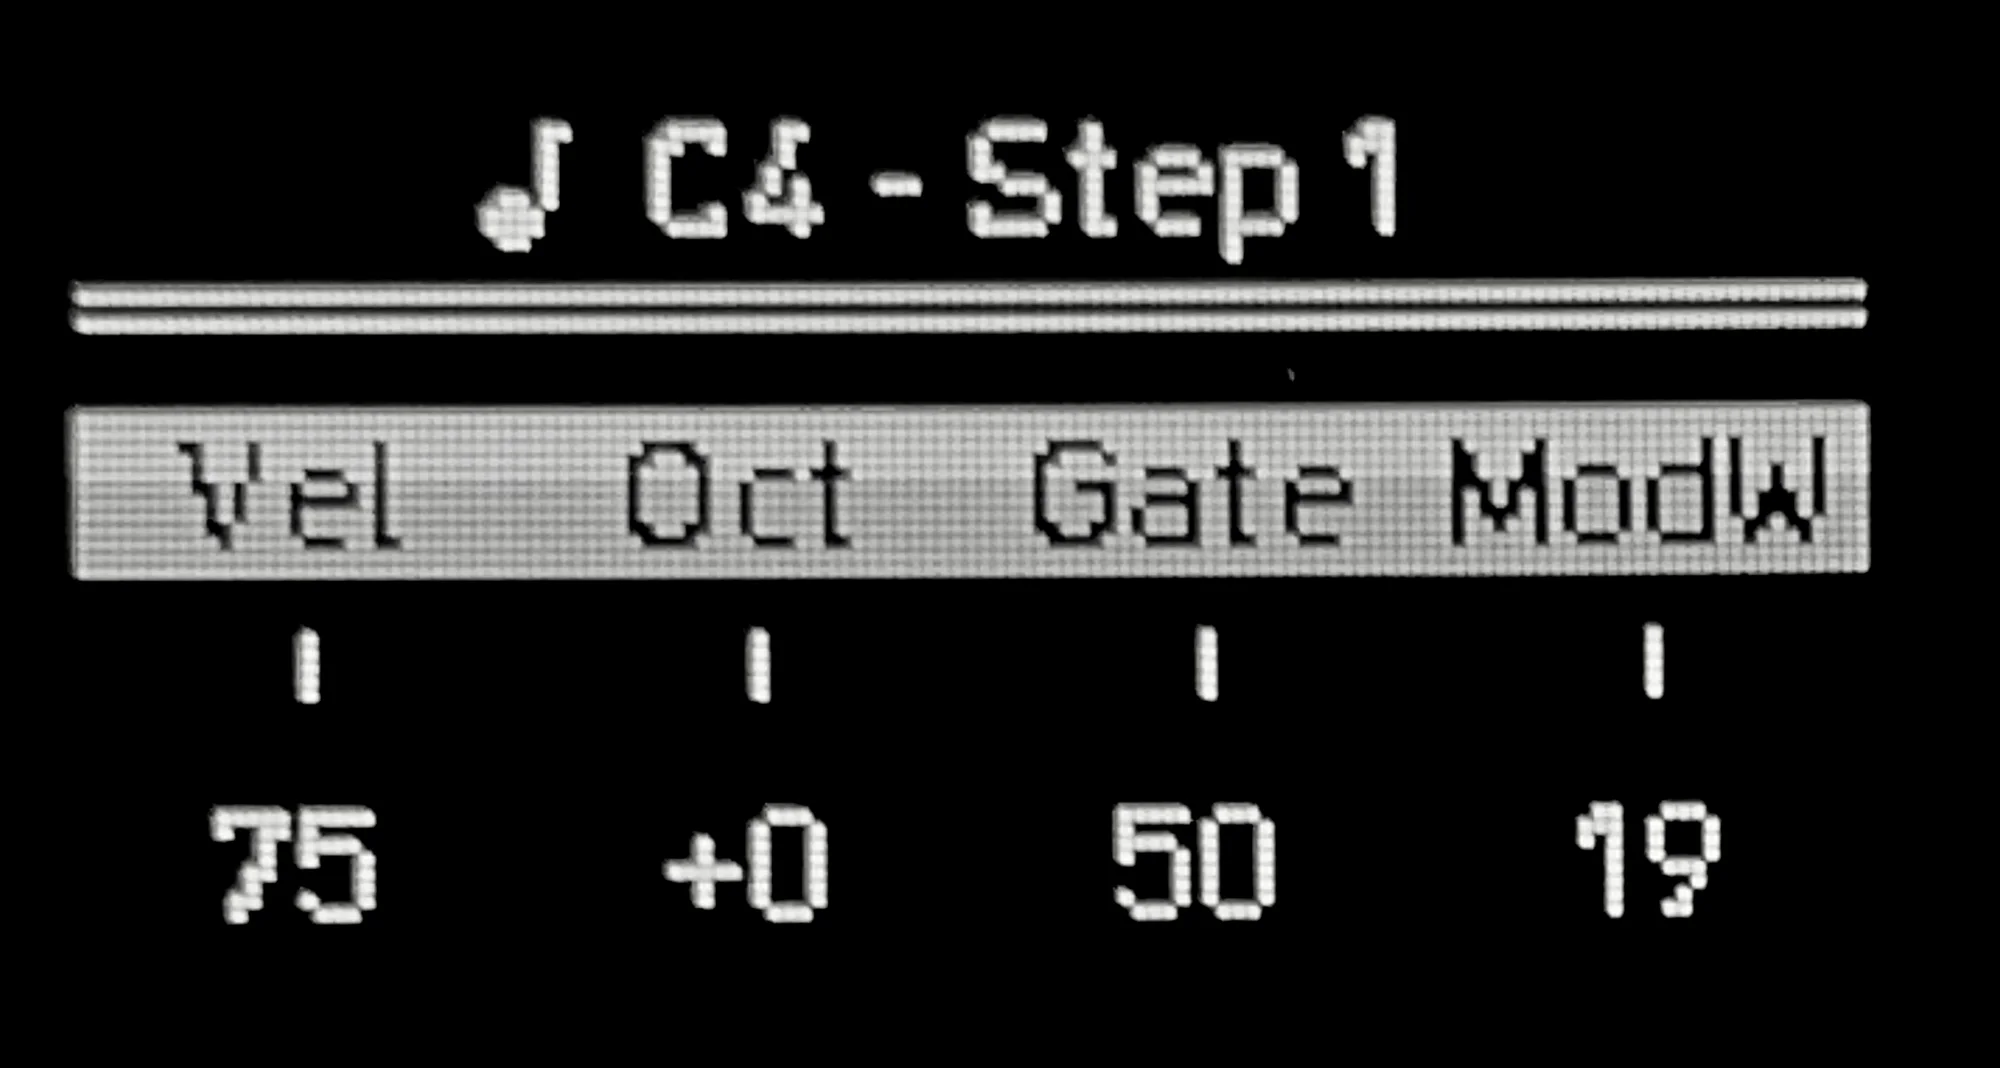
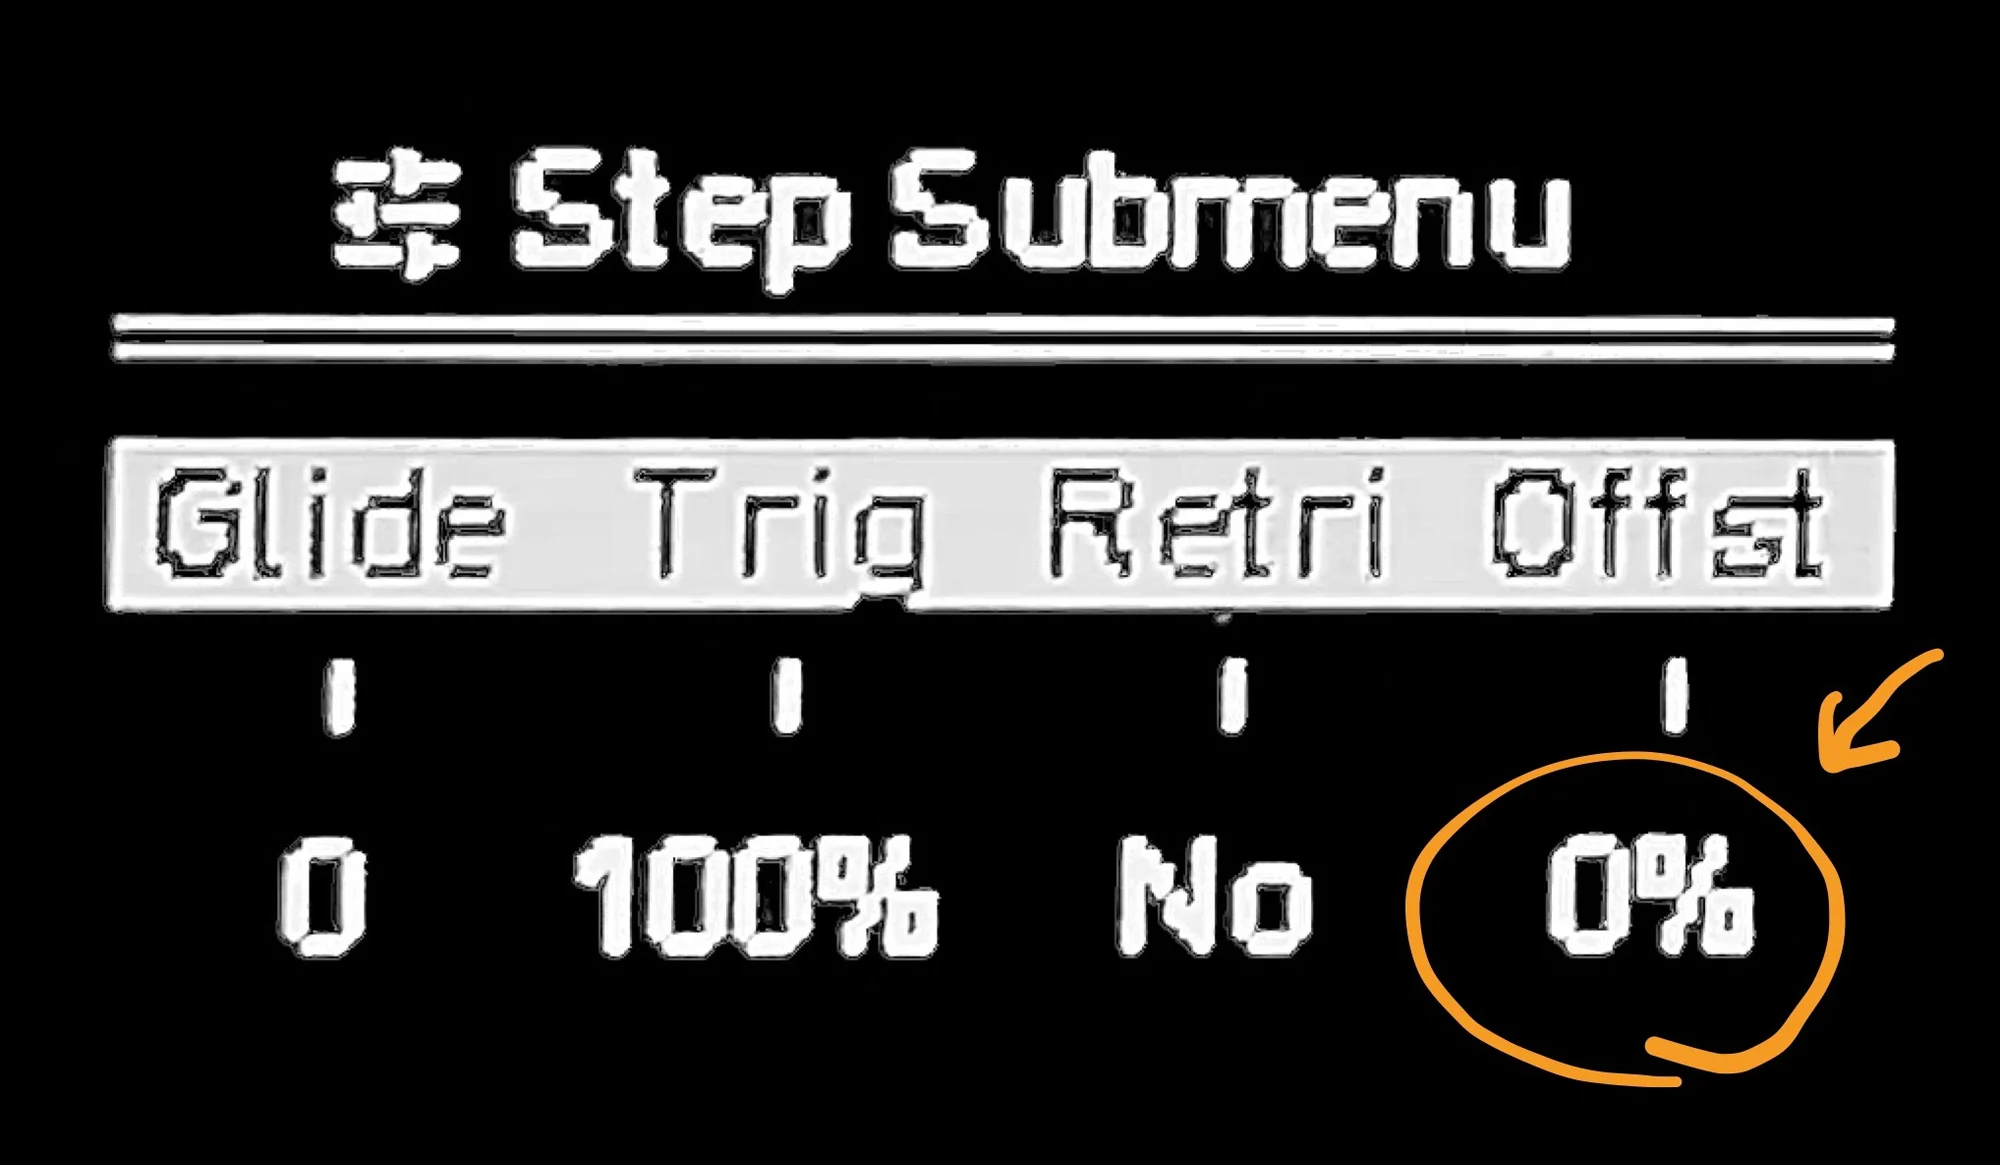
There are actually more per-note settings available, accessed by pressing Shift while holding a note. When you do this, the display changes as follows:
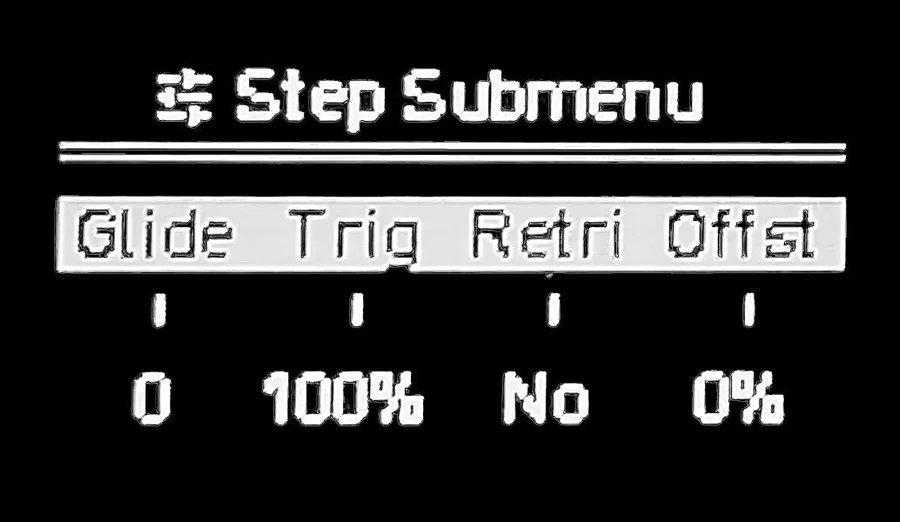
This is the note submenu. The items shown here are also per-note settings:
- Glide
- Trigger (Trig)
- Retrigger (Retri)
- Offset (Offst)
I’ll explain these next, but to change these values, you need to hold Shift and the note pad with one hand while turning an encoder with the other — which is quite a stretch. Turning Step Chord ON lets you access the submenu directly when pressing a note, without needing Shift. Turning it OFF returns to the normal menu.
By the way, it’s called “Step Chord” because when the track is in Chord mode, pressing this button again switches the note-hold menu to Chord settings — hence the name.
Note Submenu
So let’s go through the note submenu items. There are 4 items:
- Glide
- Trigger (Trig)
- Retrigger (Retri)
- Offset (Offst)
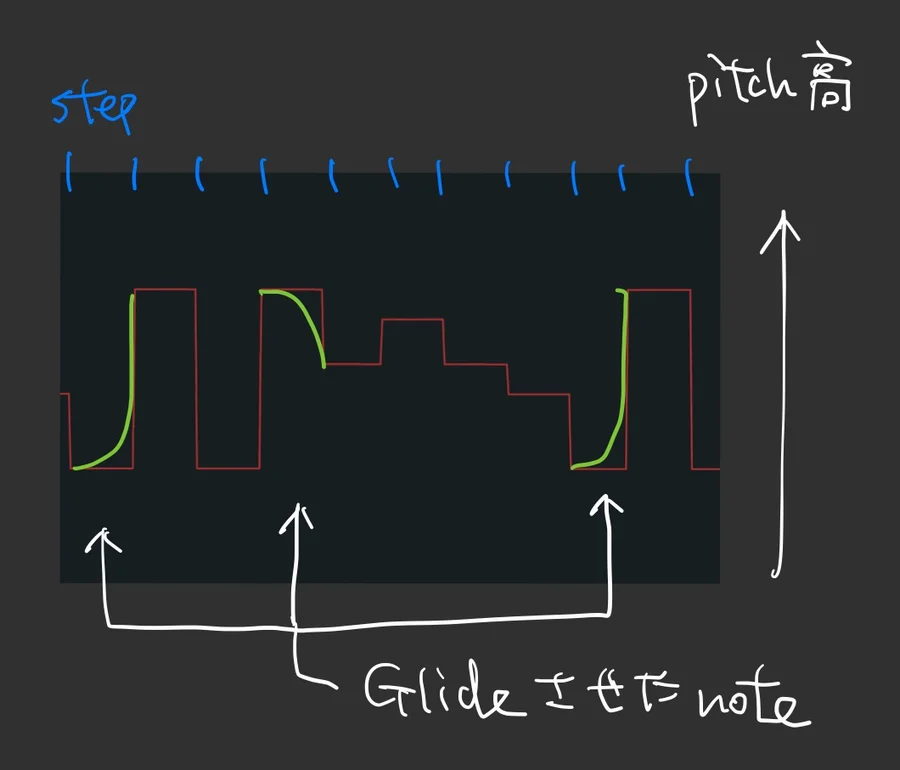
Glide
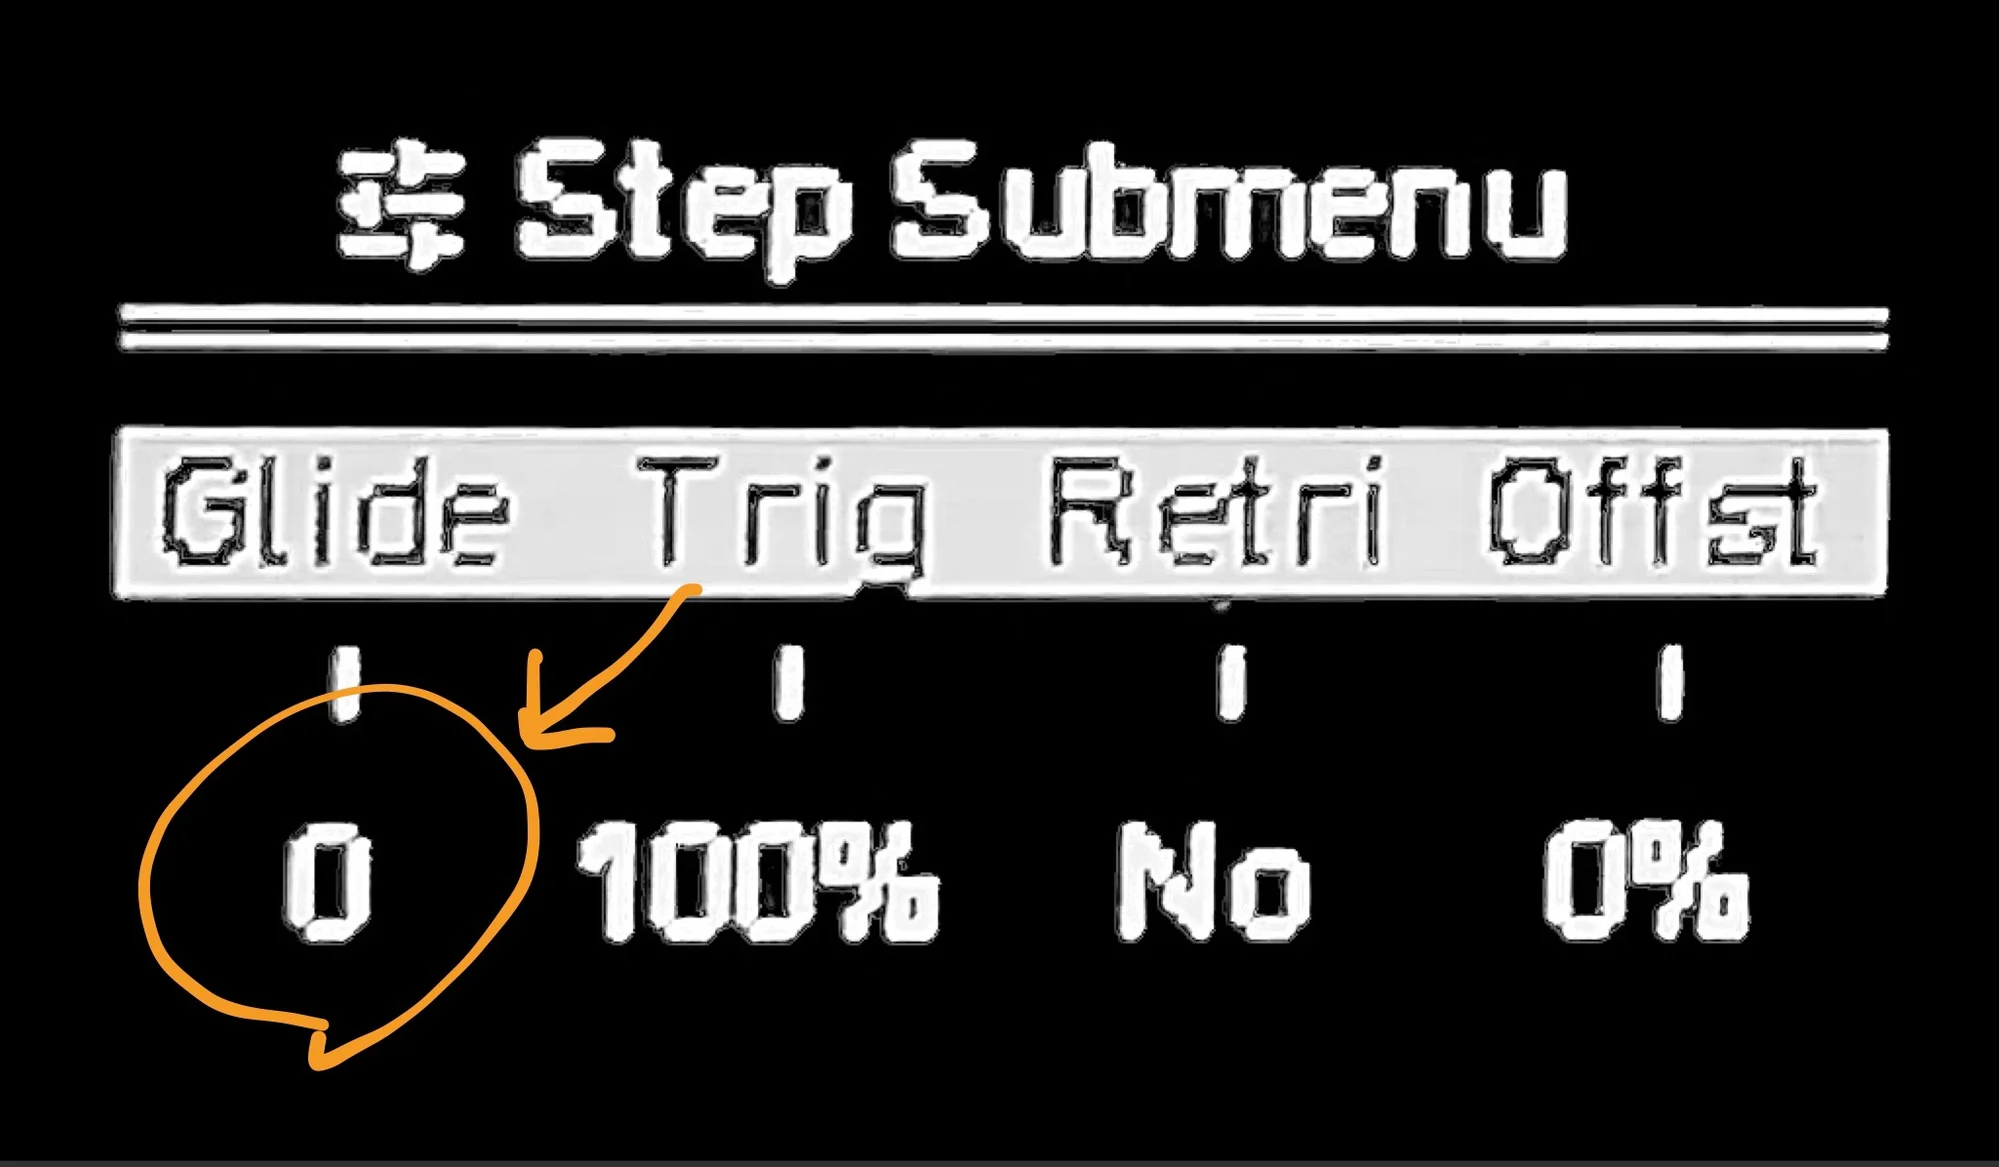
Glide is a parameter that smoothly transitions the pitch between two notes. You can set the transition curve from 0 to 100. The default is 0, which means no effect, but increasing the value changes the pitch transition as follows:
Note that as of firmware version 3.9.3, this effect only applies to CV pitch output. Changing Glide has no effect on MIDI output. (This may be addressed in future updates.)
Trigger (Trig)
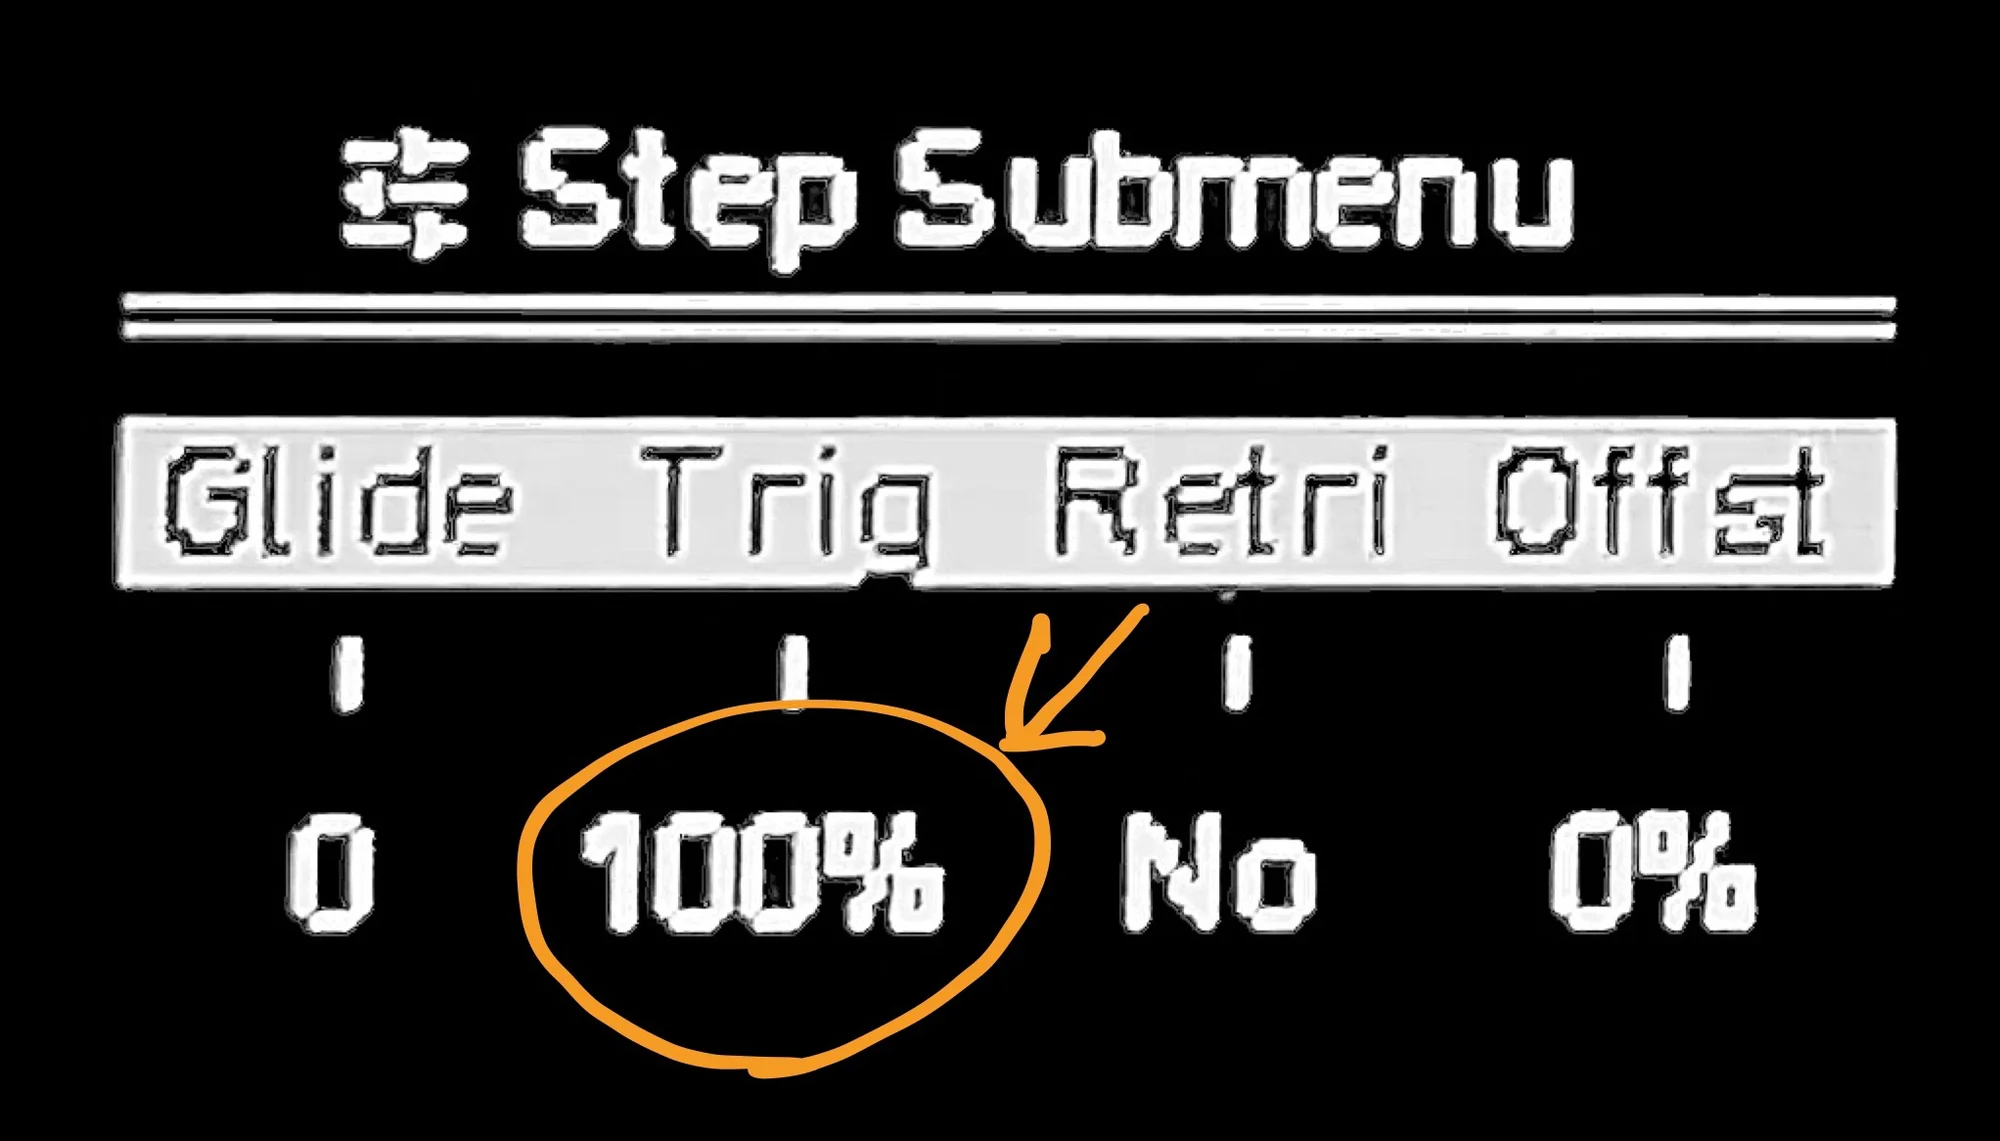
Trigger (Trig) specifies the probability or condition for triggering a note.
Probability
The first option is probability, ranging from 0% to 100%. The default is 100%, meaning the note is triggered every time its step becomes active. Stating it explicitly sounds obvious, but…
Setting it to 50%, for example, means a random draw occurs each time the step becomes active, and the note triggers with a 50% chance. This way, even while repeating the same sequence, certain notes will sometimes play and sometimes not, creating continuous variation.
Conditions
Turning the encoder further reveals values like 1 | 3 and 4 | 7. These mean:
1 | 3: Trigger only on the 1st out of every 3 passes4 | 7: Trigger only on the 4th out of every 7 passes
It might seem confusing, but with 1 | 3, here’s how it plays out across loop repetitions:
- Loop 1: Trigger
- Loop 2: No trigger
- Loop 3: No trigger
- Loop 4: Trigger
- Loop 5: No trigger
- Loop 6: No trigger
- Loop 7: Trigger
- Loop 8: No trigger
- Loop 9: No trigger
In this case, even an 8-step sequence effectively becomes a 24-step loop because it takes 3 repetitions to complete one cycle.
There are additional setting values available, but since this is more advanced content, I’ll skip those details here.
Trigger is hidden in the submenu but is actually quite useful.
Retrigger (Retri)

Retrigger (Retri) sets the number of times a trigger fires within one step. The default is “No” (which means once), but setting it to 2 or higher fires multiple triggers within a single step.
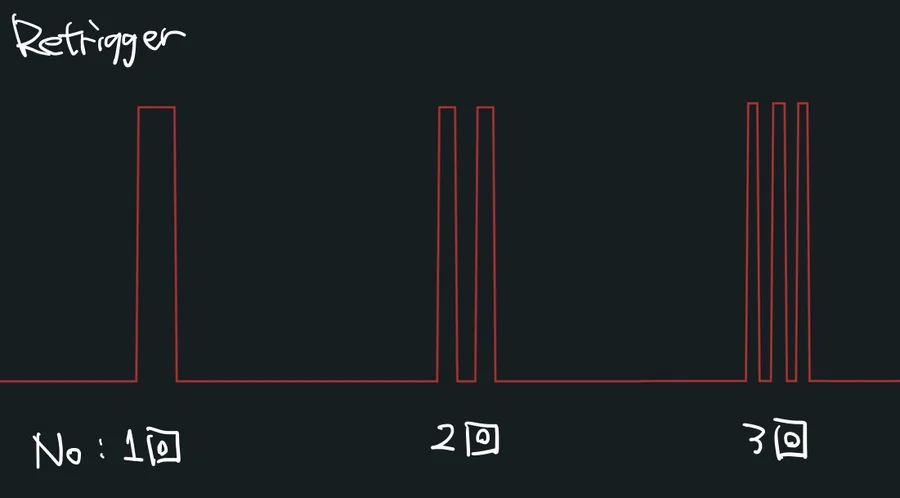
In addition to a count, you can also select “Skip,” which fires 0 times — meaning no trigger is generated.
Retrigger lets you create finely timed triggers without changing the time division.
Offset (Offst)
Offset (Offst) specifies how much to shift a note’s trigger timing forward or backward. The default is 0, meaning the note triggers exactly when its step becomes active. Offset can be set from -45% to 45%.
For example, with a time division of 1/16, setting offset to 45% means the trigger fires after 45% of one step’s duration has elapsed from when the step becomes active. Roughly speaking, the trigger occurs about 1/32 later than normal.
Negative values work in reverse — the trigger fires before the step becomes active.

This is useful for fine-tuning timing below the time division resolution.
That’s it for Part 2. Part 3 will probably start with the Modulation Lane explanation.