I'm starting a guide series on the OXI ONE MKII.
We carry the OXI ONE MKII here at Takazudo Modular, and this is quite a deep sequencer. It features eight independent sequencers, each of which can be set to one of six sequencer modes — that's a serious amount of functionality.
OXI has released an official tutorial video series called "First Steps with OXI One MKII," and it's very well structured, so I've decided to write this guide series in parallel, following along with those videos. I'll also be supplementing with content from the manual.
I've published a Japanese translation of the manual at the site below. If you want to dig into the details, feel free to check it out as well.
There are also guide articles for the original OXI ONE on this site, but the MKII has evolved significantly — the number of sequencers has increased from four to eight, and the grid layout has changed. So this series is written as a dedicated MKII guide from scratch.
If you have any questions about the OXI ONE MKII, feel free to join the Takazudo Modular Discord linked below. I should be able to help with basic questions there.
- What Is the OXI ONE MKII?
- OXI ONE MKII Product Page
- Hardware Overview
- Projects and Patterns
- Selecting and Muting Sequencers
- Grid Basics
- Sequence Length and Init/End
- Keyboard View
- Copy and Paste
- Encoder Parameters
- Sync Mode
What Is the OXI ONE MKII?
The OXI ONE MKII is an advanced performance sequencer developed by OXI Instruments, based in Spain. A sequencer is an instrument that controls connected sound sources — synthesizers, drum machines, and so on — by sending out MIDI or CV/Gate signals in sequence. In other words, the OXI ONE MKII itself doesn't produce any sound.
Here's a quick summary of its key features:
- Eight independent sequencers, each configurable with a different mode (Mono, Poly, Chord, Multitrack, Stochastic, Matriceal)
- 16x8 RGB LED pad grid (128 pads total) as the main input surface
- Four encoders for quick parameter adjustments
- MIDI TRS in/out, eight CV/Gate outputs, Clock in/out, USB-C, and Bluetooth
- Built-in battery (2200mAh) with up to approximately 8 hours of operation
- microSD card support for saving and loading projects
From melodies and chord progressions to drum patterns and generative sequences, this single unit covers an impressively wide range of sequencing.
OXI ONE MKII Product Page
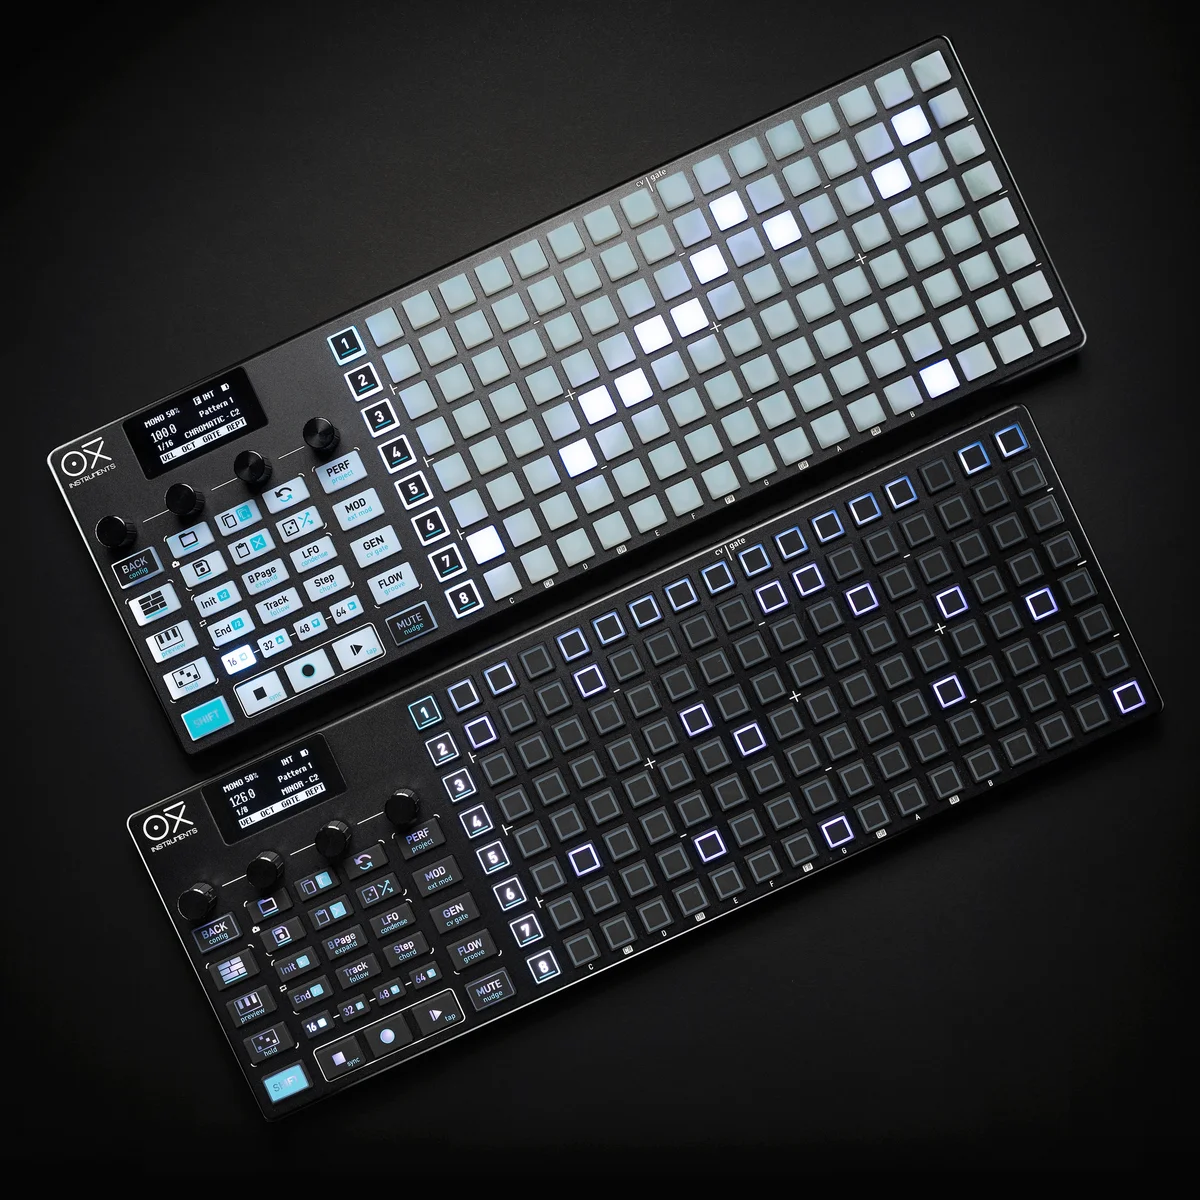
The OXI ONE MKII is available in two color variations.
OXI ONE MKII Black Edition, next-generation model with 8-part sequencer. Enhanced generative features, large OLED display, and up to 64-track control.
OXI ONE MKII, next-generation model with 8-part sequencer. Enhanced generative features, large OLED display, and up to 64-track control.
Hardware Overview
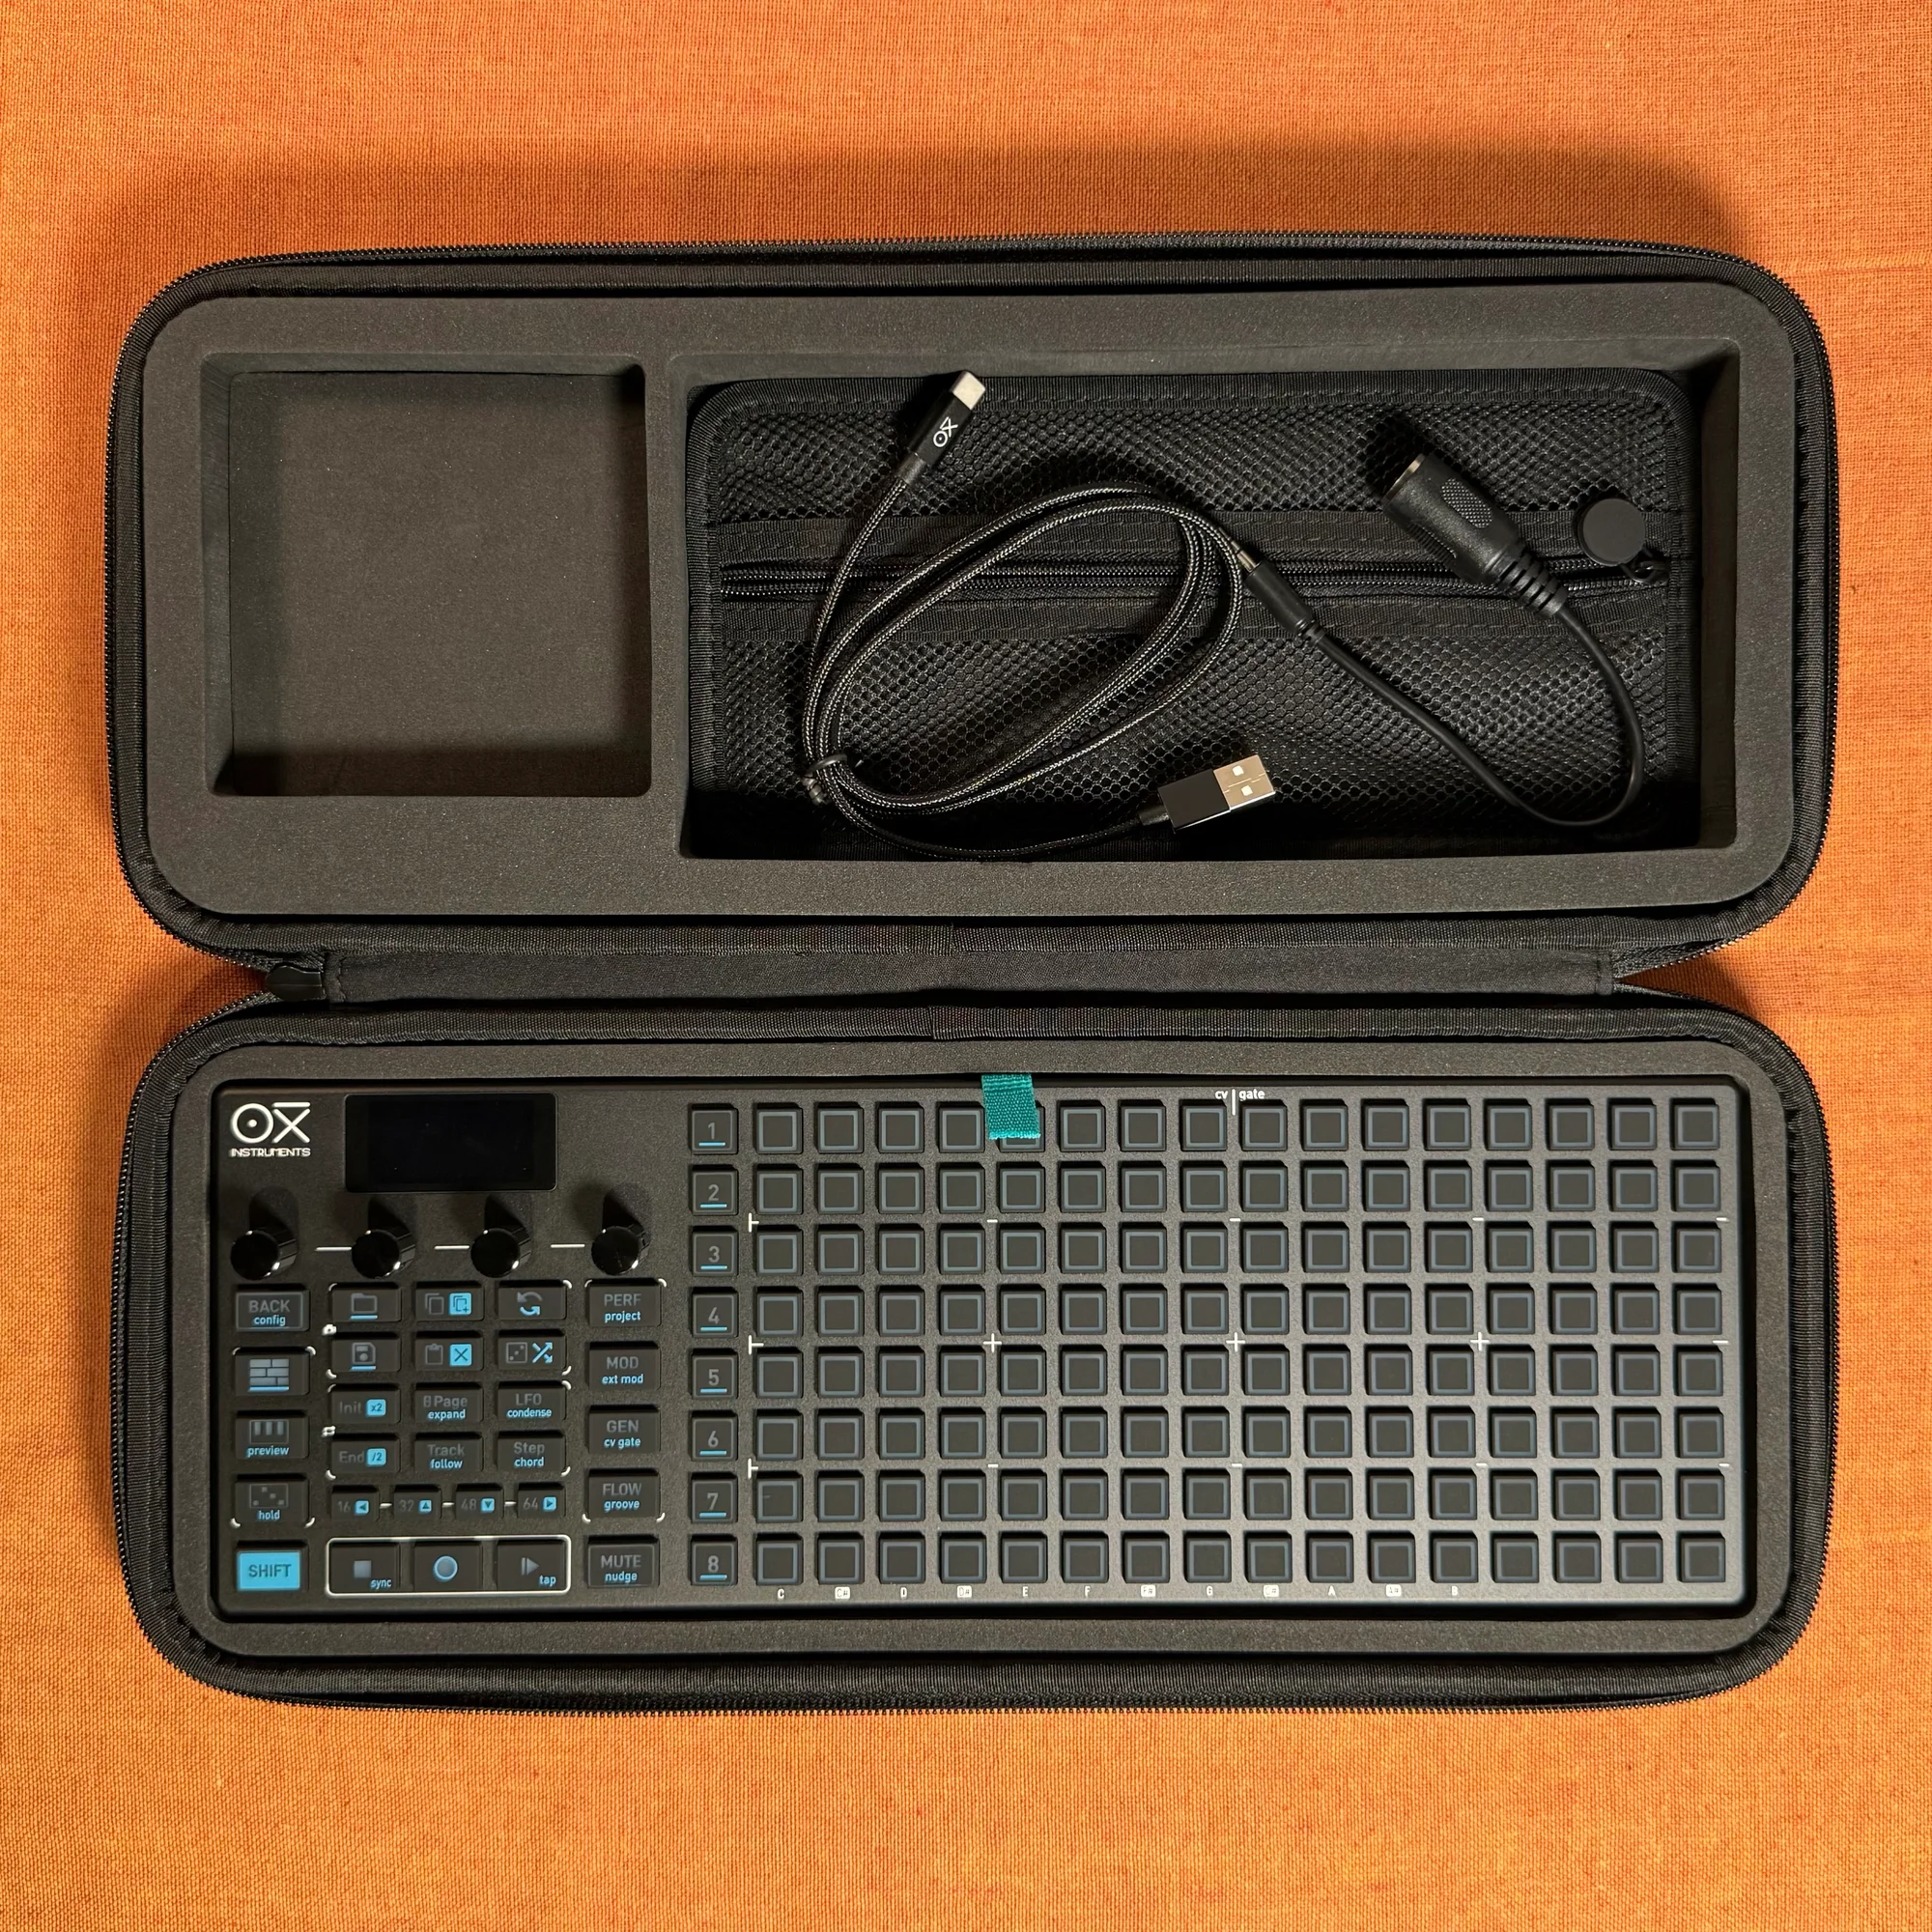
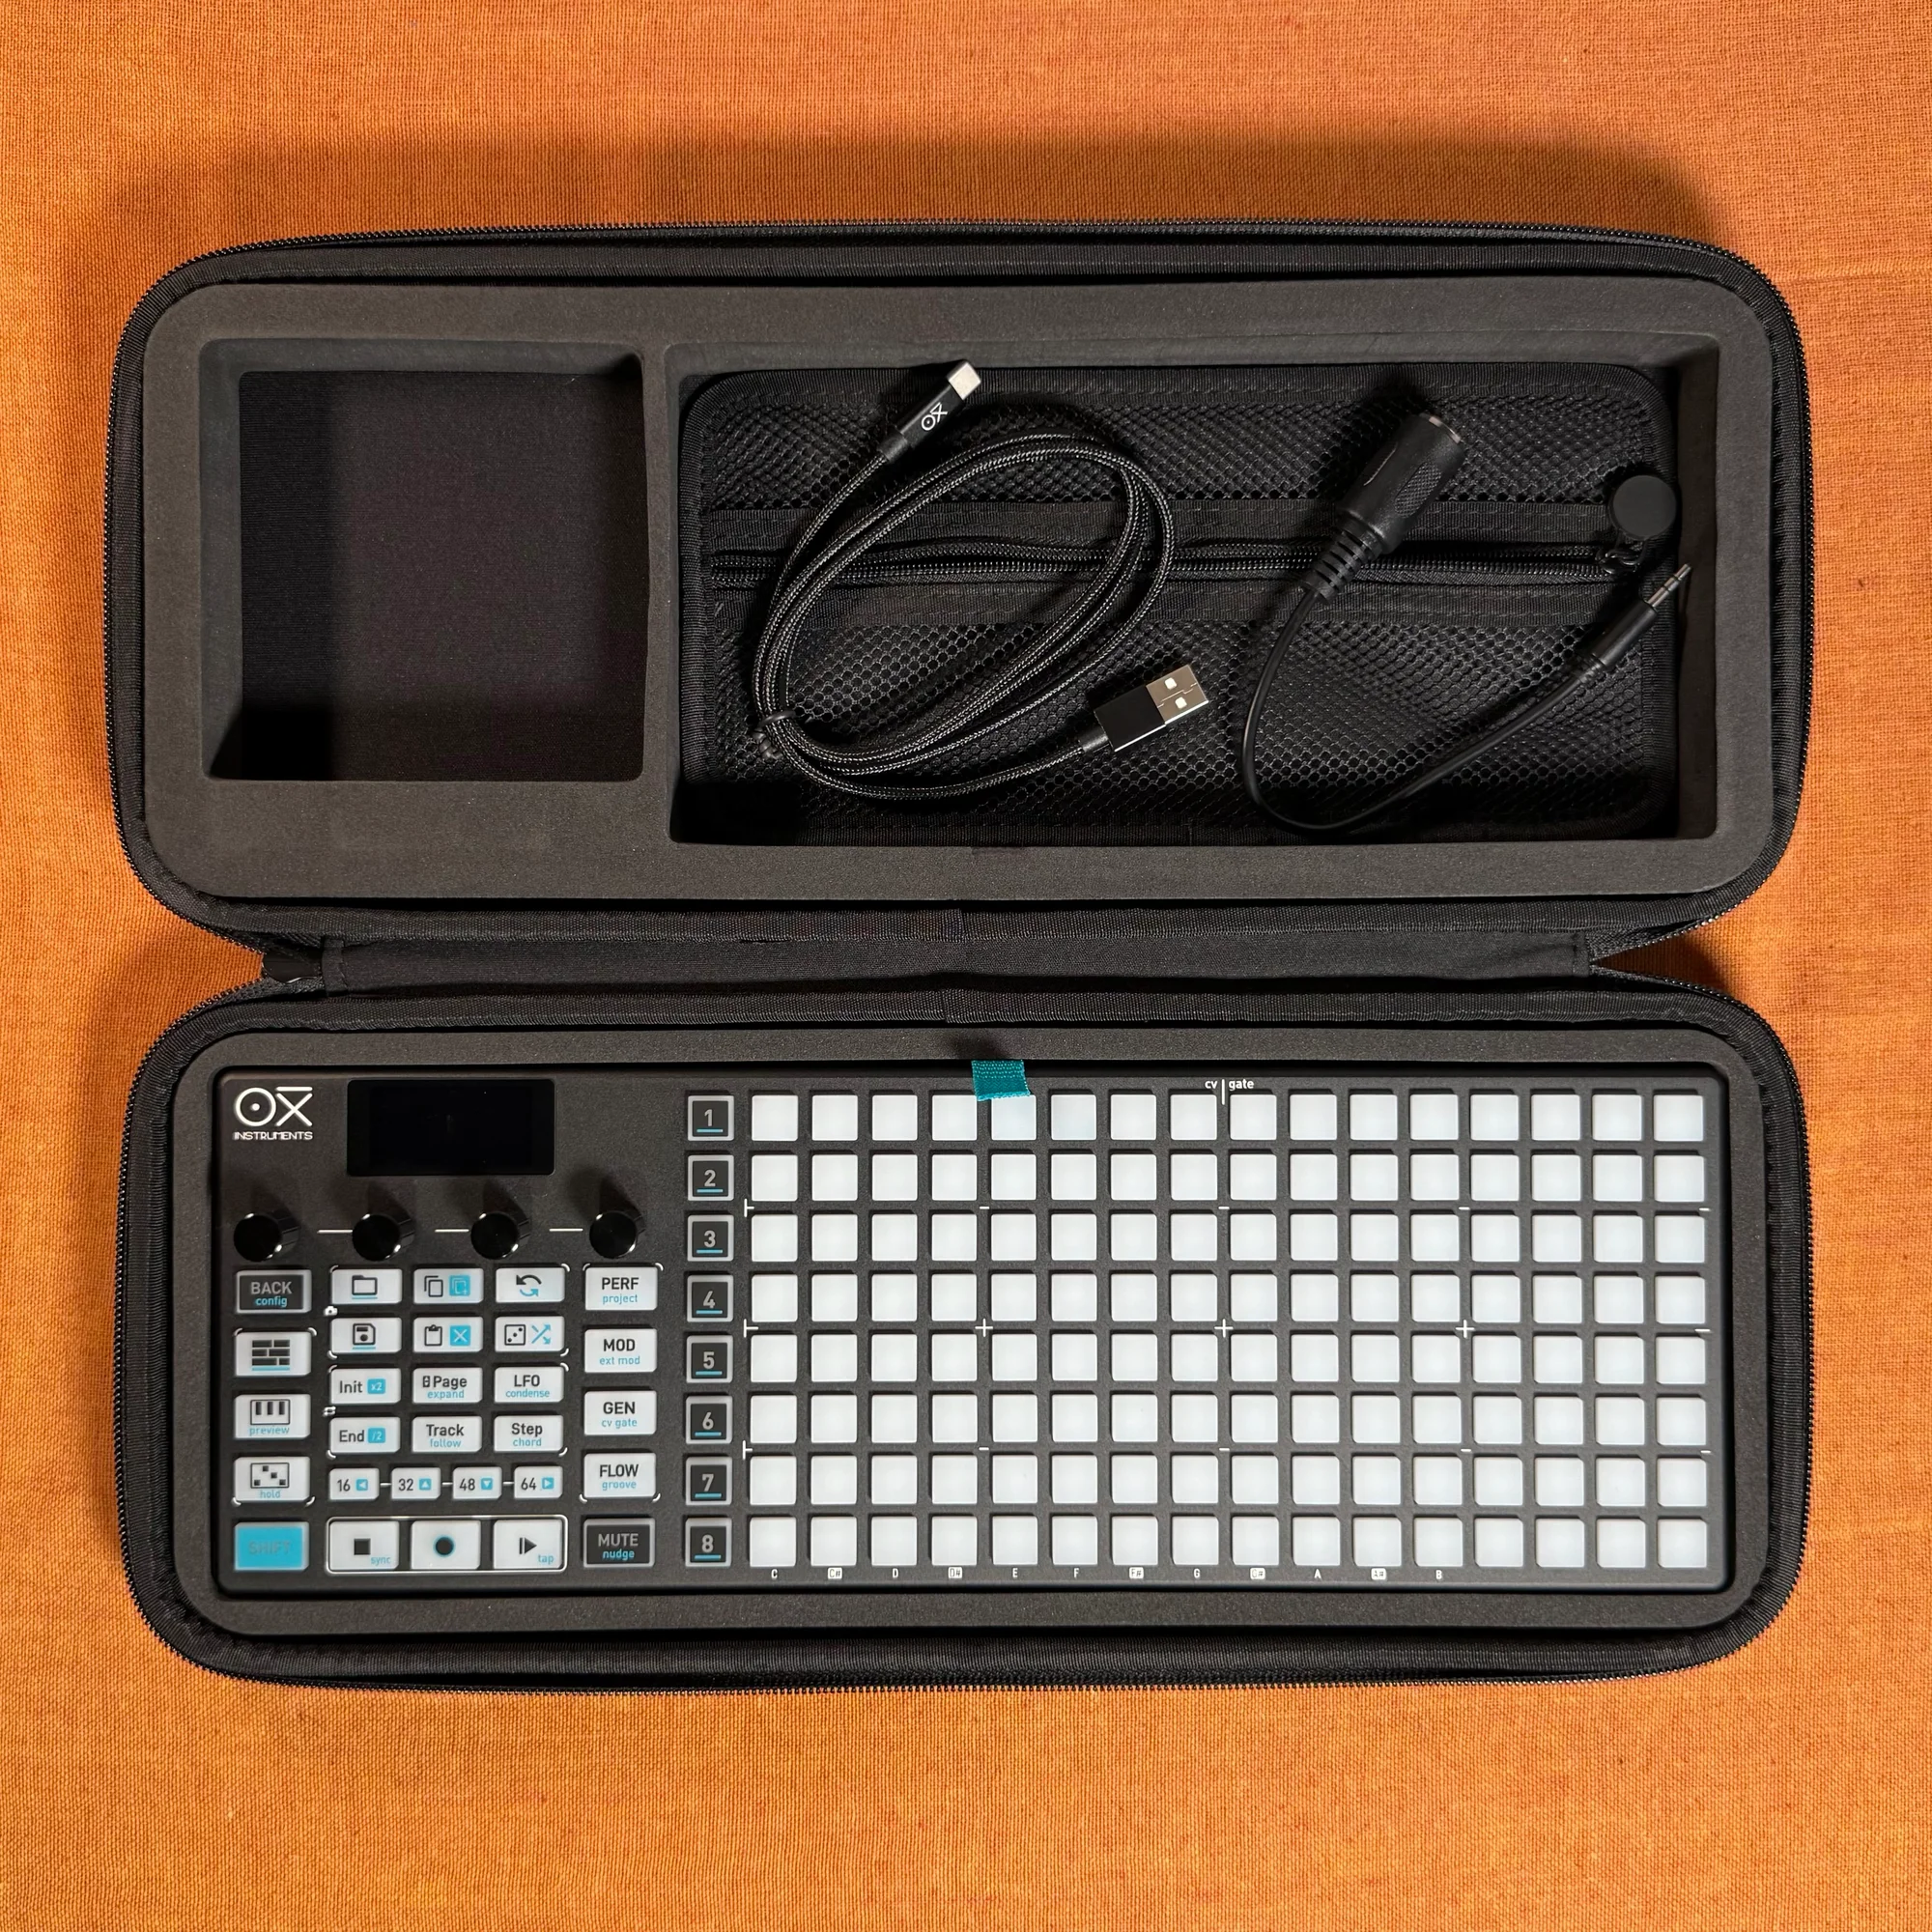
Let's take a look at the physical layout of the OXI ONE MKII.
Front Panel
The front panel consists of these main elements:
- Sequencer buttons (1–8): Eight buttons arranged vertically on the left side. Used to select which sequencer you want to edit
- 16x8 pad grid: The large area on the right. 128 RGB LED pads for placing notes and editing parameters
- OLED display: A small screen in the center. Shows the current state and parameters
- Four encoders: Rotary knobs below the display. Turn, press, or long-press to control various parameters
- Function buttons: Play, Stop, Record, Shift, Mute, Back, and many more
Shift Button
The Shift button is particularly important. Holding Shift while pressing other buttons accesses their secondary functions. The turquoise text printed on each button indicates its Shift function name. You'll use this constantly, so keep it in mind.
Rear Connections
The rear panel has a generous array of I/O connections:
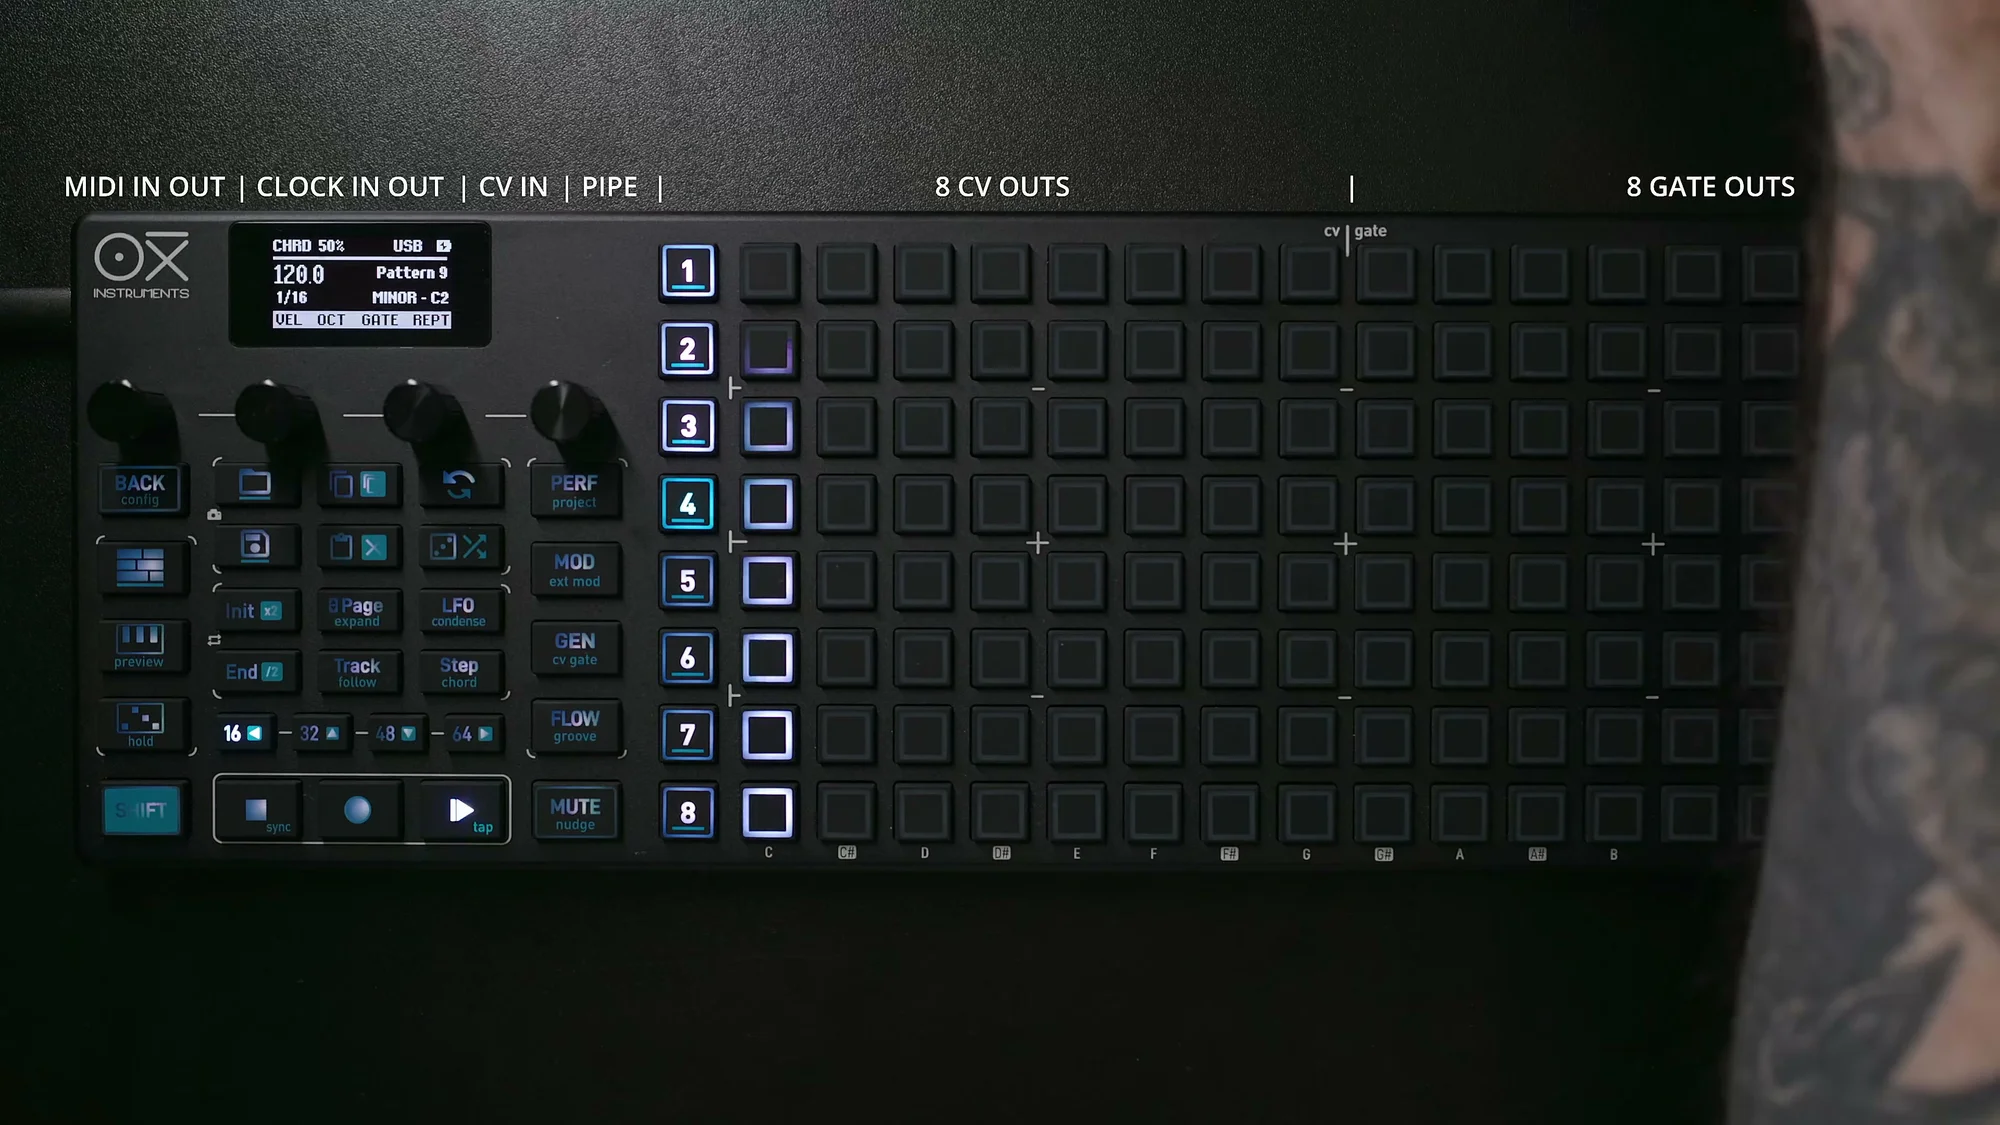
- MIDI TRS In/Out: For connecting external MIDI devices (DIN adapters included)
- Clock In/Out: Analog clock signal I/O
- CV Out (1–8): Control voltage outputs ranging from -3V to +5V
- Gate Out (1–8): Gate outputs at 5V or 10V (configurable)
- CV Input: External CV input
- Pipe (Mini HDMI): For connecting to the OXI Pipe MKII module
- USB-C: For charging, PC/Mac connection, and USB MIDI communication
All CV/Gate outputs are configurable — you can freely customize which sequencer data goes to which output jack.
Projects and Patterns
The OXI ONE MKII's data structure has two levels: Projects and Patterns.
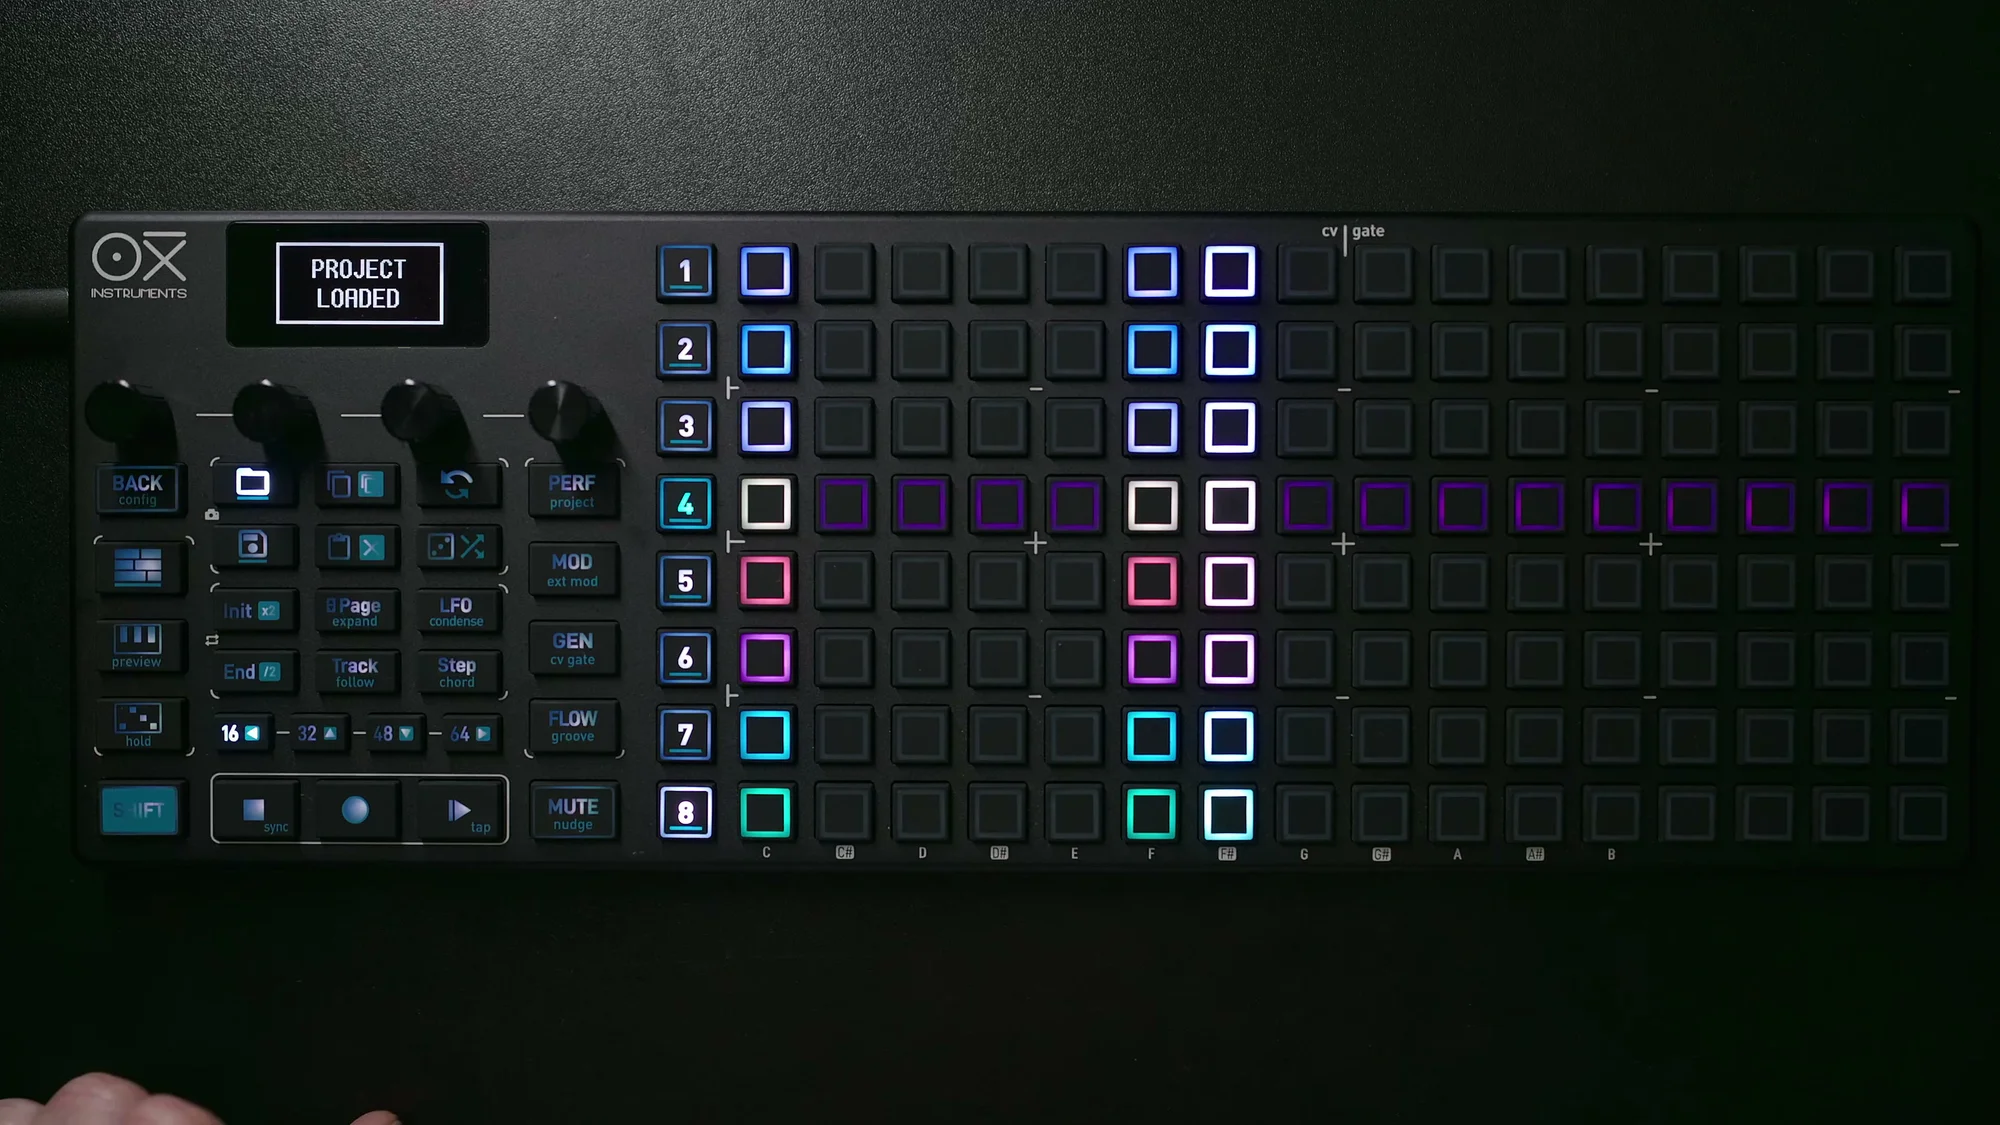
Projects
A project is the top-level structure in the OXI ONE MKII, containing data for all eight sequencers. Only one project is active at a time, and when you power on, the previous project loads automatically.
- 20 internal project slots are available
- With a microSD card, you can save and load even more projects
- Loading from internal slots has no wait time, making live project switching smooth
To load a project, press the Load button and turn Encoder 1. The preview screen also shows an overview of the patterns contained in each project.
To save, press the Save button and select a slot. You can also quick-save by holding Shift + Save.
Patterns
Patterns are the building blocks of tracks and performances. Each sequencer can hold 16 patterns, with one pattern active per sequencer at a time.
- When the sequencer is stopped, tapping a pattern button loads it instantly
- Pattern switching during playback follows the quantization settings in the project configuration
- Pattern switching can also be automated using the Arranger
Selecting and Muting Sequencers
Selecting a Sequencer
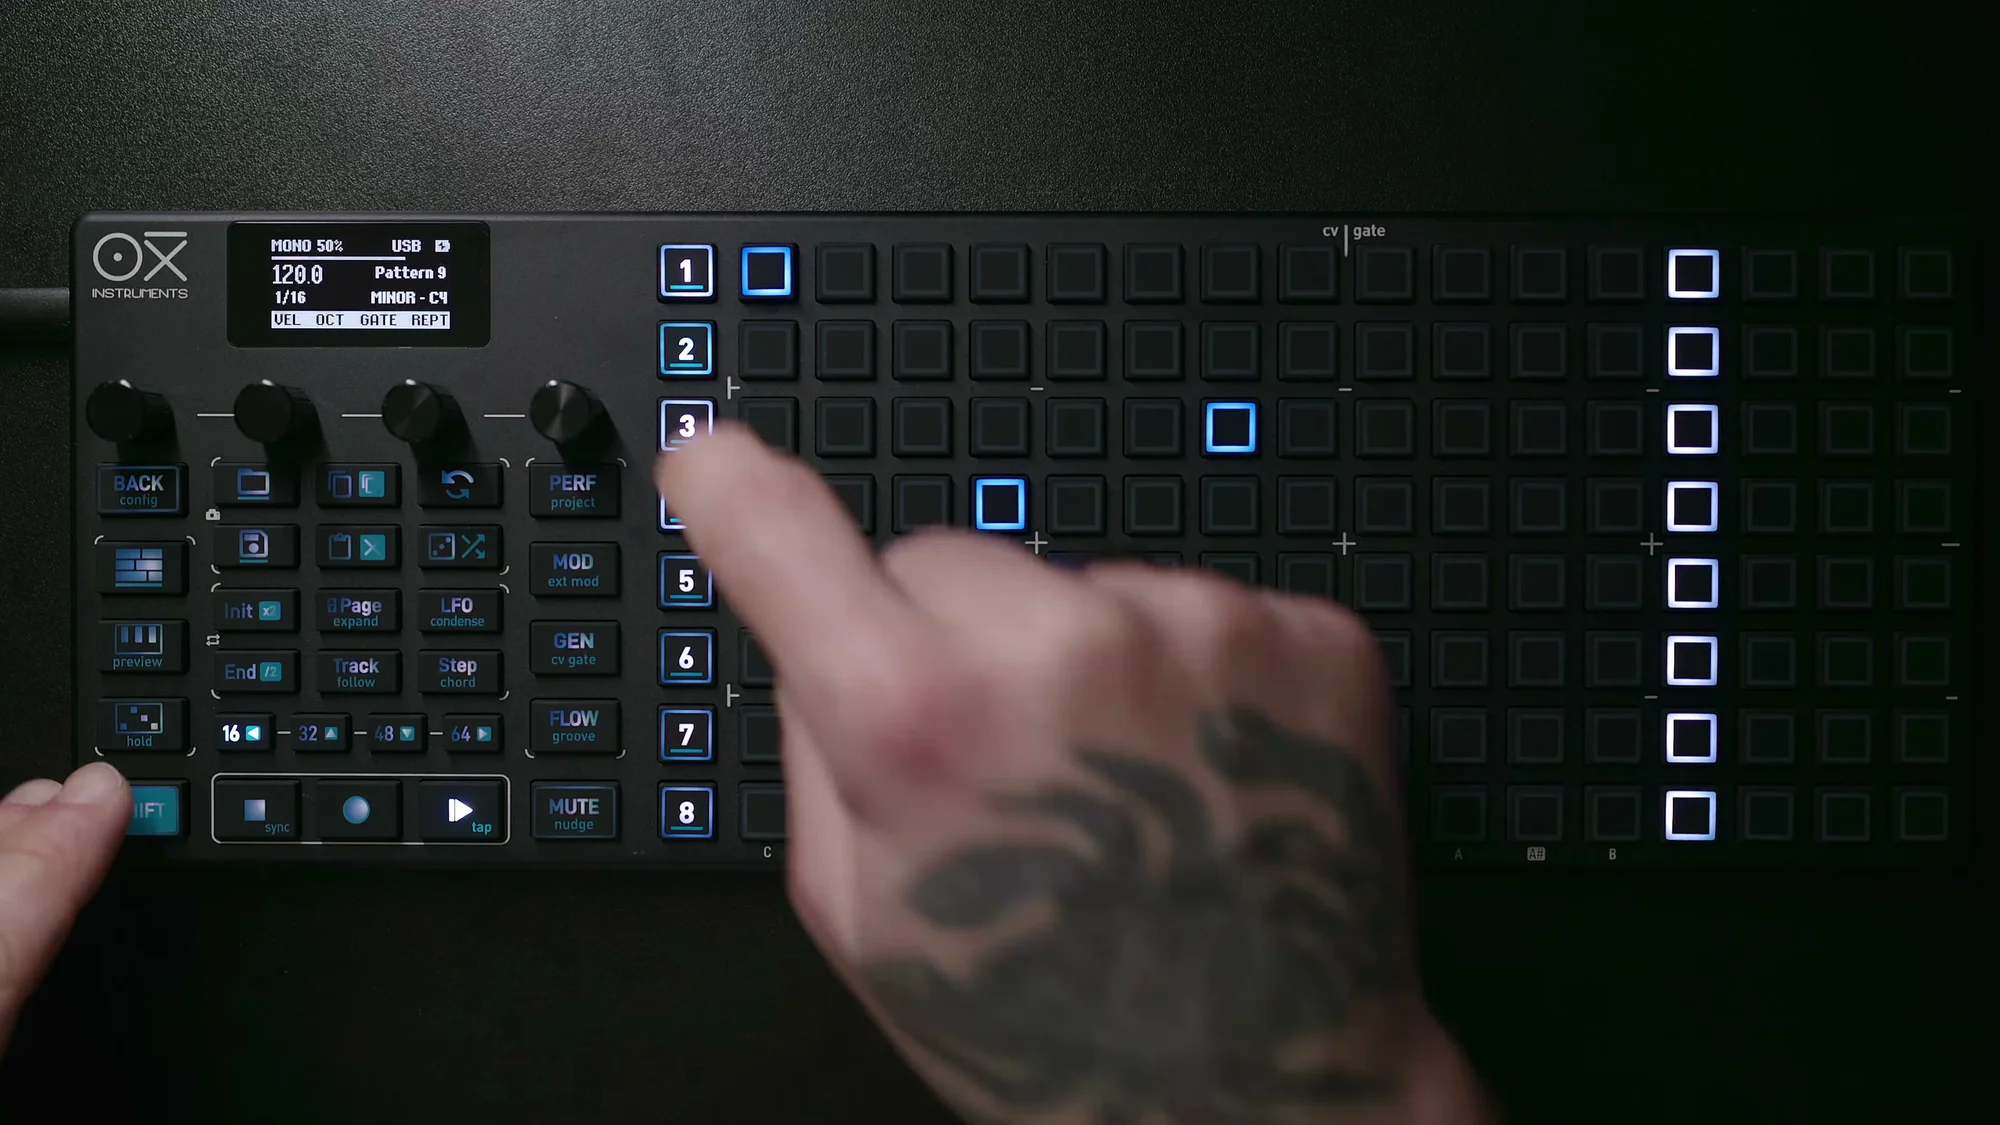
Press buttons 1–8 on the left side to select the sequencer you want to edit.
- Flashing (color + white): Currently selected for editing
- Solid white: Active but not currently being edited
- Off: Muted sequencer
Pressing Shift + a sequencer button opens its settings screen, where you can change the MIDI channel, program change, sequencer mode, and more.
Muting
Hold the Mute button and press a sequencer button to mute (silence) that sequencer.
- Flashing red: Mute pending
- Flashing green: Unmute pending
- Releasing the Mute button applies all pending mute/unmute changes at once
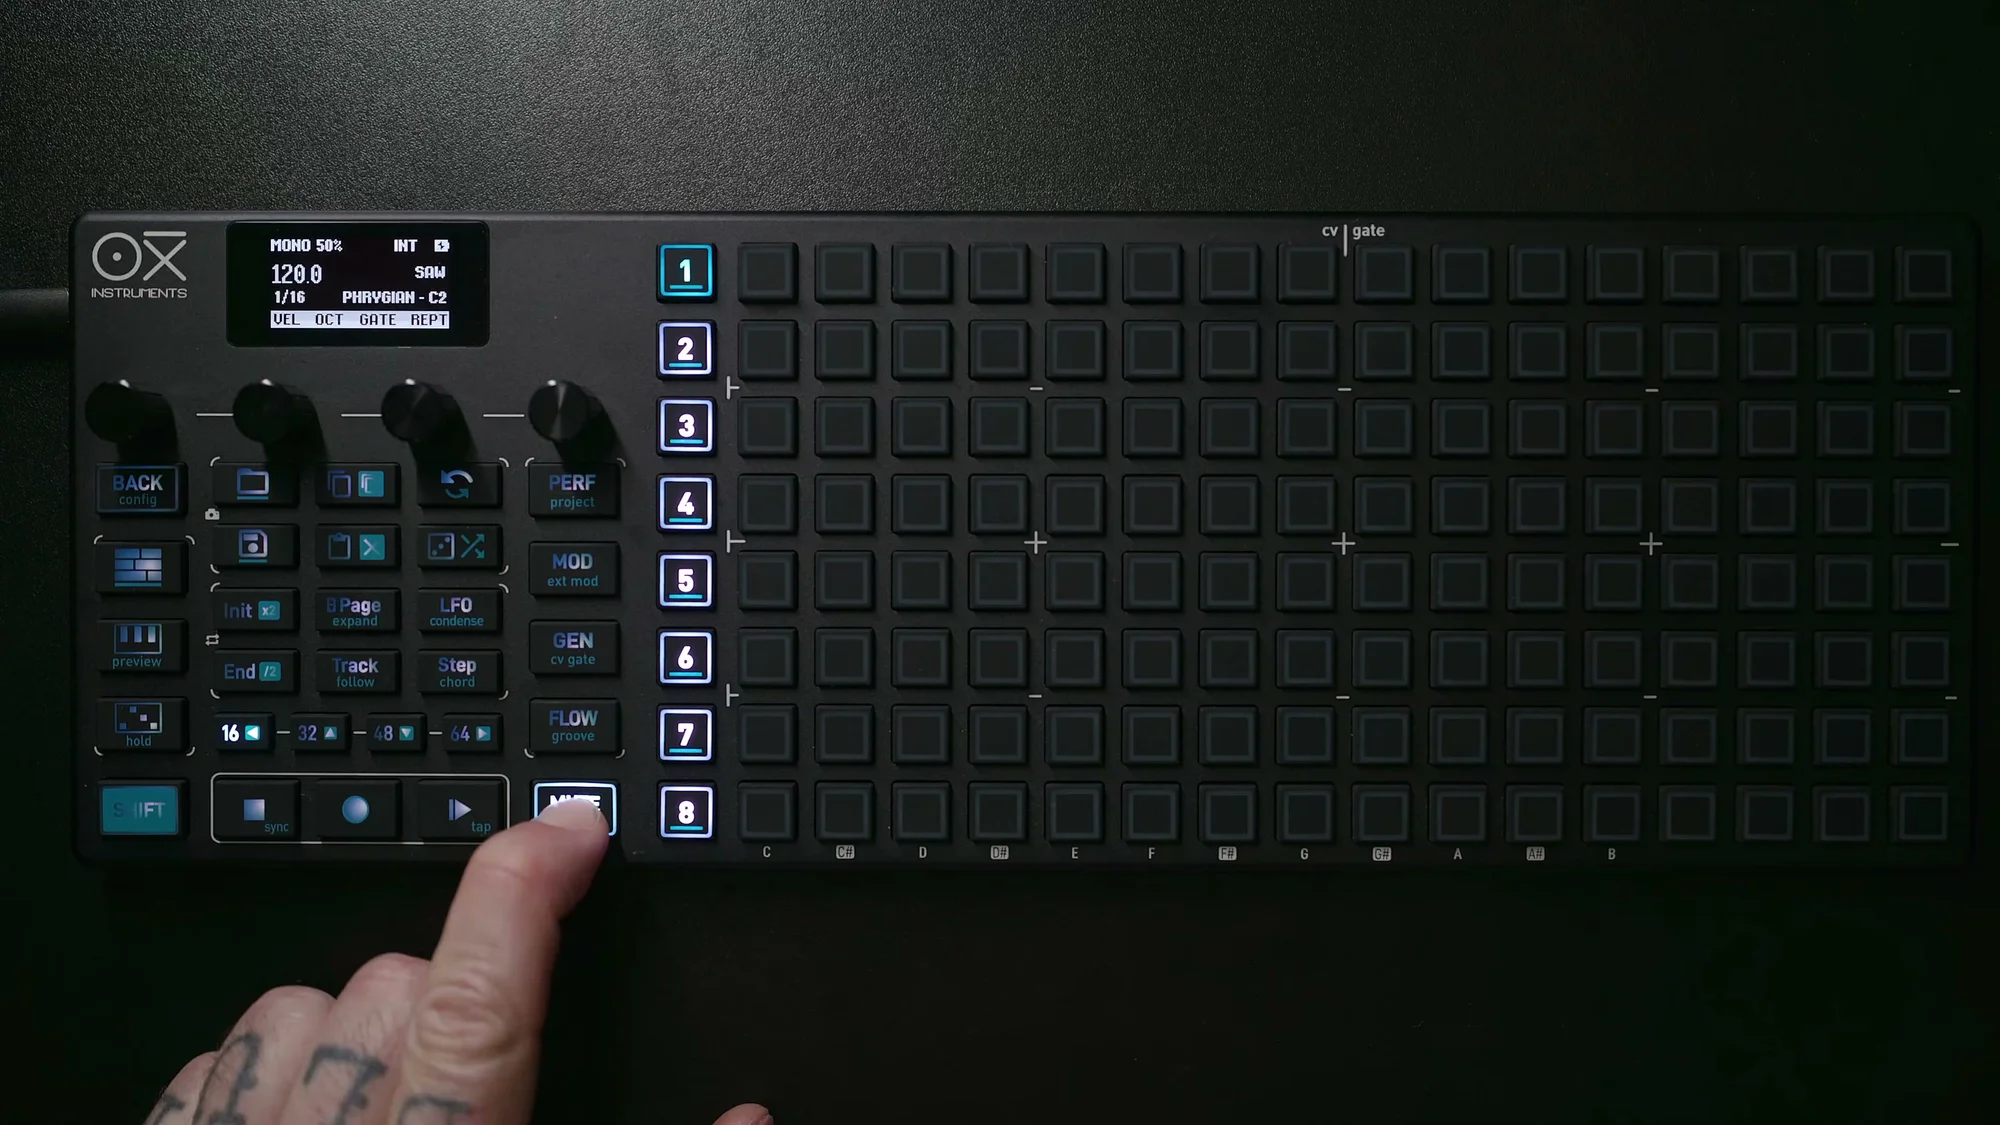
A muted sequencer doesn't output sound, but you can still edit it. In the performance settings, you can choose different mute behaviors to match your style.
Grid Basics
The 16x8 pad grid is the main control surface of the OXI ONE MKII. How the grid is used varies by sequencer mode, but the basic rules are as follows:
- Horizontal axis (16 columns): Steps (time axis). Progresses from left to right
- Vertical axis (8 rows): Pitch. Lower notes at the bottom, higher notes at the top
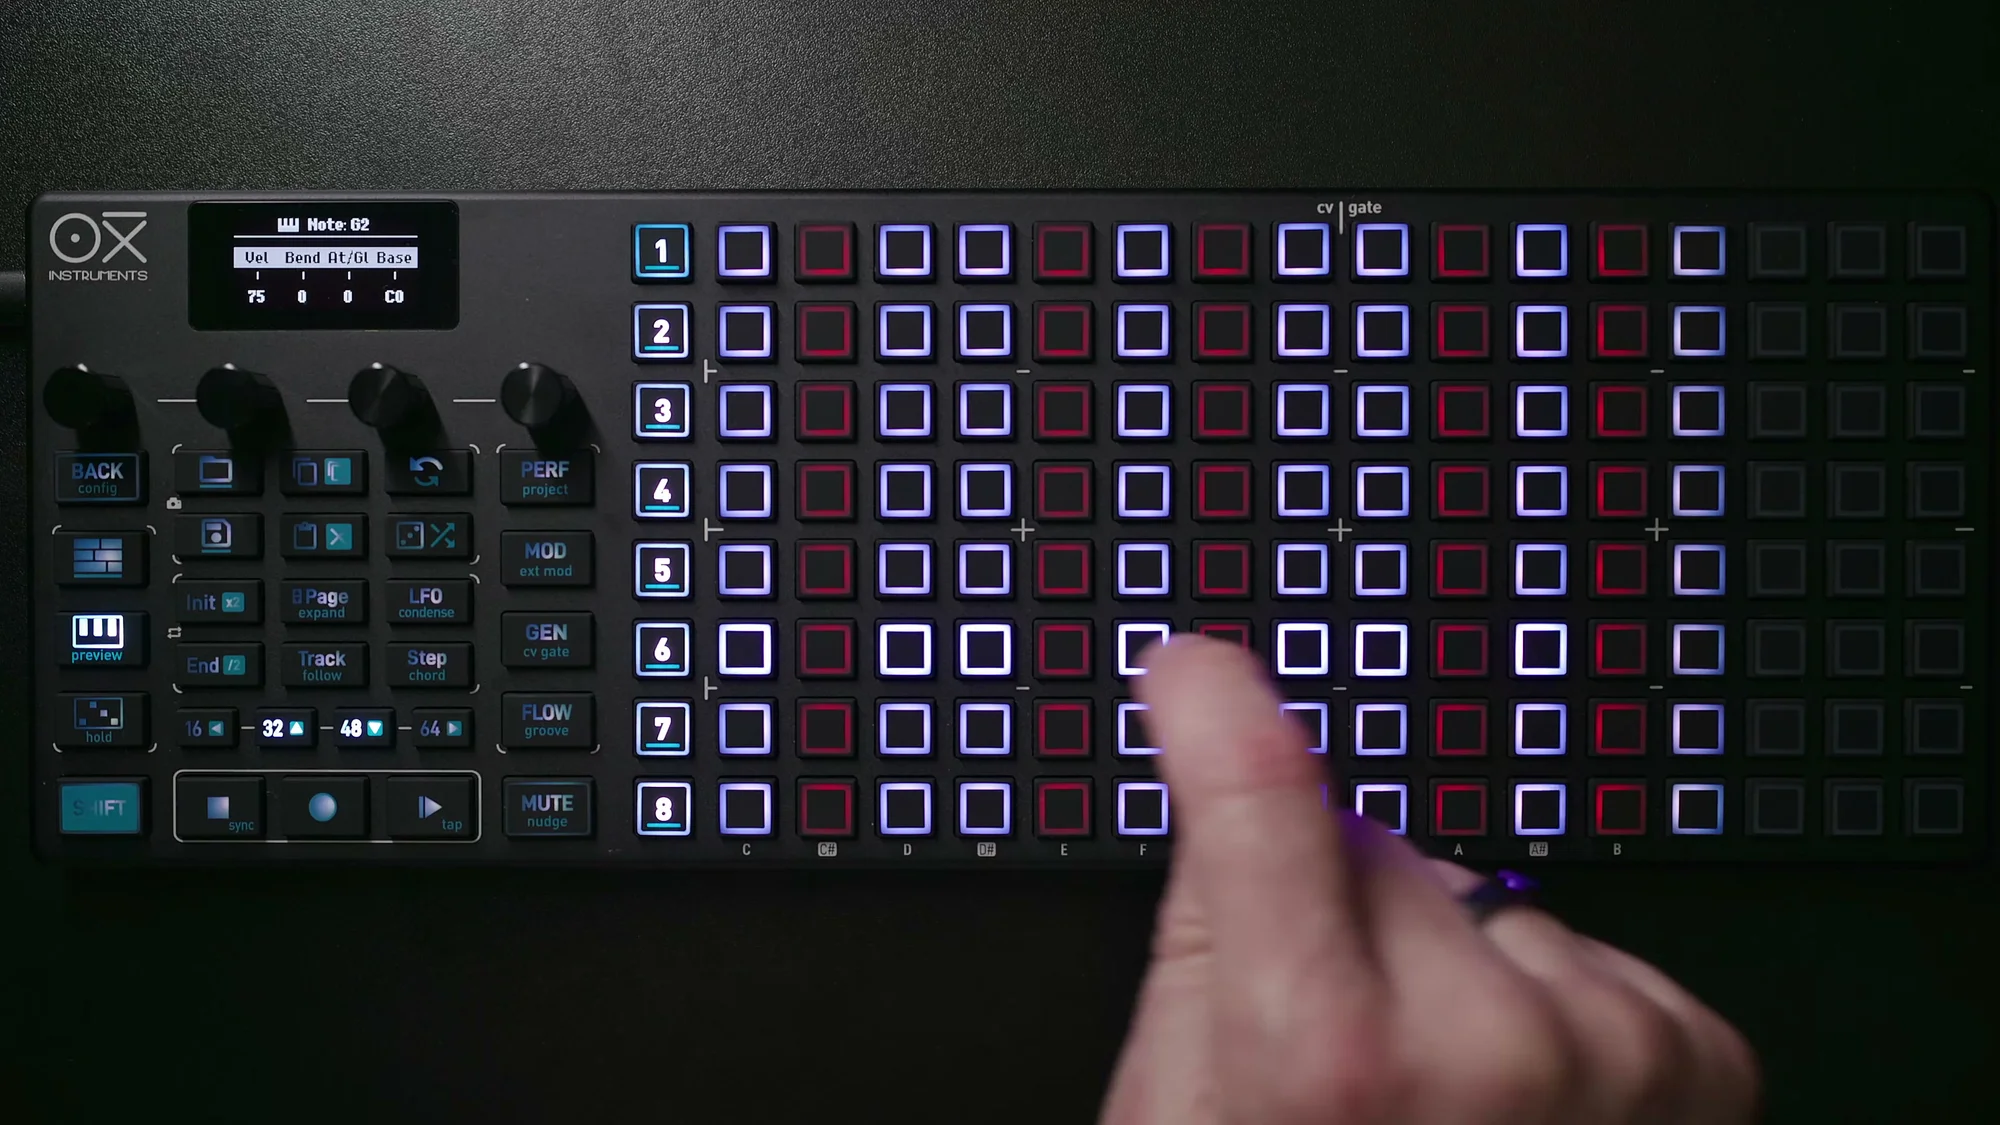
Tapping a pad places a note on that step; tapping again removes it. Pitch can be quantized to a scale — use Shift + Encoder 3 (Scale) to set the scale and Encoder 4 (Root) to set the root note.
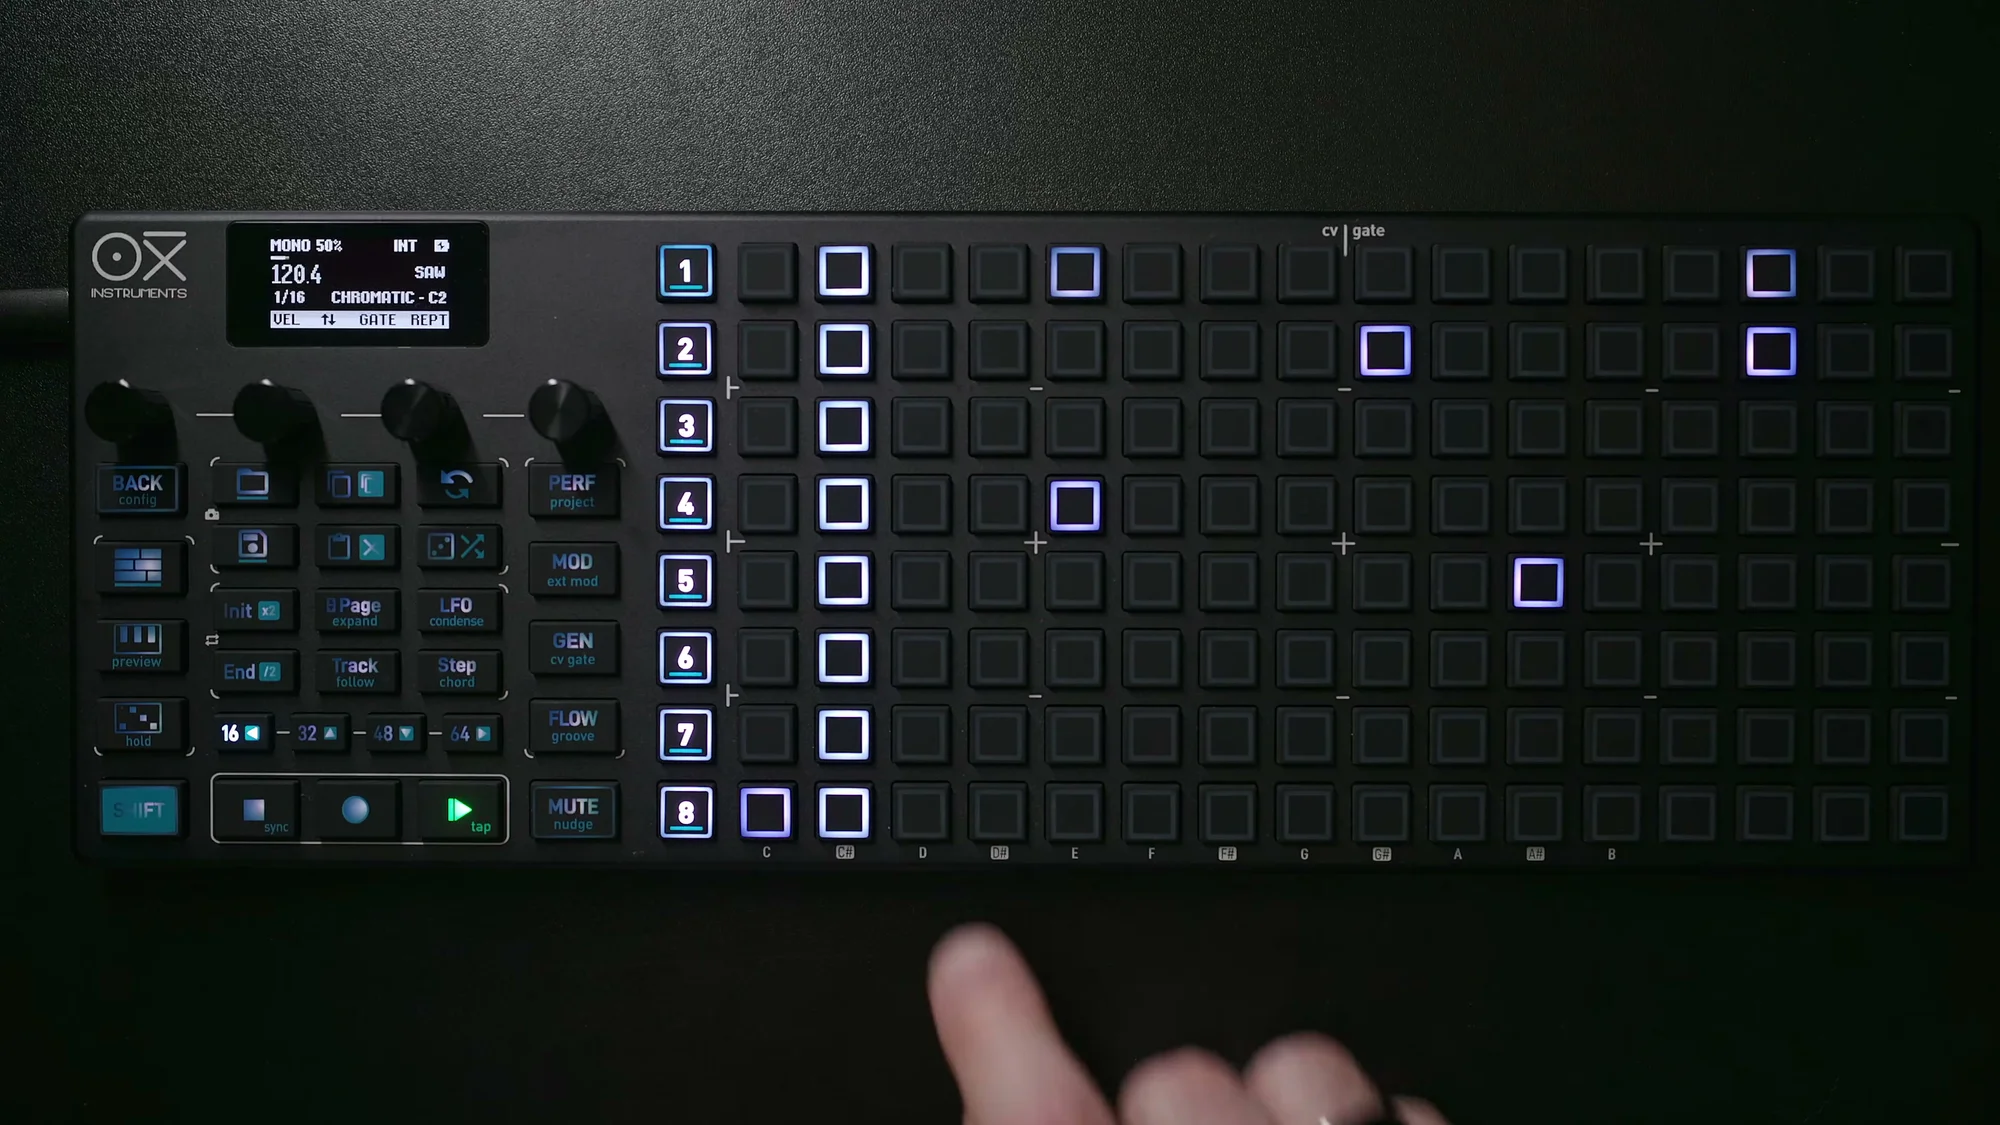
Notes in octaves outside the visible range are indicated by white indicators on the top row and red indicators on the bottom row.
Below is an example grid with some notes placed in C major. The horizontal axis represents steps (time), and the vertical axis represents pitch.
Sequence Length and Init/End
Sequence Length
The default sequence length is 16 steps (one page), but it can be extended up to 8 pages (128 steps).
To select a page, tap the page buttons at the bottom of the grid (16/80, 32/96, 48/112, 64/128). Tapping again accesses the second-half pages (steps 80–128).
Hold the End button and tap a page button to set the sequence's end position (i.e., its length).
Init/End (Start/End Position)
Use the Init button and End button to freely set the playback range.
- Hold Init and tap the grid → set the start position
- Hold End and tap the grid → set the end position
This lets you loop just a portion of the 16 steps, or create long sequences spanning multiple pages.
Below is an example with Init set to step 4 and End set to step 12. The purple markers indicate the Init/End positions, and only this range will loop during playback.
Loop Mode
Pressing Init and End simultaneously activates Loop Mode. In this state, selecting a grid page or section will loop just that range. A purple bar indicates the loop range.
Press Init or End again to exit Loop Mode.
Keyboard View
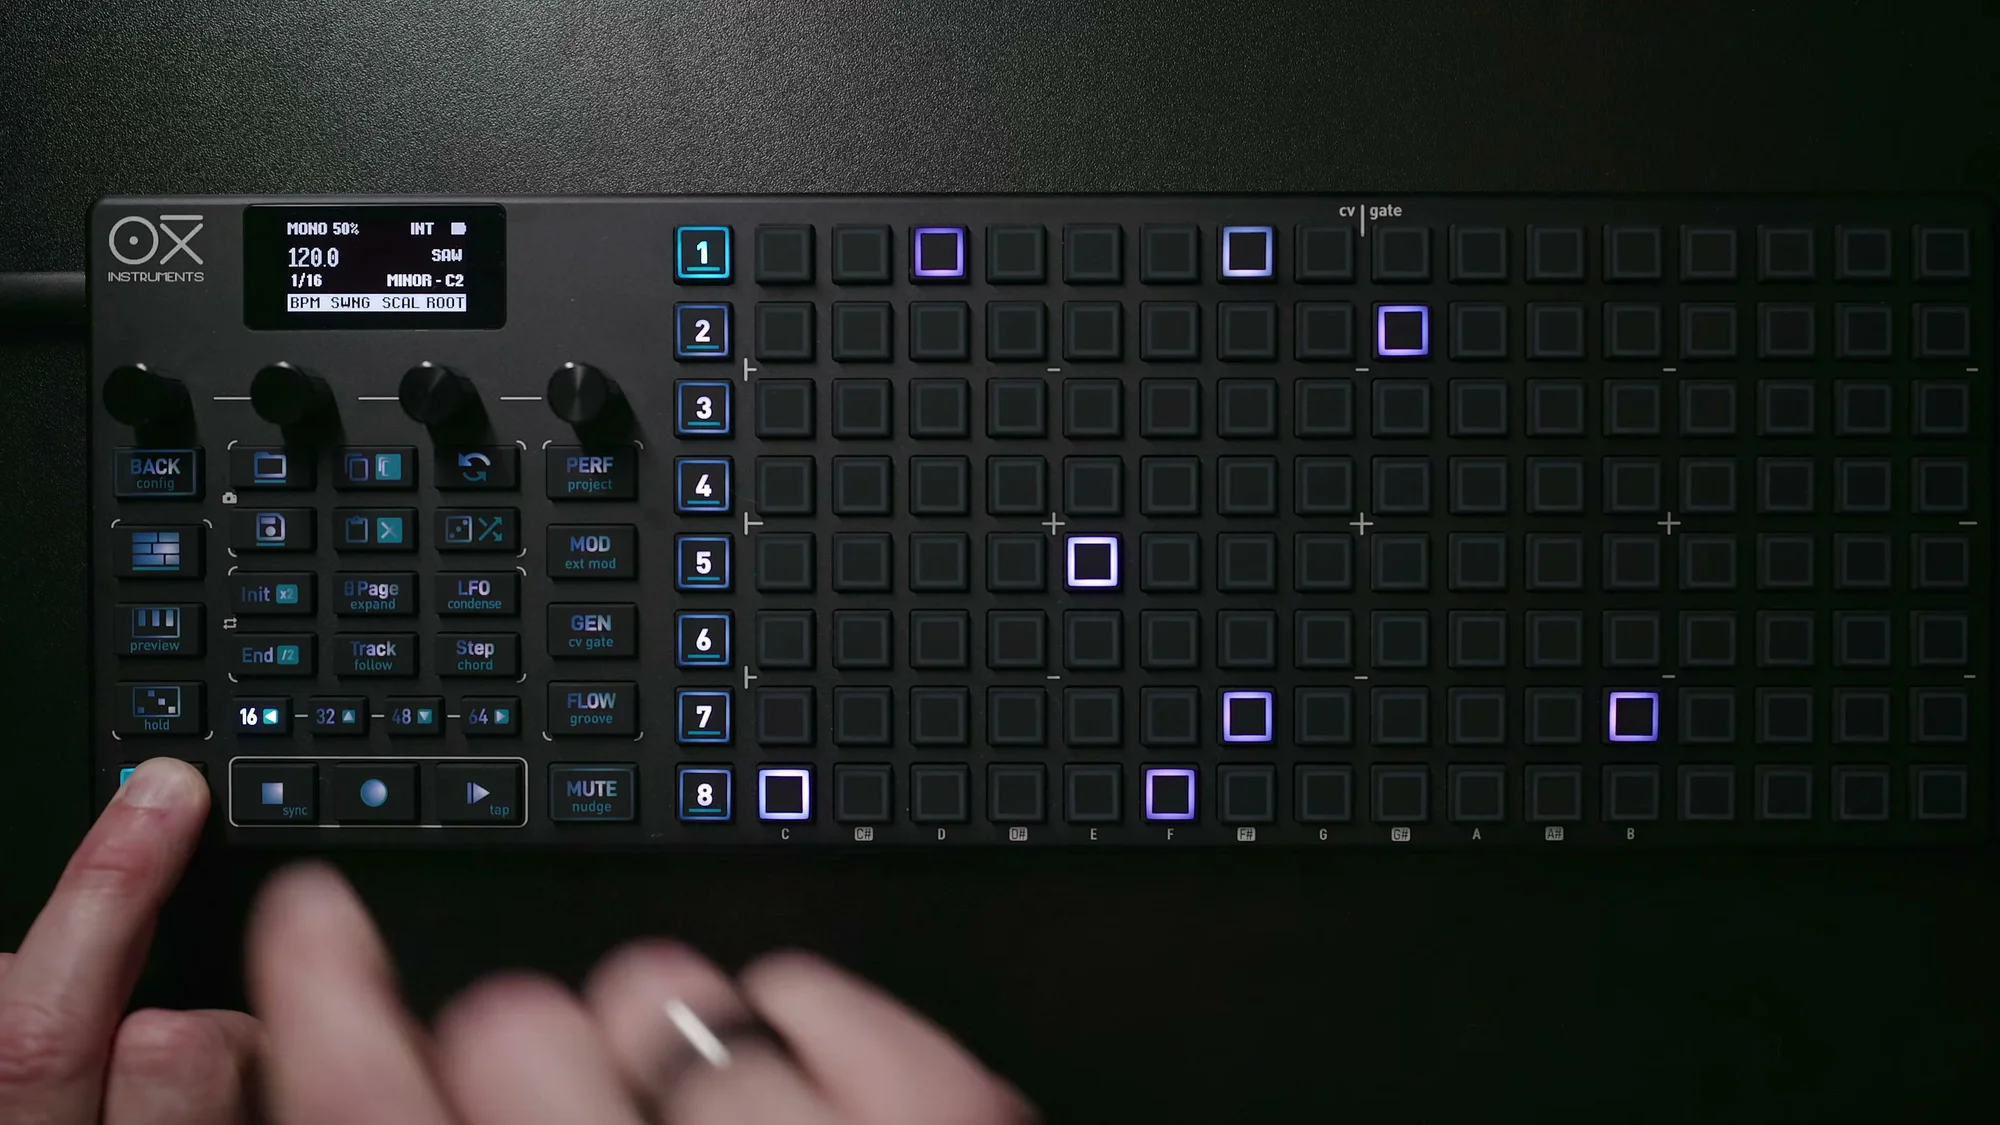
Pressing the Keyboard button switches the grid to Keyboard View. In this view, the OXI ONE MKII functions like a playable instrument.
- Horizontal axis represents chromatic notes
- Vertical axis represents octaves
- Reference notes are printed on the chassis
When scale quantization is active, notes outside the scale become unplayable. This view is ideal for live performance and real-time recording.
In the performance settings, you can also change the keyboard layout to an isomorphic layout in fourths or fifths.
Copy and Paste
The OXI ONE MKII supports copy and paste at various levels, from a single step to an entire sequencer.
- Copy a step: Hold Copy and tap a step → Hold Paste and tap another step
- Multiple steps: Hold Copy and tap multiple steps. Relative positions are preserved when pasting
- Copy a grid page: Page-level copying is also available
- Copy an entire sequencer: You can copy a whole sequencer as well
Shift + arrow buttons let you shift the entire sequence up, down, left, or right. If you specify a range with Init/End, only that range will be shifted.
Encoder Parameters
The four encoders provide quick access to frequently used parameters.
Normal Mode
- Encoder 1 (Velocity): Sets global velocity. Press to open per-step column view
- Encoder 2 (Octave): Shifts octave. Press to scroll the piano roll without changing pitch
- Encoder 3 (Gate): Sets global gate length (0–99). Press for per-step column view
- Encoder 4 (Repetition): Sets repeat count. Press for repeat column view. Shift for repeat span settings
With Shift
Holding Shift while turning the encoders accesses the following settings:
- Encoder 1 (BPM): Tempo setting. This is the only global setting (shared across all sequencers)
- Encoder 2 (Swing): Swing amount. Configurable per sequencer
- Encoder 3 (Scale): Scale setting. Per sequencer
- Encoder 4 (Root): Root note setting. Per sequencer
Sync Mode
These settings control how the OXI ONE MKII syncs with other devices. With the sequencer stopped, press Shift + Stop to cycle through sync modes.
- Internal: The OXI ONE MKII acts as the clock master. Use when running standalone or syncing other devices to the OXI ONE MKII
- MIDI: Receives external MIDI clock via the rear TRS MIDI input
- USB: Receives clock from a DAW or similar via USB connection to a PC/Mac/iPad
- Clock: Receives analog clock signal via the rear Clock In. Ideal for syncing with modular synths
- Bluetooth: Receives MIDI clock via Bluetooth
When you first use the unit, it should be set to Internal, so if you're just playing with the OXI ONE MKII on its own, you're good to go.
That's it for EP.1. The goal of this article was to give you a broad overview of the OXI ONE MKII. From EP.2 onward, we'll dive into the detailed usage of each sequencer mode.
- OXI ONE MKII Guide EP.2: Mastering Mono Mode
- OXI ONE MKII Guide EP.3: Breathing Life into Patterns with Groove
OXI ONE MKII Product Page
See the product details for the OXI ONE MKII below.
OXI ONE MKII Black Edition, next-generation model with 8-part sequencer. Enhanced generative features, large OLED display, and up to 64-track control.
OXI ONE MKII, next-generation model with 8-part sequencer. Enhanced generative features, large OLED display, and up to 64-track control.