Welcome to EP.2 of the OXI ONE MKII guide series. This time, we'll take a detailed look at Mono Mode — the most basic mode on the OXI ONE MKII — covering everything from fundamental operations to advanced techniques.
You can find the previous episode here:
Mono Mode may look simple at first glance, but it's actually quite a deep mode once you start digging in. It's great for quickly putting together melody lines, lead sequences, and bass patterns, so I think it's the best place to start.
Mono Mode existed on the original OXI ONE as well, but the MKII version adds more features like the accumulator and Groove. Even if you've been using the original, there should be some new discoveries here.
If you have any questions about the OXI ONE MKII, feel free to join the Takazudo Modular Discord linked below — I should be able to help with the basics.
- Piano Roll Basics
- Recording Patterns
- Track Page Settings
- Init/End and Looping
- Encoder Parameters
- Per-Step Detailed Settings
- Accumulator
- Useful Techniques
- Introducing Groove
Piano Roll Basics
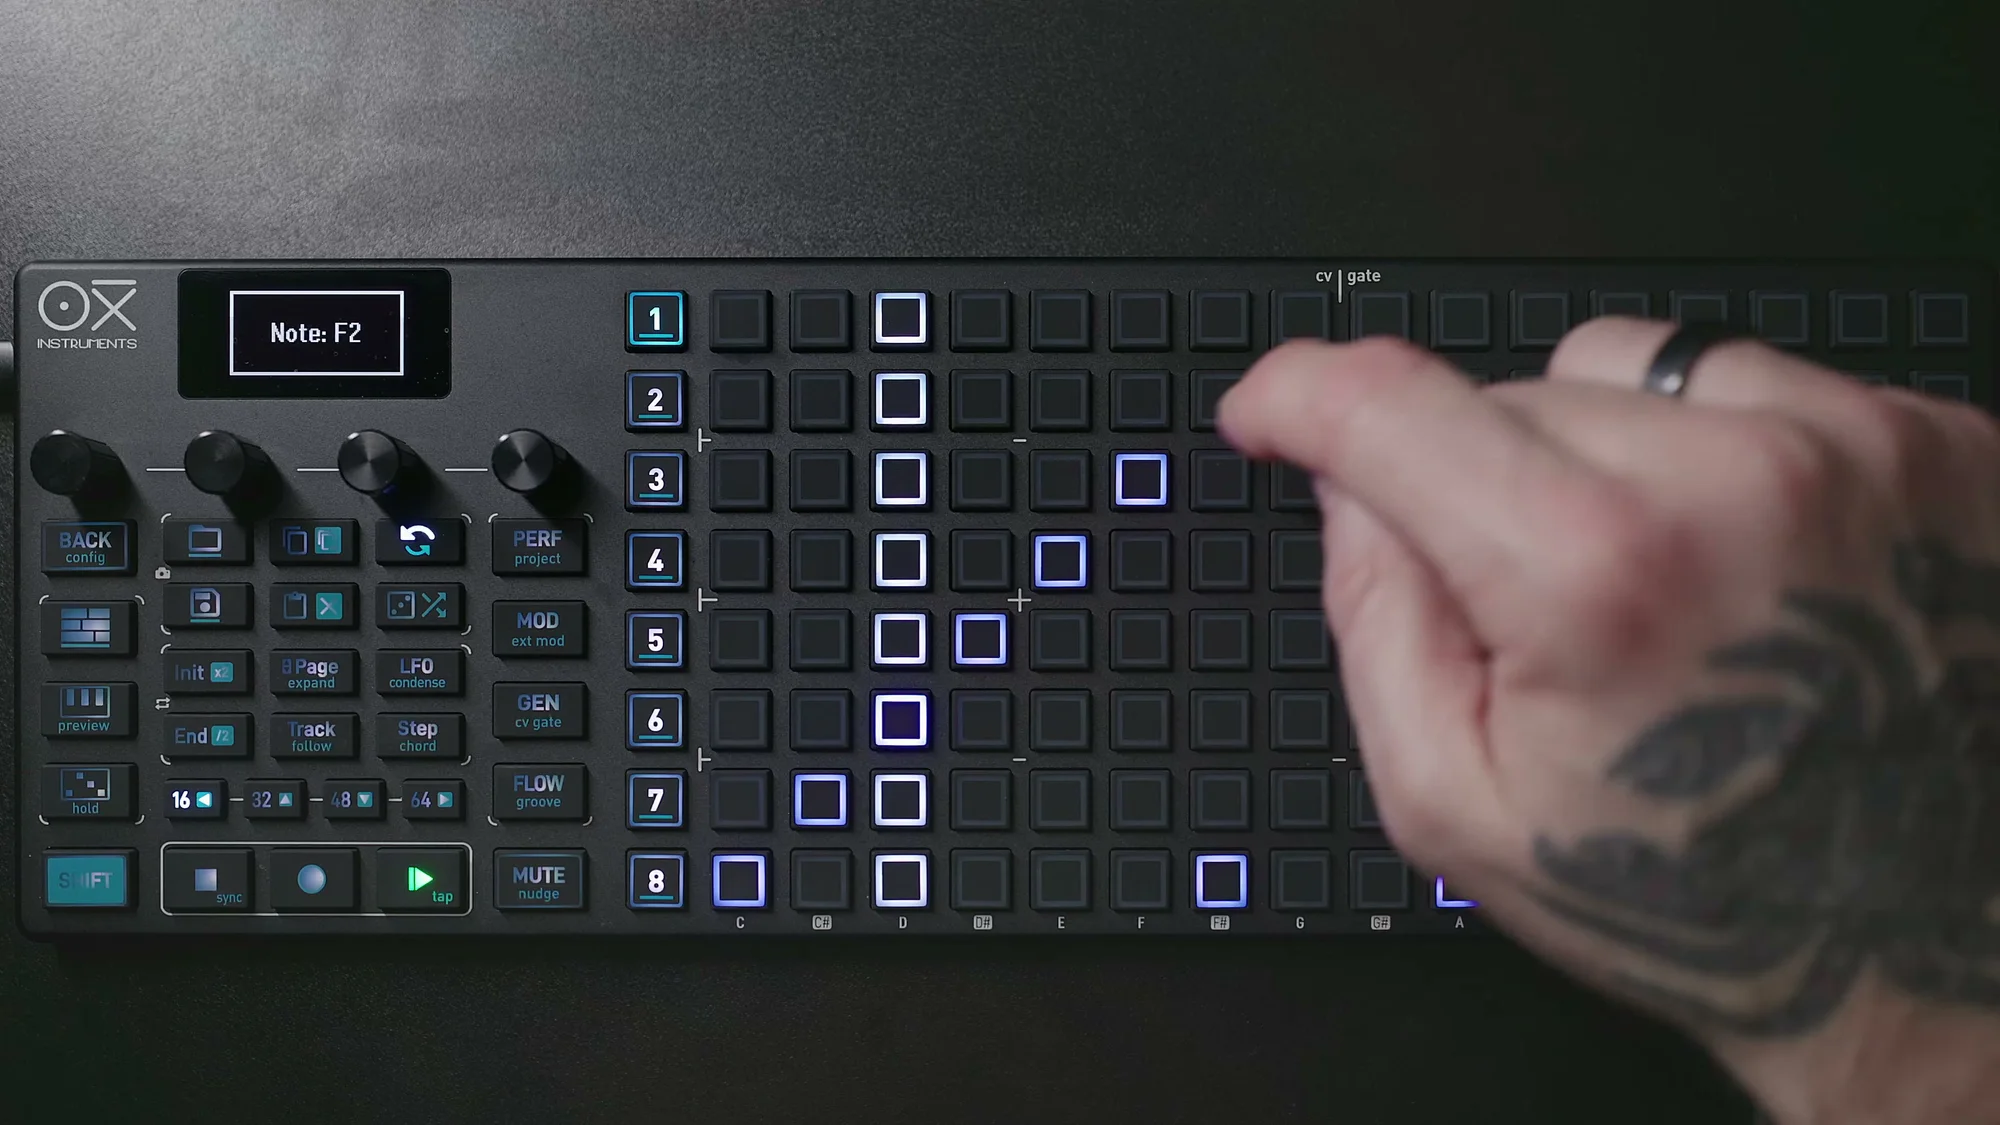
In Mono Mode, the grid is laid out as a piano roll. The horizontal axis (columns) represents steps (time), and the vertical axis (rows) represents pitch. By default, 16 steps make up one page, which corresponds to one bar when the Time Division is set to 1/16.
If you've used a piano roll editor in a DAW, the concept should feel familiar right away. The difference is that the OXI ONE MKII's grid is an 8-row × 16-column pad, so the visible range is limited. Working within these constraints is part of what makes hardware sequencers fun, I think.
Adding and Removing Steps
Press a pad to place a note at that step. Press a step that already has a note to remove it. In Mono Mode, each column can only hold one note — that's what makes it "mono." If you press a different row in the same column, the note's position (pitch) is replaced.
During playback, the playhead lights up and moves forward, and when it reaches a step with a note, a MIDI note is sent. Simple, but this operation is the foundation of everything in Mono Mode.
The grid's 8 rows are arranged according to a scale, with the bottom row being the root note (C2 by default). Higher rows correspond to higher pitches.
Here's an example of a simple melody in C minor. Each step has one note placed on it.
Scale Quantize
By default, the grid uses the chromatic scale, meaning the vertical layout includes all semitones. Using Shift + Scale (encoder 3), you can switch to scales like Major, Minor, and others. When a scale is set, only the notes belonging to that scale appear on the grid, so you don't have to worry about hitting out-of-scale notes — even if you're not deeply versed in music theory.
You can also change the root note with Root (Shift + encoder 4). For example, setting Minor + A gives you the A minor scale.
If you're not sure which scale to pick, just go with Minor or Major. Try different Root settings and find one that sounds good to you. With a scale set, even random pad presses will produce decent-sounding melodies, so it's great for beginners too.
Navigation (Vertical Scrolling)
The grid only has 8 rows, so there will be times when you need pitches outside the visible range. To scroll up or down, press encoder 2 in and then turn it. Scrolling changes the display range, letting you place notes at higher or lower pitches.
Press encoder 2 again to re-center to the default position. If notes exist outside the visible range, the top or bottom row of the grid will light up to indicate "there are notes in this direction." White indicates notes above, and red indicates notes below.
Creating Ties (Long Notes)
To create a note that spans multiple steps, hold the first pad and tap the last pad. The steps in between will be tied together and played as a single long note. Tapping a pad within the tied range will break the tie and split the note.
In the example below, steps 3–5 are tied into a long note (the lighter green indicates the tied continuation).
There's also a "reverse tie" operation where you hold the last pad and tap the first one. Depending on the Config → Workflow setting, this acts as a fill or random note placement. It's useful when you want to insert fills of the same note.
You can also create ties across pages. Hold the first pad, press the Page button to move to the next page, then press the pad at the end position.
Muting Steps
You can mute individual steps. Hold the Mute button and tap a pad to mute that step — it turns purple. Muted steps are skipped during playback. To unmute, press Mute + the pad again.
Clearing a Pattern
There are two ways to clear a pattern:
- Shift + Clear: Clears the notes
- Shift + Clear (long press): Performs a full clear including modulation data
Even if you accidentally clear something, the Undo button will restore it immediately. Shift + Undo gives you Redo as well.
By the way, Undo on the OXI ONE MKII works with nearly every operation, so whenever you think you've messed something up, just hit Undo. I use it constantly.
Recording Patterns
Tapping pads to enter notes one by one is fine, but the OXI ONE MKII also has real-time recording capabilities.
Live Recording
Press the Rec button and then Play to start a count-in, followed by live recording. You can record notes in real time using the Keyboard View (described later) or MIDI input.
By default, notes are recorded unquantized (timing as-is), but entering the recording settings with Shift + Rec lets you turn quantize ON. With quantize enabled, slightly off-timing notes get snapped to the nearest step, which I think is easier to work with.
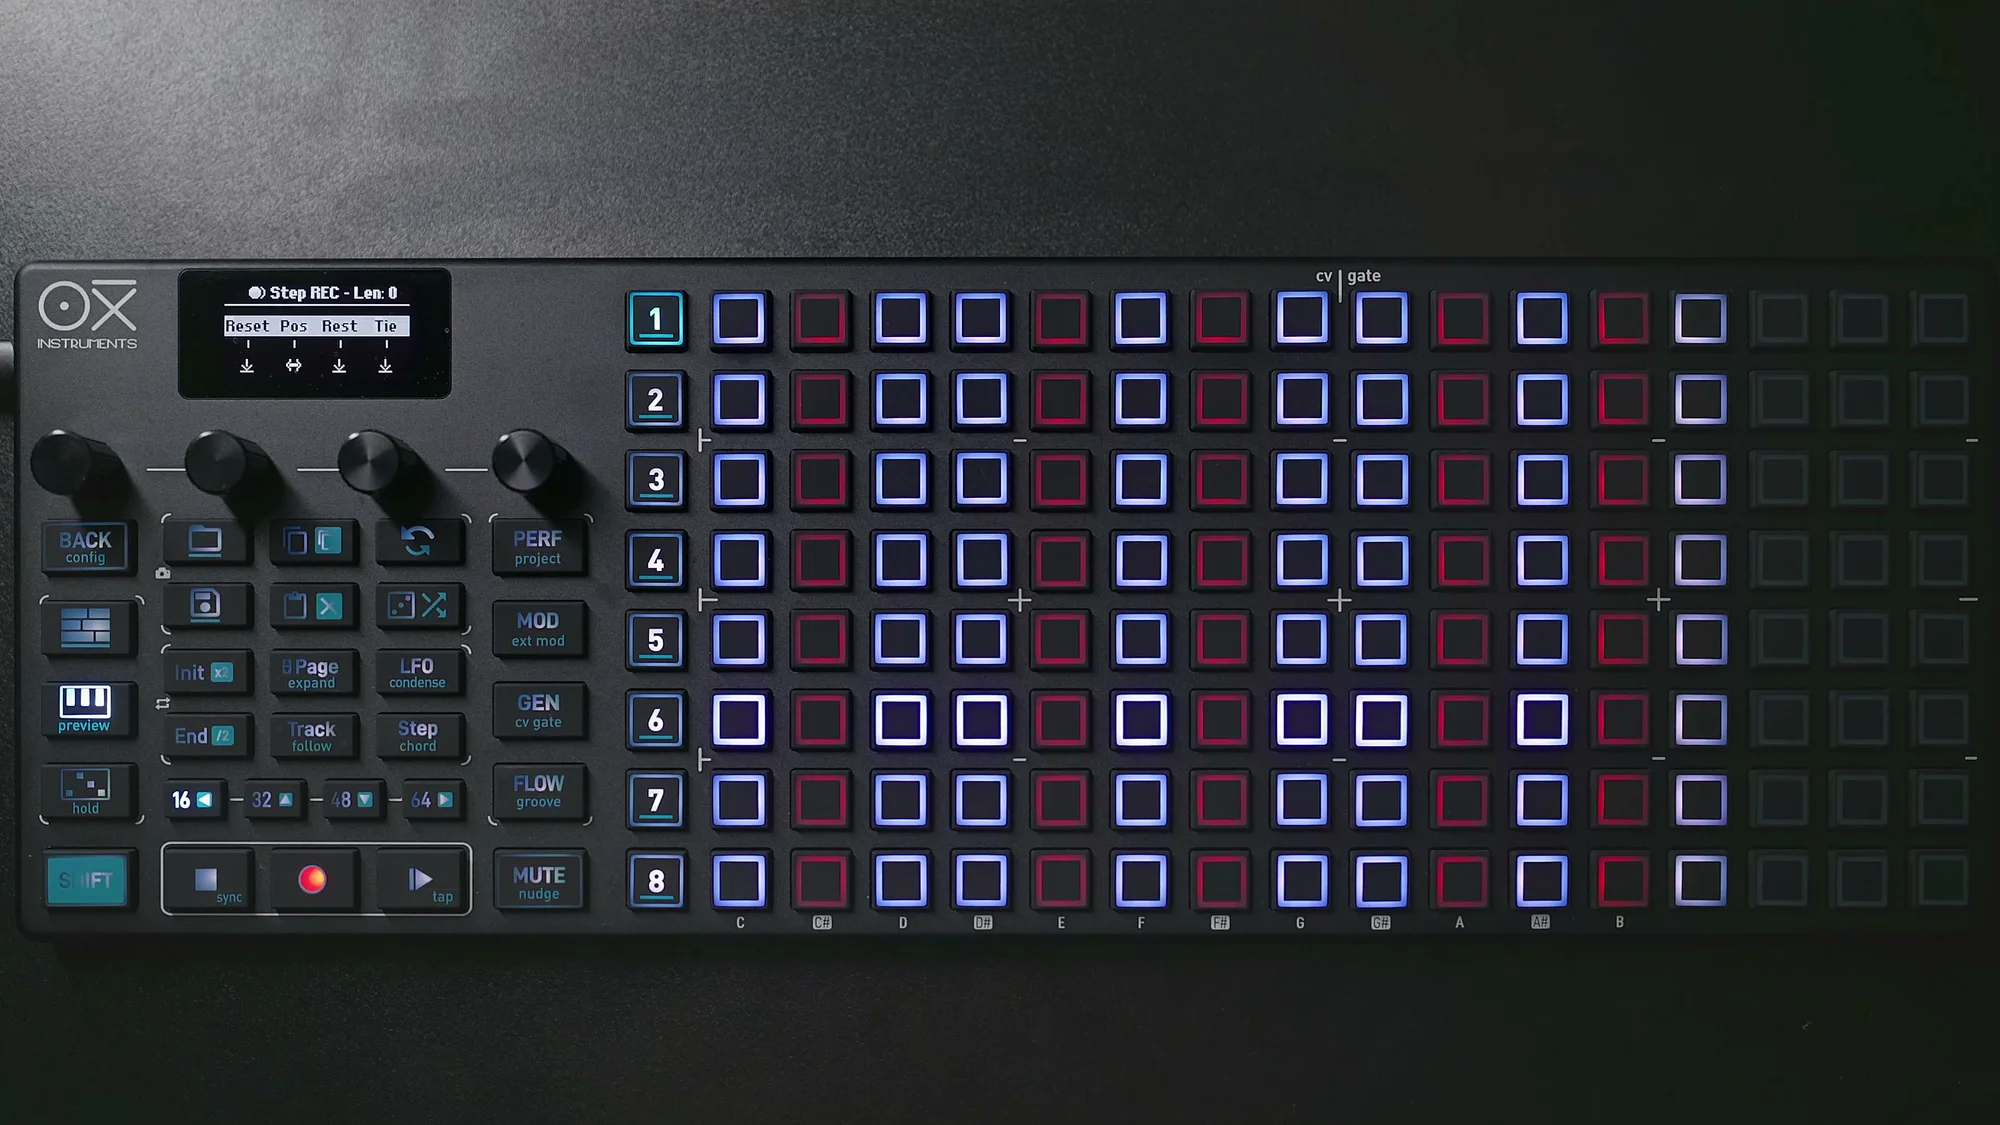
Step Recording
Press and hold Rec, then press Play to enter step recording mode. This method lets you input notes one step at a time while playback is stopped.
Switch to Keyboard View, press a note, and it gets recorded at the current step — then automatically advances to the next step. You can also insert rests, change note lengths, and add ties. When you're done, press Rec + Play again to exit.
Step recording might be easier if you're not great at real-time playing. I use it quite a bit myself.
By the way, in live recording, you can also arm the recording (put it in standby). Press Rec while holding Stop, and it enters a state where it waits for note input — recording starts the moment a note is received. This is handy when using an external MIDI keyboard.
Track Page Settings
Press the Track Page (Track button) to access various settings for the sequencer. Since Mono Mode only has one track, the settings here apply to the entire sequencer.
Scroll (Encoder 1)
The first encoder on the Track Page lets you move the piano roll display up or down. This is the same navigation as described earlier, but accessible from the Track Page as well.
Direction (Encoder 2)
You can change the playback direction. There are four options:
- Forward: Normal left-to-right playback (default)
- Backward: Right-to-left reverse playback
- Pendulum: Alternating back and forth (left → right → left)
- Random: Steps played in random order
Backward and Pendulum can give the same pattern a completely different feel. Random is great for adding an experimental element. In particular, using Random with short step counts (like 2–4 steps) creates a minimal but constantly shifting vibe. Press the encoder to reset to the default Forward.
Division (Encoder 4)
Changes the Time Division (the length of each step). The default is 1/16, but setting it to 1/8 halves the speed, while 1/32 doubles it. Press the encoder to reset to the default 1/16.
Random Division (Encoder 3)
With each step advance, the Time Division randomly changes based on the set probability. The range is 0% (OFF) to 100% — higher values cause more frequent timing fluctuations. This works well with percussive elements. Press the encoder to reset the setting.
Init/End and Looping
Changing Sequence Length
The default is a 16-step loop, but you can change the loop range using the Init and End buttons.
- Init: Sets the loop start position (hold Init and tap a pad)
- End: Sets the loop end position (hold End and tap a pad)
For example, setting End to step 8 gives you an 8-step loop, while setting it to step 32 on the second page gives you a 32-step loop. You can extend up to 8 pages, or 128 steps maximum.
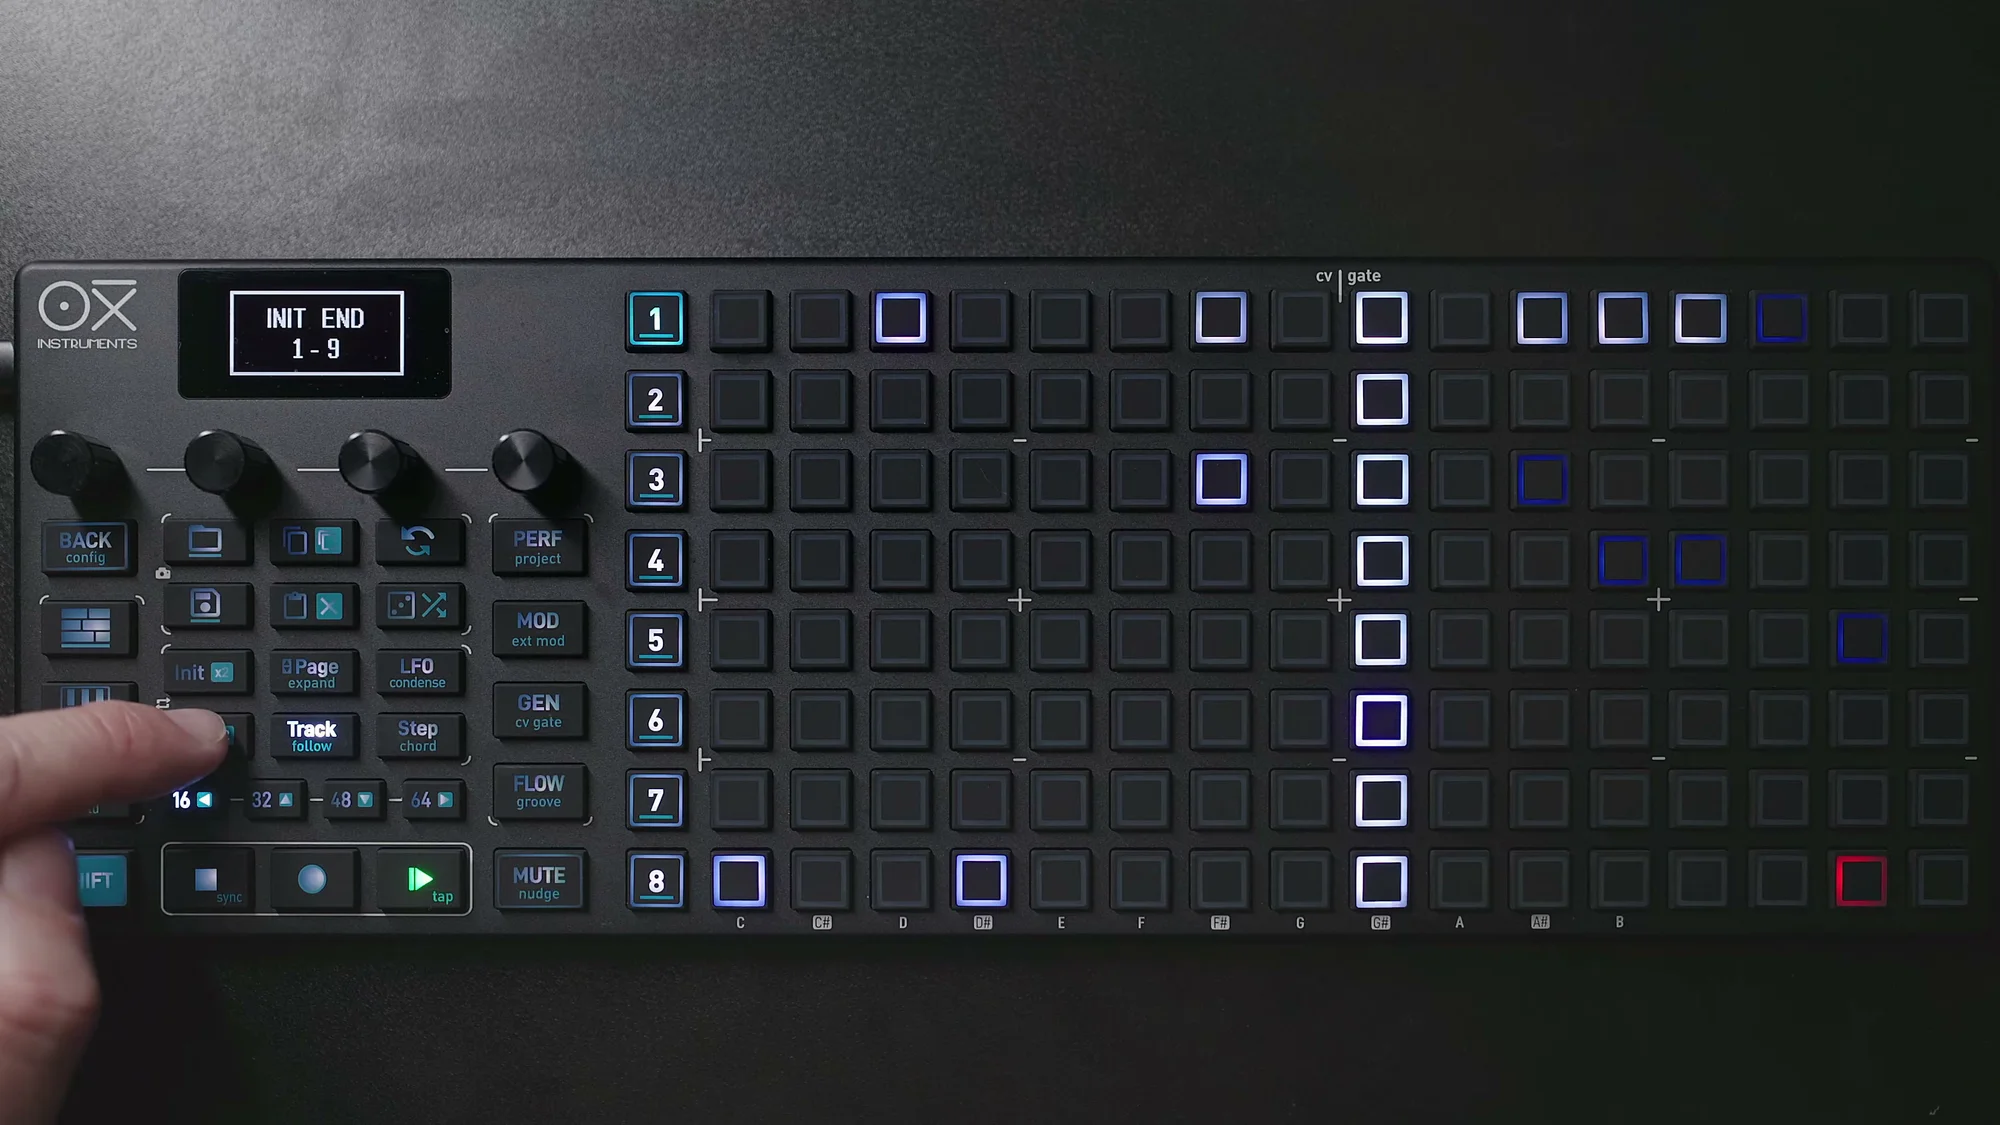
Below is an example with Init set to step 3 and End set to step 11. The purple markers indicate the Init/End positions.
You can change Init/End during playback too, which is great for live-performance-style loop manipulation. This is surprisingly fun — just changing the loop range on the same pattern can make it sound like a completely different phrase.
Duplicating Patterns
After creating a 16-step pattern, if you want to copy it to the second page, use Shift + Copy to duplicate the current page to the next one. This lets you quickly build 32-step material. From there, you can tweak just the second page, add accumulators to some steps on page 2, and so on.
By the way, when working with multi-page sequences, turning on the Follow function (Shift + Track) is handy — it automatically switches pages to follow the playhead during playback. Conversely, if you want to edit notes during playback, make sure Follow is OFF, or the page will keep jumping away while you're trying to edit.
Section Loop
Pressing Init + End simultaneously sets a section loop for the current page. You can also press Init + End + a page button to loop a specific page. Press Init + End again to release the loop.
While looping, the start and end positions are shown with purple bars, so you can always see which range is being looped at a glance.
Encoder Parameters
In Sequencer View, the four encoders control different parameters. Turn an encoder normally to access the primary parameter, or use Shift + turn for the secondary parameter. The secondary side includes Tempo, Swing, Scale, and Root — these were covered in EP.1, so here we'll focus on the four primary parameters.
Velocity (Encoder 1)
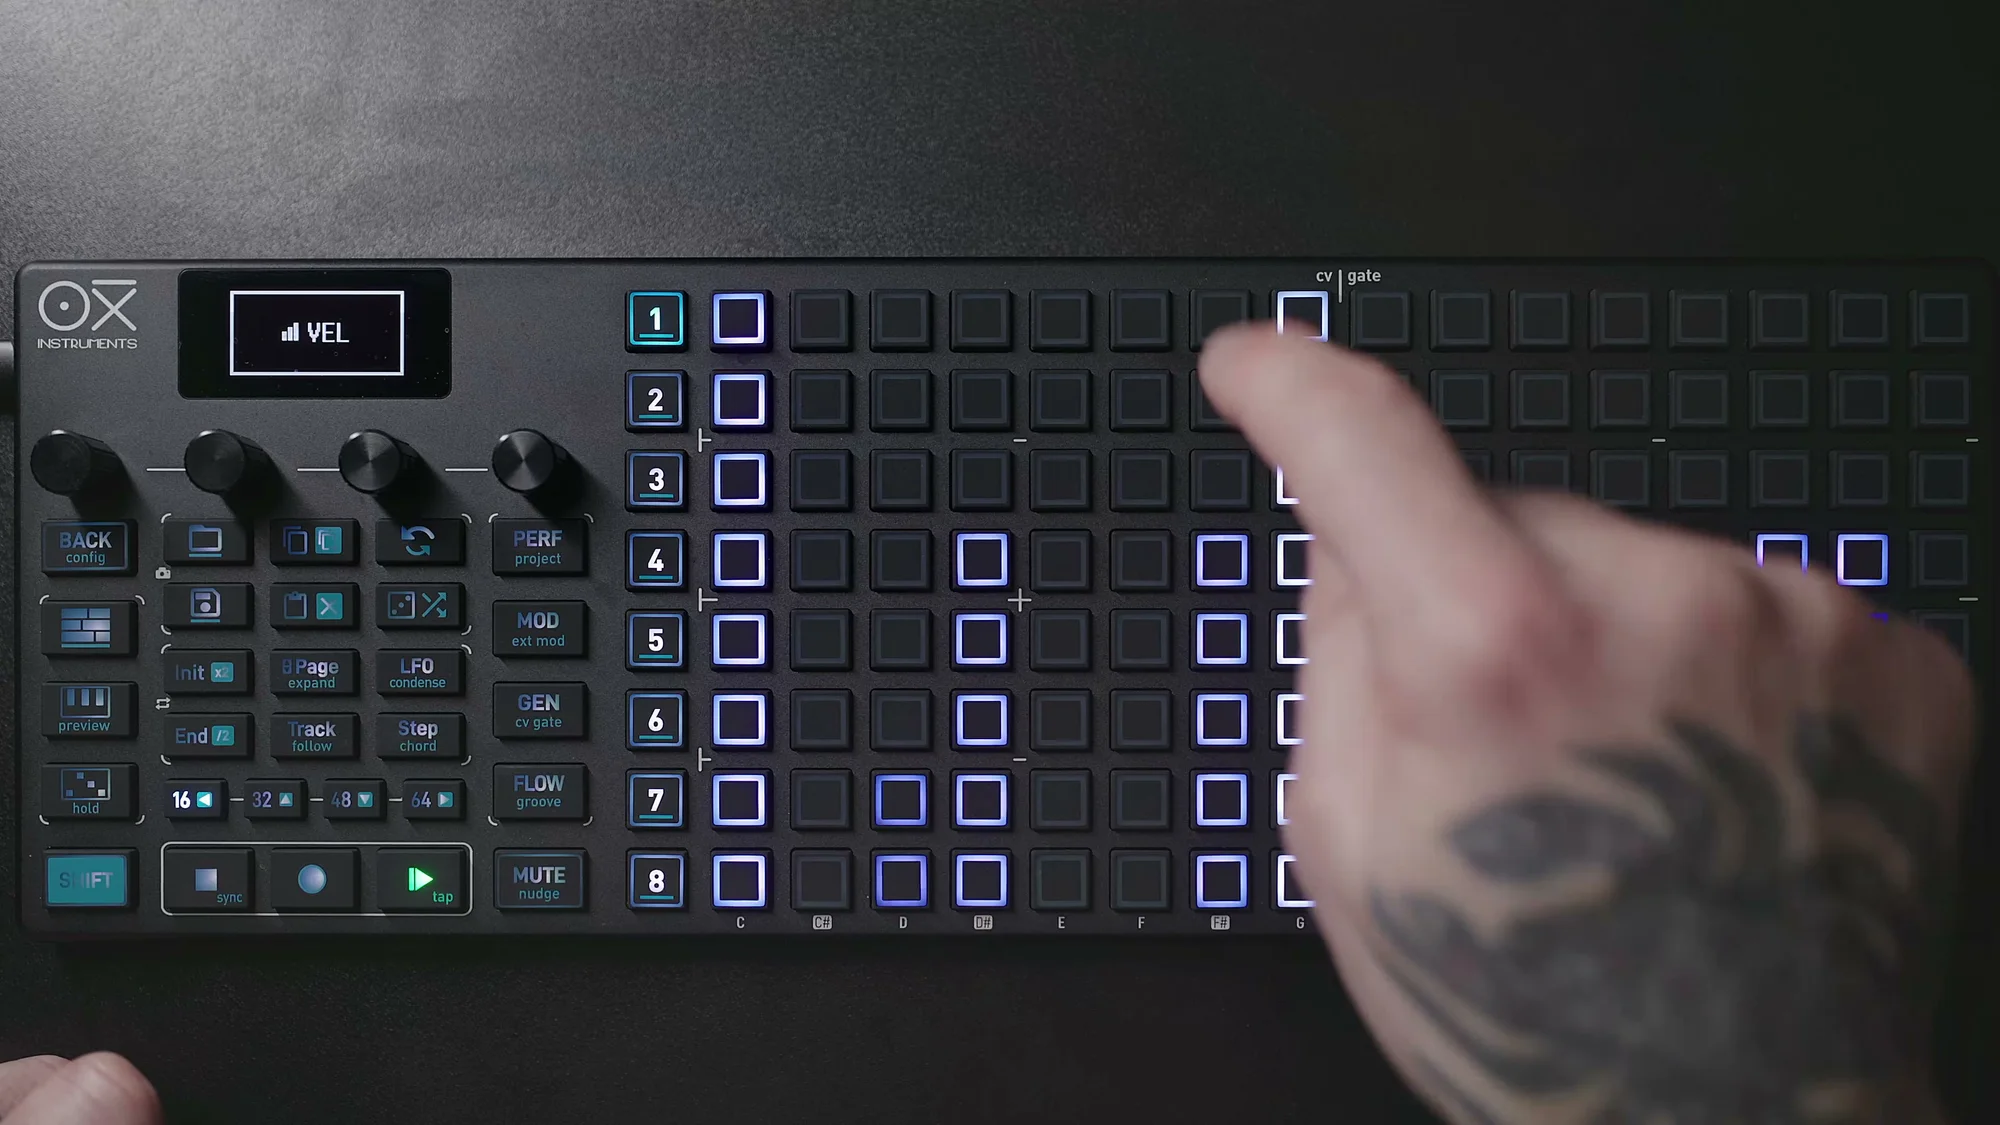
Turning encoder 1 adjusts the global Velocity (note strength). The display shows a range like 75-75 indicating the lower and upper bounds. Changing the global Velocity affects existing notes relatively.
Pressing encoder 1 switches to the Velocity column view. Here, each column on the grid represents the Velocity value for that step, and you can visually set per-step Velocity by tapping pads up and down.
The default Velocity value is 75, which can be changed in Config → Workflow.
Gate (Encoder 3)
Sets the note length (gate). The default is 50, meaning half the step length. Increasing to 100 results in TIE, producing a note that spans the full step duration.
Pressing encoder 3 switches to the Gate column view, where you can edit per-step Gate values using the pads.
Octave (Encoder 2)
Octave provides two operations:
- Turn the encoder: Transposes the entire sequence by octaves
- Press the encoder in, then turn: Scrolls the grid display up or down without changing pitch
Note that transpose and scroll are different things. Transpose actually changes the pitch of the notes, while scroll only changes the display position — the note pitches remain the same.
Repetition (Encoder 4)
Turning encoder 4 sets the global Repetition (repeat count). The range is 1–15, and increasing the value causes notes to repeat the specified number of times.
Pressing encoder 4 switches to the Repetition column view. In this view, you can set per-step repeat counts using the pads. Holding Shift lets you change the repeat duration — for example, "3 repeats spread over 3 steps."
A quick note on the difference between Repetition and Retrigger: Repeat plays the original note repeatedly at step intervals, while Retrigger repeats in a ratchet-like fashion within a single step's length. Both can be viewed and edited in the column view.
All the parameters covered so far follow a common rule: "turning the encoder affects all steps globally, while holding a step's pad and turning affects that individual step." Keeping this interaction pattern in mind makes operating the OXI ONE MKII much smoother overall.
Per-Step Detailed Settings
The encoder parameters we've covered so far are mainly global settings, but the OXI ONE MKII's real strength lies in its per-step detail.
Hold a step and press the Page button to access the step's submenu. It's divided into three pages, each with detailed parameters. The display shows current values for each parameter, and you change them with the corresponding encoder.
Page 1: Basic Parameters
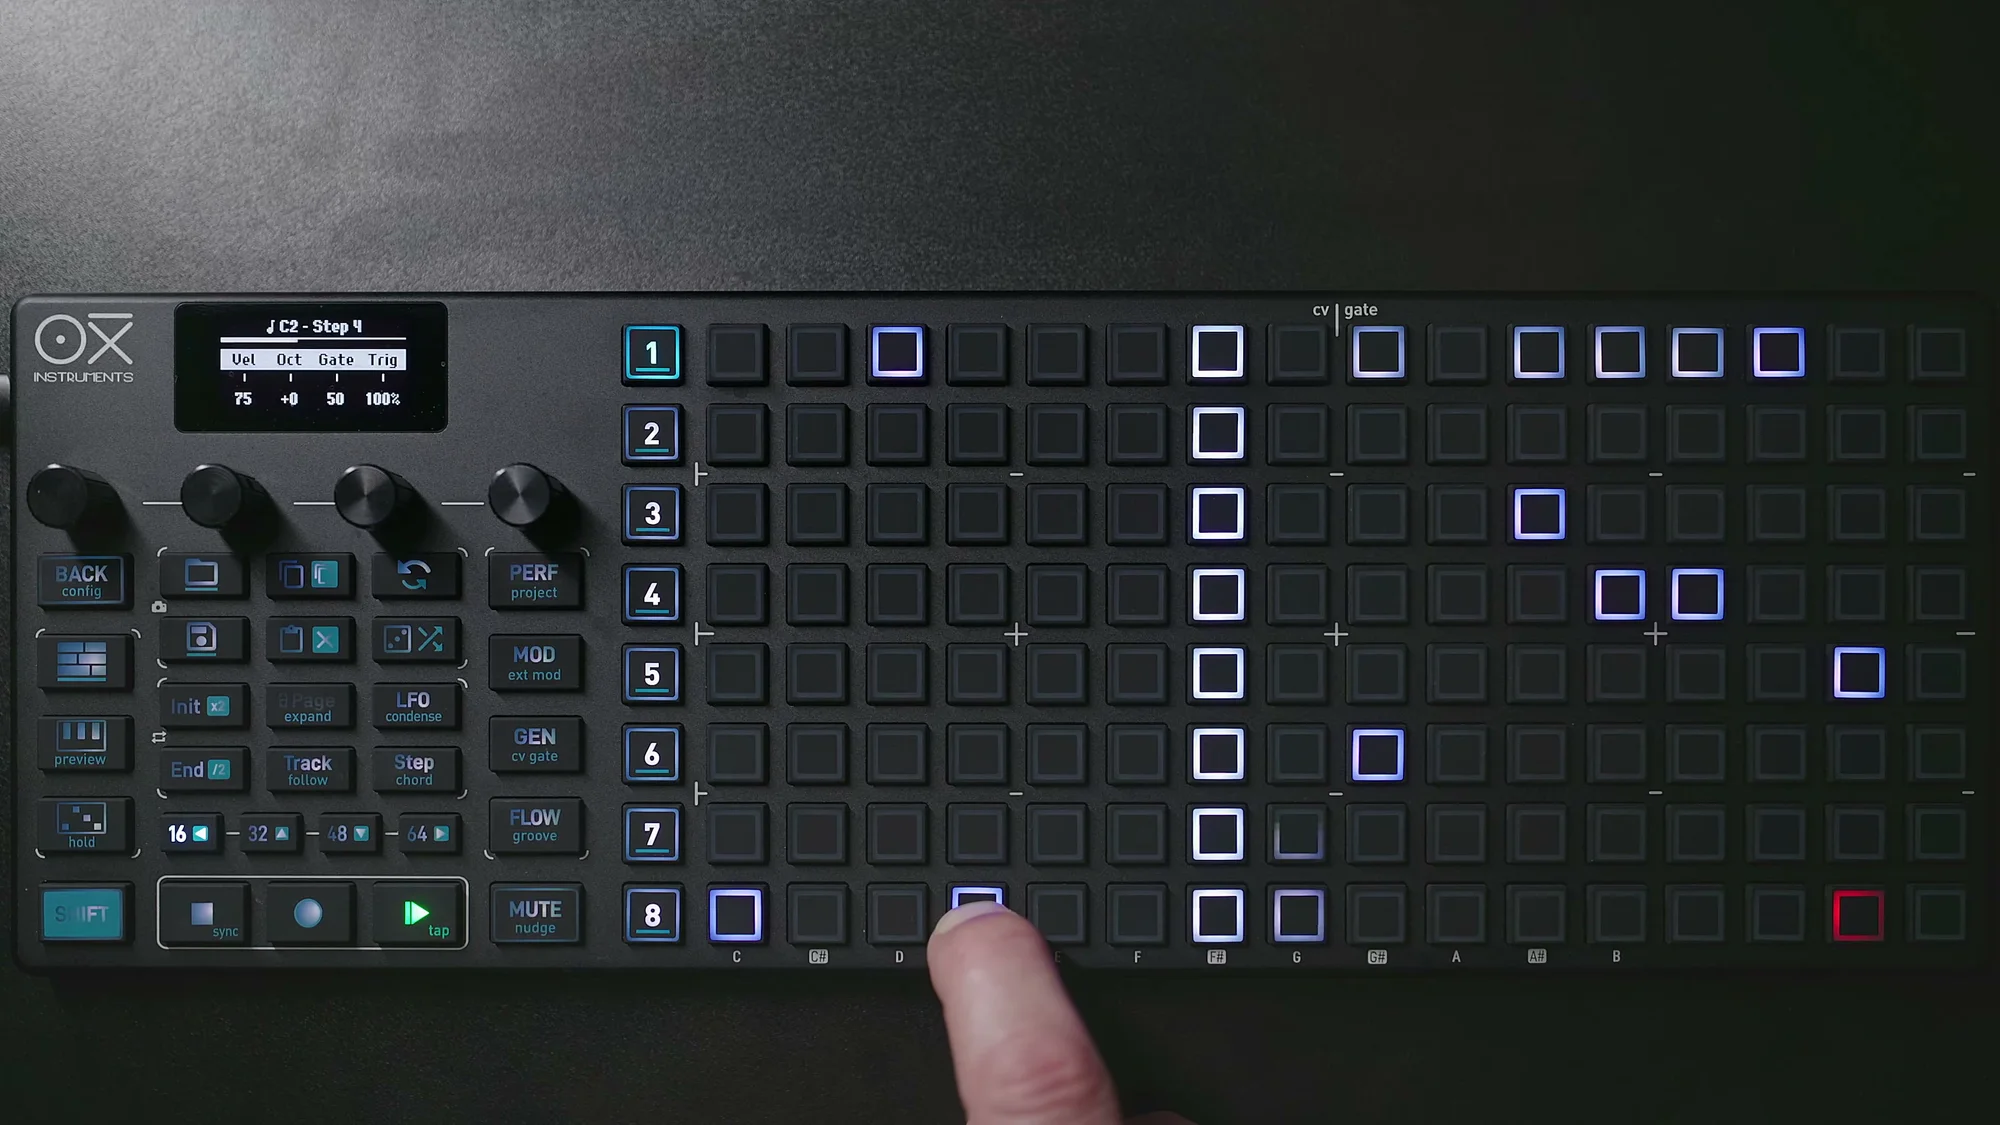
Hold a step and turn the encoders to set the following on a per-step basis:
- Velocity: The note strength for that step
- Octave: The octave offset for that step
- Gate: The note length for that step
- Trig (Trigger Condition): The probability or condition for that step to fire
Trig is a very useful feature. The default is 100%, meaning it always fires, but setting it to 50% means it only fires half the time. This creates the effect of the same pattern sounding slightly different each time it loops.
Turning the encoder further reveals conditional triggers like 1|2 (fires once every 2 cycles) and 1|3 (fires once every 3 cycles). Even with an 8-step pattern, using conditional triggers can make it sound effectively much longer.
Press the encoder to reset.
Conditional triggers are especially powerful for percussive sequences and hi-hat patterns. Even for melody lines, simply setting "this note only fires every other cycle" adds lively movement to the pattern.
Page 2: Repeat and Offset
Press the Page button to move to the second page, where you can access:
- Repetition: Per-step repeat count and duration
- Offset: Shifts the step timing forward or backward within a range of
-45%to+45%. Useful for adding subtle timing variation. This allows fine timing adjustments below the Time Division — great for adding a bit of swing - Glide: Smooths pitch transitions between consecutive notes. Set from 0–100%, with higher values producing smoother transitions. This only works with CV, not MIDI. Very effective when used with modular synths
Repetition also has condition settings — pressing the encoder lets you choose between "100% repeat probability," "a specific repeat probability," or "repeat on specific cycles."
Page 3: Accumulator
The third page features the accumulator, a function unique to Mono Mode. We'll cover this in detail in the next section.
Note that there are two ways to access the step submenu: hold a pad and press Shift + Page, or press the Step button to switch to the global view. In global view, simply pressing a pad immediately opens the submenu, which is more efficient when editing multiple steps in succession.
Accumulator
The accumulator is a unique feature exclusive to Mono Mode, and it's really the highlight of the mode.
The concept is simple: for a specific step, each time the playhead passes through it, the pitch changes incrementally. Even though the same pattern keeps looping, certain steps' notes gradually shift, adding a generative element to your sequence.
Basic Usage
Access the step submenu's Page 3 to see the accumulator parameters:
- Amt (Amount): The pitch change per trigger (in semitones). For example,
+1stmeans the pitch goes up by one semitone each time the playhead passes through - Mode: The accumulation behavior mode
- Acml+: The upper limit (in semitones)
- Acml-: The lower limit (in semitones)
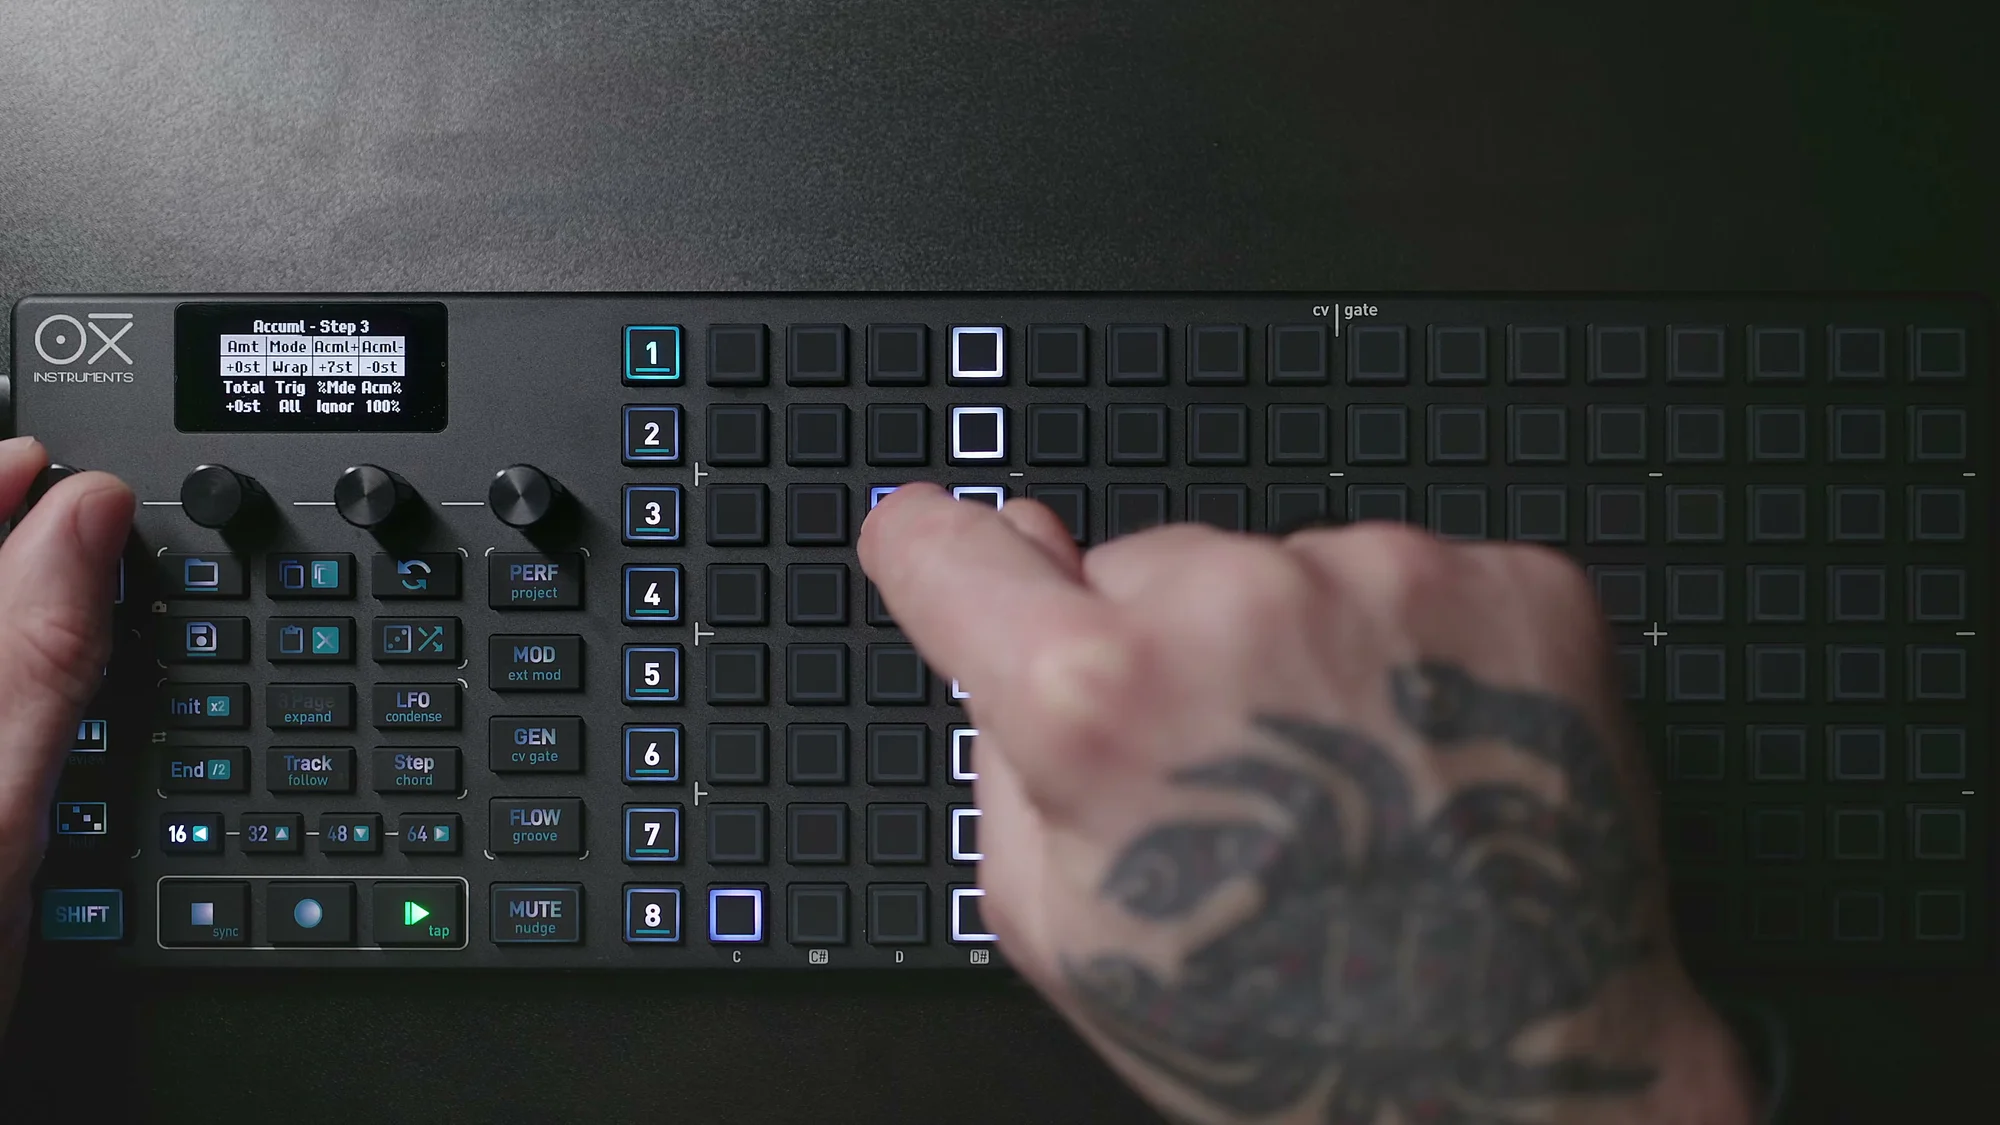
For example, setting Amount to +1st and Acml+ to +3st means "the pitch goes up by one semitone each pass, but resets after reaching 3 semitones."
Below is an example of a 4-step pattern with an accumulator on step 3 (Amt=+1, Pendulum mode, Acml+=+3). The orange step is the accumulator target, and its pitch changes with each cycle (reading left to right, every 4 steps is one cycle).
Three Modes
The accumulator has three modes:
- Wrap: When the limit is reached, it wraps around and continues from the opposite end. For example, upon hitting the upper limit, it wraps to the lower limit side and continues accumulating at the set interval. It creates an up-and-down motion, but the wrap point differs from Pendulum
- Pendulum: When the limit is reached, the direction reverses. It goes up until hitting the upper limit, then starts going down, and vice versa — like a pendulum. This mode naturally produces ascending → descending melodic lines
- Clip: When the limit is reached, it resets and restarts from the opposite limit. It goes up to the max then jumps back to the minimum — like a sawtooth wave
Each mode also has randomized variations, allowing you to add a moderate amount of randomness to the basic behavior pattern.
Conditional Accumulation
You can also set probability and conditions for the accumulator. The Acm% parameter lets you set the probability of accumulation being applied, or apply it on specific cycles.
For example, setting it to "accumulate only once every 2 cycles" slows down the pitch changes.
Combining with Repetition
You can use the accumulator and repetition at the same time. Since accumulation is applied with each repeat, you can create phrases where pitch changes in a staircase pattern within a single step.
The accumulator is one of Mono Mode's most powerful features, so I encourage you to experiment with it. Even a simple sequence gains a continuously evolving, generative quality just by adding an accumulator.
Personally, I like setting accumulators on just one or two steps in a short sequence (6–8 steps). The basic phrase stays the same, but specific notes gradually shift, creating sequences that stay interesting to listen to. Setting Wrap mode with narrow upper/lower limits keeps the notes moving within a limited range of the scale, which tends to sound musical and is easy to work with.
Useful Techniques
Transpose
To transpose the entire sequence, hold a sequencer number button (1–8) and tap any pad on the grid. The entire sequence transposes by the difference between the tapped pad position and the existing notes.
If you tap a pad above or below an existing note in the same column, the sequence transposes by that interval. If you tap a pad in an empty column, the nearest note to the right becomes the reference.
This is different from the Octave encoder's octave-unit transposition — here you can transpose by any interval within the scale, enabling finer pitch changes. It's really handy when you want to quickly change key during playback.
Multi-Step Editing
There are two ways to edit multiple steps simultaneously.
The first is multi-press. Hold multiple step pads at the same time and turn an encoder to change parameters for all held steps at once. Useful for batch-setting Velocity, Octave, Gate, and more.
The second is step selection. Press the last step in the range you want to edit, then press the left arrow button. All steps between the two yellow bars become selected and can be edited together. Pressing the arrow again expands the selection range.
Beyond parameter changes, you can also apply the random generator to the selected range to randomize notes, or delete only the selected range.
Multi-press is good for selecting non-adjacent steps, while step selection is better for selecting a continuous range. Use whichever suits the situation.
Moving Steps
Shift + arrow buttons move all notes within the Init–End range in any direction (up, down, left, right). The movement stays within the loop range, so nothing overshoots past End.
To move specific steps only, hold that step's pad and use the arrow buttons. You can also move just the steps selected via step selection.
Copy & Paste
Copy and paste is an essential function for speeding up pattern creation.
To copy steps, hold the Copy button and tap the pads of the steps you want to copy. You can select multiple steps — the display shows how many are selected. To paste, hold the Paste button and tap the destination pad.
When pasting multiple steps, the distance between steps is preserved. Tied steps can also be copied and pasted. The first step selected during copy becomes the "anchor" (reference point), and the paste destination pad corresponds to that anchor's position.
Note that copying a step also copies all its parameters — Velocity, Gate, Repetition, etc. When pasting, note positions are placed relative to the original step, giving you reasonable flexibility in rearranging patterns.
You can even copy an entire sequence to a different sequencer. This lets you paste a pattern you created in one sequencer into another and make variations from there.
Random Generator
Applying the random generator to a selection randomizes the notes within the selected steps. Rather than generating a completely random sequence from scratch, it randomizes just a portion of an existing pattern, which can lead to unexpected and interesting phrases.
The random generator was covered in EP.1 as well, but in Mono Mode, the combination with step selection is particularly powerful.
Introducing Groove
The OXI ONE MKII features a Groove function. Access the settings screen with Shift + Groove.
Groove applies accent and timing templates to your sequence. Various presets are available — just pick one to add character to your pattern.
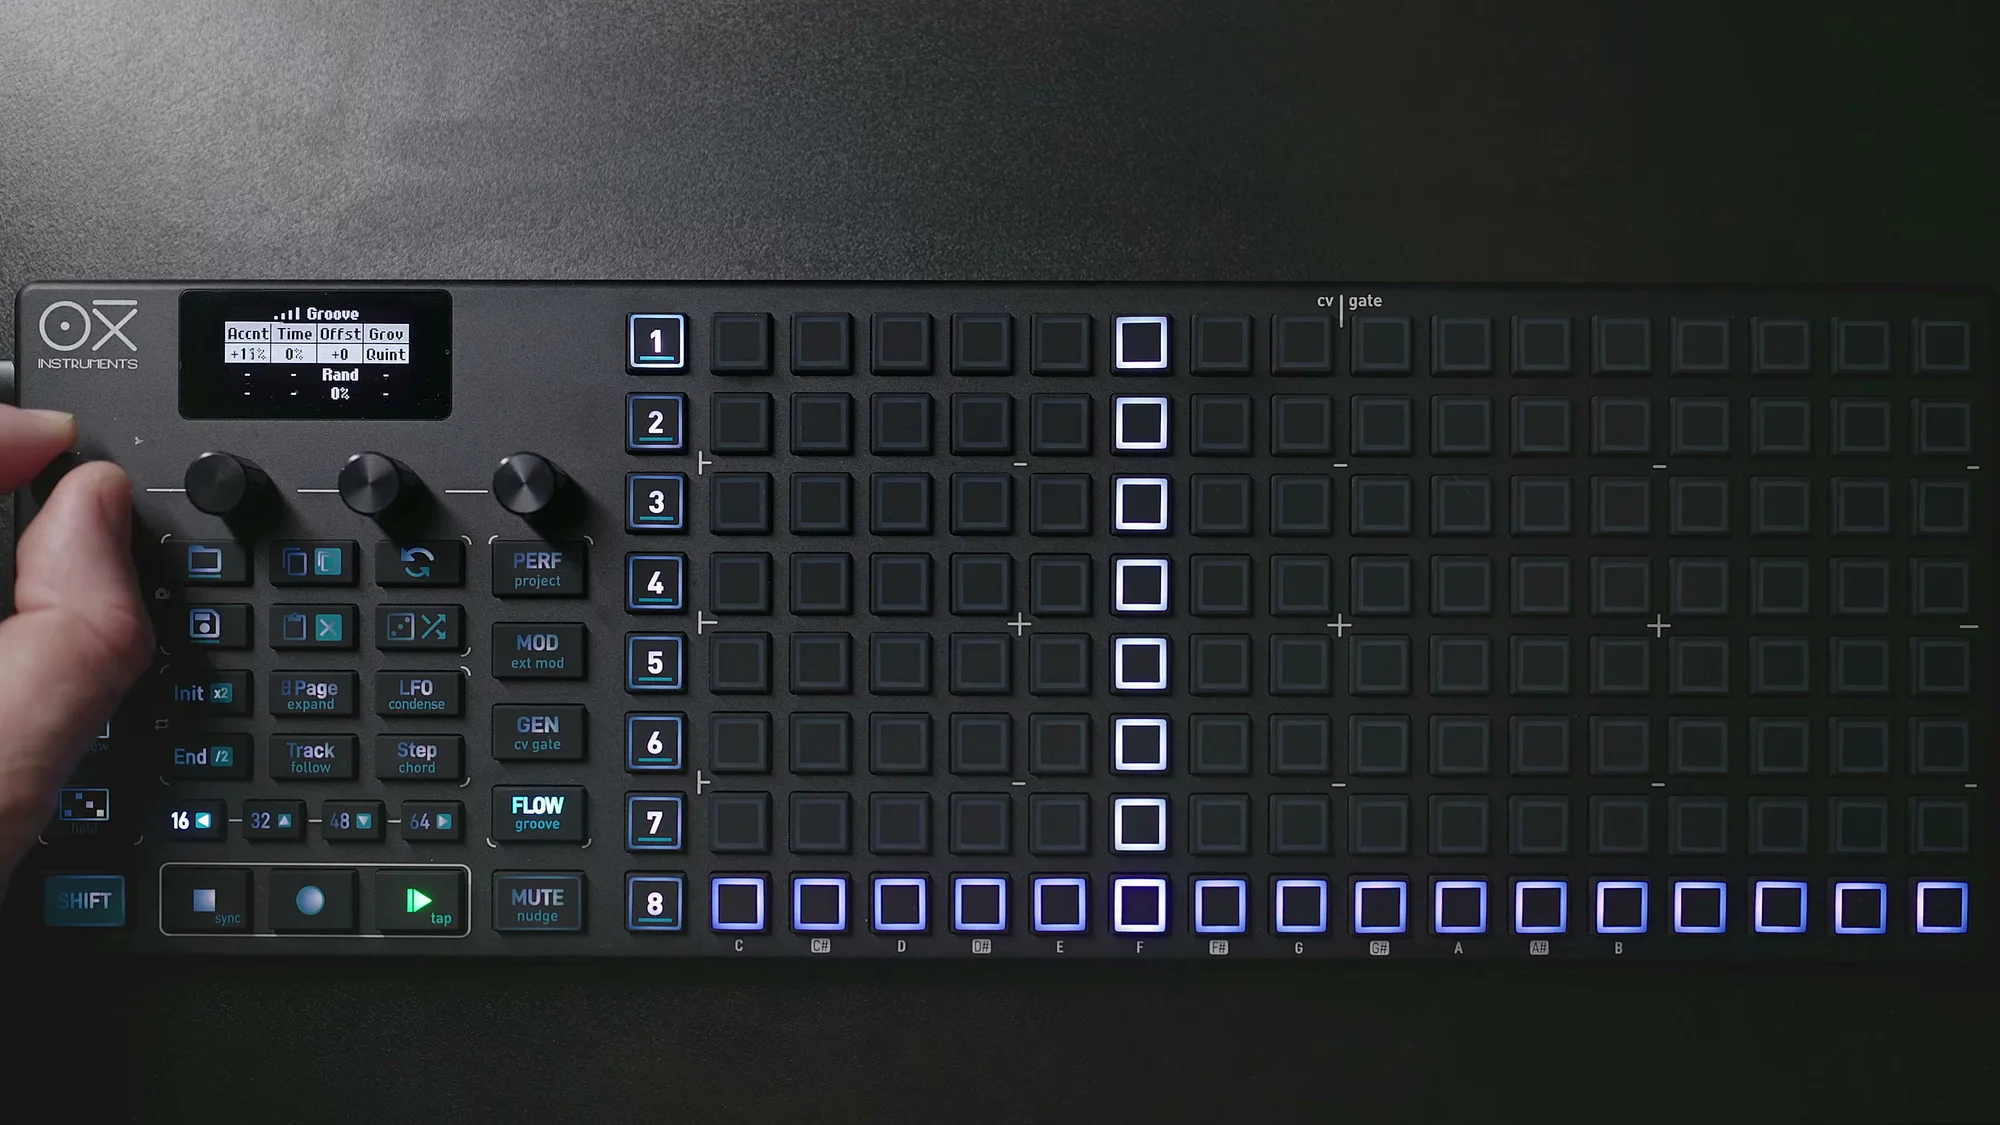
- Groove Template: Select a preset. Various styles are available, such as Quintaroca and others
- Accent: Sets the accent strength. Adjusts how much it affects Velocity
- Time: Sets the amount of timing variation. Higher values cause step timing to shift more according to the template
Groove operates independently of the pattern length. For example, even if your pattern is 14 steps, the Groove continues running on a 16-step template, so the accent positions shift slightly with each loop, creating ongoing variation. You can intentionally mismatch pattern length with the Groove template to create polyrhythmic effects.
Using the OXI App, you can also design and import your own Groove templates.
This alone can dramatically change a pattern's character, so give it a try when a programmed pattern feels like it's missing something. I plan to cover Groove in more detail in EP.3.
That's it for EP.2. We've covered Mono Mode from basic operations through accumulators and various techniques. Mono Mode is the simplest mode, but combining Repetition, conditional triggers, and accumulators lets you create surprisingly complex and expressive sequences. I recommend starting with a simple pattern and gradually adding elements.
There's also a video walkthrough on YouTube — check it out below.
OXI ONE MKII Product Page
See the product details for the OXI ONE MKII below.
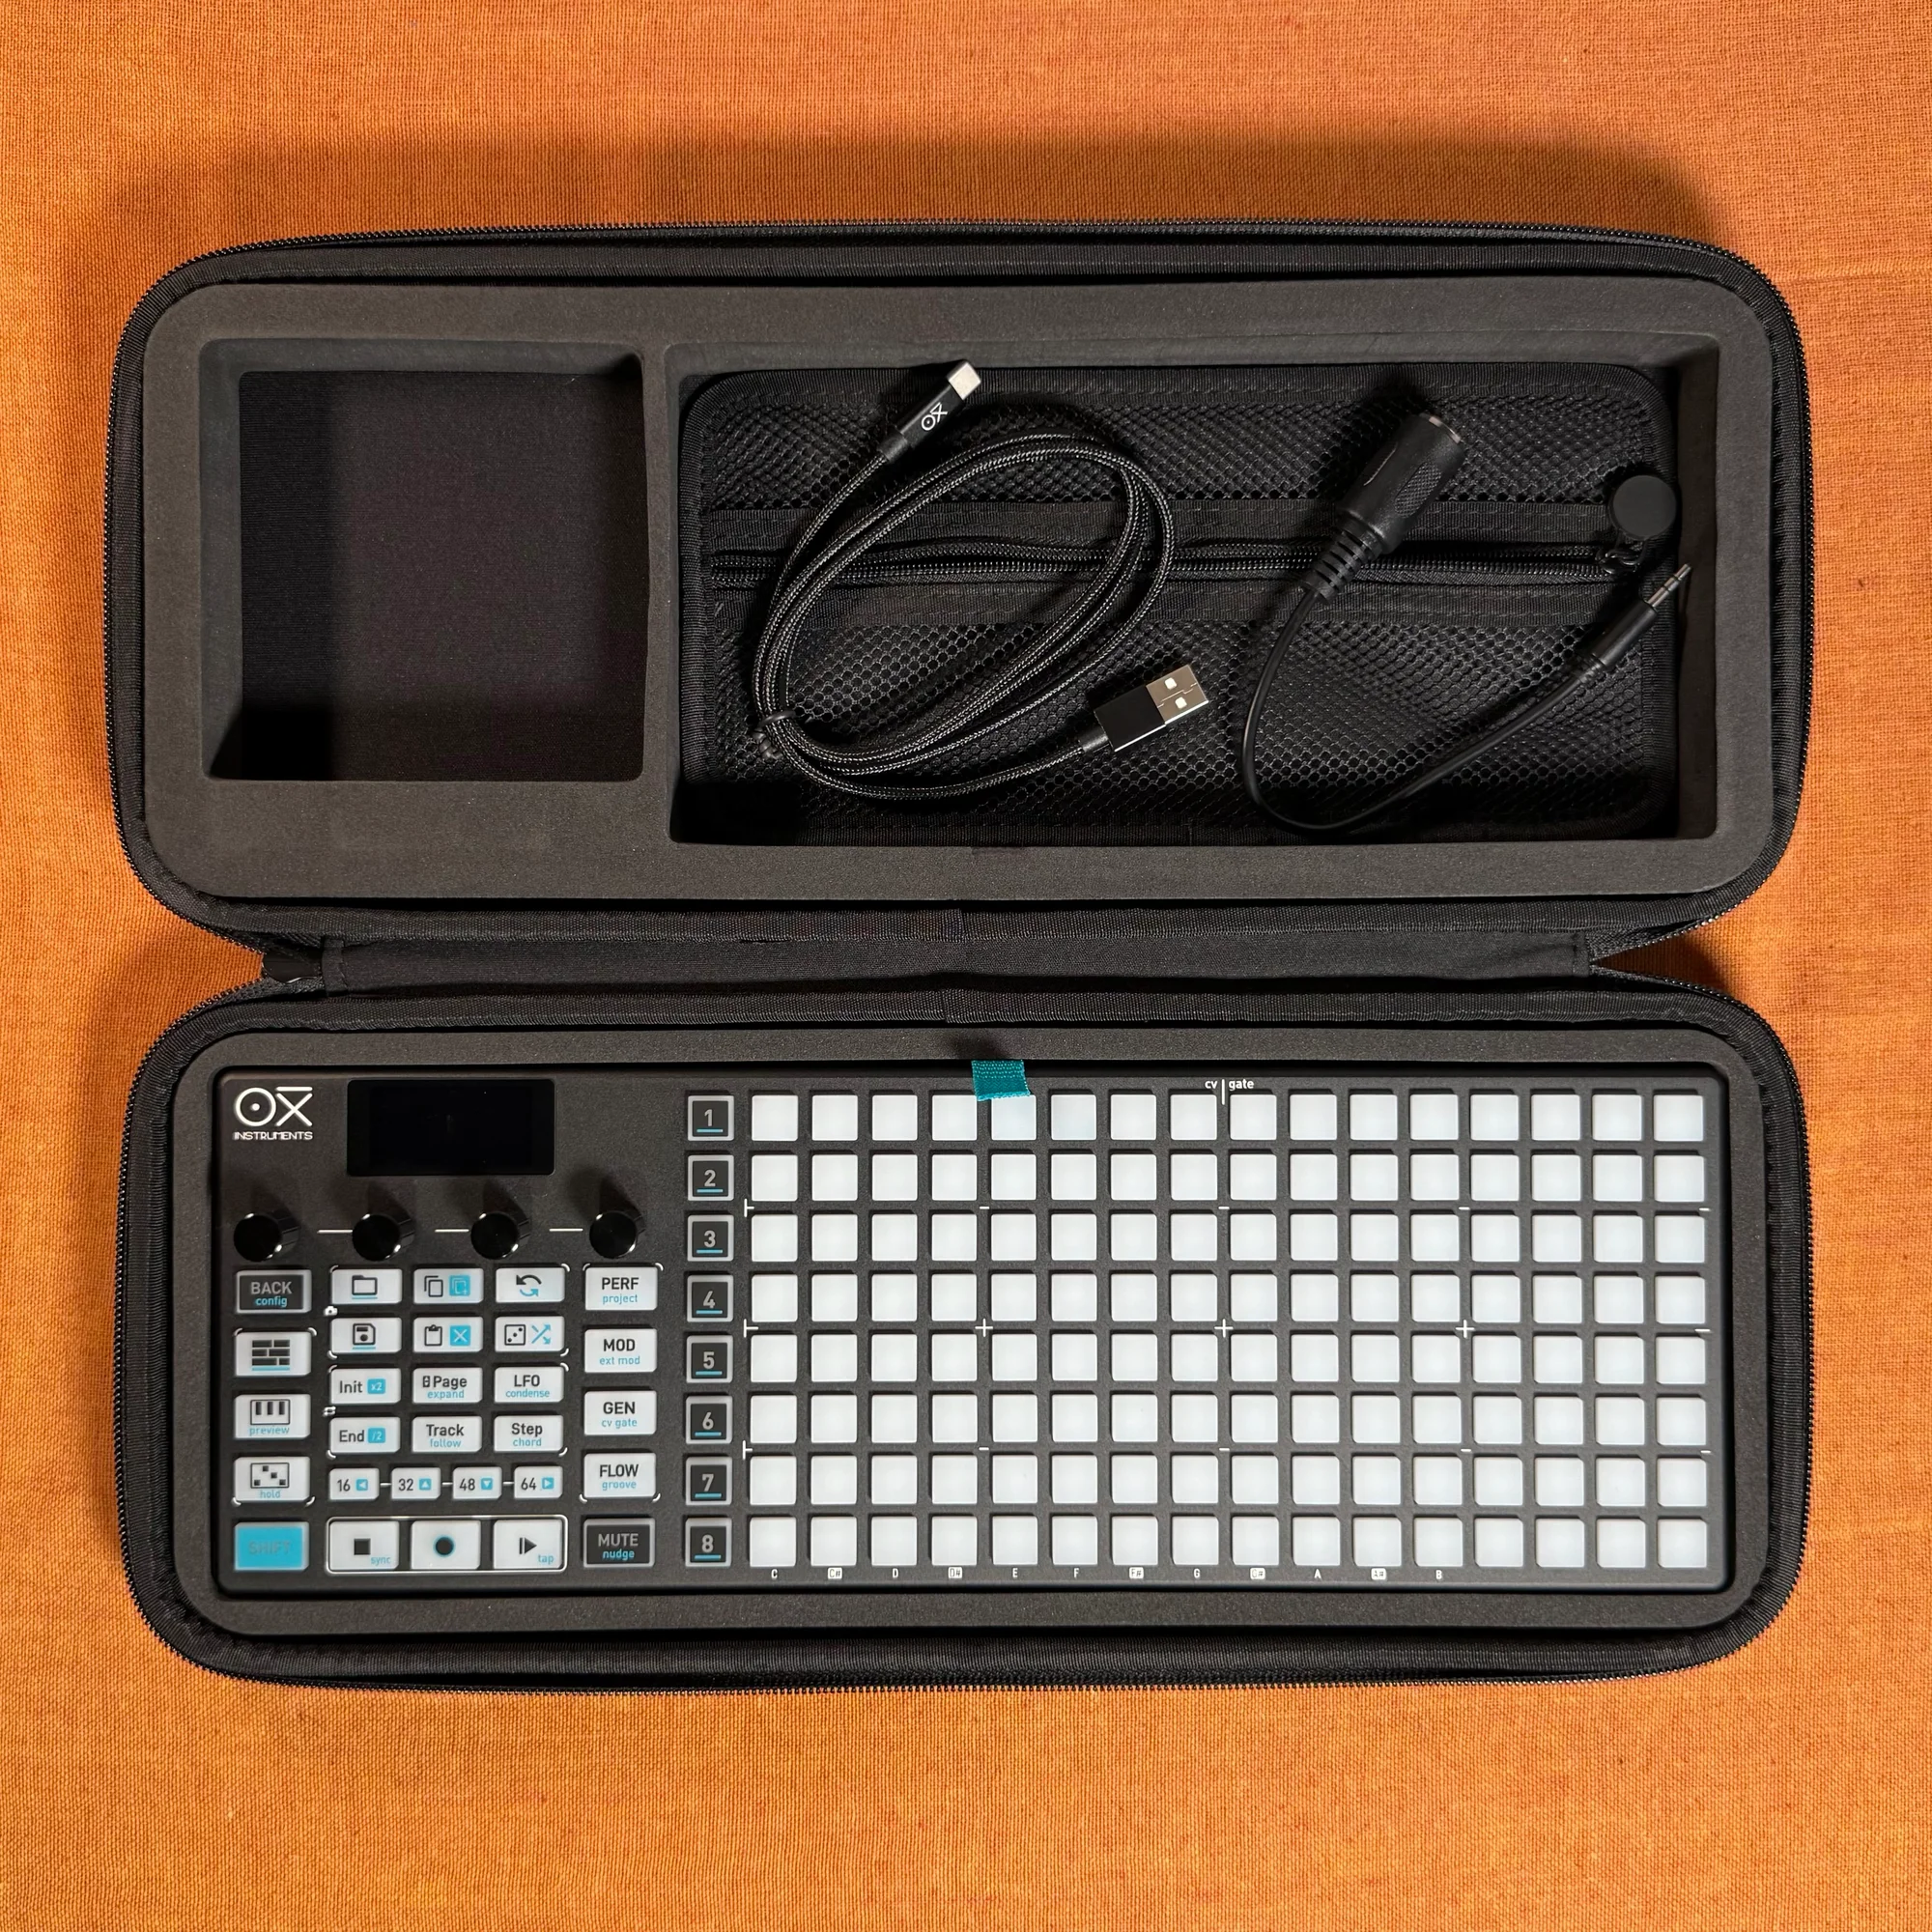
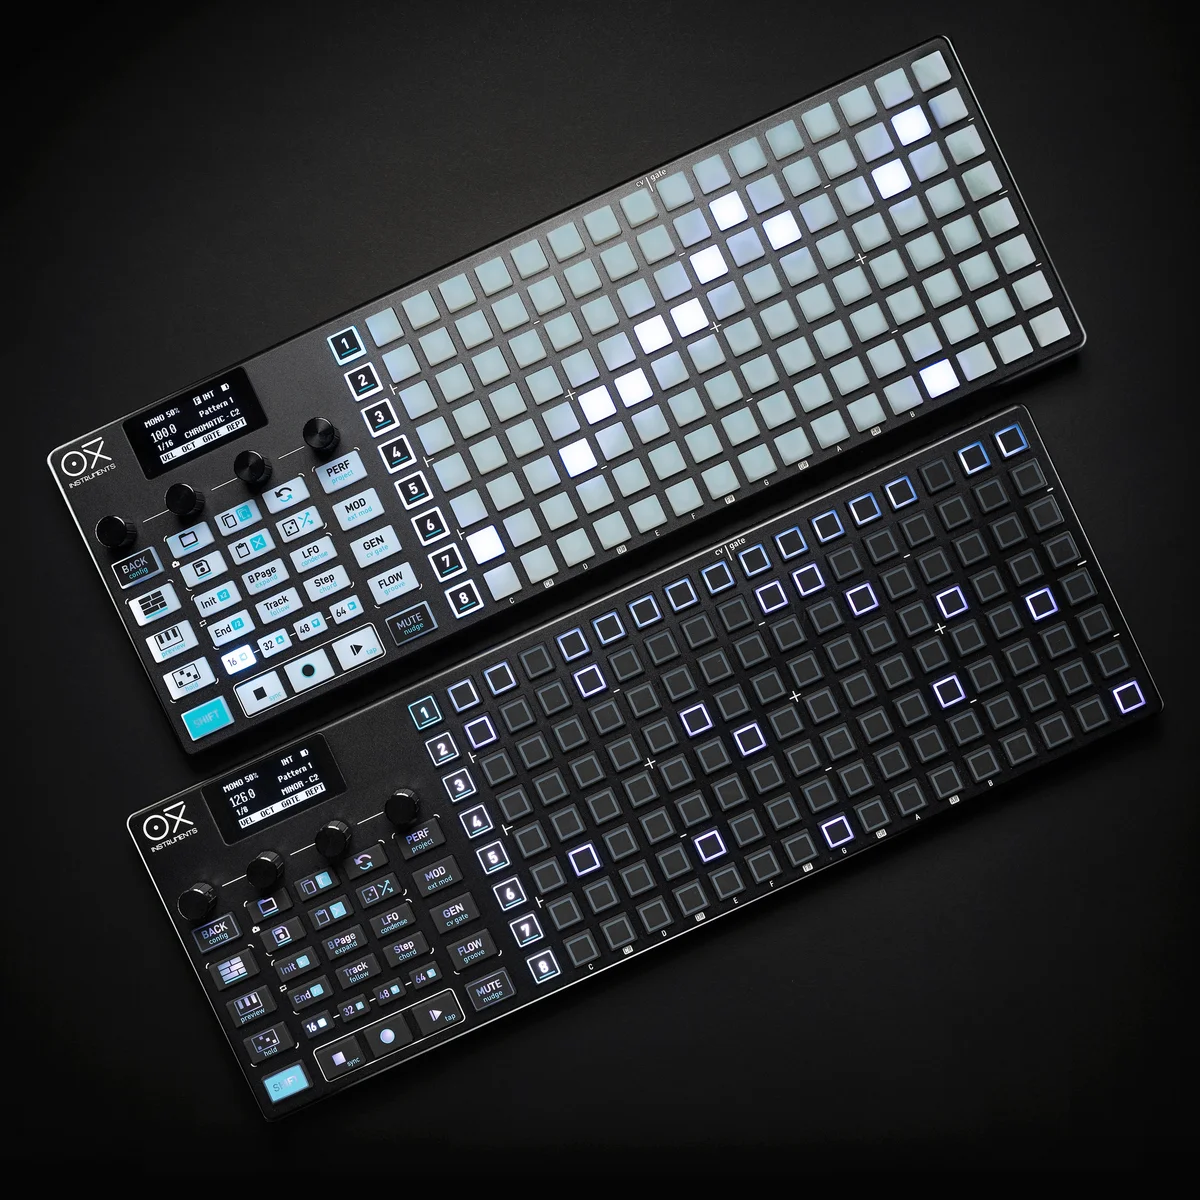
OXI ONE MKII Black Edition, next-generation model with 8-part sequencer. Enhanced generative features, large OLED display, and up to 64-track control.
OXI ONE MKII, next-generation model with 8-part sequencer. Enhanced generative features, large OLED display, and up to 64-track control.