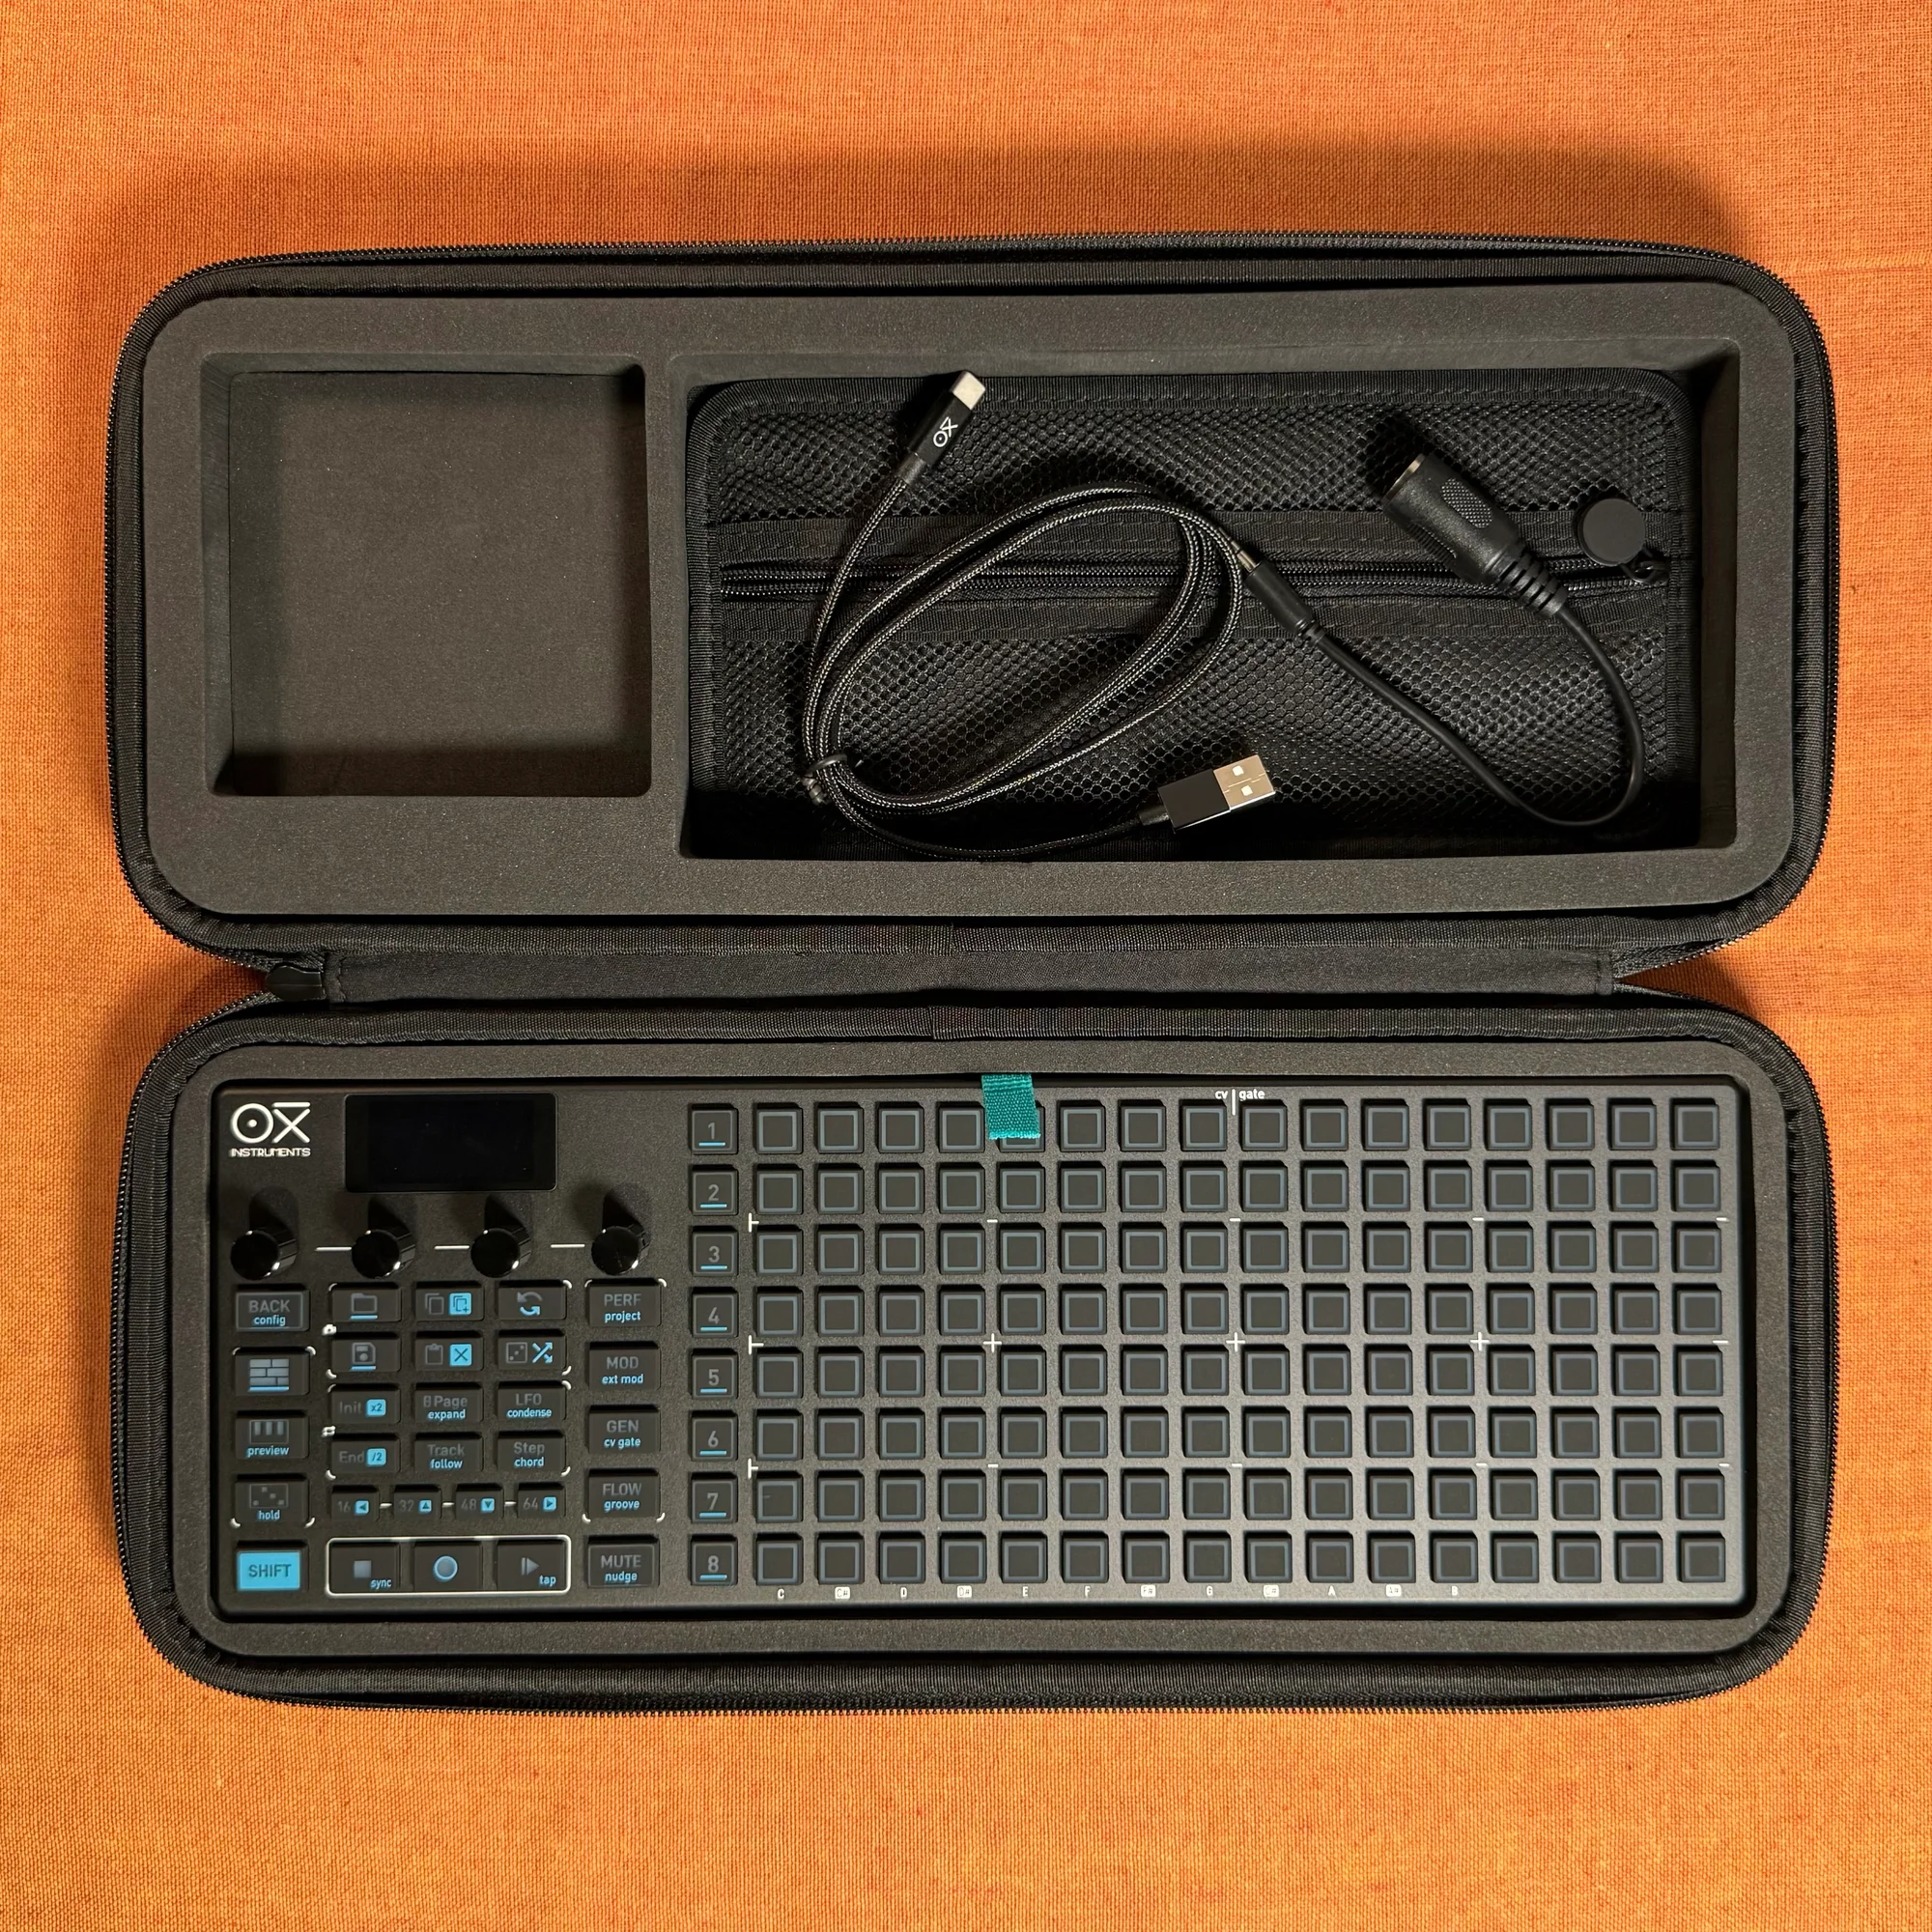
Welcome to EP.3 of the OXI ONE MKII guide series. This time, the topic is Groove.
When you program patterns on a sequencer, they play back with perfectly quantized timing locked to the grid. But that precision alone can feel mechanical and flat. When a real person plays drums or keys, there are subtle timing fluctuations and dynamic variations — and it's exactly those "imperfections" that give rhythm its sense of life.
The OXI ONE MKII offers two features for creating that kind of feel: Swing and Groove. In this episode, I'll start with the difference between the two, then walk through each Groove parameter and how to create custom Grooves.
- The Difference Between Swing and Groove
- Setting Up Swing
- The Groove Menu
- Groove Parameters in Detail
- Per-Sequencer Groove
- Groove and Repetition
- Groove on Melodic Tracks
- Groove in the Arpeggiator
- Velocity Headroom Settings
- Creating Custom Grooves
The Difference Between Swing and Groove
Let's start by clarifying the difference between Swing and Groove. They might seem similar in effect, but they're actually quite different in nature.
Swing is a function that shifts the timing of off-beats. It takes evenly spaced 16th notes and delays (or advances) the off-beats slightly, giving the rhythm a bouncy, shuffled feel. The only thing it adjusts is timing offset.
Groove, on the other hand, applies both timing shifts and velocity (dynamic) changes simultaneously, based on a pre-defined template. So while Swing only affects "timing," Groove is a "timing + velocity" package.
Here's a summary:
- Swing: Off-beat timing offset only. Simple
- Groove: Template-based, modifying both timing and velocity. More complex and expressive
Which one to use depends on the situation. If you just want a subtle bounce, Swing will do the job. If you want a more authentic groove feel, go with Groove.
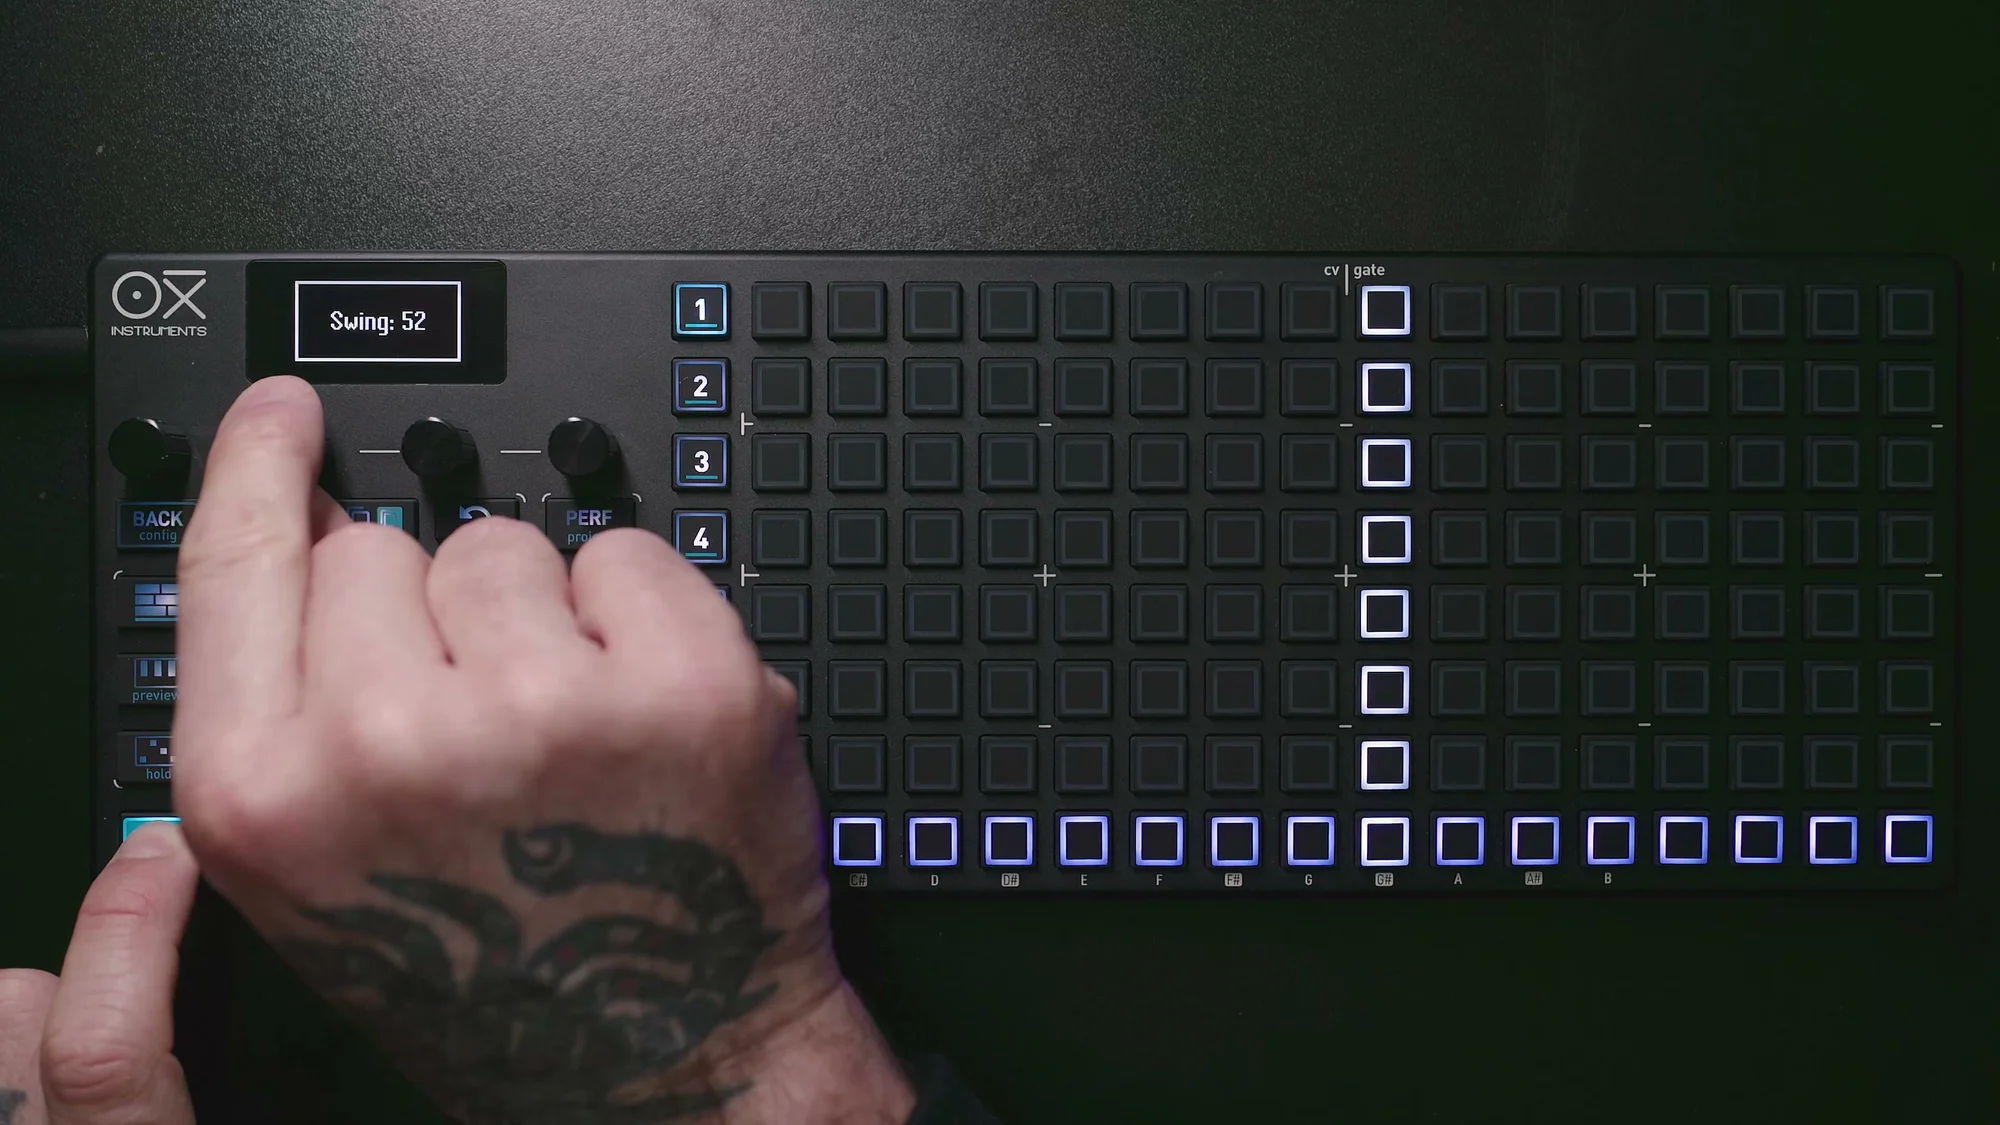
Setting Up Swing
Setting up Swing is very straightforward.
Simply hold Shift and turn encoder 2 (Swng). The default value is 50, which means no Swing is applied.
- Values above 50 shift the off-beats later (delayed)
- Values below 50 shift the off-beats earlier (advanced)
- The range is 10 to 90
For a subtle bounce, setting it around 55-60 works nicely. For a heavy shuffle, you can push it to 70 or above, but overdoing it will make the rhythm fall apart, so use it in moderation.
Swing is set per sequencer and saved with the pattern. To reset it, hold Shift and press and hold the Swng knob to return to the default value of 50.
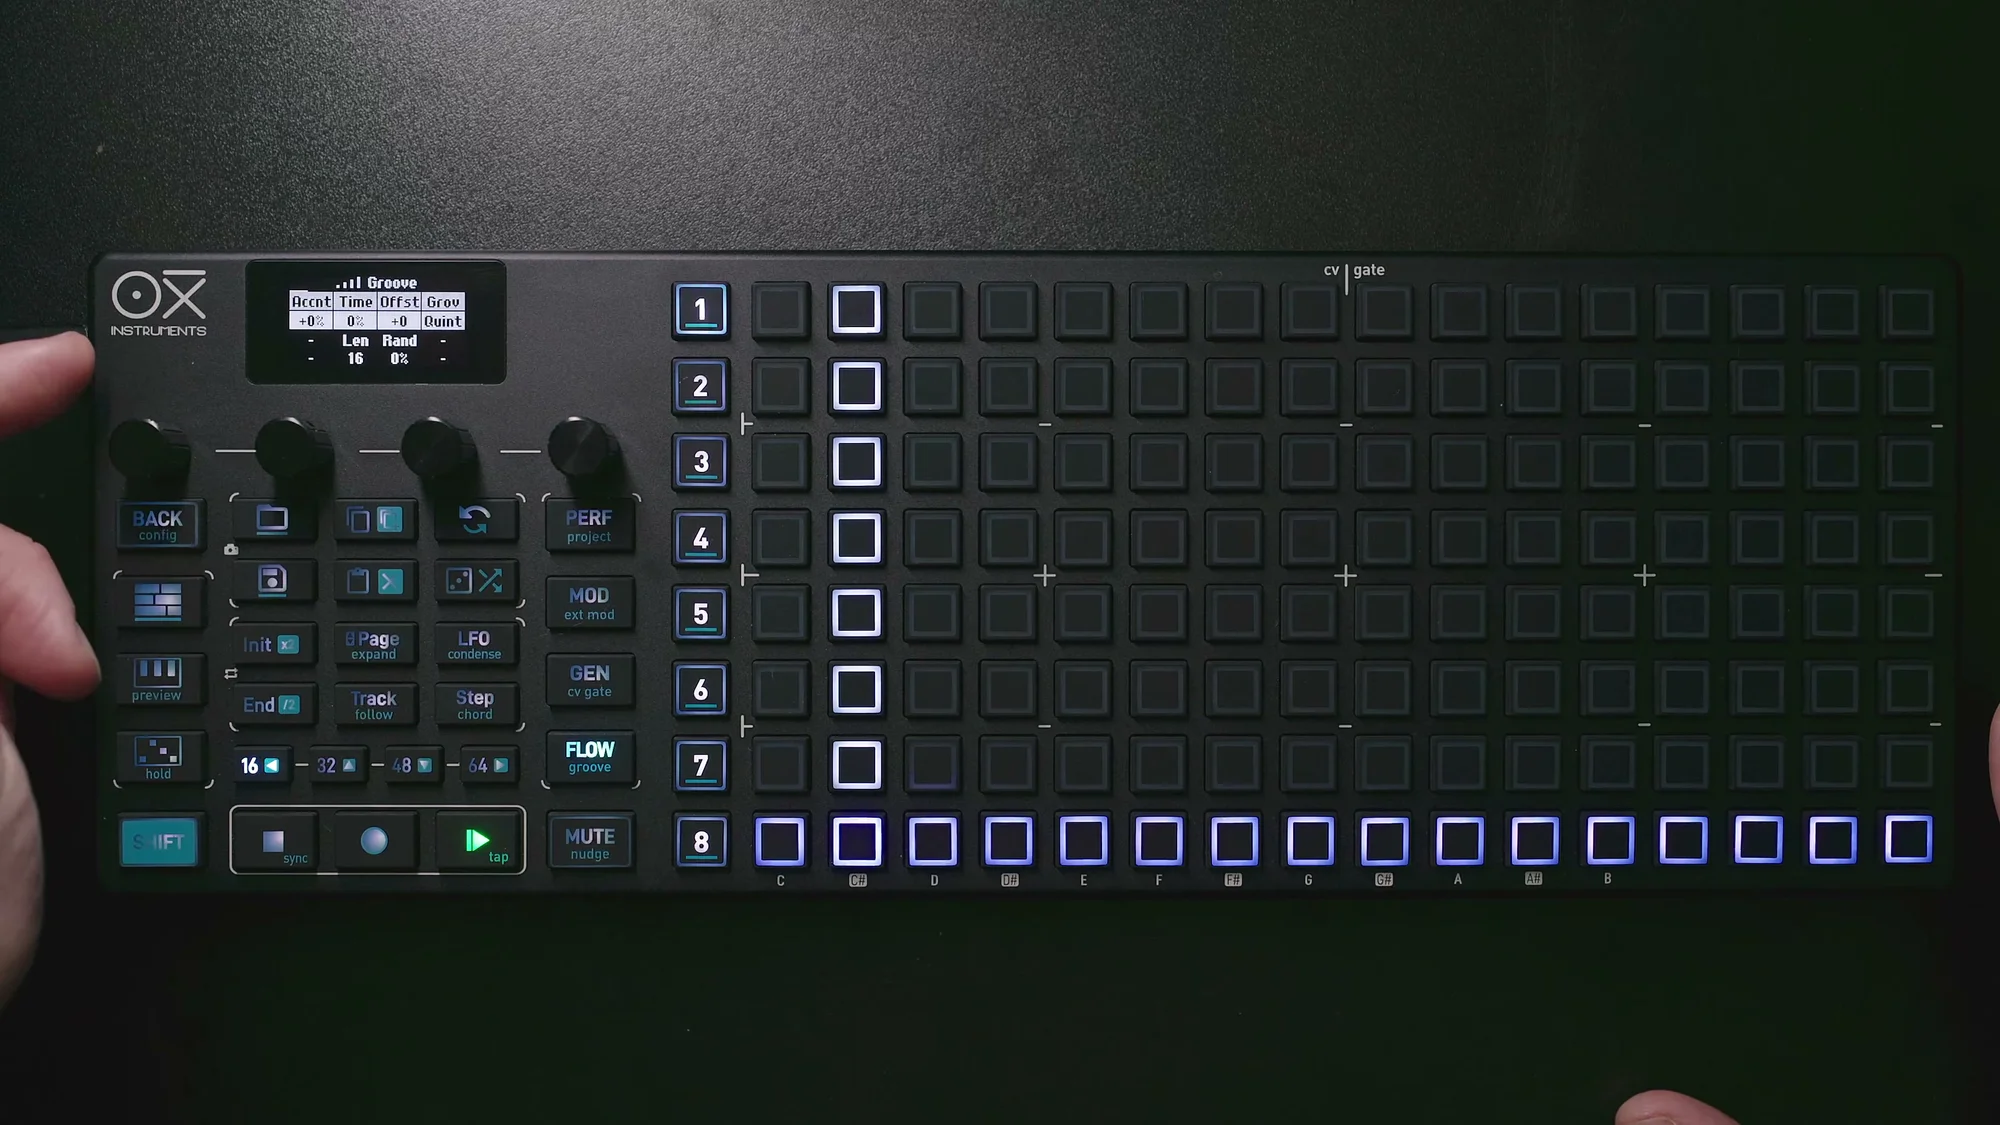
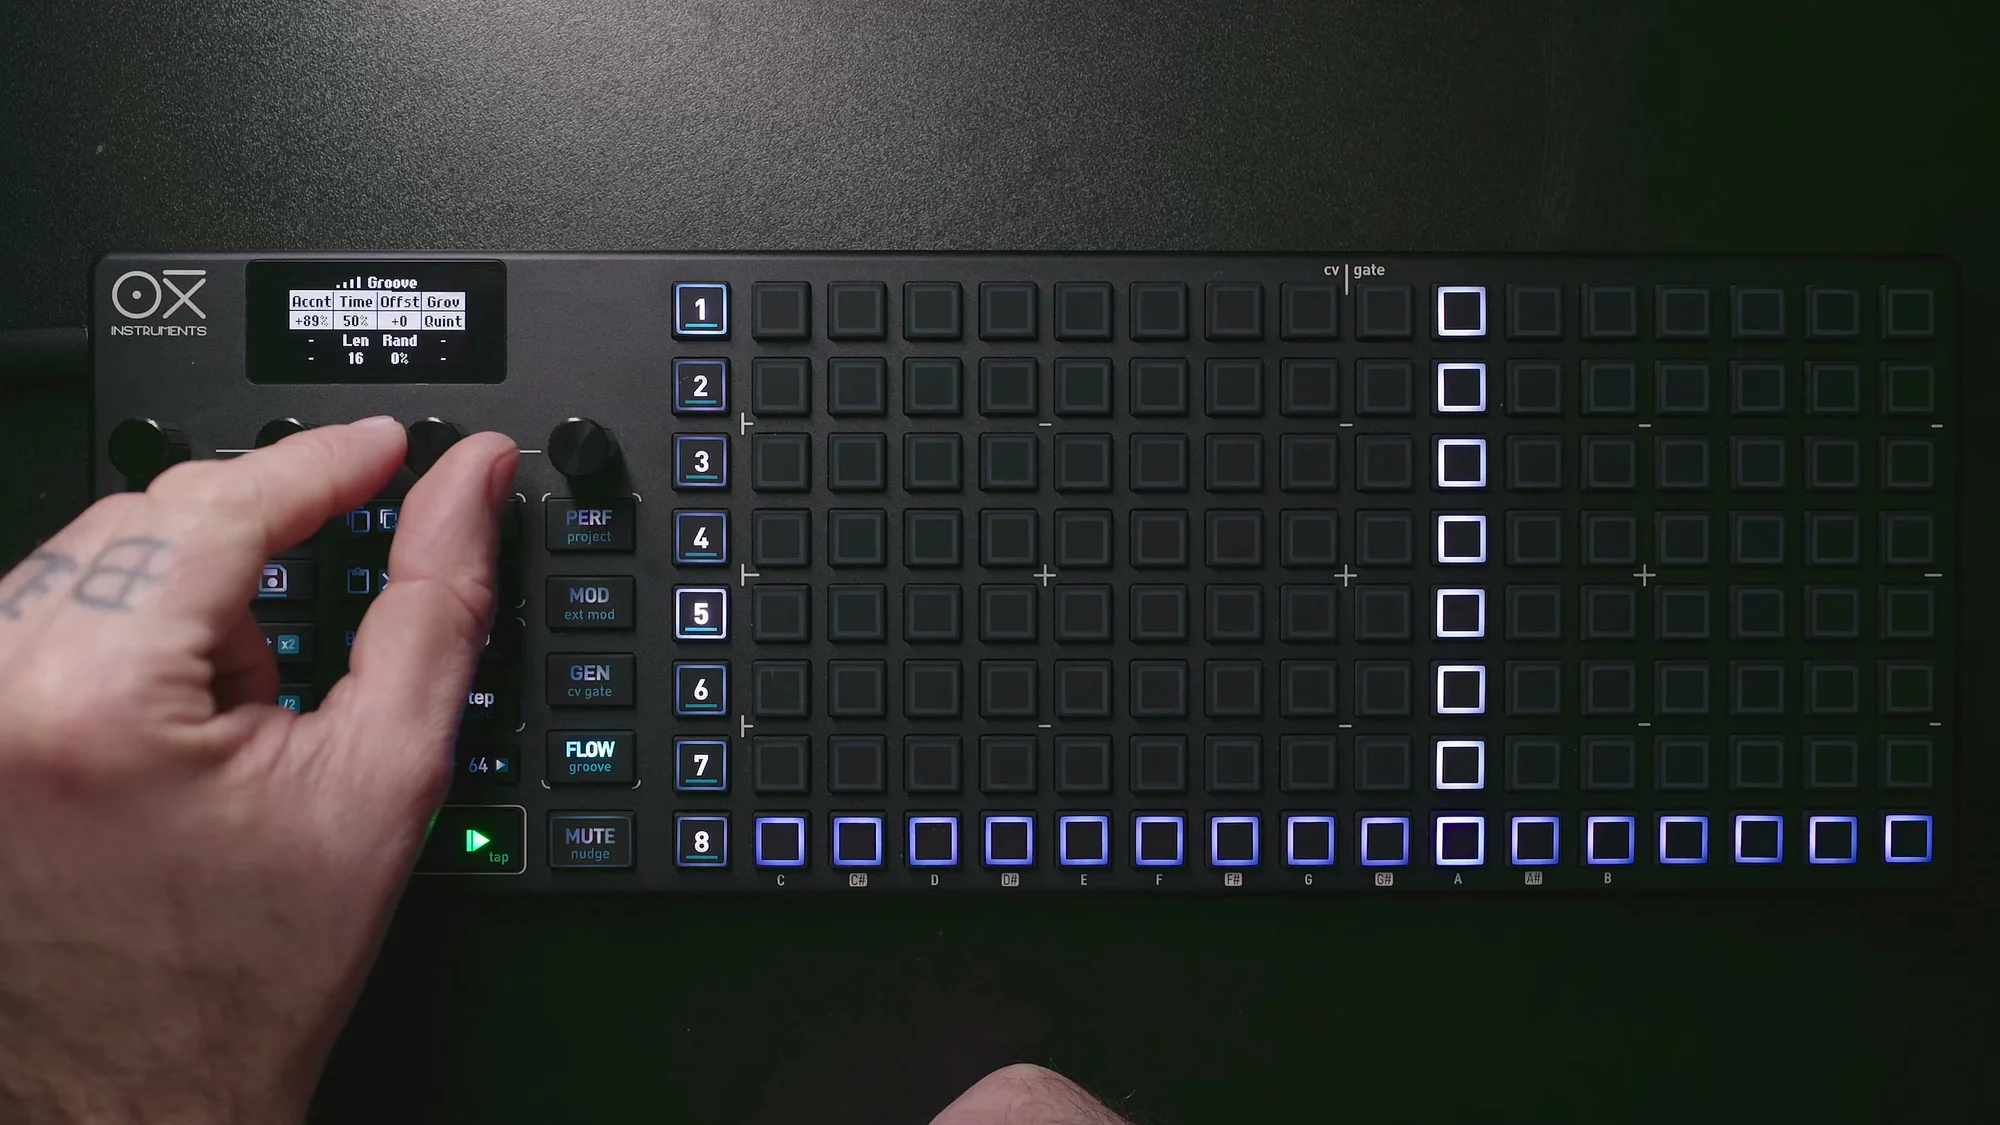
The Groove Menu
When you want a richer groove feel than what Swing can offer, it's time to use the Groove function.
To access the Groove menu, press the Groove button while holding Shift. This opens a menu showing the following four parameters:
- Accnt (Accent): Amount of velocity accent
- Time: Amount of timing shift
- Rand (Random): Amount of randomization
- Grov (Groove): Groove template selection
Select a template with Grov, then adjust the intensity with Accnt and Time — that's the basic workflow.
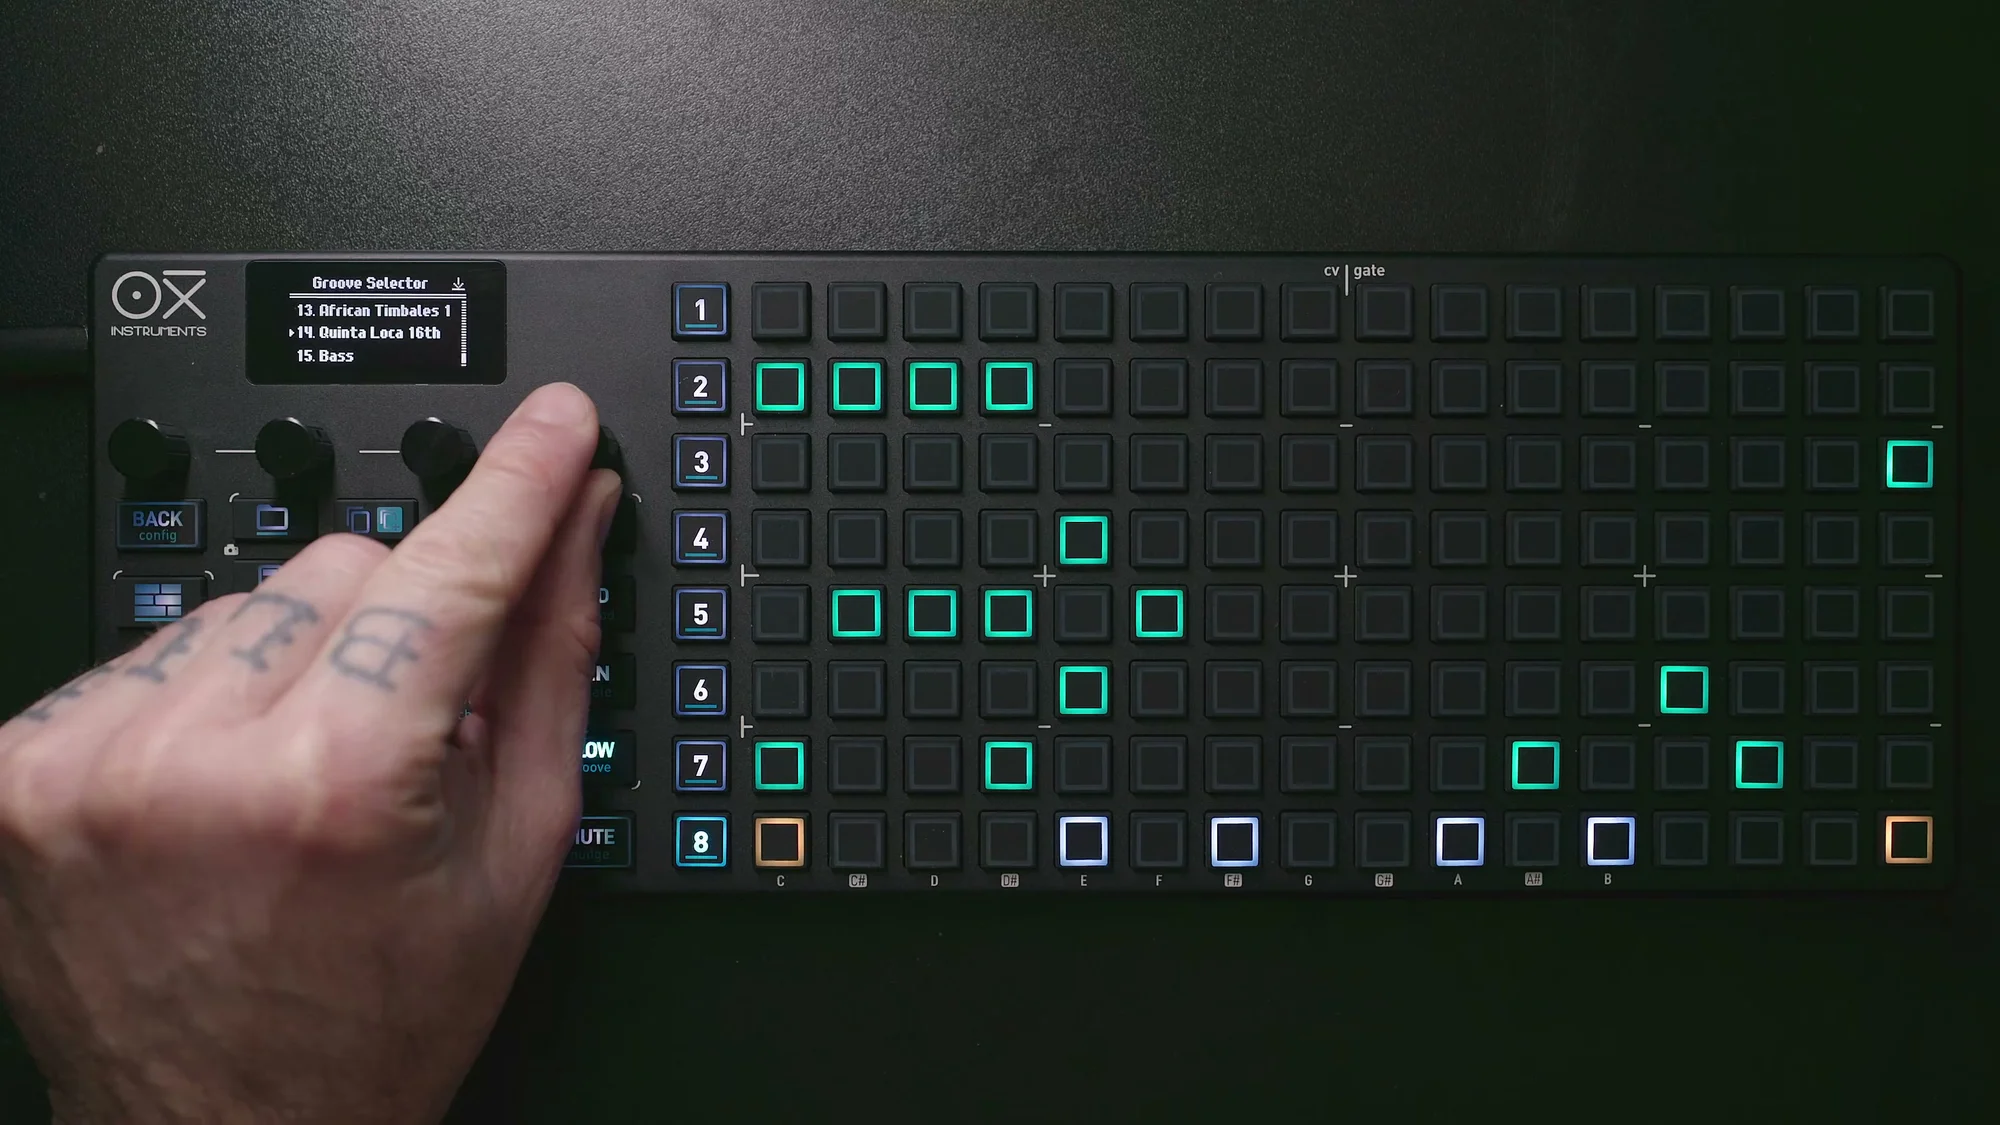
The OXI ONE MKII comes with 14 factory preset grooves:
- Trancey Groove 16th
- Disco Light Swing 16th
- Tambourin 16th
- Bomba Acc 16th
- Shaker ChaCha 16th
- Loosely Flow 16th
- Claves Accent 16th
- Caixa Accent 16th
- Charanga Shaker 16th
- Dancehall 16th
- Disco Indie 16th
- Fusion Tight 16th
- African Timbales 16th
- Quinta Loca 16th
In addition to these, user slots are available for grooves created in the OXI App or imported from an SD card. These appear from slot number 15 onward.

Groove Parameters in Detail
Let's take a closer look at each Groove parameter. Turn the knob to edit the value, and press and hold the knob to reset to the default.
Accent
Accent modifies each step's velocity based on the velocity profile of the selected Groove template.
- Range: -120% to +120%
- Default: 0%
Positive values apply the template's dynamic pattern as-is. Negative values invert the dynamics — steps that would normally be accented become quieter, and quieter steps become louder.
Higher values increase the velocity variation, so I'd recommend starting with moderate values (around 20-40%) and adjusting to taste.
Below is an illustration of Accent applied to a 16-step pattern. The labels H (High) / M (Medium) / L (Low) represent the velocity levels defined by the Groove template.
Note that Accent is also applied to Repetitions. This is covered in more detail in the "Groove and Repetition" section below.
Time
Time shifts the timing of each step based on the Groove template.
- Range: -120% to +120%
- Default: 0%
Positive values apply the template's timing shifts as defined. Negative values invert the shift direction.
The difference from Swing is that Swing uniformly shifts all off-beats by the same amount, whereas Groove's Time applies a different timing offset to each step based on the complex pattern defined in the template.
Time only applies to the note itself — it does not affect Repetition timing. This is a different behavior from Accent, so it's good to keep that in mind.
Length
Groove templates have a Length property, which defines how many steps the groove pattern spans. Most presets use 16 or 32 steps.
By intentionally setting the note pattern length and the Groove template length to different values, the Groove's position shifts slightly with each loop of the pattern.
For example, if the note pattern is 16 steps and the Groove length is set to 12 steps, the Groove application point shifts by 4 steps each time the pattern loops. This creates a subtly different groove feel with each repetition, bringing organic variation to your performance.
It's a small trick, but it's an effective technique for breaking the monotony of a pattern.
Below is an illustration of timing shifts caused by Groove Time. The top row shows the pre-Groove state (even timing), and the bottom row shows the post-Groove state (with subtle per-step timing shifts).
Random
Random adds random variation to the Groove application amount.
- Range: 0 to 100%
- Default: 0%
This adds a random offset on top of the values already set by Accent and Time. In other words, if Accent and Time are both at 0, raising Random alone won't have any effect. You first set the base Groove amount with Accent and Time, then add Random as "variation on top of the variation" — a two-stage approach.
Increasing Random means the Groove behaves slightly differently each time it plays, creating a more human and unpredictable rhythmic feel. It's also useful for keeping things interesting when looping the same pattern for extended periods during a live performance.
Offset
Offset shifts the entire Groove template left or right.
This might seem like a minor parameter, but it's actually quite useful. Even with the same Groove template, changing the Offset alters how the Groove "lands" on your note pattern.
For example, when applying Groove to a rhythmic pattern, gradually moving the Offset can help you find a sweet spot where it just feels right. It's especially handy for drum and percussion patterns, where you're looking for the perfect alignment between kick/snare hits and the Groove's accent points.
Try moving the Offset in real time during playback — it feels great.
Per-Sequencer Groove
One of the major strengths of the OXI ONE MKII is that each of the 8 sequencers can have its own independent Groove settings.
For example, you could set a tight Groove on the kick sequencer and a looser Groove on the hi-hat sequencer. By varying the groove character for each instrument, you can build more dimensional and complex rhythms.
Furthermore, when using Multitrack mode, each of the 8 tracks can also have independent Groove settings. This means you can apply different Grooves to individual parts of a drum kit within a single sequencer — that's a fine level of control.
In real drum performances, it's virtually unheard of for the hi-hat, kick, and snare to all share exactly the same timing feel. Applying different Grooves to each element lets you create more natural and realistic drum patterns.
Groove and Repetition
When combining Groove with the Repetition feature, there's an important thing to know:
- Accent (velocity changes): Applied to all note events, including repetitions
- Time (timing shift): Applied to the original note only, not to repetitions
So when Groove is applied to a step with Repetitions, the velocity changes affect everything including the repeats, but the timing shifts only affect the original note.
This is a sensible design choice. Repetitions should fire at precise timing intervals relative to the original note — if Groove timing shifts were applied to them, it would cause unintended rhythmic disruption.
On the other hand, having the velocity changes apply to repetitions gives the repeated notes dynamic variation, resulting in more expressive performances.
Groove on Melodic Tracks
You might think of Groove as something only for drums and percussion, but it's highly effective on melodic tracks too.
Applying Groove to a bassline adds note dynamics and timing variations that reduce the "programmed" feel. It also works well on synth leads and arpeggios.
The Accent parameter's velocity changes are particularly impactful, as they affect filter envelope amount and amp dynamics, adding organic expression to melodic lines.
Give it a try — you'll notice how a rigid, grid-locked melody suddenly starts to feel like it's being "played." Start with subtle settings and listen to the difference.
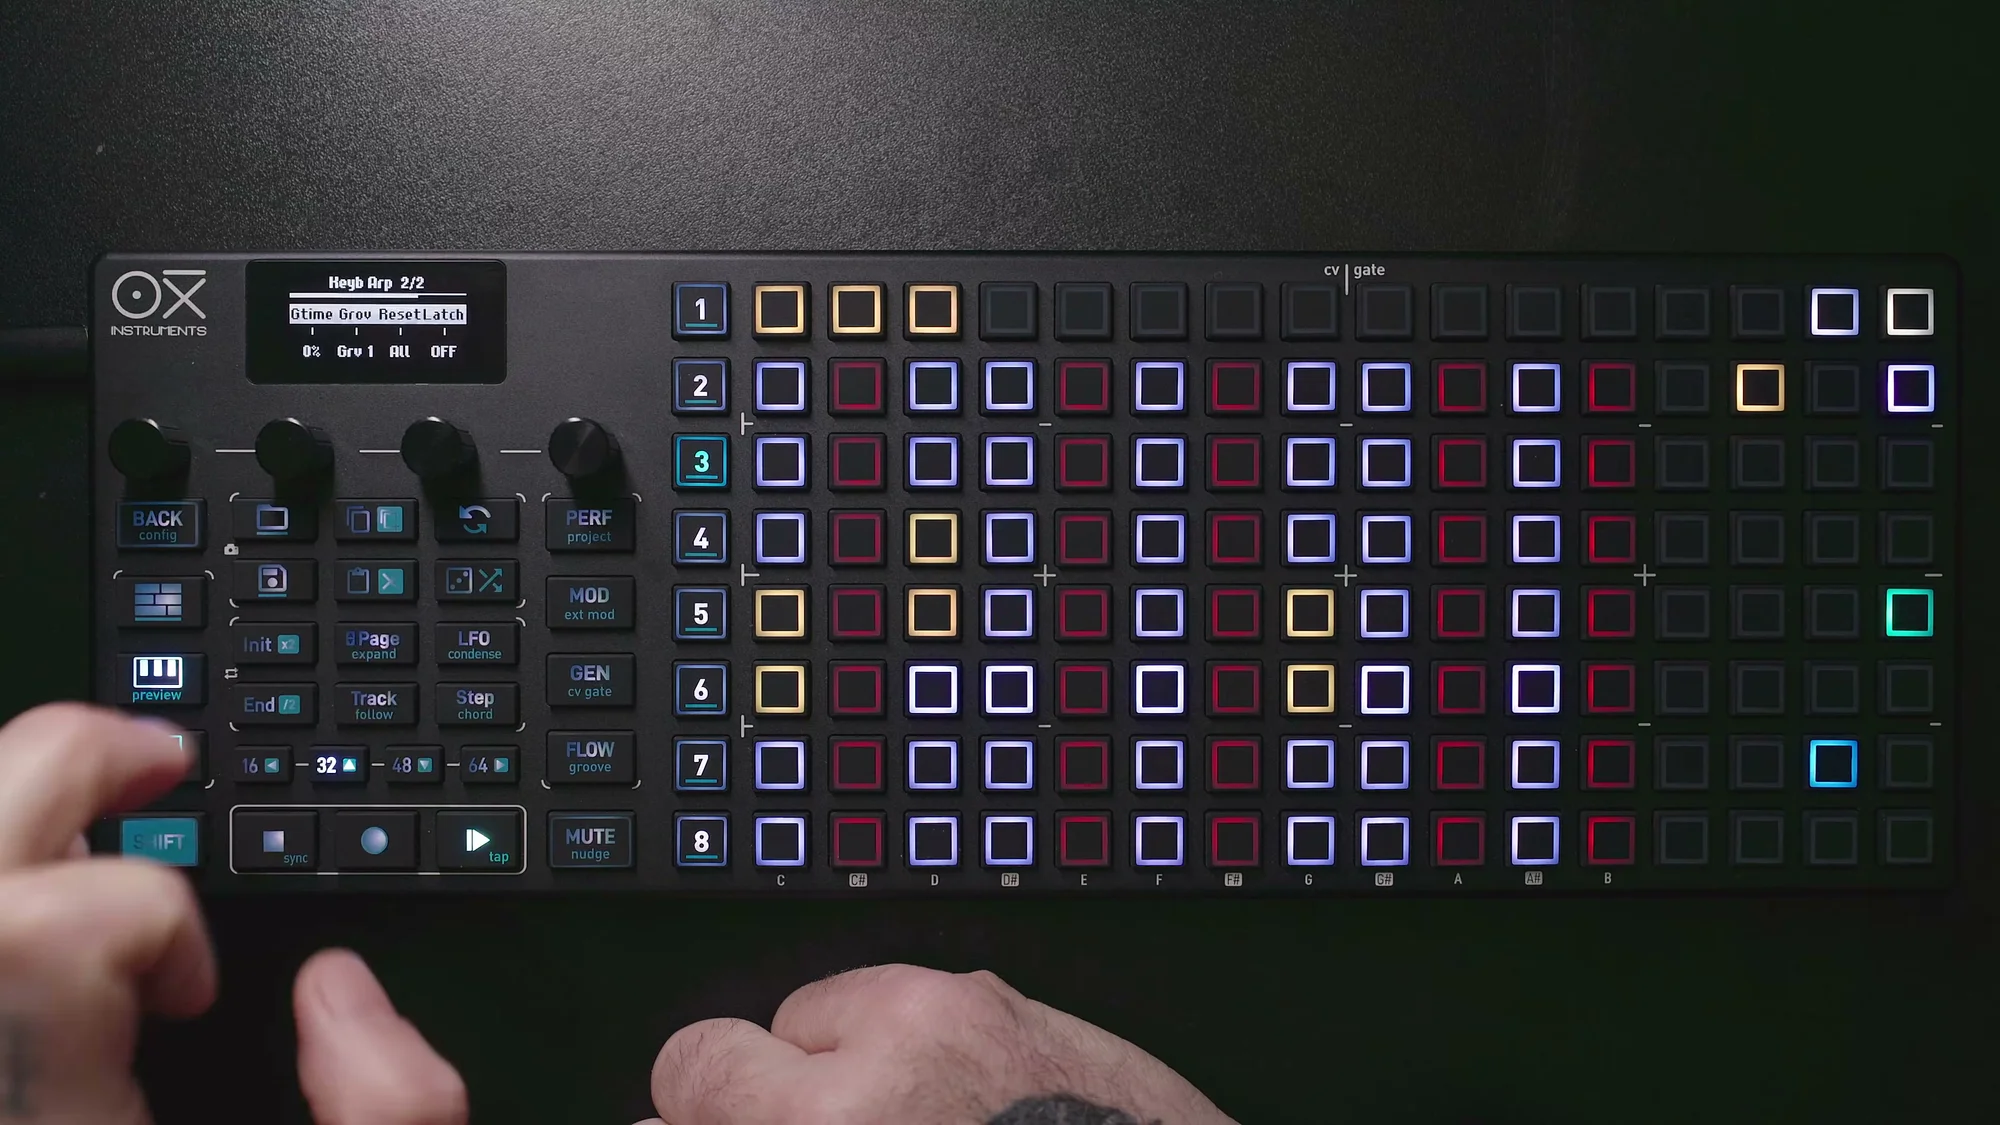
Groove in the Arpeggiator
The OXI ONE MKII's arpeggiator has its own dedicated Groove menu, found on arpeggiator parameter page 2.
The arpeggiator Groove parameters are:
- Accnt: Amount of velocity accent applied to arpeggio notes (-100 to +100%)
- Gtime: Swing-style Groove that offsets micro-timing of arpeggio notes (-100 to +100%)
- Grov: Groove template selection (from the same template library as the main Groove)
- Reset: Reset behavior when a new arpeggio note is applied (pattern position, Groove, both, or none)
The arpeggiator's Groove operates independently from the sequencer's Groove, so you can apply Groove only to the arpeggiator while leaving the sequencer pattern unaffected (or vice versa).
Adding a Groove template's velocity profile and timing shifts to the arpeggiator's evenly spaced notes transforms a mechanical arpeggio into something much more musical.
Velocity Headroom Settings
Here's a quick tip for using Groove effectively.
The Groove Accent parameter varies velocity up and down based on the template. The important thing to keep in mind is that the MIDI velocity range is 1 to 127.
If the default velocity is set to 75, you have 127-75=52 of headroom above and 75-1=74 below. This means the upward range tends to be more limited.
By setting the default velocity to 64 (roughly the center), you ensure nearly equal headroom in both directions, allowing the Groove accent to work at its full range.
You can change the default velocity from config > workflow options. If you use Groove a lot, I'd definitely recommend reviewing this setting.
Creating Custom Grooves
If the preset Groove templates aren't enough, you can create your own custom Grooves. There are two main methods.
Creating in the OXI App
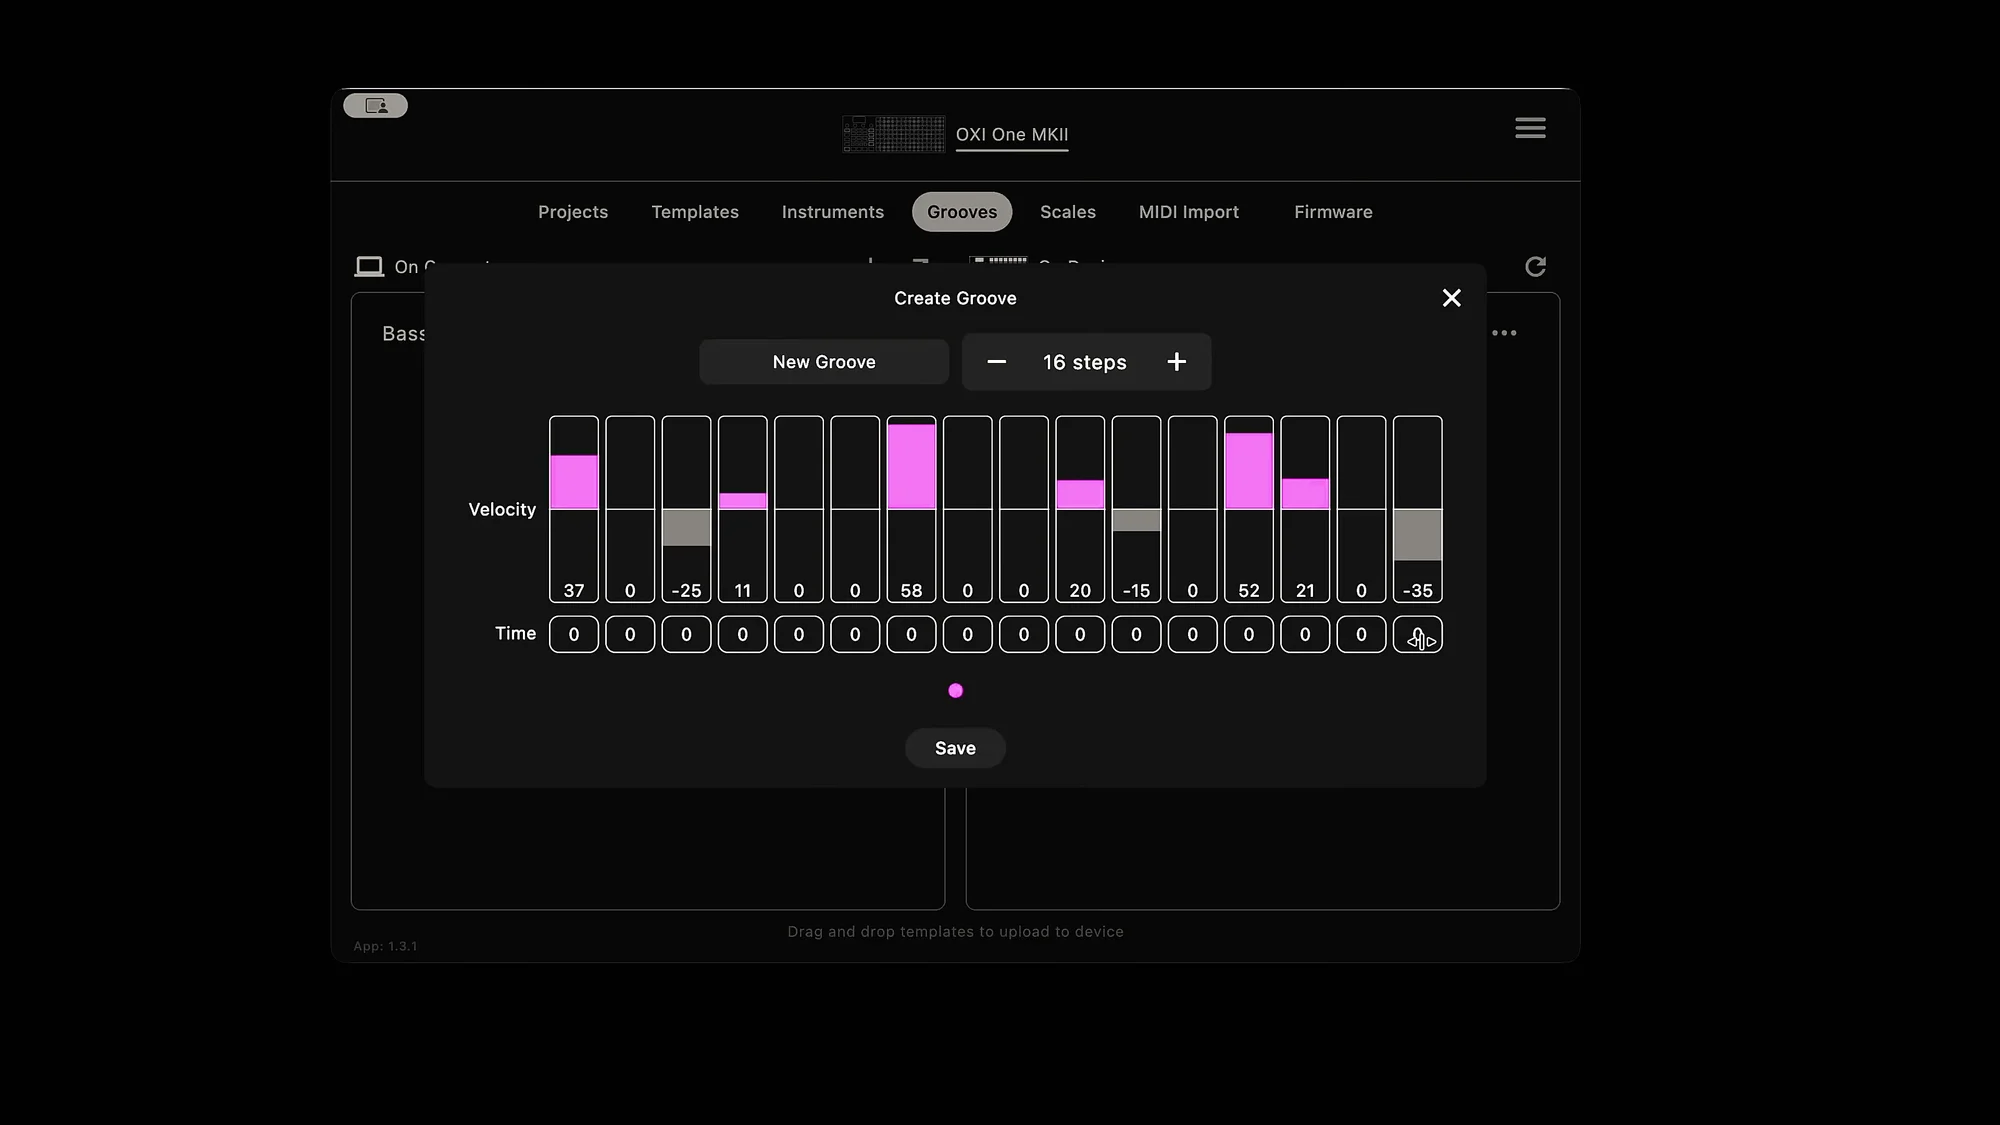
The OXI App includes an integrated Groove builder.
In the Groove builder, you can set the following two values for each step:
- Velocity: Velocity offset (range of +/-64)
- Timing: Timing offset (range of +/-40%)
Here's the workflow:
- Open the OXI App and navigate to the Groove section
- Select "Create new Groove"
- Set the velocity and timing values for each step
- Enter a name for the Groove
- Save to your PC/Mac
- Drag and drop the template to transfer it to the OXI ONE MKII
Transferred Grooves appear from slot number 15 onward in the Groove template library.
Importing MIDI from Ableton Live
You can also import Groove templates created in Ableton Live into the OXI ONE MKII. Being able to use grooves you've crafted in Ableton directly on a hardware sequencer is a welcome feature for those who value DAW integration.
The import method is simple: just drag and drop files from a folder on your PC/Mac into the Groove folder on the microSD card. After that, they'll be accessible from the OXI ONE MKII's Groove template library.
However, externally created Grooves aren't necessarily guaranteed to work perfectly on the OXI ONE, so keep that in mind. It's best to apply them and verify they behave as expected.
That's it for EP.3. Once you get the hang of Groove, the same patterns can take on a completely different character, so definitely experiment with various templates and parameters.
OXI ONE MKII Product Page
You can find the product details for the OXI ONE MKII below.
OXI ONE MKII Black Edition, next-generation model with 8-part sequencer. Enhanced generative features, large OLED display, and up to 64-track control.
OXI ONE MKII, next-generation model with 8-part sequencer. Enhanced generative features, large OLED display, and up to 64-track control.