Welcome to EP.6 of the OXI ONE MKII guide series. This time, I'll be covering the Random Generator.
Random Generator is a pattern generation tool built into the OXI ONE MKII. Despite having "random" in the name, it's not just about scattering notes around haphazardly. It's designed to generate musically meaningful patterns using seven parameters. The official video uses the phrase "creative seeds," and that's exactly what it feels like — you generate a pattern as a starting point, then refine and polish it to make it your own.
In other words, this isn't a tool that replaces creativity — it's a tool that kickstarts the creative process. Building a pattern one step at a time from scratch is fun in its own right, but generating a pattern with Random Generator and then thinking "oh, that part's nice" or "I'll tweak that bit" can lead you to phrases you'd never have come up with on your own.
- What Is Random Generator?
- The Seven Parameters
- Additional Tools
- Making Use of Undo
- Using It in Poly & Chord Mode
- Practical Tips
What Is Random Generator?
Random Generator is accessible as a secondary option on the Randomizer button. Here's how to access it:
- Press Shift + Randomizer button
- Or tap the Randomizer button to toggle between pages (switches between Random Perform and Random Generator)
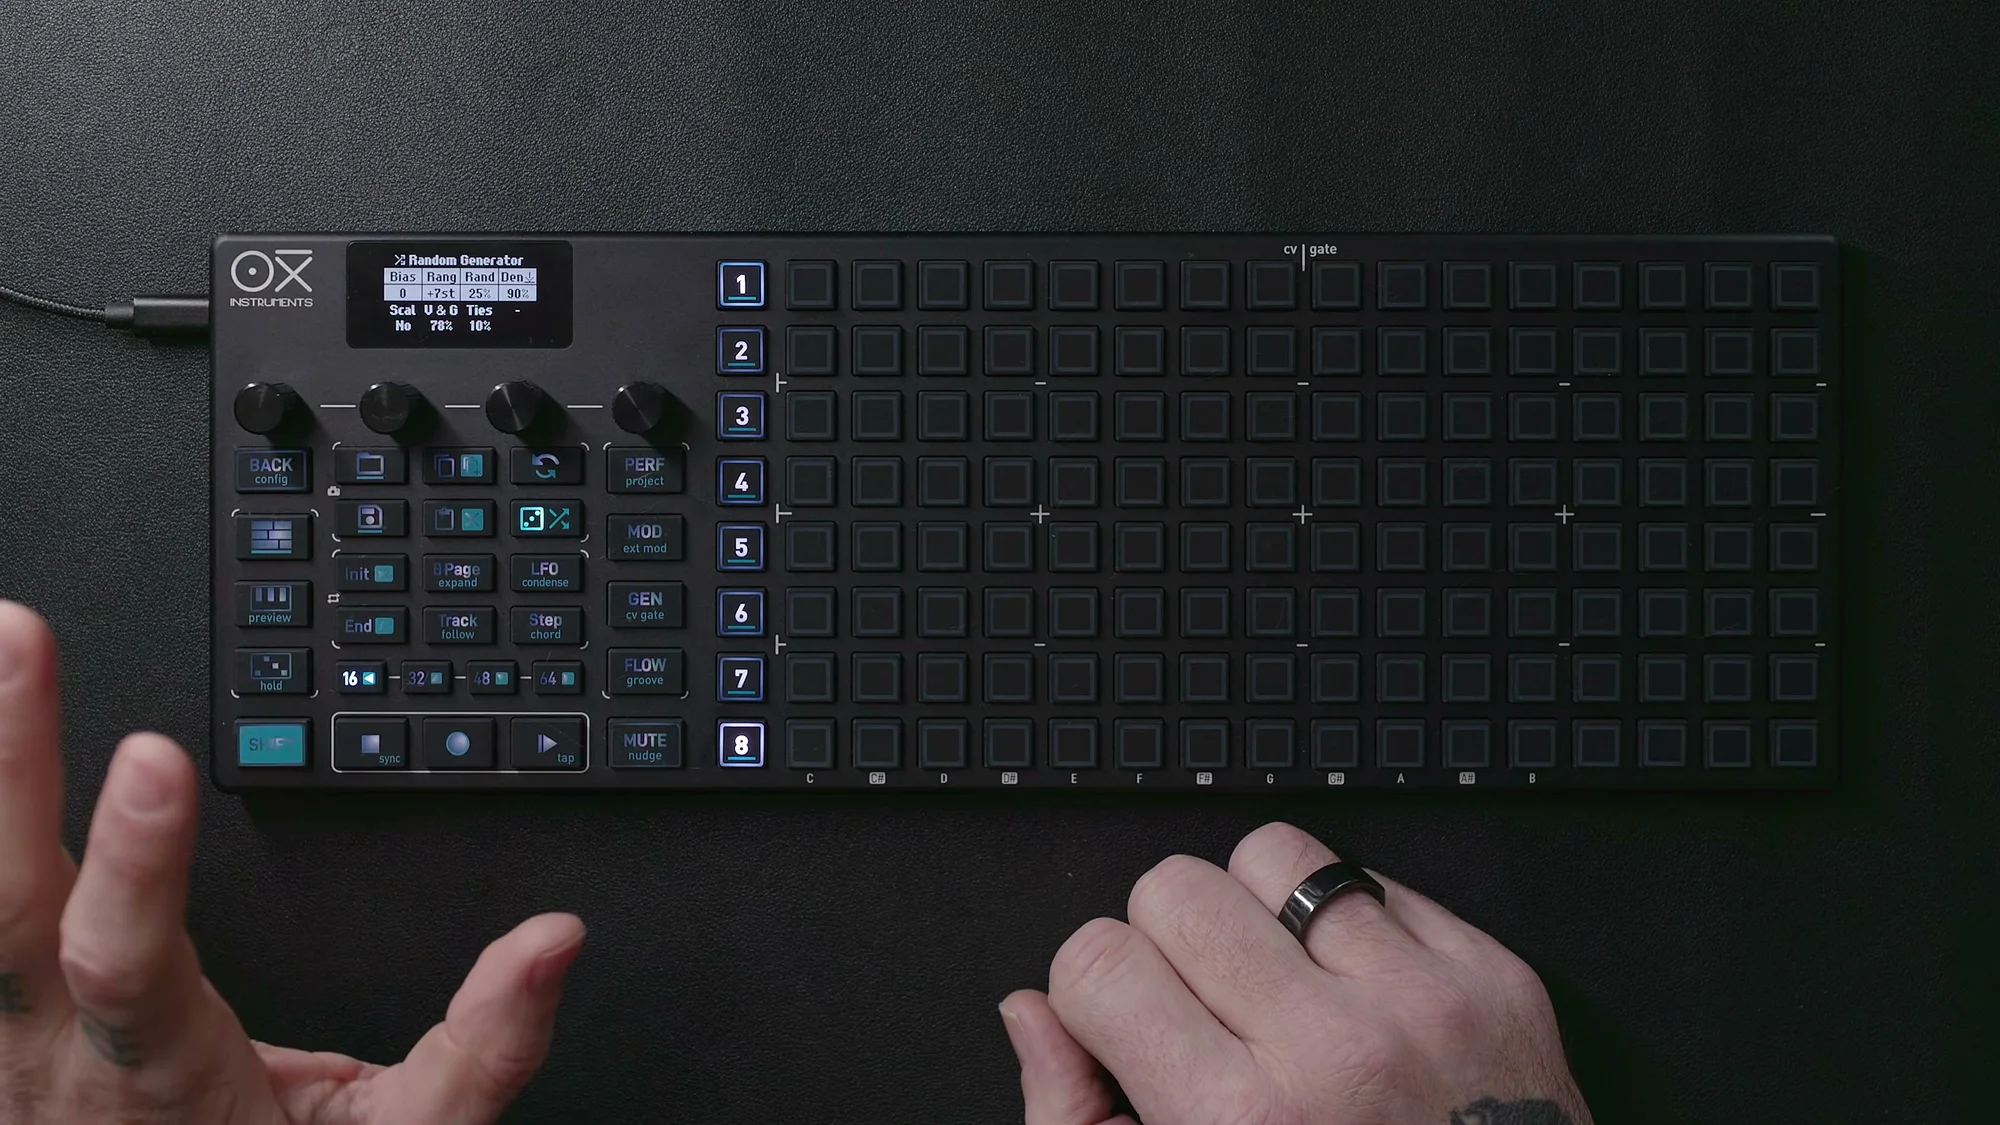
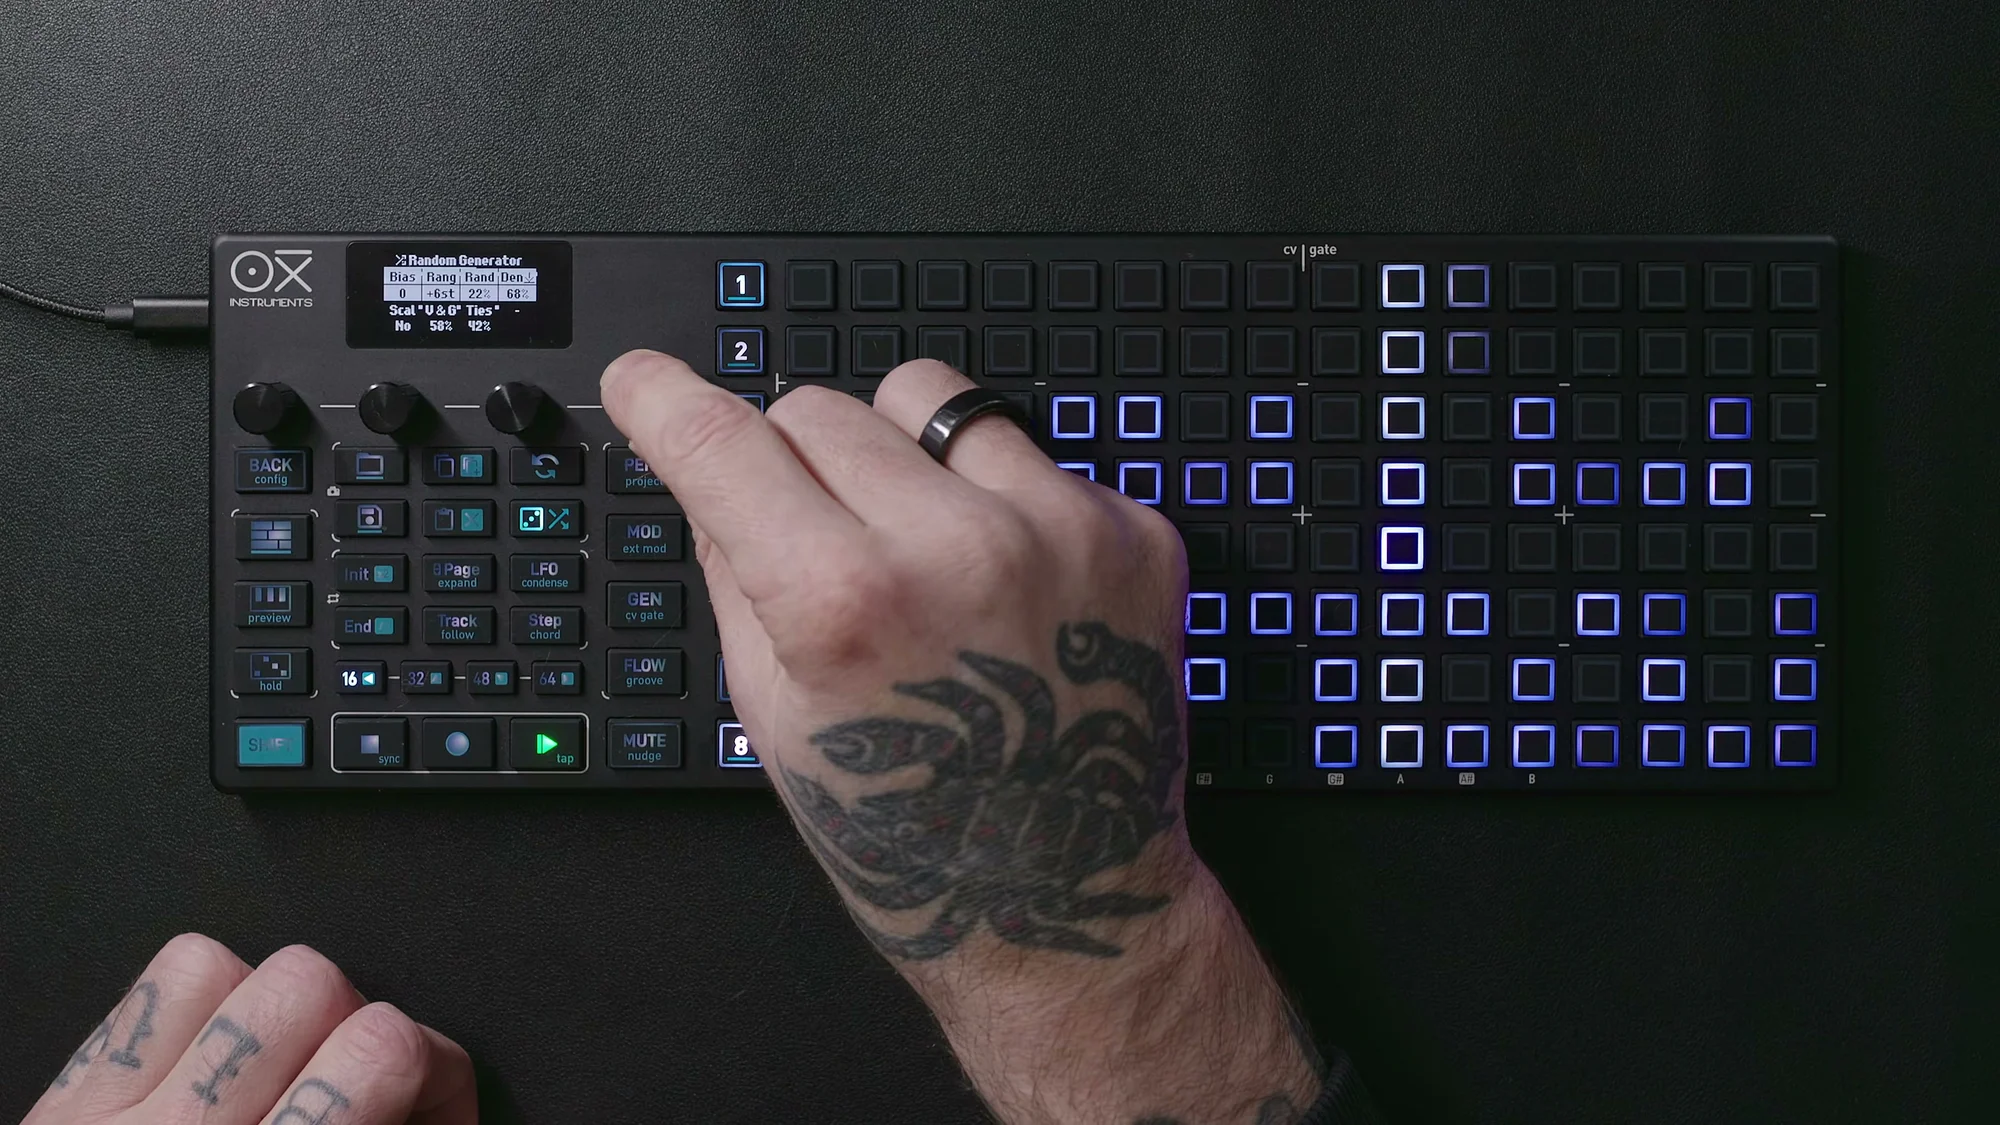
When you open Random Generator, the display shows the parameters. You adjust each parameter on this screen, then press the Density (Den) knob to generate a new pattern based on your settings.

This feature works in Mono Mode, Poly Mode, and Chord Mode. The nature of the generated patterns varies by mode, but the basic operation is the same.
One important note: pattern generation is a destructive process. Your existing pattern will be overwritten, so make sure to save any important patterns beforehand, or use Undo (described later).
The Seven Parameters
Random Generator has seven parameters. The default values are tuned to produce musically useful results, so it's worth trying a few generations with the defaults first by pressing the Density knob to see what kind of patterns come out.
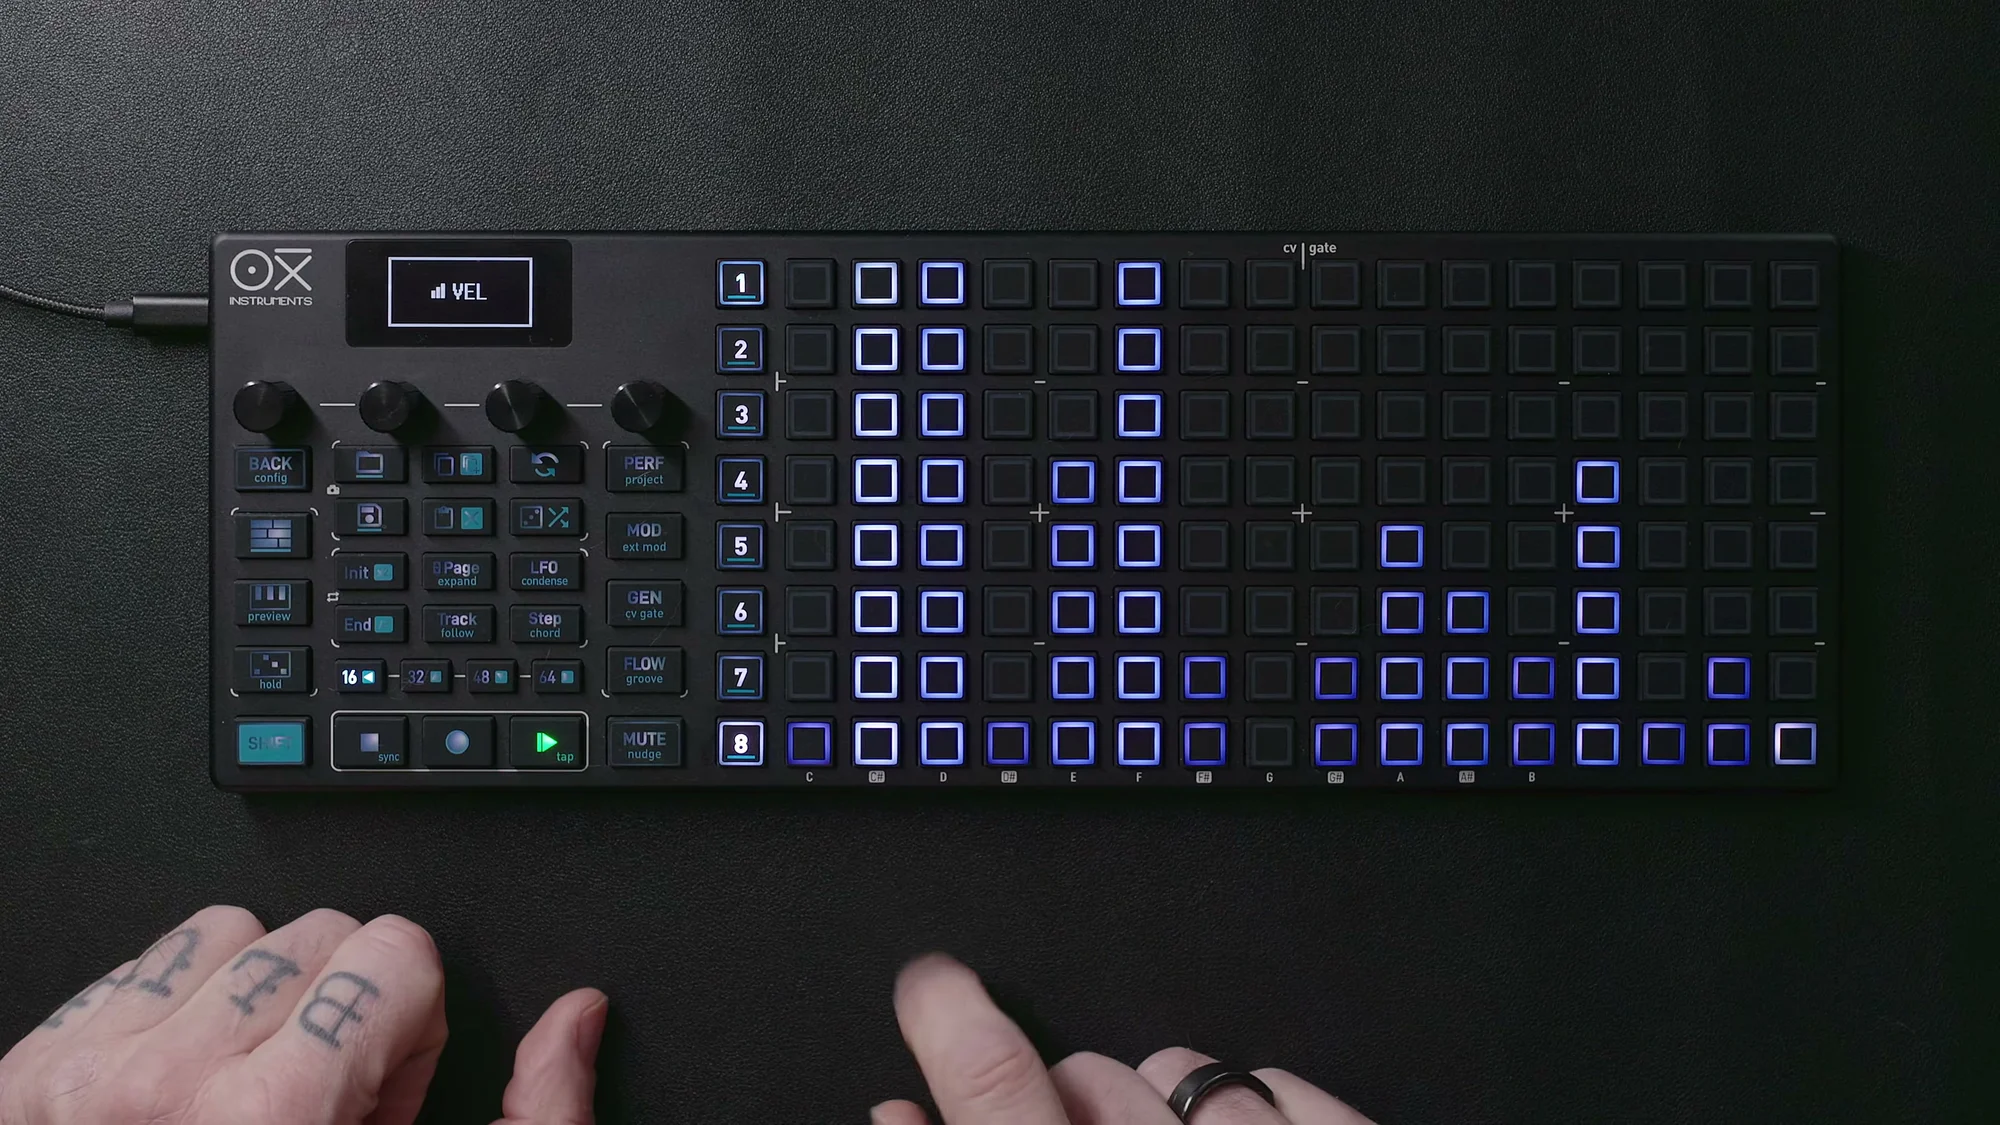
Here's an example of a pattern generated by Random Generator. With settings around Density=75%, Ties=10%, and V&G=15%, you get a musical pattern with a nice spread of notes.

Bias
Bias sets the root note offset, determining the "tonal center" of the generated pattern. The range is -10 to +10, with a default of 0.
At 0, generated notes are centered around the root note. Increasing the value shifts the center upward, while decreasing it shifts it downward. The Range parameter (described below) operates relative to this Bias point.
For example, if you want to create a lead pattern, setting Bias higher makes the melody unfold in a register above the root, which tends to work nicely.
Scale
Scale is a simple Yes/No toggle. The default is No.
- No: The scale and root note currently set on the sequencer are maintained as-is
- Yes: The scale and root note are also randomized. This means the tonality itself changes each time you generate a pattern
If you're making music where the tonality shifts frequently, like techno, setting this to Yes works well. It's a good option when you want to embrace the "anything could happen" factor.
Range
Range sets the pitch range for generated notes in semitones, relative to the Bias point.
The range is -4 to +24 semitones. In other words, notes are generated from up to 4 semitones below the Bias position to up to 24 semitones above it.
Higher values create wider melodic contours and more dynamic phrases. Lower values produce more restrained phrases that stay within a narrow range. Think of it as a parameter that controls the size of melodic movement.
Rand
Rand sets the degree of variation in the generated notes, from 0% to 100%.
- Low values (around 6%, for example): The generated pattern has more repetition and consistency, with similar motifs recurring
- High values (approaching 100%): The pattern becomes chaotic and unpredictable
The default is set fairly low, so patterns tend to be musically usable right out of the box. Crank it up for full randomness, or bring it down for a more minimal feel.
V&G (Velocity & Gate)
V&G sets the amount of variation in velocity and gate. The range is Off, then 1% to 100%, with a default of 10%.
- Off: All notes are generated with uniform velocity and gate — flat and mechanical
- Higher values: Velocity and gate gain variation, resulting in more expressive patterns with a sense of groove
When creating rhythm patterns, raising this value adds dynamics and groove, making the pattern feel more lively.
Ties
Ties sets the probability of tied notes (notes spanning multiple steps), from 0% to 100%, with a default of 10%.
Higher values produce more long notes and a legato feel. Setting it to 0% makes every note one step long, creating a staccato-like feel.
For melodic patterns, some amount of ties tends to sound more natural, while rhythmic patterns generally work better with lower values.
Density
Density sets how densely notes are placed, from 1% to 100%.
- 100%: Notes are placed on every step
- Low values: Notes are placed sparsely, creating a sparser pattern
When using Poly Mode or Chord Mode, I'd recommend setting Density on the lower side. In these modes, multiple notes sound on each step, so too high a density can make things overly dense and hard to make out.
The Density knob also doubles as the pattern generation trigger. Once you've set your parameters, press the Density knob (Knob 4) to generate a new pattern.
Additional Tools
If you turn the Density knob to the left past 1%, additional tools appear. These apply transformations to existing patterns — rather than generating new notes, they modify the pattern you already have.
Humanize
Humanize applies humanization to the existing pattern. Specifically, it adds variation to gate lengths and micro-timing, giving the pattern a more organic, human-played feel.
No new notes are added, so the pattern's structure stays the same. It's effective when things feel "a bit too mechanical."
Order
Order shuffles the order of existing notes. The pitches themselves are preserved, but which step each note falls on changes.
For example, if you have a phrase like "C, E, G, B," applying Order might rearrange it to "G, B, C, E." It's useful when you want a different melodic progression using the same material. Note that tied notes are not preserved.
Pitch
Pitch is the reverse concept from Order. The note placement (which steps have notes) stays the same, but the pitches change.
This is handy when you want to keep the rhythm pattern intact but change the melody. Tied notes are not preserved here either.
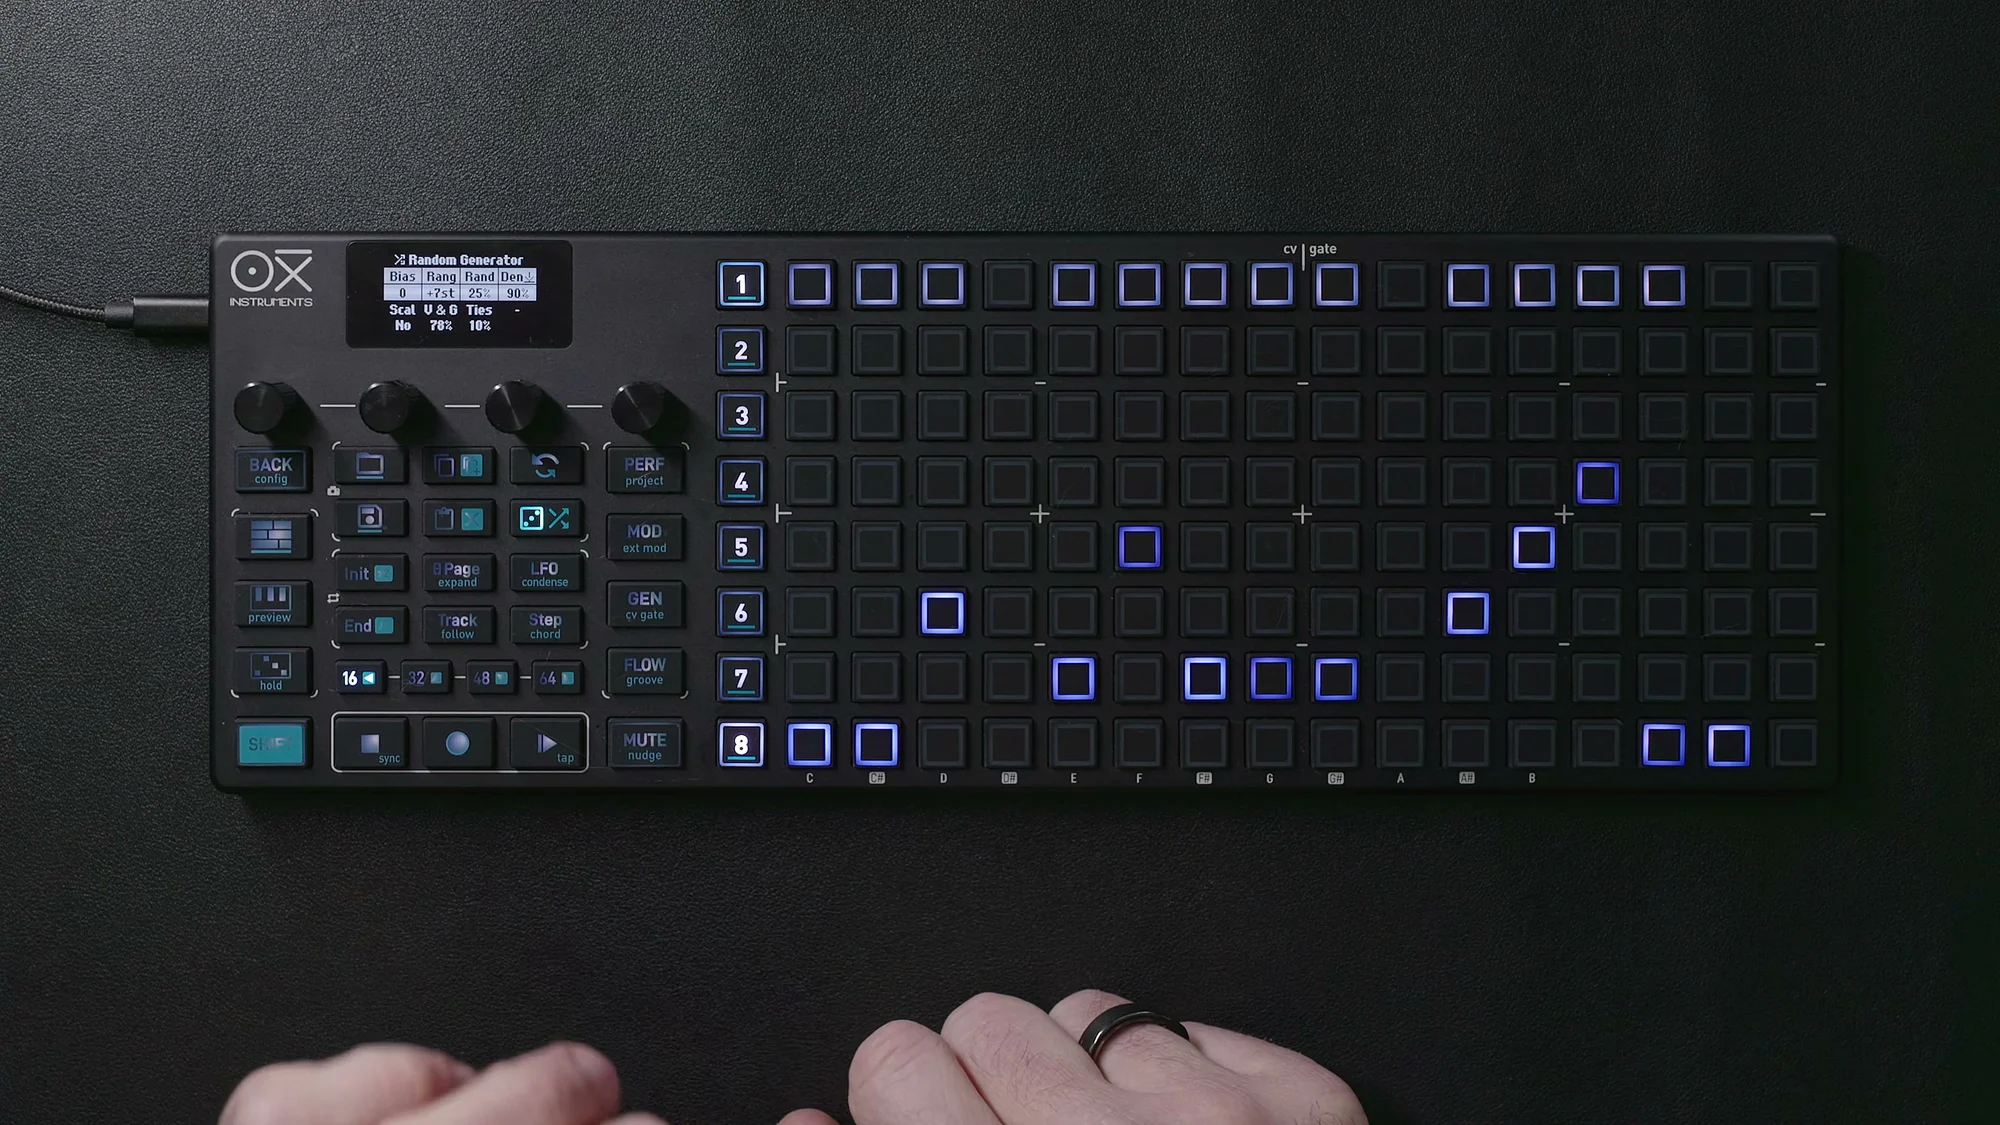
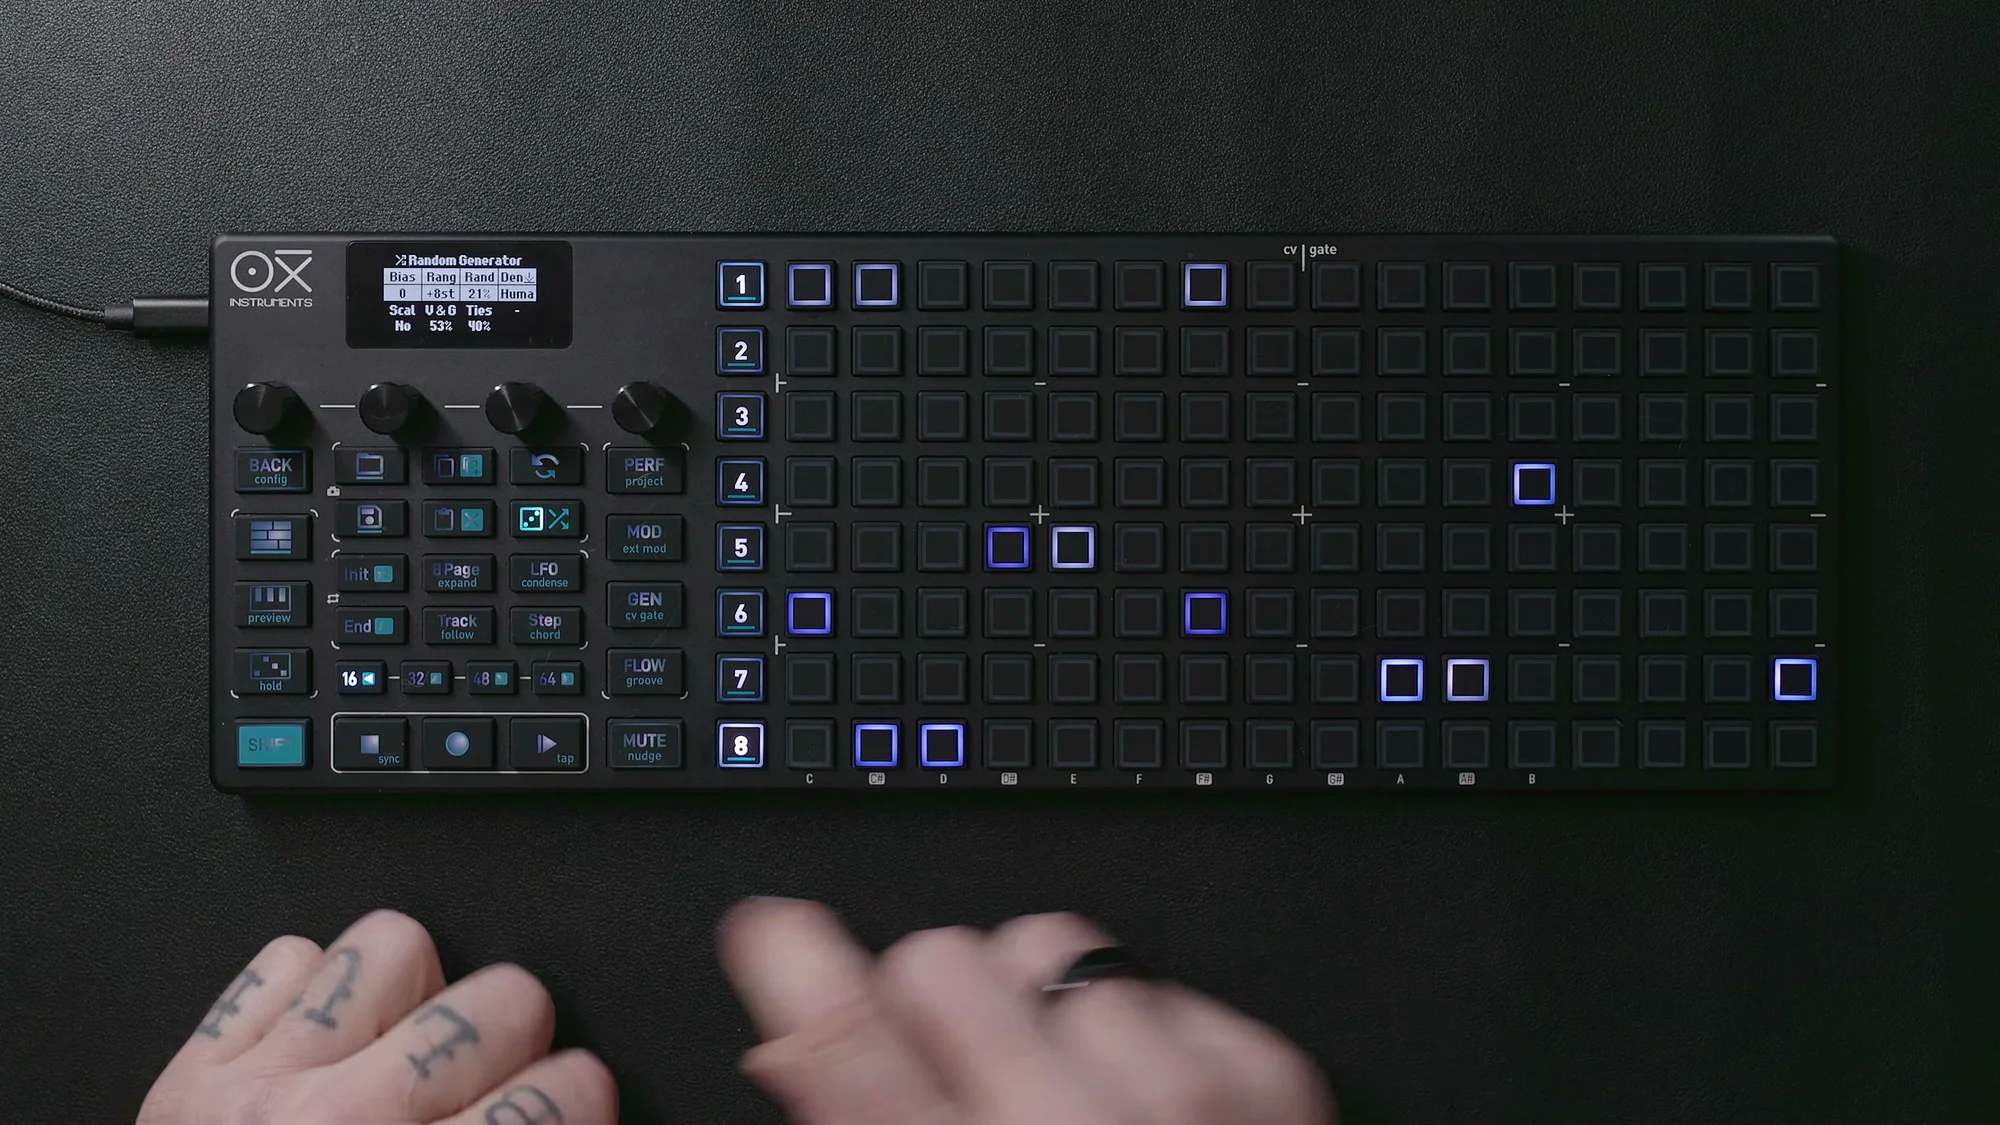
Flip
Flip reverses the entire sequence along the time axis. The last note becomes the first, and the first becomes the last.
Think of it as "reverse playback." When you want to drastically change the feel of a phrase, giving Flip a try can sometimes reveal surprisingly good patterns.
Here's an example showing the effect of Flip. The top grid is the original pattern, and the bottom grid shows the pattern after Flip, with the time axis reversed.
Making Use of Undo
Random Generator operations are destructive (they overwrite existing patterns), but Undo is available. This is quite important.
The process is simple — just press the Undo button. You can go back up to 15 operations. Shift + Undo gives you Redo as well.
In practice, the natural workflow is to press the Density knob several times to generate a few patterns, and if you think "the previous one was better," just Undo back to it. To make sure you don't miss any happy accidents, I'd recommend using Undo liberally.
Results from the additional tools (Humanize, Order, Pitch, Flip) can also be undone the same way, so feel free to experiment.
Using It in Poly & Chord Mode
Random Generator works not only in Mono Mode, but also in Poly Mode and Chord Mode.
When using these modes, I'd recommend setting Density on the lower side. In Poly Mode, multiple notes sound simultaneously on each step, and in Chord Mode, chords are played, so having notes packed on every step can make things too dense.
Setting Scale to Yes is particularly effective for techno-style use, as the tonality changes with each generation. It's a way to intentionally break down tonal structures.
Practical Tips
Here are some tips to keep in mind.
Creating lead patterns:
- Set Bias higher (around +3 to +5)
- Set Range to a wide positive value (+12 to +24)
- This makes it more likely to generate lead-like phrases that unfold in a register above the root
Creating rhythm patterns:
- Set Density high (80%–100%) to fill the steps
- Raise V&G to add dynamics and groove
- Keep Ties low for short, rhythmic notes
Creating variations:
- Generate a base pattern, and save it if you like it
- Then use the additional tools — Order, Pitch, Flip — to create variations
- If you don't like the result, Undo back
Generate-then-edit workflow:
- Random Generator is just a starting point
- Rather than using generated patterns as-is, manually fine-tuning them is the most effective approach
- Making adjustments like "I want to change just this note" or "I want to delete this step" is how you shape it into your own phrase
The default parameter values are tuned to produce musically useful results, so at first, you can just press the Density knob a few times without changing much, and you'll already get some pretty usable patterns. As you gradually learn what each parameter does, you'll be able to efficiently generate patterns in the direction you're aiming for.
In the world of modular synths, there are many modules that generate random CV, and part of the fun is embracing that randomness. The OXI ONE's Random Generator offers a similar kind of experience. You might call it controlled randomness — being able to blend in that element is another part of what makes the OXI ONE so appealing.
That wraps up EP.6. Random Generator is a remarkably deep tool. By combining the seven parameters with the additional tools, you can generate a truly wide range of patterns, so I'd encourage you to experiment freely.
OXI ONE MKII Product Page
See the links below for OXI ONE MKII product details.
OXI ONE MKII Black Edition, next-generation model with 8-part sequencer. Enhanced generative features, large OLED display, and up to 64-track control.
OXI ONE MKII, next-generation model with 8-part sequencer. Enhanced generative features, large OLED display, and up to 64-track control.