This is EP.9 of the OXI ONE MKII guide series. In this episode, we cover Multitrack mode rhythm sequencing.
Multitrack mode lets you display and control up to 8 tracks simultaneously on a single grid. Each track has independent settings including MIDI channel, time division, and groove. Each row on the grid corresponds to a track — the bottom row is Track 1, the top row is Track 8. EP.9 focuses on rhythm sequencing; melodic usage will be covered in the next video.
- Multitrack Mode Overview
- Track Selection
- Global Functions
- Global Settings
- Keyboard Page
- Track Settings
- Drum Rack Setup Example
- Step Placement and Track Editing
- Per-Step Editing
- Column View
- Groove
- Generators
- Multi-Instrument Routing
- Drum Pattern Generator
- Performance Page
Multitrack Mode Overview
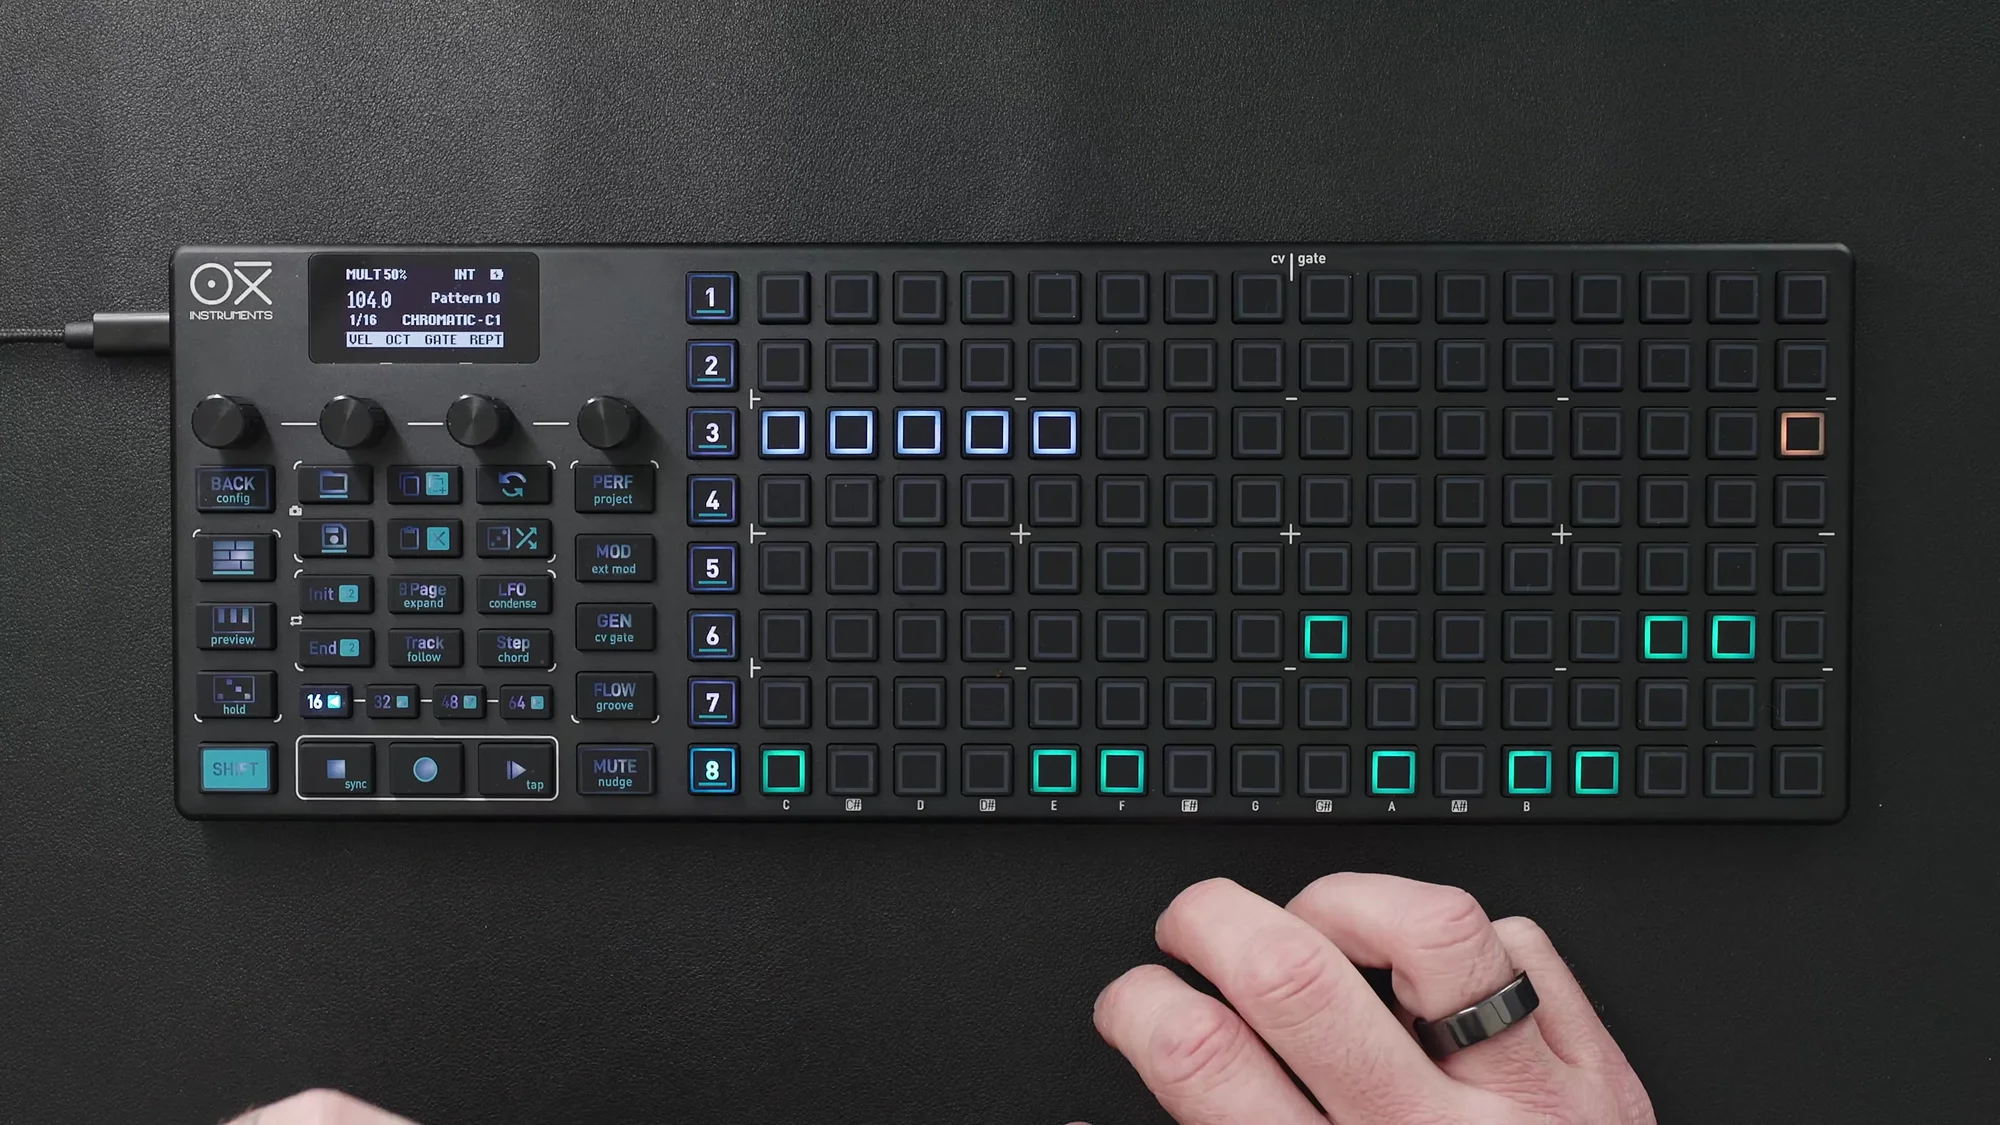
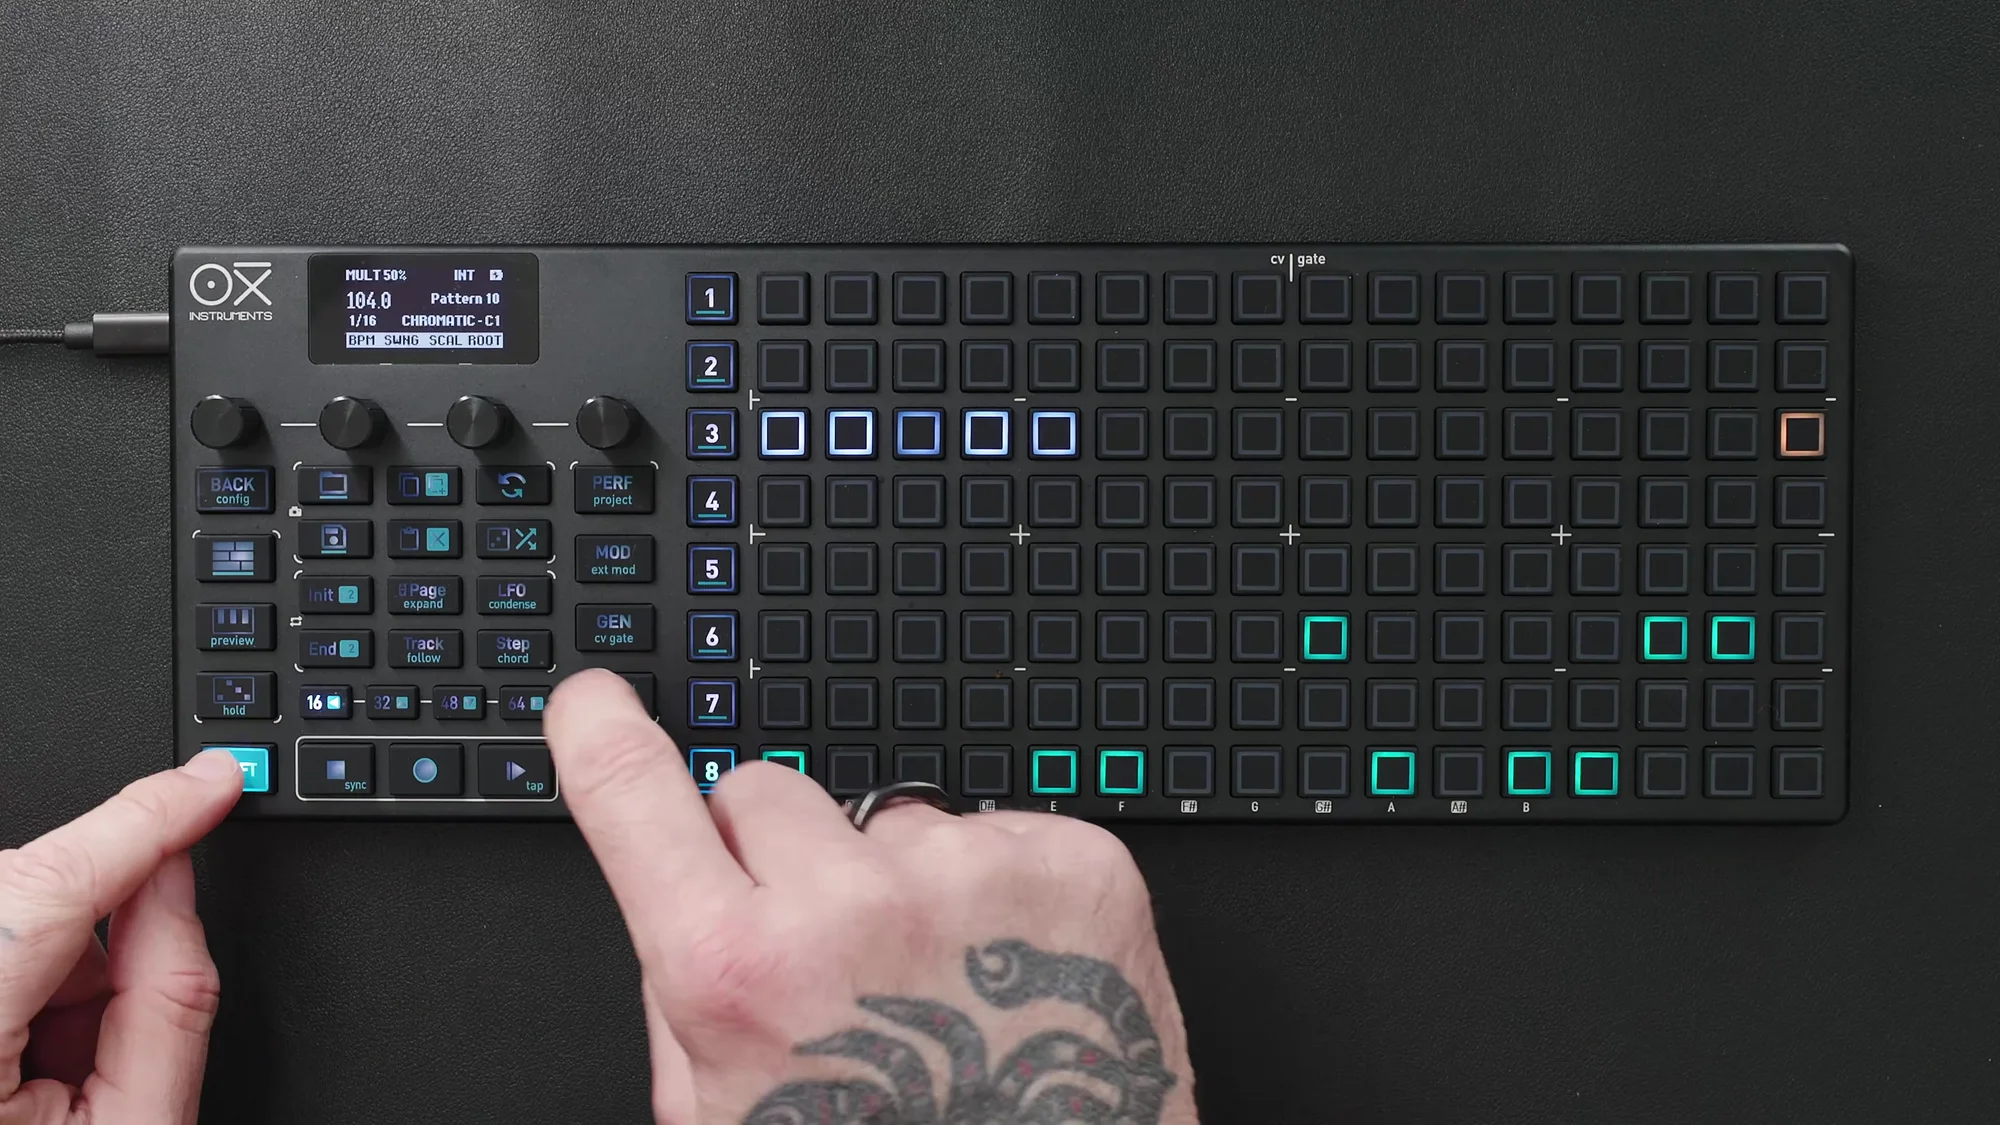
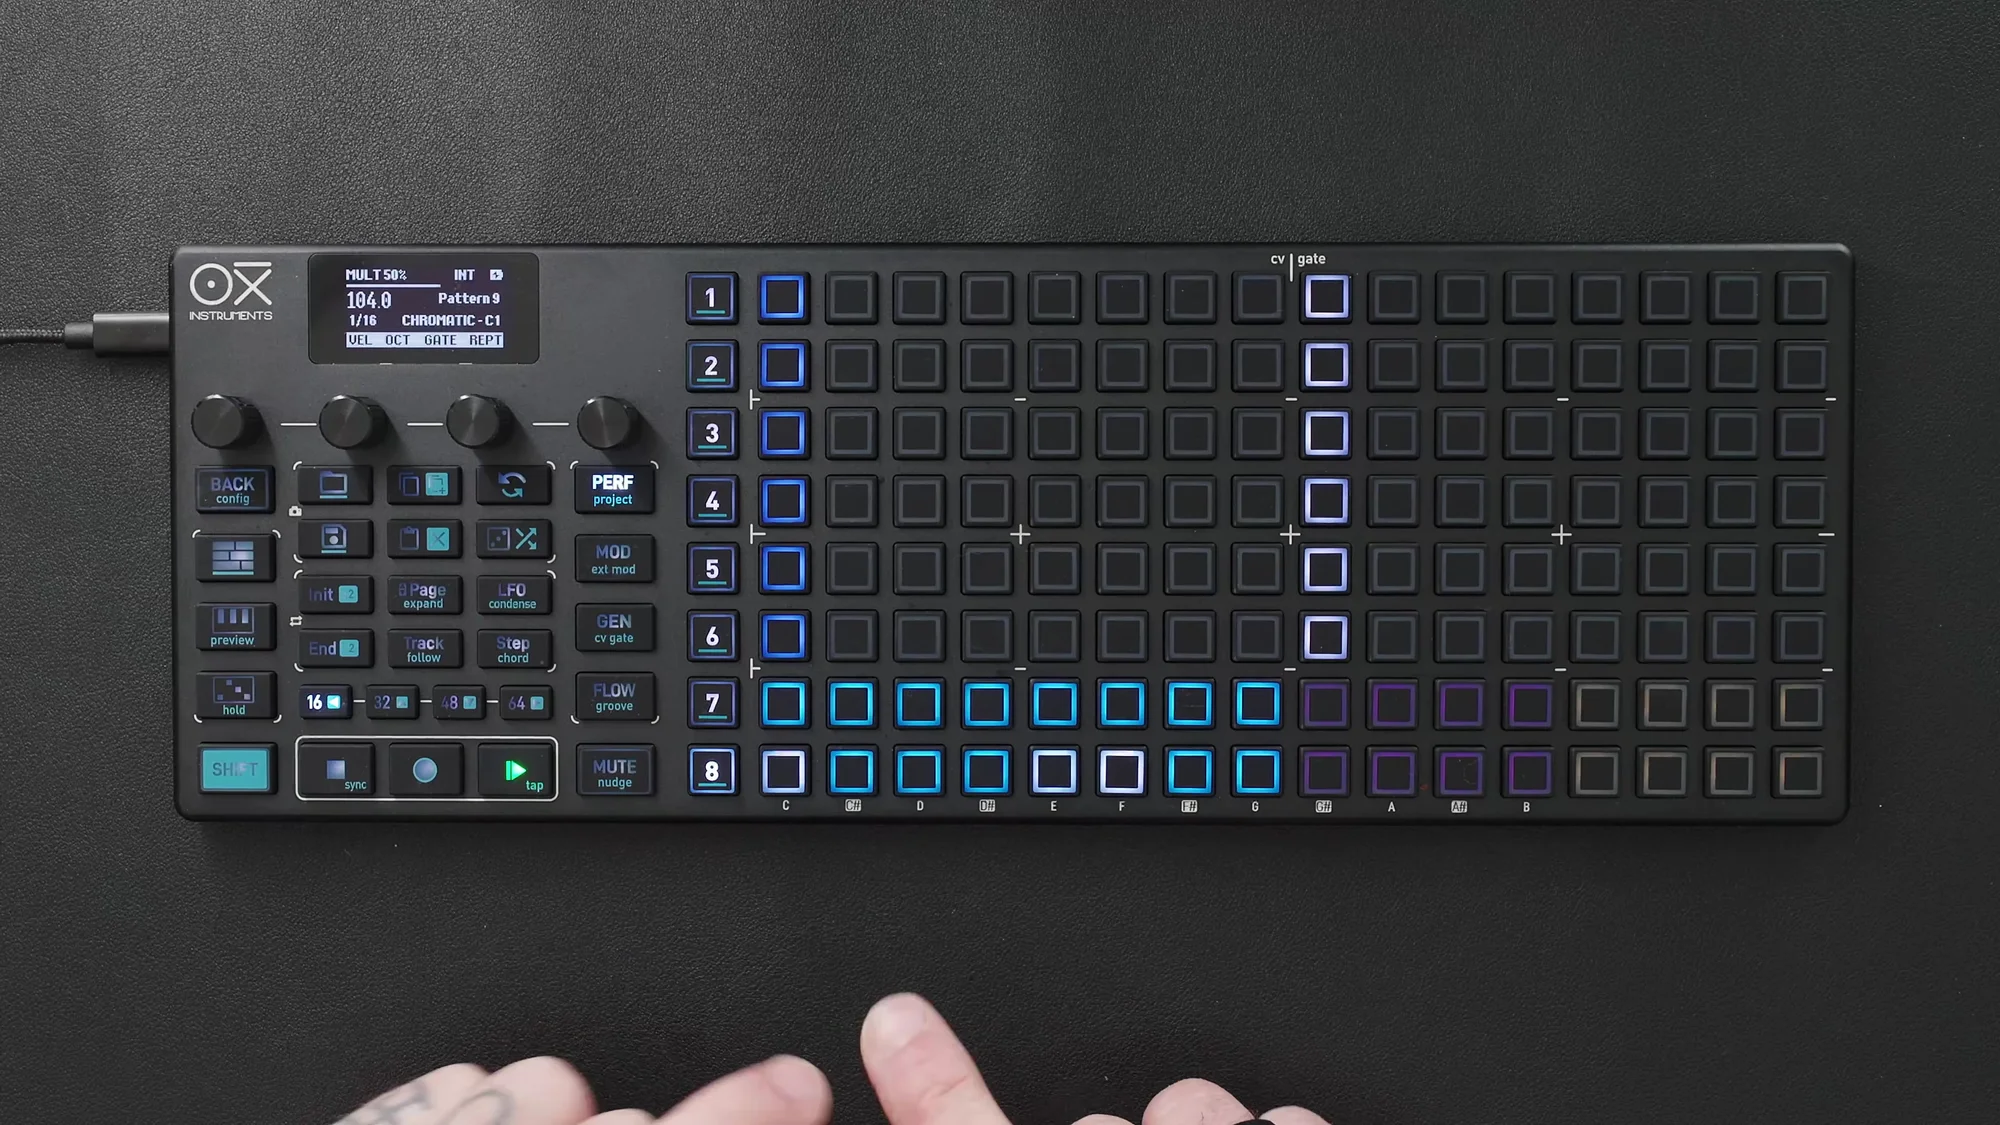
When you select Multitrack mode, the entire 16×8 grid becomes the display area for 8 tracks. Each row corresponds to one track, with Track 1 at the bottom through Track 8 at the top. The currently selected track is shown with yellow pads.
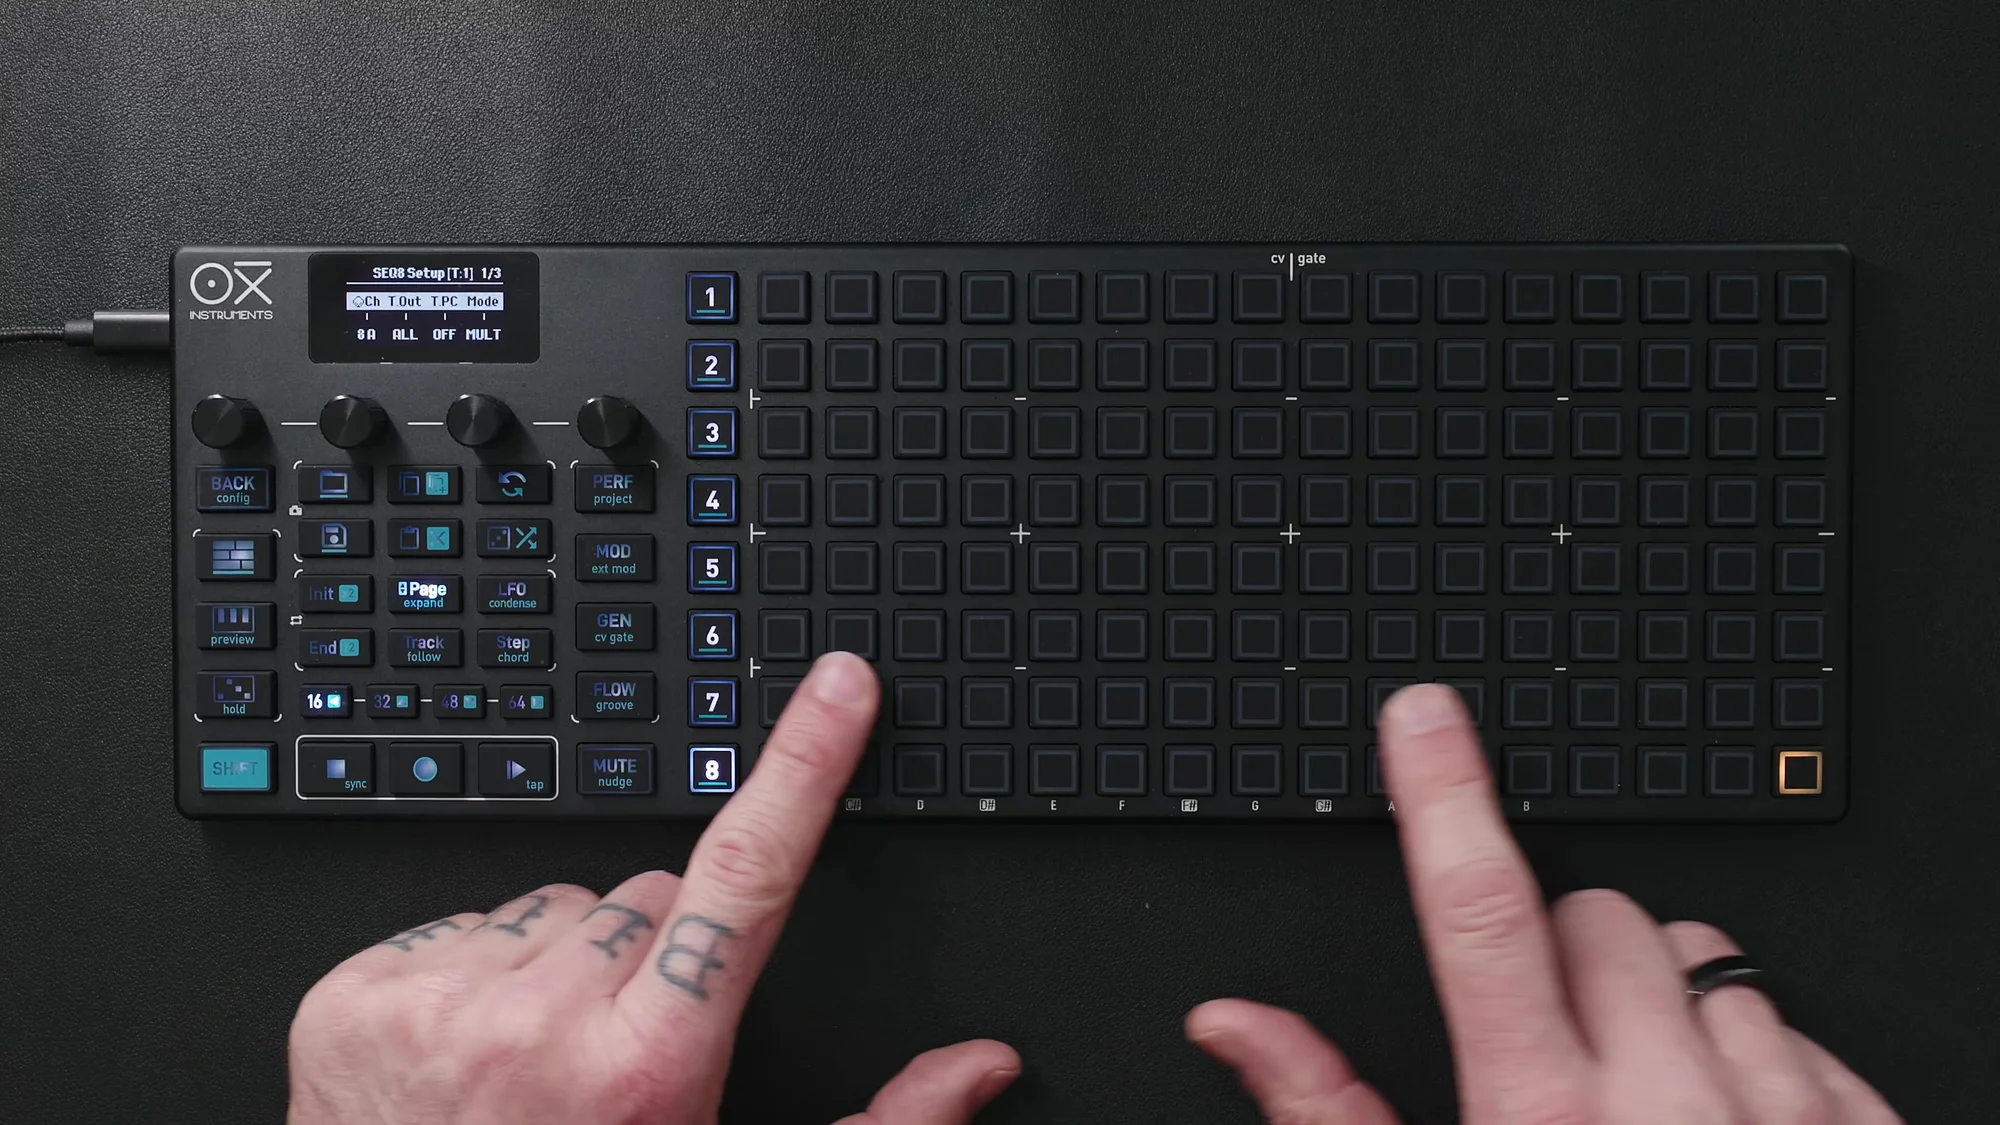
Each track has independent settings — you can change the MIDI channel, time division, groove, and more on a per-track basis. On the grid, each track’s playhead moves independently, giving you a constant visual overview of all track states.
Track Selection
There are two ways to select tracks, switchable in Workflow Settings.
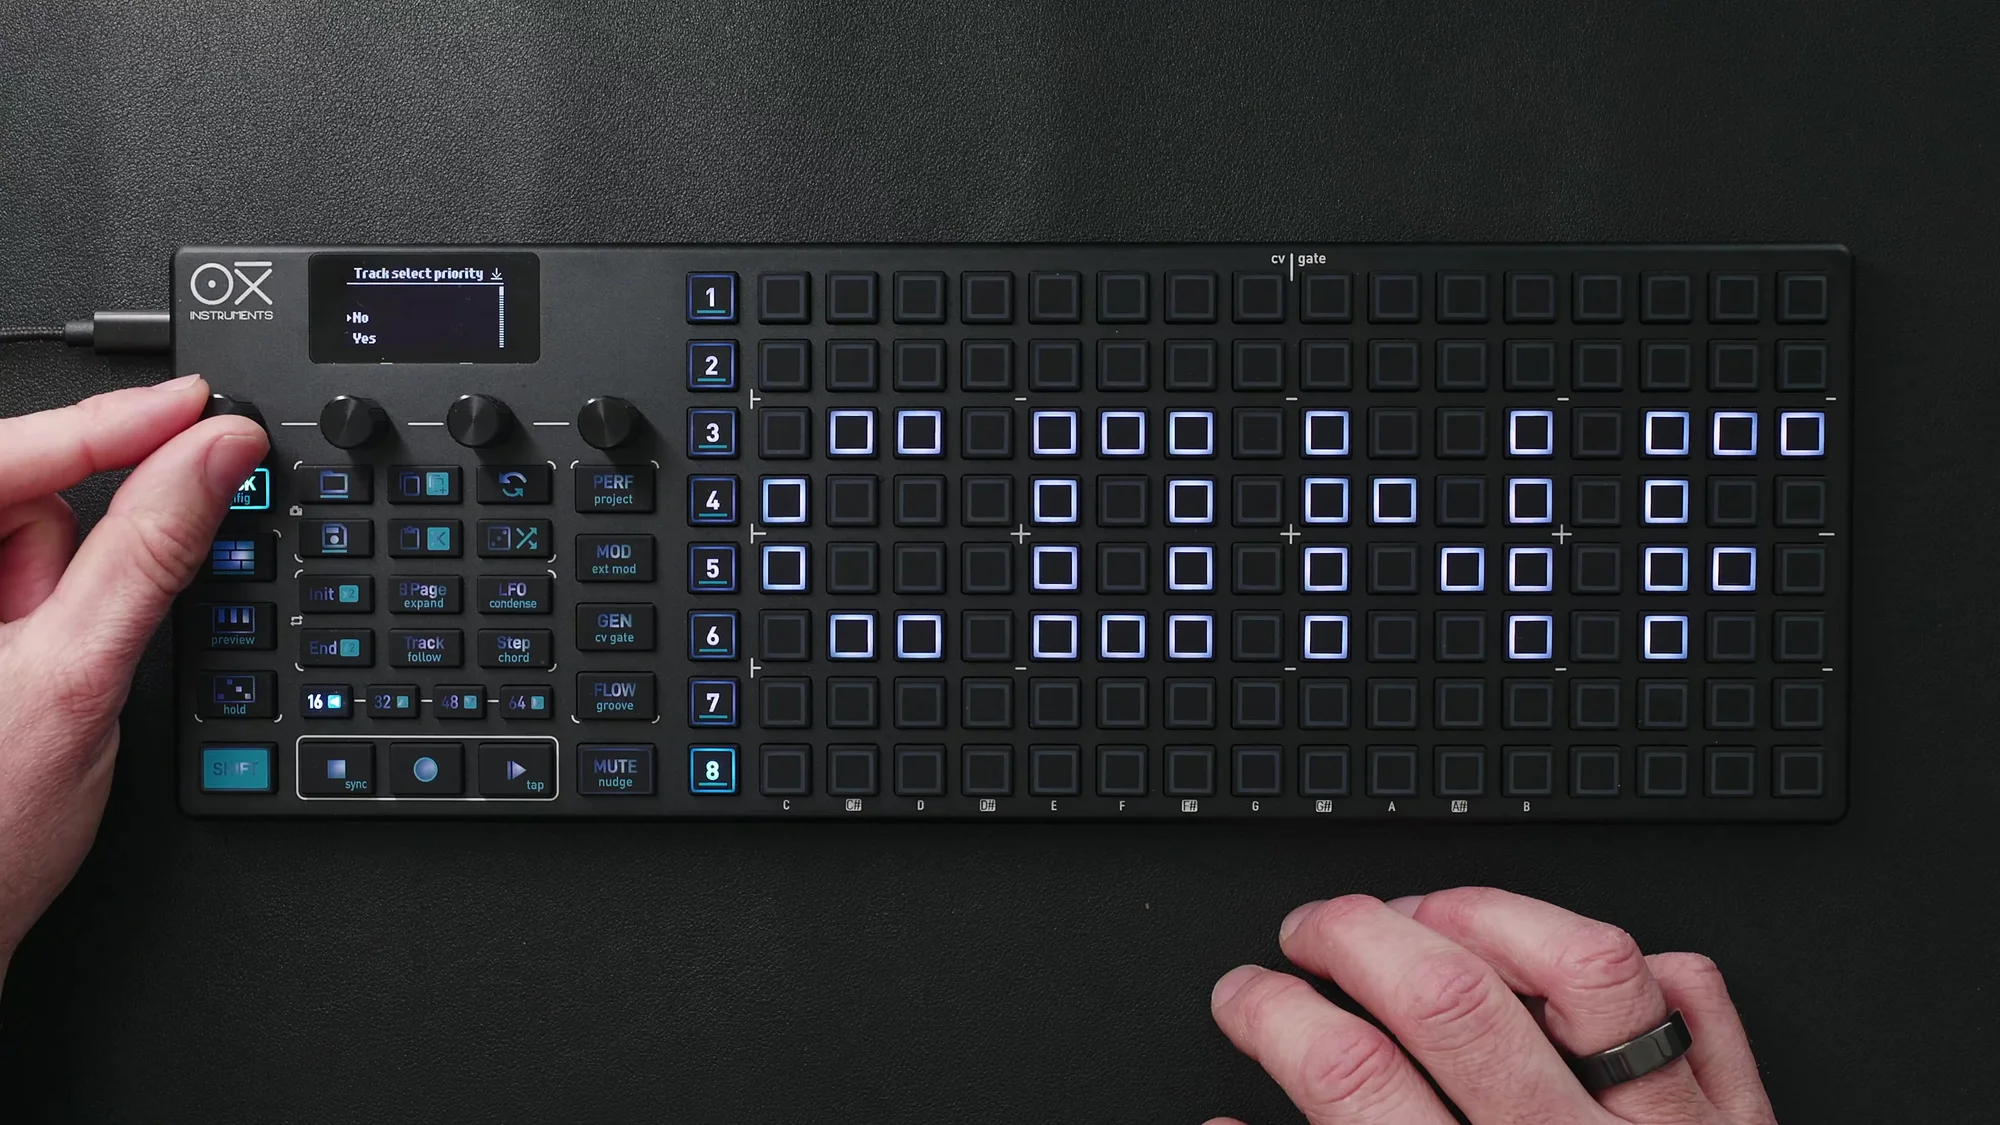
Track Priority (default: on)
When Track Priority is on, tapping any row first selects that track. Steps are placed on the second tap. This is the safer method, preventing accidental step placement.
Track Priority: Off
With Track Priority off, tapping any row immediately places a step. Operations are faster but unintended steps may occur.
Other Track Selection Methods
-
Long press: Long-pressing a step on a different track changes the track selection without
placing a step
-
Seq + step: Press the sequencer number while pressing the first step in the target track’s
row to change track selection
Global Functions
Several functions can be applied to all tracks at once.
Global Start/End
Hold the sequencer number and set Init / End to change the start and end positions of all tracks at once.
Bulk Step Deletion
- Shift + Delete: Delete all steps in the selected track
- Shift + Sequencer Number + Delete: Delete all steps across all tracks
- Shift + Delete (long press): Full clear — wipes all settings, not just steps
Global Settings
Press Shift + Sequencer button to access Multitrack global settings. This is where you configure settings common to all tracks.
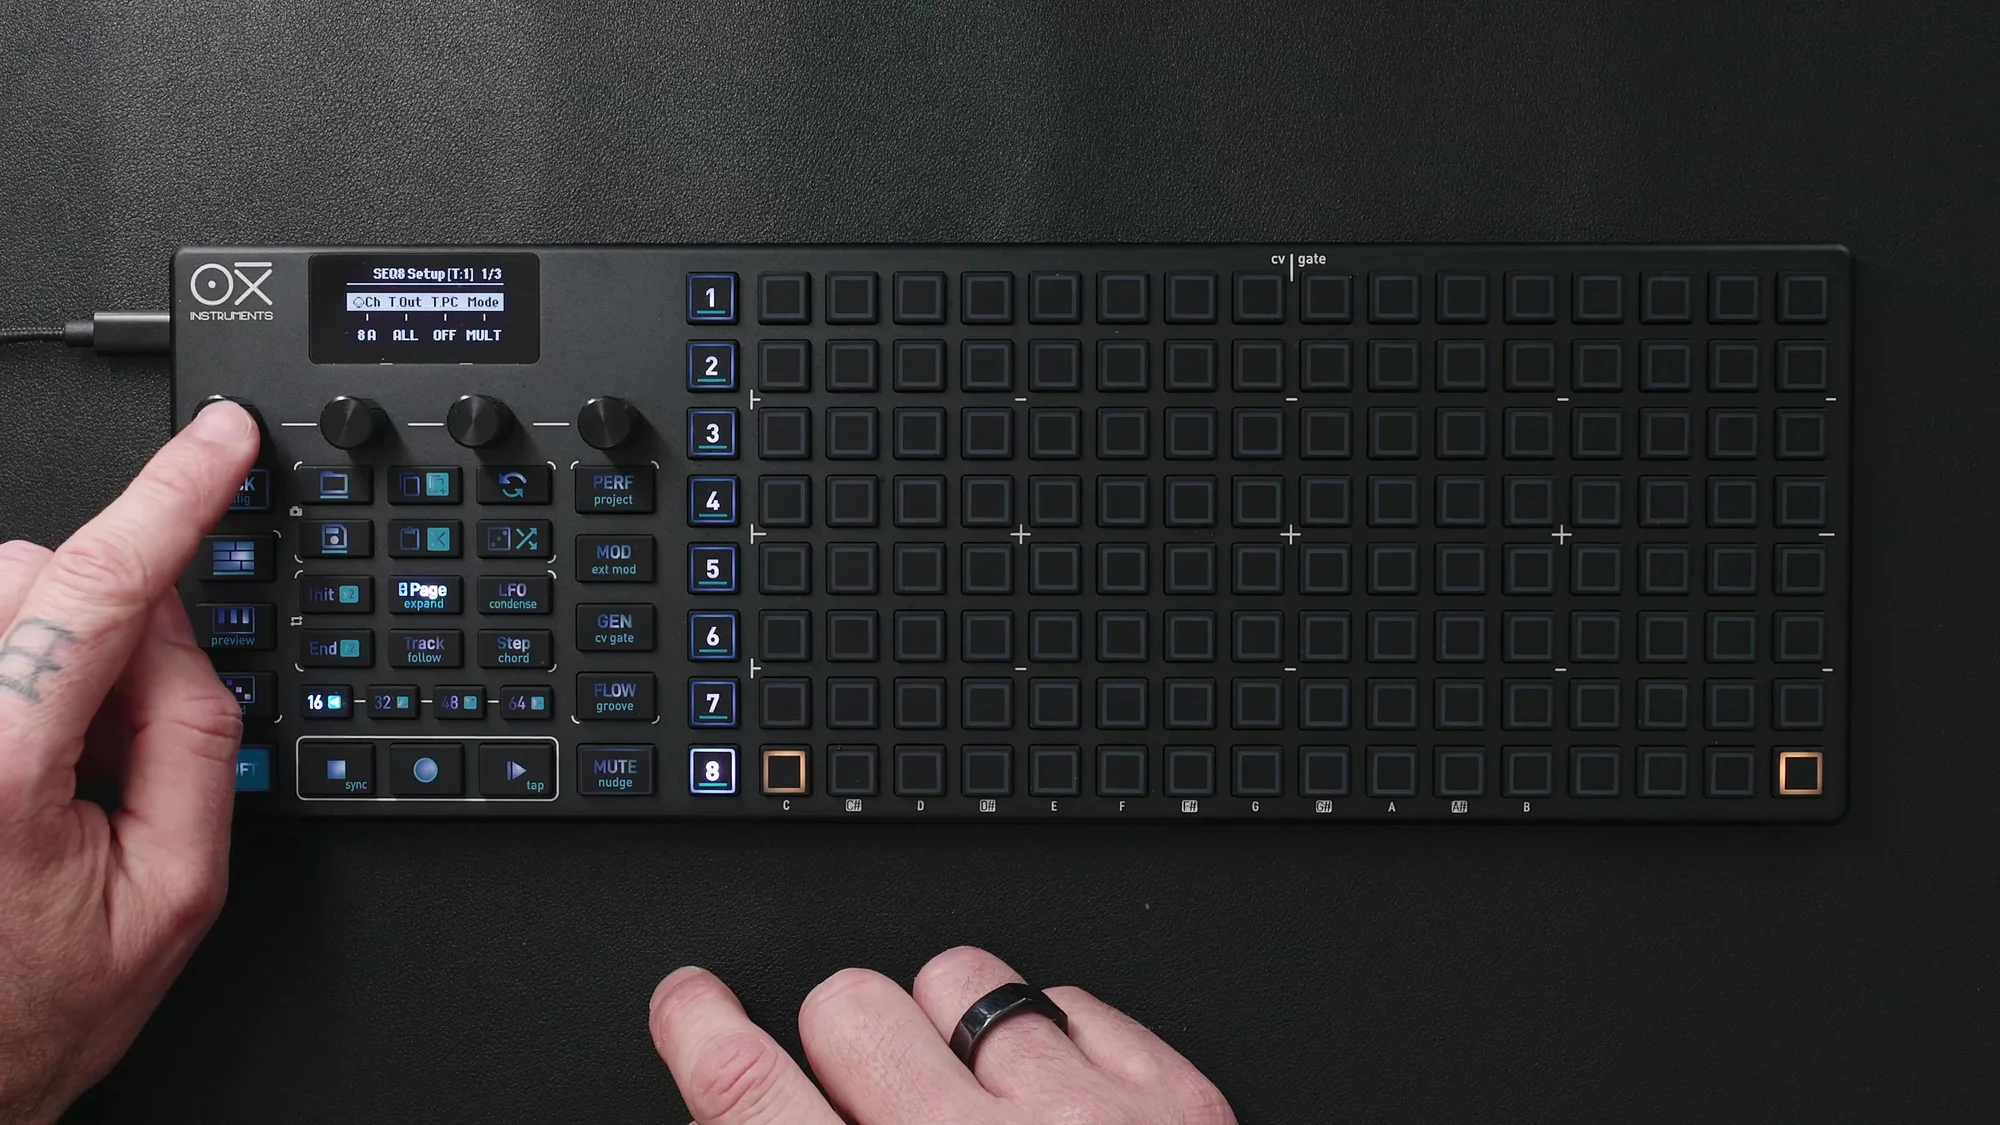
-
Global MIDI Channel: MIDI output channel shared by all tracks (can also be set individually
per track)
-
Global Scale: Scale selection (for drum use, Chromatic is common)
-
Default Root Note: Base note for each track (for drum rack use, C1 is common)
By default, each track starts offset by one interval from the root note, quantized according to the selected scale.
Keyboard Page
Use the keyboard page for note preview and performance.
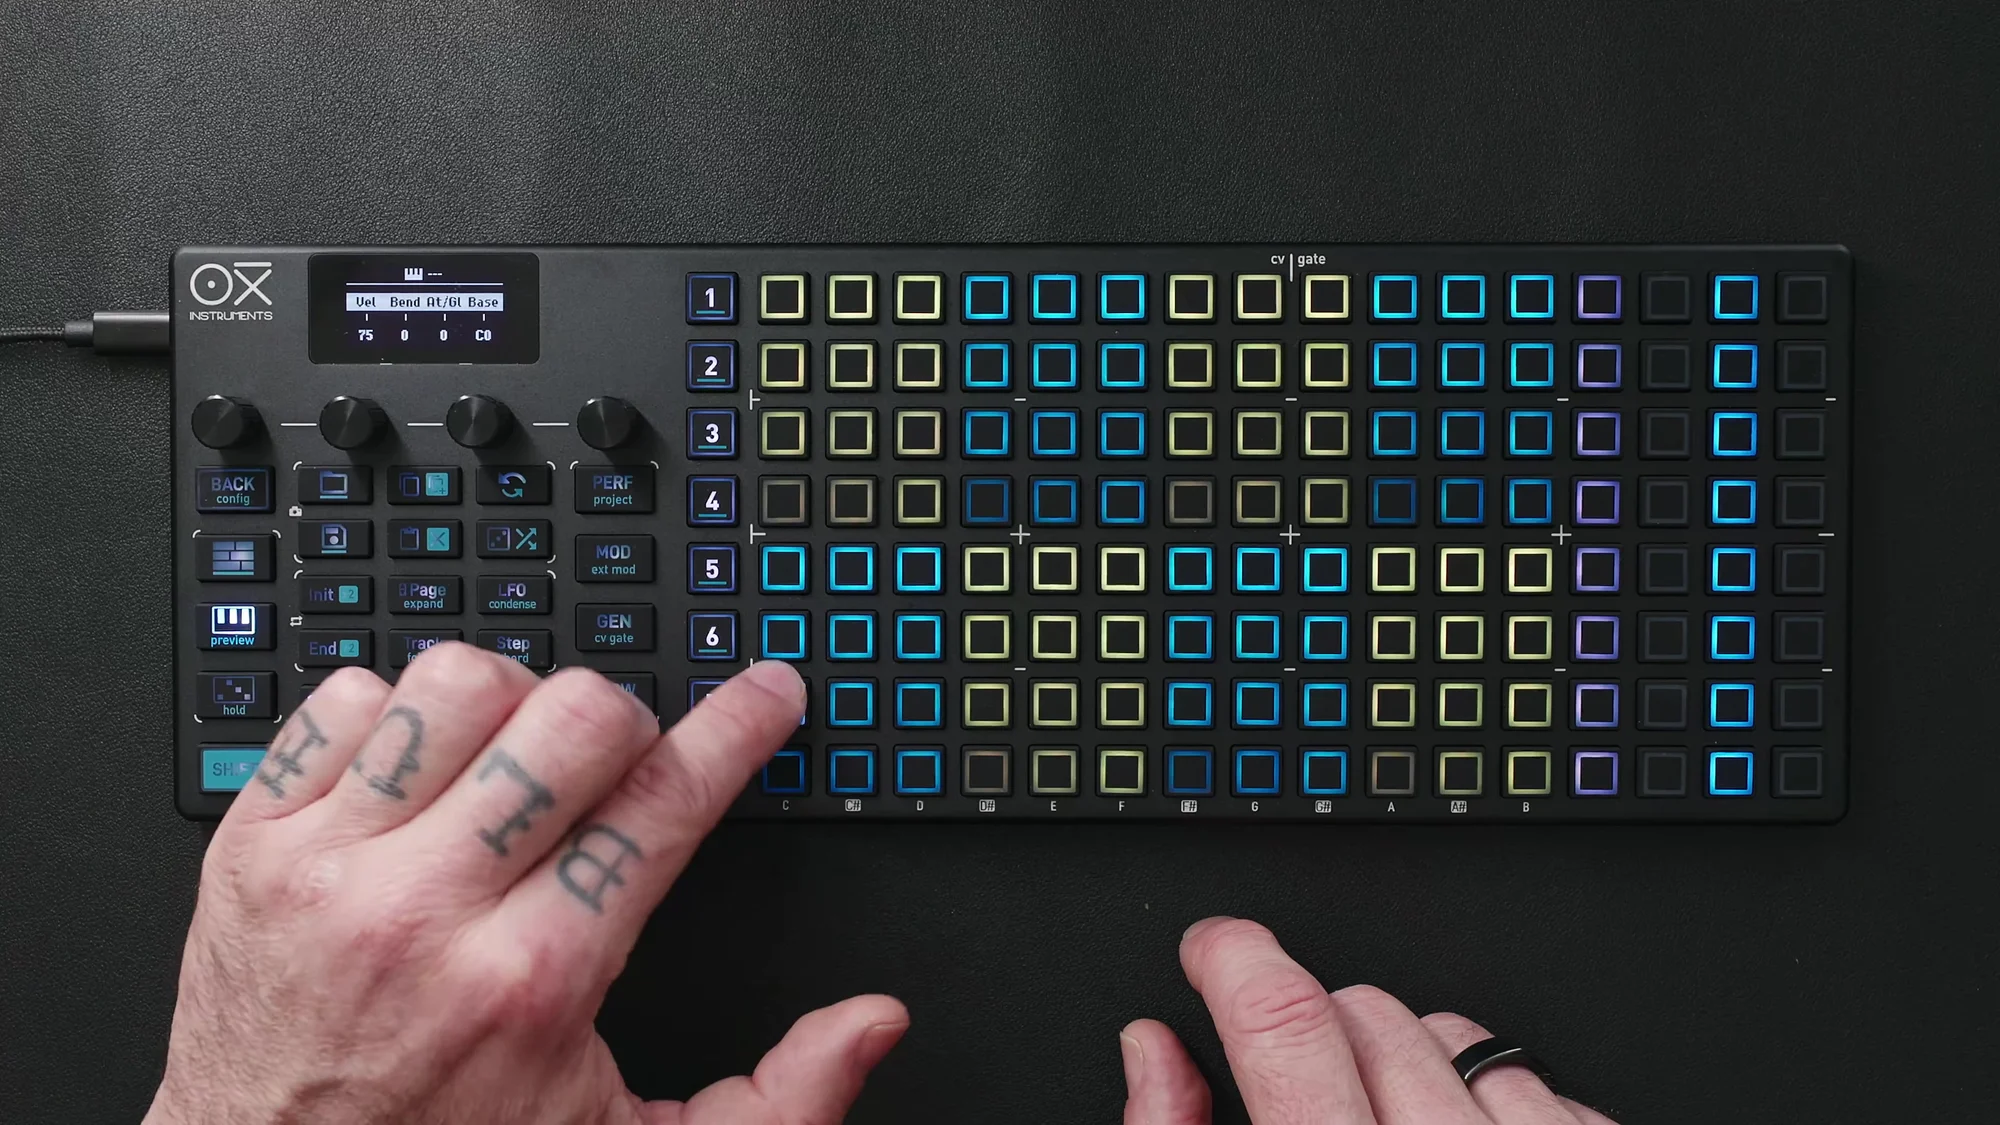
The keyboard page in Multitrack mode has two display formats.
-
Drum view: Shown when a track is armed. The keyboard is divided into 8 groups of 3×4 blocks,
each corresponding to a specific note. Playable at 12 velocity levels
-
Standard keyboard view: Using Arm, you can switch to the same standard keyboard display as
Mono or Poly modes
On the keyboard page, column 15 controls mute and column 16 controls solo. The keyboard layout can be changed at any time in Performance Settings.
The roller function is also available while the sequencer is playing.
Track Settings
To access individual track settings, select a track and press the Track button. Use the Page button to switch between 2 pages of settings.
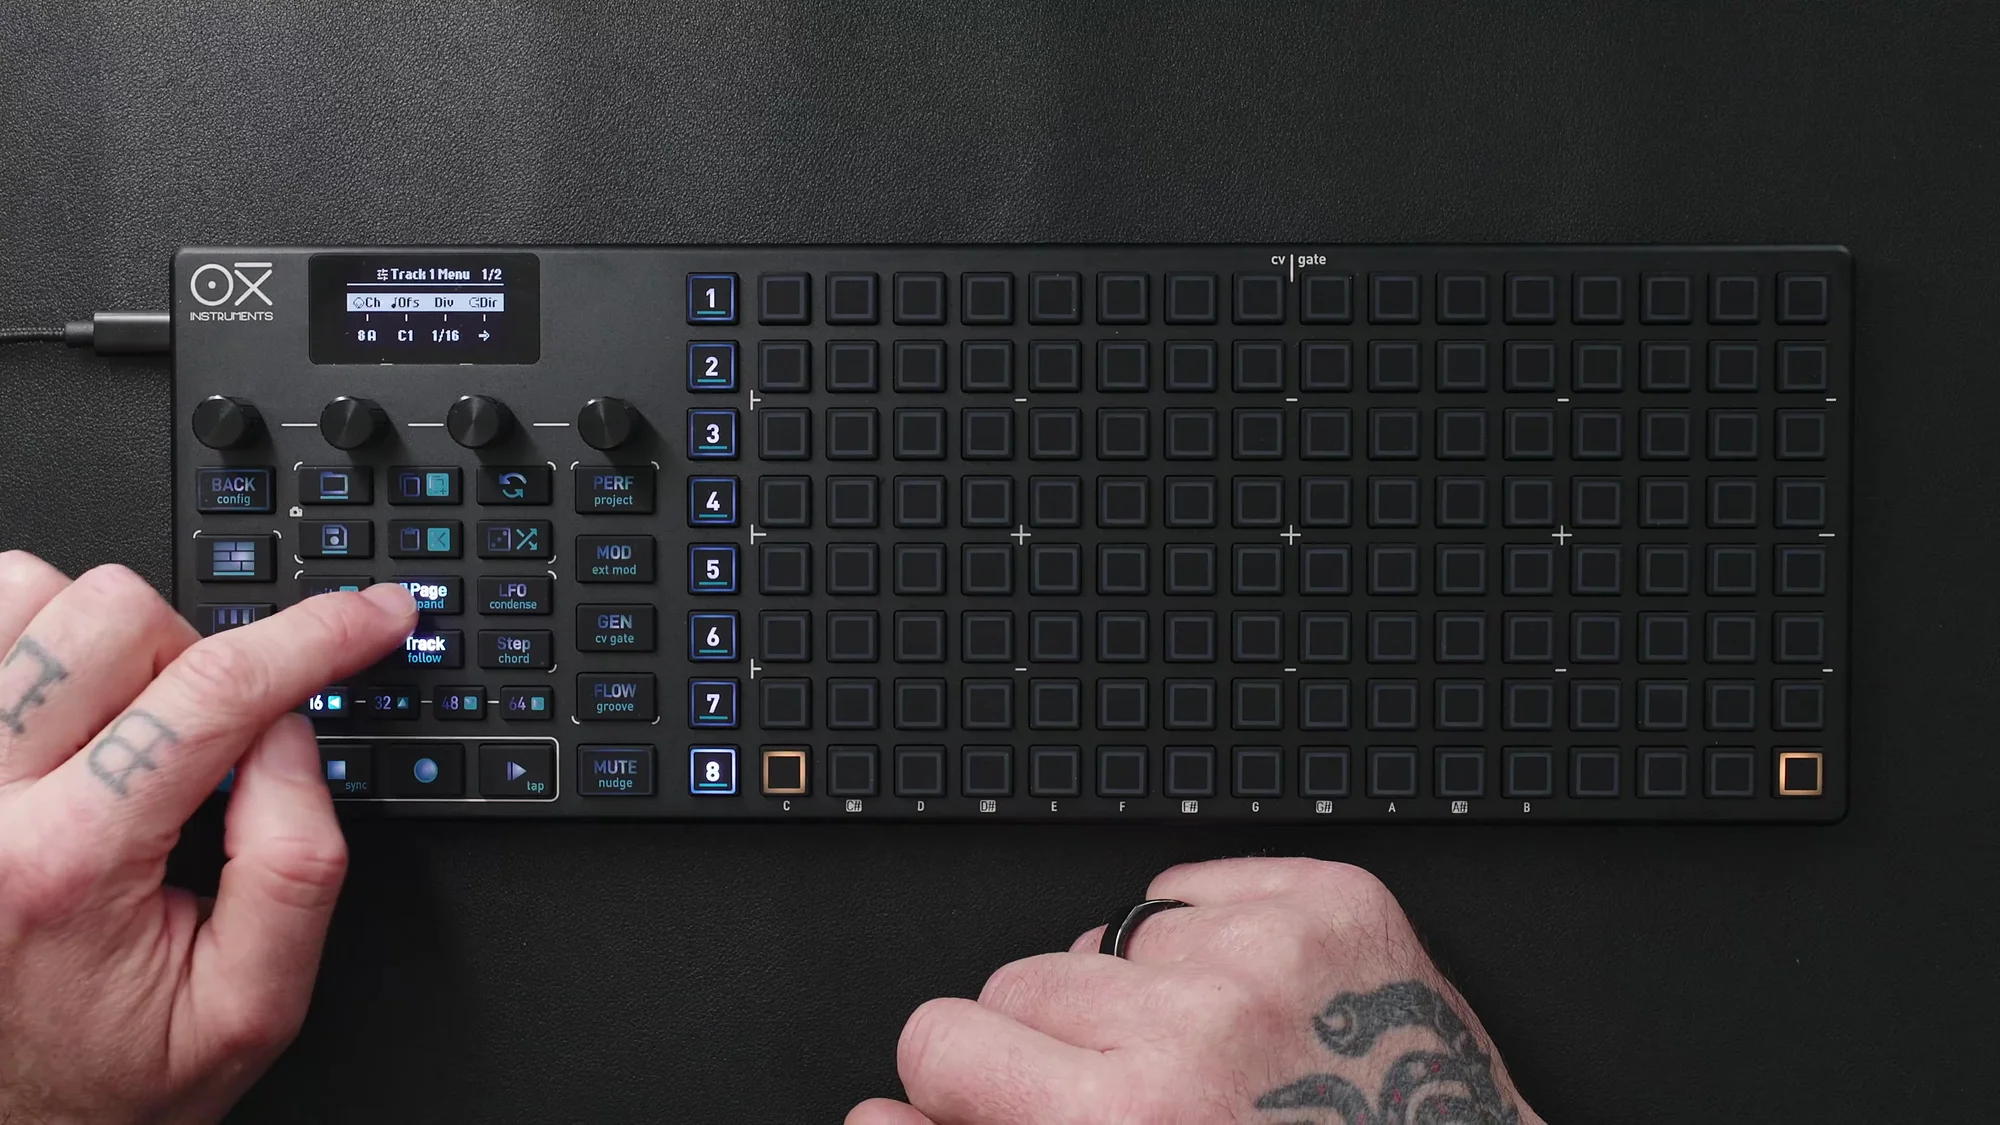
Page 1
- MIDI Channel: Per-track MIDI output channel
- Note Offset: Base note for the track
- Time Division: Playback speed (1/4, 1/8, 1/16, etc.)
- Direction: Playback direction
Page 2
- Output Port: MIDI output destination
- Program Change Output: Program change message settings
- Time Division Randomize: Add a random element to time division
- Track Swing: Per-track swing setting (set to Same to follow global settings)
Drum Rack Setup Example
The video shows a practical setup example combining OXI ONE MKII with an Ableton drum rack.
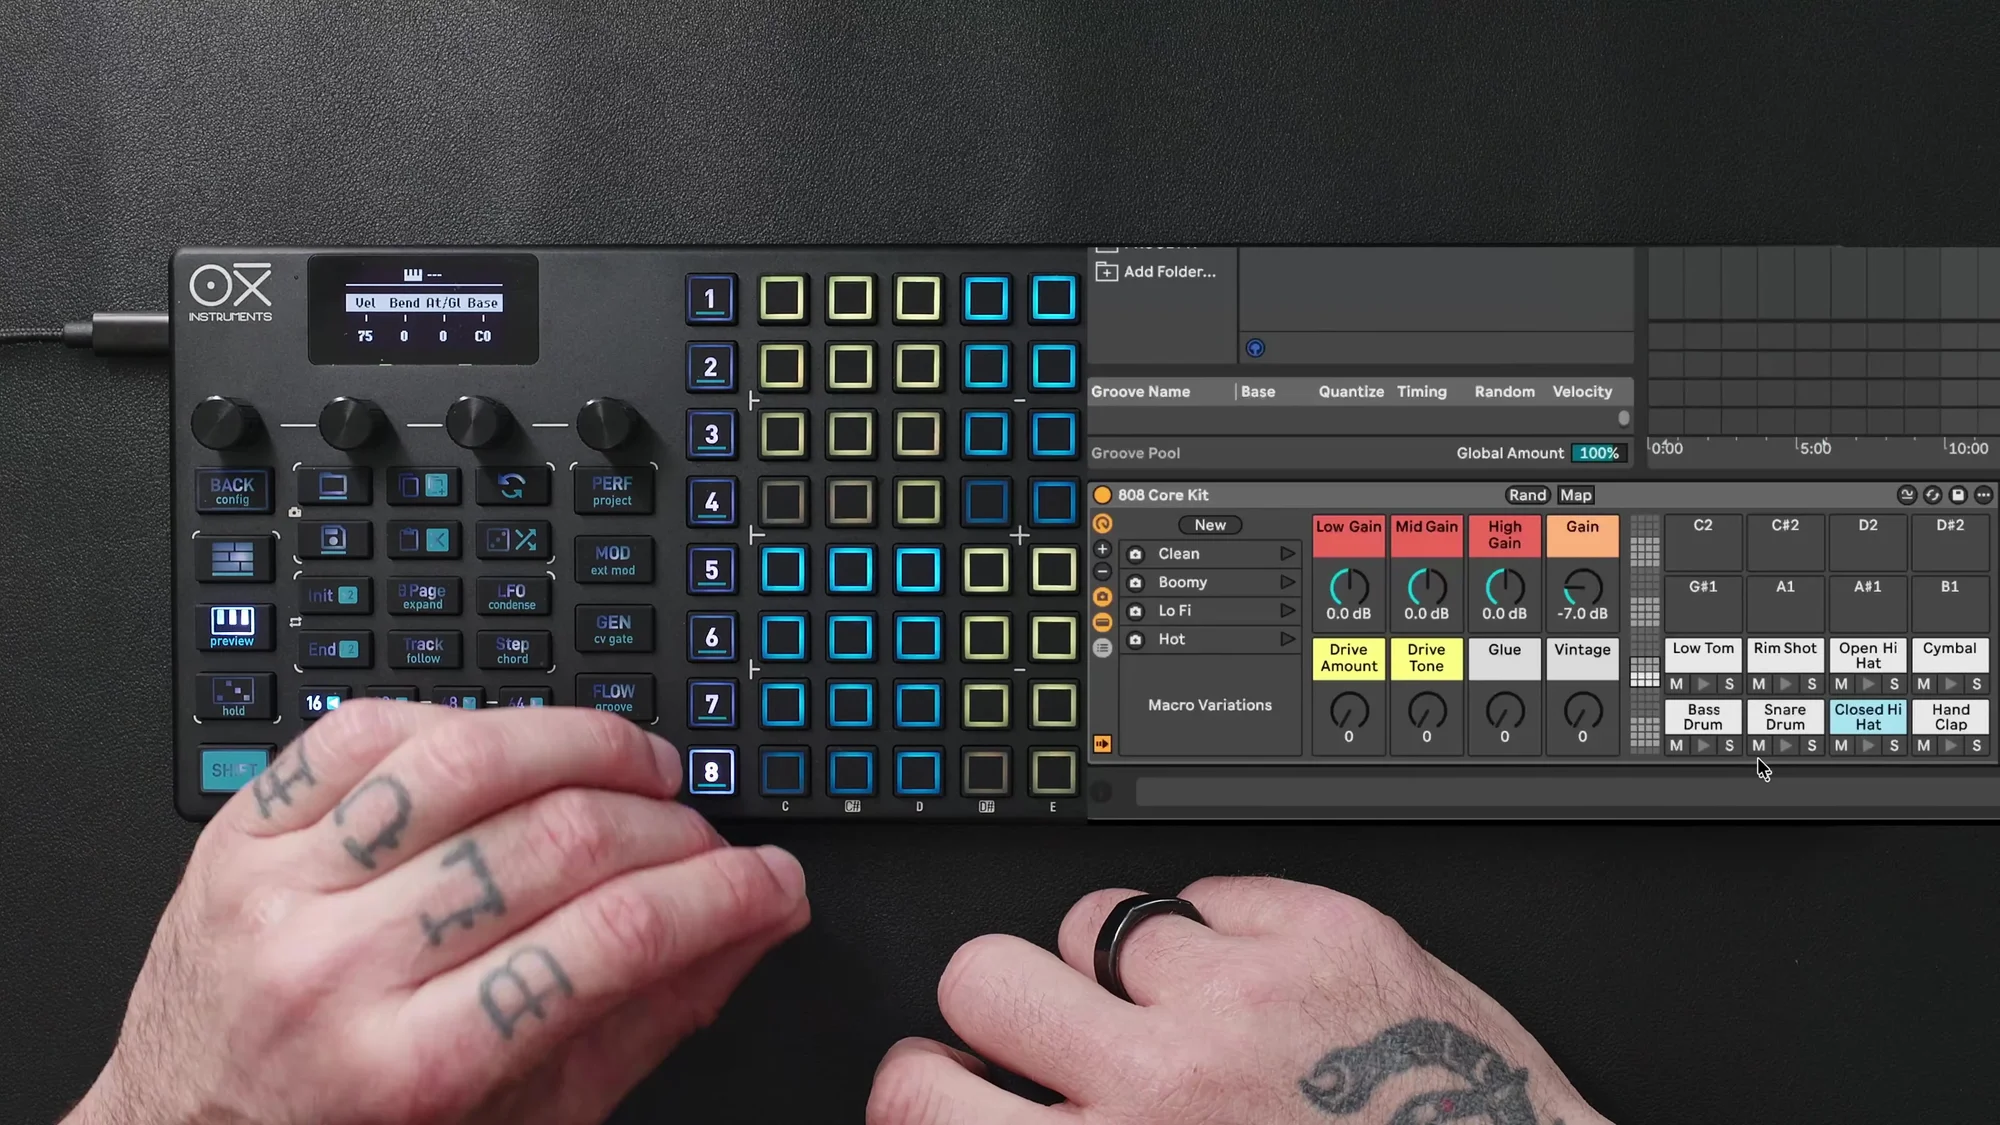
The setup steps are as follows:
- Set the MIDI channel to 8 in Multitrack global settings
- Set the receiving channel of the Ableton drum rack to 8
- Set the scale to Chromatic (all semitones are needed for drum racks)
- Set the root note to C1 (most drum machines and VSTs trigger notes from C1)
Most drum machines and VST plugins trigger samples via notes starting from C1, but this may vary by device. Check the manual for your gear and adjust the note offset and MIDI channel as needed.
Step Placement and Track Editing
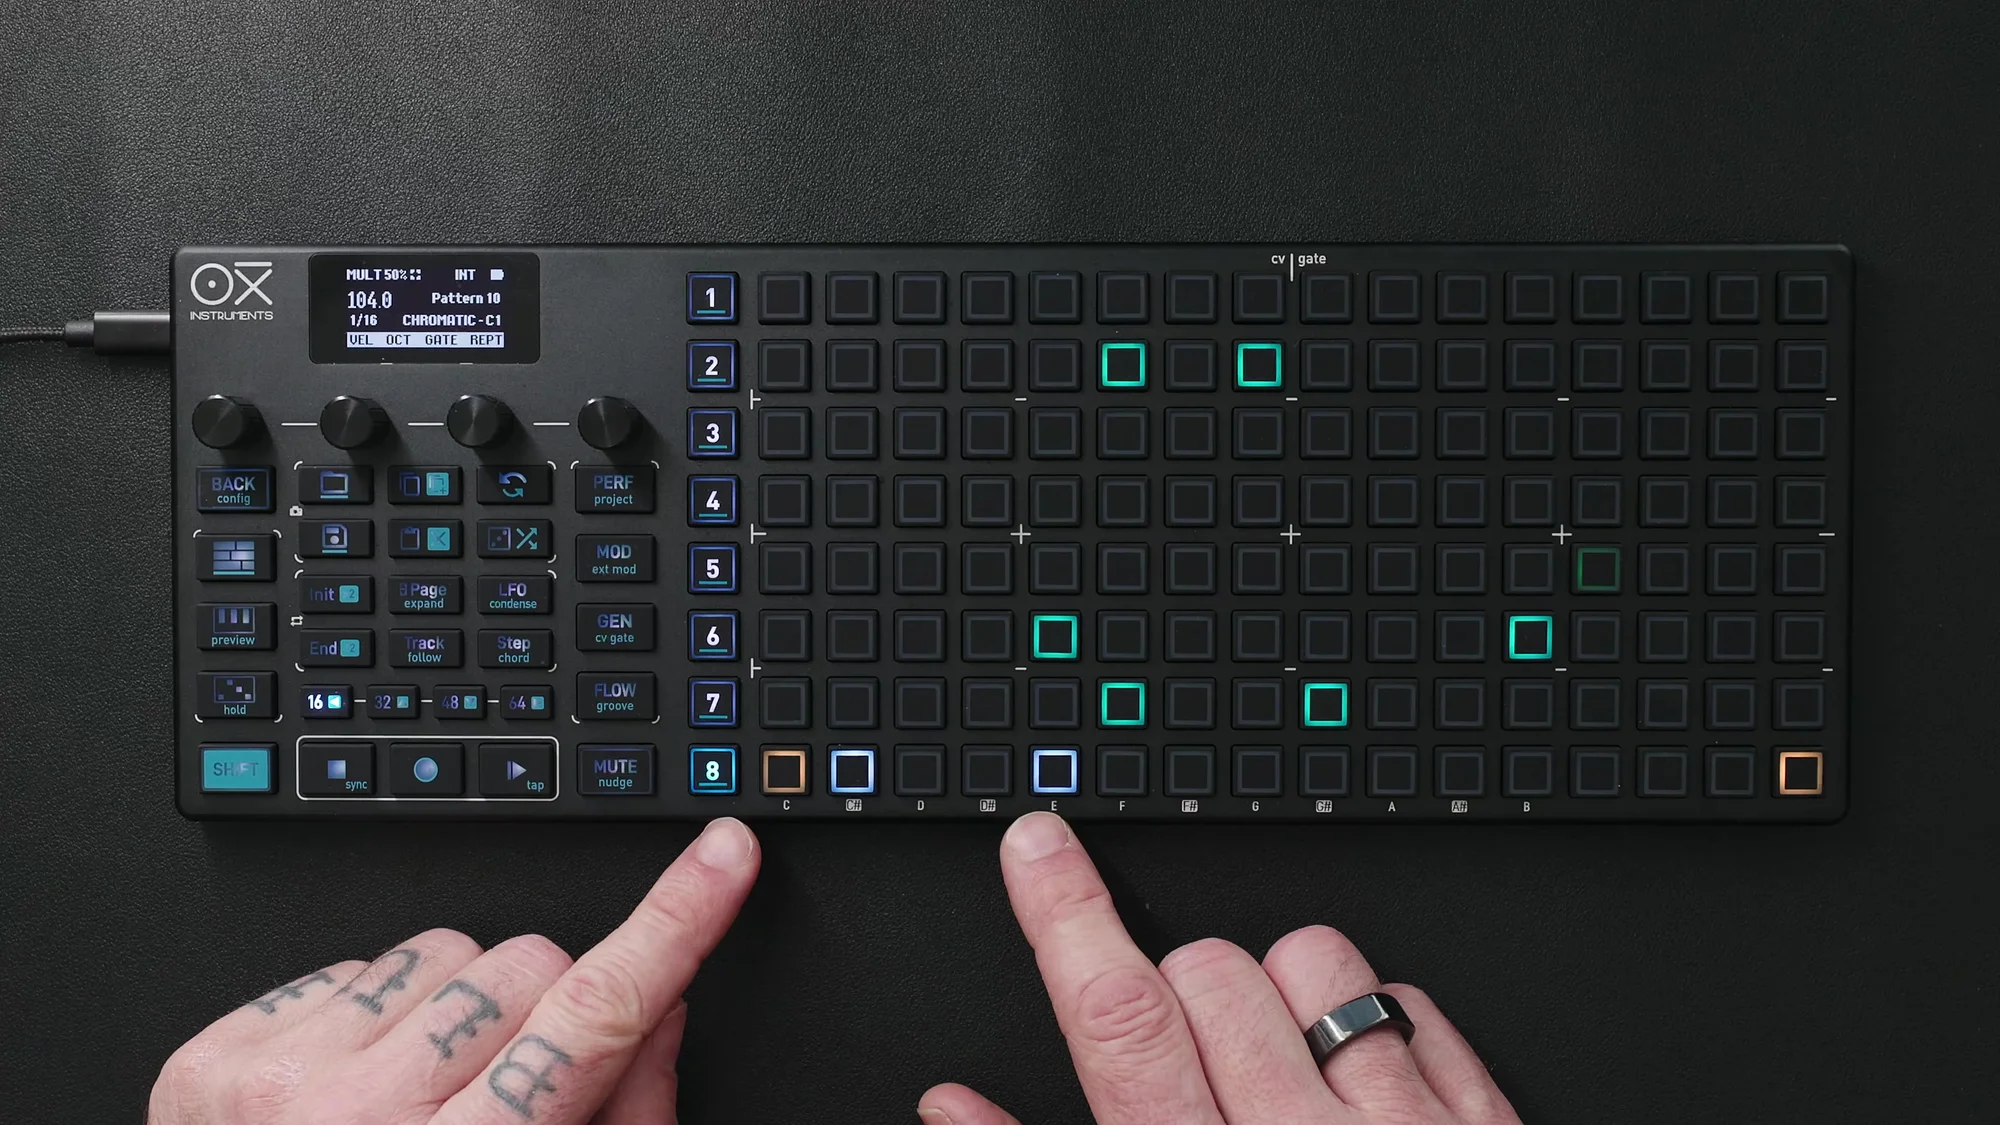
Once setup is complete, place steps on each track.
For example, you might place kick on Track 1, snare on Track 2, and hi-hat on Track 3. Steps on each track are color-coded so you can check all track states at a glance.
Per-Track Pattern Length
You can set an independent pattern length for each track. Hold End and press the desired step to set the end position for that track. For example, setting the hi-hat track to 5 steps will loop it at a different length from other tracks.
Changing Time Division
You can also change the time division per track. Either change it from the track settings menu or use Shift + Init / Shift + End to double or halve the speed.
Per-Step Editing
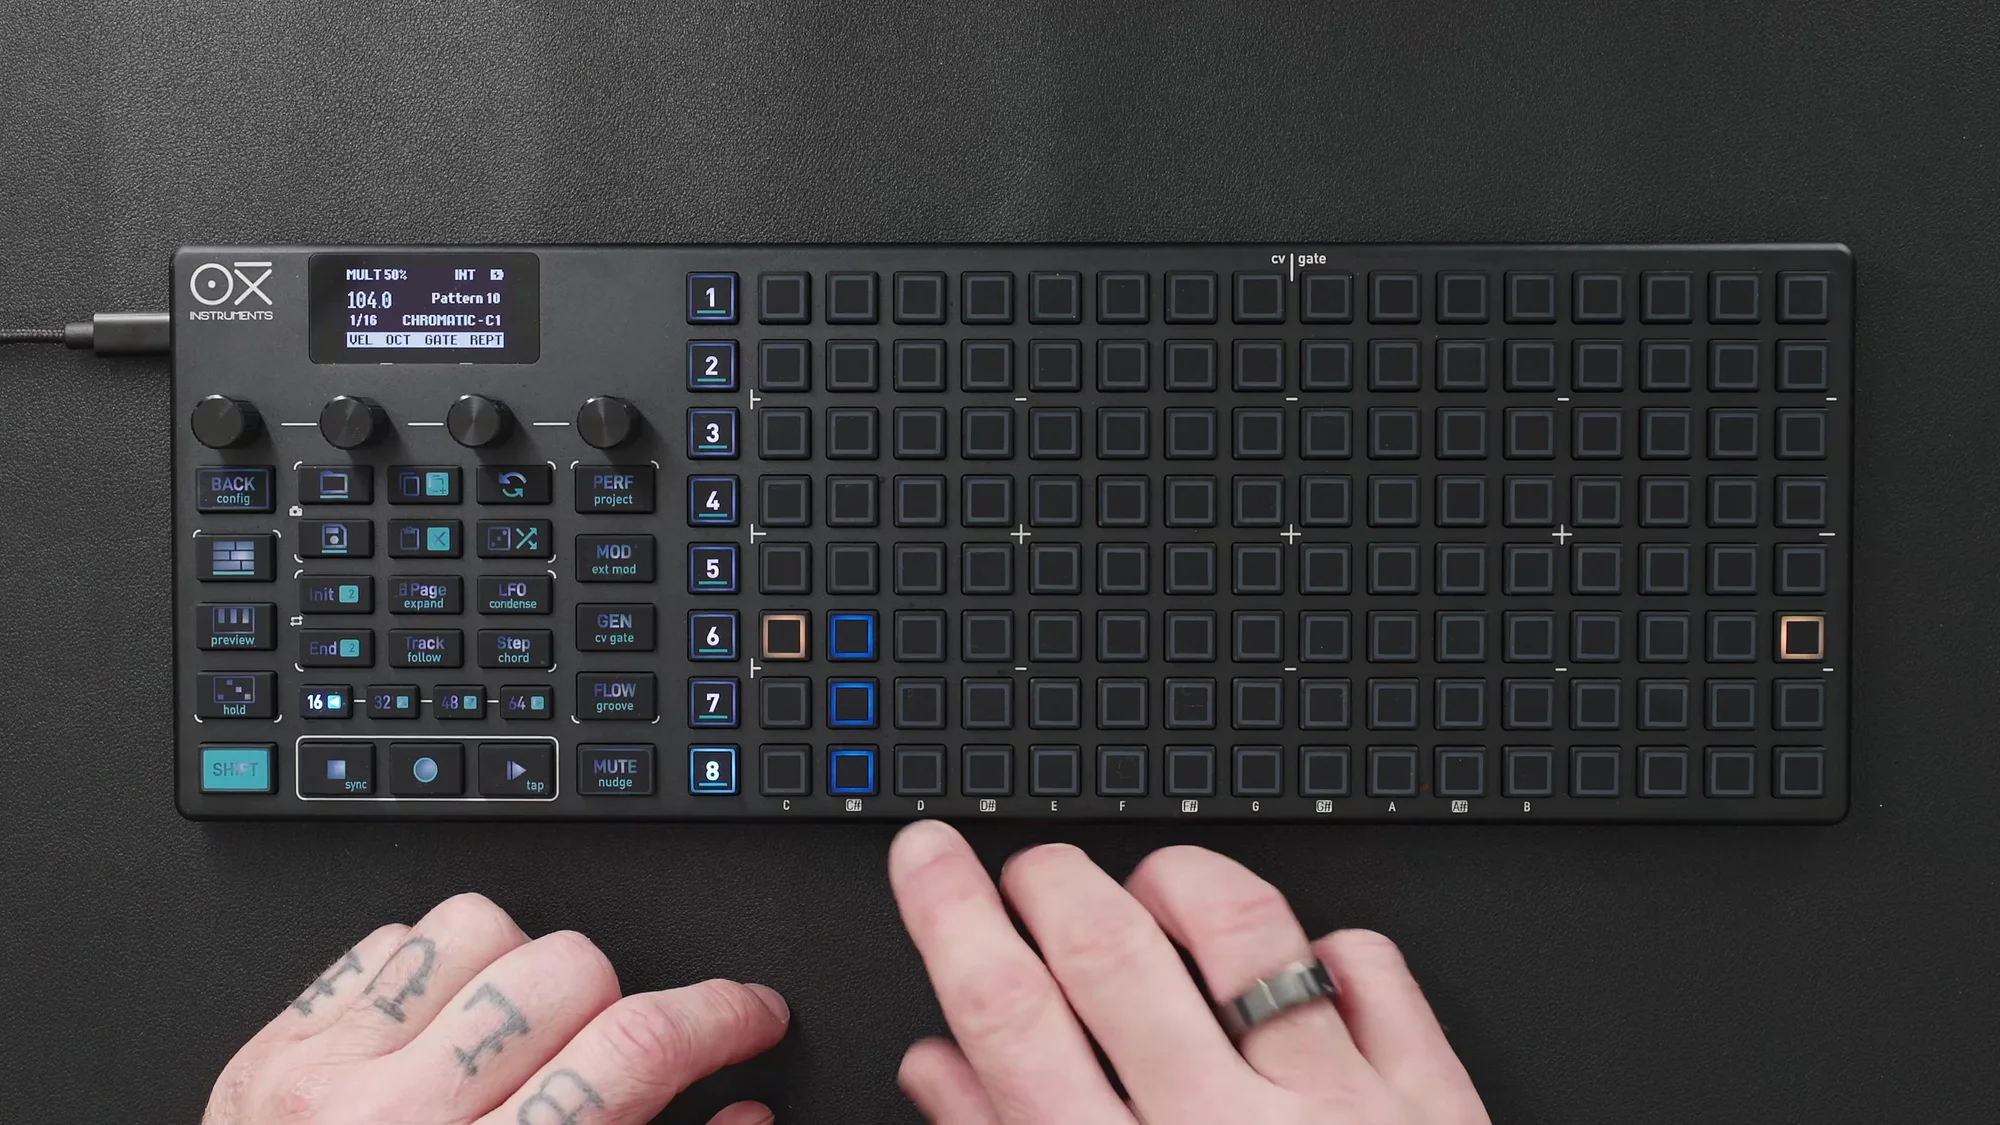
Press any step to edit its individual parameters. Hold the step and press Page to switch between two editing pages.
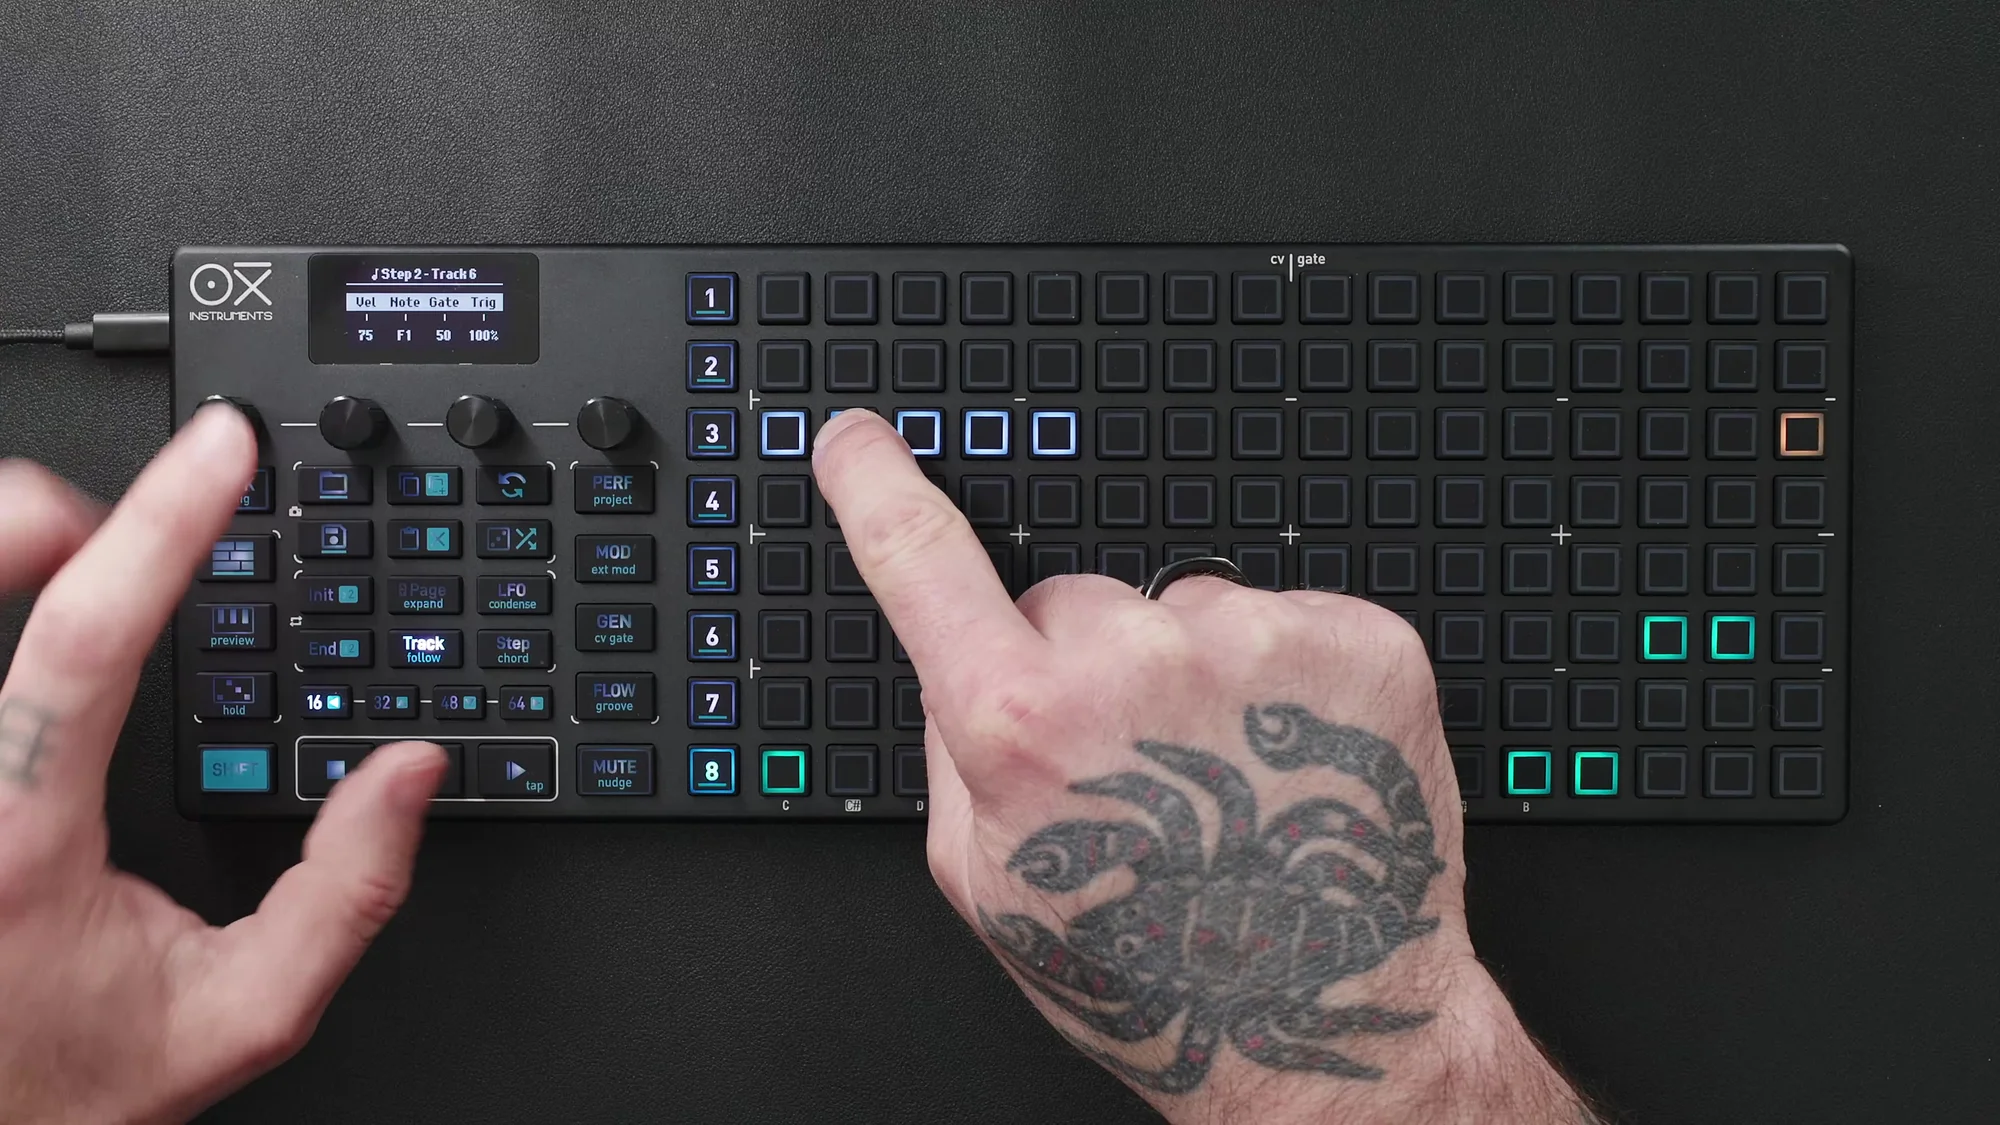
Page 1
- Encoder 1: Velocity
- Encoder 2: Note Offset
- Encoder 3: Gate Length
- Encoder 4: Trigger Probability and Logic Condition
Page 2
- Encoder 1: Repetition
- Encoder 2: CV Glide
- Encoder 3: Time Micro Offset
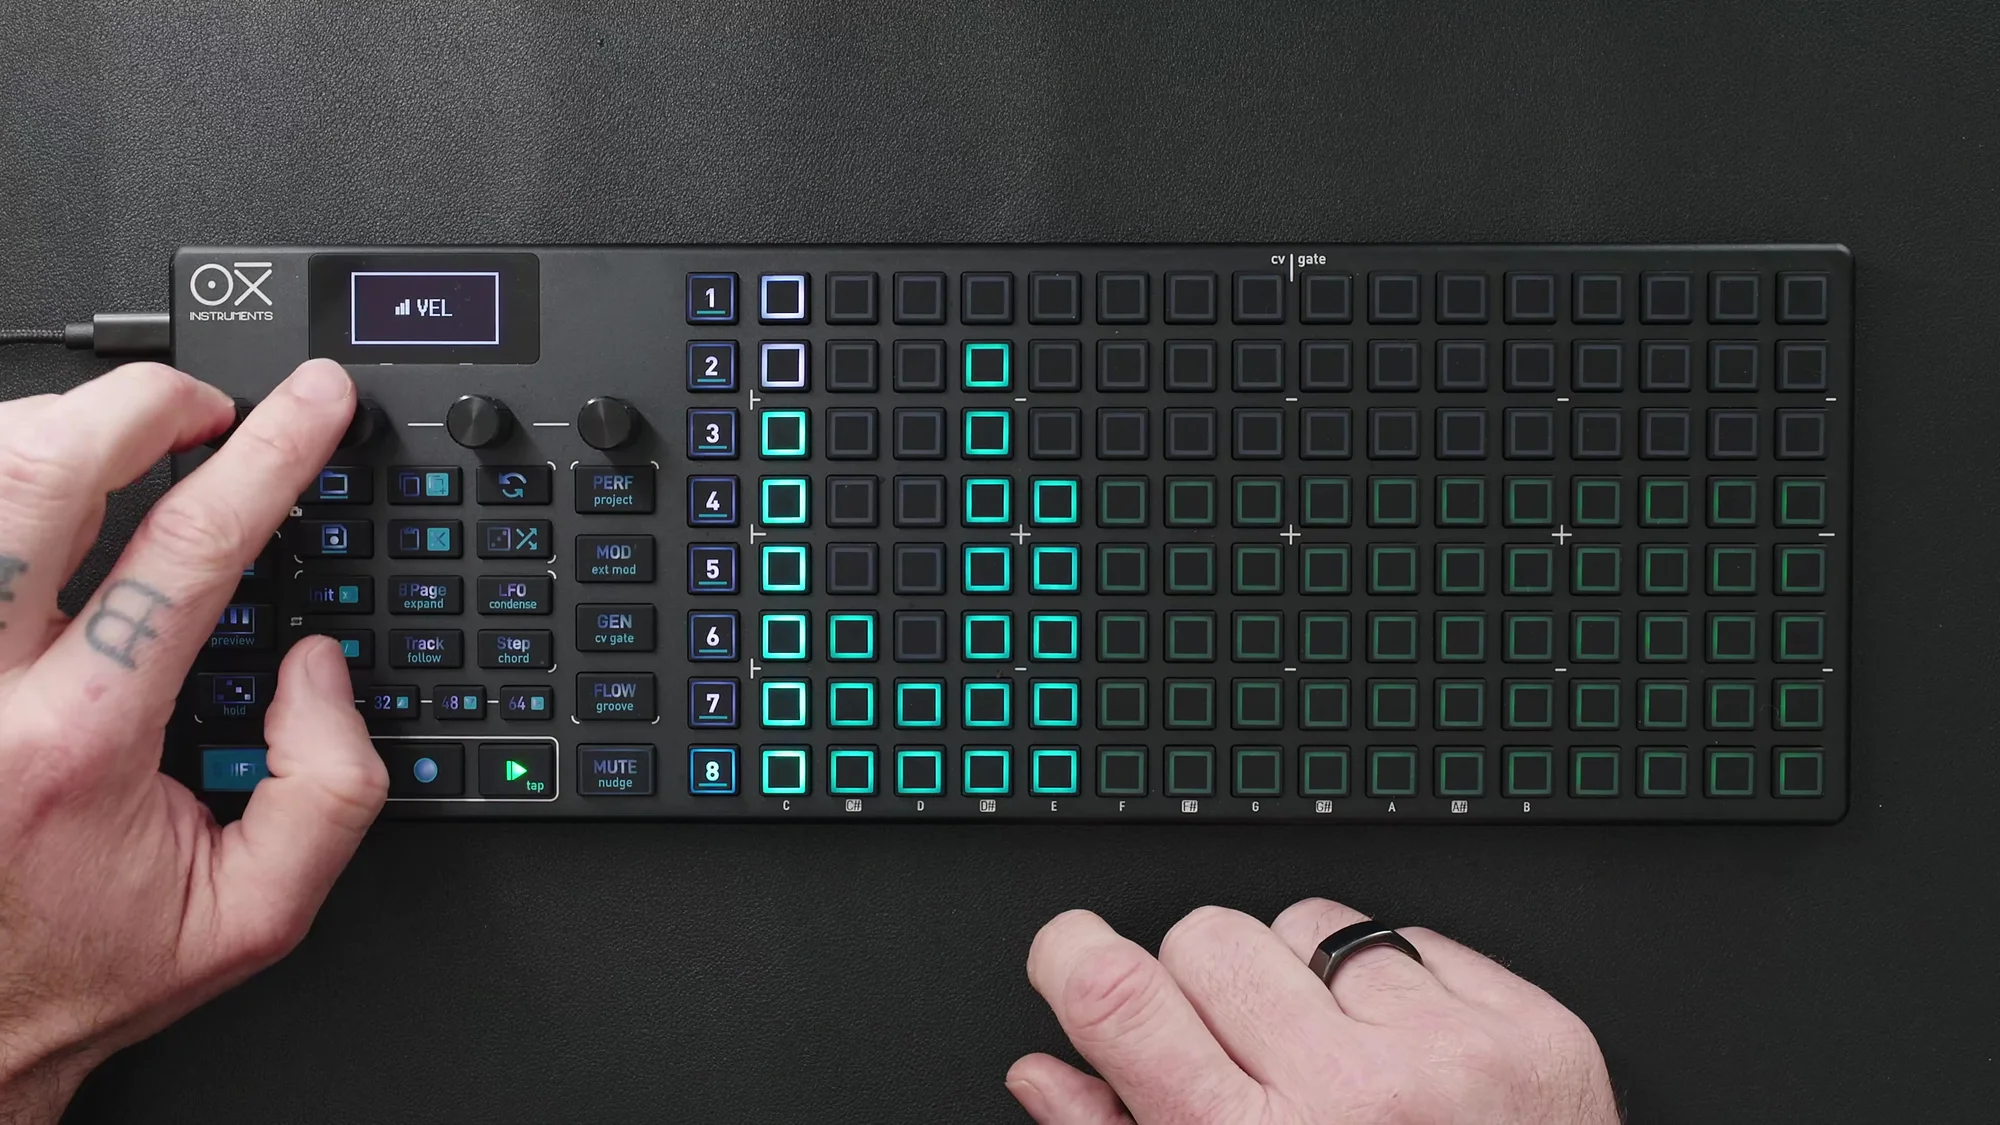
Column View
Column view is a mode where you can see and edit all step parameters for the selected track at once. Press an encoder to switch to it.
-
Press Encoder 1: Velocity column view
-
Press Encoder 2: Note Offset column view. When using a drum rack, you can trigger different
samples by changing the note
-
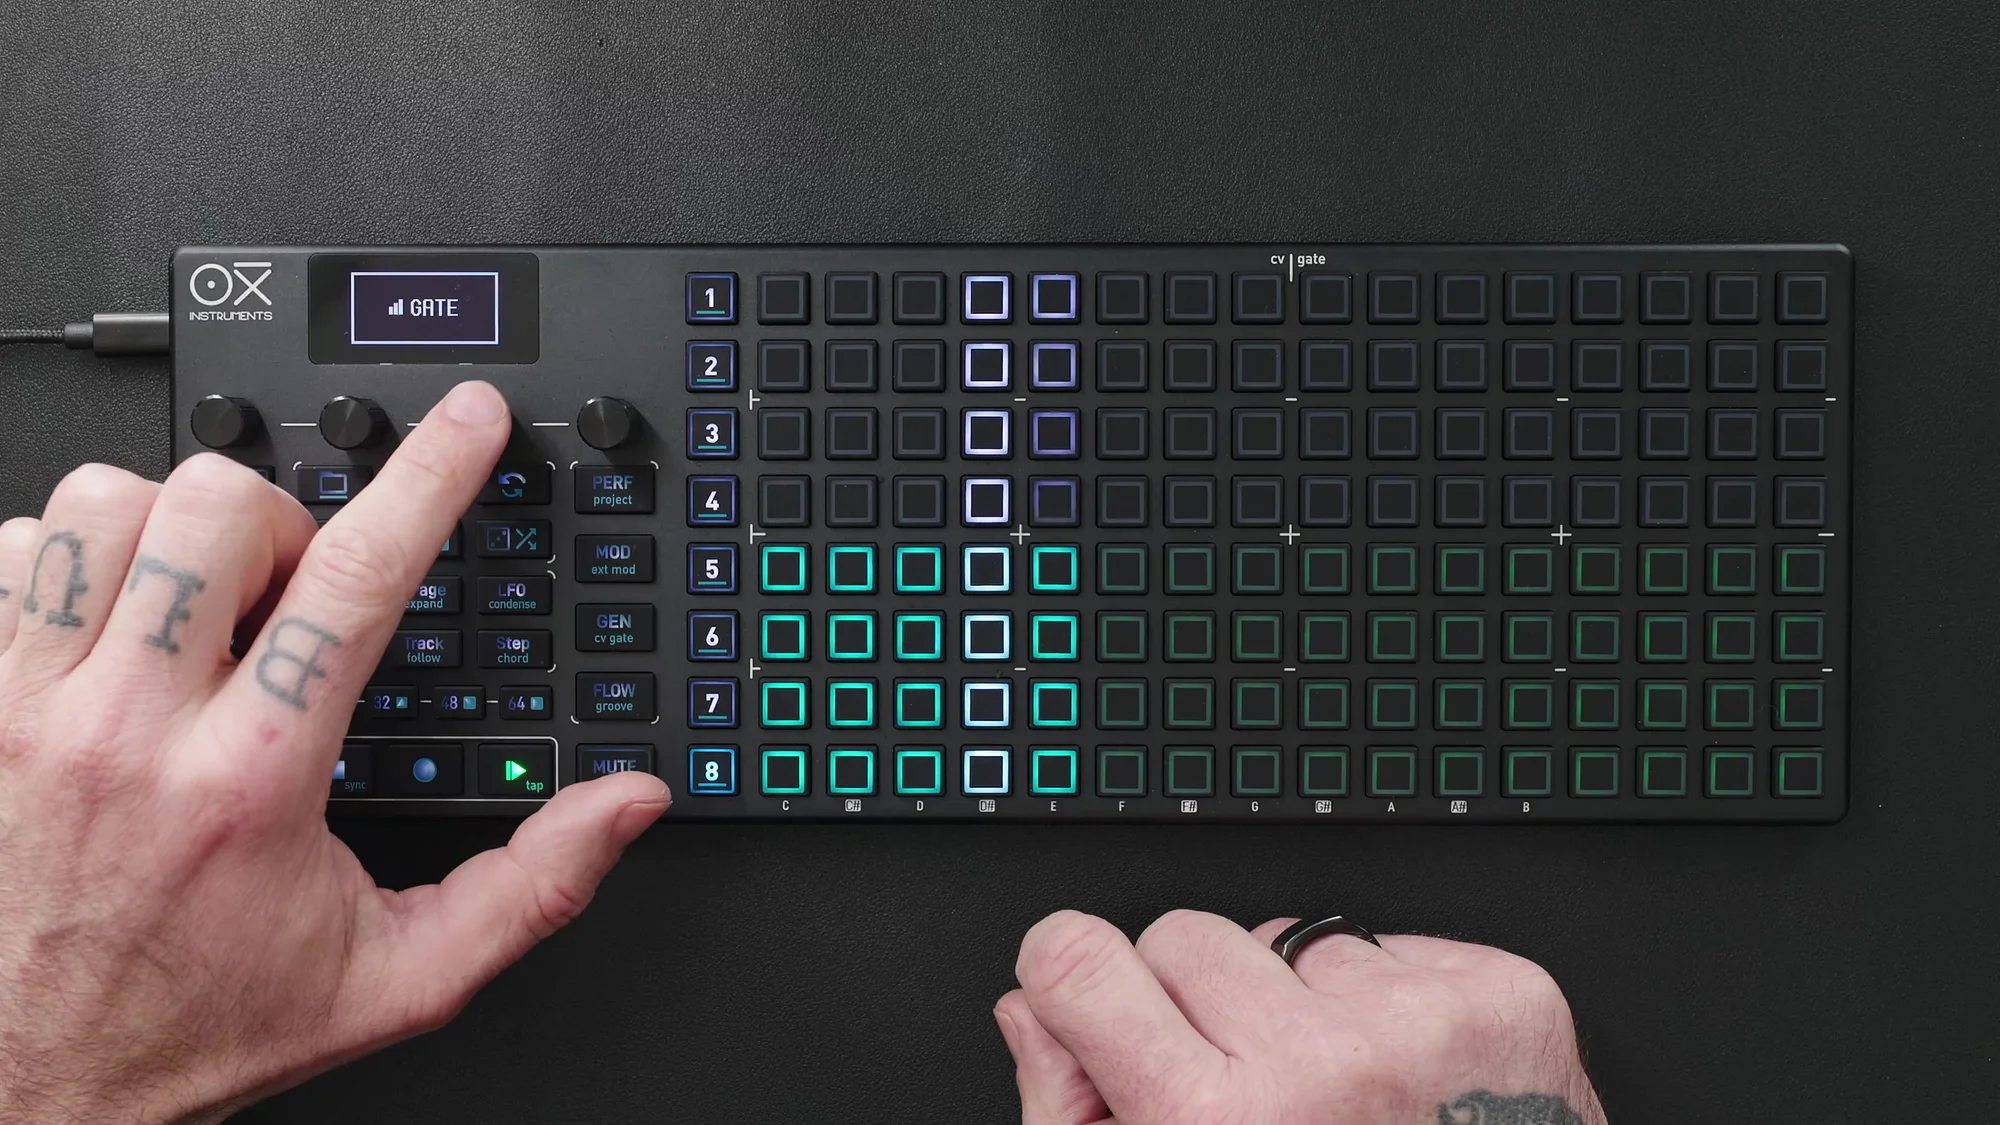
Press Encoder 3: Gate Length column view
-
Press Encoder 4: Retrigger column view. Set the retrigger count; hold Shift while
adjusting to change the retrigger time span
As a retrigger example: setting a step to Retrigger 3 with span 2 will produce 3 triggers within that step’s duration, spread over 2 steps’ worth of time.
Groove
You can assign an independent groove to each track. Press Shift + Groove to enter the groove page, select a track, and apply a groove.
The video demonstrates applying Quintuplet Accent to the hi-hat track. A groove consists of two elements: accent (velocity variation) and time (timing variation).
Generators
In Multitrack mode, you can generate patterns using the Euclidean generator and the random generator.
Euclidean Generator
Select a track and press the Gen button to access the Euclidean generator.
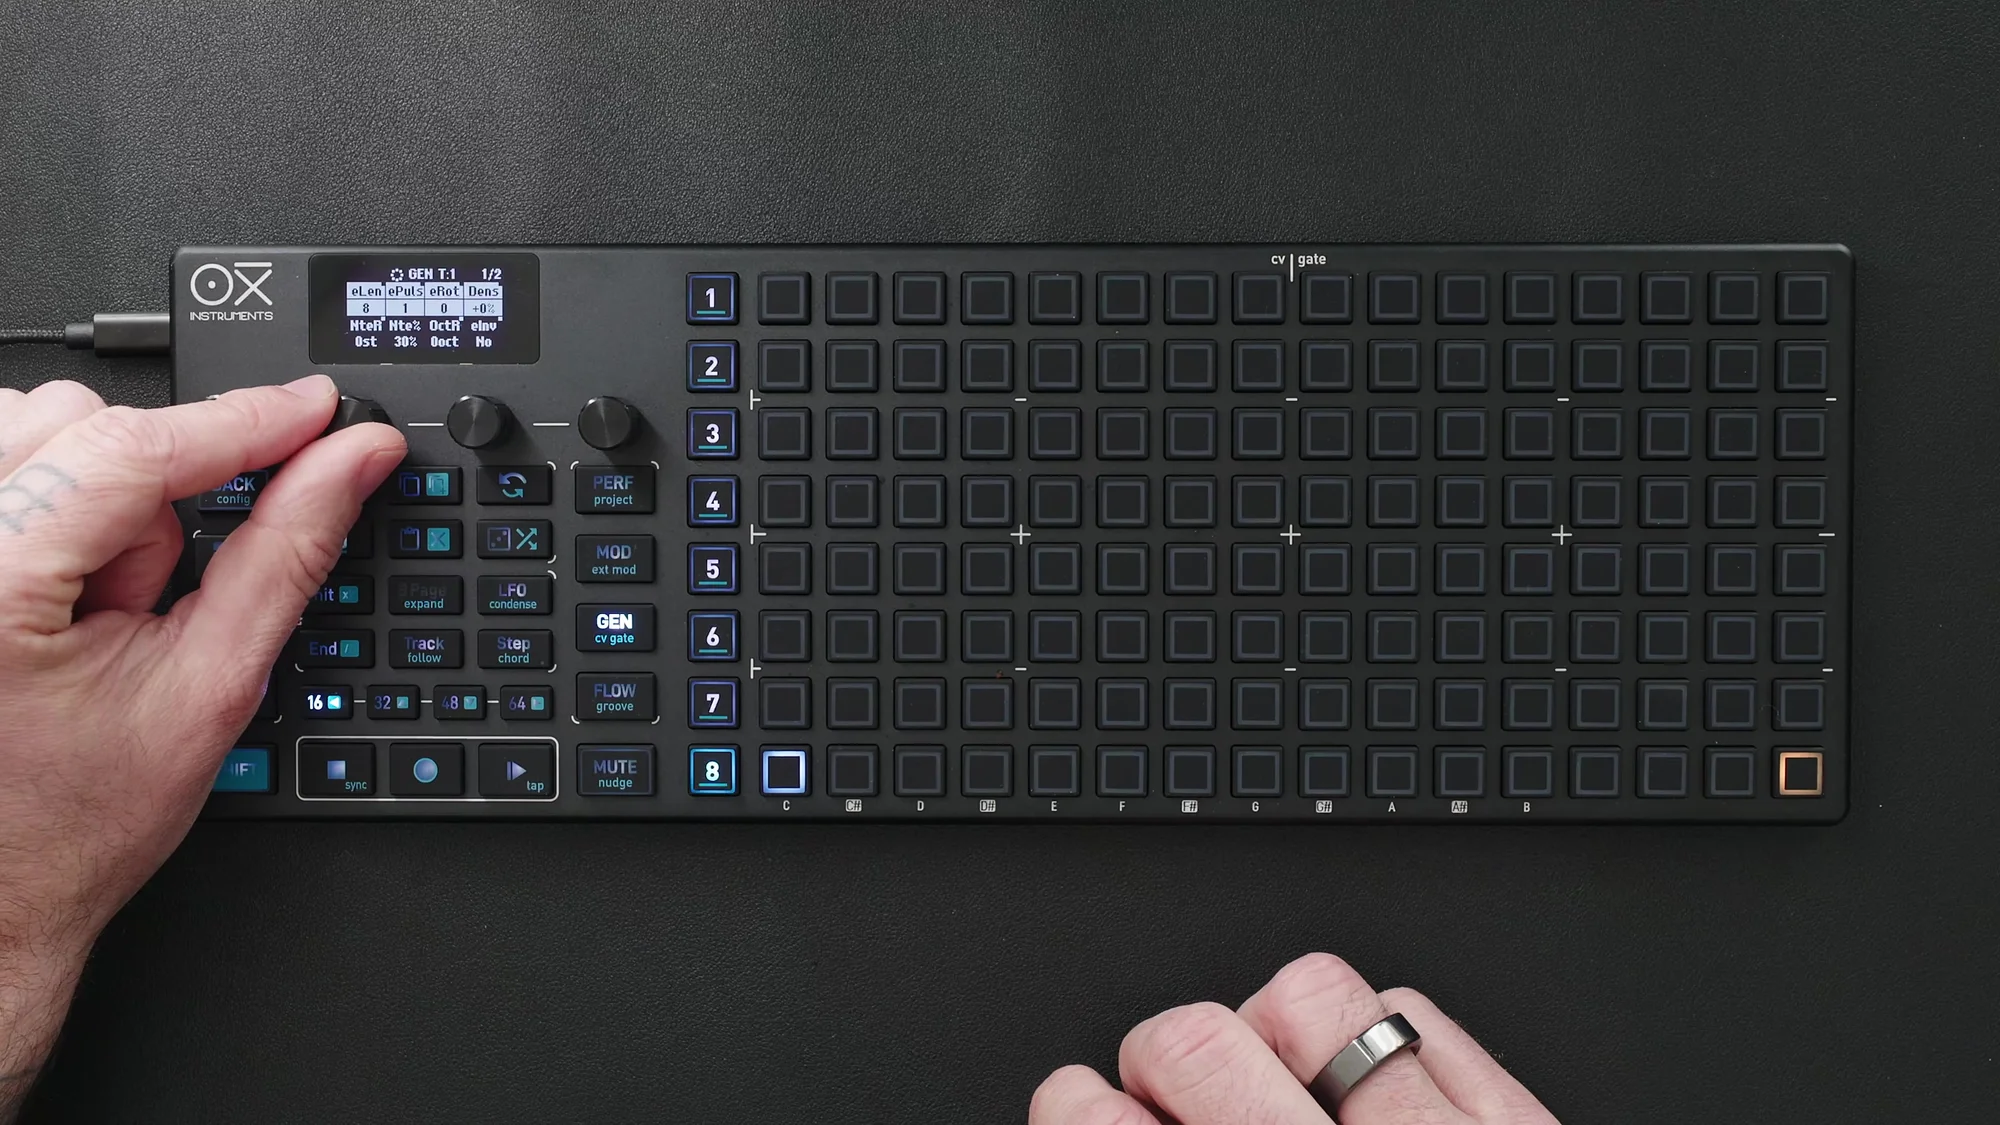
- Length: Total pattern length (e.g., 8 steps)
- Pulses: Number of steps to place (e.g., 3 pulses)
- Rotation: Shift the pattern’s start position
The Euclidean function distributes pulses evenly across the pattern. For example, with 8 steps and 3 pulses, 3 triggers are placed at equal intervals.
Random Generator
Press the Random button twice to enter the random generator.
- Range: Random range for notes (for drum use, set to 0 to trigger only the same note)
- Ties: Number of ties
- Density: Step density (e.g., 60%)
- Press Encoder 4: Generate a random pattern
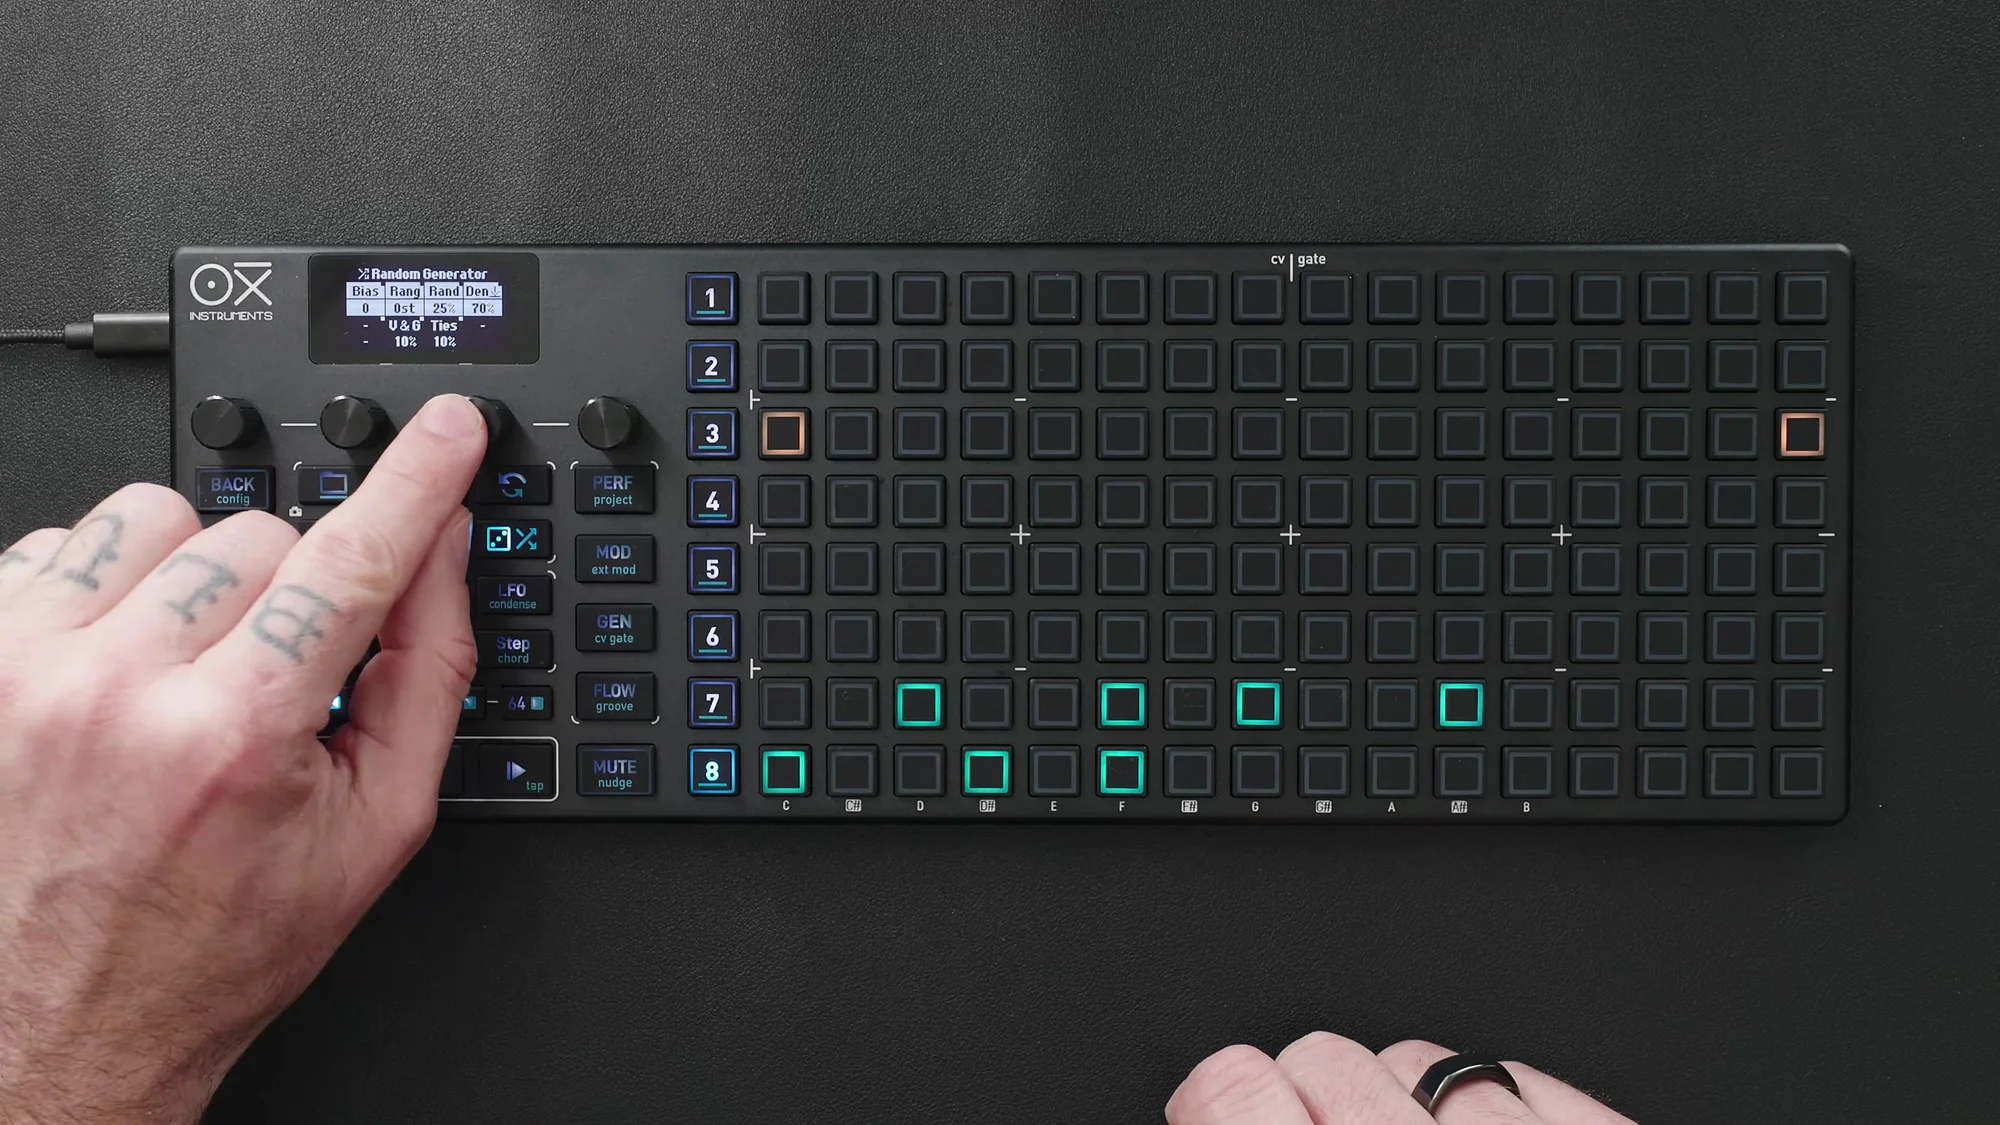
The random generator has a second page where Velocity and Trigger Probability can also be randomized. Press Encoder 4 repeatedly to regenerate until you find a pattern you like.
Multi-Instrument Routing
In Multitrack mode, you can control multiple instruments simultaneously by assigning different MIDI channels to each track.
The video demonstrates starting with Tracks 1–7 assigned to the drum rack on MIDI channel 8, then changing only Track 8 to MIDI channel 9 to trigger a shaker sample loaded in Ableton’s Simpler.
Since Simpler can play back chromatically, using Encoder 2 (Note Offset) in column view lets you vary the pitch, creating a sequence with pitch variations. Setting the pattern length to 7 steps and offsetting it from the other tracks creates rhythmic variation.
Drum Pattern Generator
The drum pattern generator is a non-destructive generative feature exclusive to Multitrack mode. Three engines are optimized for Track 1 (kick), Track 2 (snare), and Track 3 (hi-hat) respectively.
Activation
Hold the Random button to display three blue pads on Tracks 1, 2, and 3. Press any of them to enable the generator.
Parameters
Press a blue pad and select the sequencer number to access generator parameters.
-
Density: Controls step density
-
X / Y: Values that define the rhythm table. Changing X and Y alters the rhythm pattern
-
Chaos: Amount of variation per playback cycle. Higher values change the pattern from cycle to
cycle
Steps are generated when Play is pressed. It is recommended to use a pattern length of 32 steps.
You can also add manual steps on top of generator-produced steps. Manually added steps are shown in a different color for easy distinction.
Performance Page
The performance page lets you control mute, solo, loop, and fill for each track.
- Mute: Press the corresponding track’s pad to toggle mute/unmute
- Solo: Hold Shift and press the track’s pad to solo it
- Looper: The looper function shown in yellow loops a specific section
- Fill: The fill function shown in pink adds fills to the pattern
The performance page will be covered in detail in an upcoming video.
That wraps up EP.9. We’ve covered the full range of rhythm sequencing in Multitrack mode.
As for my personal take, I use OXI ONE mostly for drums, so Multitrack mode has always been the one I reach for the most. I already knew most of what was covered, but with devices like this, having it explained in a video is really helpful. When you read through the manual one item at a time, there’s always this extra step of interpreting a text description of physical actions inside your head — so I really appreciate video walkthroughs that just show you exactly which buttons to press.
I also only just realized that the feature set had expanded with the MKII. Multitrack mode has been a very powerful feature since the original OXI ONE, but it turns out it now includes something that feels inspired by Mutable Instruments’ Grids. That’s a welcome addition I only learned about by watching this video.
What I think is great about the OXI ONE is that after building a random sequence like this, you can immediately arrange it further on the pads. Controlling pure randomness is fun in its own right, but this is a mode that really showcases the rich feature set only a sequencer can offer — I think it’s one of the main modes you’ll keep coming back to.
OXI ONE MKII Product Page
Find detailed product information for OXI ONE MKII below.
OXI ONE MKII Black Edition, next-generation model with 8-part sequencer. Enhanced generative features, large OLED display, and up to 64-track control.
OXI ONE MKII, next-generation model with 8-part sequencer. Enhanced generative features, large OLED display, and up to 64-track control.