
In EP.1, we covered the basics of the N32B Slim editor using the previous version. Since then, SHIK has released an entirely new web editor. The UI has been redesigned from the ground up, with significant changes to the navigation structure and how presets are managed.
In this episode, we’ll take a look at the overall layout of the new web editor (v3.4.1). We’ll go over the key differences from the old editor and walk through each page’s role and new features.
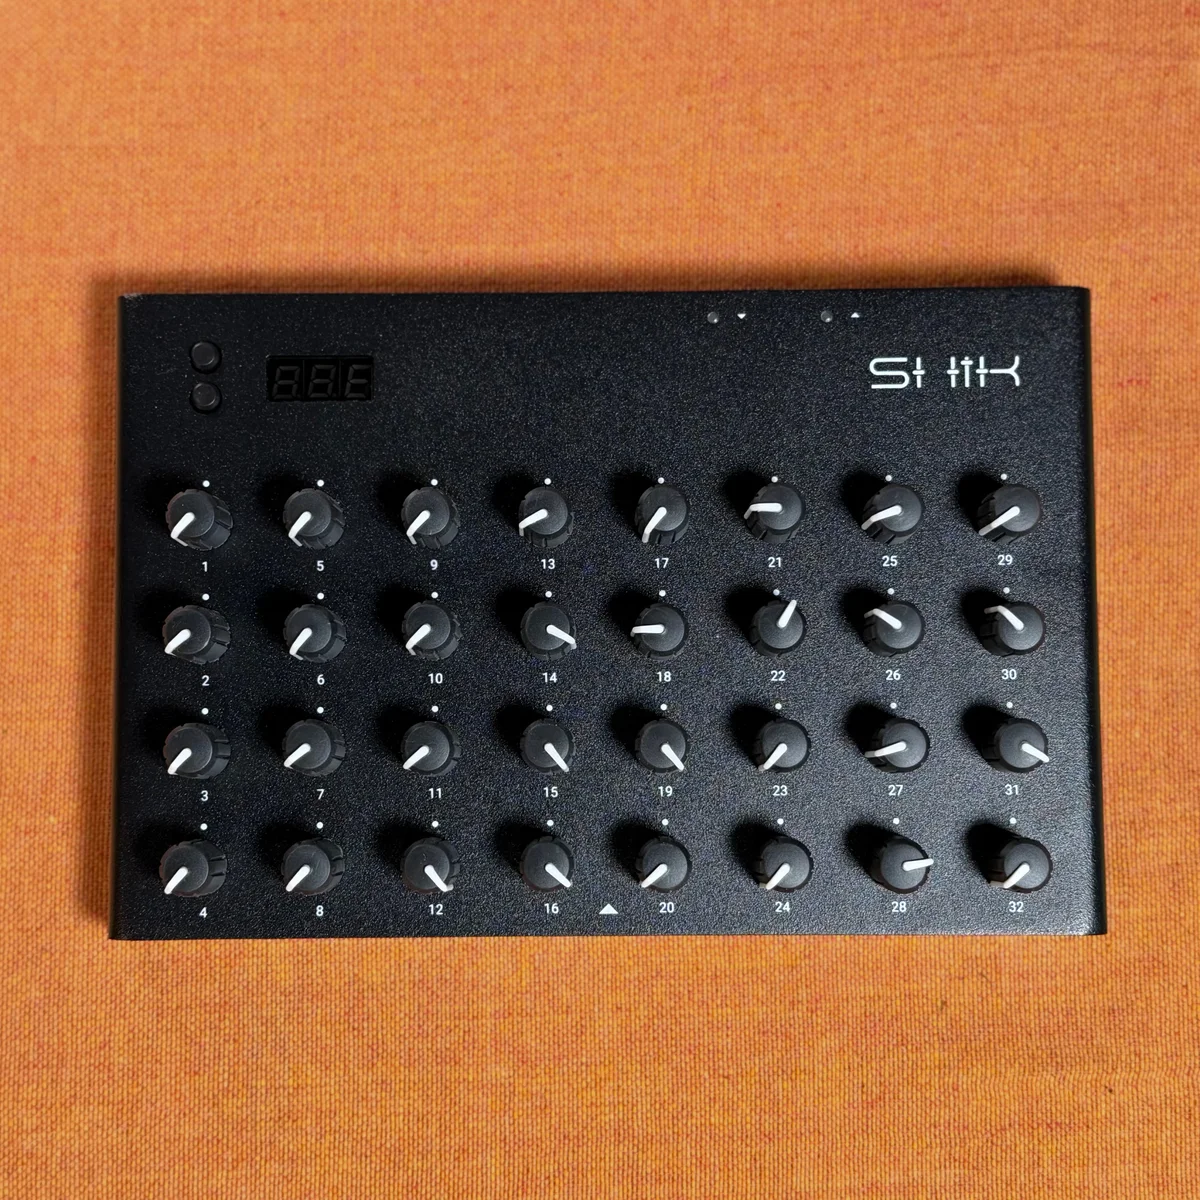
N32B Slim Product Details
- Differences Between the Old and New Editors
- Devices Page
- Editor Page
- Changes to Knob Modes
- Macro Detail Settings
- MIDI Routing
- Presets Page
- MIDI Monitor
- Settings
- Practical Tips
- Takazudo’s Take
Differences Between the Old and New Editors
Let’s start by outlining the major differences between the old and new editors.
The old editor crammed all functionality into a single screen. The main view, editor controls, and action panel were all laid out on one page, and you did everything from knob editing to preset saving in the same place.
The new editor uses a page-based navigation approach. Features are separated into distinct pages, and you switch between them using icons in the left sidebar.
- Devices: Device connection and management
- Presets: Preset library
- Editor: Knob editing (equivalent to the old editor’s main view + right panel)
- MIDI Monitor: Real-time MIDI message monitoring (new feature)
- Settings: App settings
The old editor’s URL was shik-tech.github.io/N32B-Web-Editor/build/, but the new editor has moved to editor.shik.tech. Chrome remains the recommended browser.
Devices Page
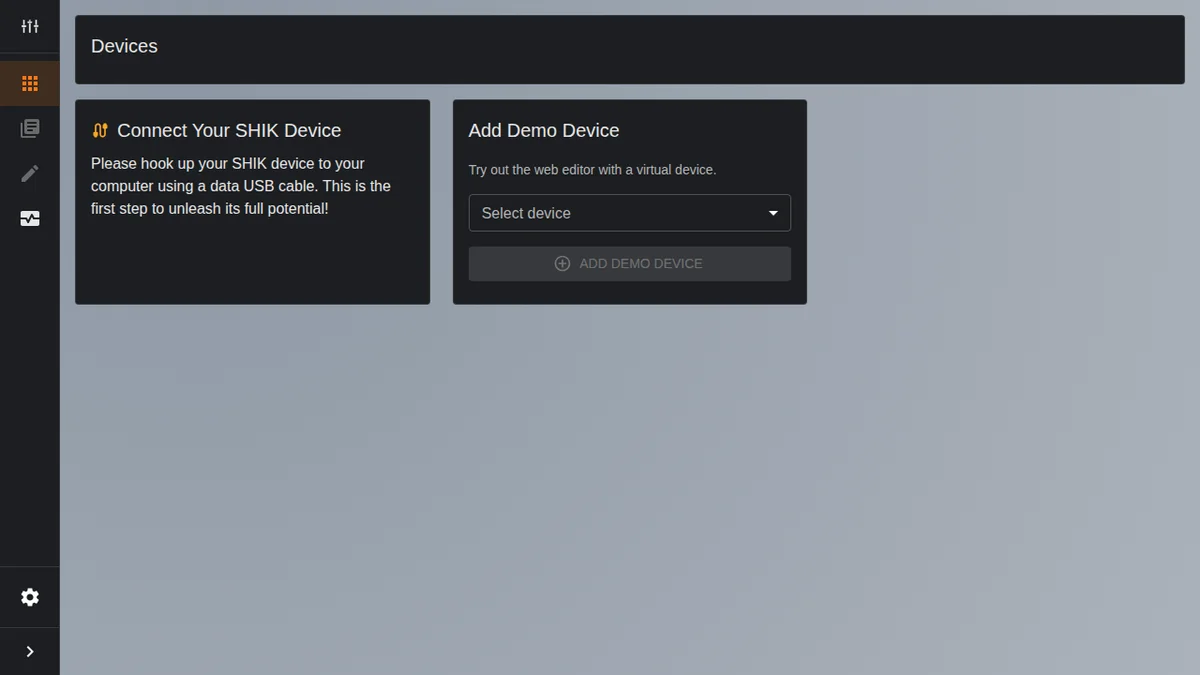
When you open the new editor, the first thing you see is the Devices page. This is where you manage the connection with your N32B Slim.
The page is divided into two sections:
- Connect Your SHIK Device: An area that prompts you to connect your device via USB cable. Once plugged in, the device is automatically detected
- Add Demo Device: A demo mode that lets you try the editor without a physical device. You can choose from three models: SHIK N32B, SHIK N32B V3, and SHIK N32B SLIM
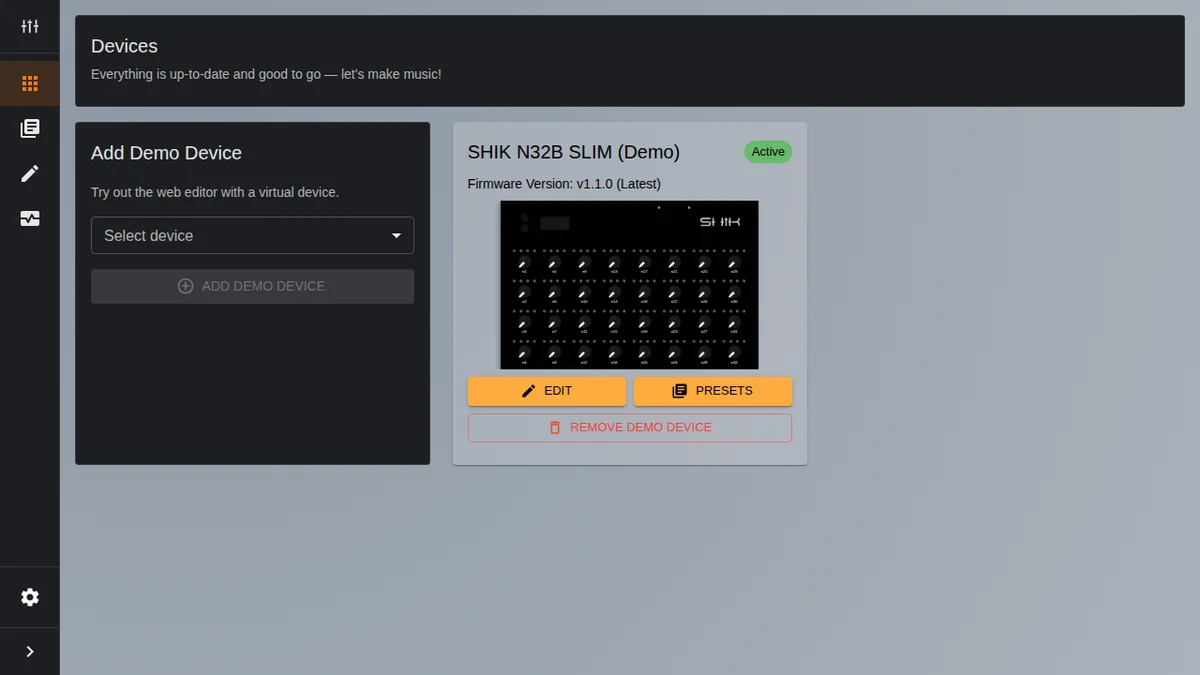
Once you add a demo device, a device card appears showing the firmware version (displayed as something like v1.1.0 (Latest)), a knob layout preview, and Edit and Presets buttons that take you directly to the Editor and Presets pages.
The old editor didn’t have a demo mode, but the new editor lets you explore its features without a device connected.
Editor Page
The Editor page is the central hub for knob configuration, equivalent to the old editor’s main view and editor controls combined.
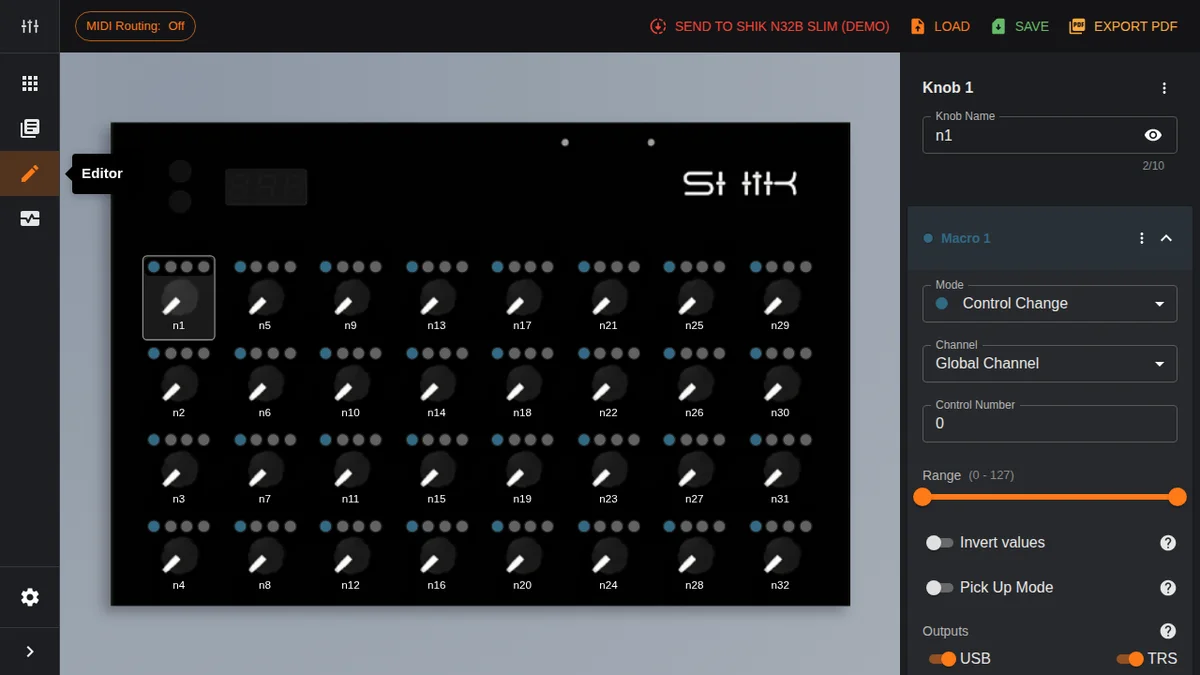
The screen is divided into three main areas:
Toolbar
The toolbar at the top of the screen includes the following features:
- MIDI Routing: Opens the MIDI thru settings dialog (more on this below)
- Send to device: Writes the editor settings to the physical device
- Load: Loads a preset file saved on your PC
- Save: Saves the current settings as a JSON file to your PC
- Export PDF: Exports a faceplate PDF
The action-related functions that were in the left panel of the old editor have been consolidated into the toolbar.
Knob Grid
The central area displays the N32B Slim’s knobs in a 4-column by 8-row grid. Each is labeled n1 through n32 and can be selected by clicking. Zoom functionality is available just like in the old editor.
Knob Settings Panel
The right panel is where you configure the detailed settings for the selected knob. This has been significantly enhanced compared to the old editor.
Knob Name: A text field lets you set a name for each knob. Next to the name is a 7-segment preview button that shows how the name will appear on the N32B Slim’s 3-digit display. Names can be up to 10 characters (they get abbreviated on the 7-segment display).
Macro System: Each knob has Macro 1 through Macro 4 — four macro slots. When you turn a physical knob, all enabled macros fire simultaneously. Each macro can independently be configured with its own Mode, Channel, CC number, Range, and Output destination. For example, you could use a single knob to control both filter cutoff (CC74) and resonance (CC71) at the same time, or send different messages to USB and TRS simultaneously. In the old editor, the “Macro Control Change” mode could send two CCs at once, but the new editor gives every knob four macros by default, and you can even mix different message types like NRPN and SysEx across them. Each macro uses a collapsible accordion UI that can be expanded or collapsed individually. We’ll dive deeper into practical macro usage in EP.3.
Changes to Knob Modes
The Mode dropdown in each macro selects the type of MIDI message to send.
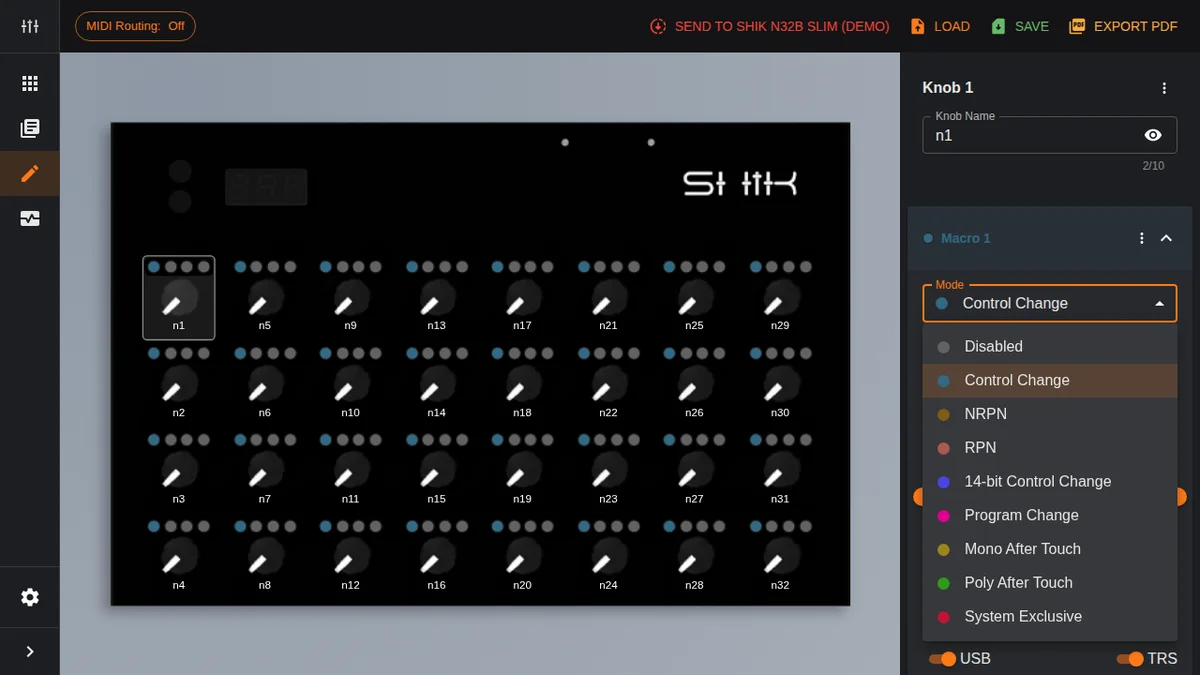
The modes available in the new editor are:
- Disabled: Deactivated
- Control Change: Standard 7-bit CC
- NRPN: Non-Registered Parameter Number
- RPN: Registered Parameter Number
- 14-bit Control Change: Renamed from “High Resolution Control Change” in the old editor. Provides 4095-step high-resolution CC
- Program Change: Program change
- Mono After Touch: Mono aftertouch
- Poly After Touch: Poly aftertouch
- System Exclusive: SysEx message sending (new feature)
There are two main differences from the old editor. The “Macro Control Change” mode has been removed, replaced by the 4-macro system which provides equal or greater functionality. Additionally, the System Exclusive mode has been newly added.
Macro Detail Settings
Each macro has several configurable options beyond the mode selection:
- Channel: MIDI channel. You can use the Global Channel or specify a channel individually
- Control Number: The CC number to send
- Range: Set the minimum and maximum values with a slider (0—127). A dual slider makes it easy to define the range intuitively
- Invert values: Reverses the value. The description reads “Reverses knob direction: clockwise decreases MIDI value, counter-clockwise increases it.”
- Pick Up Mode: A new feature on the N32B Slim. Prevents sudden value jumps. The knob won’t send messages until its physical position matches the current MIDI value. The receiving device needs to send back its current value
- Outputs: USB and TRS outputs can be toggled on or off independently
Pick Up Mode is a new feature that wasn’t in the old editor. It prevents value jumps when the knob’s physical position doesn’t match the MIDI value — for example, right after switching presets.
Copy & Paste
From the menu button at the top right of the knob settings panel, you can use the Copy/Paste feature.
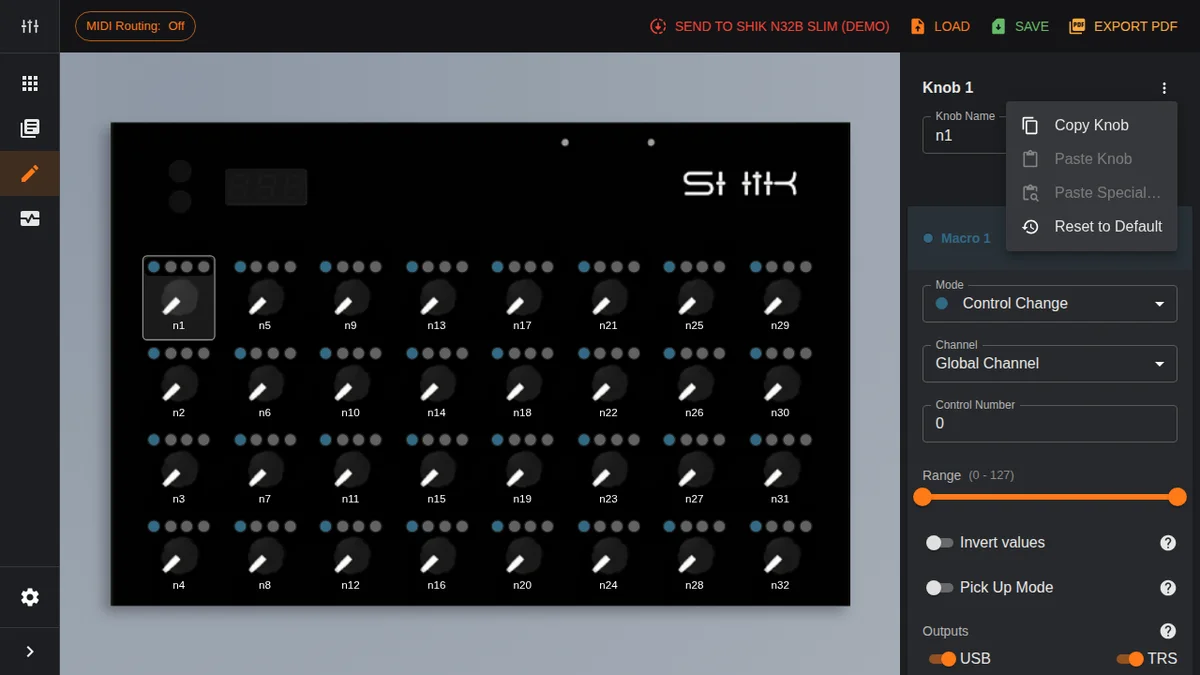
- Copy Knob: Copies all settings from a knob
- Paste Knob: Pastes the copied settings to another knob
- Paste Special…: Selectively paste only certain settings
- Reset to Default: Resets the knob to its default settings
Copy and paste also works at the macro level. You can access it from the menu in each macro’s header. This is handy when you need to apply the same settings to many knobs.
MIDI Routing
Clicking the MIDI Routing button in the toolbar opens the MIDI thru settings dialog.

In the old editor, this was a dropdown selection, but the new editor uses a card-based UI. Each option shows input and output icons, making the routing direction visually clear.
The available routing options are:
- OFF: No preset-level MIDI thru
- TRS → TRS: Routes TRS input to TRS output
- TRS → USB: Routes TRS input to USB output
- USB → USB: Routes USB input to USB output
- USB → TRS: Routes USB input to TRS output
- USB ↔ TRS (bidirectional): Sets up USB input → TRS output and TRS input → USB output simultaneously
The equivalent of the old editor’s “TRS + USB (both)” is the USB ↔ TRS bidirectional routing. Also, USB → USB routing has been added, which wasn’t available in the old editor.
Presets Page
The Presets page is where you manage presets stored on the device itself.
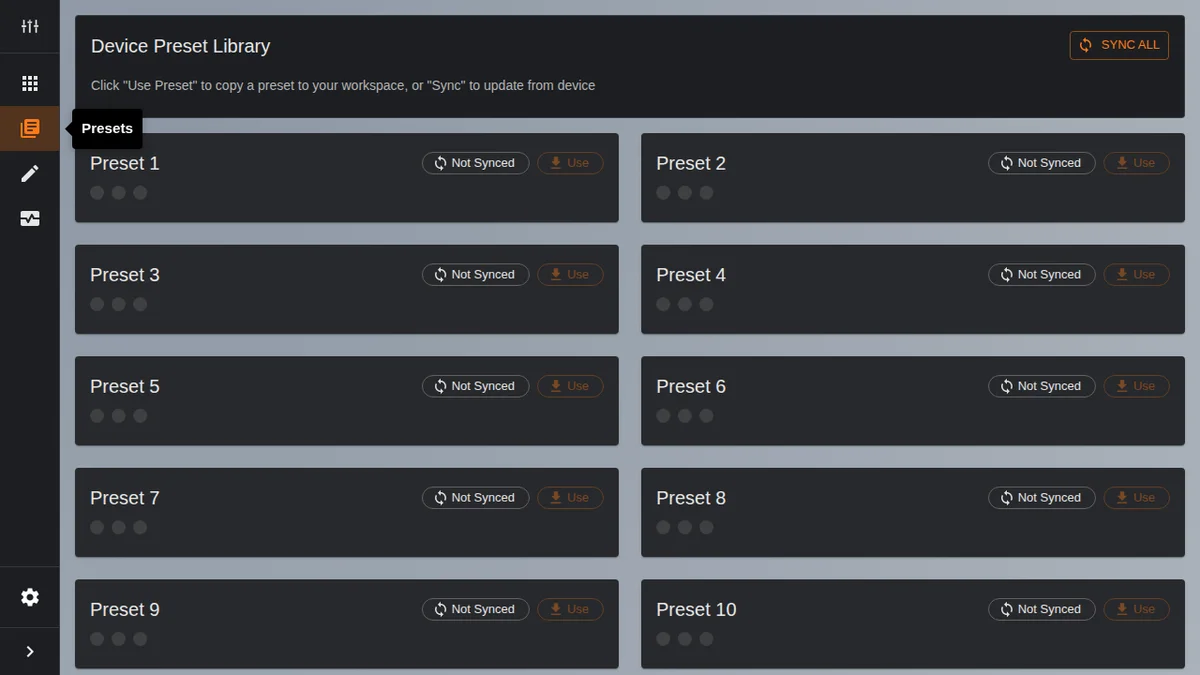
The Store Preset and Sync functions that lived inside the old editor’s action panel now have their own dedicated page.
The screen shows the Device Preset Library with 10 preset slots (Preset 1 through Preset 10) displayed as cards. Each card offers these actions:
- Sync: Loads the preset from that slot on the device
- Use: Copies the loaded preset into the editor’s workspace
The Sync All button at the top of the page lets you load all presets from the device at once.
The old editor’s Load Preset (from file) and Save Preset (to file) have moved to the Load and Save buttons in the Editor page toolbar. In other words, “file I/O with your PC” happens on the Editor page, while “managing presets on the device” happens on the Presets page — a clean separation of concerns.
MIDI Monitor
MIDI Monitor is a brand-new feature in the new editor. It’s a tool for monitoring MIDI messages in real time.
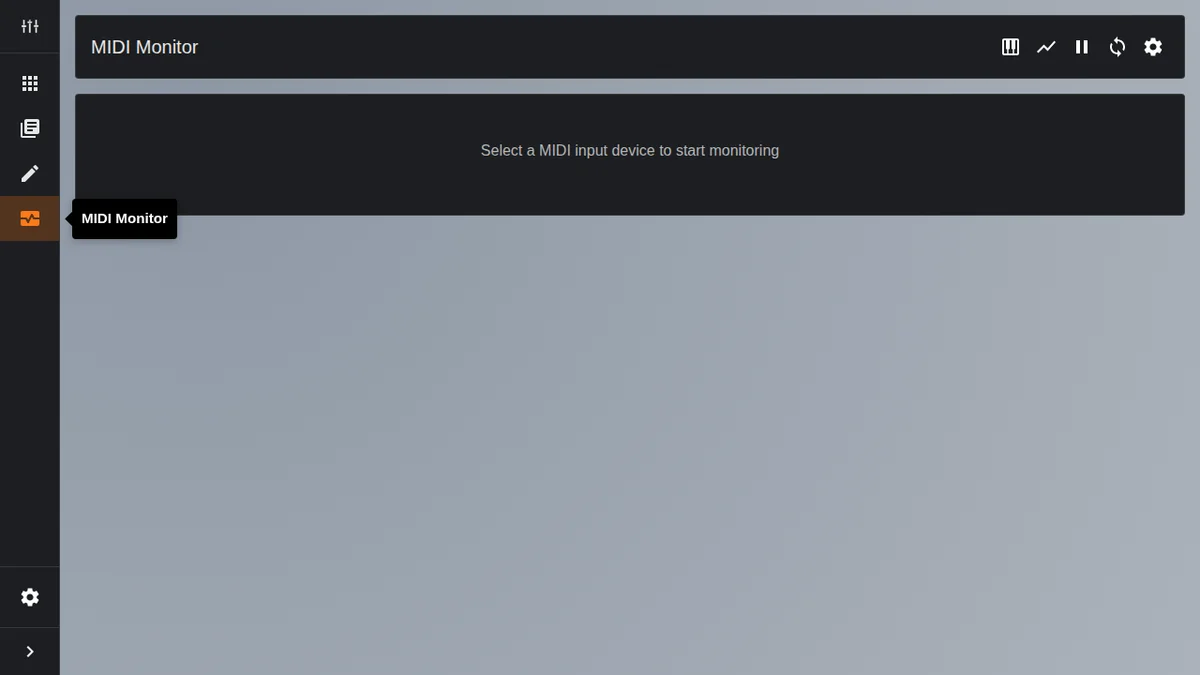
The toolbar at the top of the screen includes the following controls:
- MIDI Inputs: Select the MIDI input device to monitor
- Graph toggle: Switch between table and graph views
- Pause: Pause monitoring
- Clear all data: Clear recorded data
- Settings: Monitor display settings
Once you select a MIDI input device, incoming MIDI messages are displayed in real time. This is useful for verifying the output when you turn a knob on the N32B Slim, or for checking signals from connected external MIDI gear.
The old editor didn’t have this feature, so you needed external tools (like a MIDI Monitor app or your DAW) to inspect MIDI messages. With the new editor, you can do it all without leaving the editor.
Settings
The Settings dialog, accessible from the gear icon at the bottom of the left sidebar, offers the following options:
- Enable logs: Toggle log output on/off. Used for debugging and troubleshooting
- Web App Firmware: Displays the editor version (currently v3.4.1)
Practical Tips
Here are some tips for getting the most out of the new editor:
- Try demo mode first: Before connecting your actual device, familiarize yourself with the editor using a demo device. It supports all three models — N32B, N32B V3, and N32B SLIM — so you can pick the one that matches your hardware
- Take advantage of macros: The old editor’s Macro Control Change mode was limited to 2 CCs per knob, but the new editor supports up to 4 macros per knob. This enables more complex MIDI routing
- Speed things up with copy & paste: When applying the same settings to multiple knobs, configure one and then use Copy → Paste Knob to duplicate it. Use Paste Special to selectively paste only certain settings
- Use Pick Up Mode: If you’re bothered by value jumps after switching presets, enabling Pick Up Mode keeps things safe
- Verify with MIDI Monitor: You can check whether your settings are working as intended in real time on the MIDI Monitor page. No external tools needed — it’s all built into the editor
Takazudo’s Take
When I first looked at the web editor, I thought “Hmm, where’s Pick Up Mode?” — but after a while, I realized I had accidentally selected the old N32B (not the Slim). In other words, features like this come not just from version upgrades but are also enabled through software implementation. It really drives that point home.
When you use MIDI controllers like this, switching presets can cause values to jump unexpectedly. Say you’ve assigned a knob to track 1’s volume on preset 1, and on preset 2 the same knob is assigned to track 2’s volume.
If you had the knob turned all the way up while using preset 1, then as soon as you move it even slightly on preset 2, it immediately jumps to maximum volume (because physically the knob is still at max)… it’s a tricky situation. Pick Up Mode is what solves this, and it makes the N32B Slim a much more pleasant MIDI controller to use. You can really feel the thought that went into designing it for a stress-free experience…!
That’s it for EP.2. We’ve covered the overall layout of the new web editor and what’s changed from the old editor. In the next episode, we’ll dig into advanced macro configurations and real-world setup examples.