This is an introduction to Takazudo’s DIY series product, zudo-block-40.
This is a 40HP Eurorack modular synthesizer case DIY kit designed by Takazudo. The motivation behind creating this case was wanting something compact that allows adjustable angles and depths. It features color variations, side panel shape options, and budget-selectable rails, allowing you to build a case in your preferred combination. It’s also a visually striking case.
This product is available for purchase below. There are multiple product variations, which are detailed later on this page.
This case assembly kit is also available in other sizes and material variations. Please check the full Takazudo Modular brand product lineup below.
- Product Photos
- Features of zudo-block-40
- Lineup
- Case Development Background
- Tiltable Design
- About Lite and Dual Rails
- Included Items
- Assembly Instructions
- Related Products
- About Power Supply
- Additional Product Photos
- Dimensions / Data
Product Photos

Features of zudo-block-40
The zudo-block-40 is a compact, easy-to-handle 40HP Eurorack modular synthesizer case DIY kit designed around acrylic board. The key features of this case are:
- Vibrant appearance
- Tiltable design
- Budget-selectable rails
- Expandable through combinations
Let’s go through each of these.
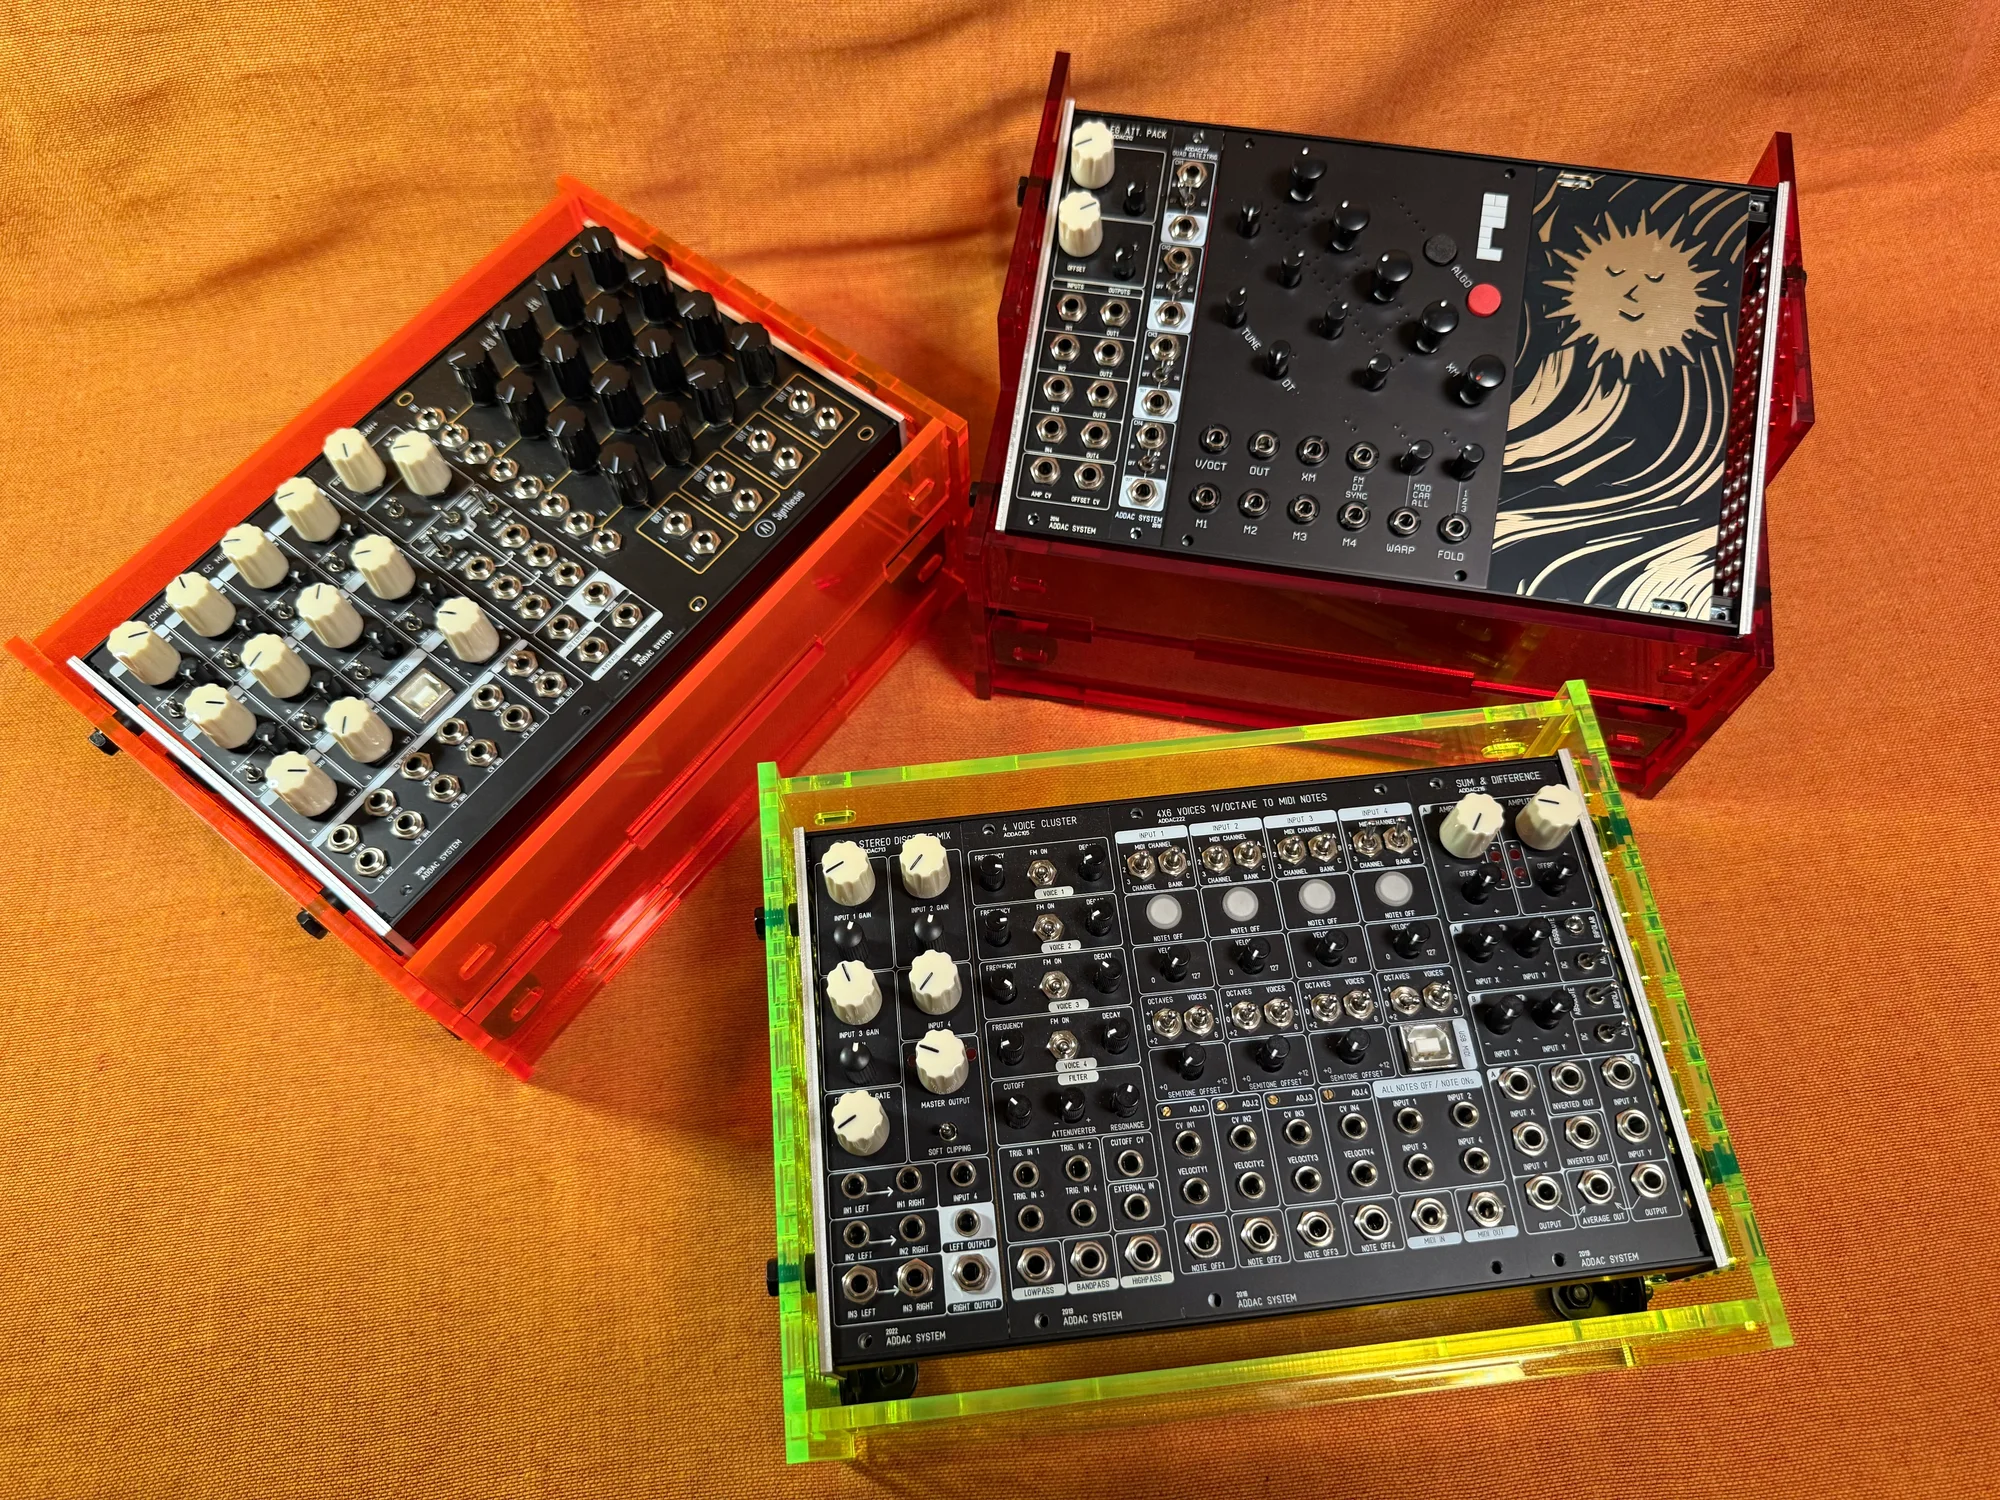
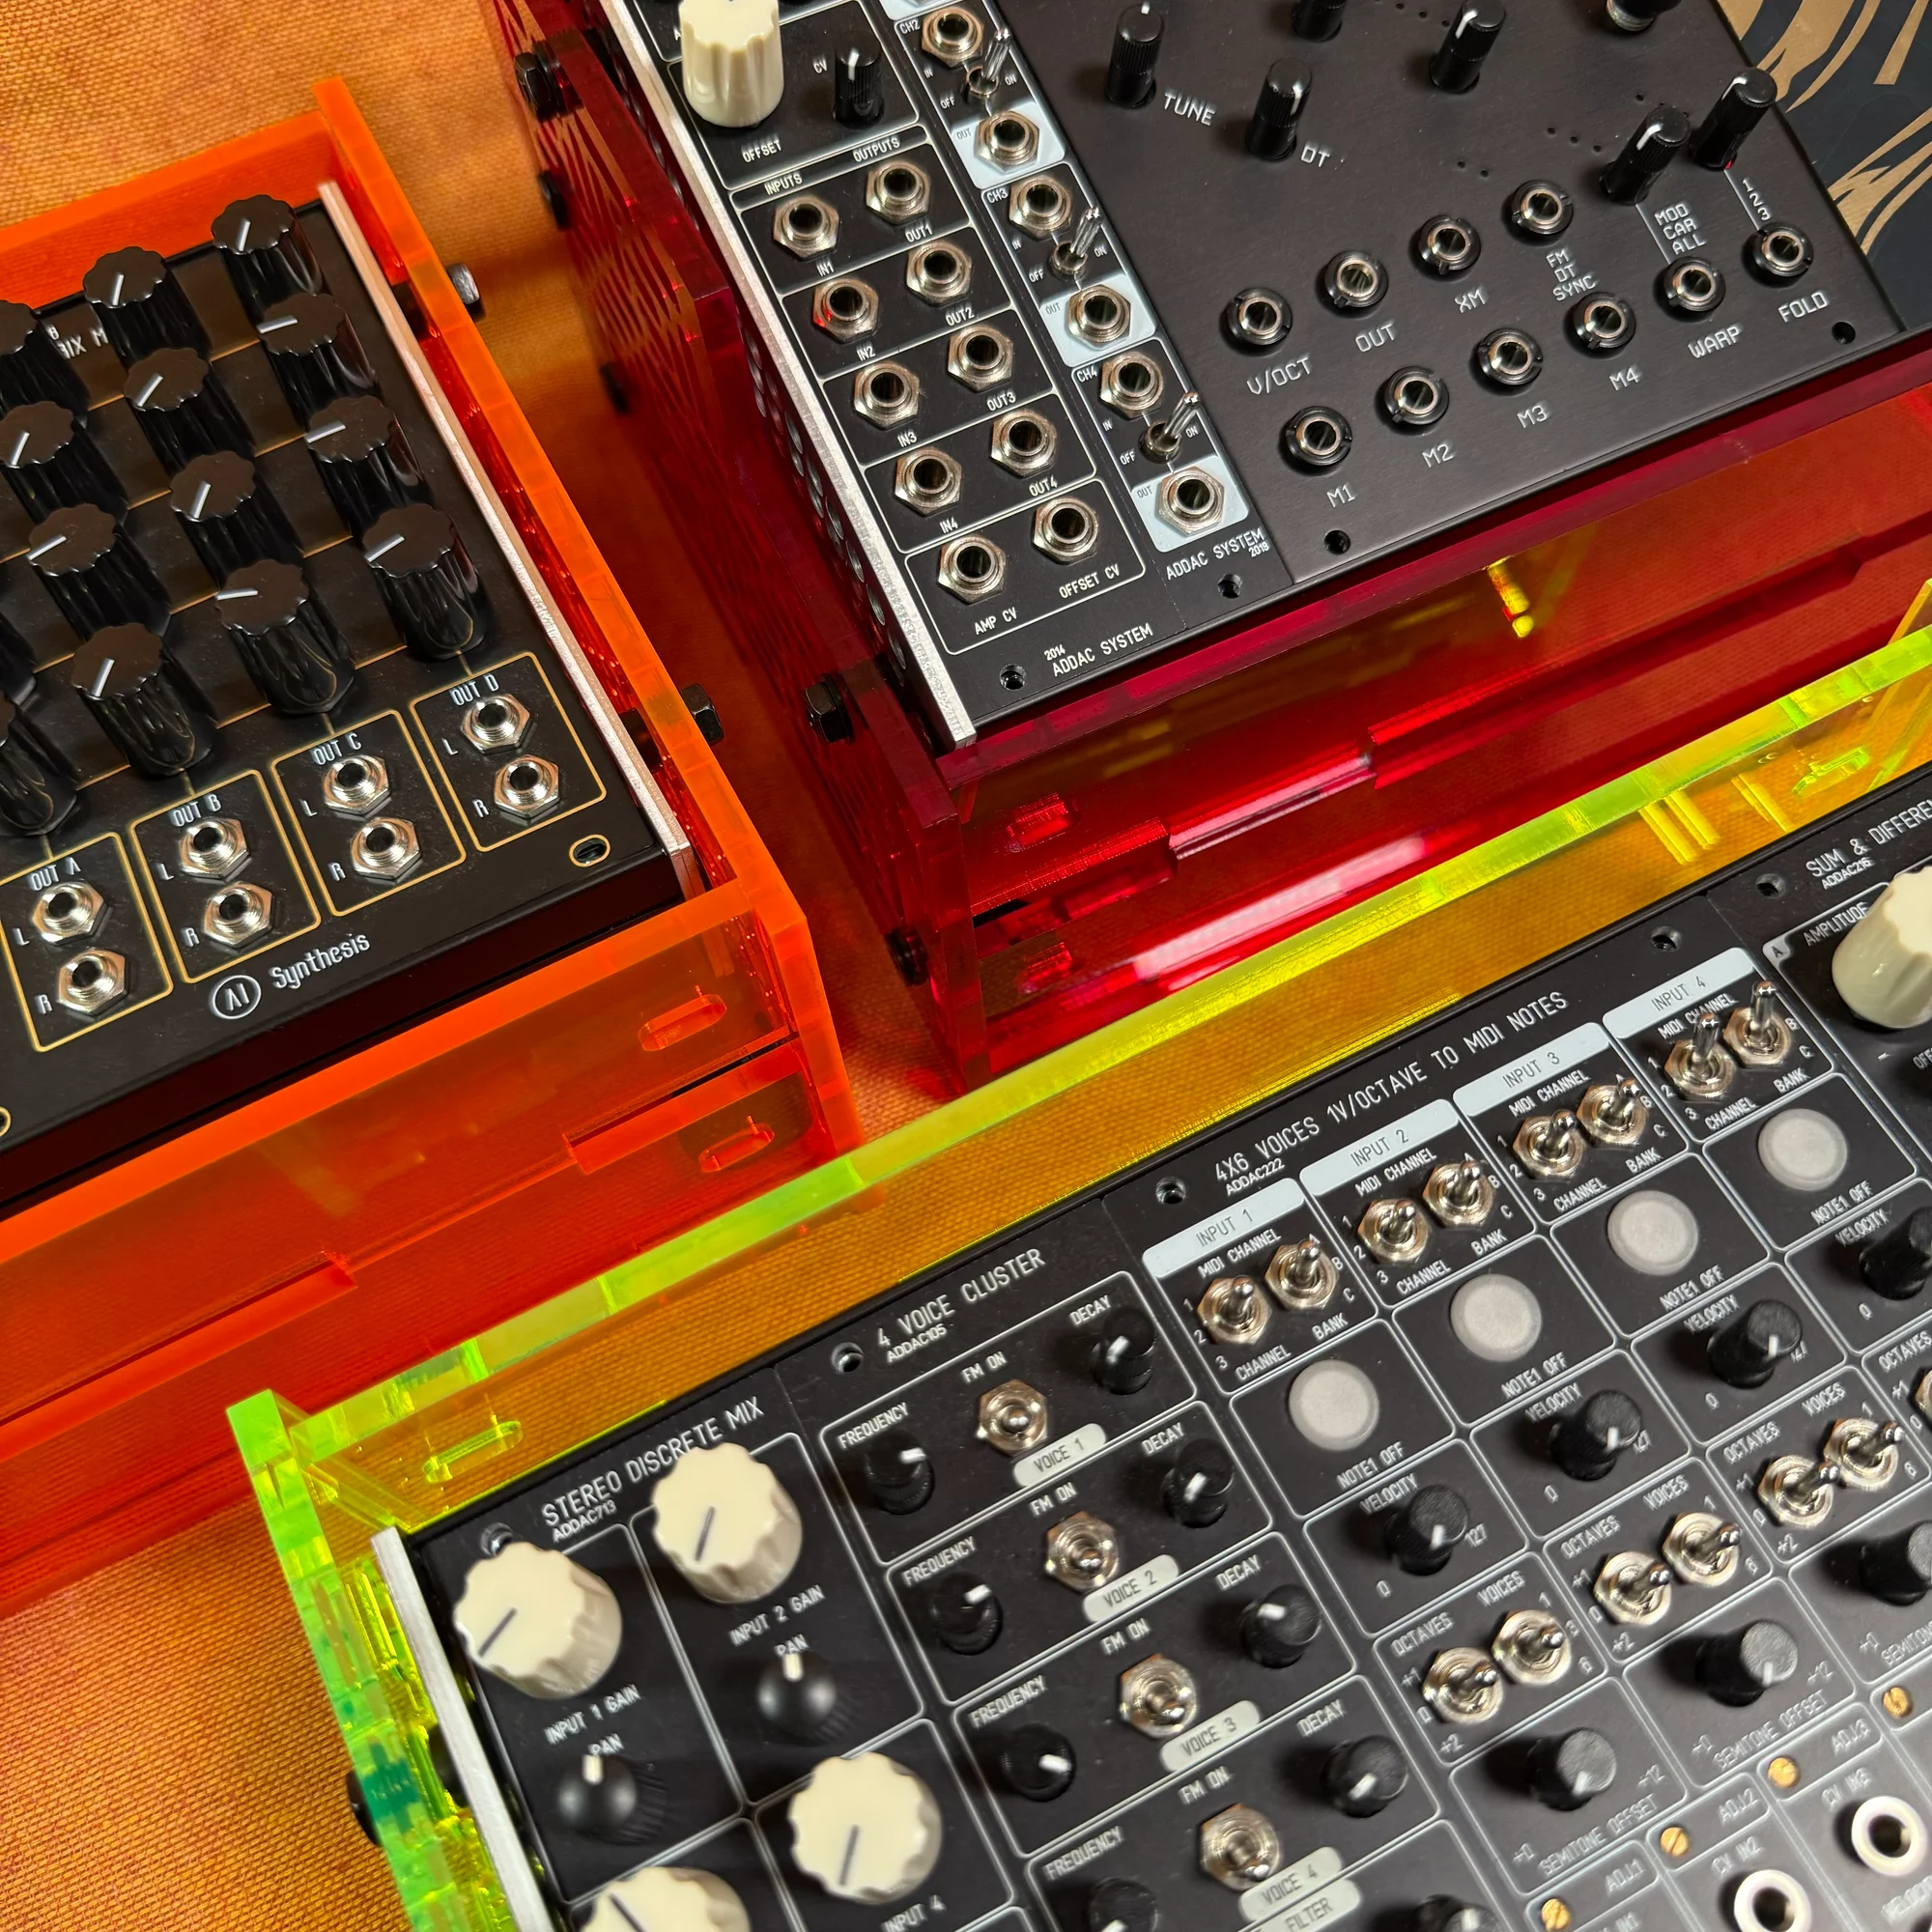
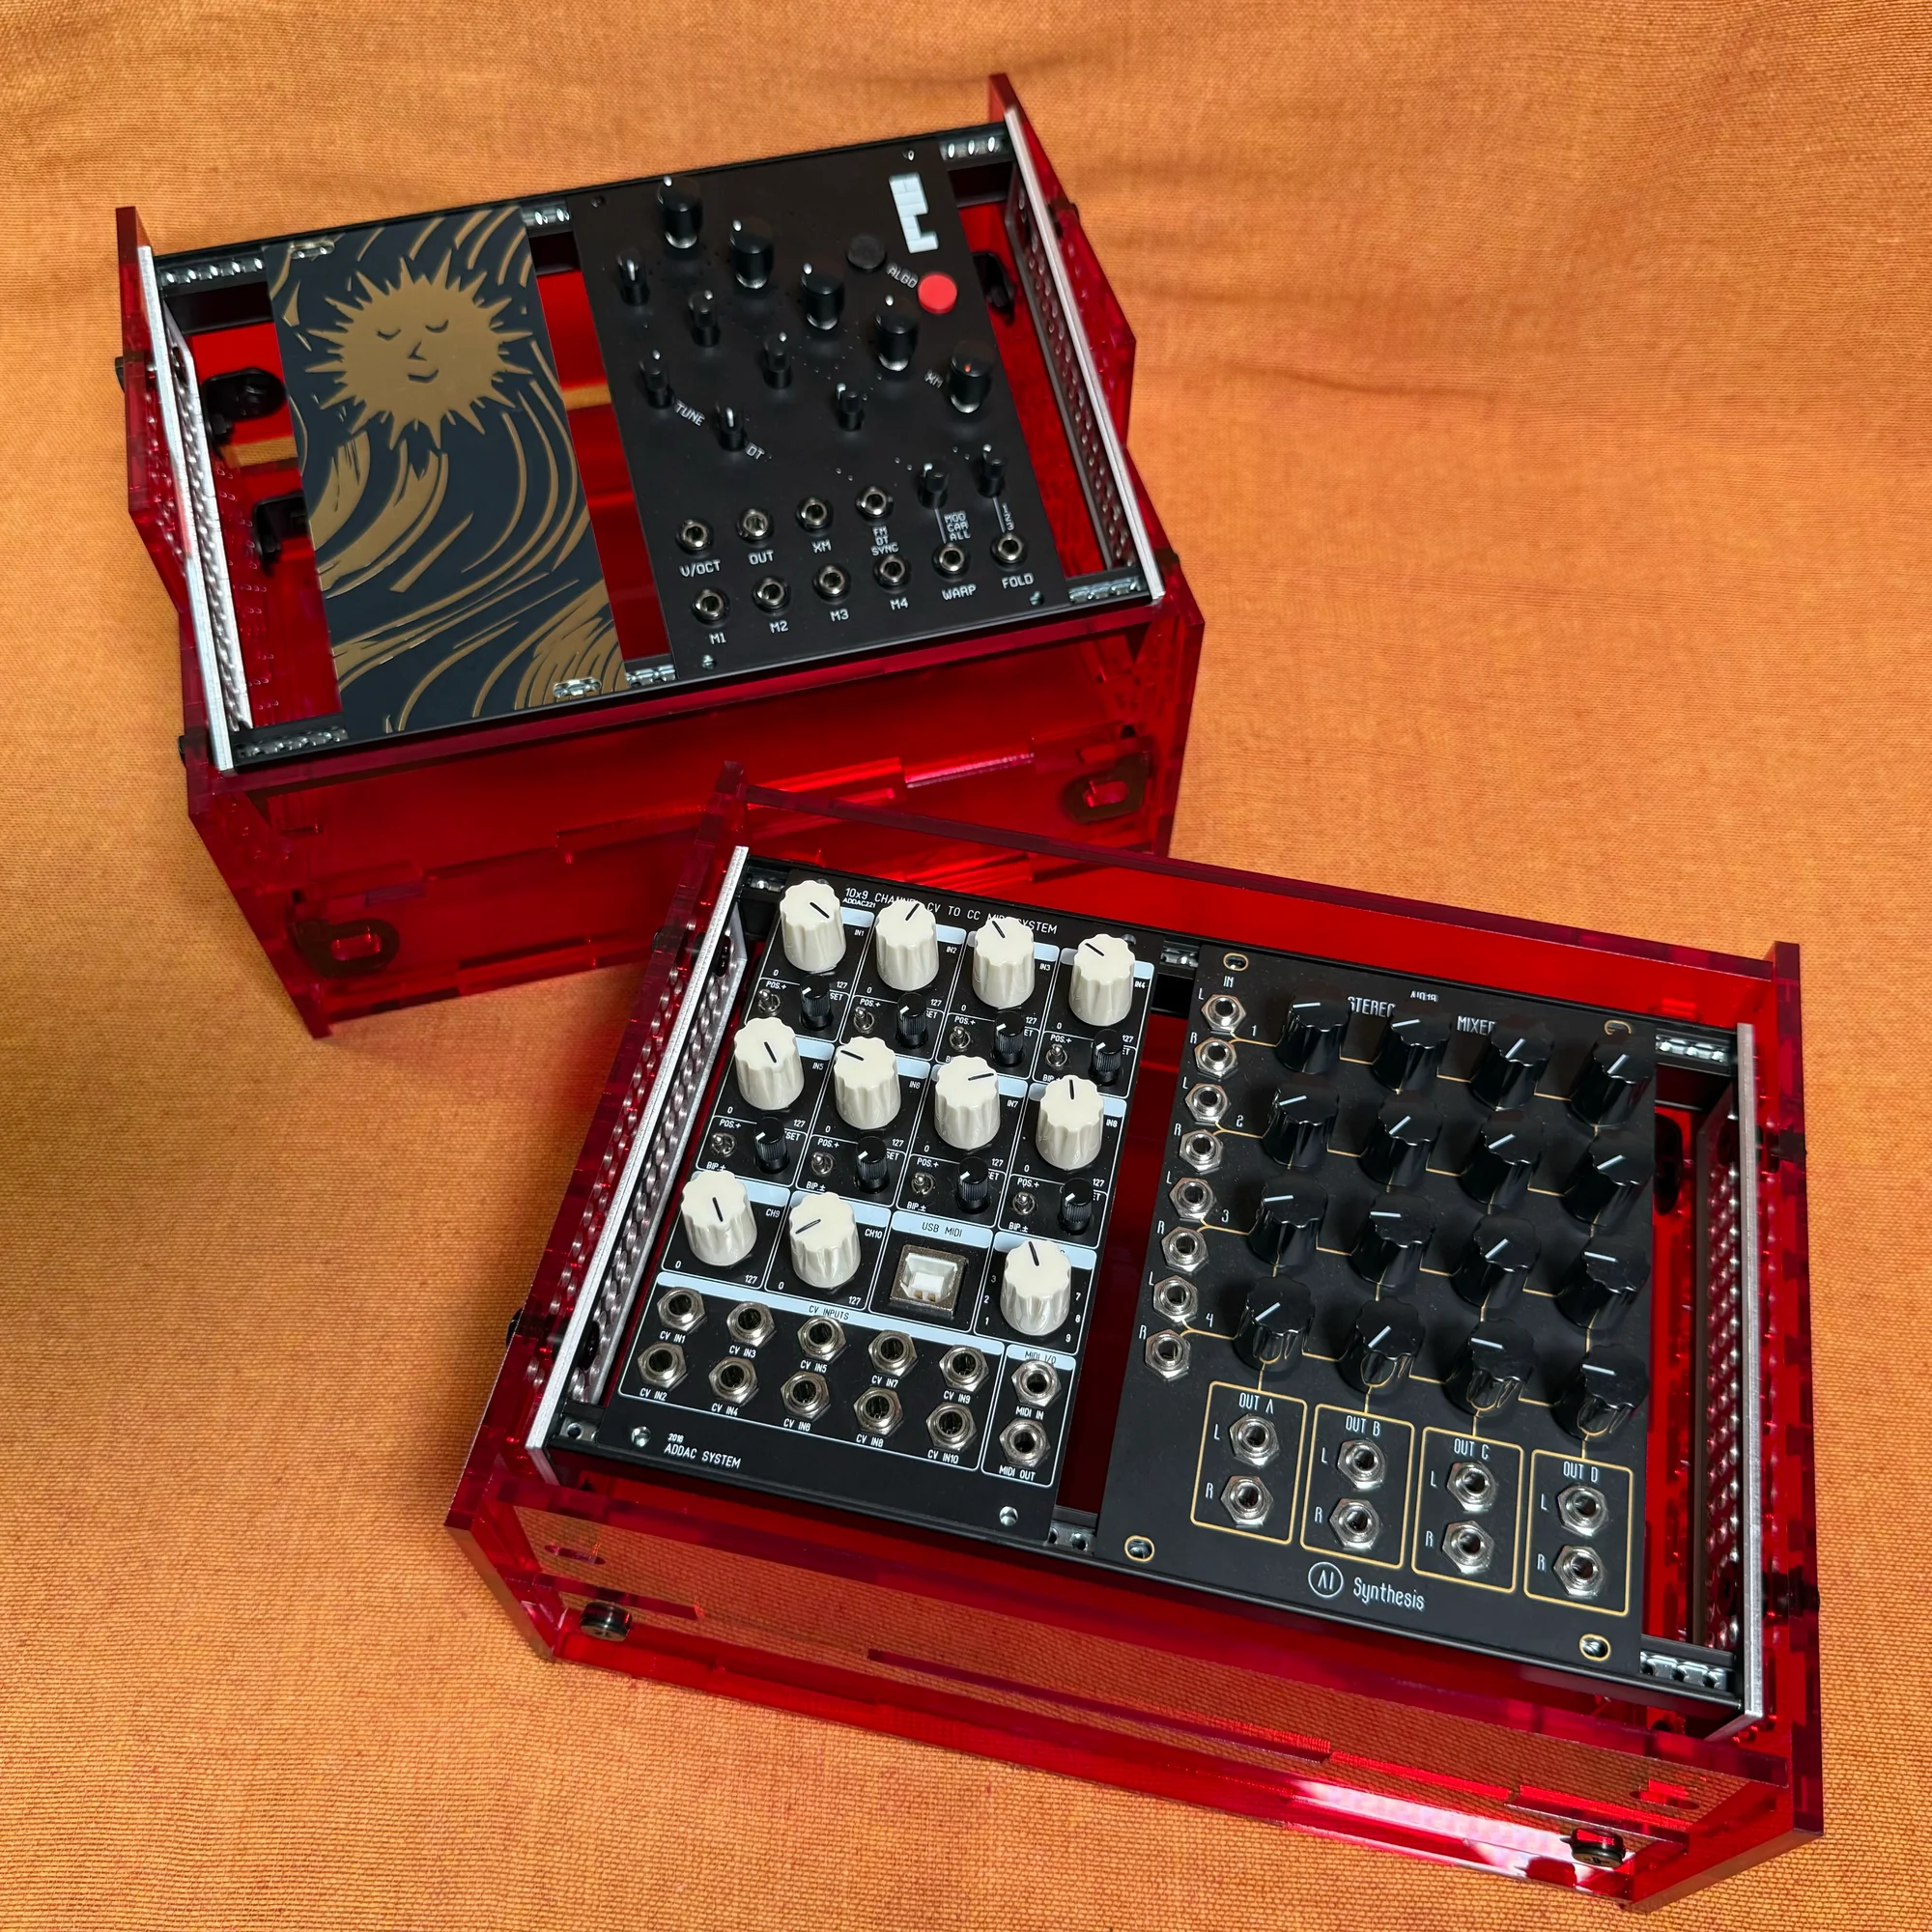
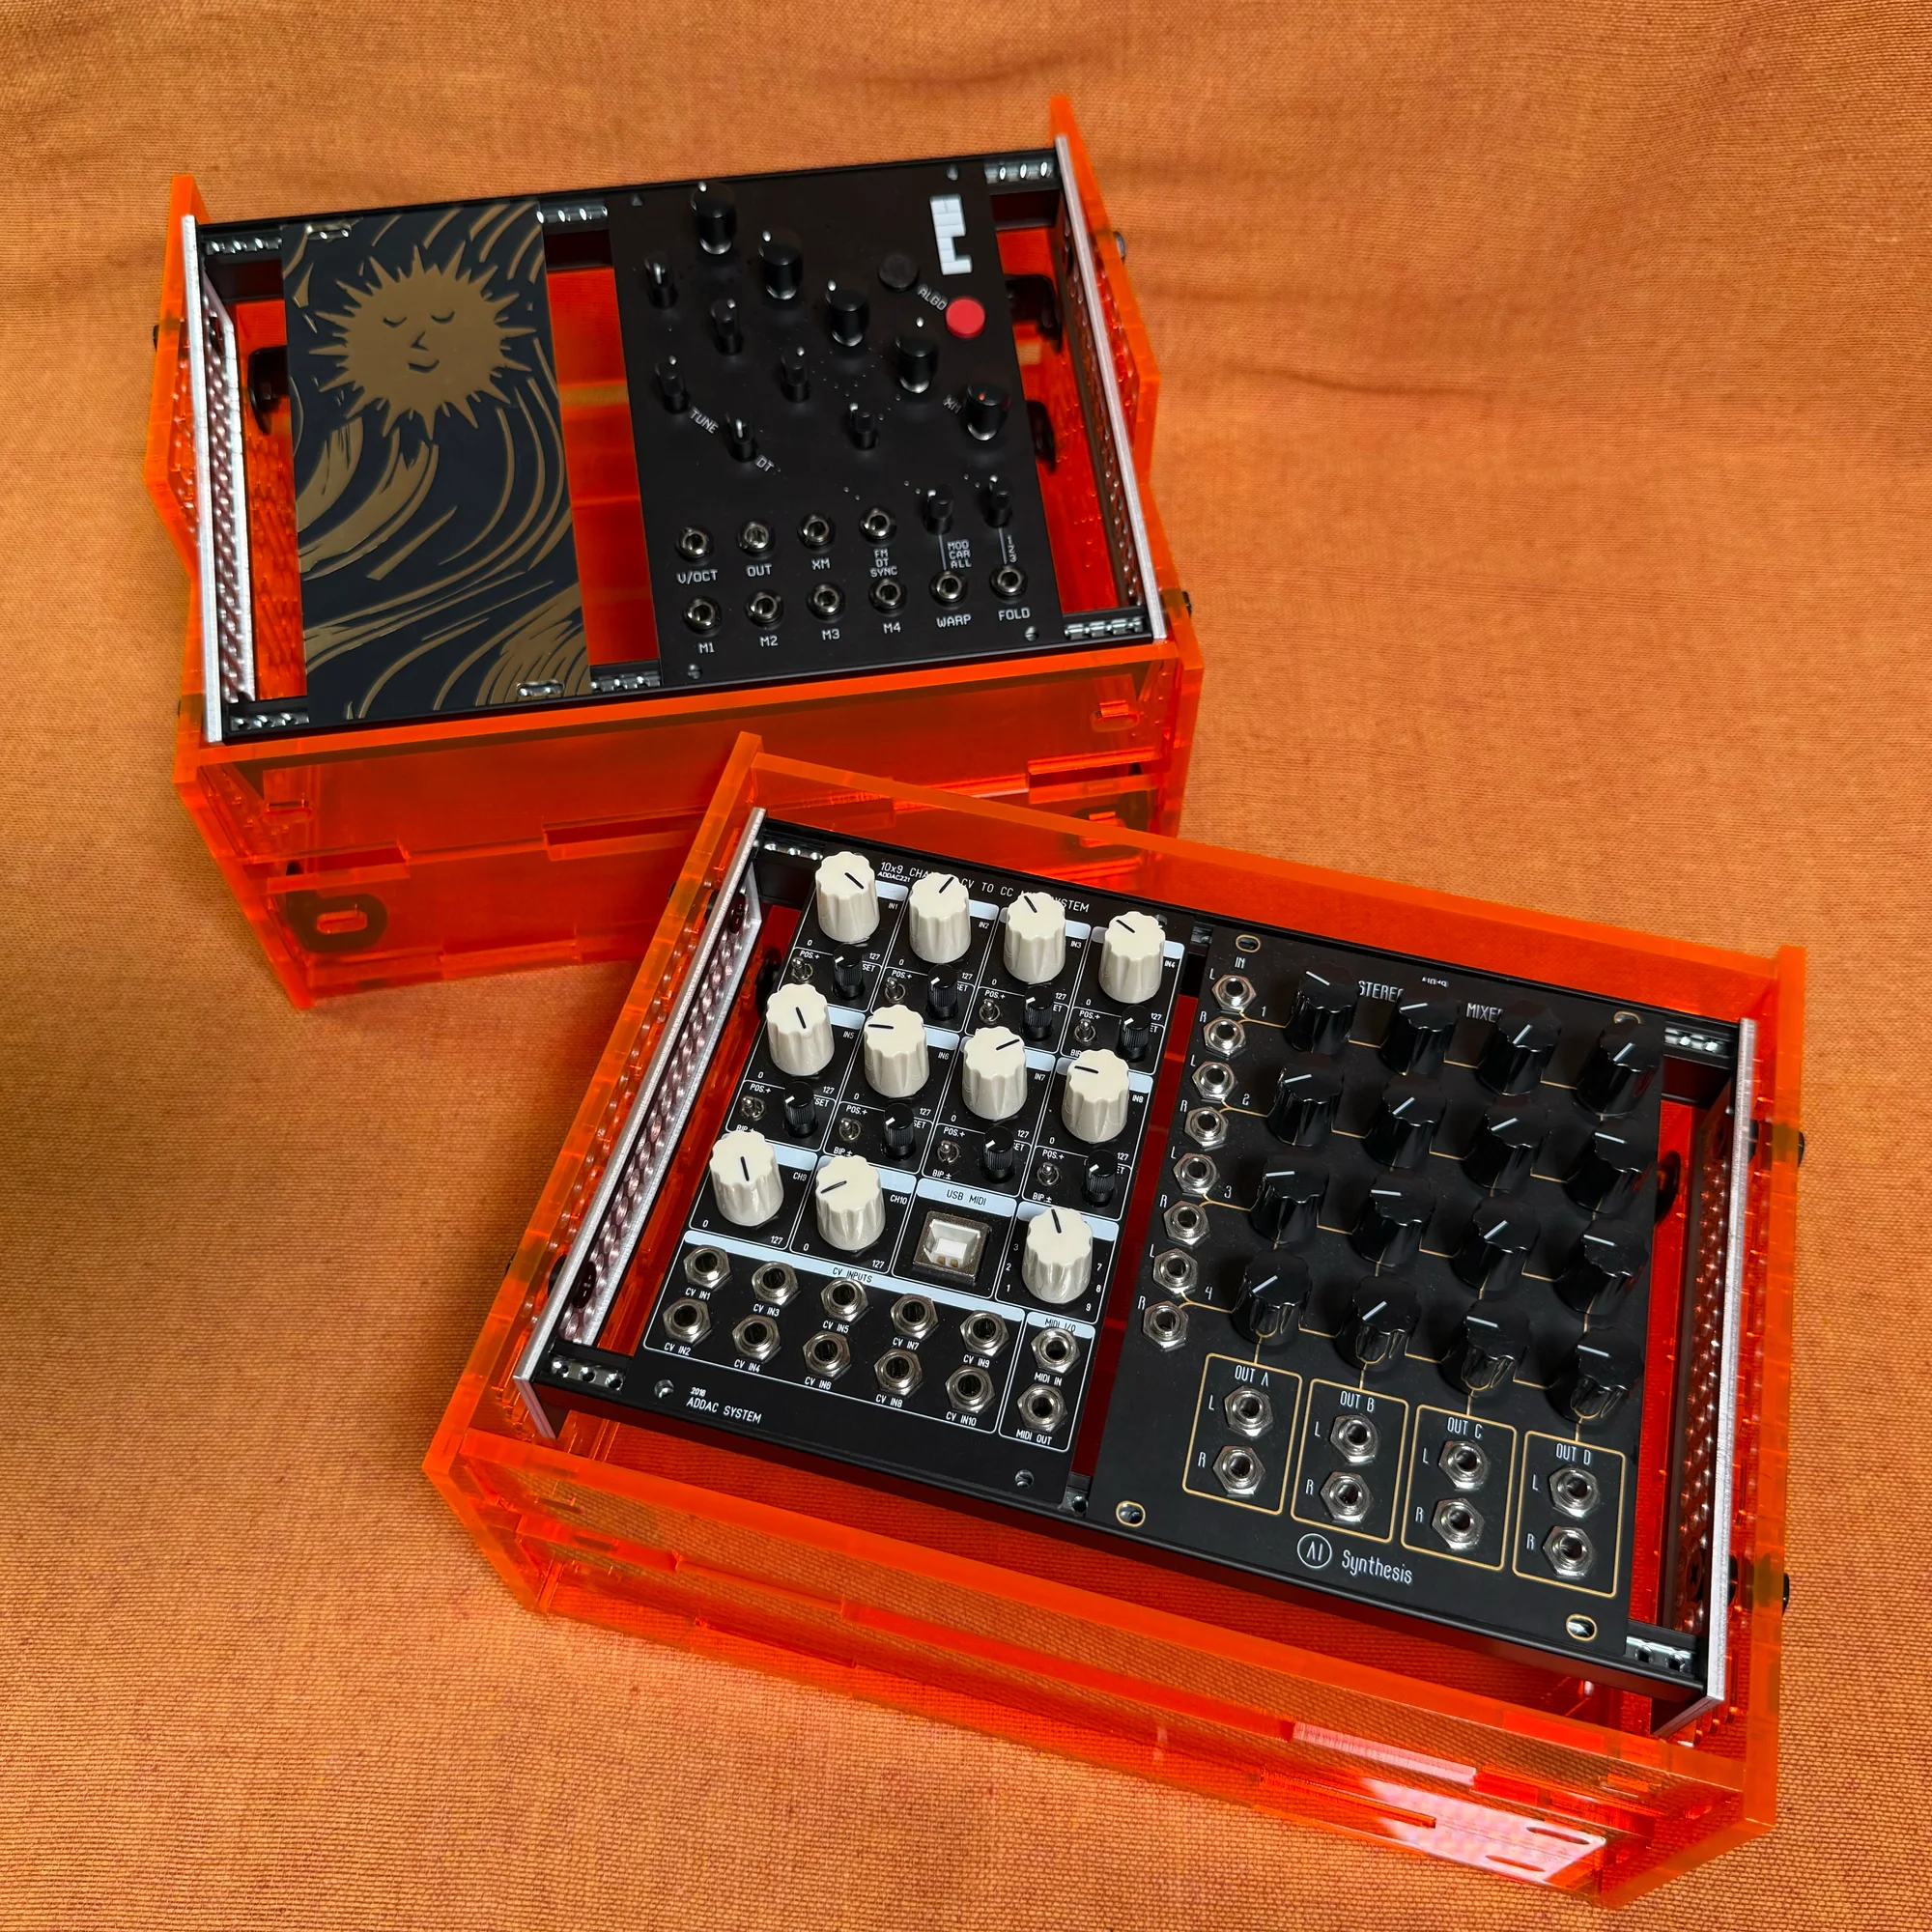
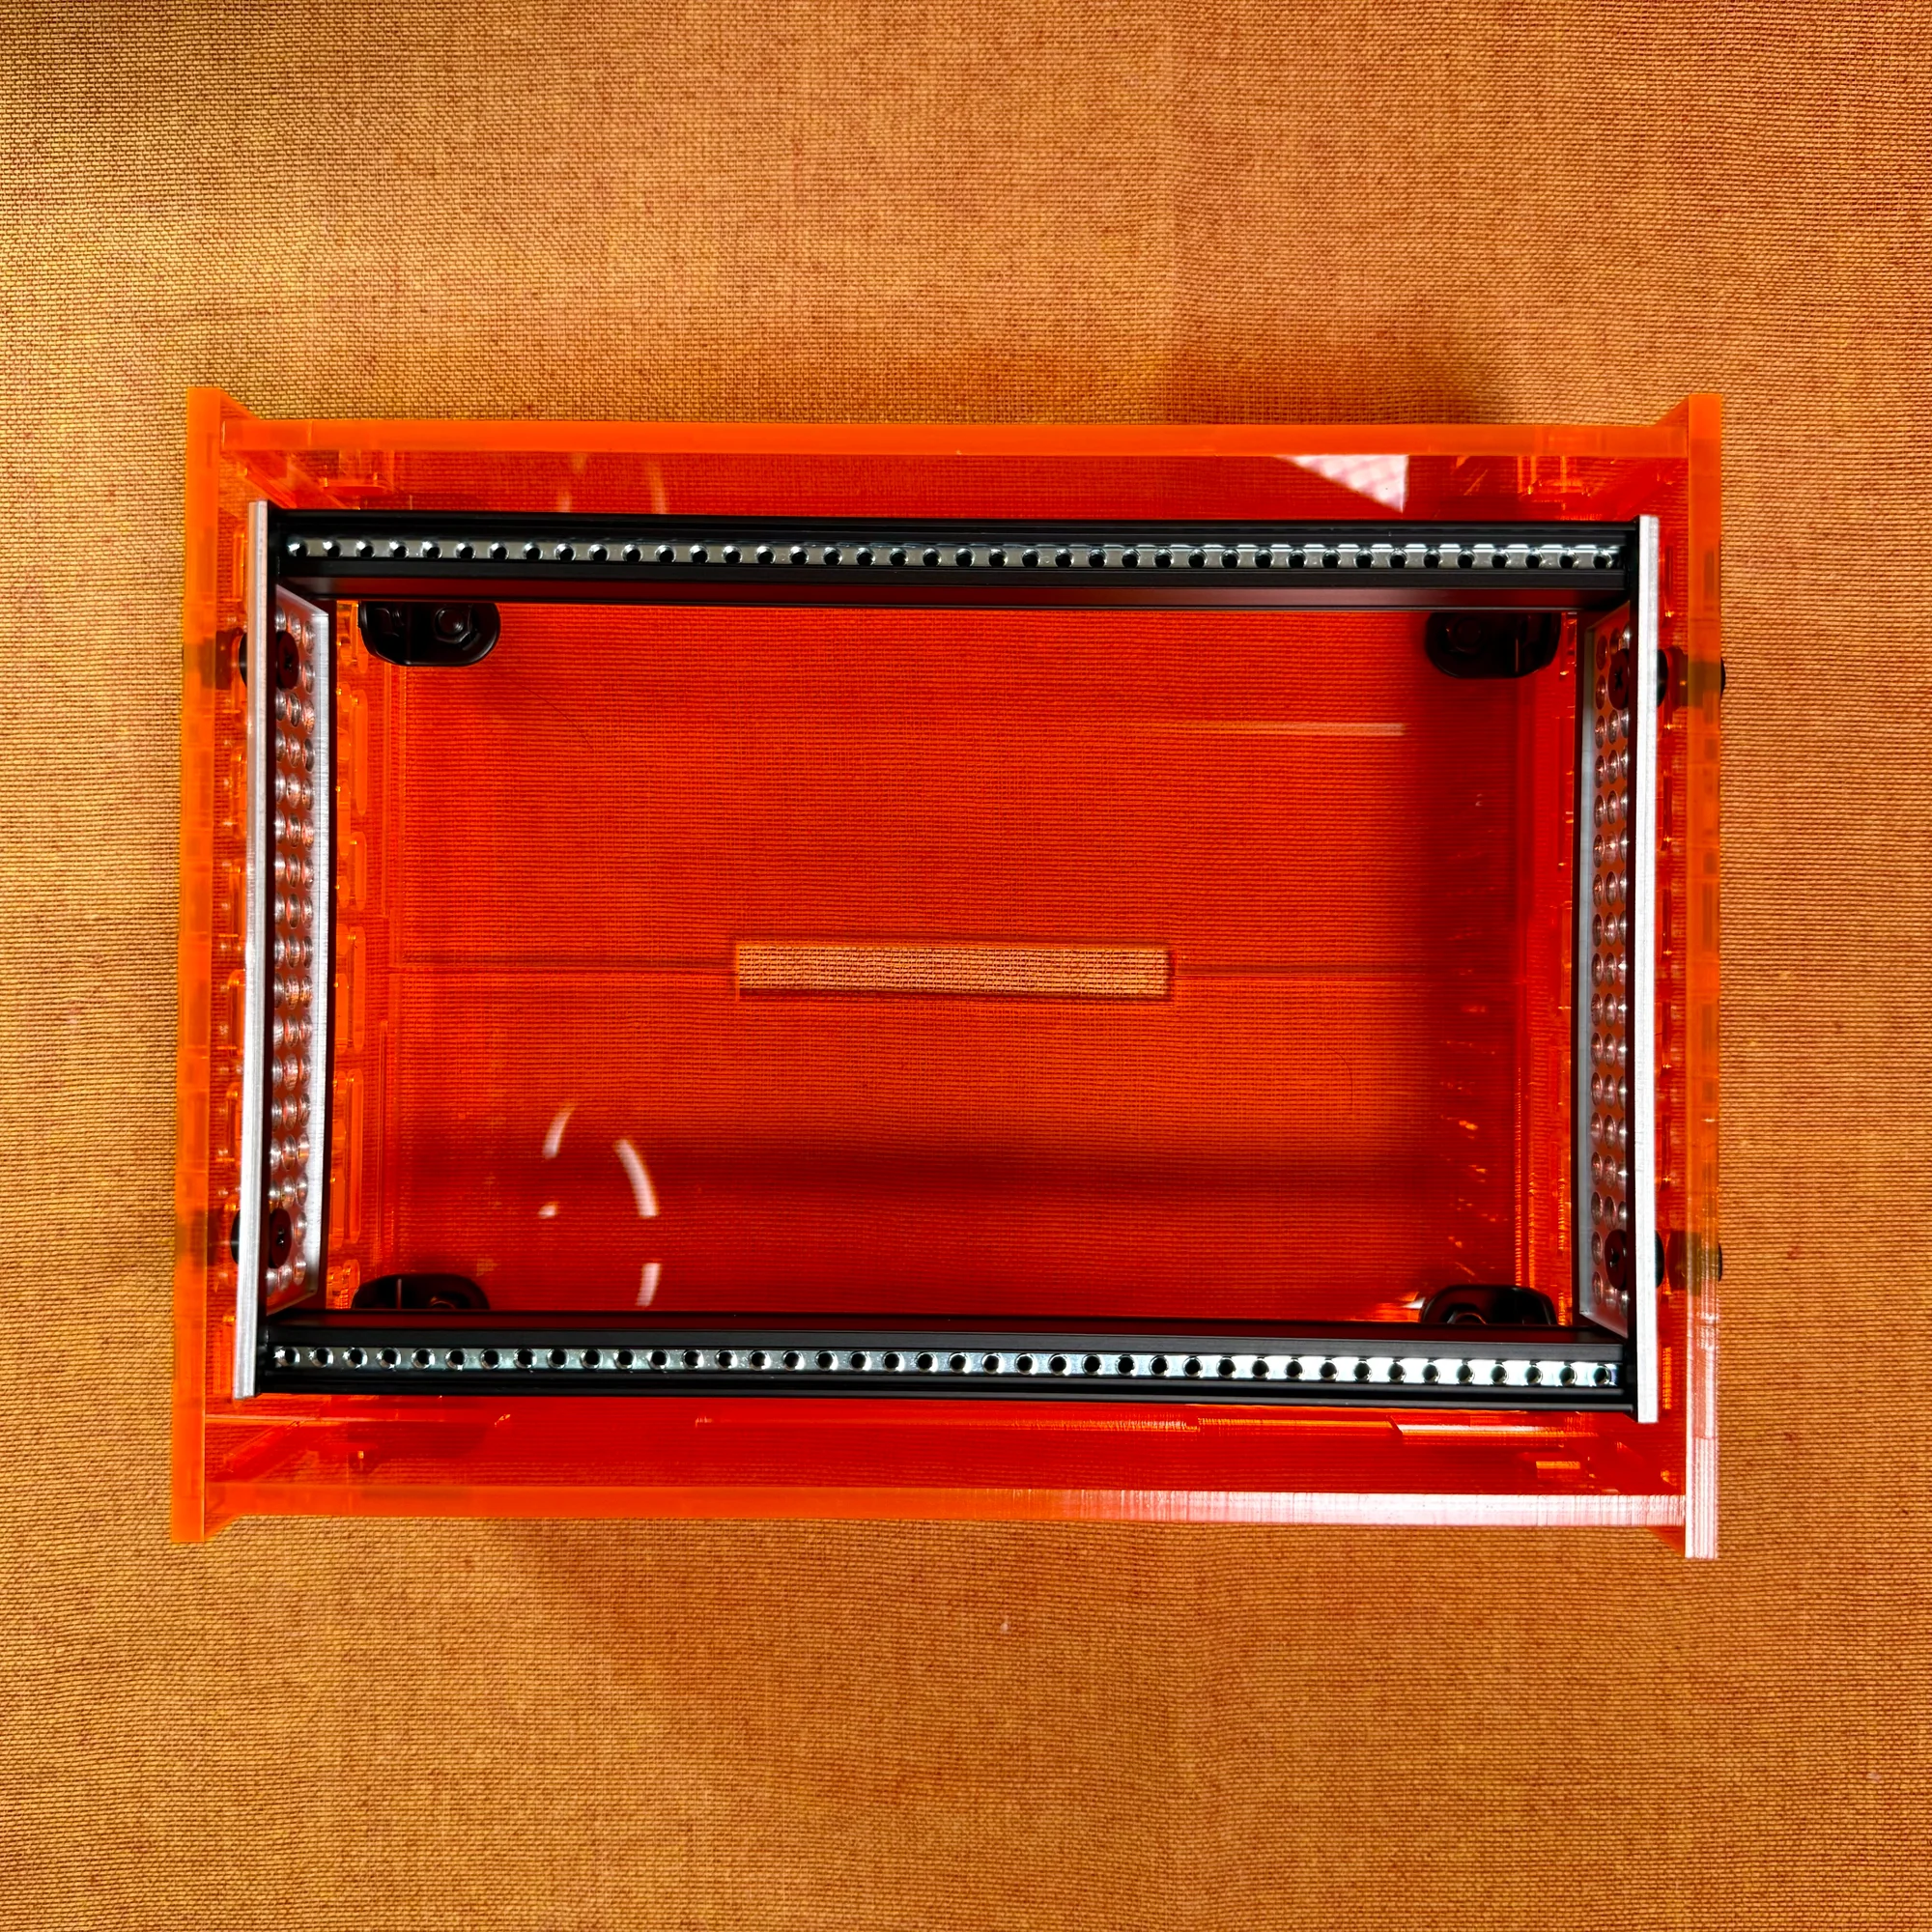
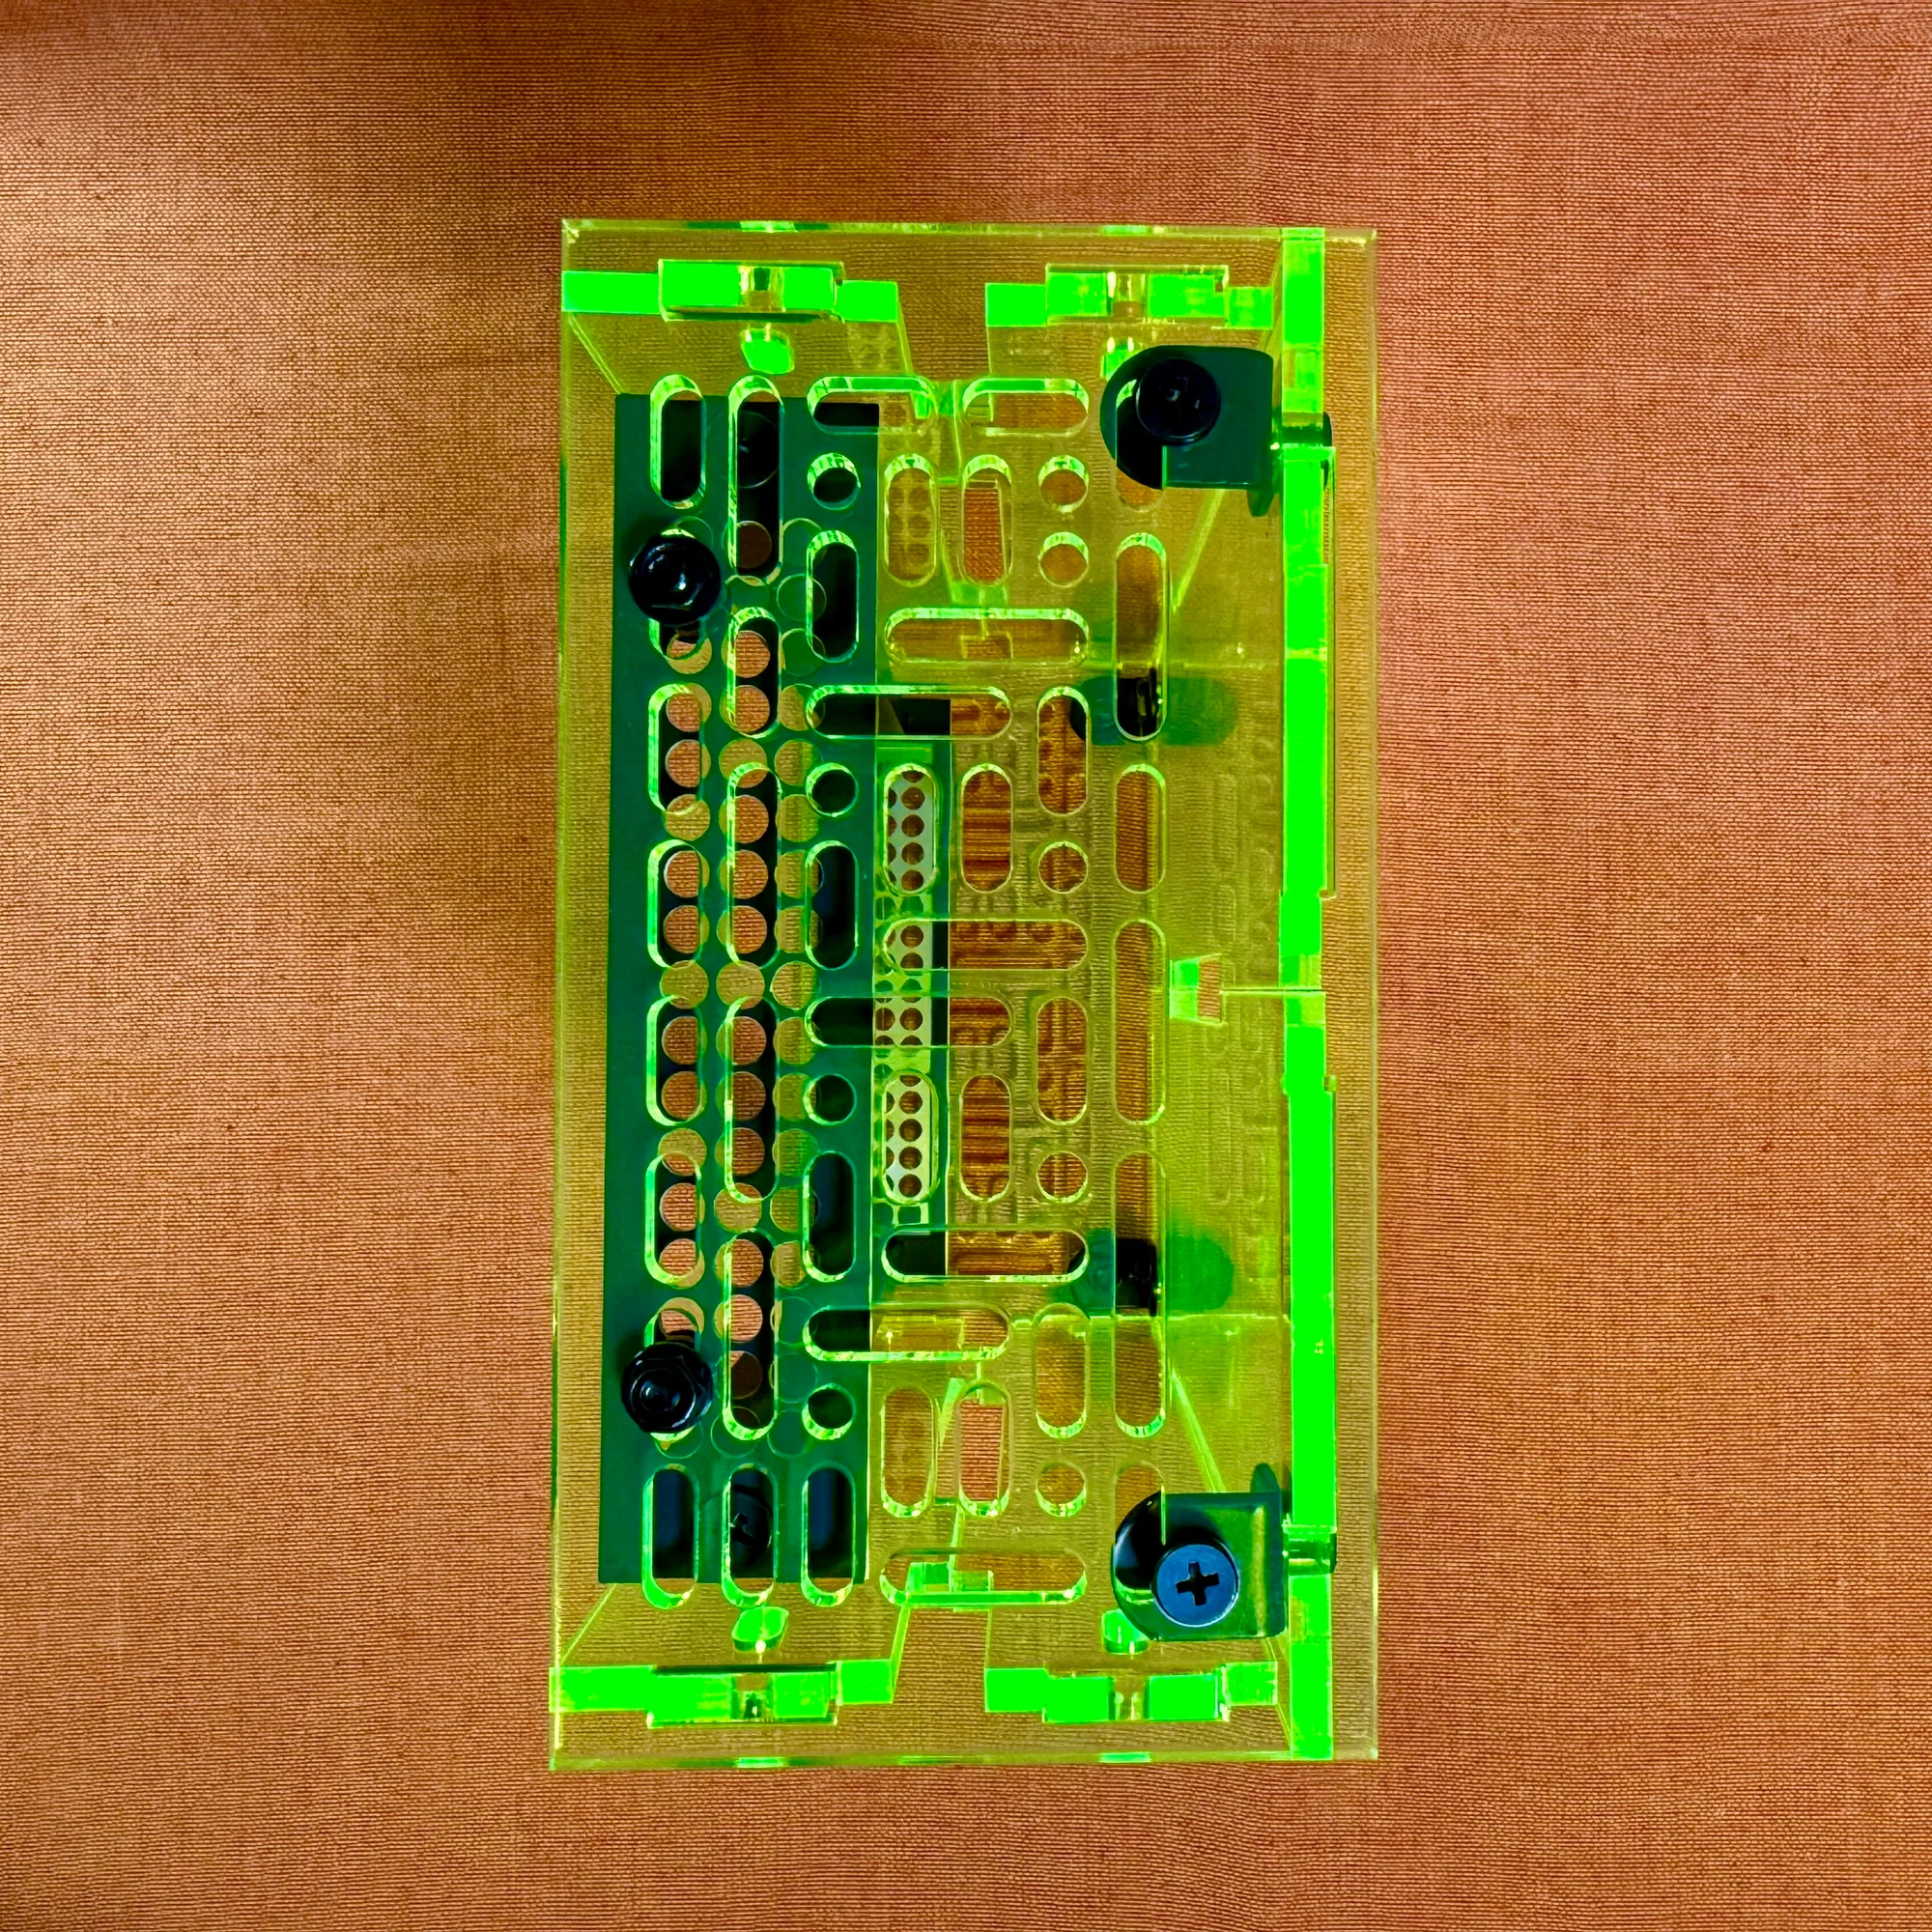
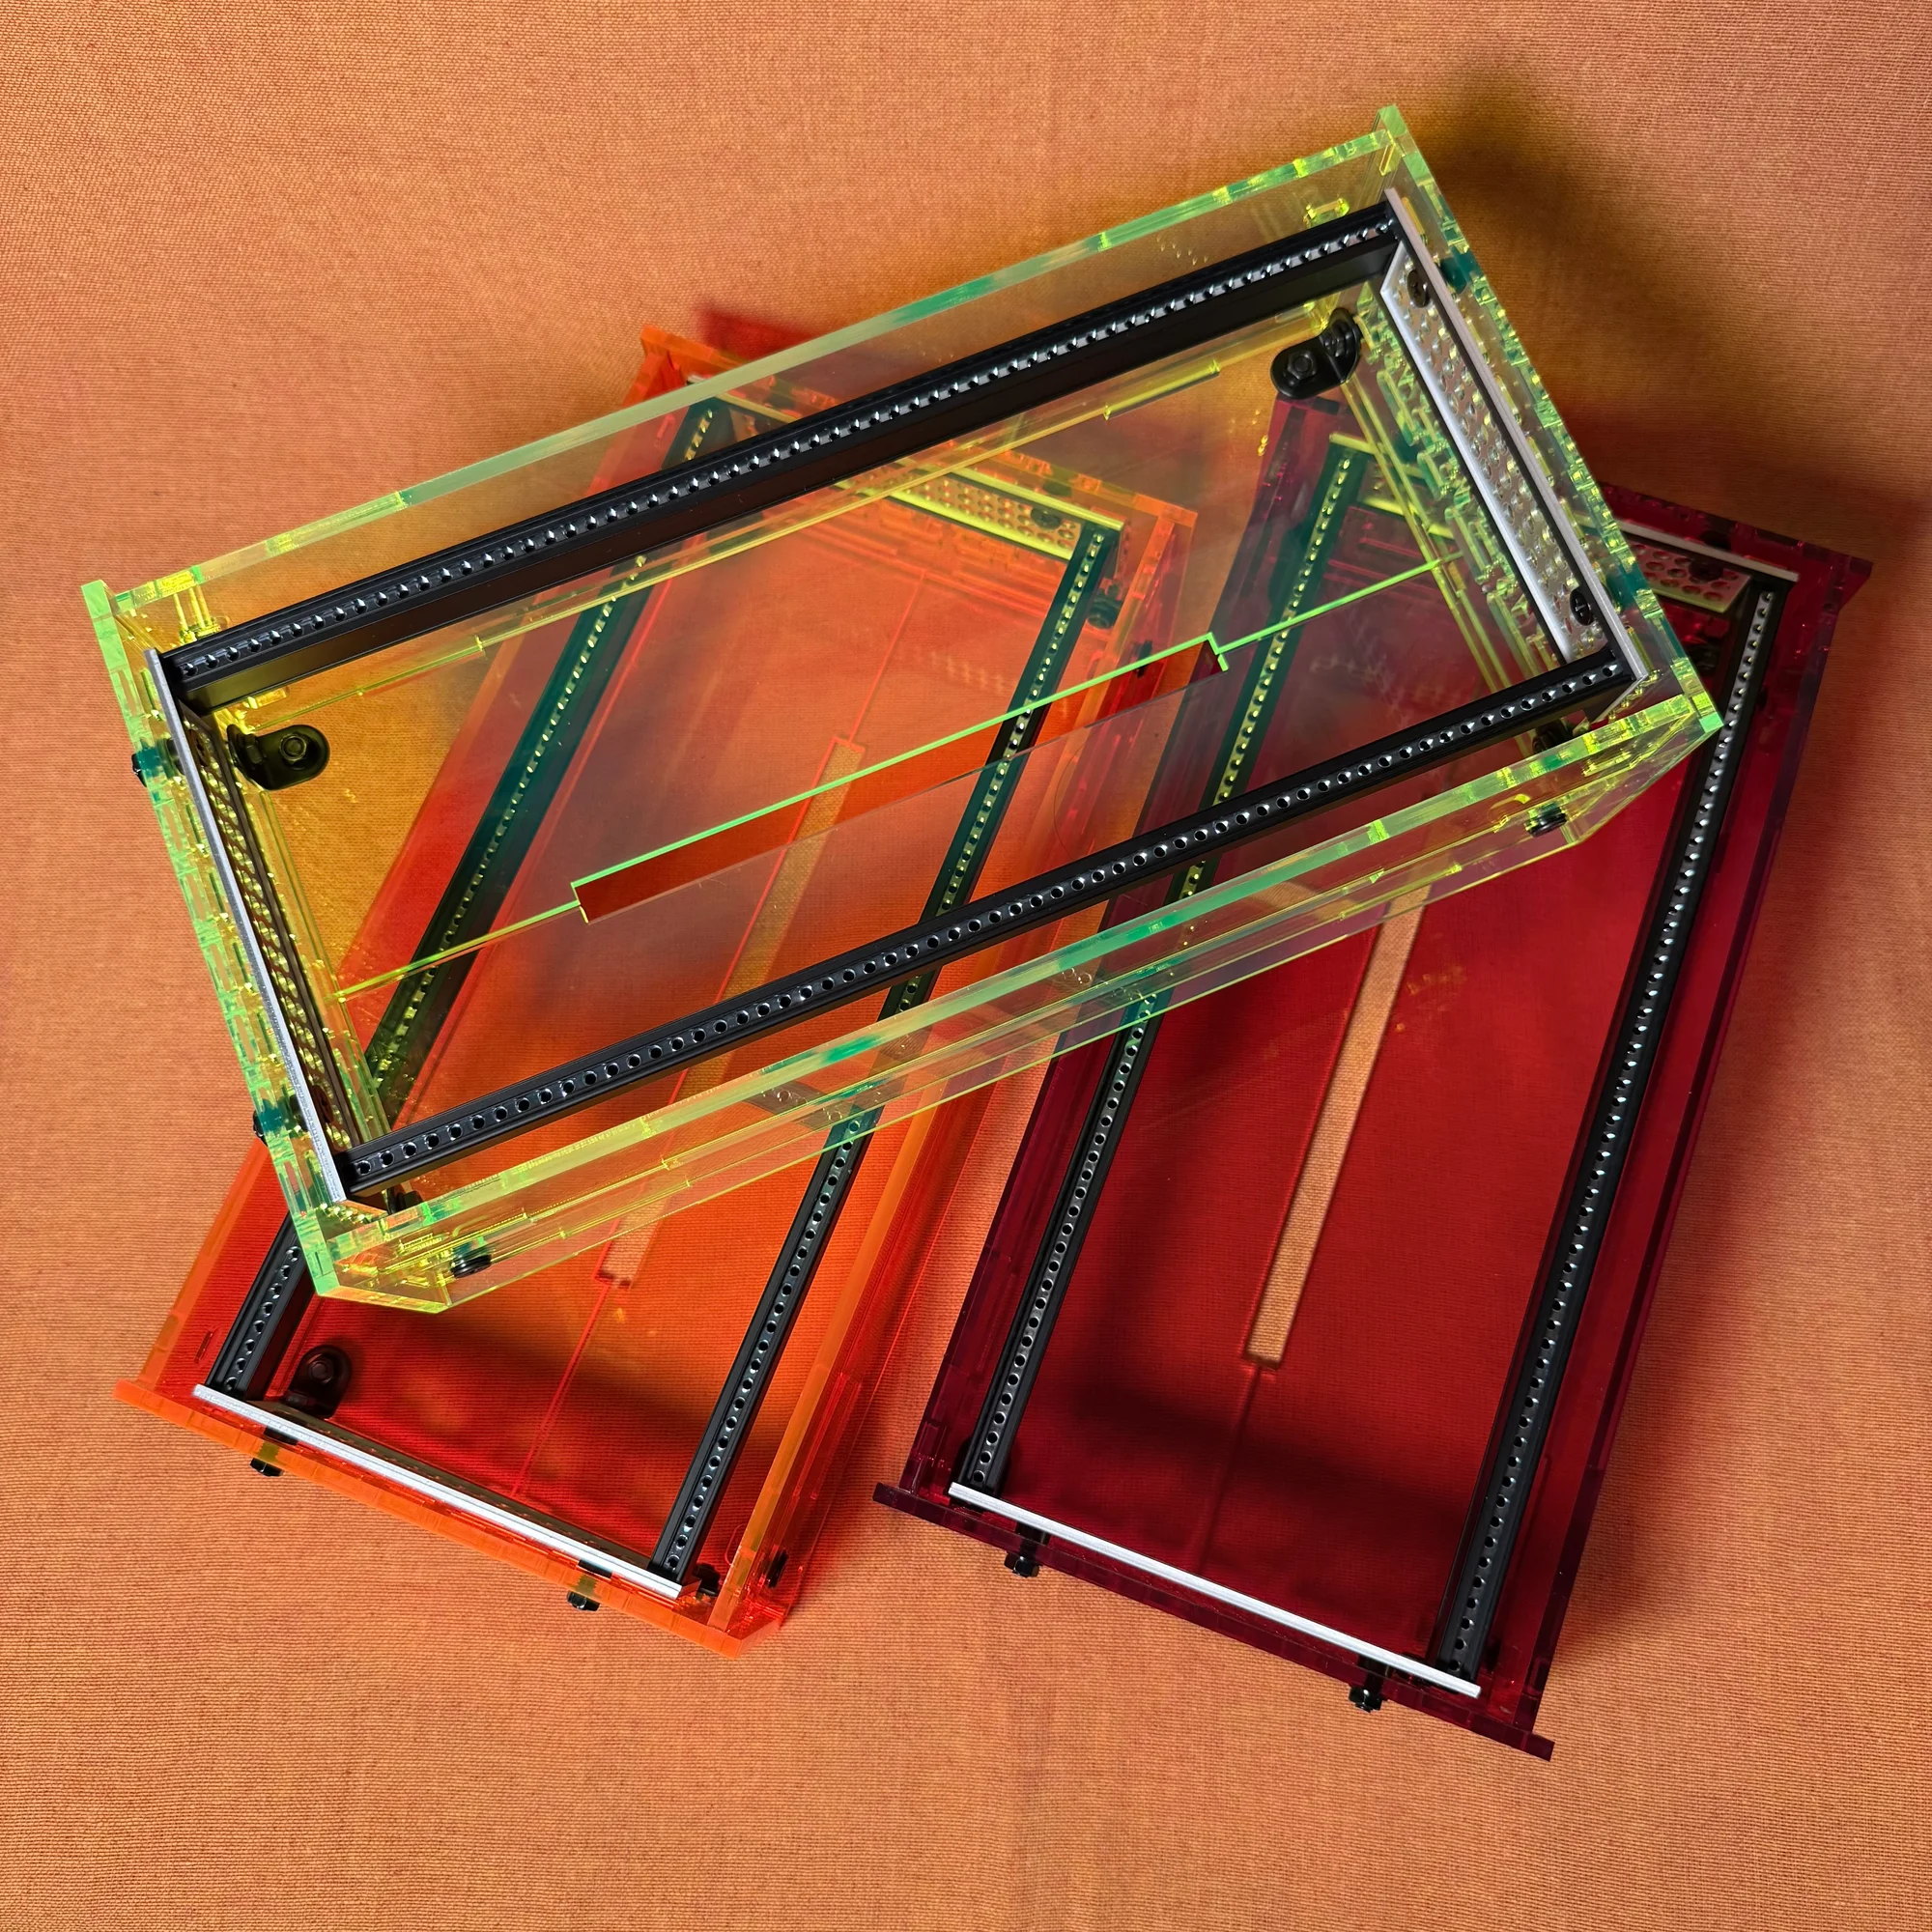
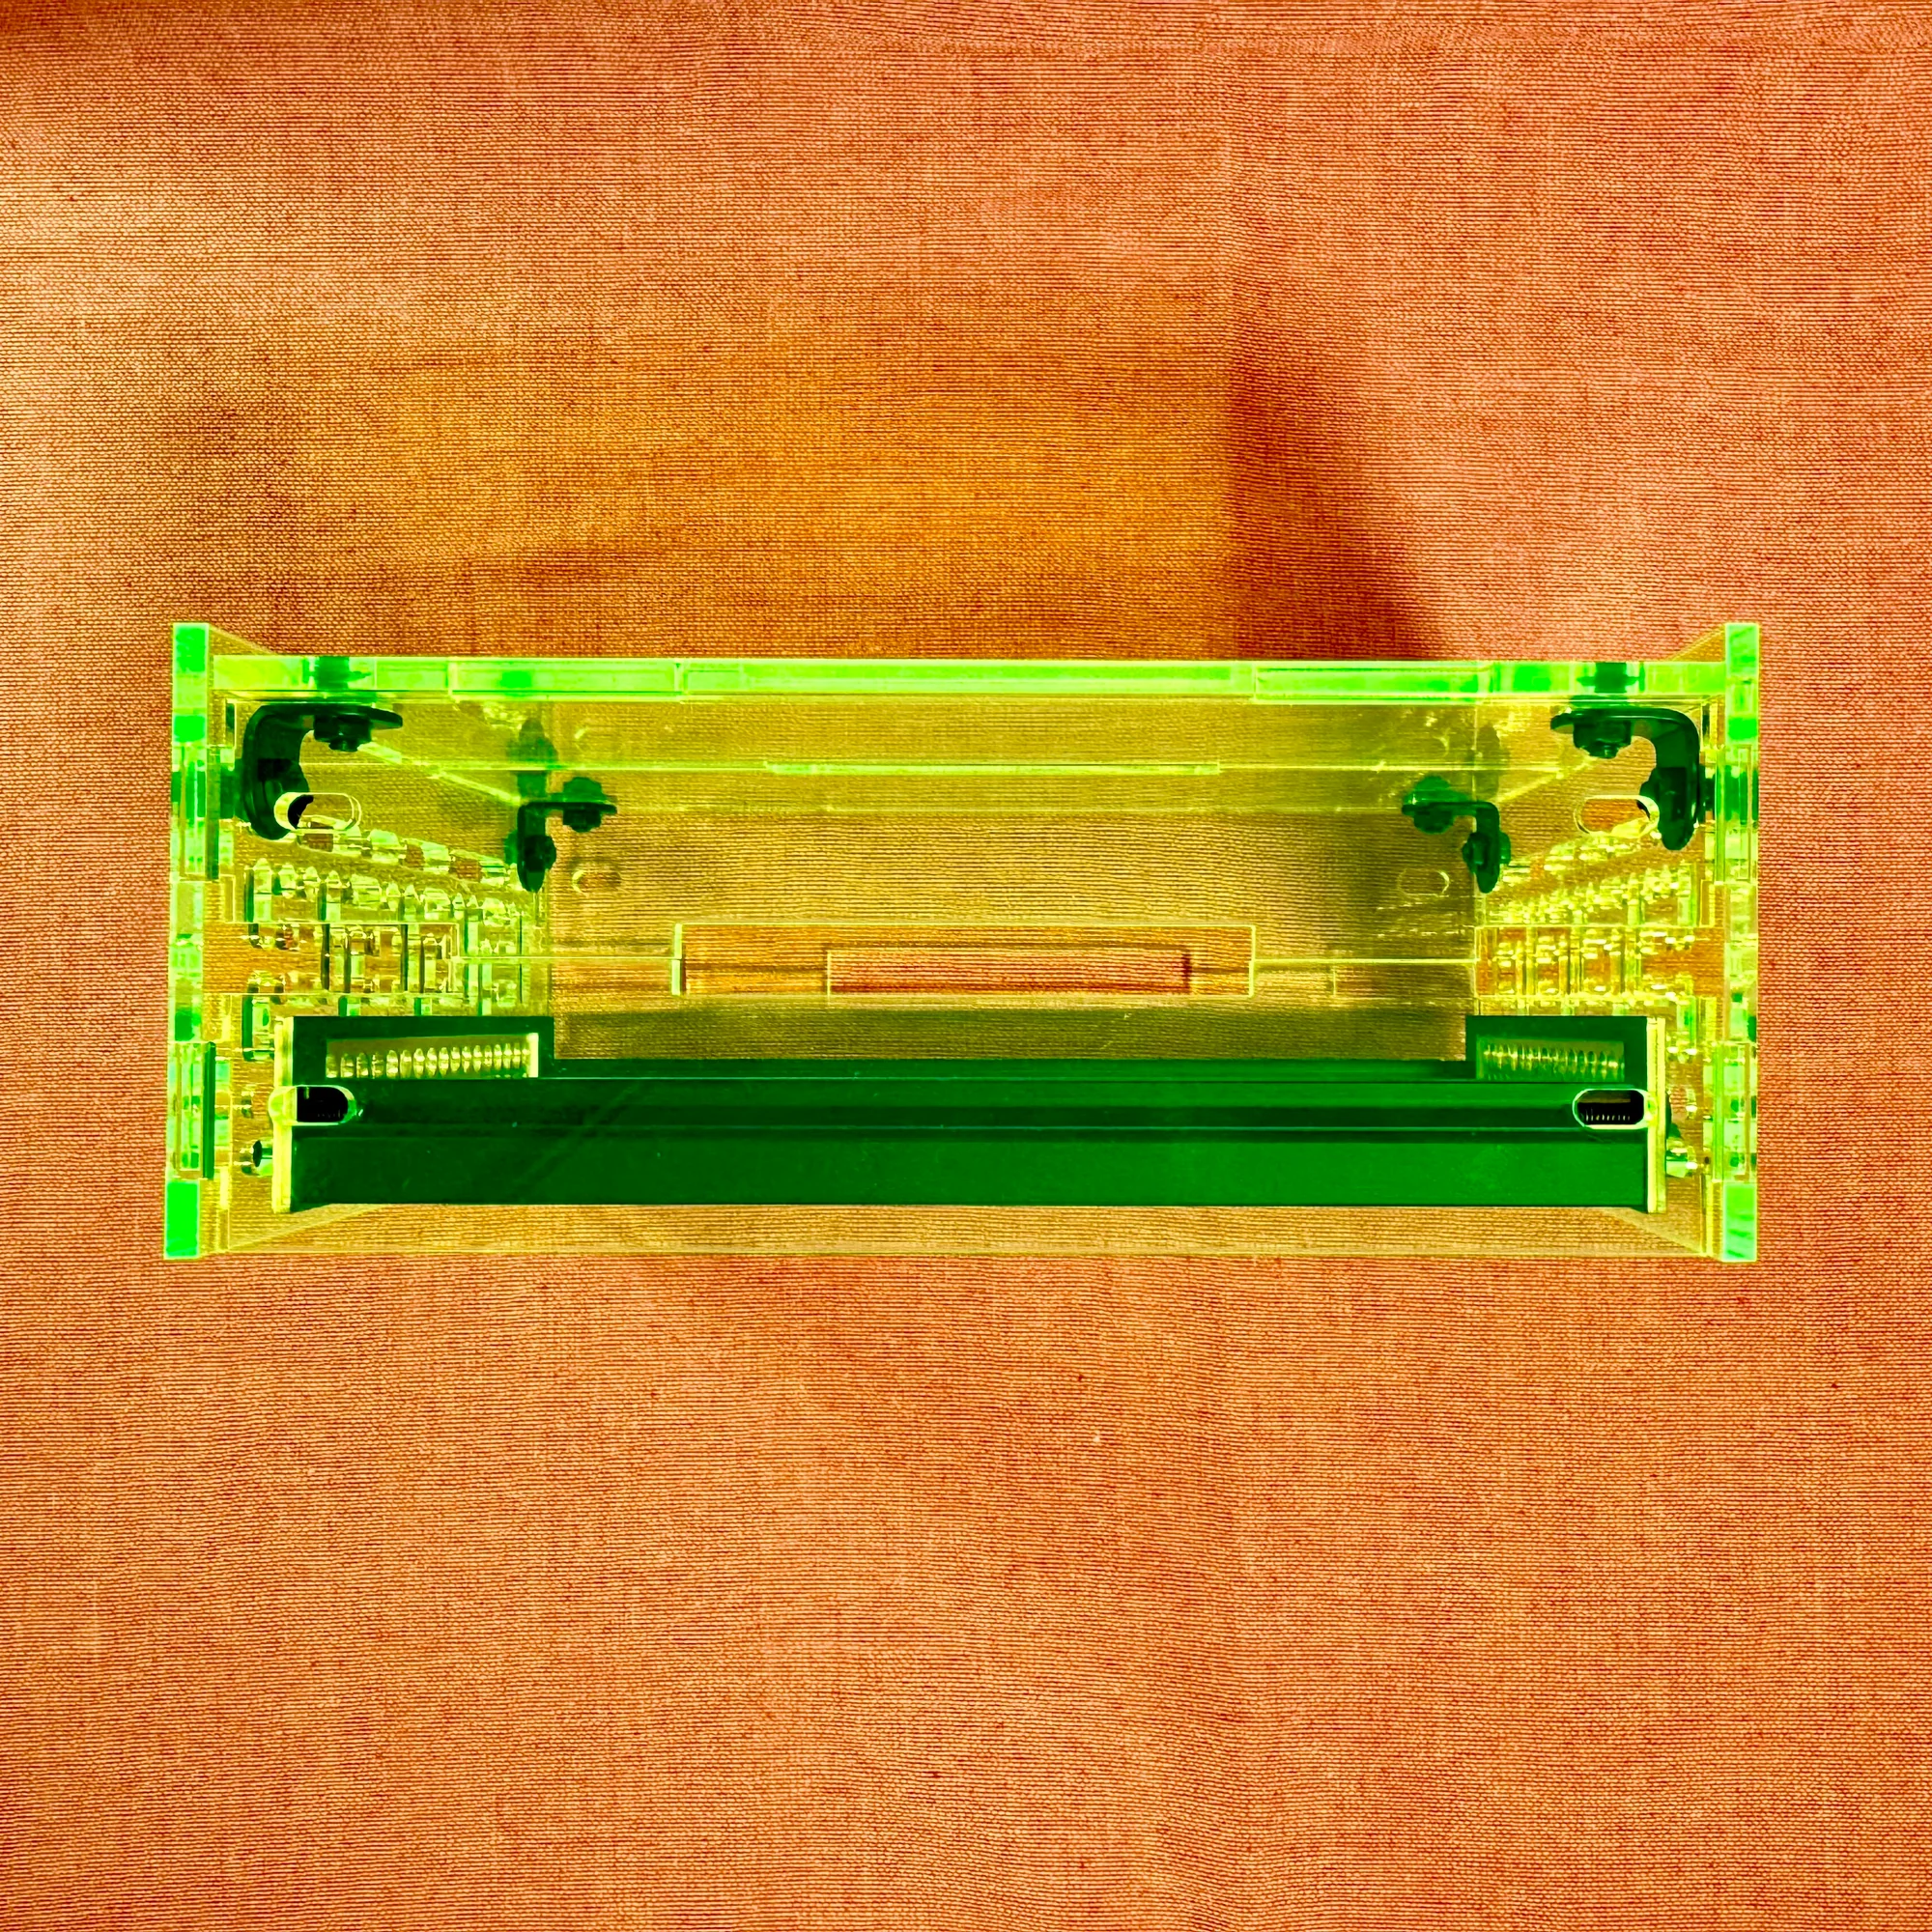
1. Vibrant Appearance
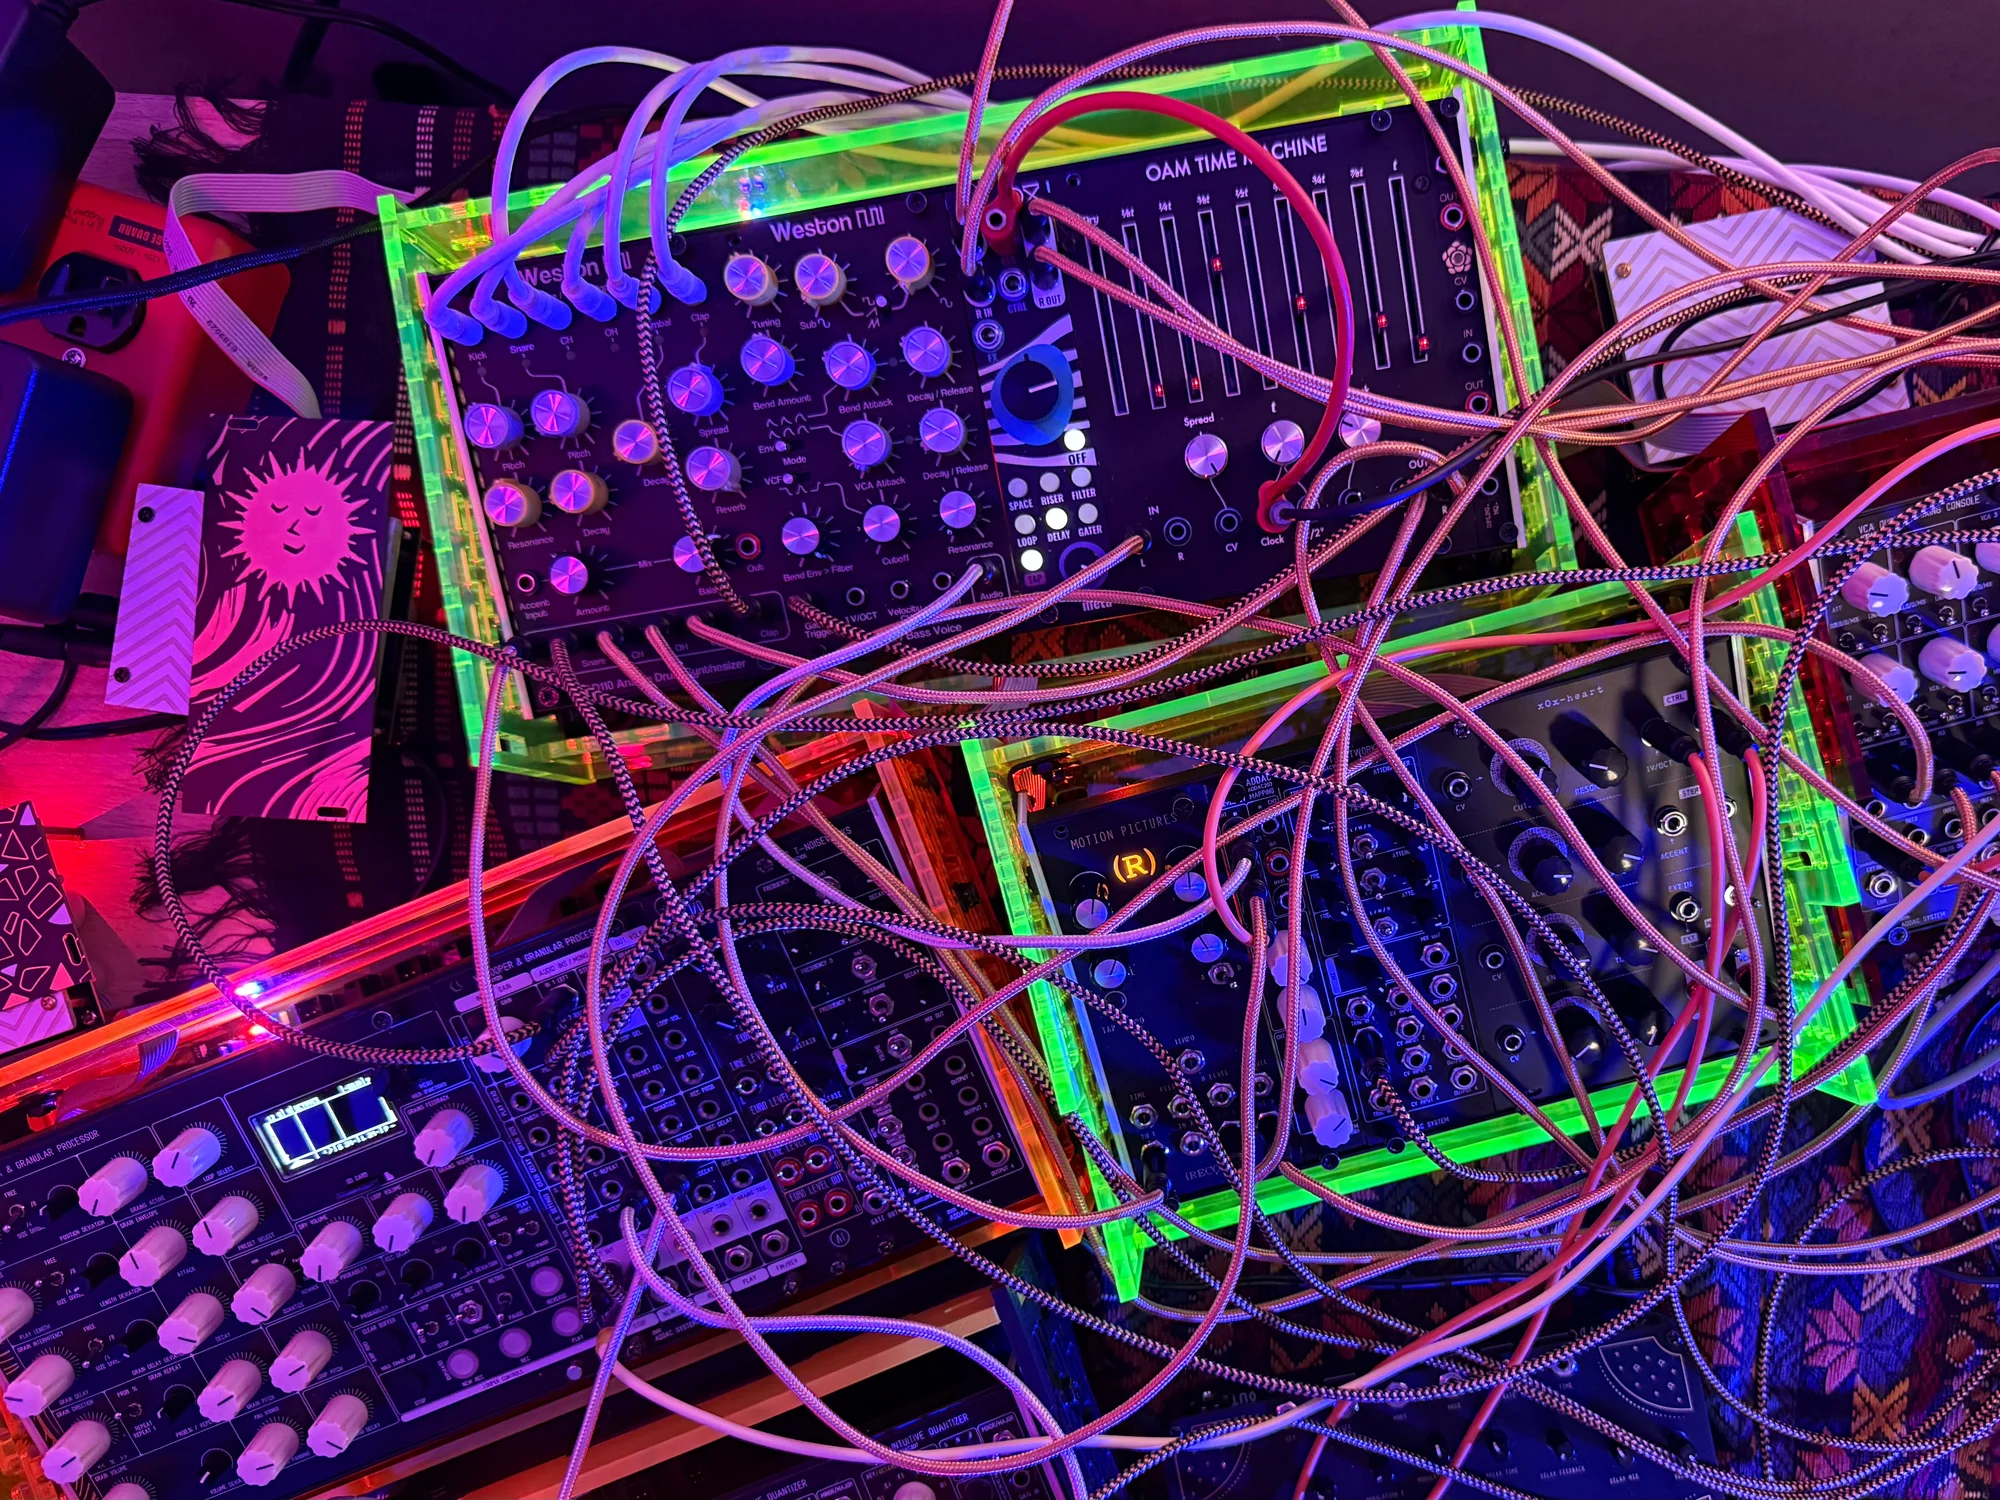
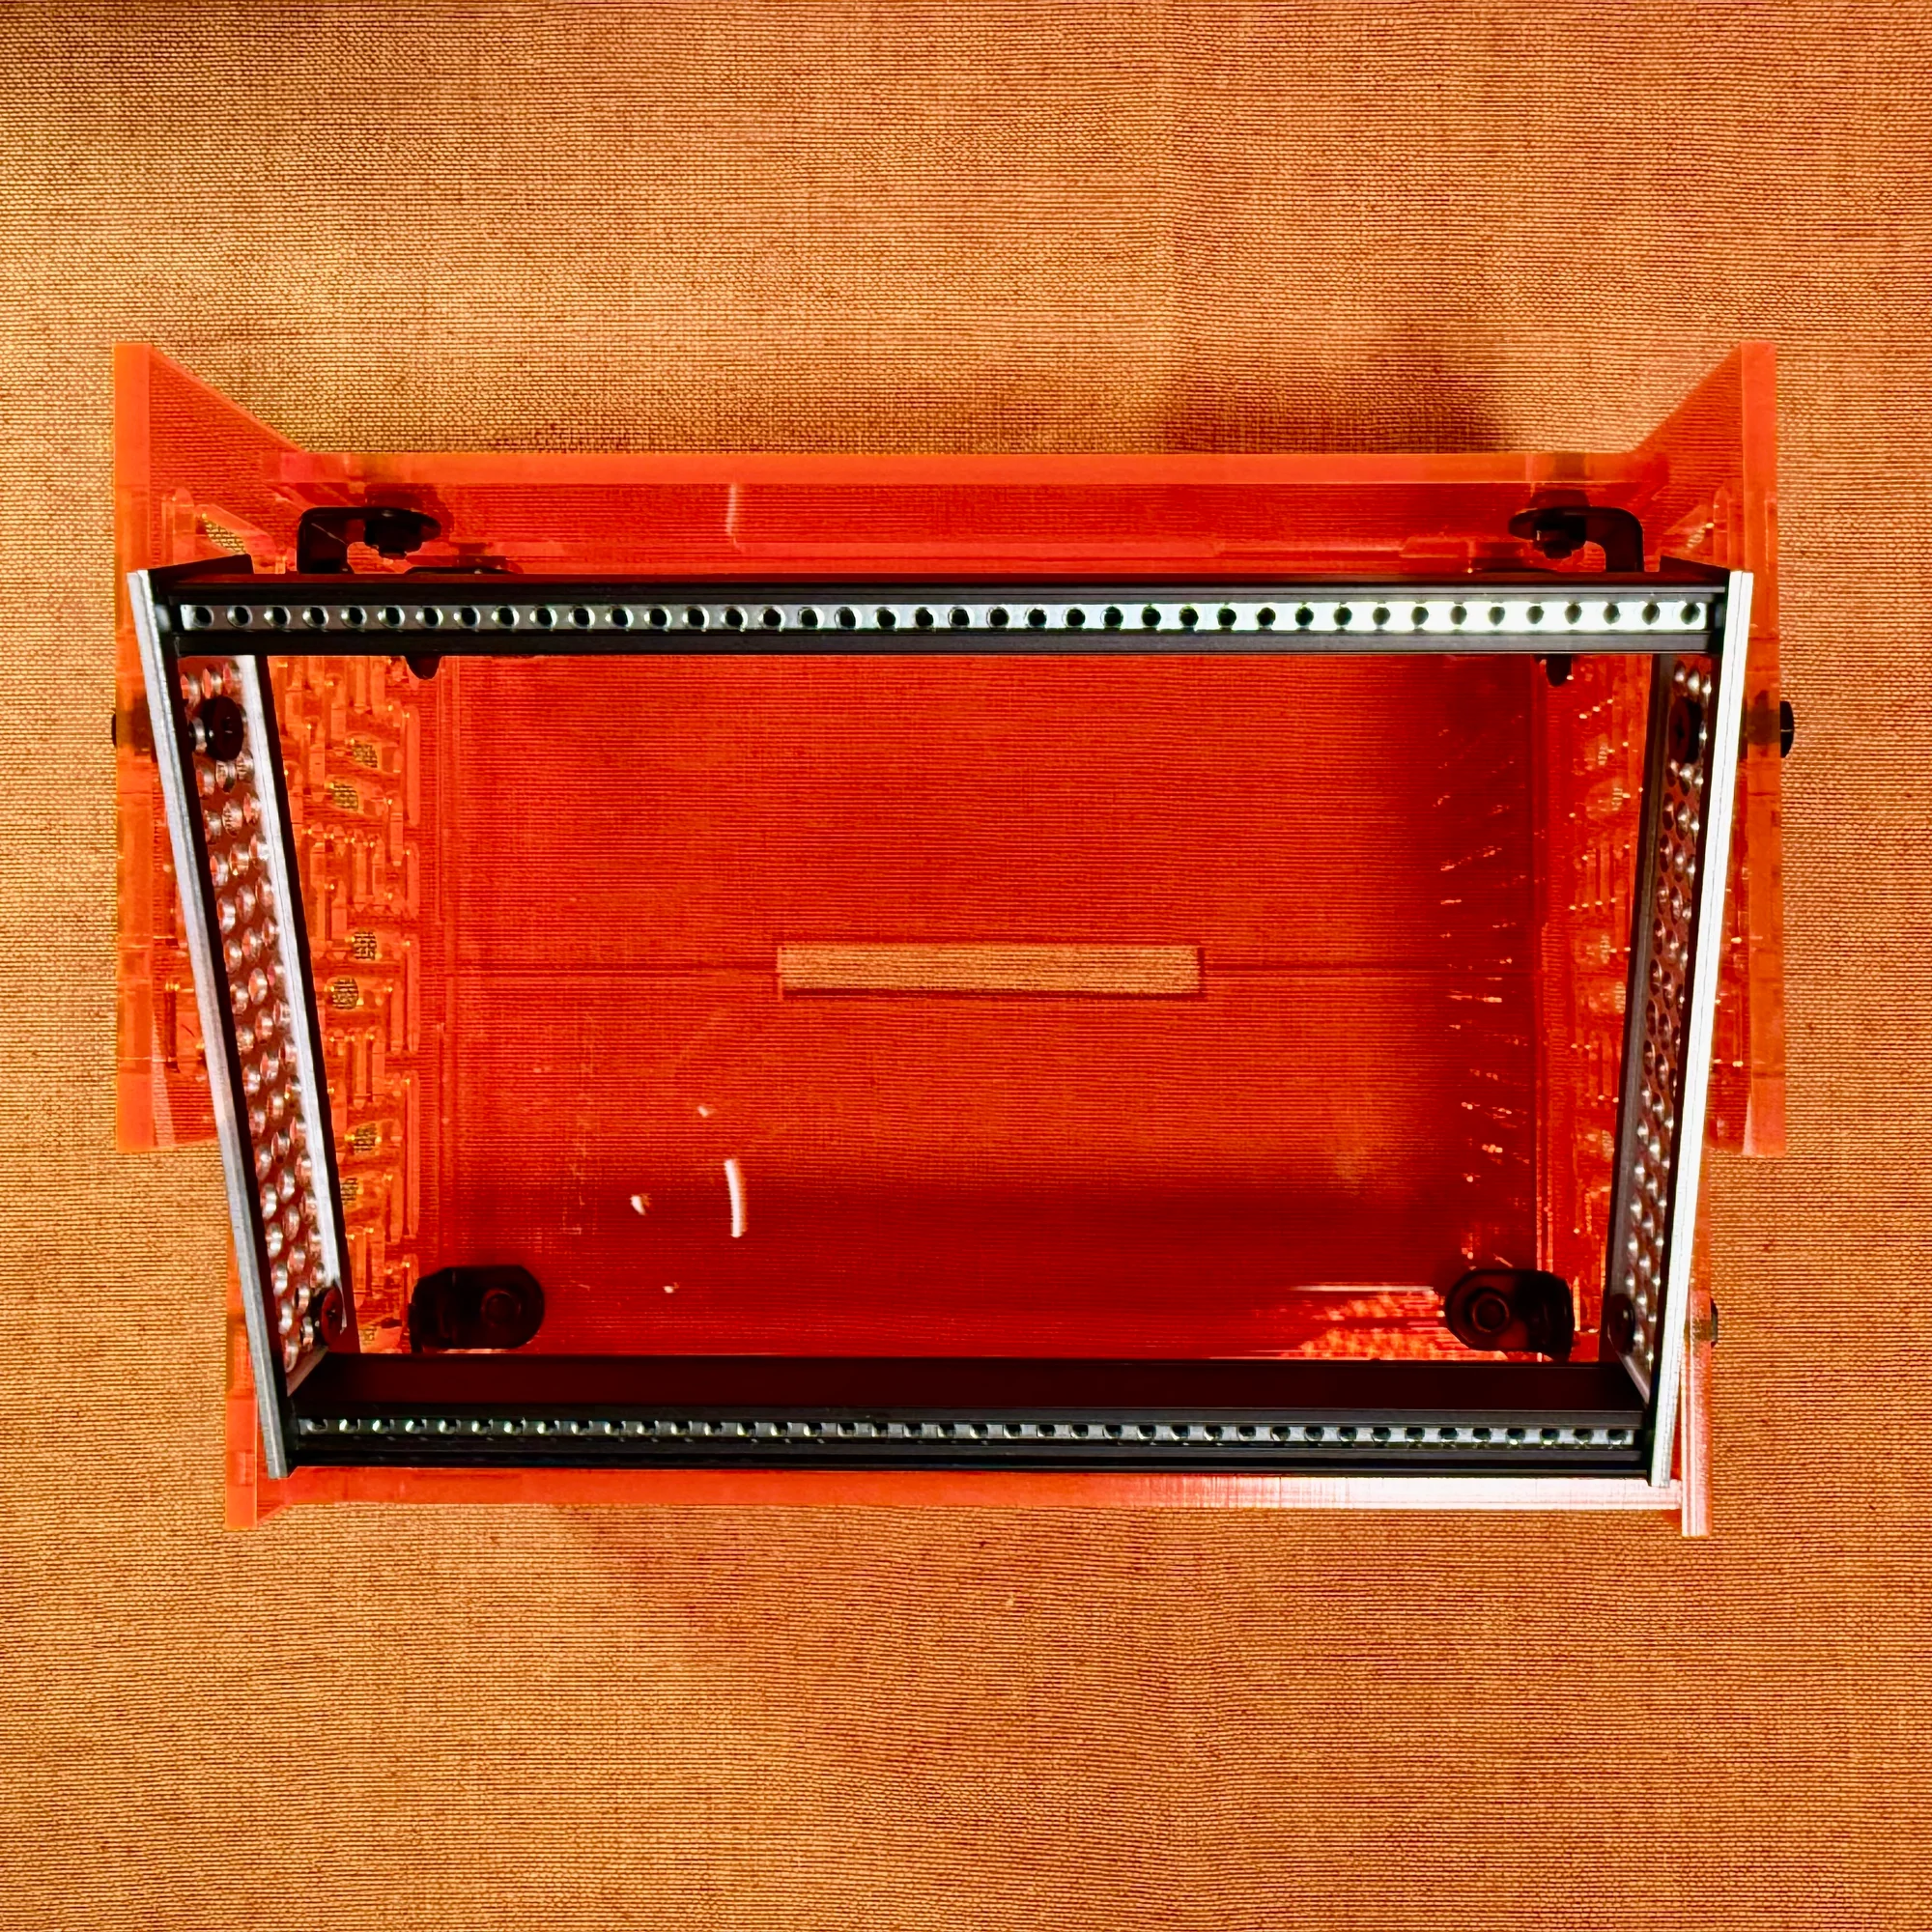
The greatest appeal of an acrylic board modular case is undoubtedly its vibrant appearance. The back of your modular synth visible through the transparent case gives a cyber, futuristic impression. The way LEDs on module backs and bus boards softly diffuse through the acrylic is a visual pleasure in itself.
The rich color variations are another charm unique to this type of case. Choose colors to match your taste and build your own original setup with your preferred combinations.
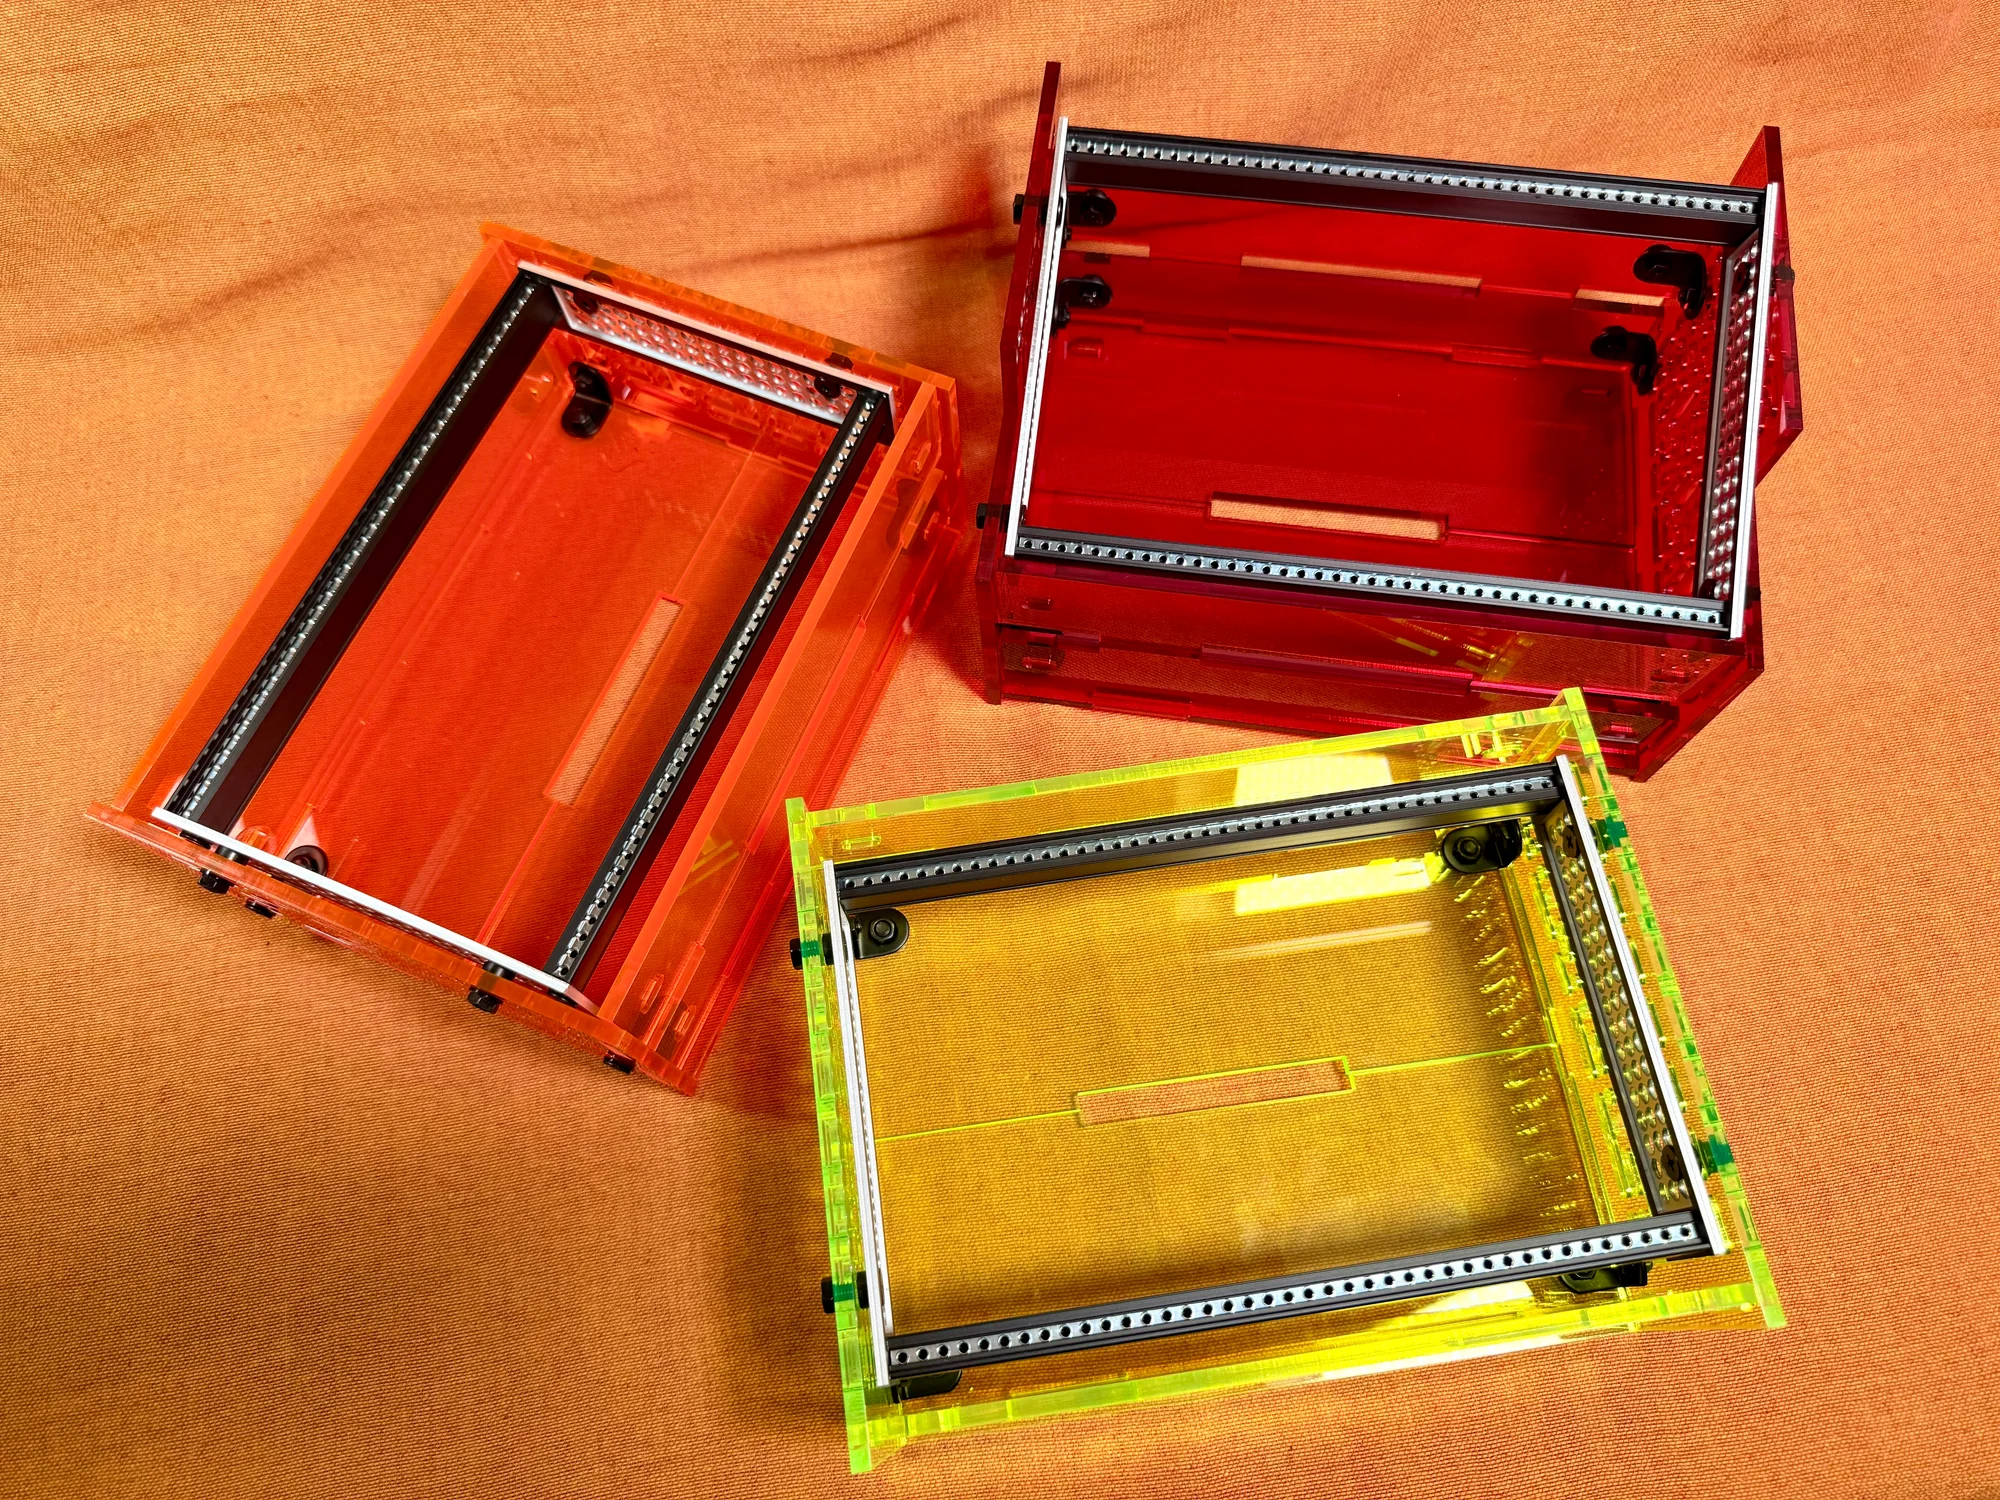
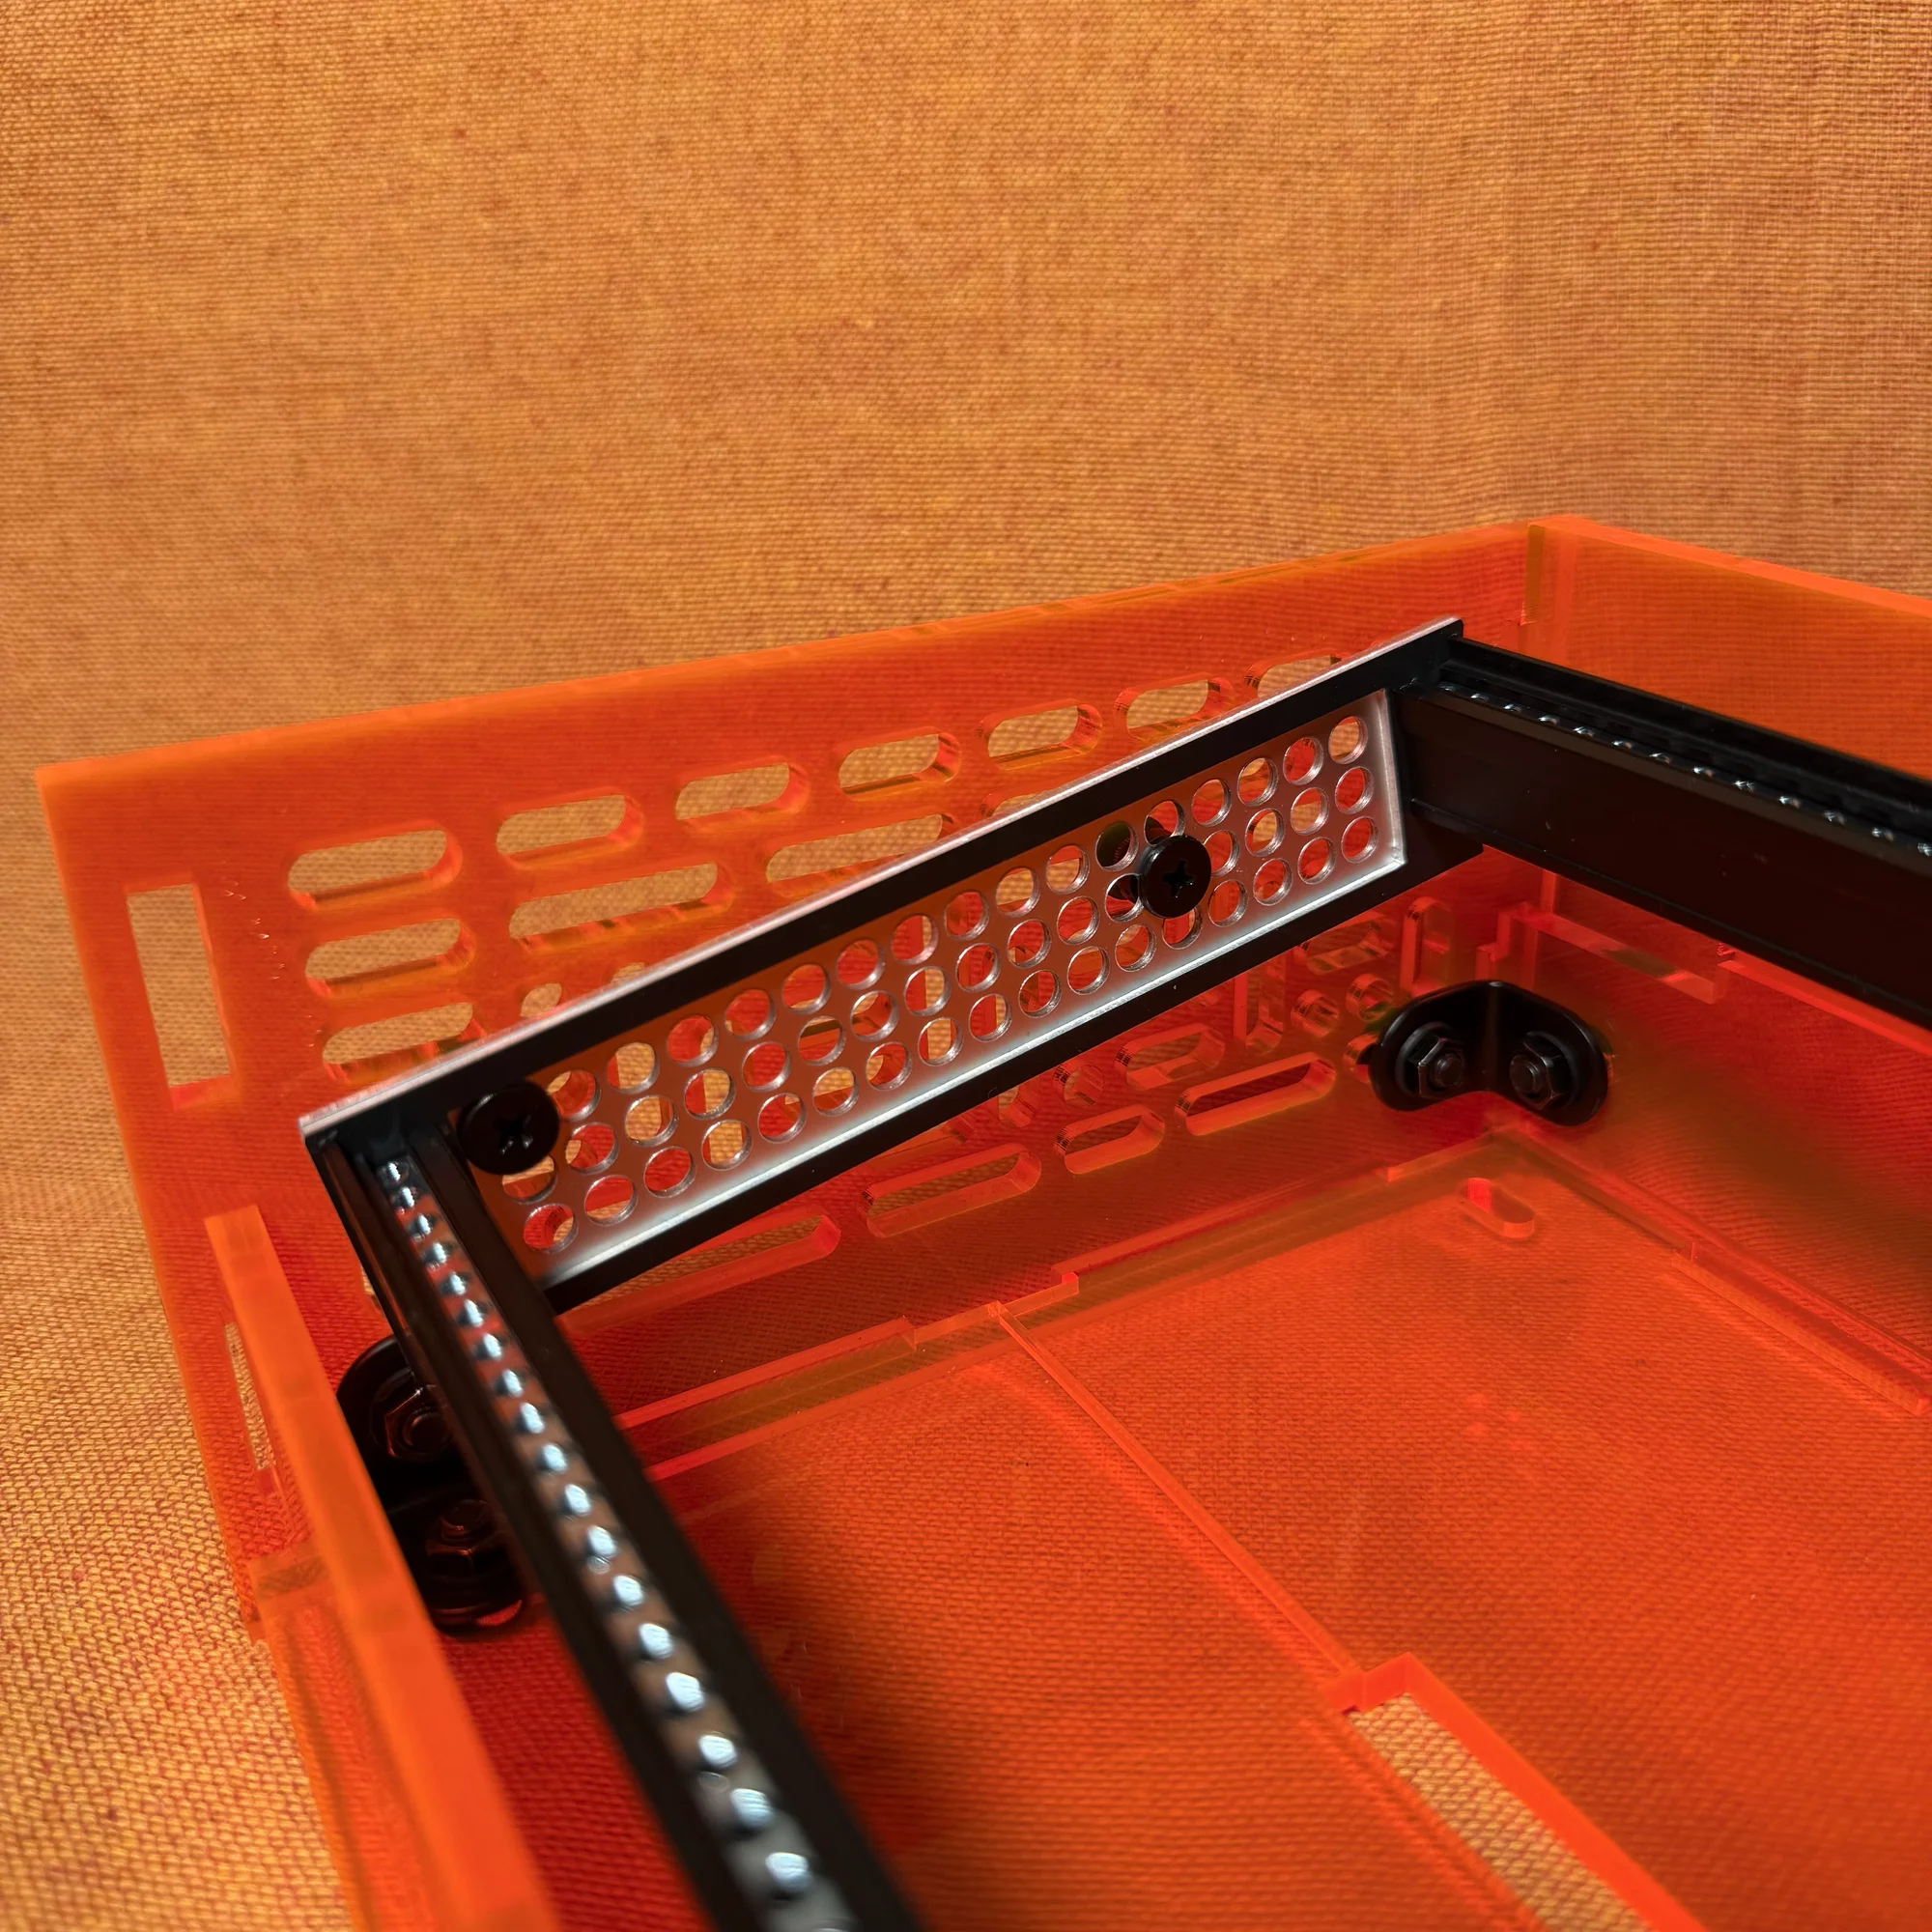
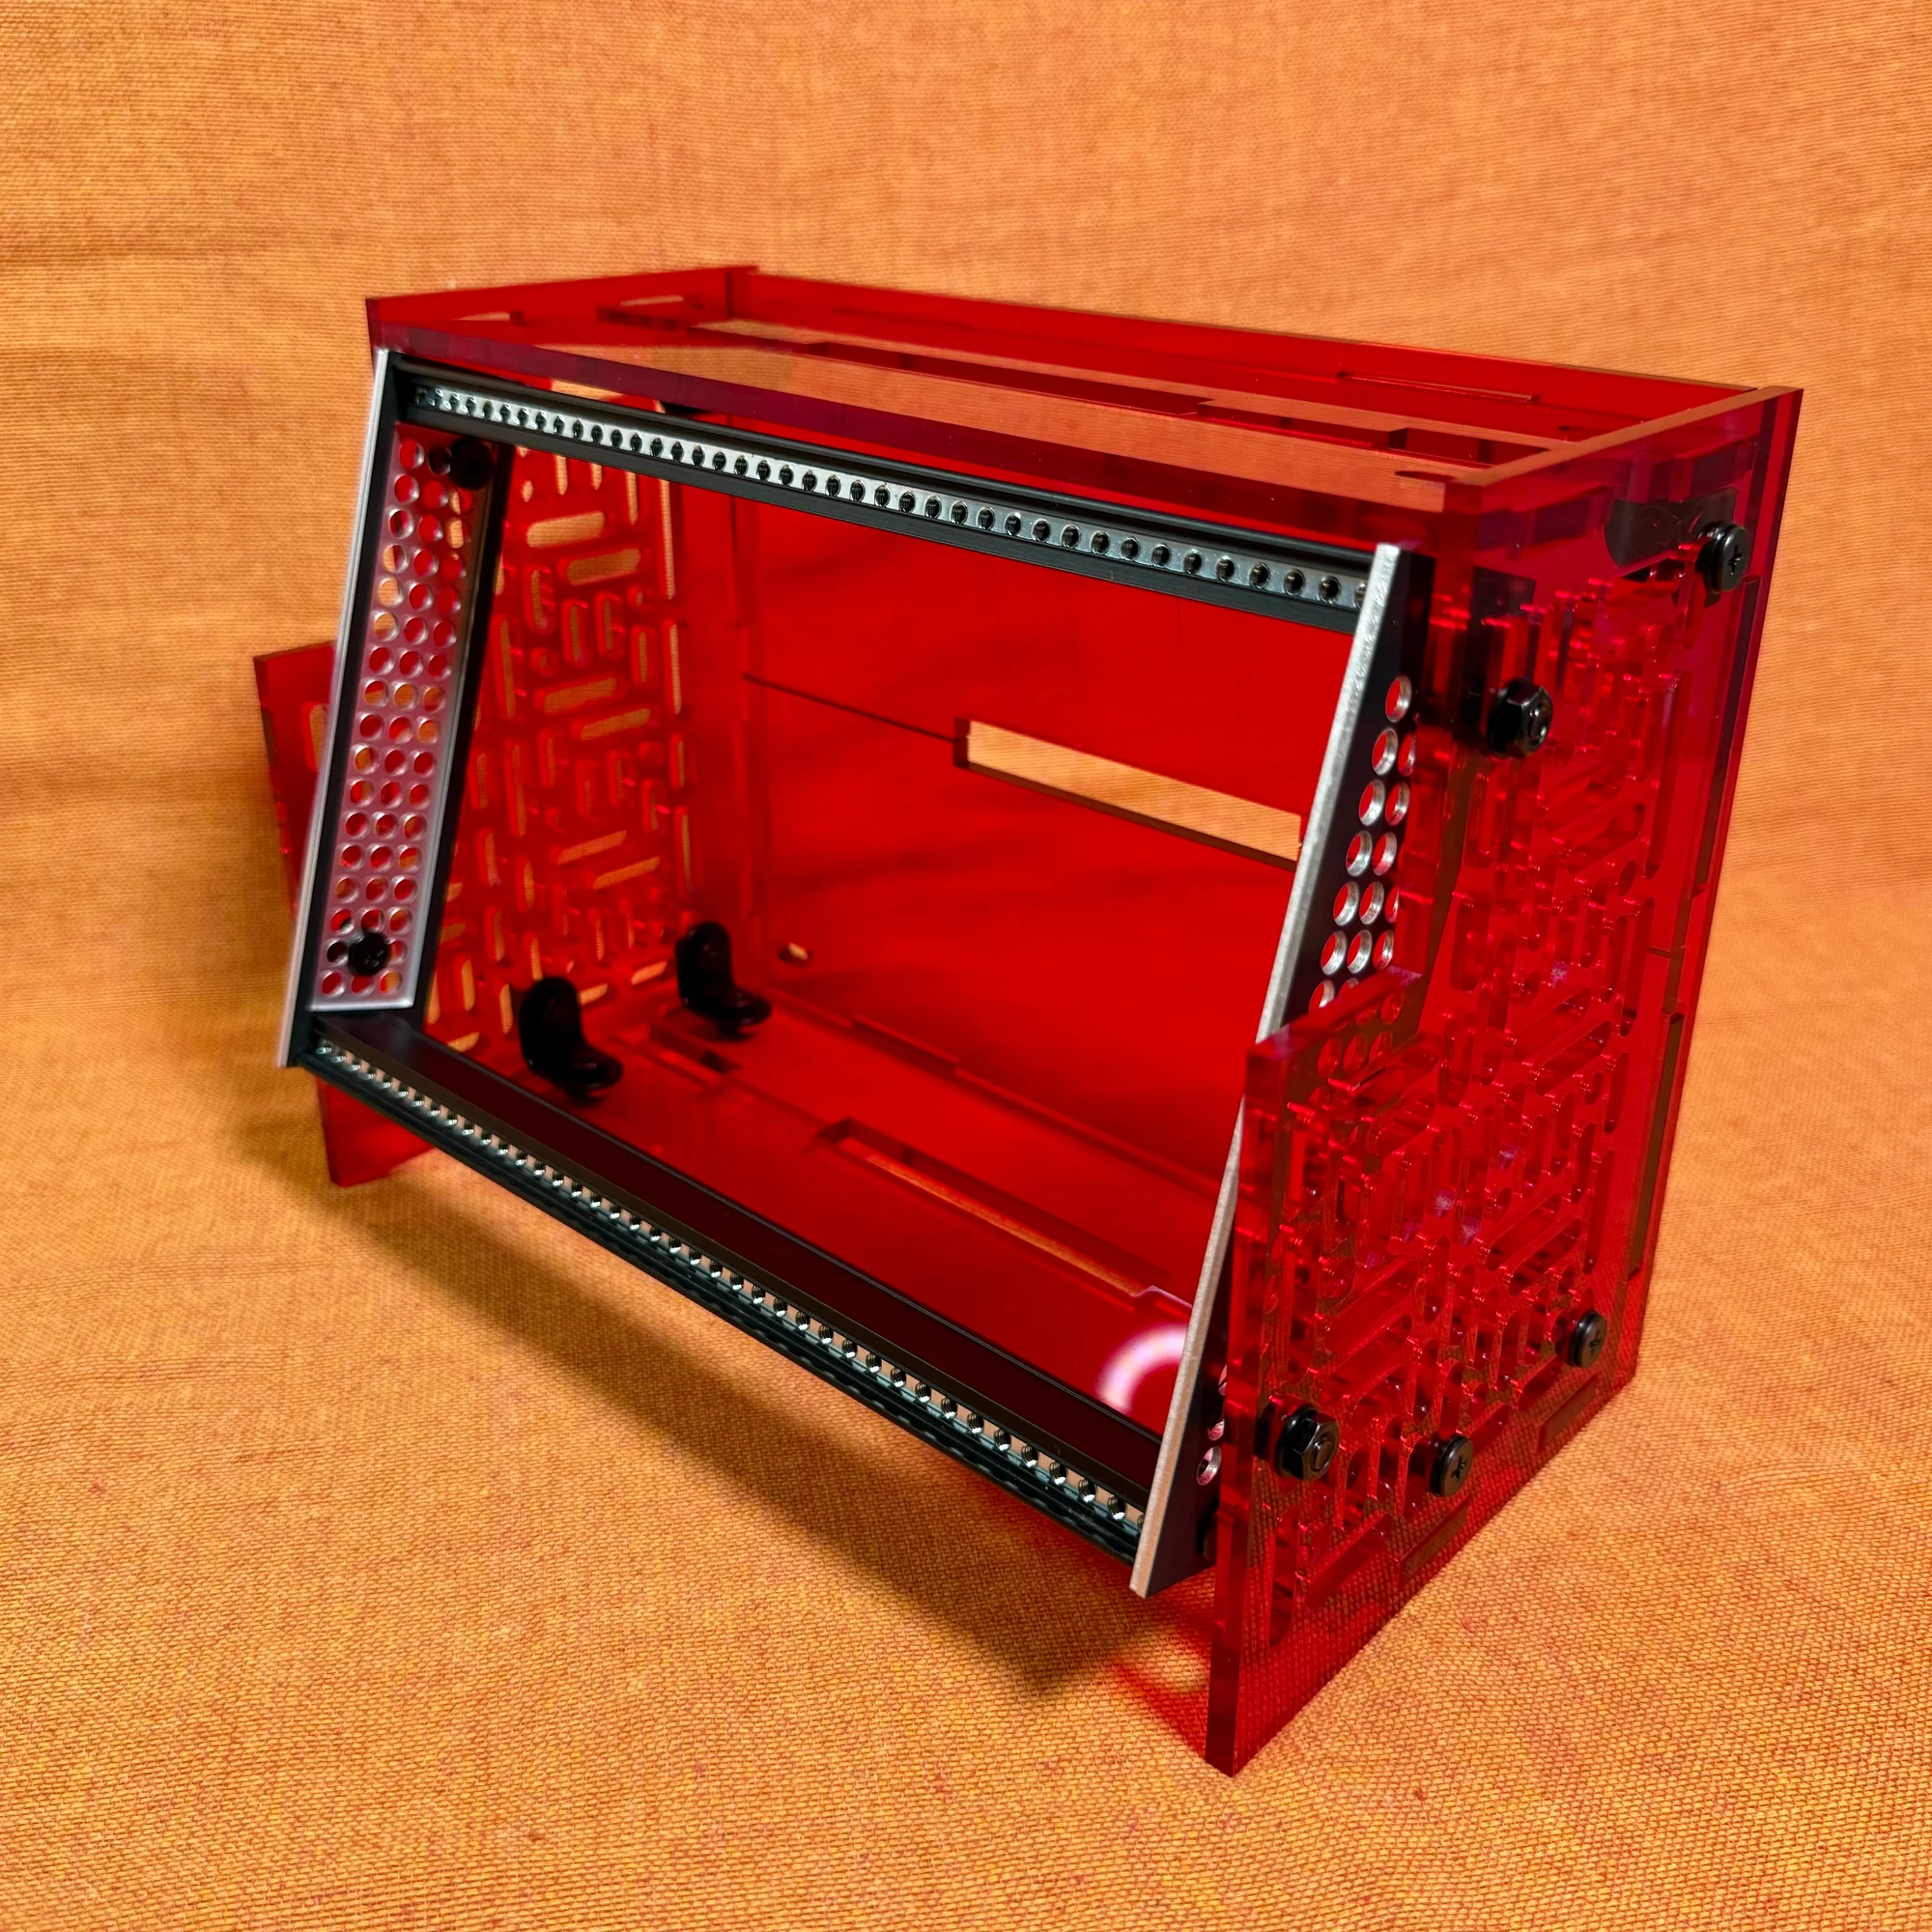
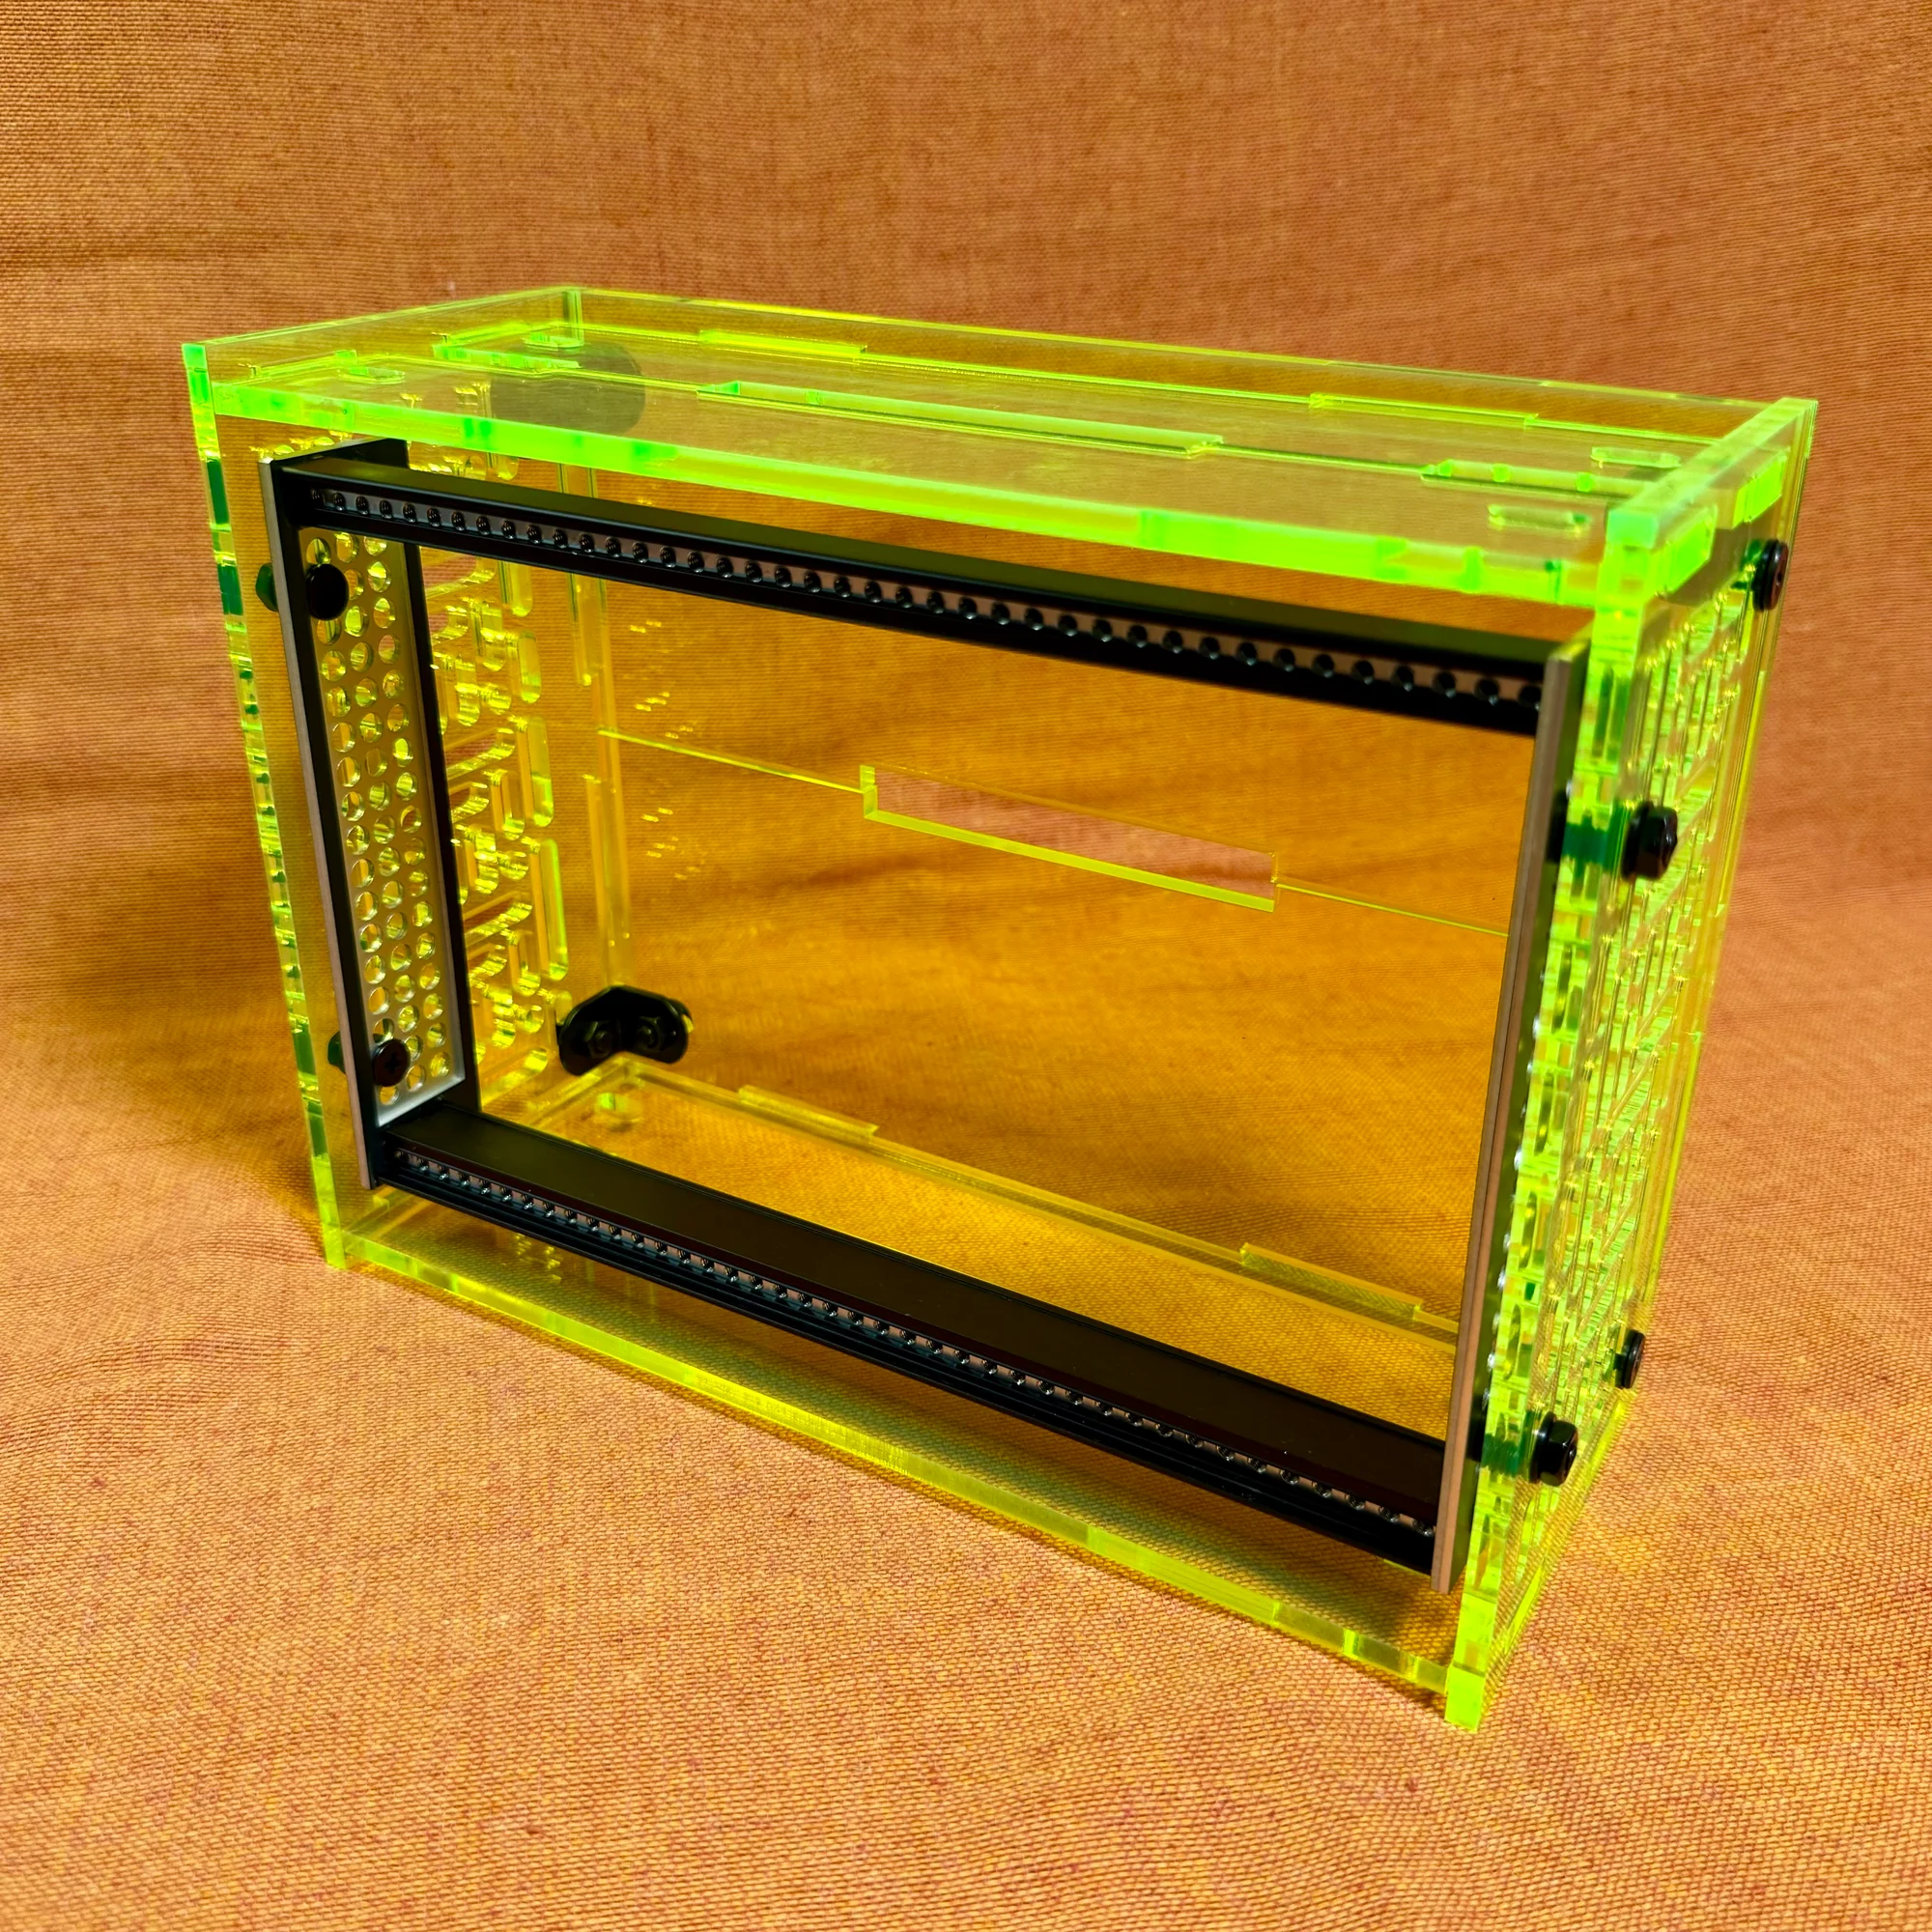
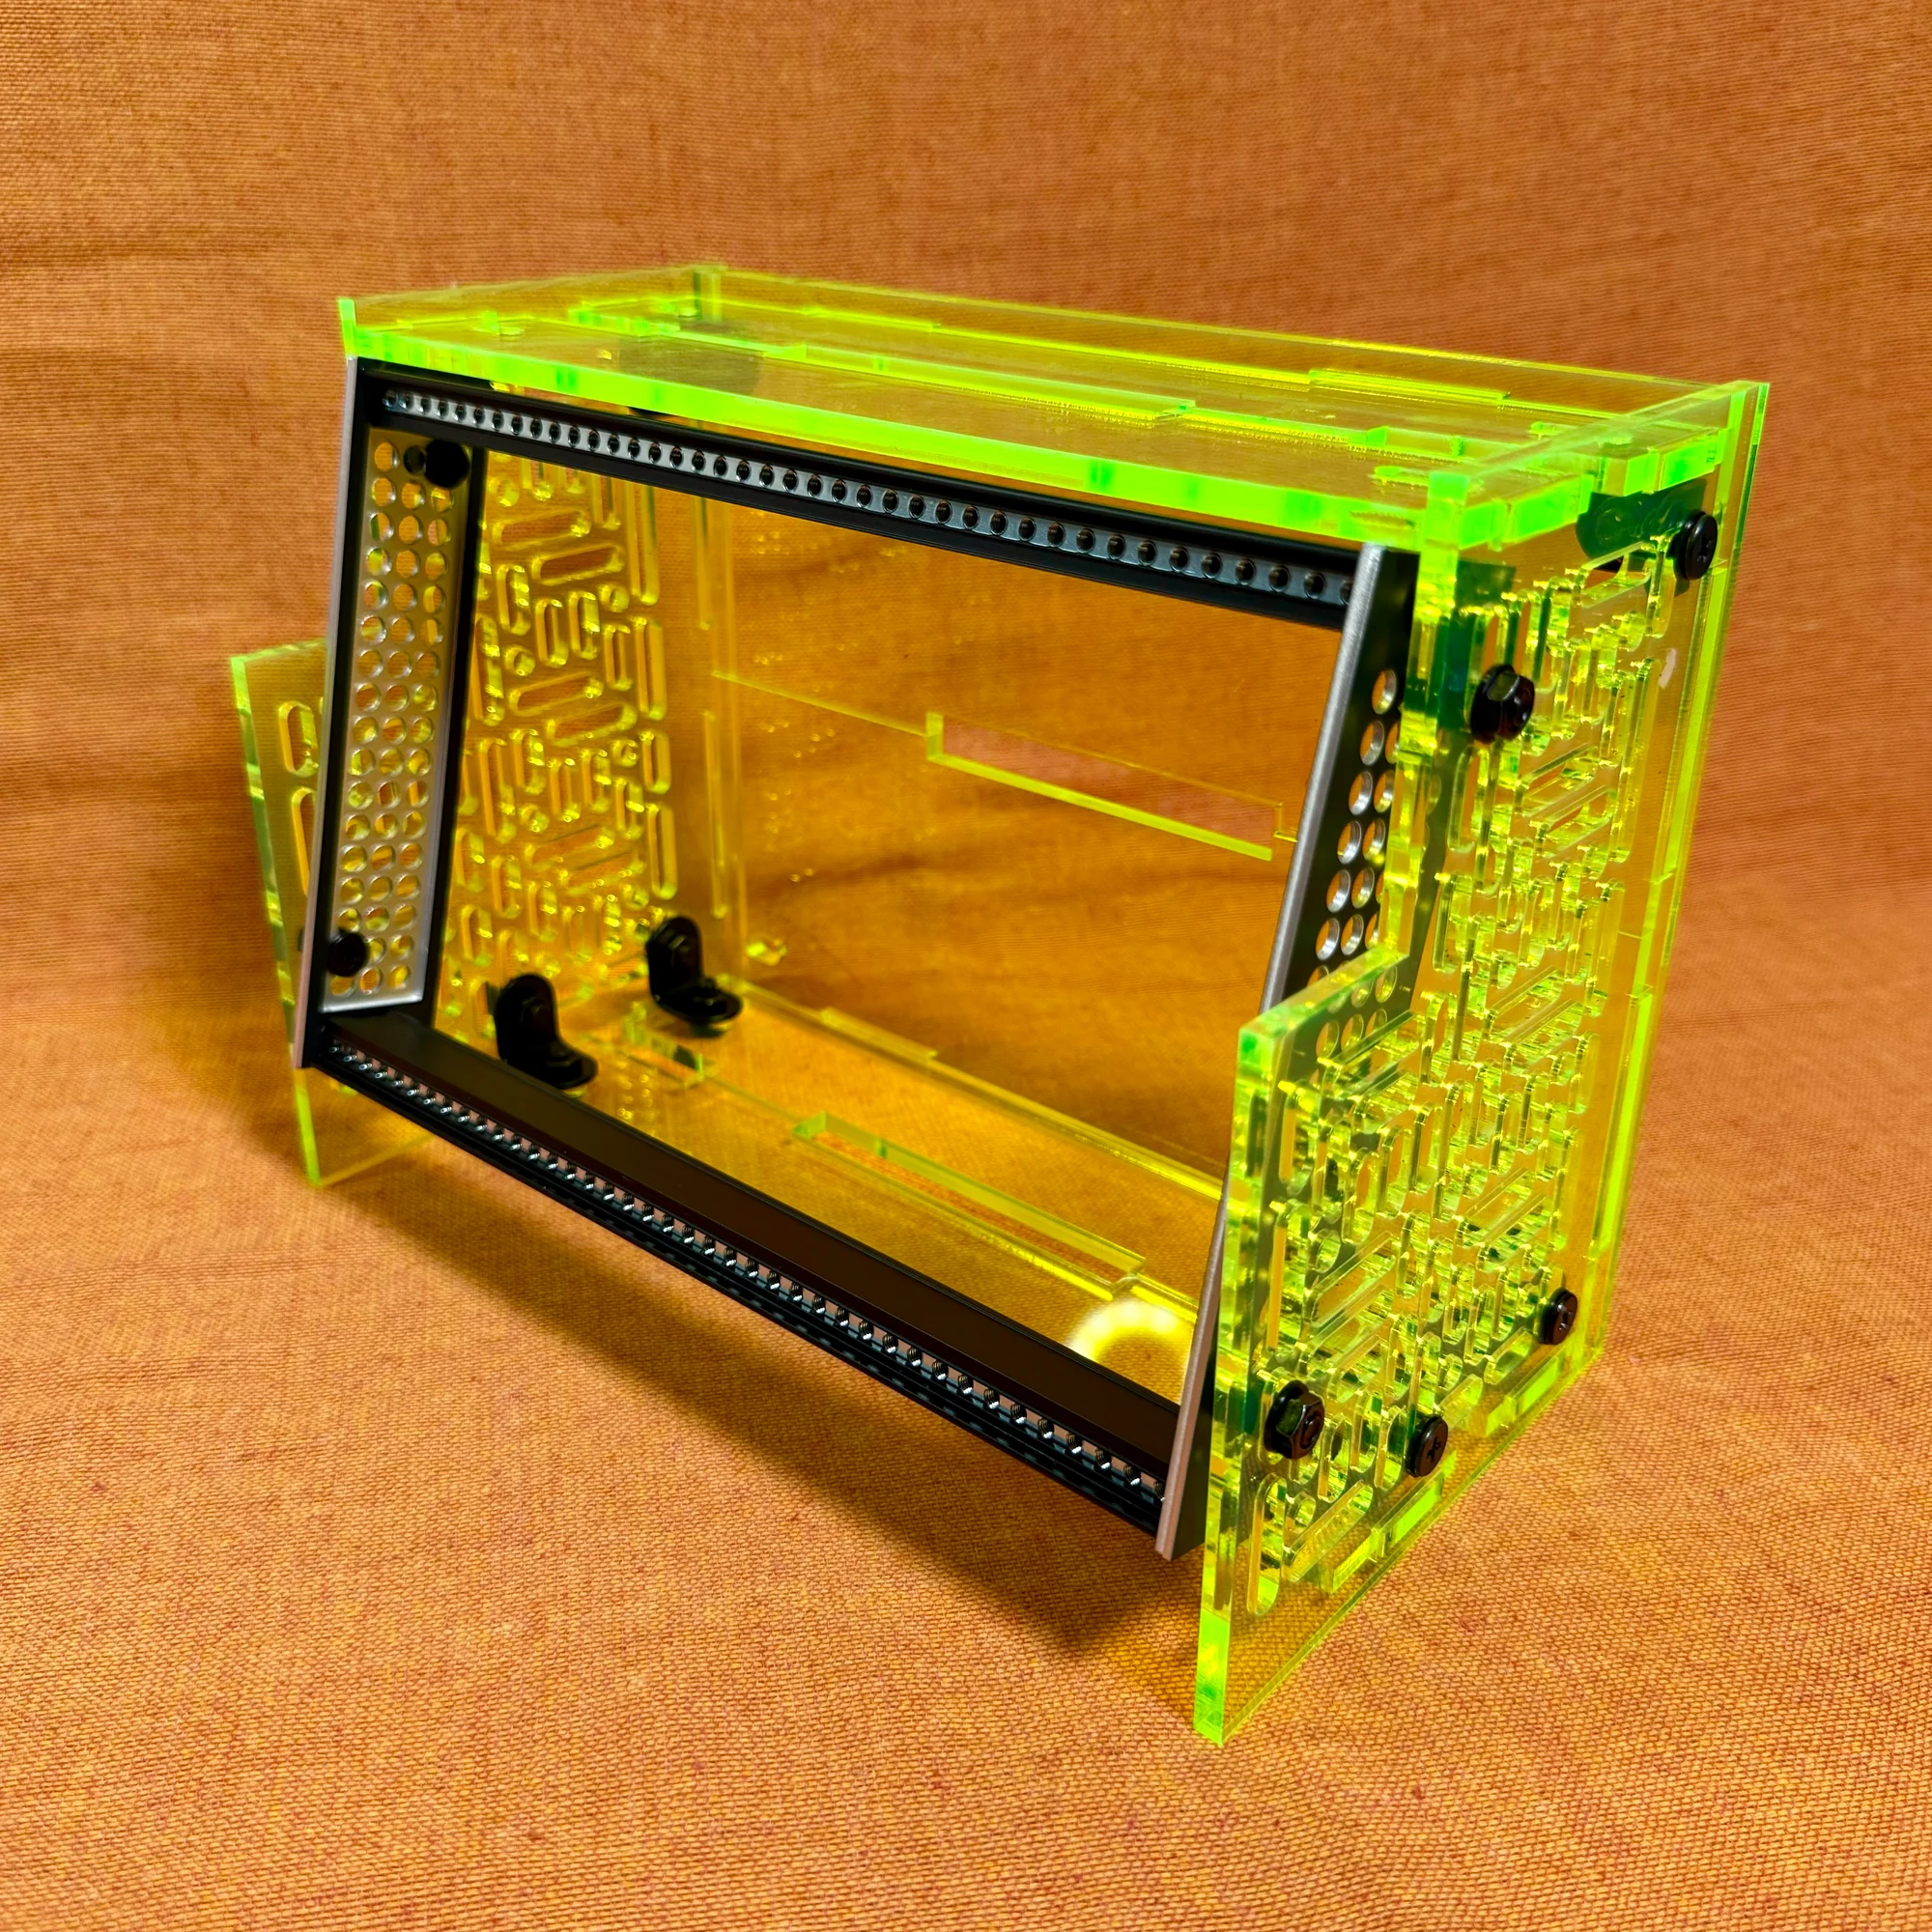
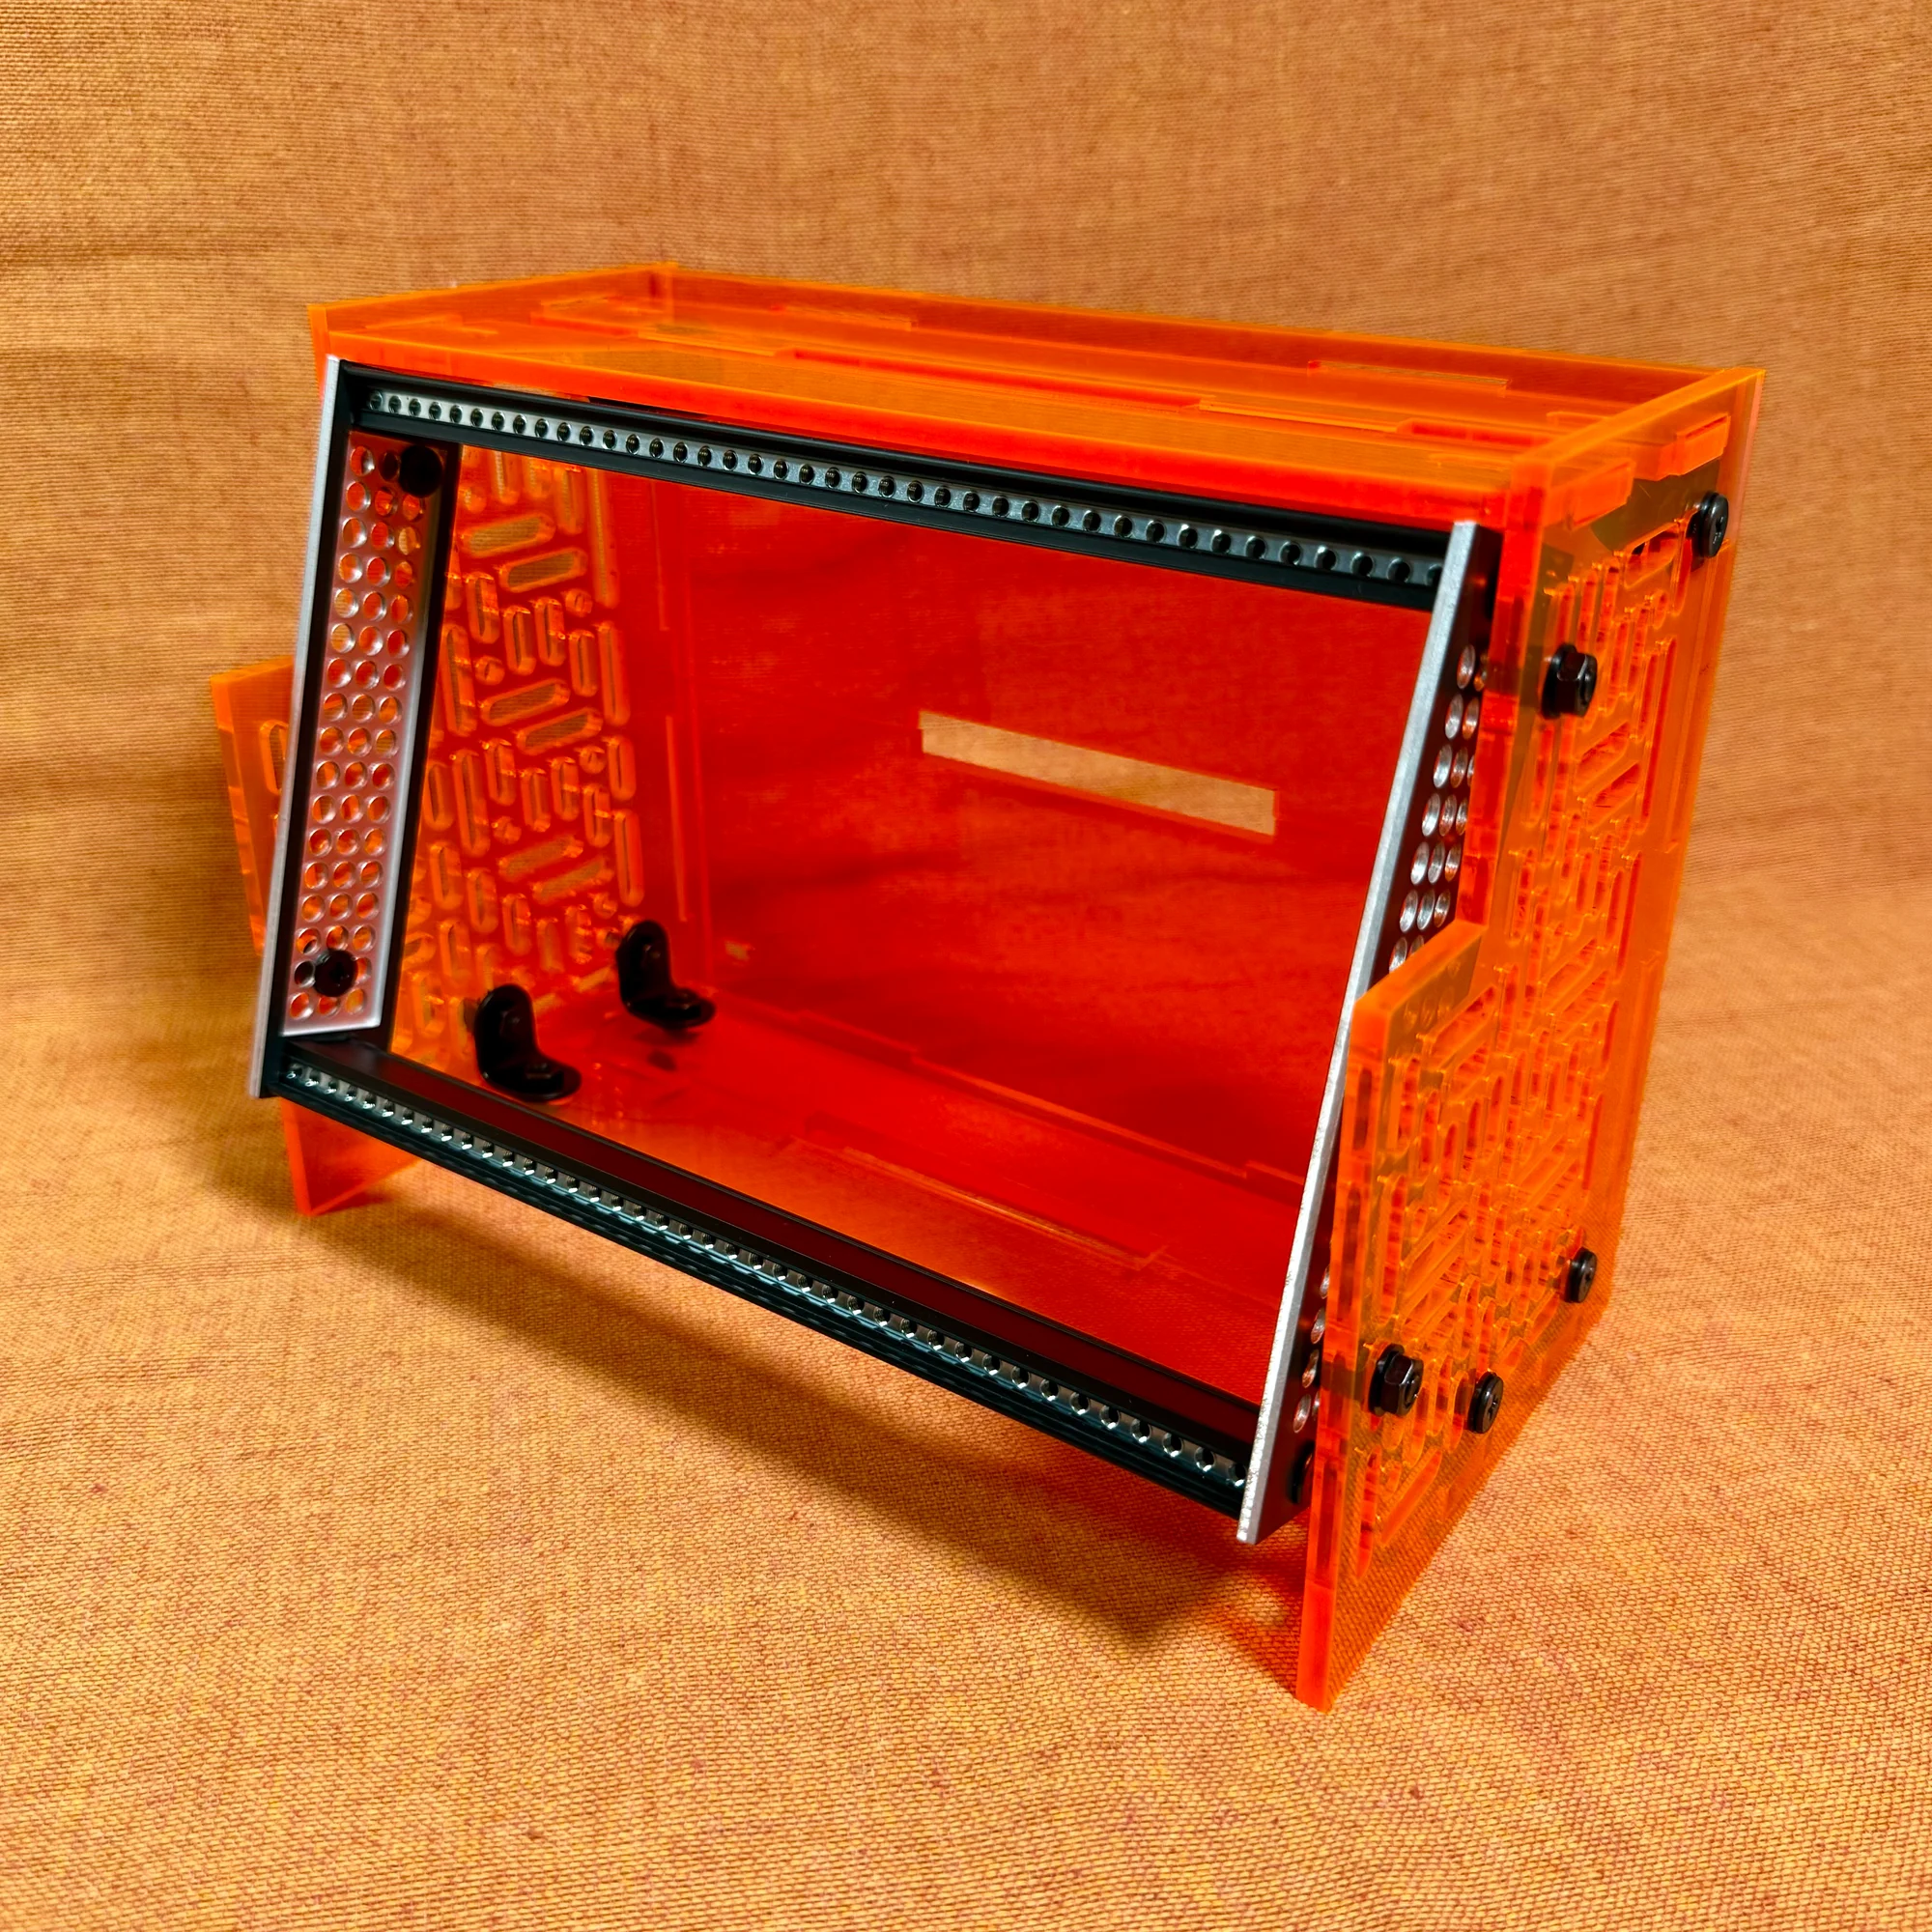
2. Tiltable Design
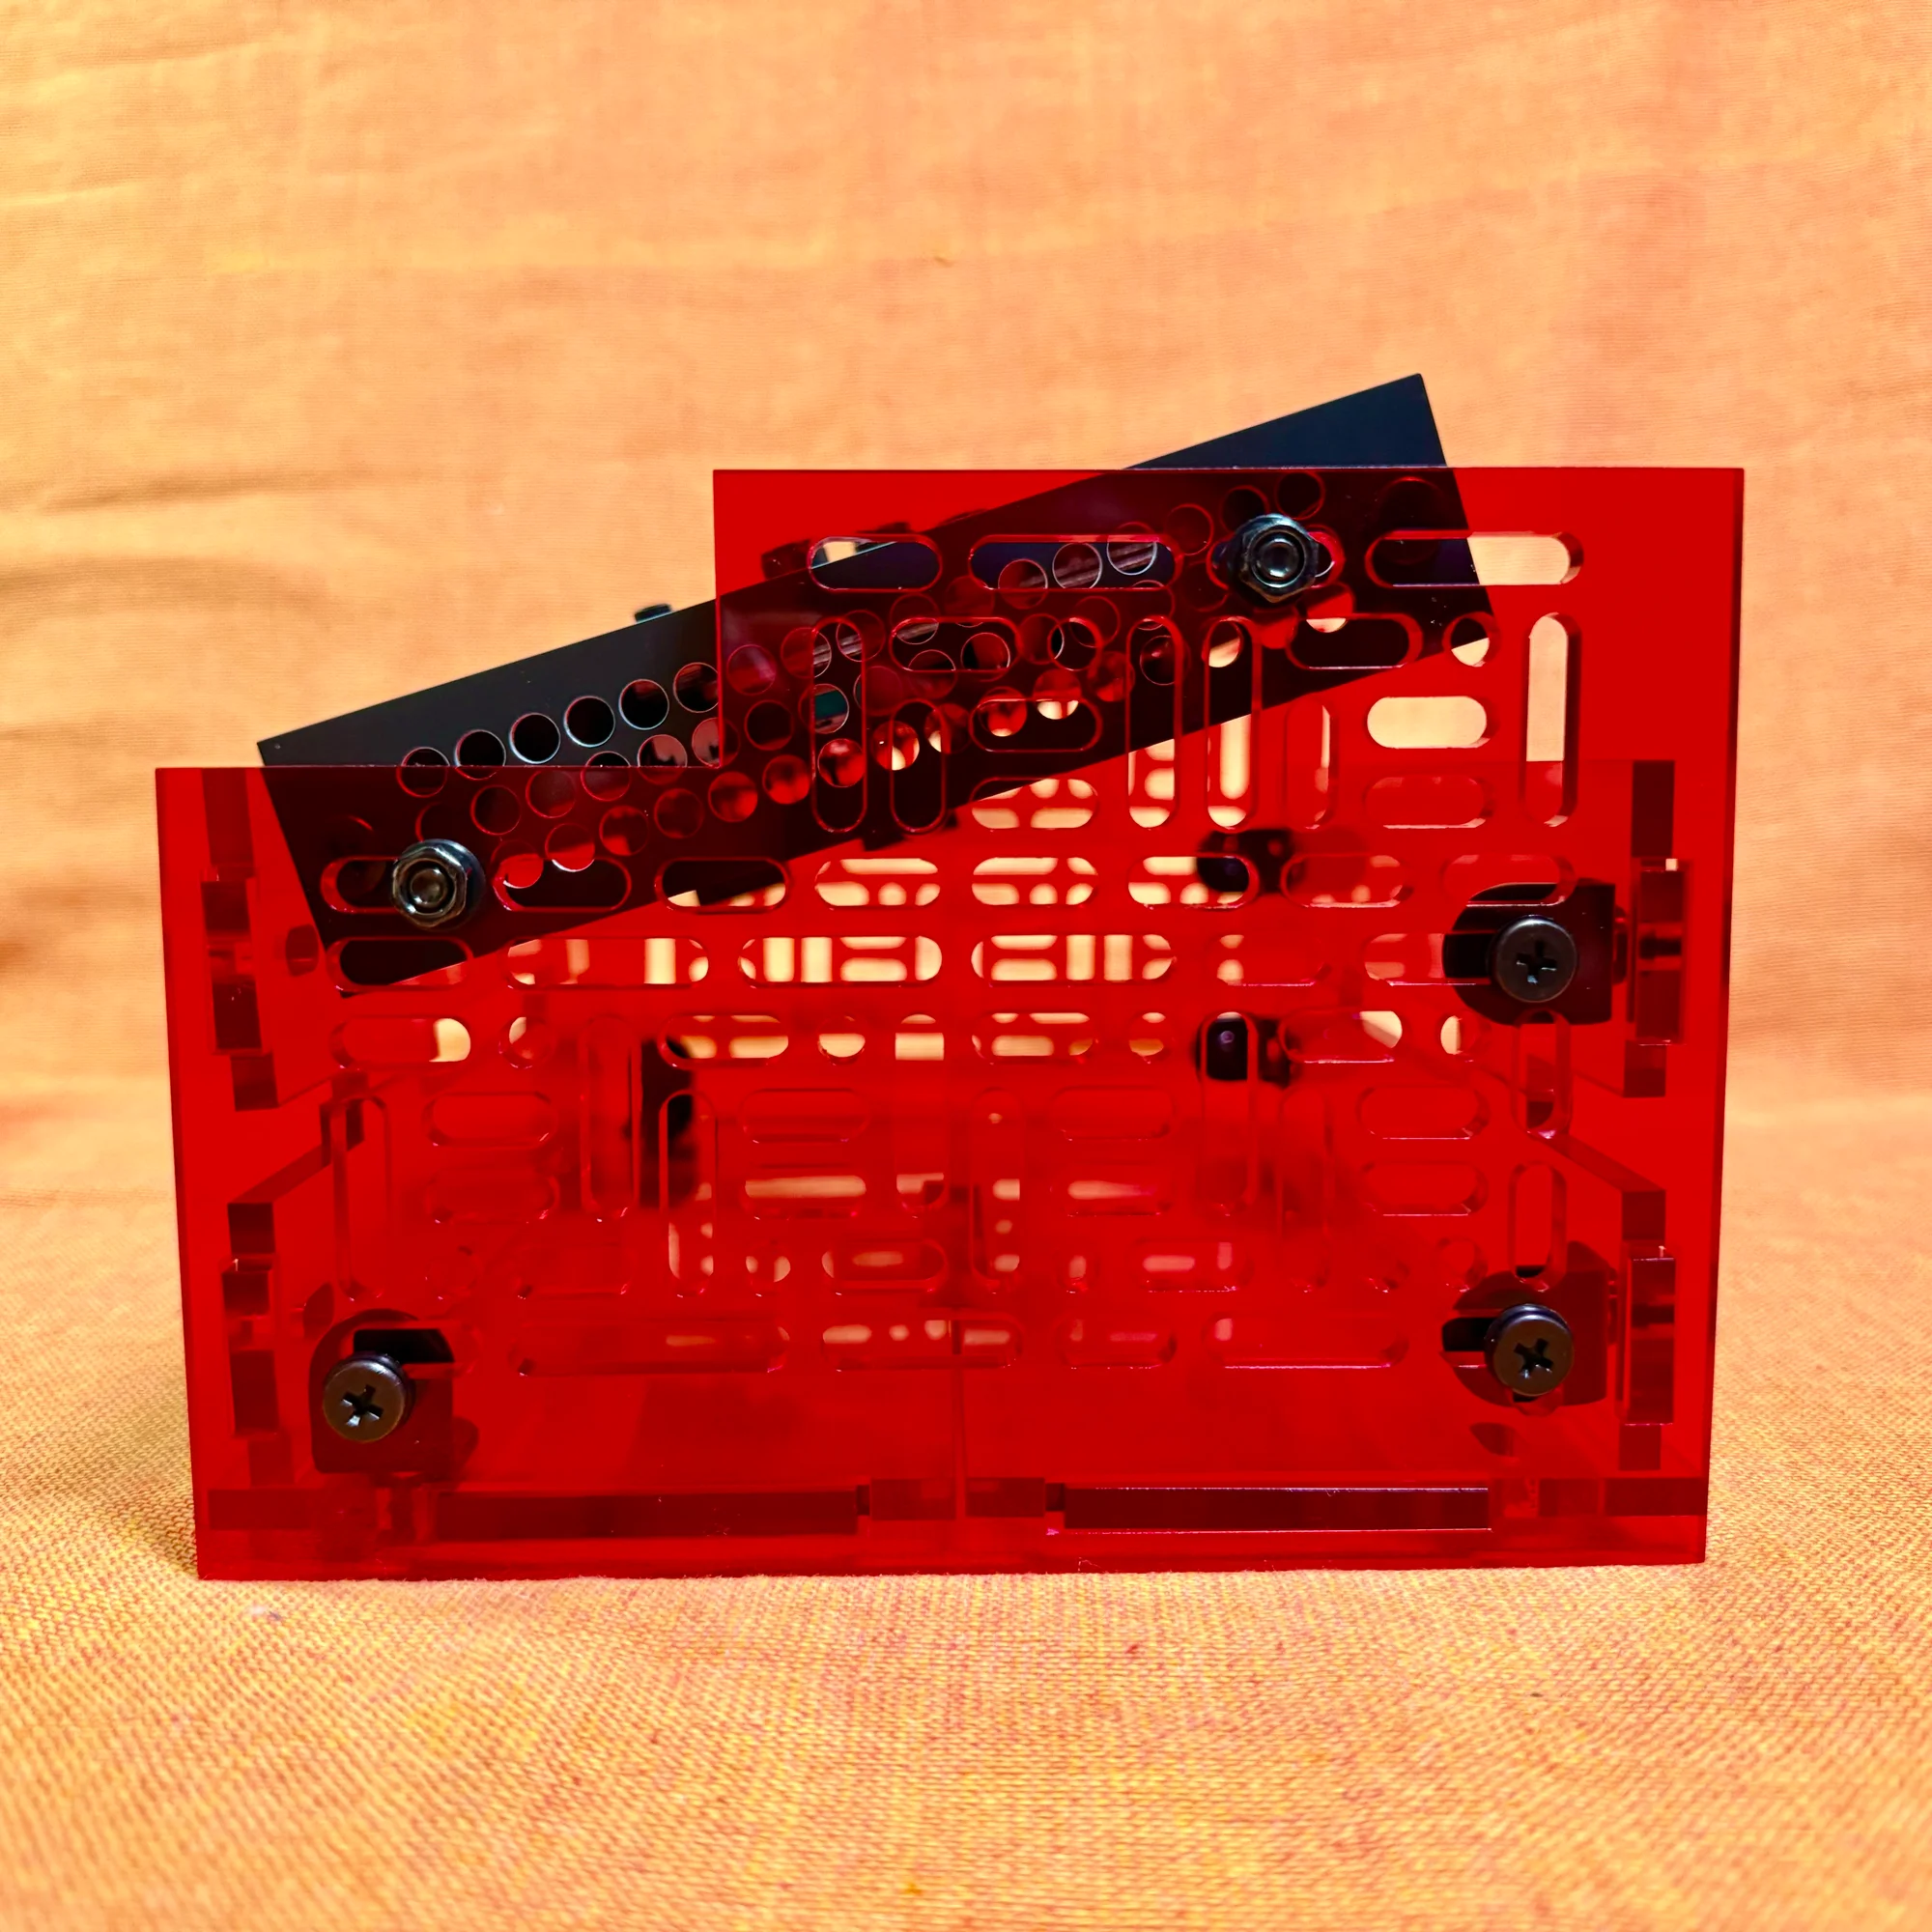
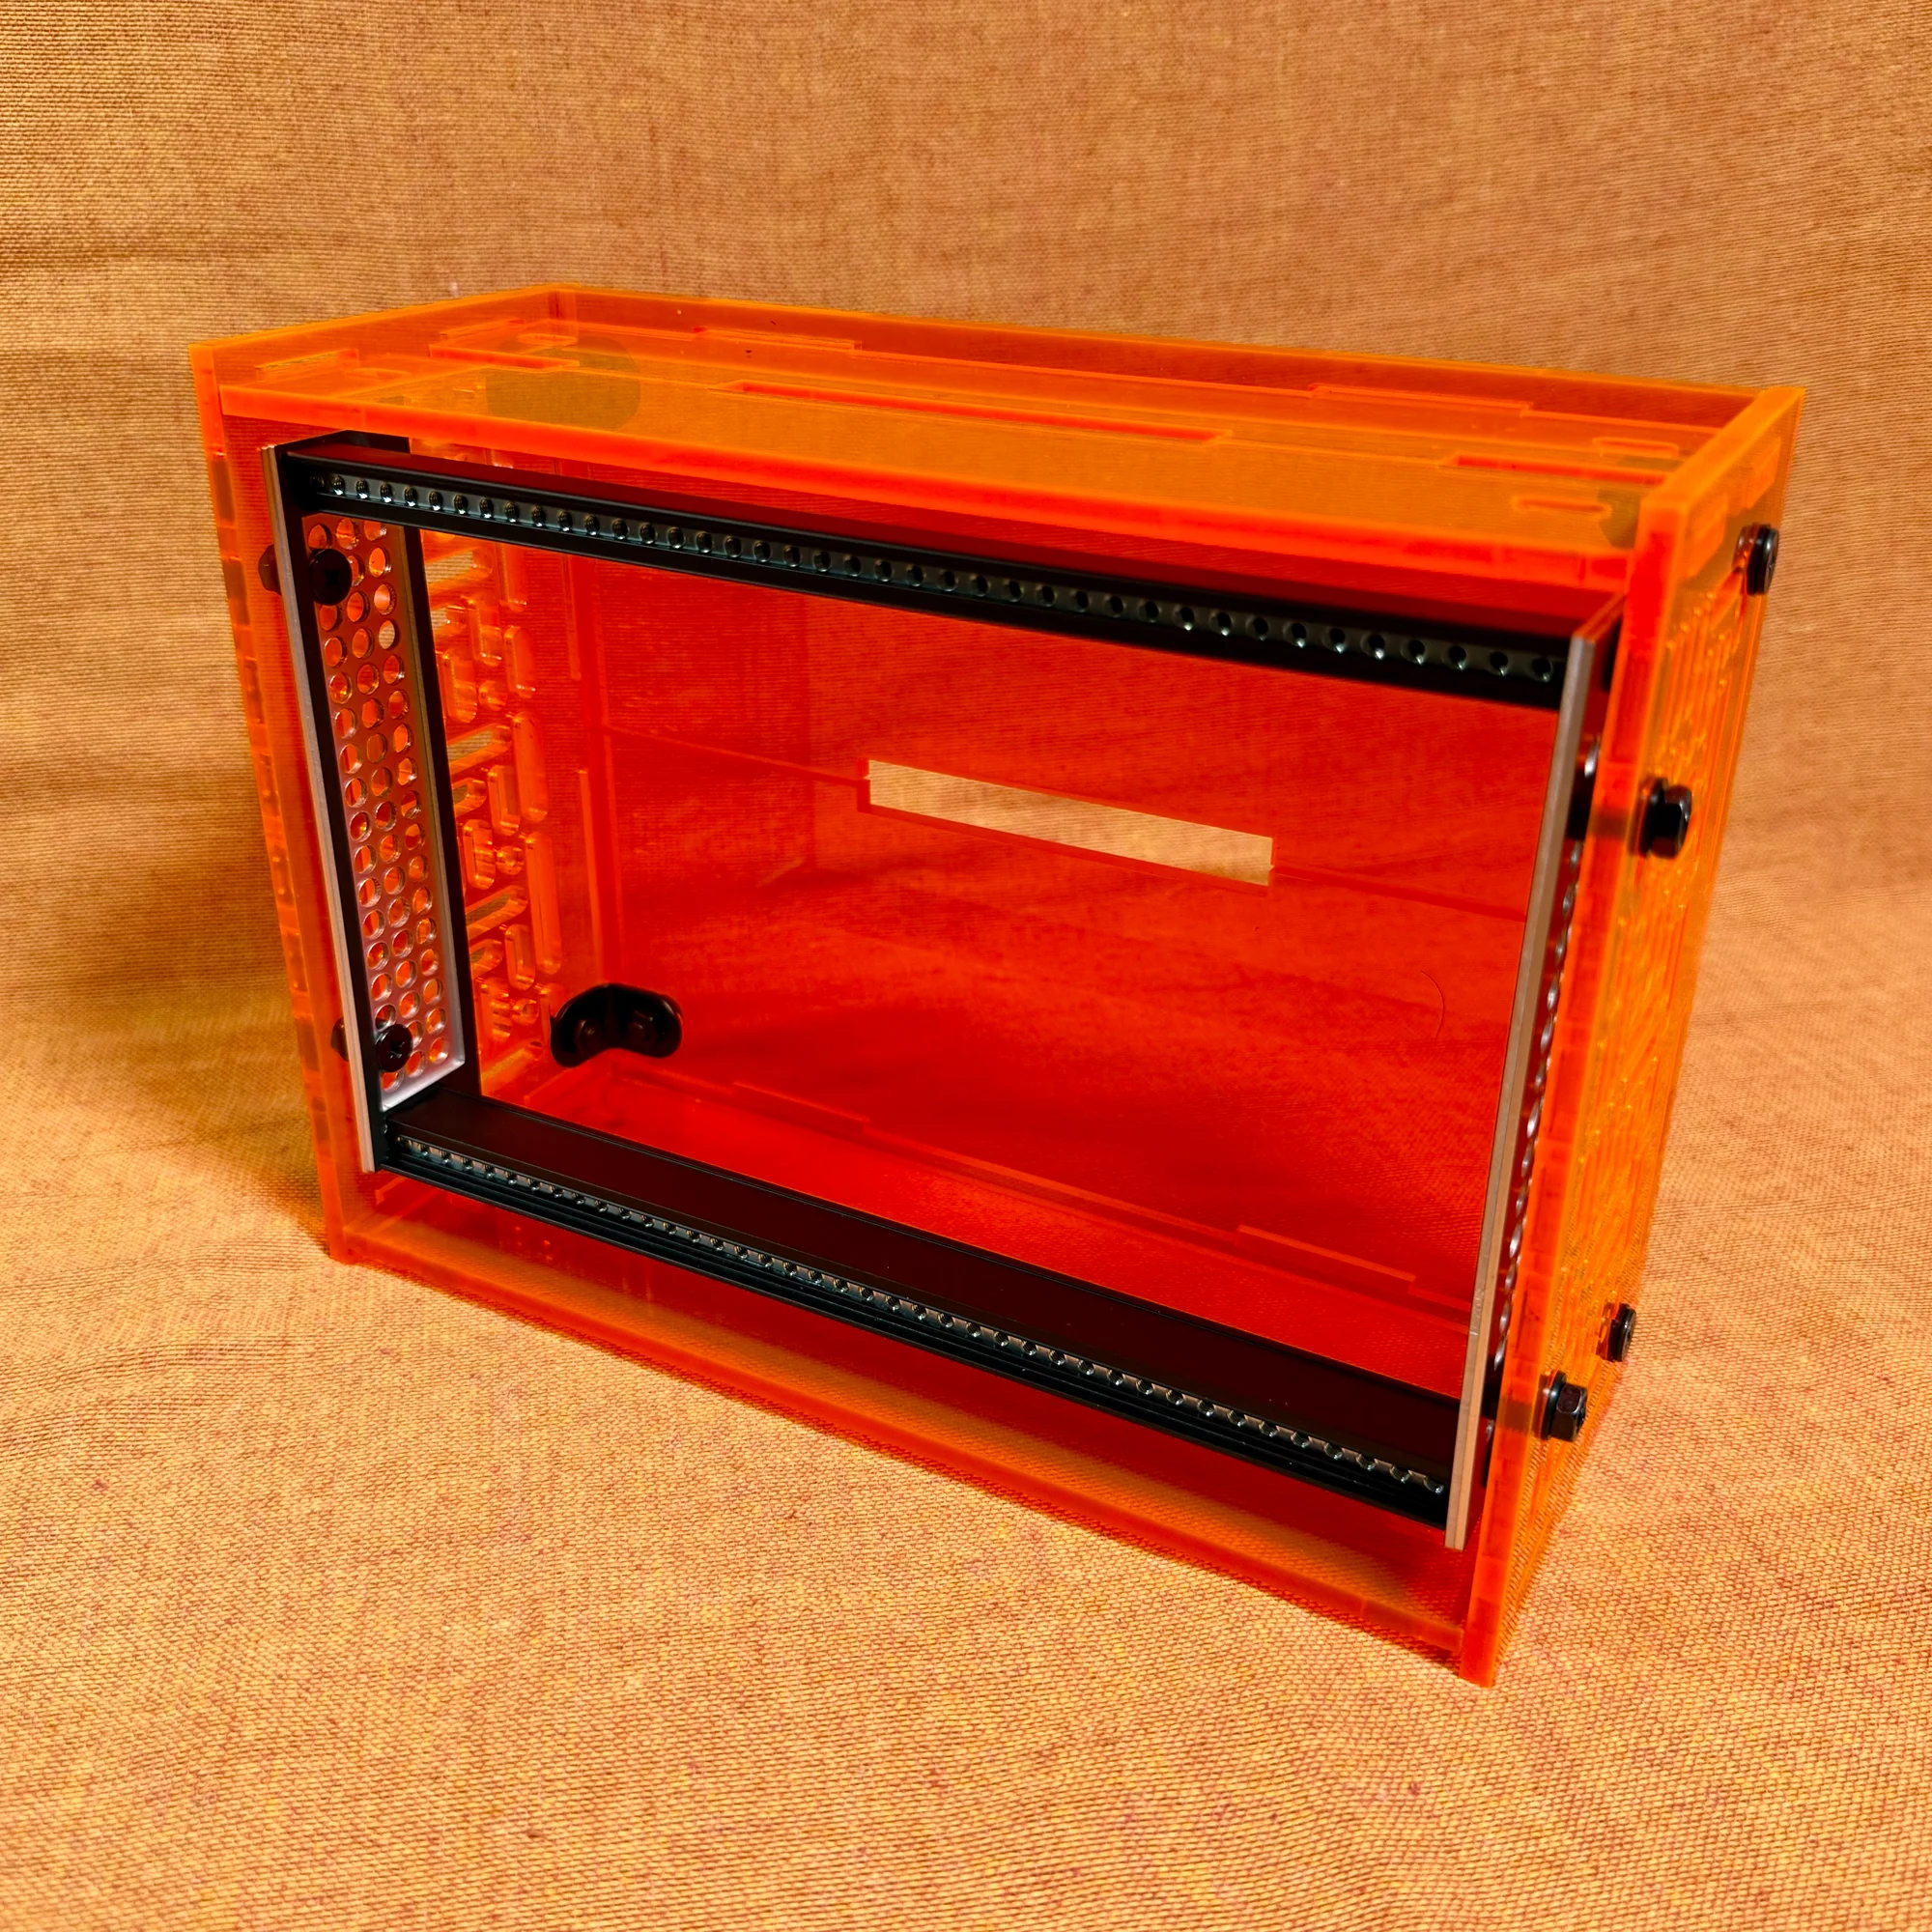
Another major feature of the zudo-block-40 is the ability to fix the inner frame at any angle. The case consists of a frame section and an outer box section, with numerous holes in the outer side panels. By fastening these two parts with screws, you can fix the frame at your preferred angle and position.
If you already own a modular synth case, have you ever felt that “flat on the desk, it’s hard to use when sitting down”? The zudo-block-40 solves this problem with the case alone. The freely adjustable frame angle significantly improves visibility and operability, creating a comfortable playing environment.
3. Budget-Selectable Rails
The zudo-block-40 is a customizable case that lets you choose from three types of rails in different materials. There’s a high-precision, premium all-aluminum type, an affordable ASA resin entry model, and a well-balanced hybrid type that sits between the two.
Rails actually account for a large portion of the overall case cost. While there’s no arguing that solid metal rails are ideal, they drive up the price. This means even buying a box to house your modules can be costly, creating a significant barrier for modular synth beginners.
This case initially used only metal rails, but to remove that barrier, we designed a resin rail that maintains usability while keeping the price down. This allows users to choose the rail type that best fits their needs.
4. Expandable Through Combinations
The zudo-block series incorporates the concept of modularity into the case design itself. Just as modular synth configurations are flexible, the case configuration can also be flexibly expanded and reconfigured based on your needs and ideas.
Start with a small setup, and when your system grows, add another zudo-block to scale up to a larger case. Since panel dimensions within the series are standardized, you can create your own original case with your preferred colors and combinations.
Lineup
Next, let’s explain the zudo-block-40 lineup. There are three key selection points:
- Side panel shape (Rectangular A-type / Stepped B-type)
- Color (Red / Orange / Green)
- Rail material (Lite / Dual / Metal)
Let’s go through each.
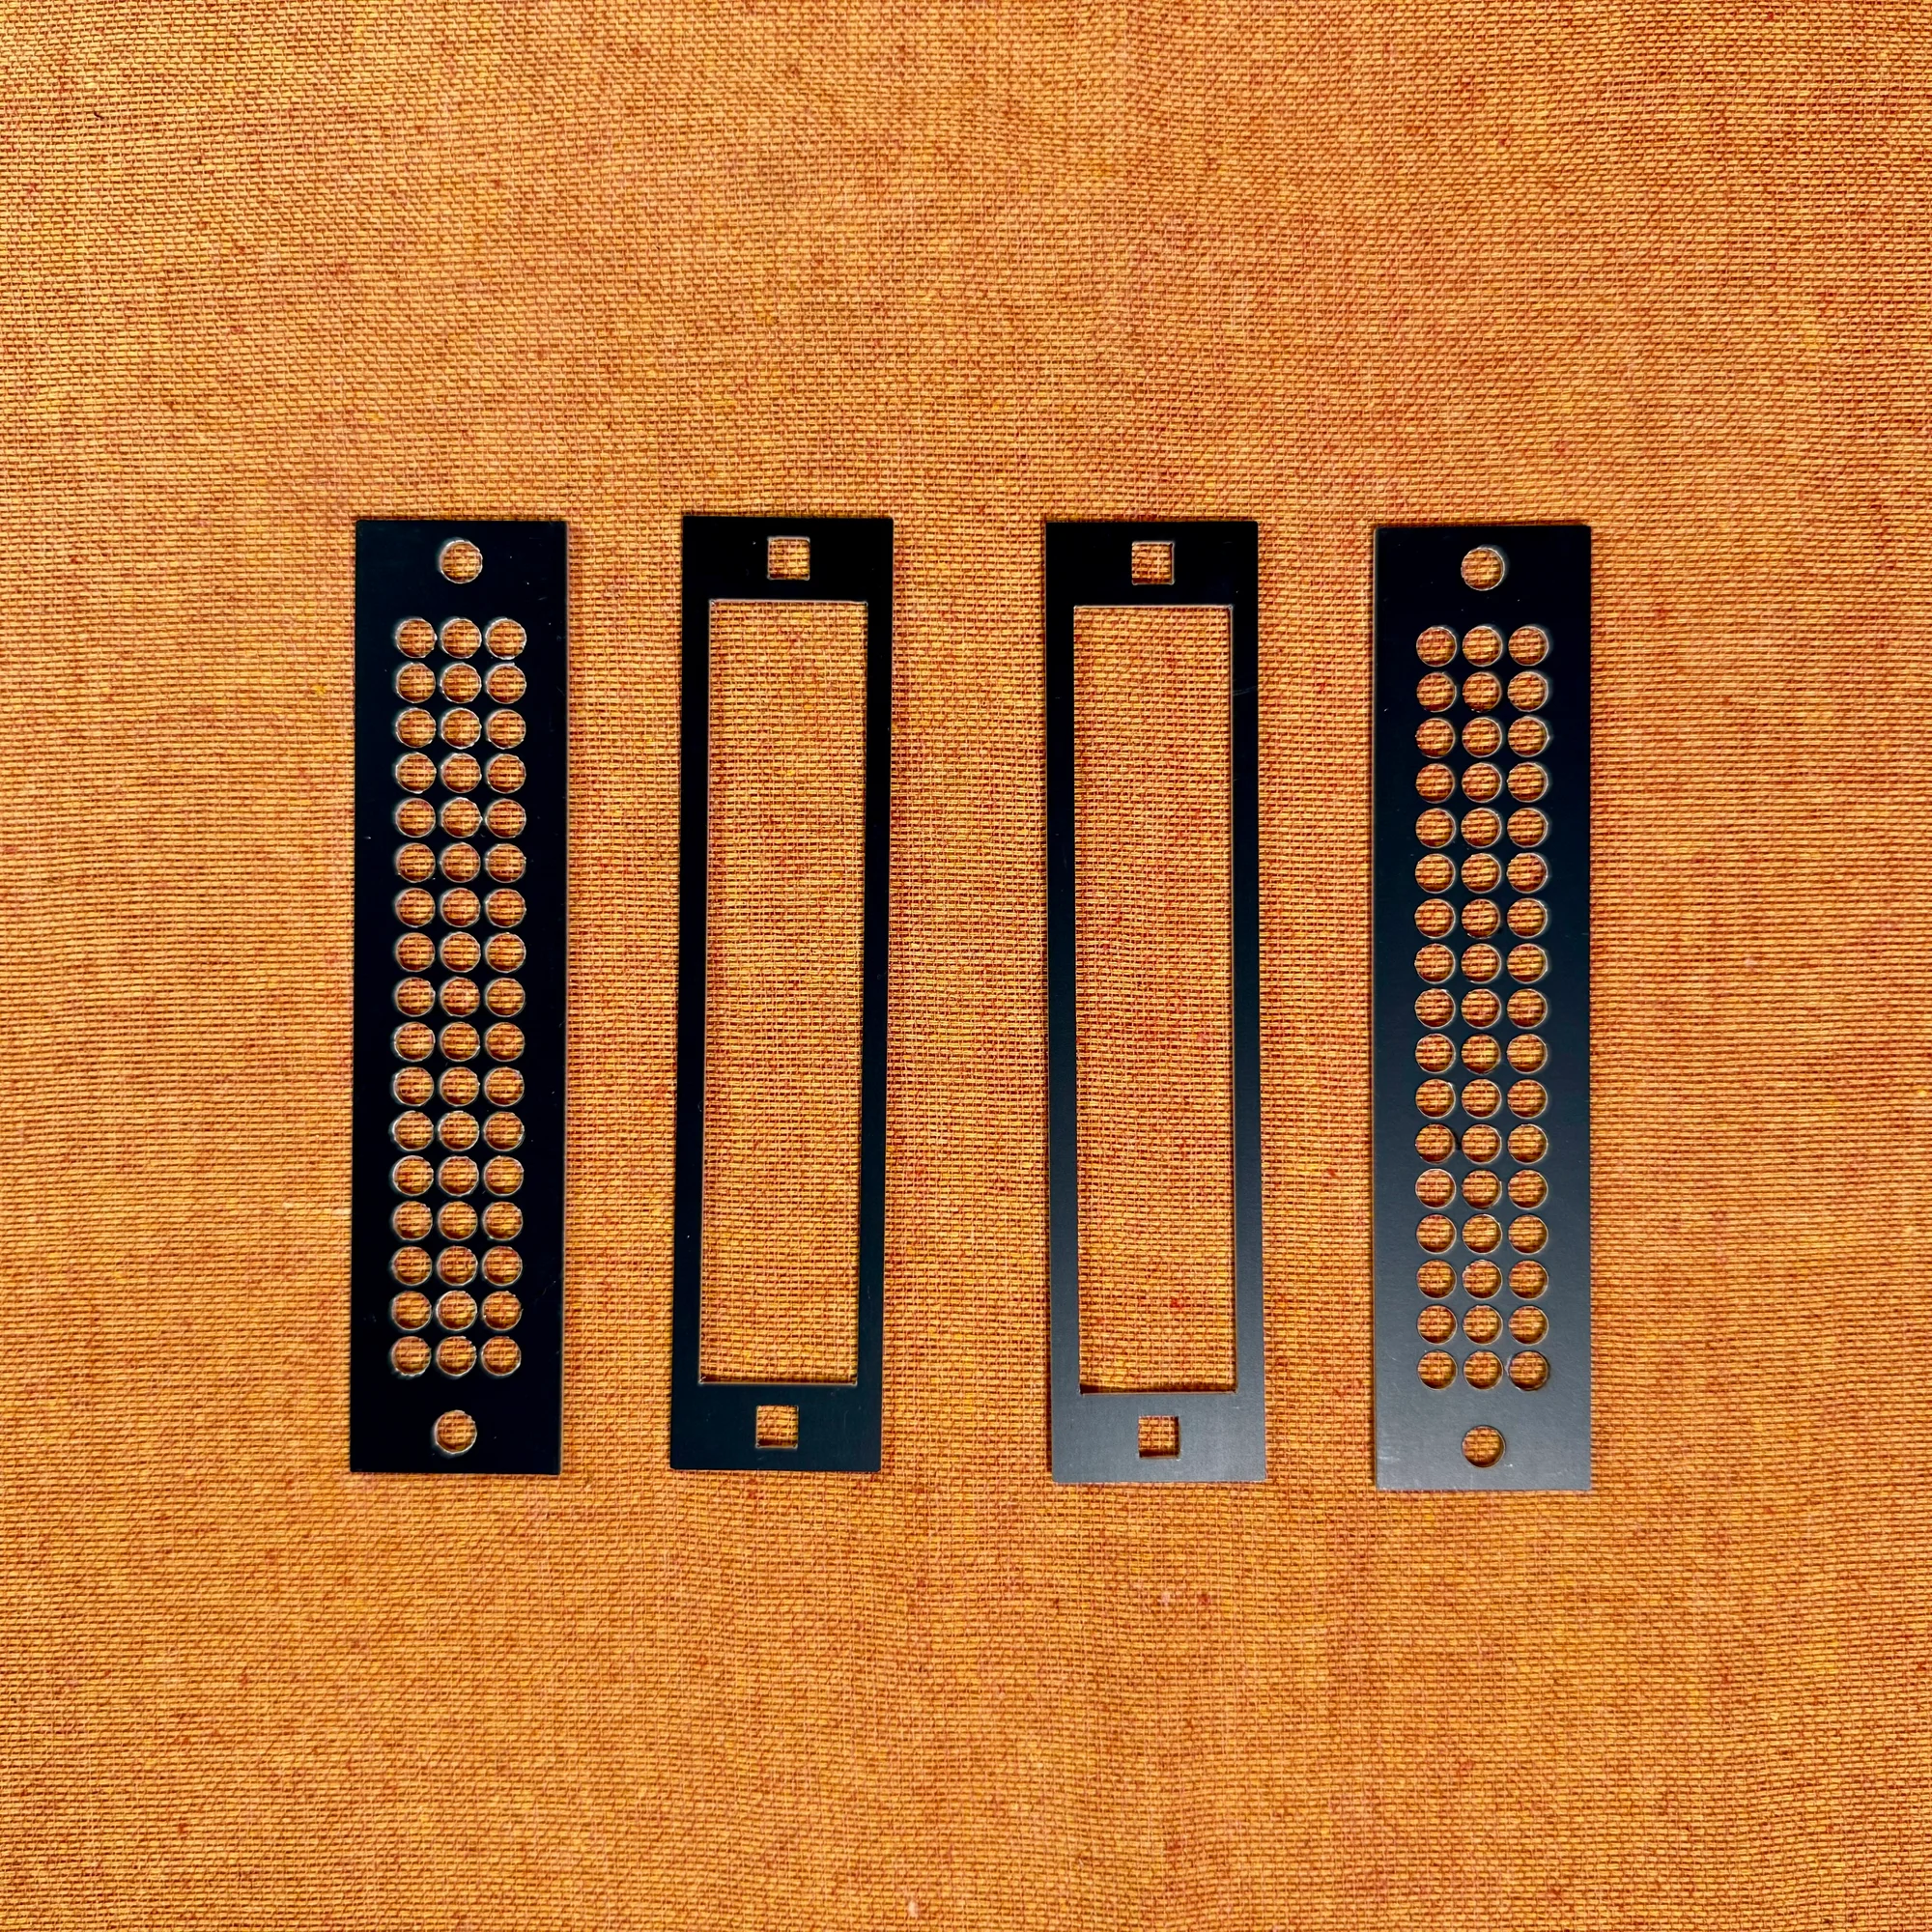
1. Side Panel Shape
First, the side panel shape. You can choose from the following two types:
- A-type: Rectangular
- B-type: Stepped
A key feature of this case is the freely adjustable rail angle, and the B-type allows for even steeper tilting.

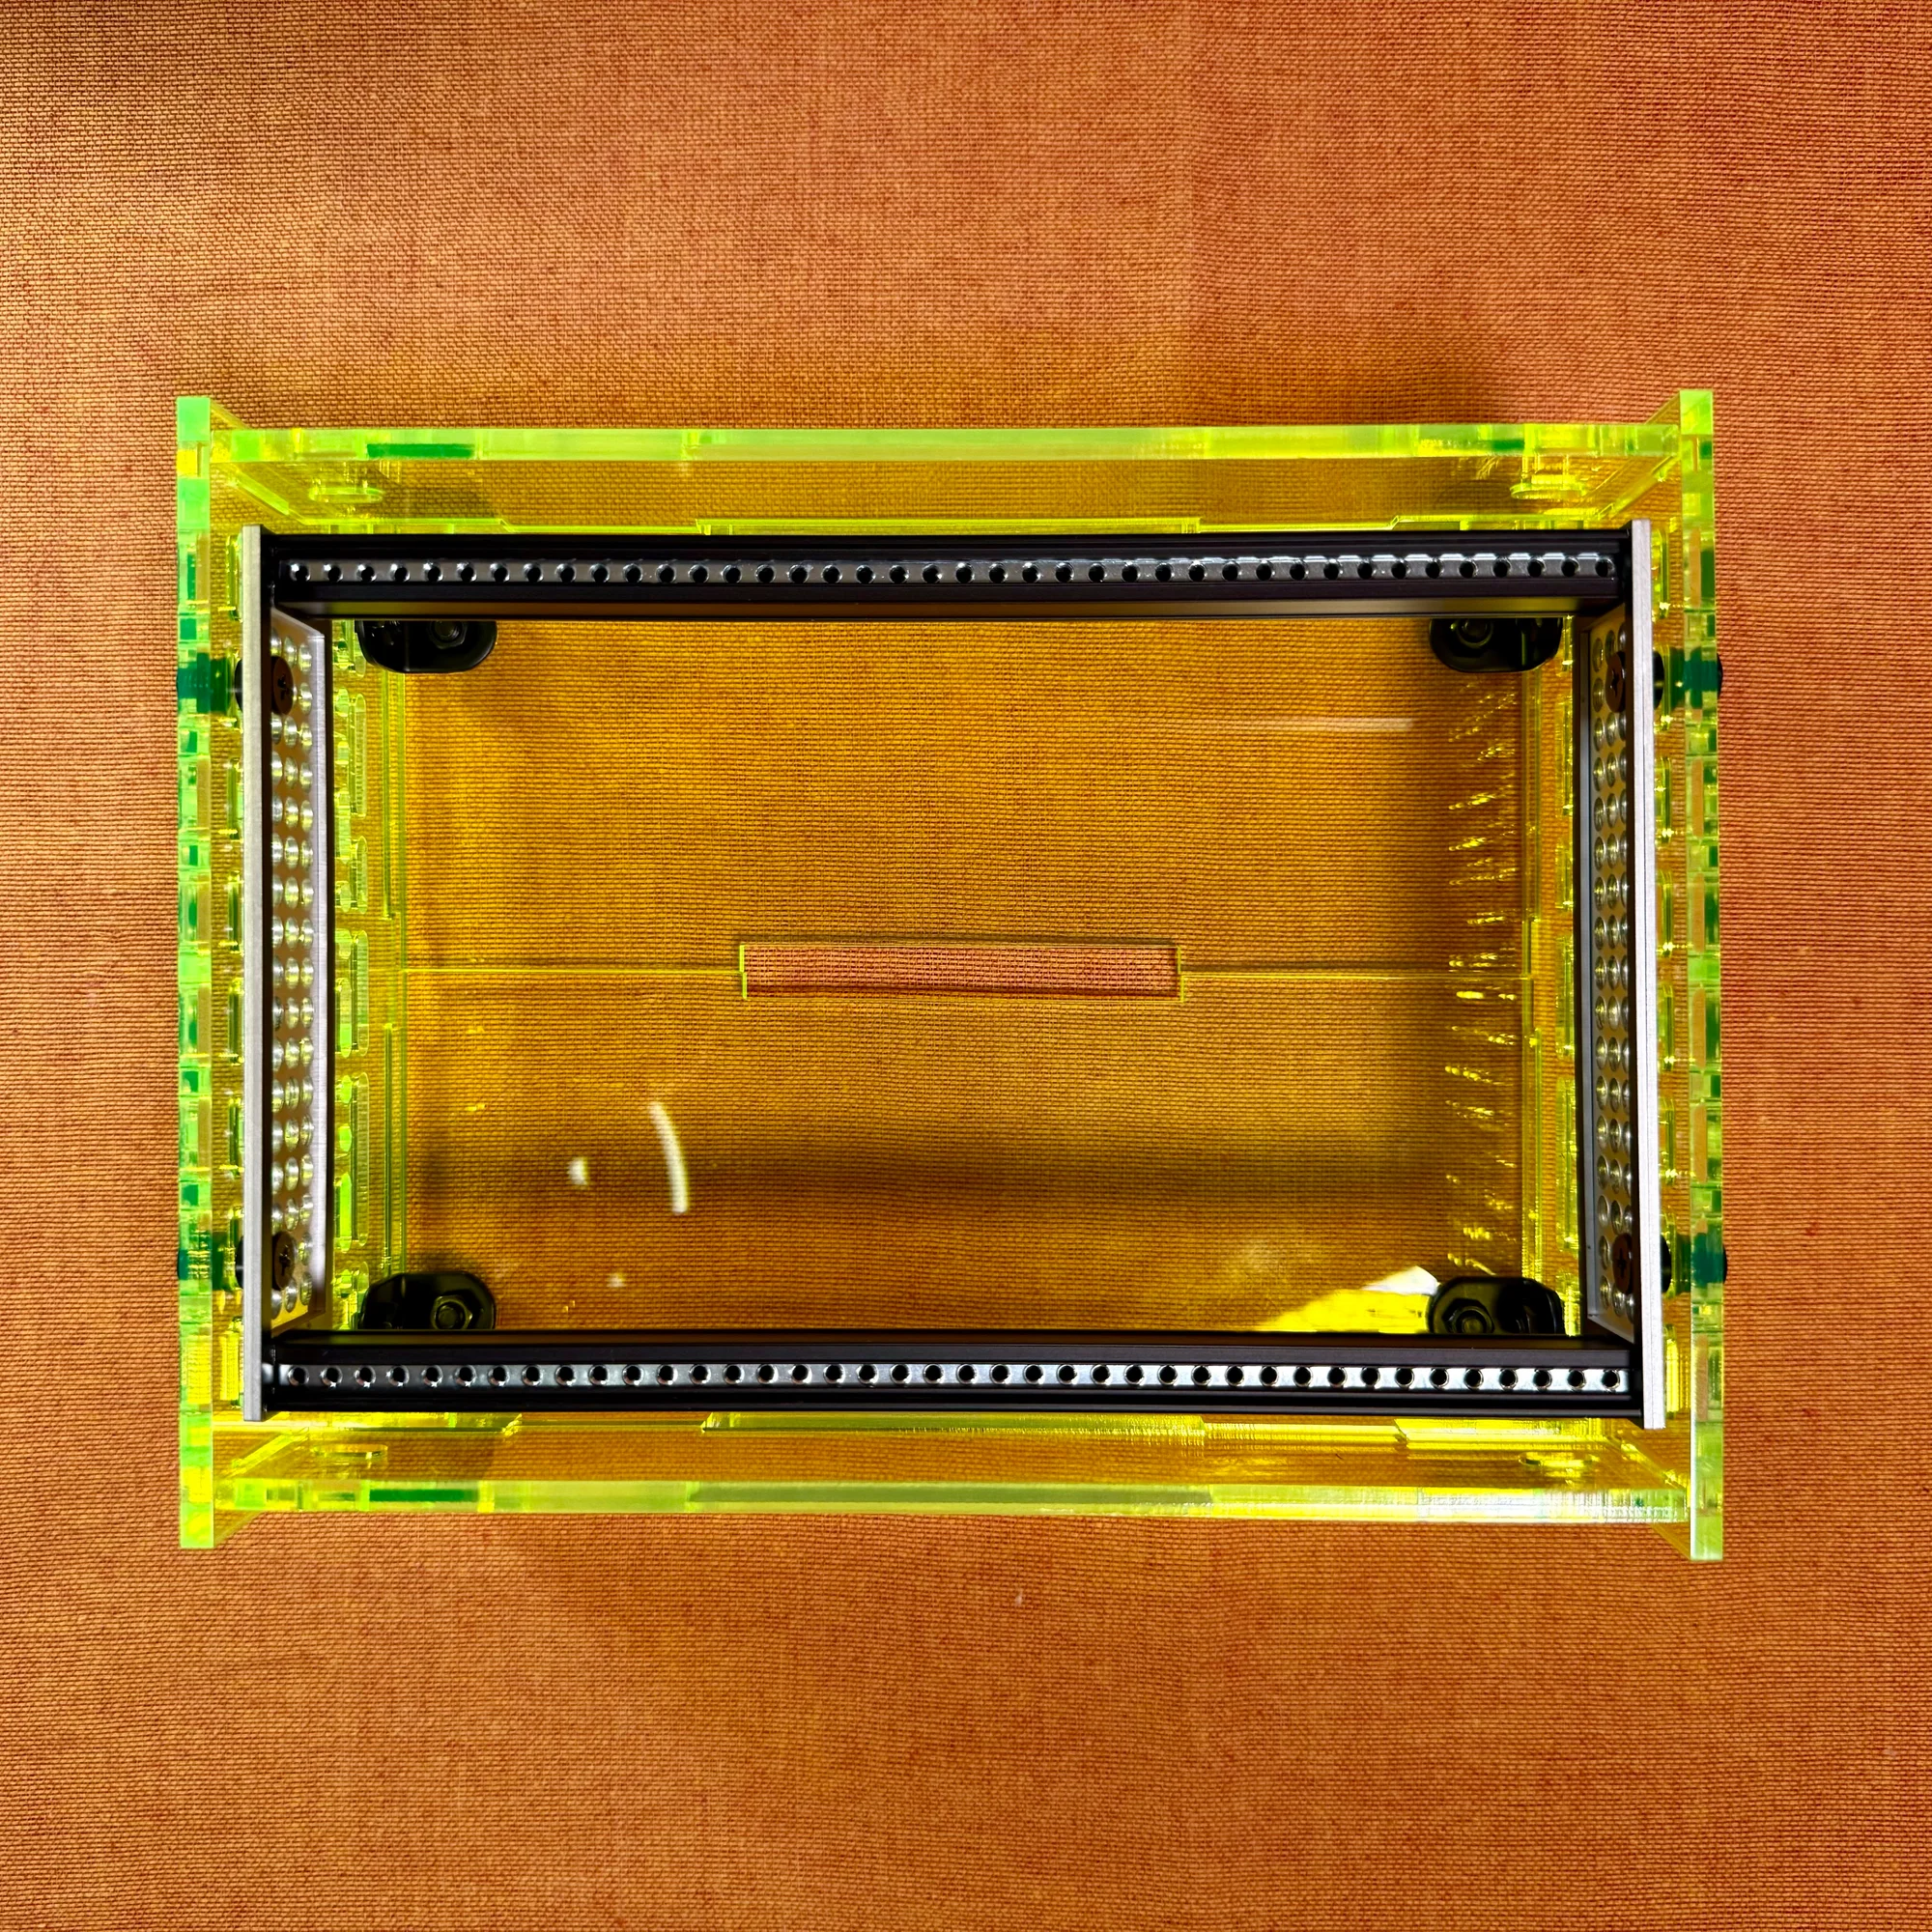
2. Color
Three colors are available:
- Red
- Orange
- Green
This product is assembled by securing acrylic panels with brackets and screws. Each panel is precision laser-cut by a specialized manufacturer.
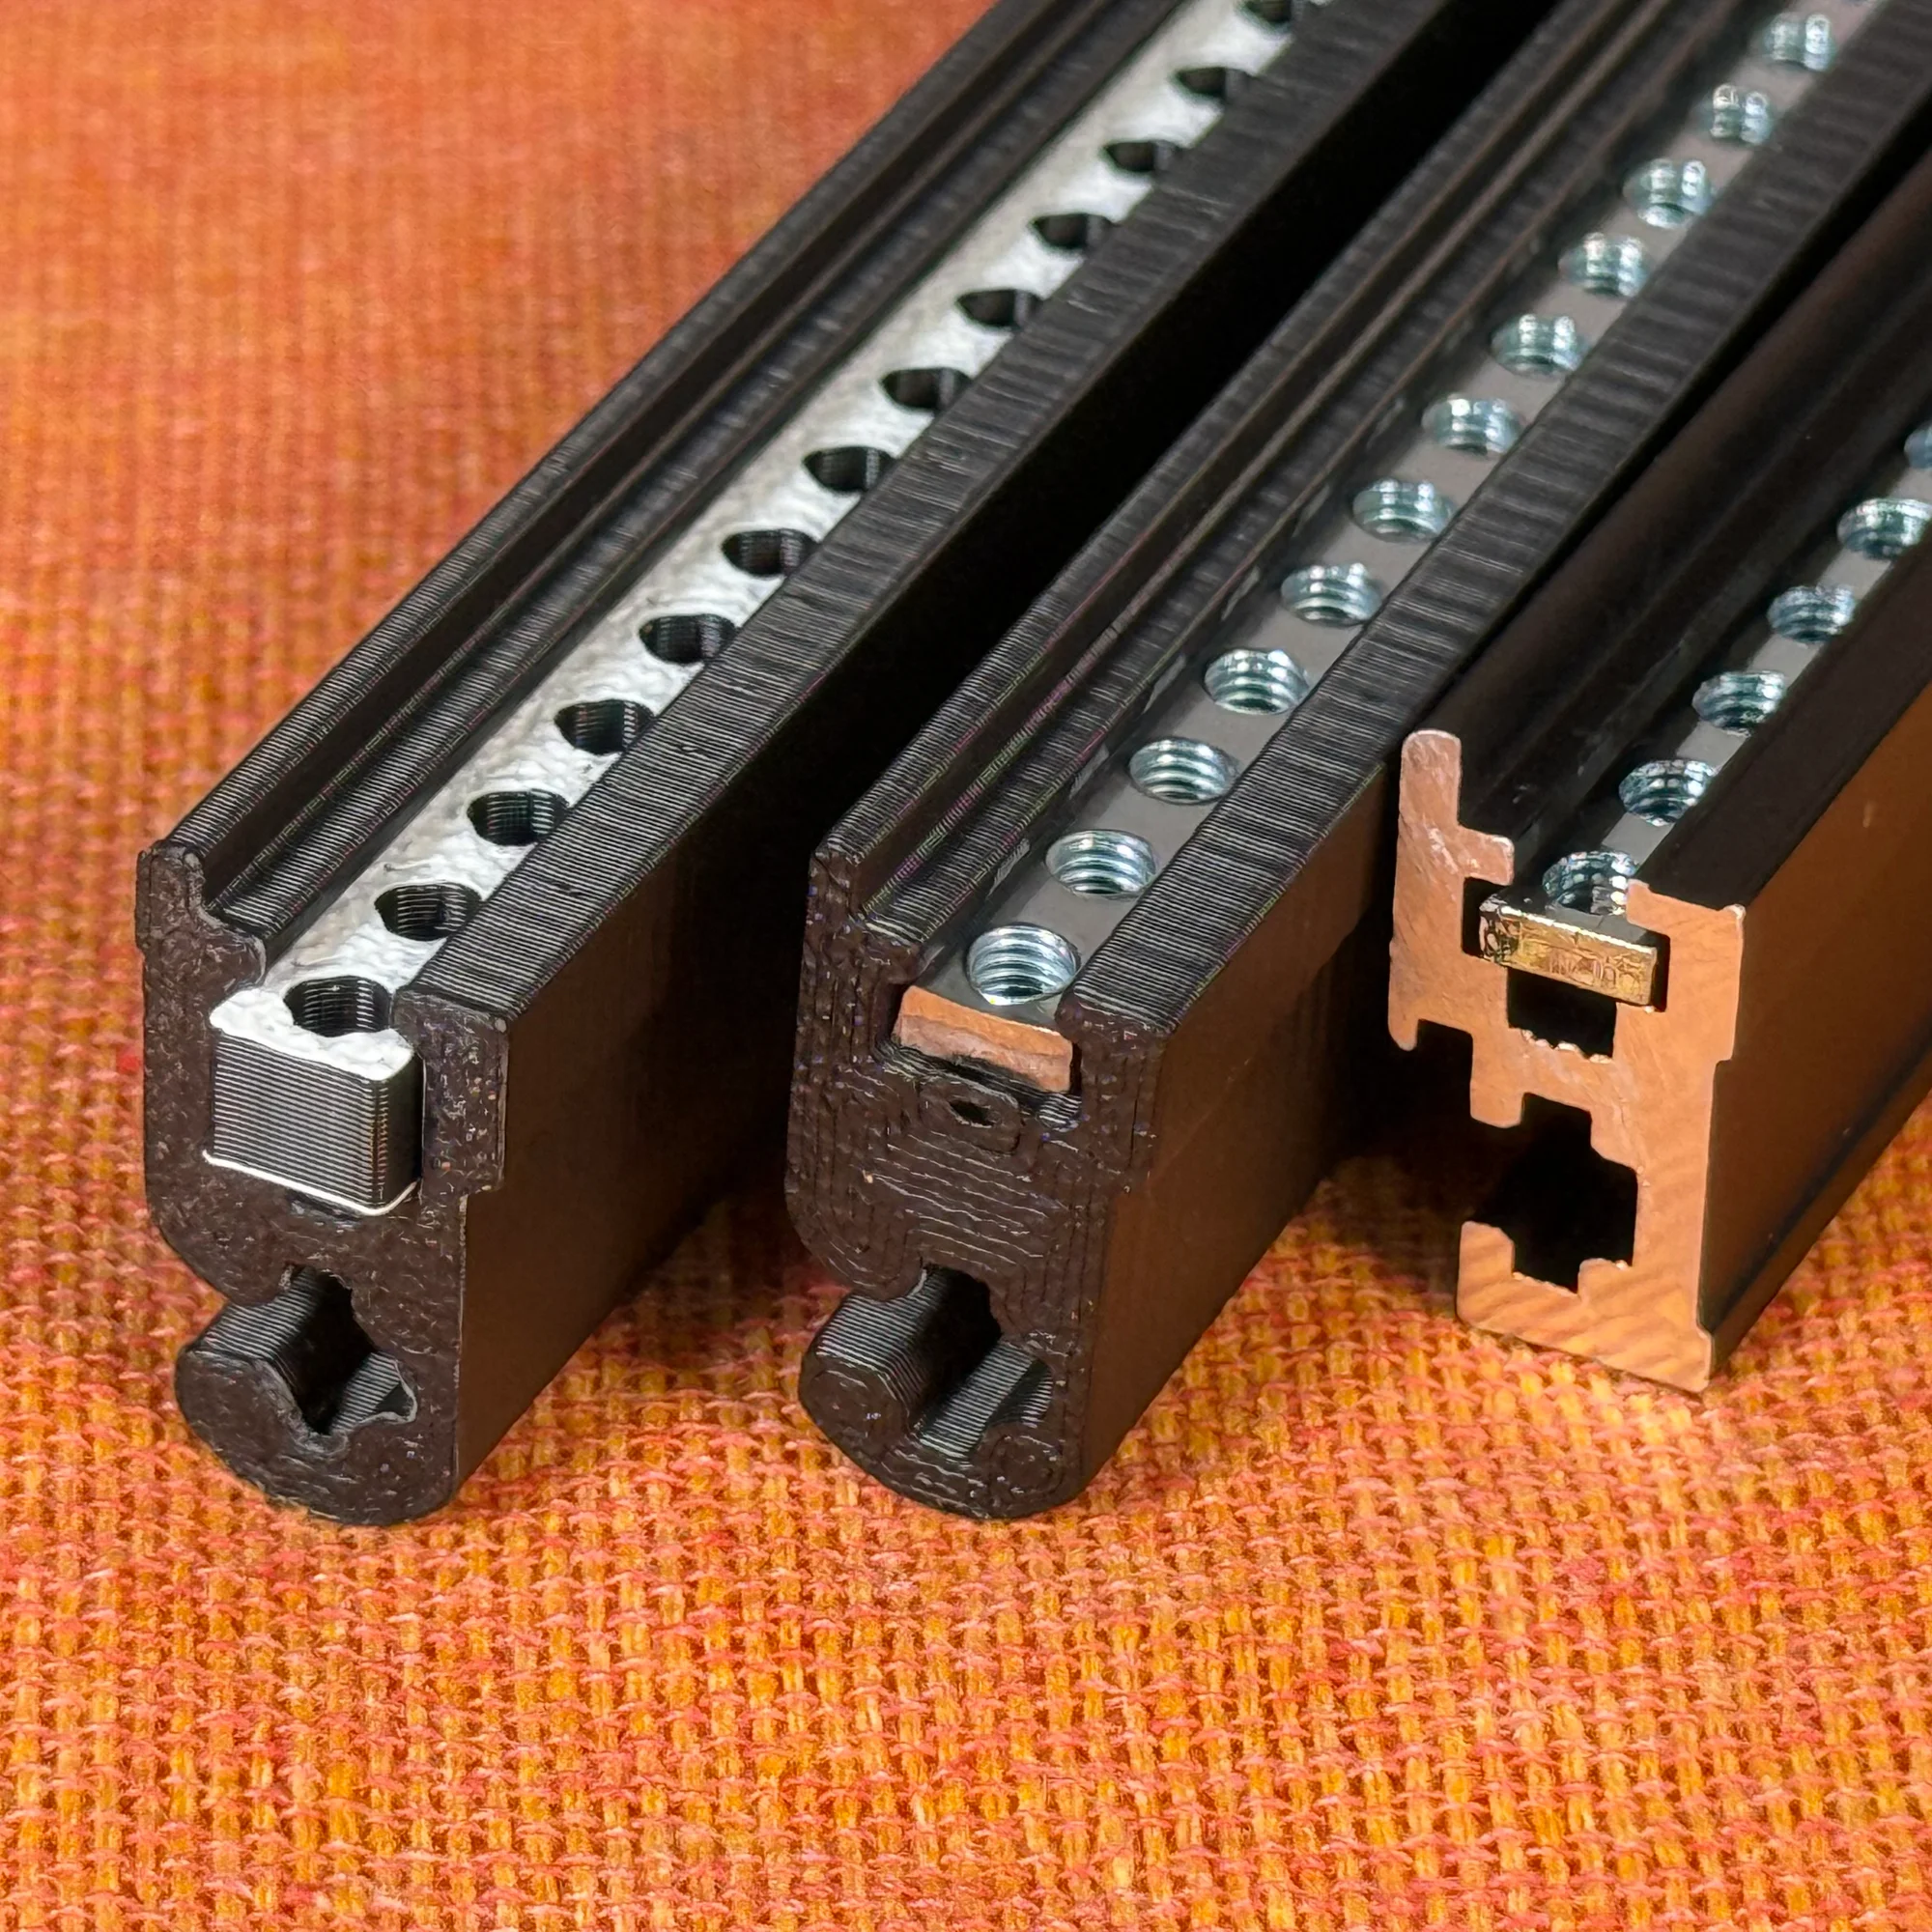
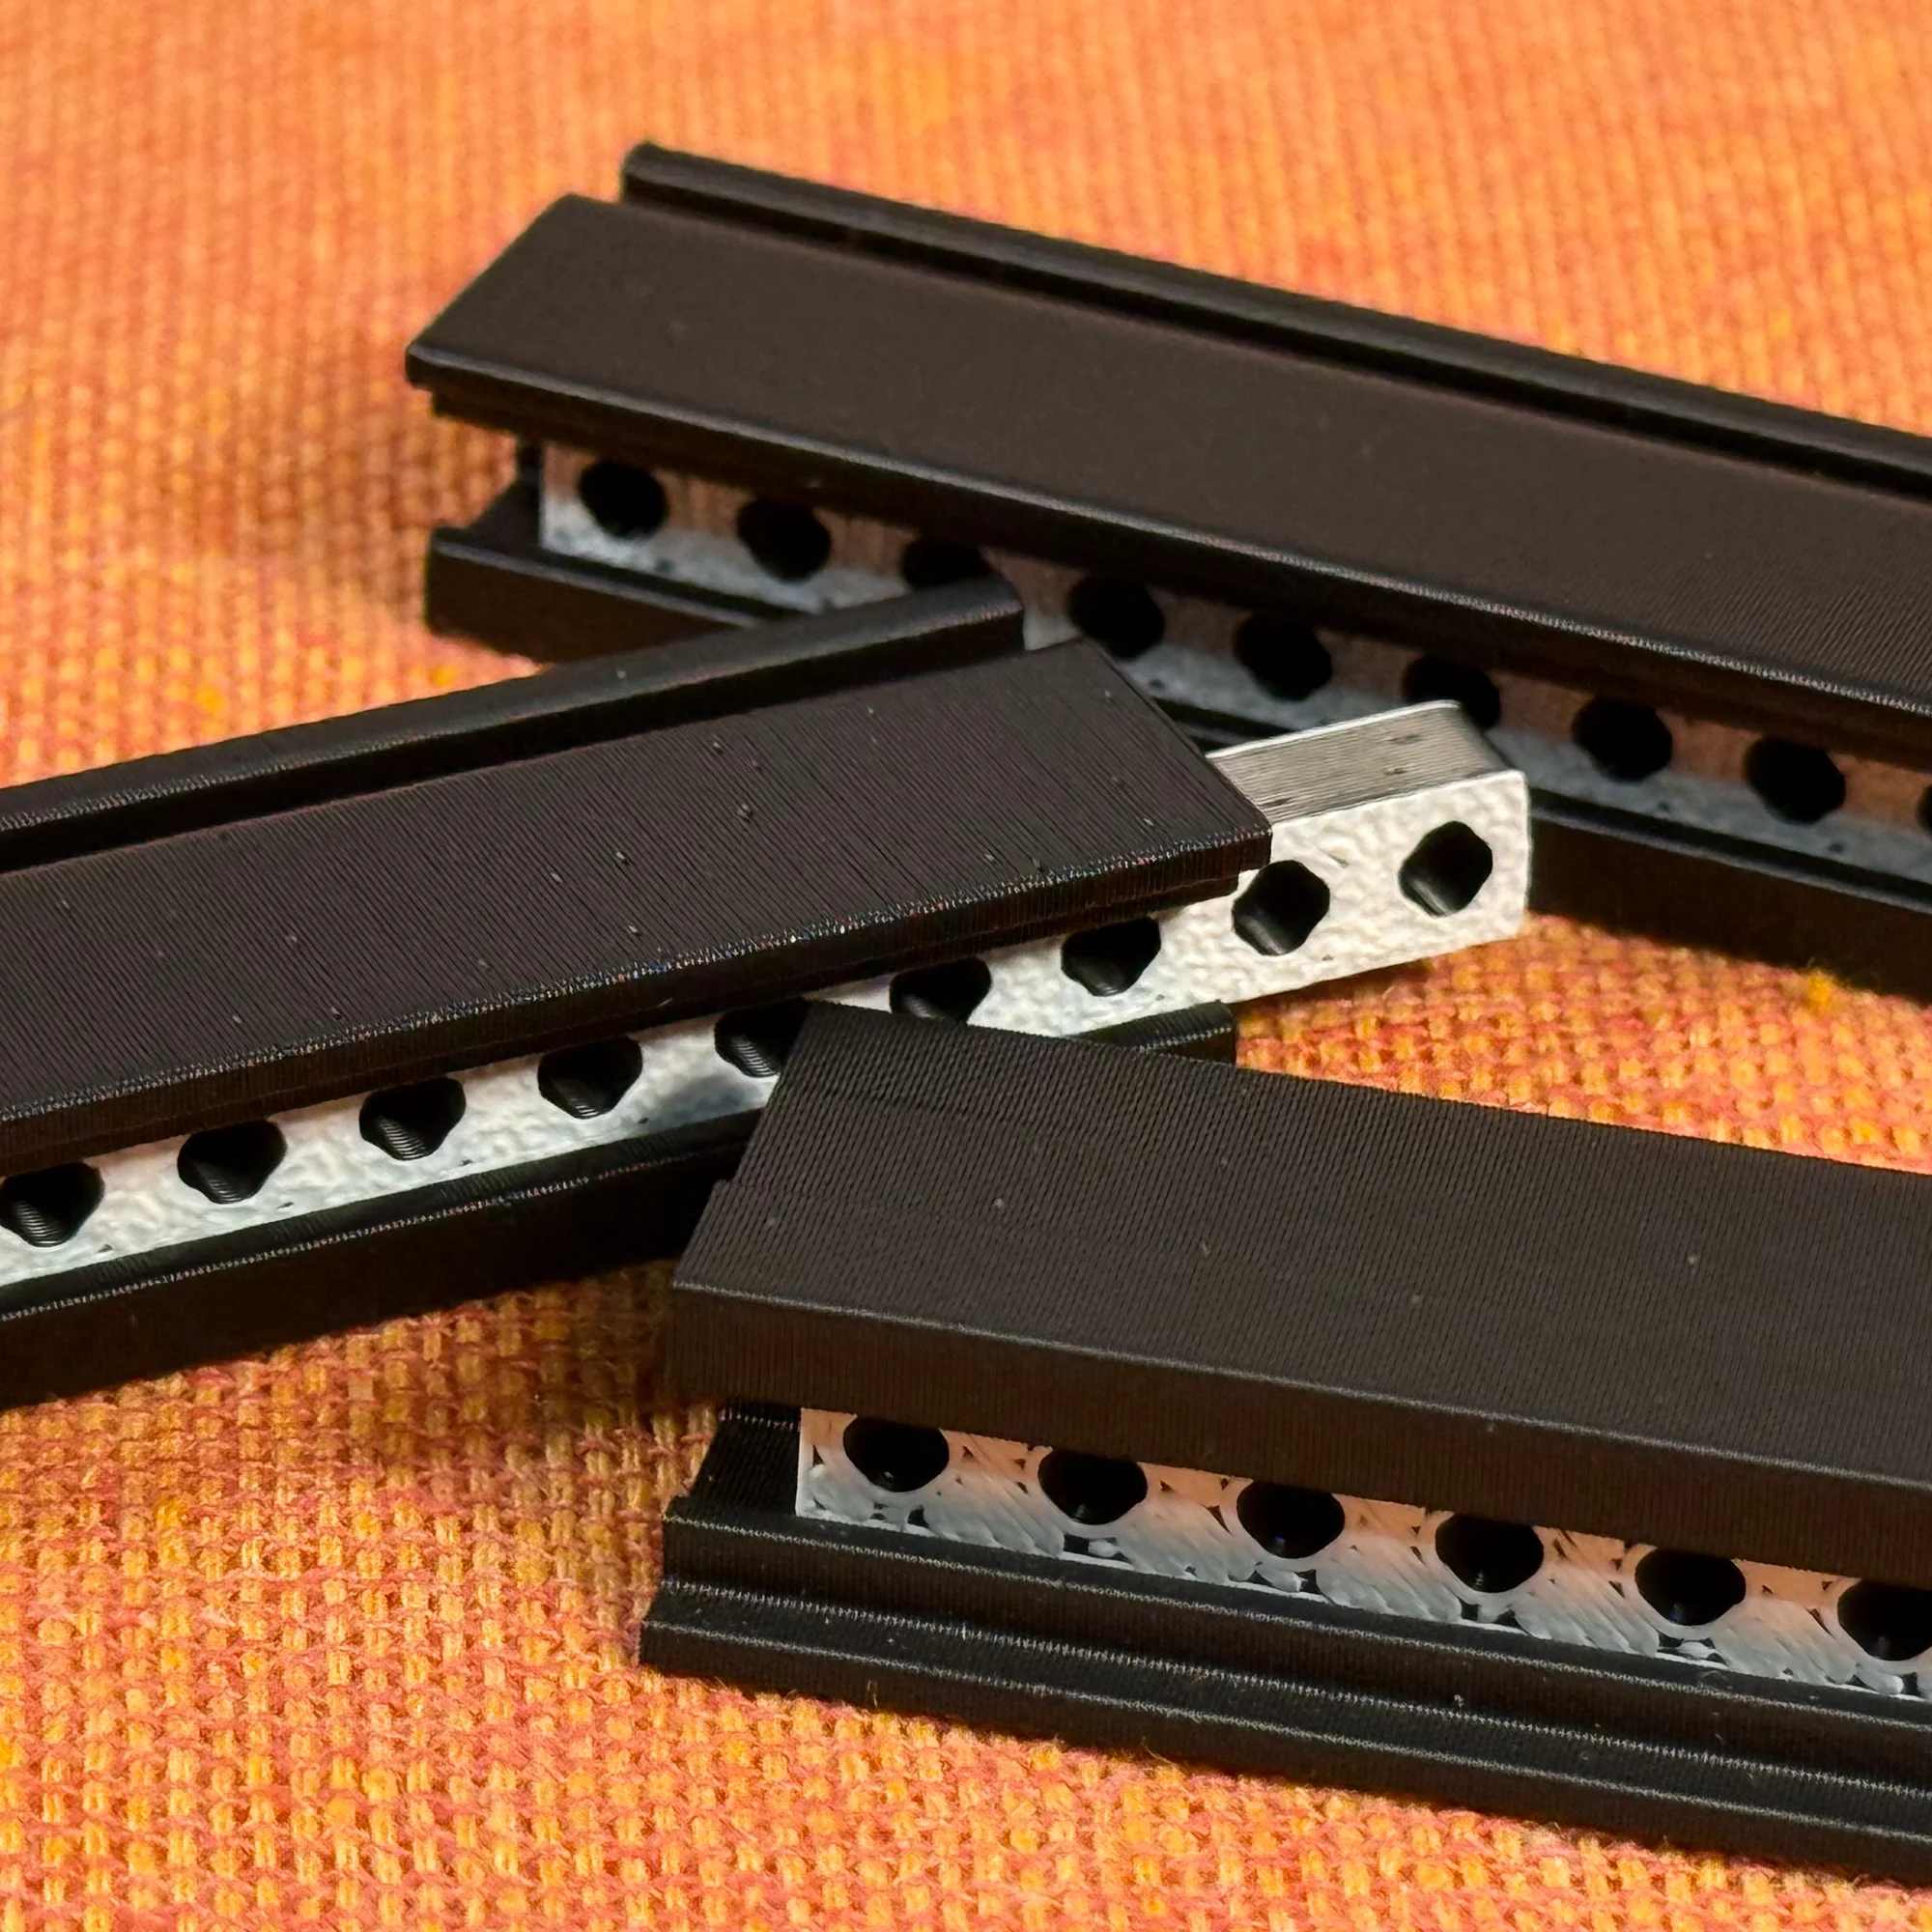
3. Rail Material
Three rail types are available:
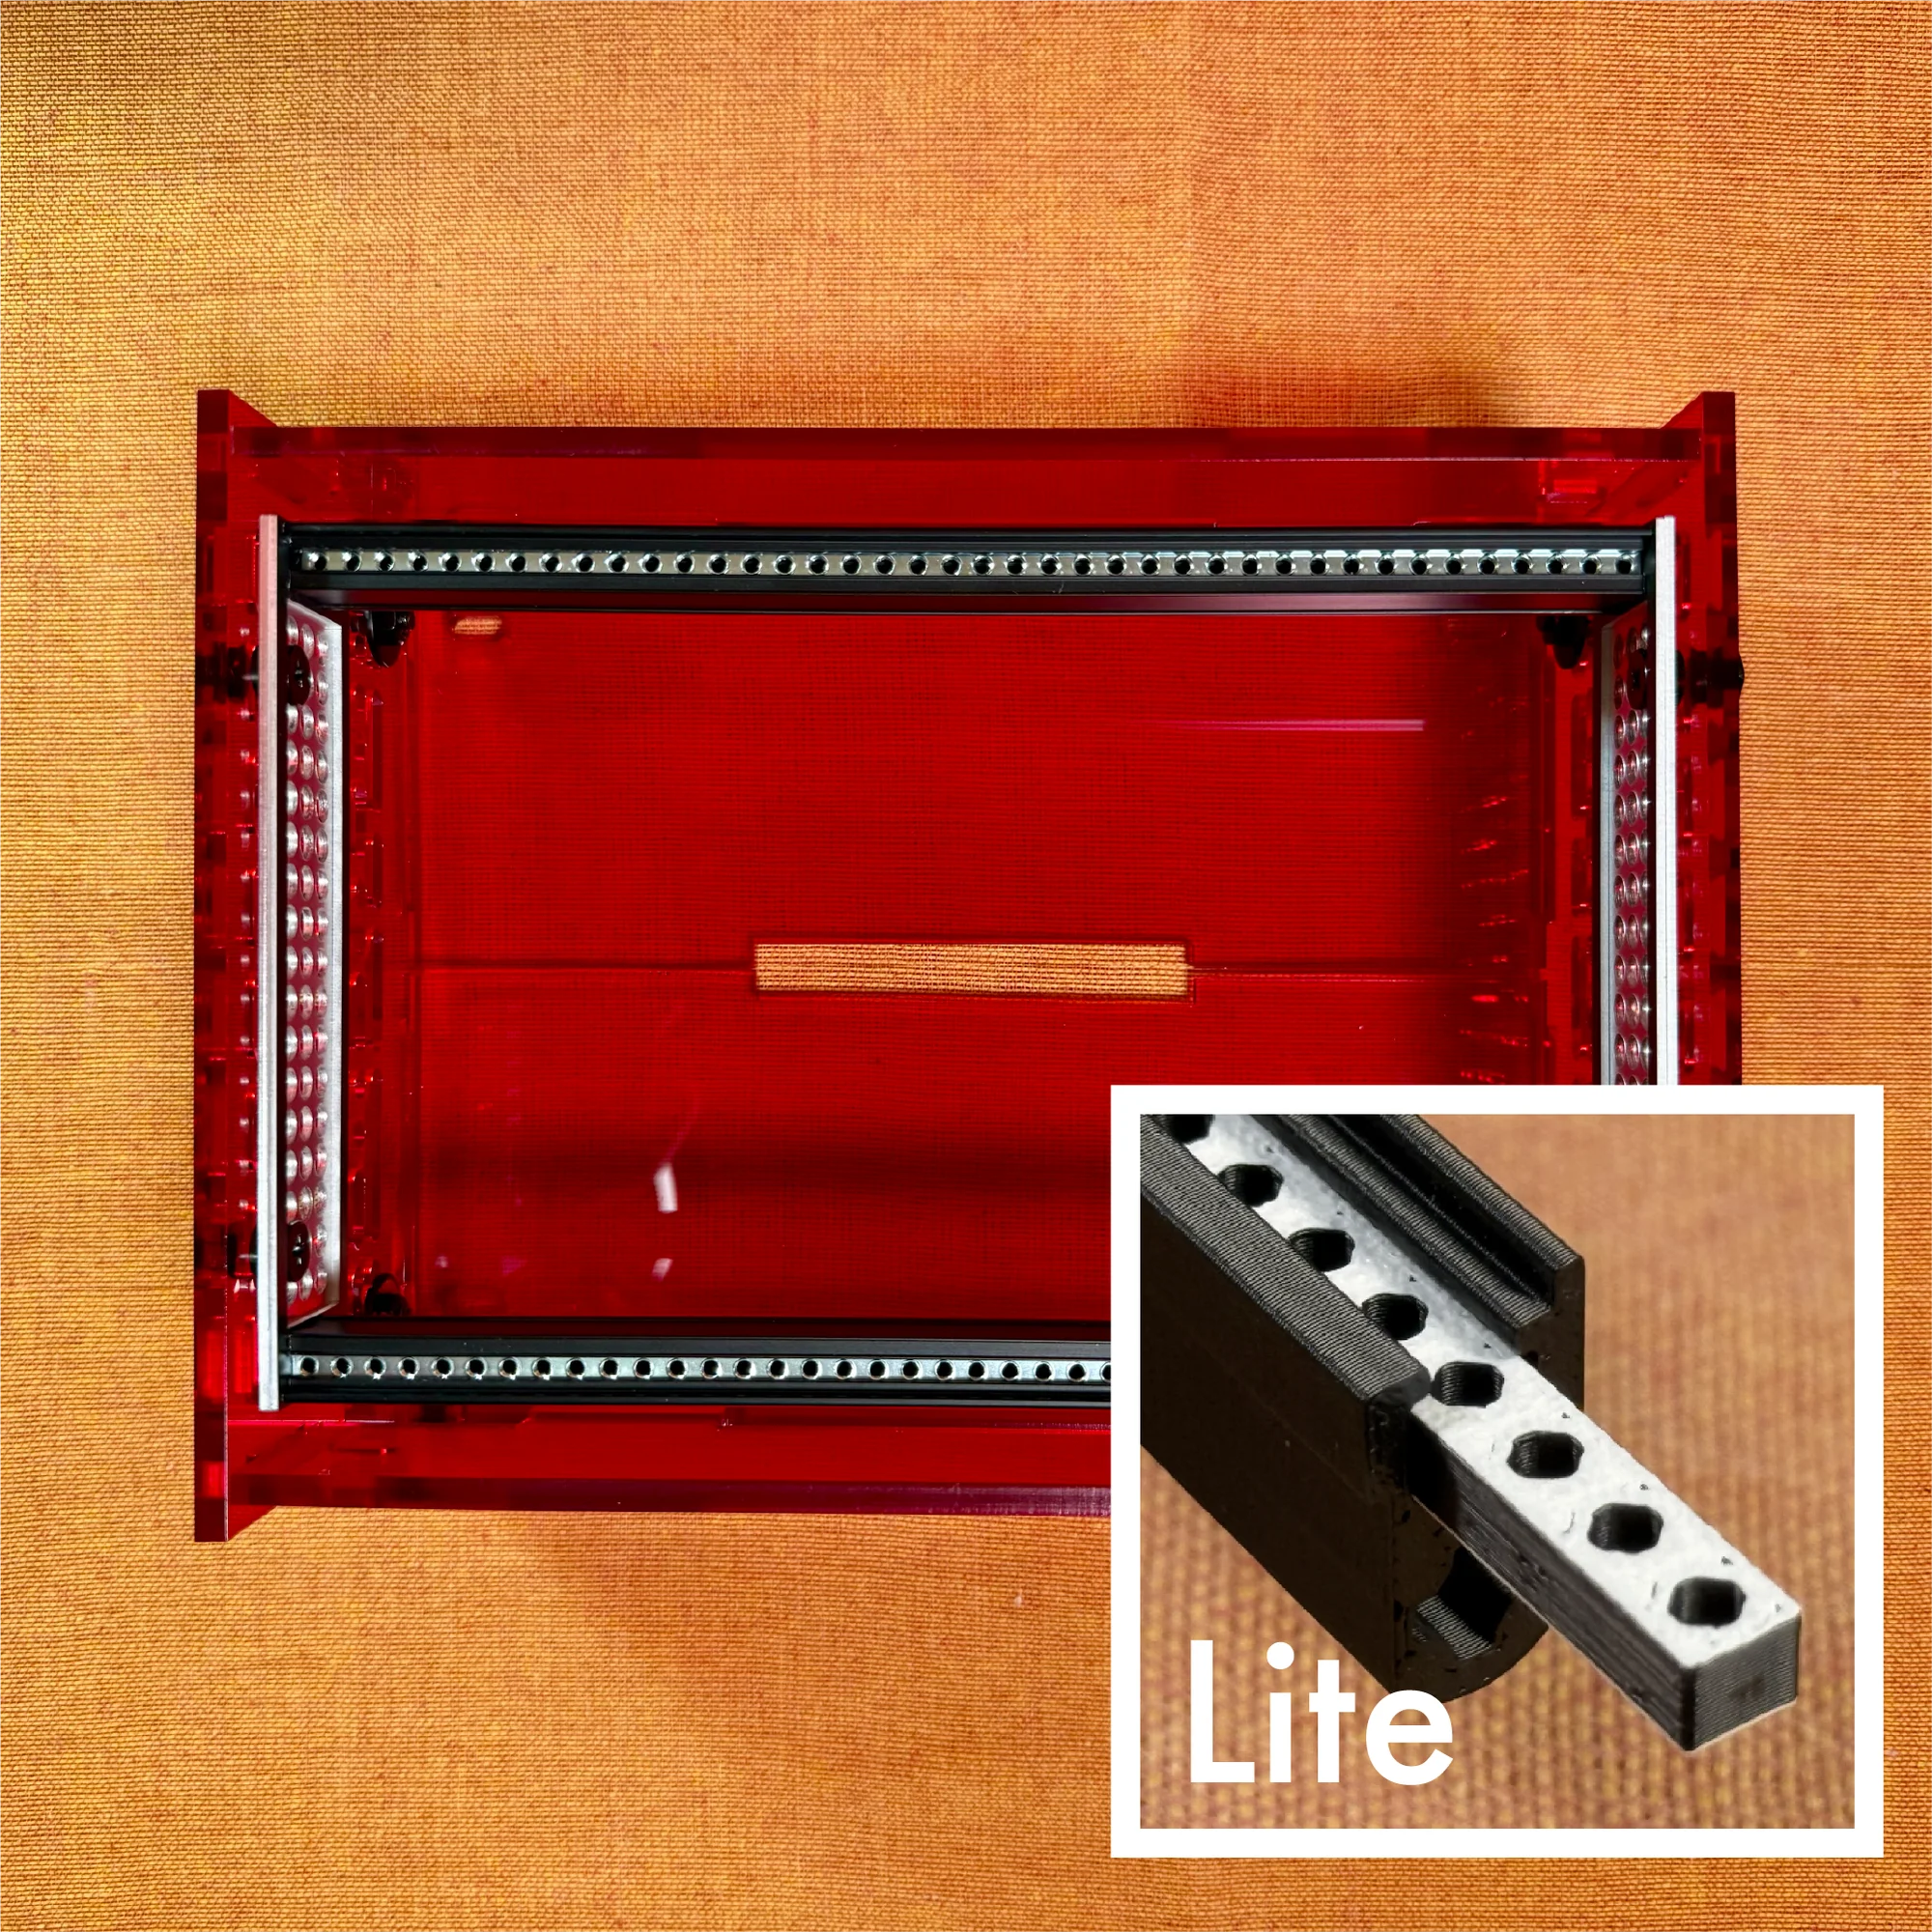
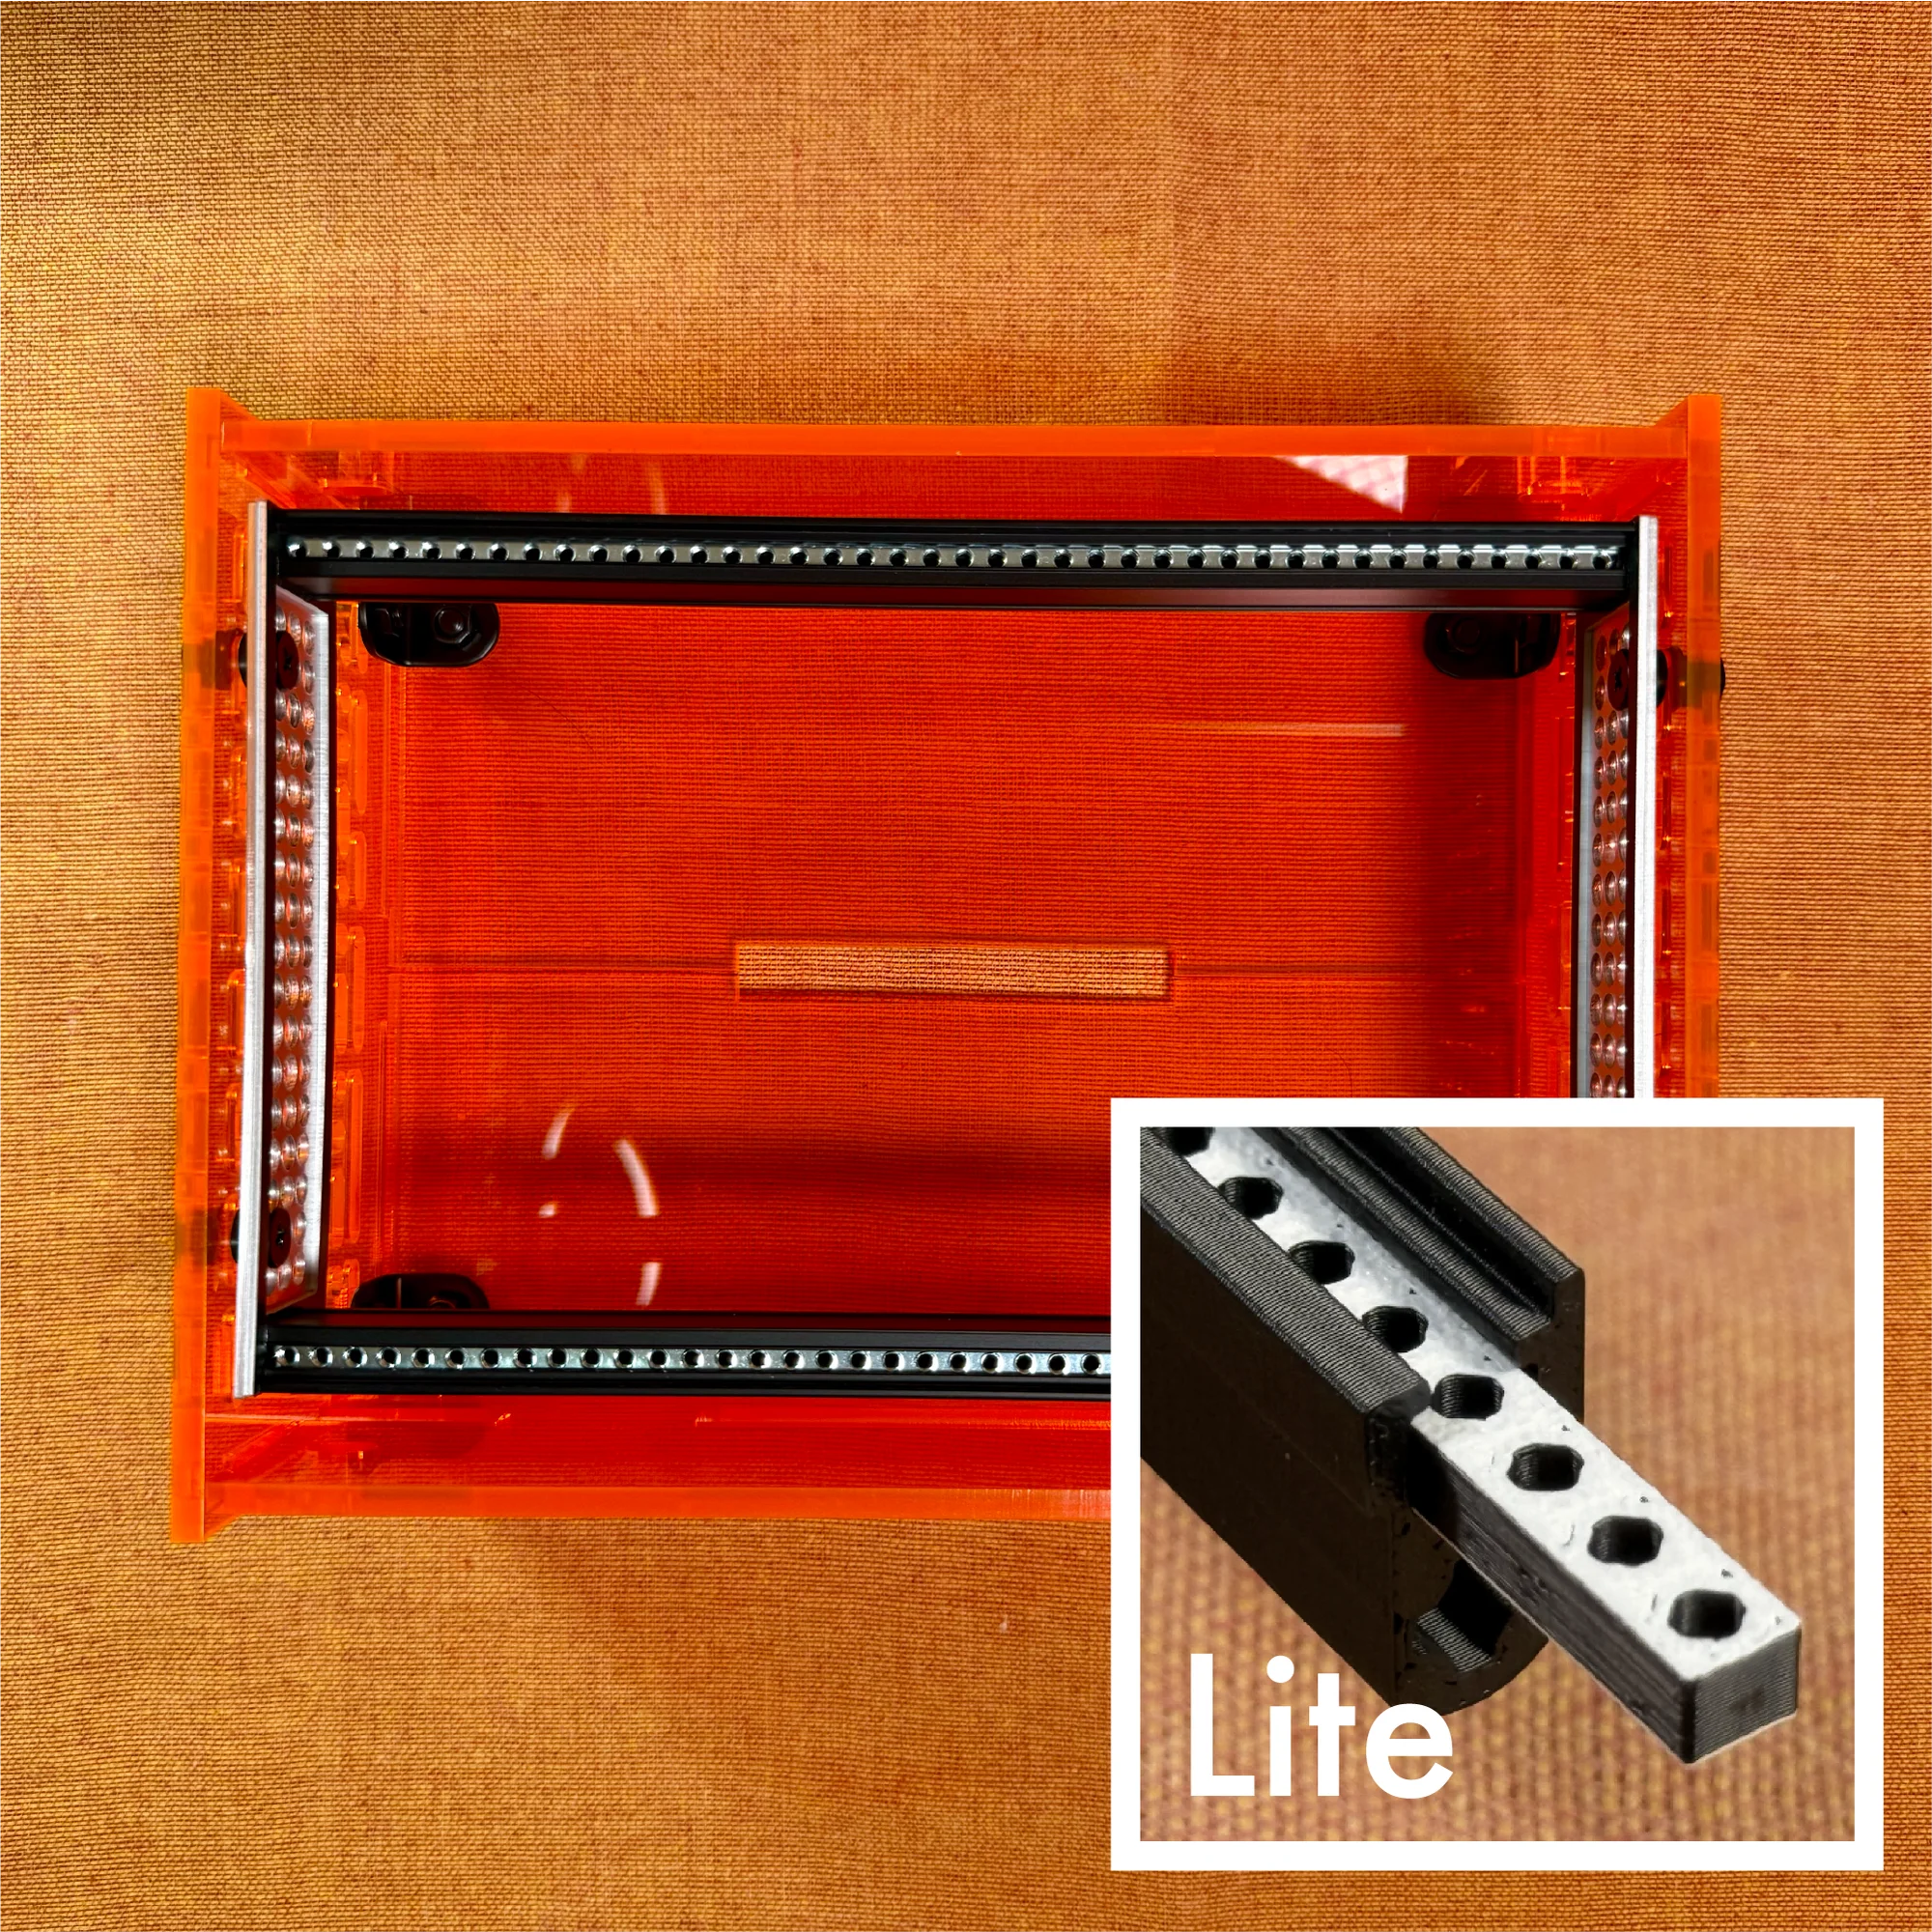
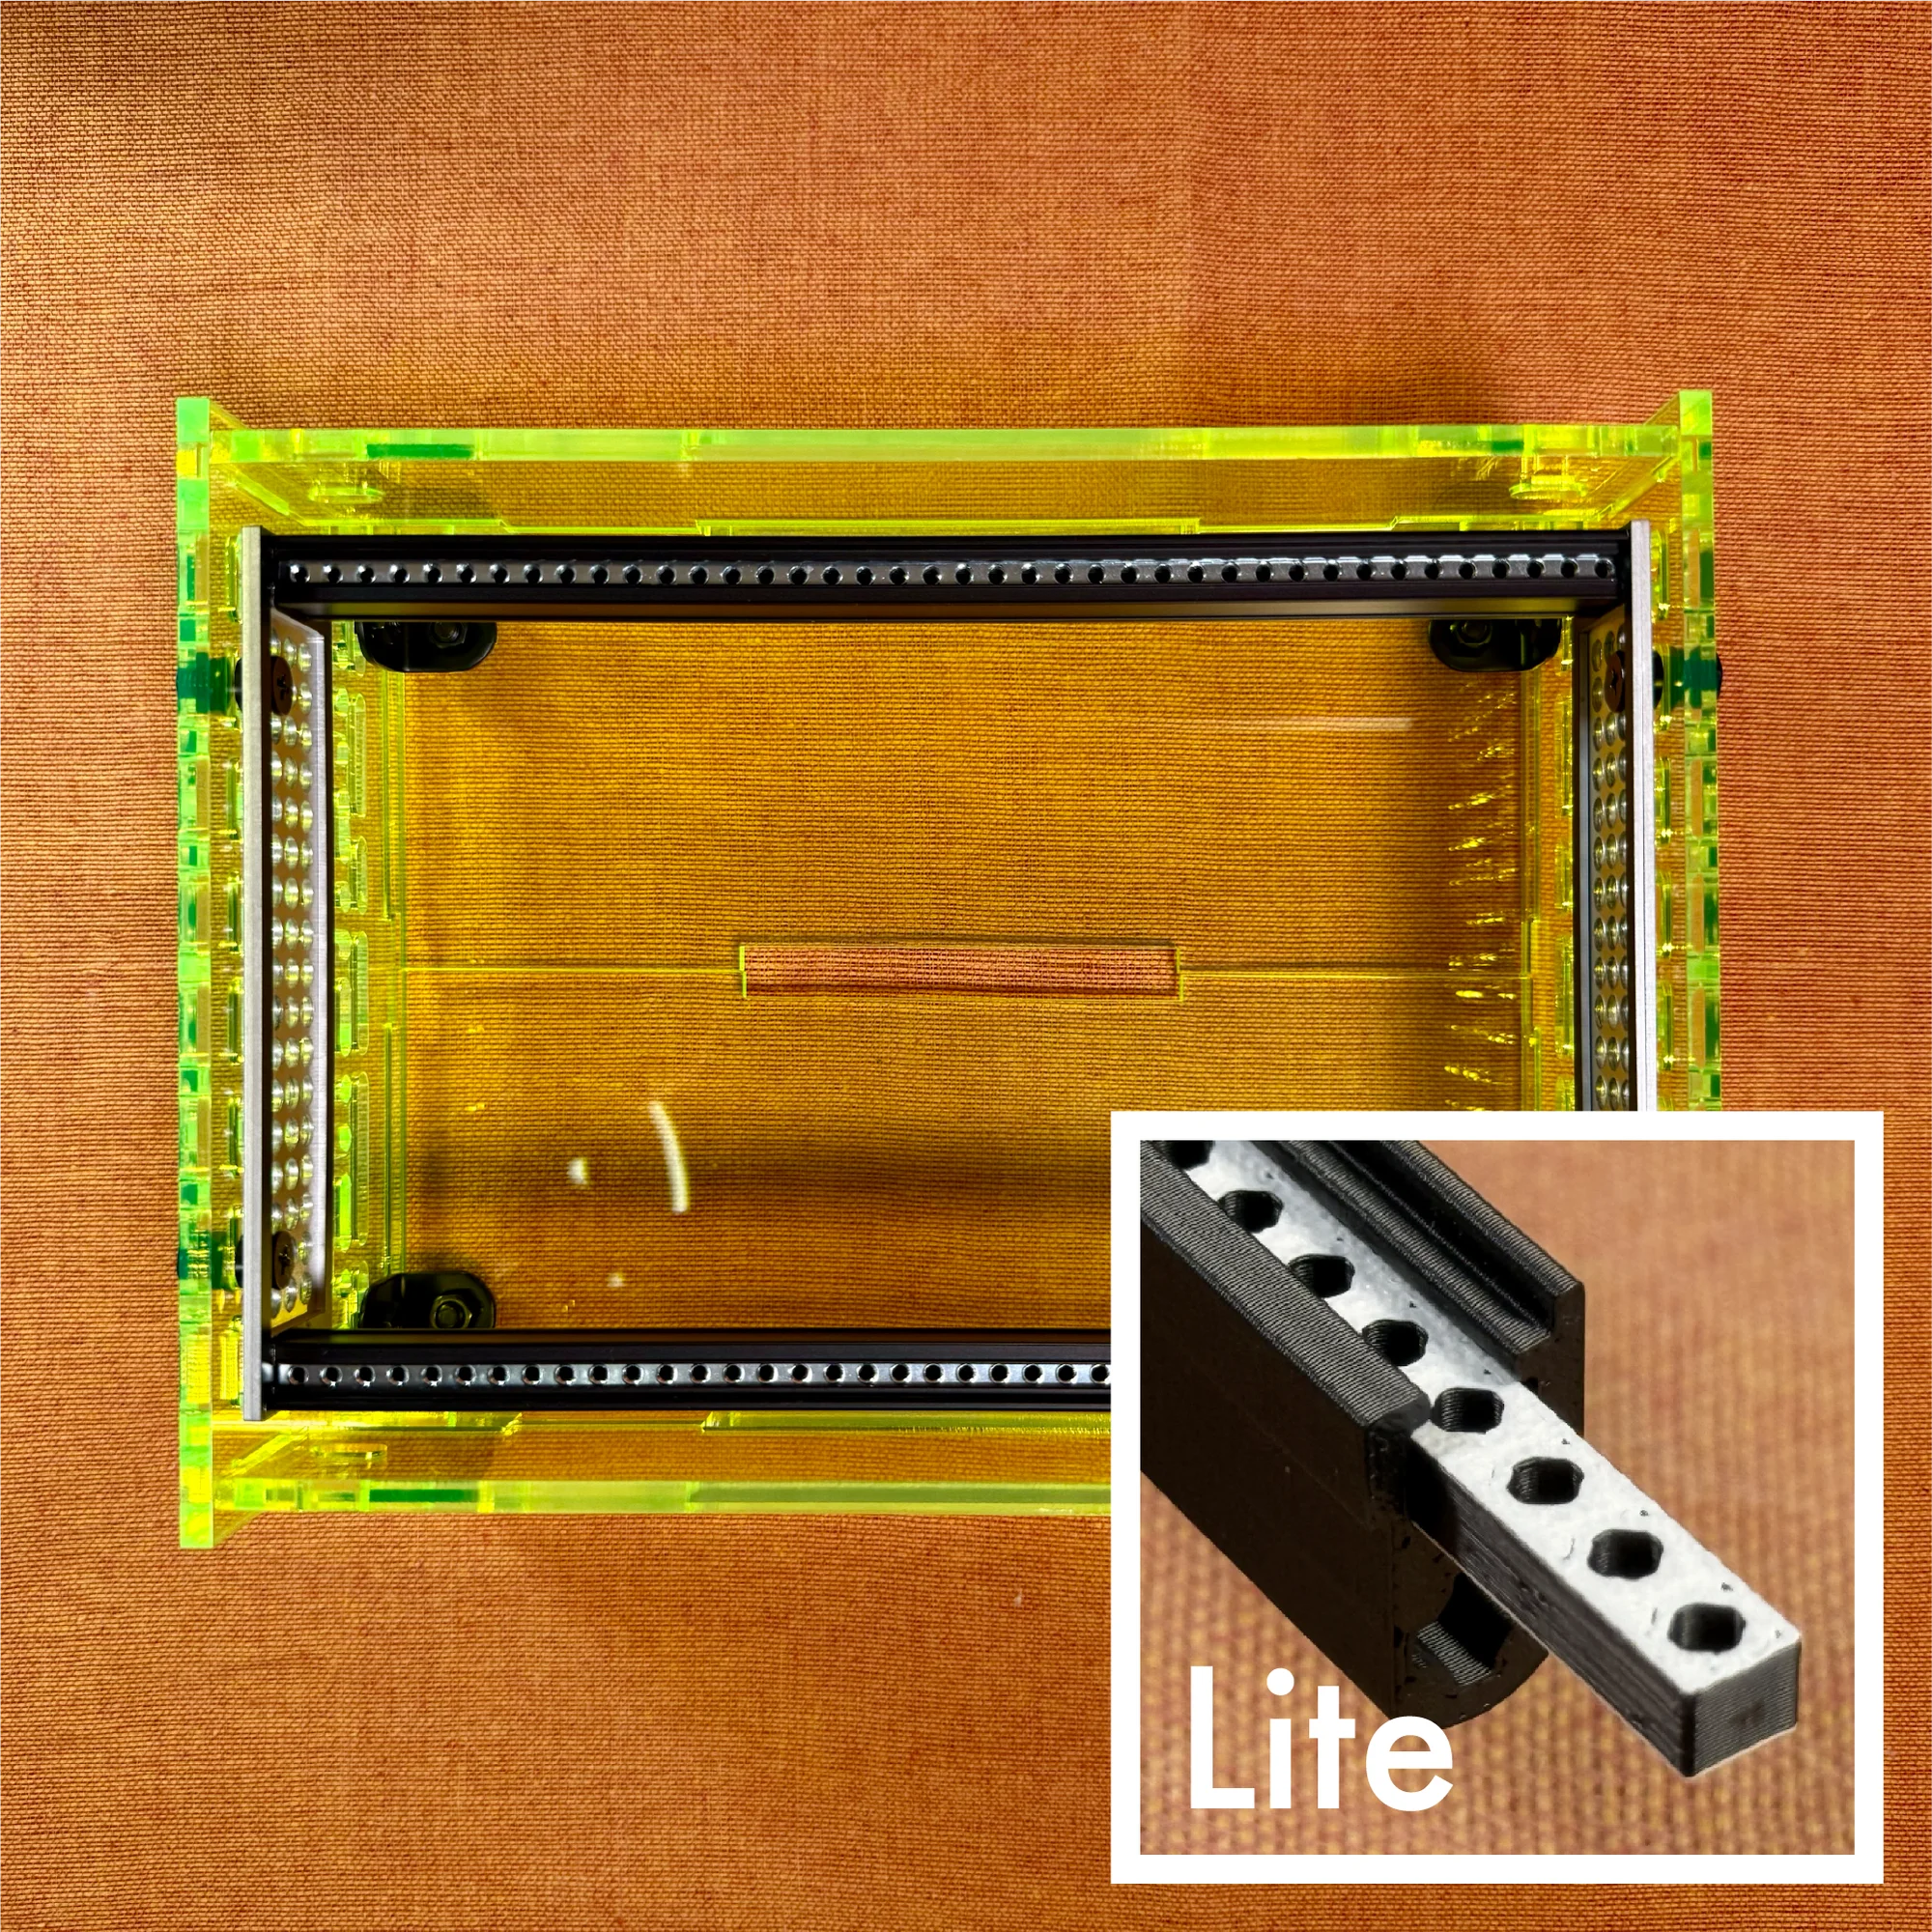
- Lite: ASA mounting rail + ASA bar nut
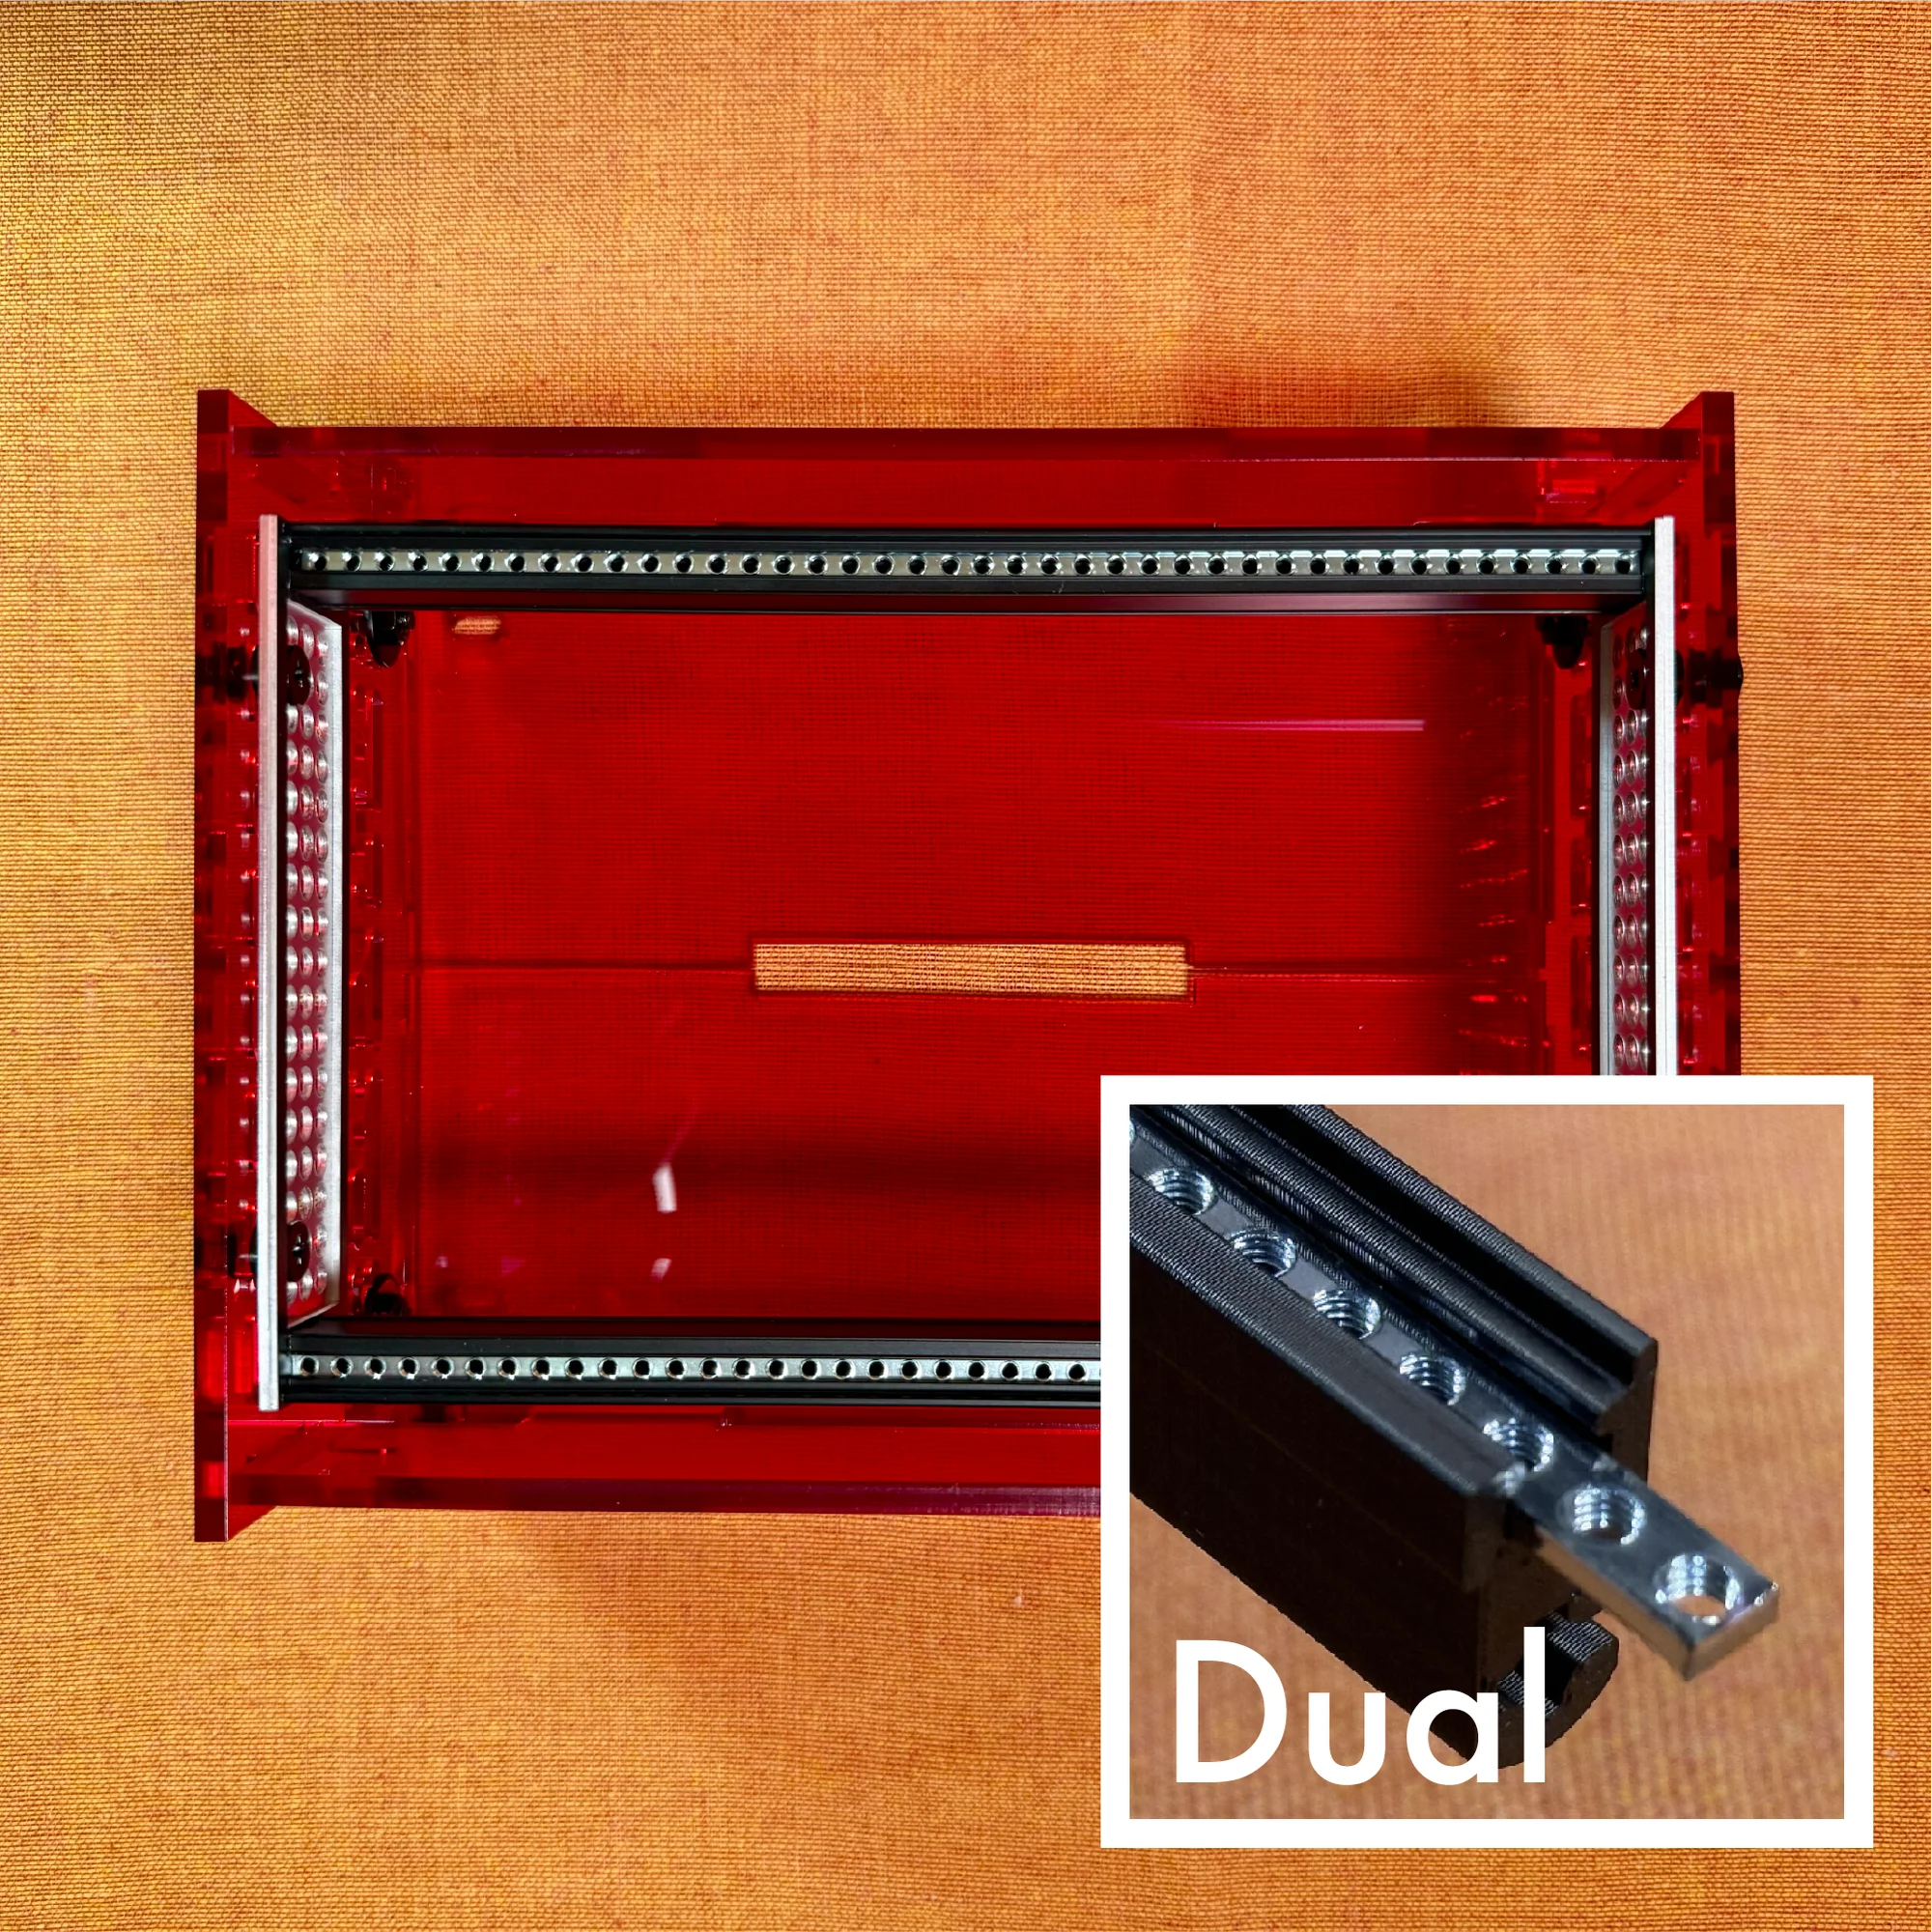
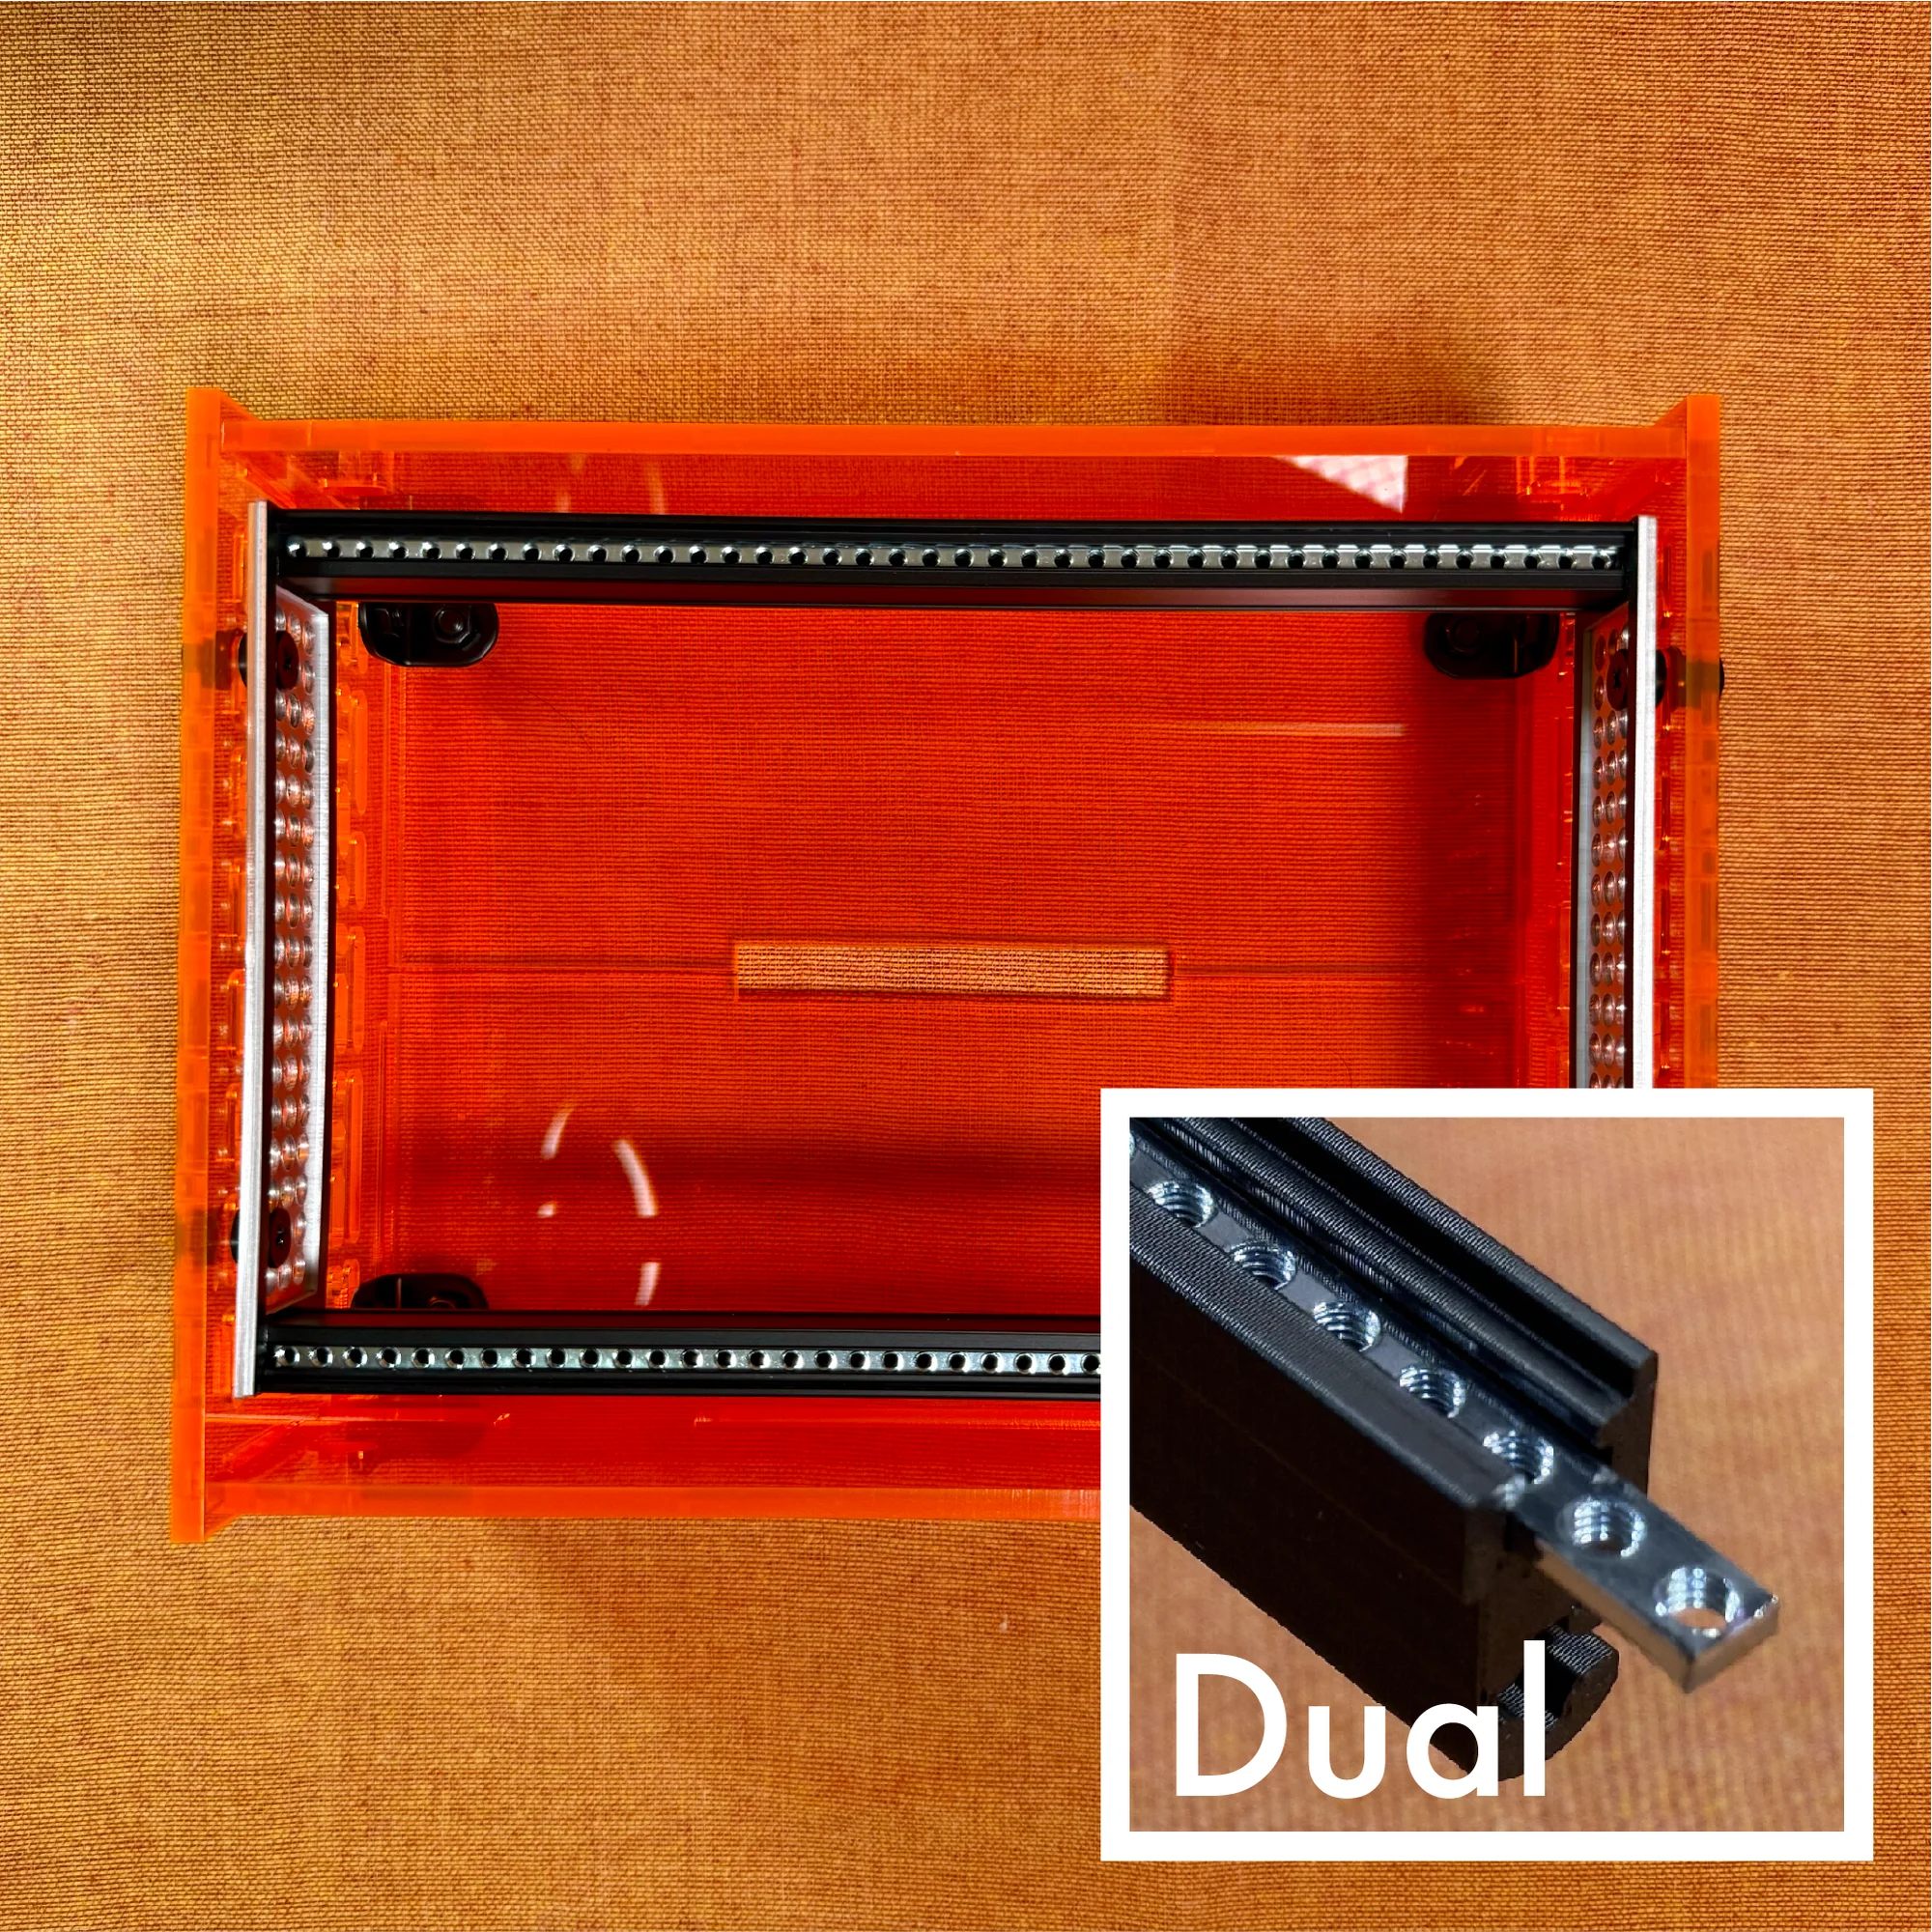
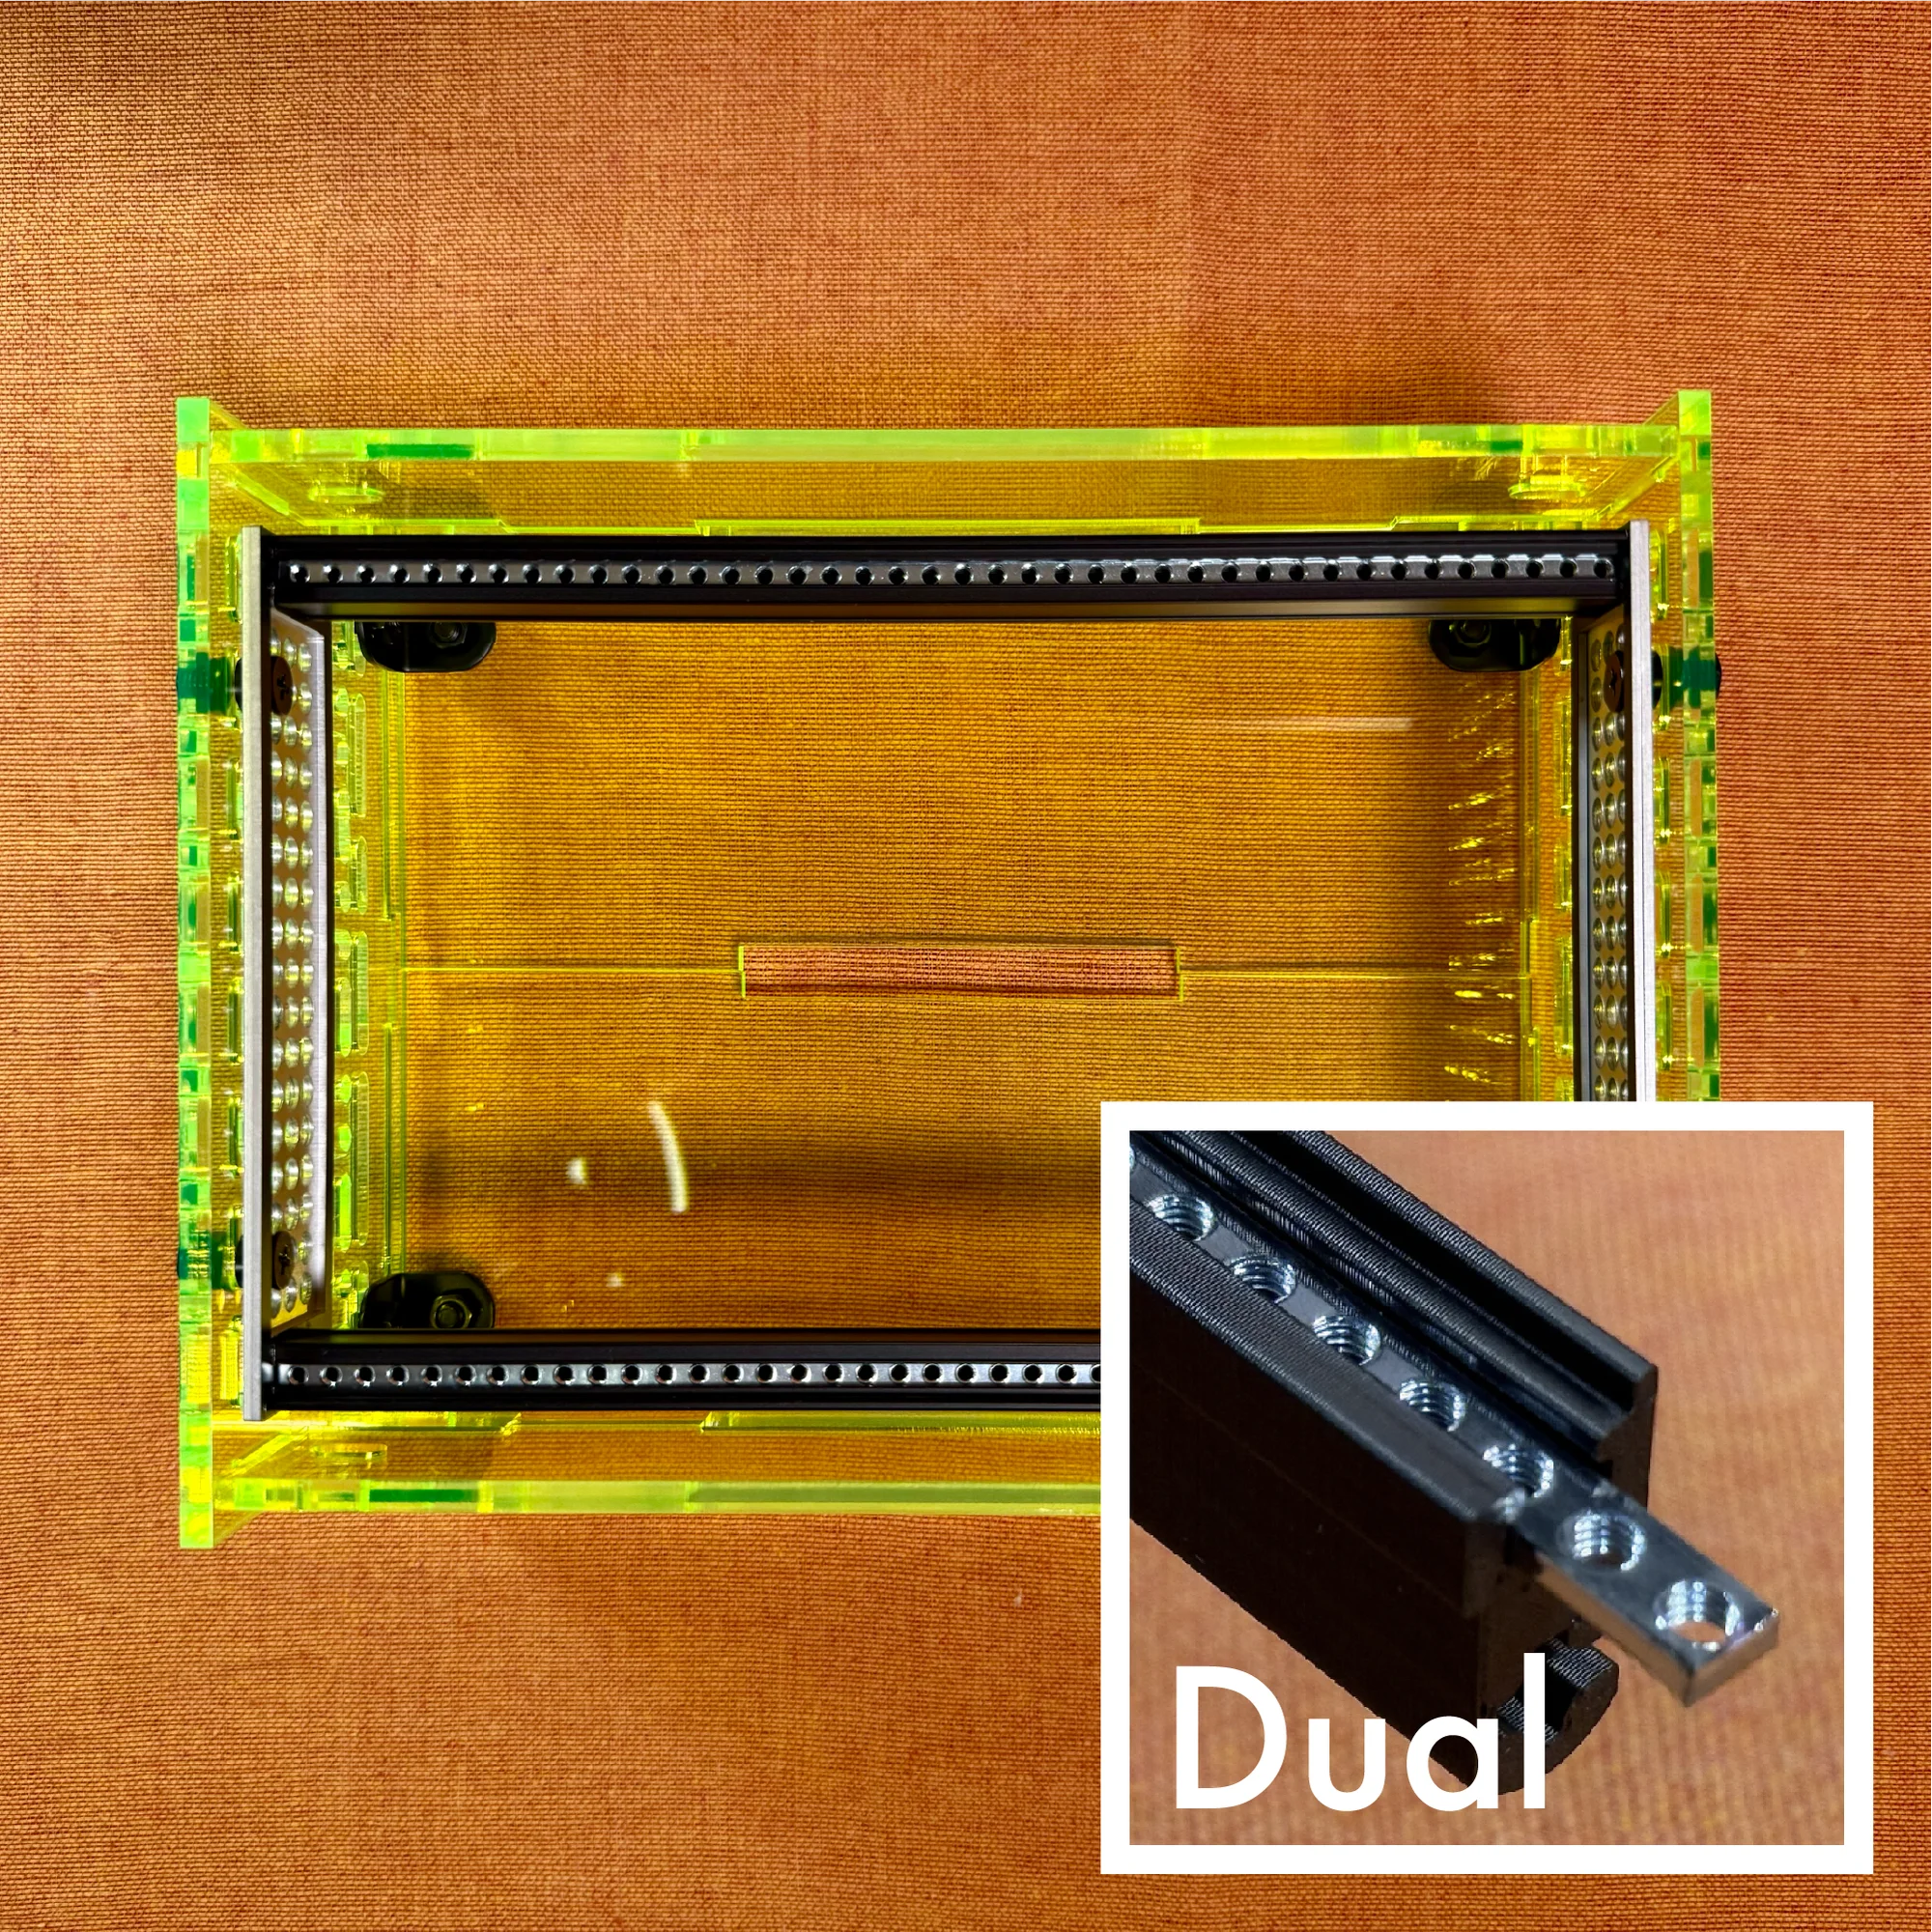
- Dual: ASA mounting rail + metal bar nut
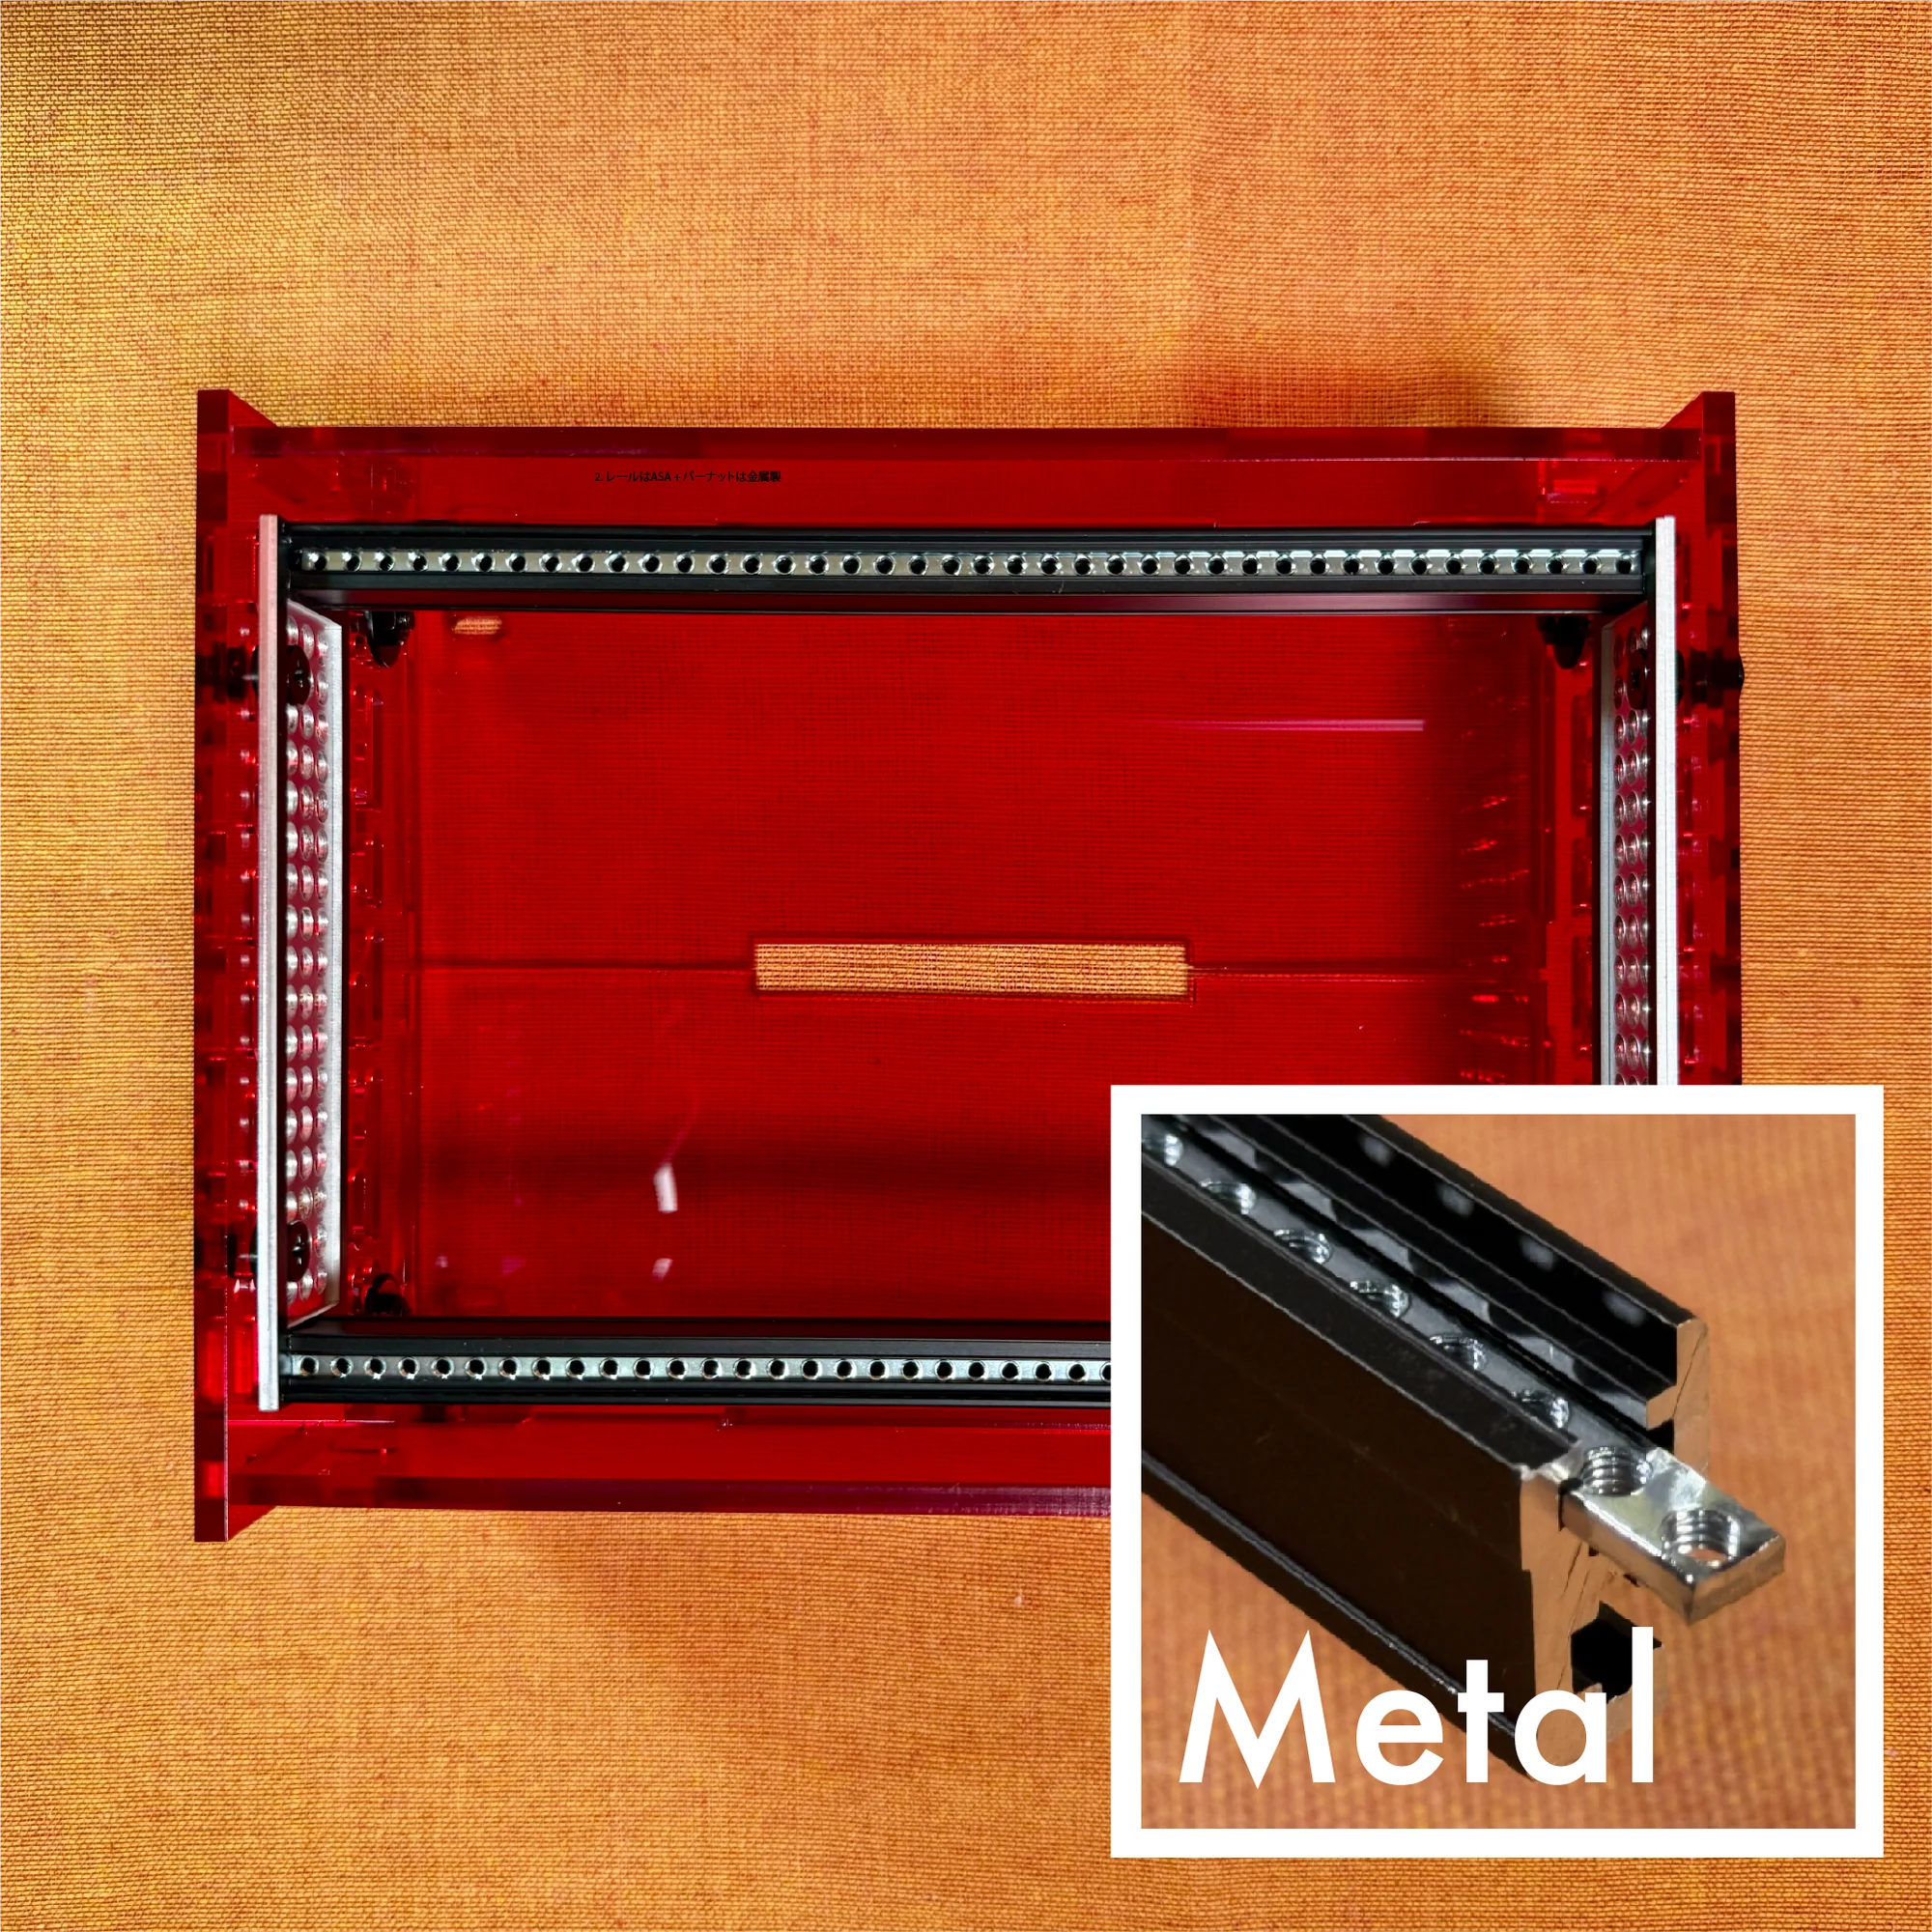
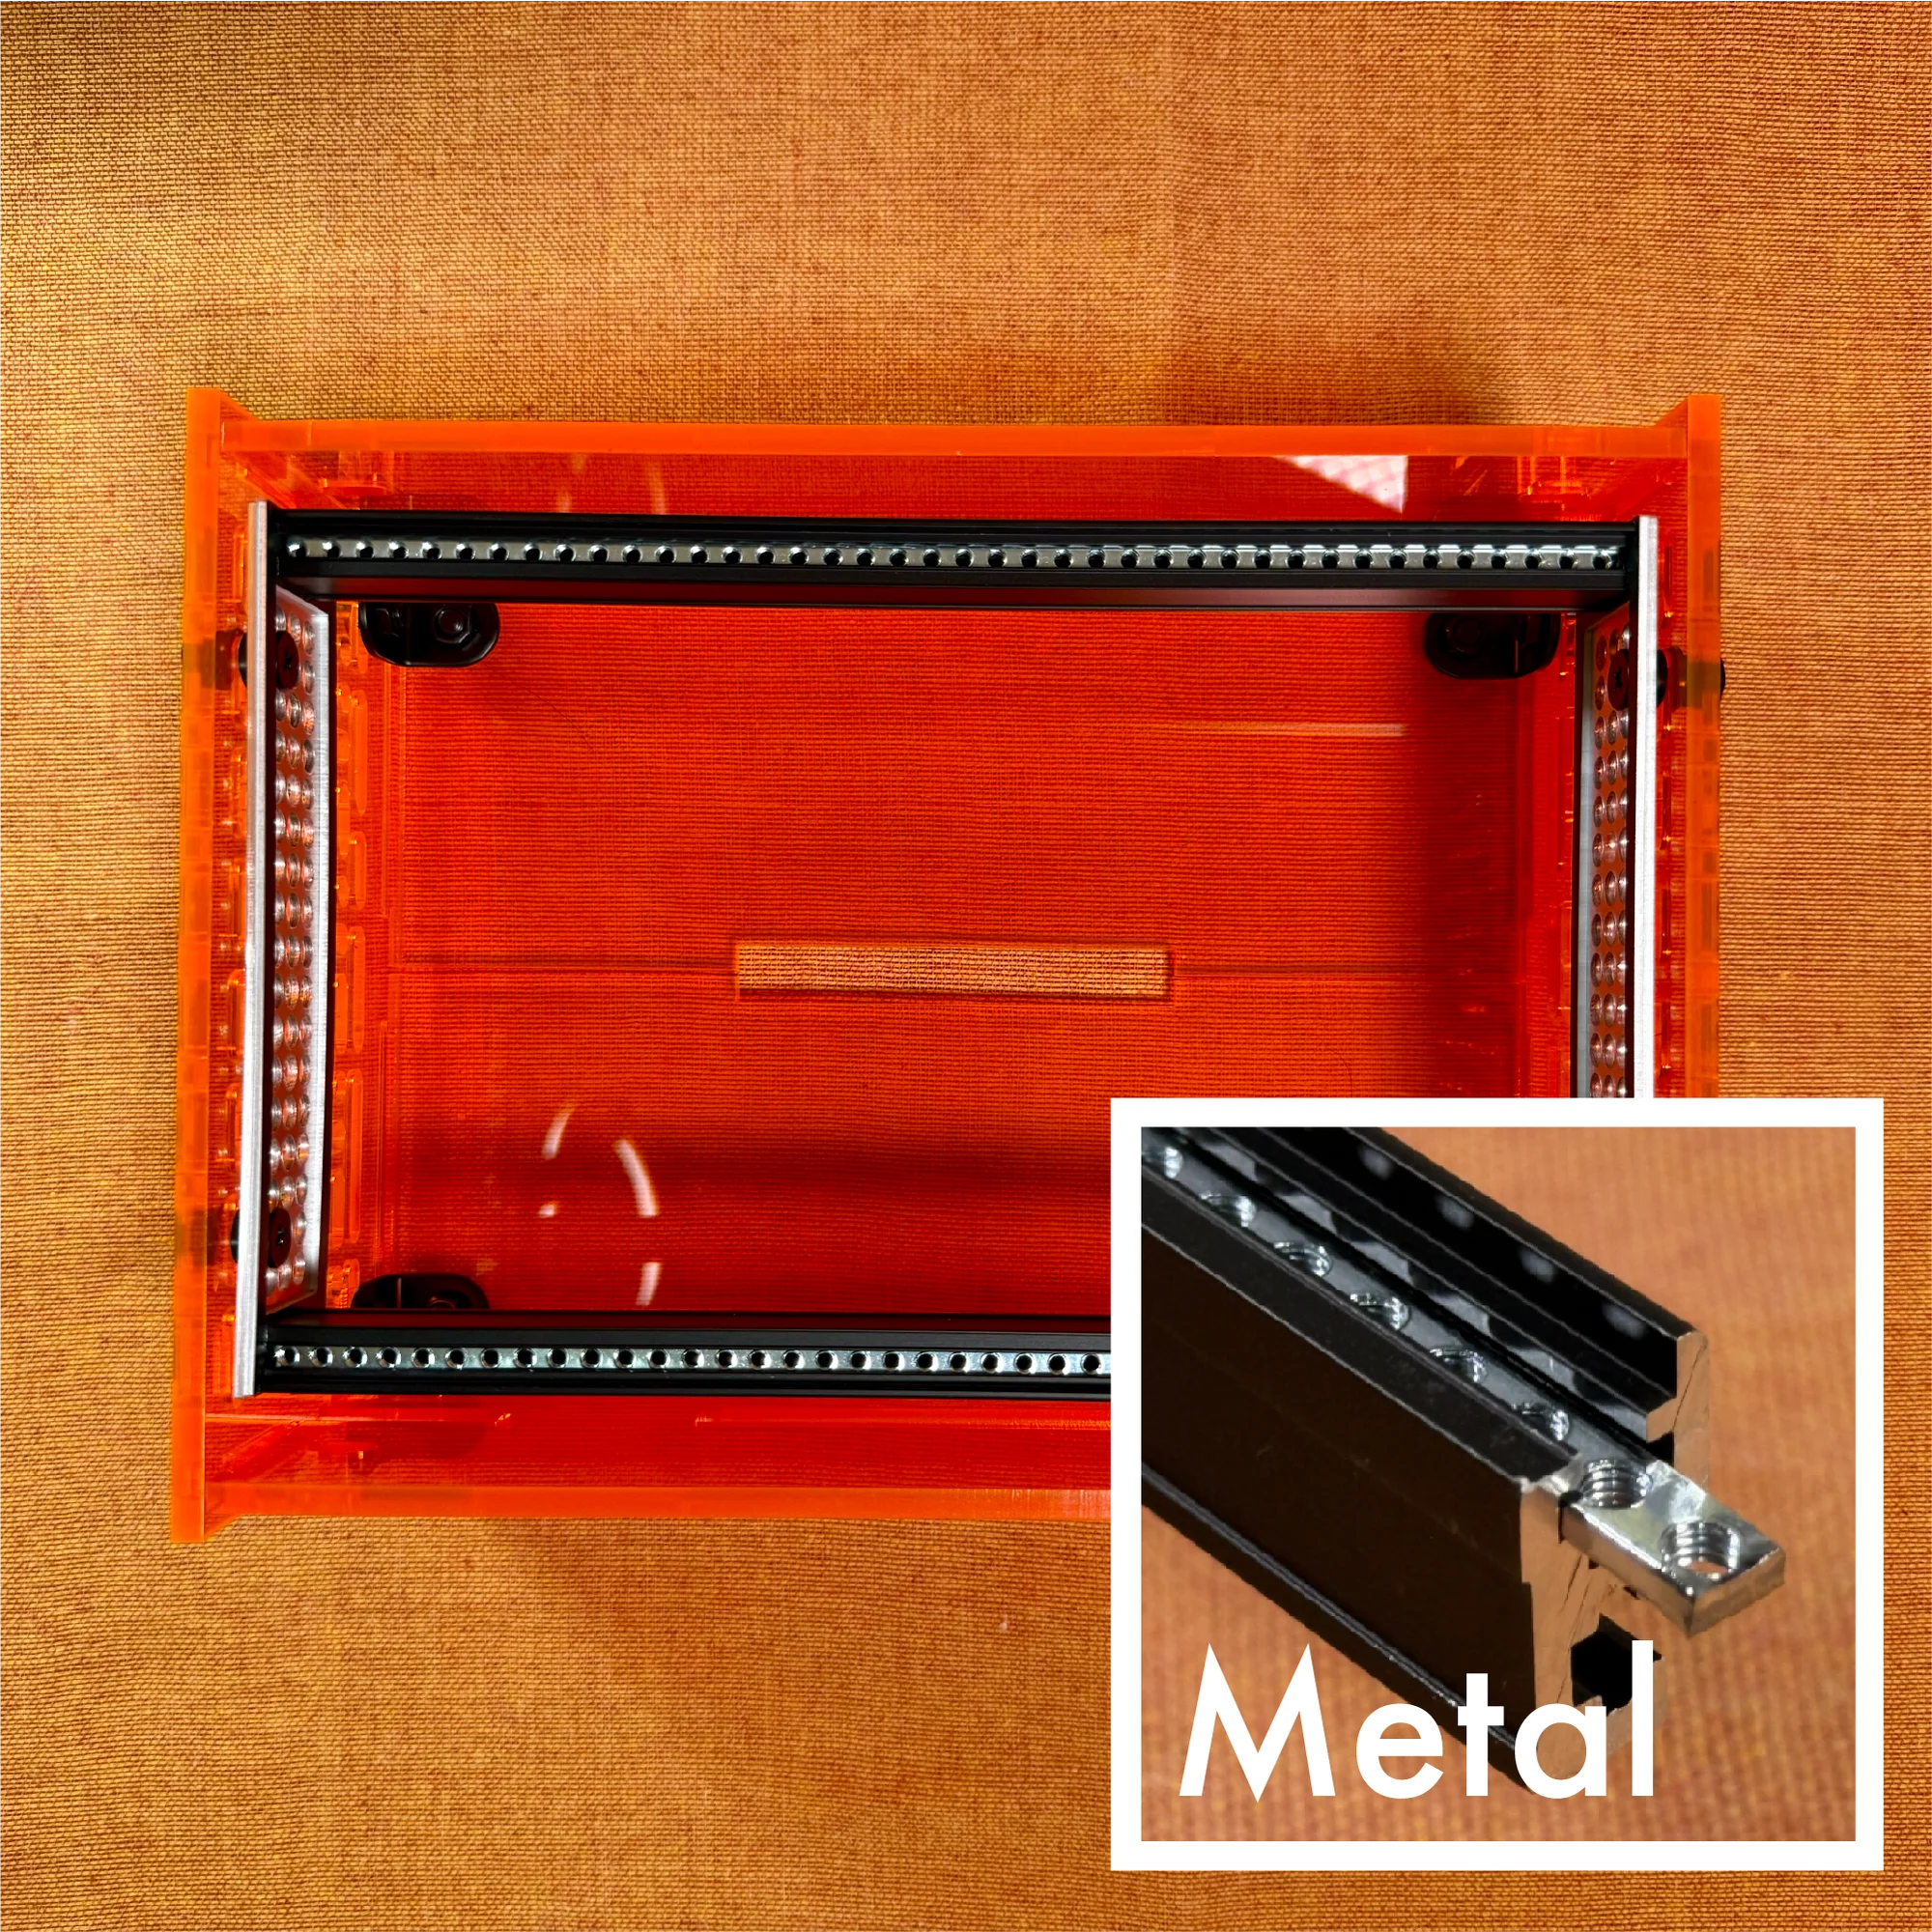
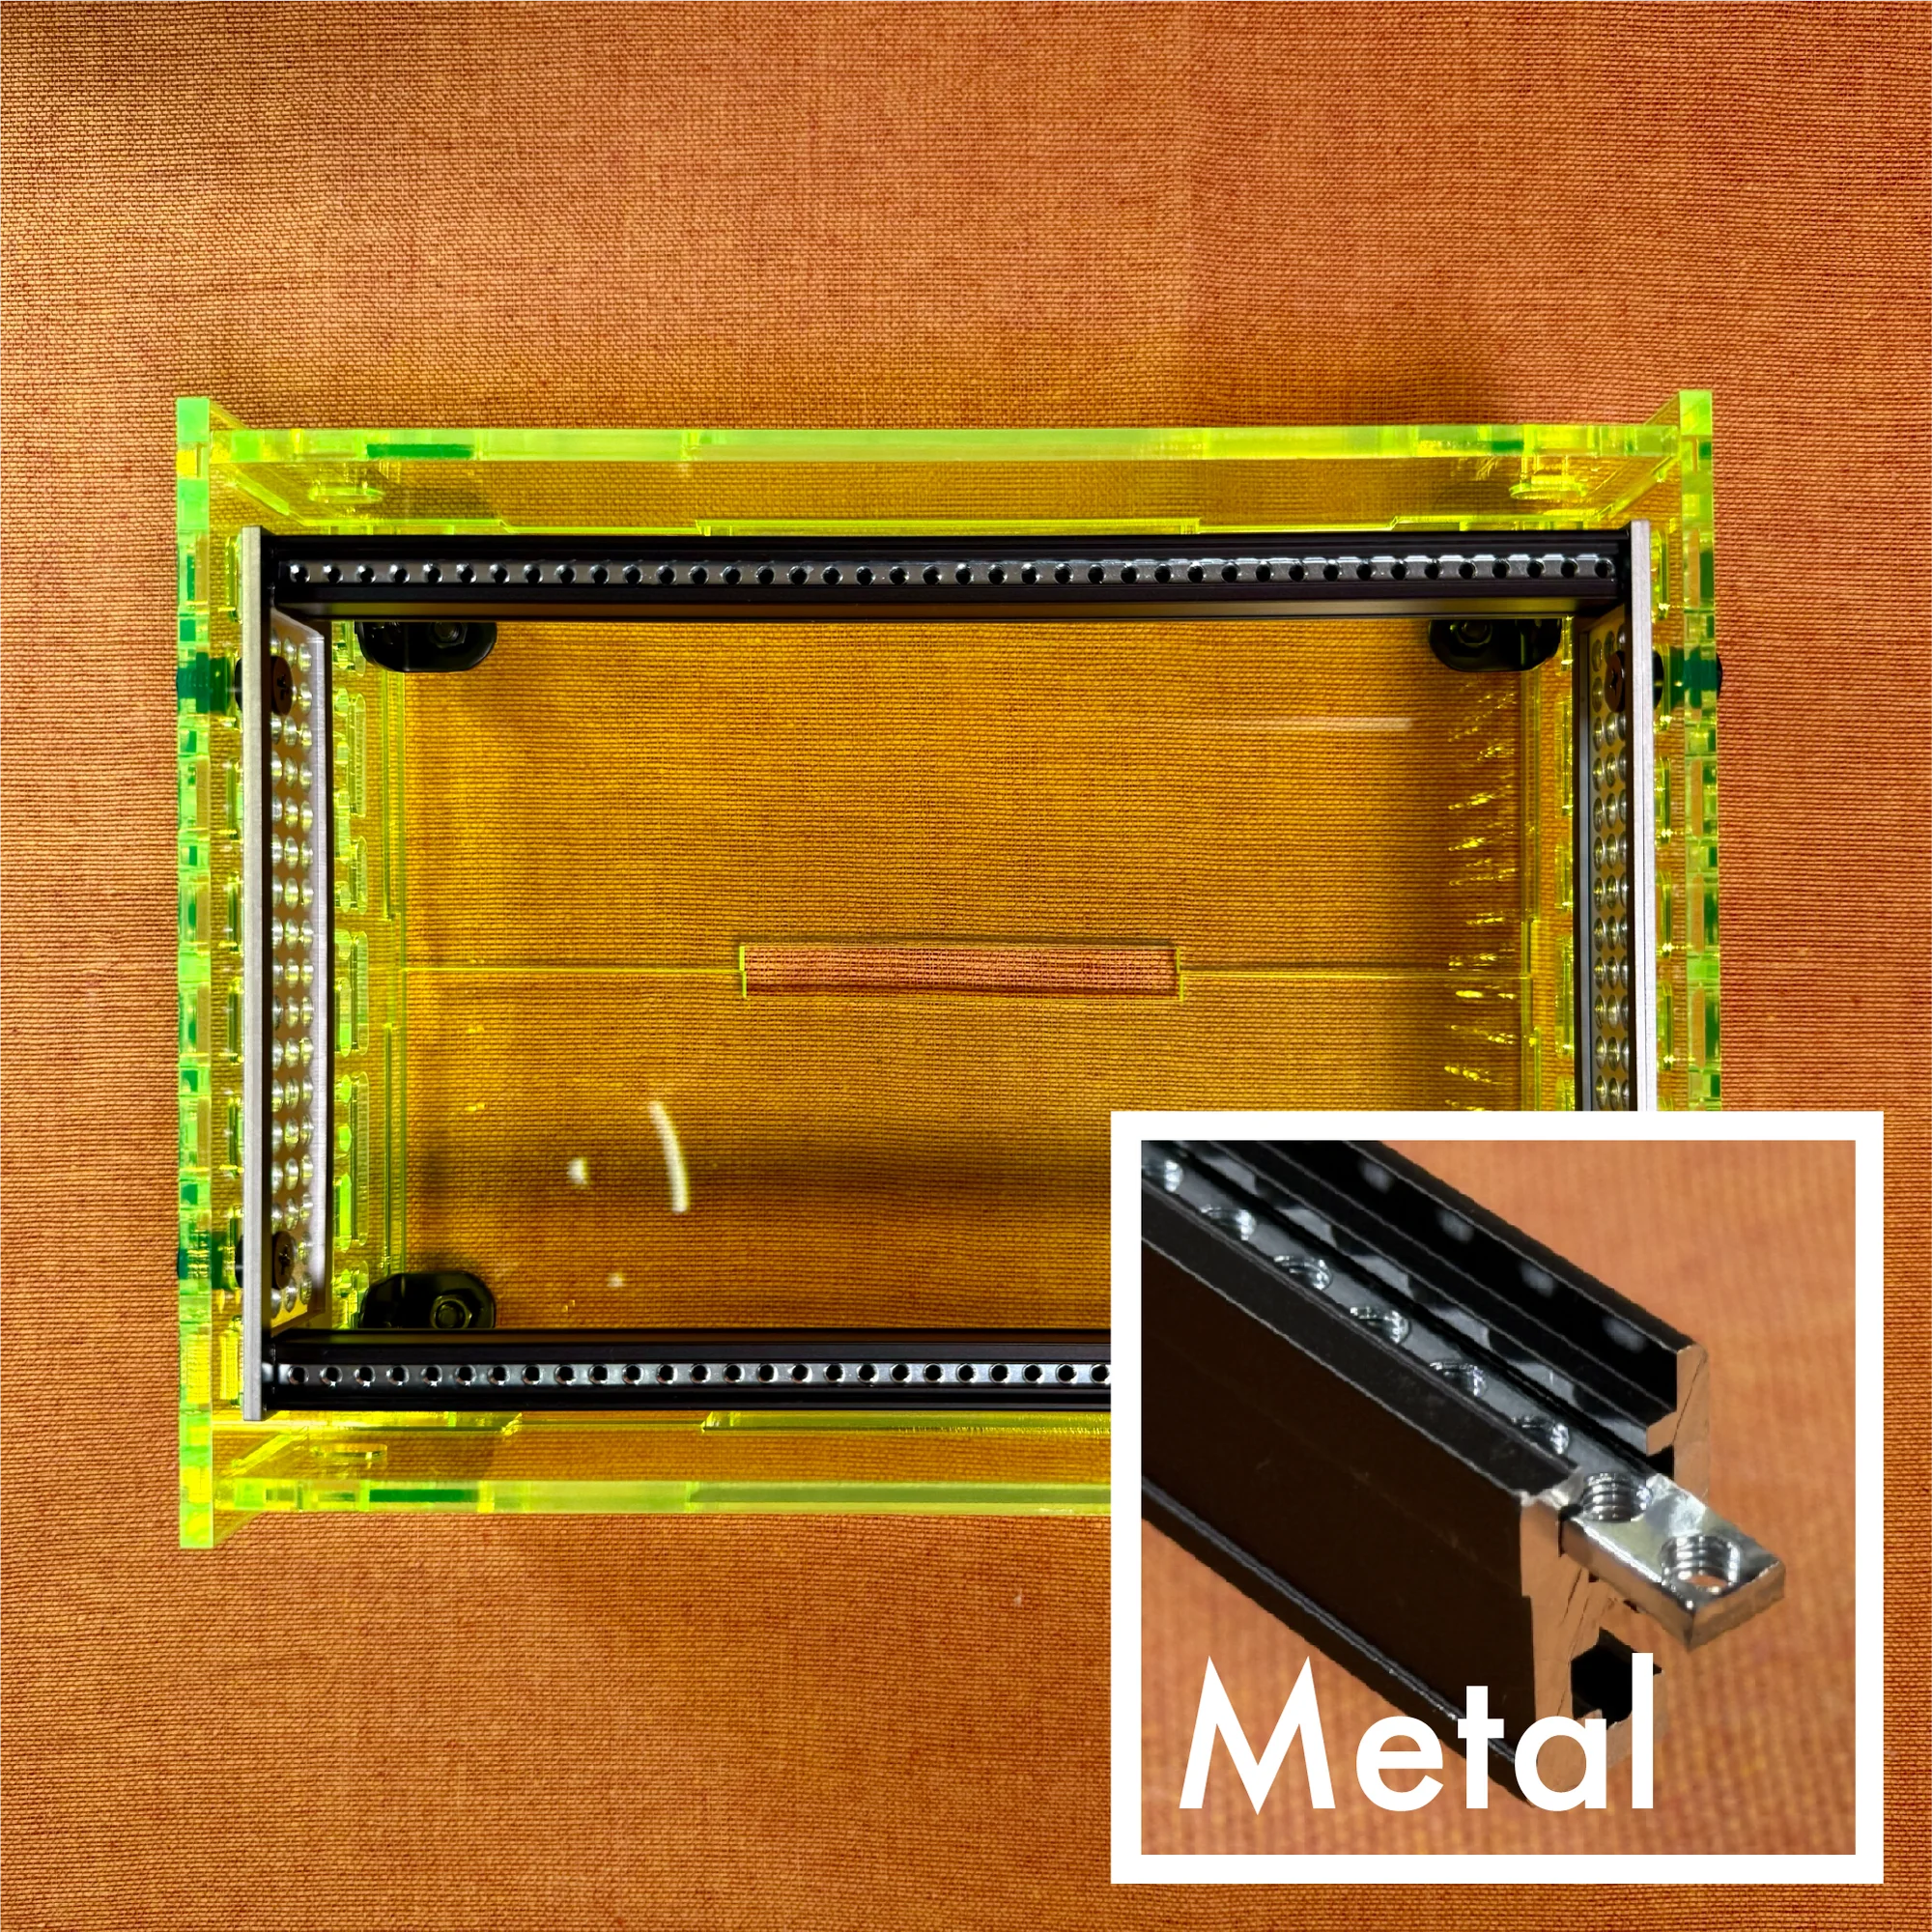
- Metal: metal mounting rail + metal bar nut
These are listed in ascending price order: Lite, Dual, Metal.
The most premium rail is Metal, featuring anodized aluminum mounting rails (the part that holds the bar nuts) and aluminum bar nuts (the part where screws are fastened). These are precisely manufactured rails with solid weight and rigidity, similar to those found in typical metal cases.
The most affordable rail is Lite, using ASA resin mounting rails with ASA resin bar nuts, produced in-house. Being plastic, they’re more prone to wear and require more force for screw insertion, but they are lightweight and inexpensive, making them a great entry model for those interested in modular synths. They’re also recommended for users who don’t frequently swap modules.
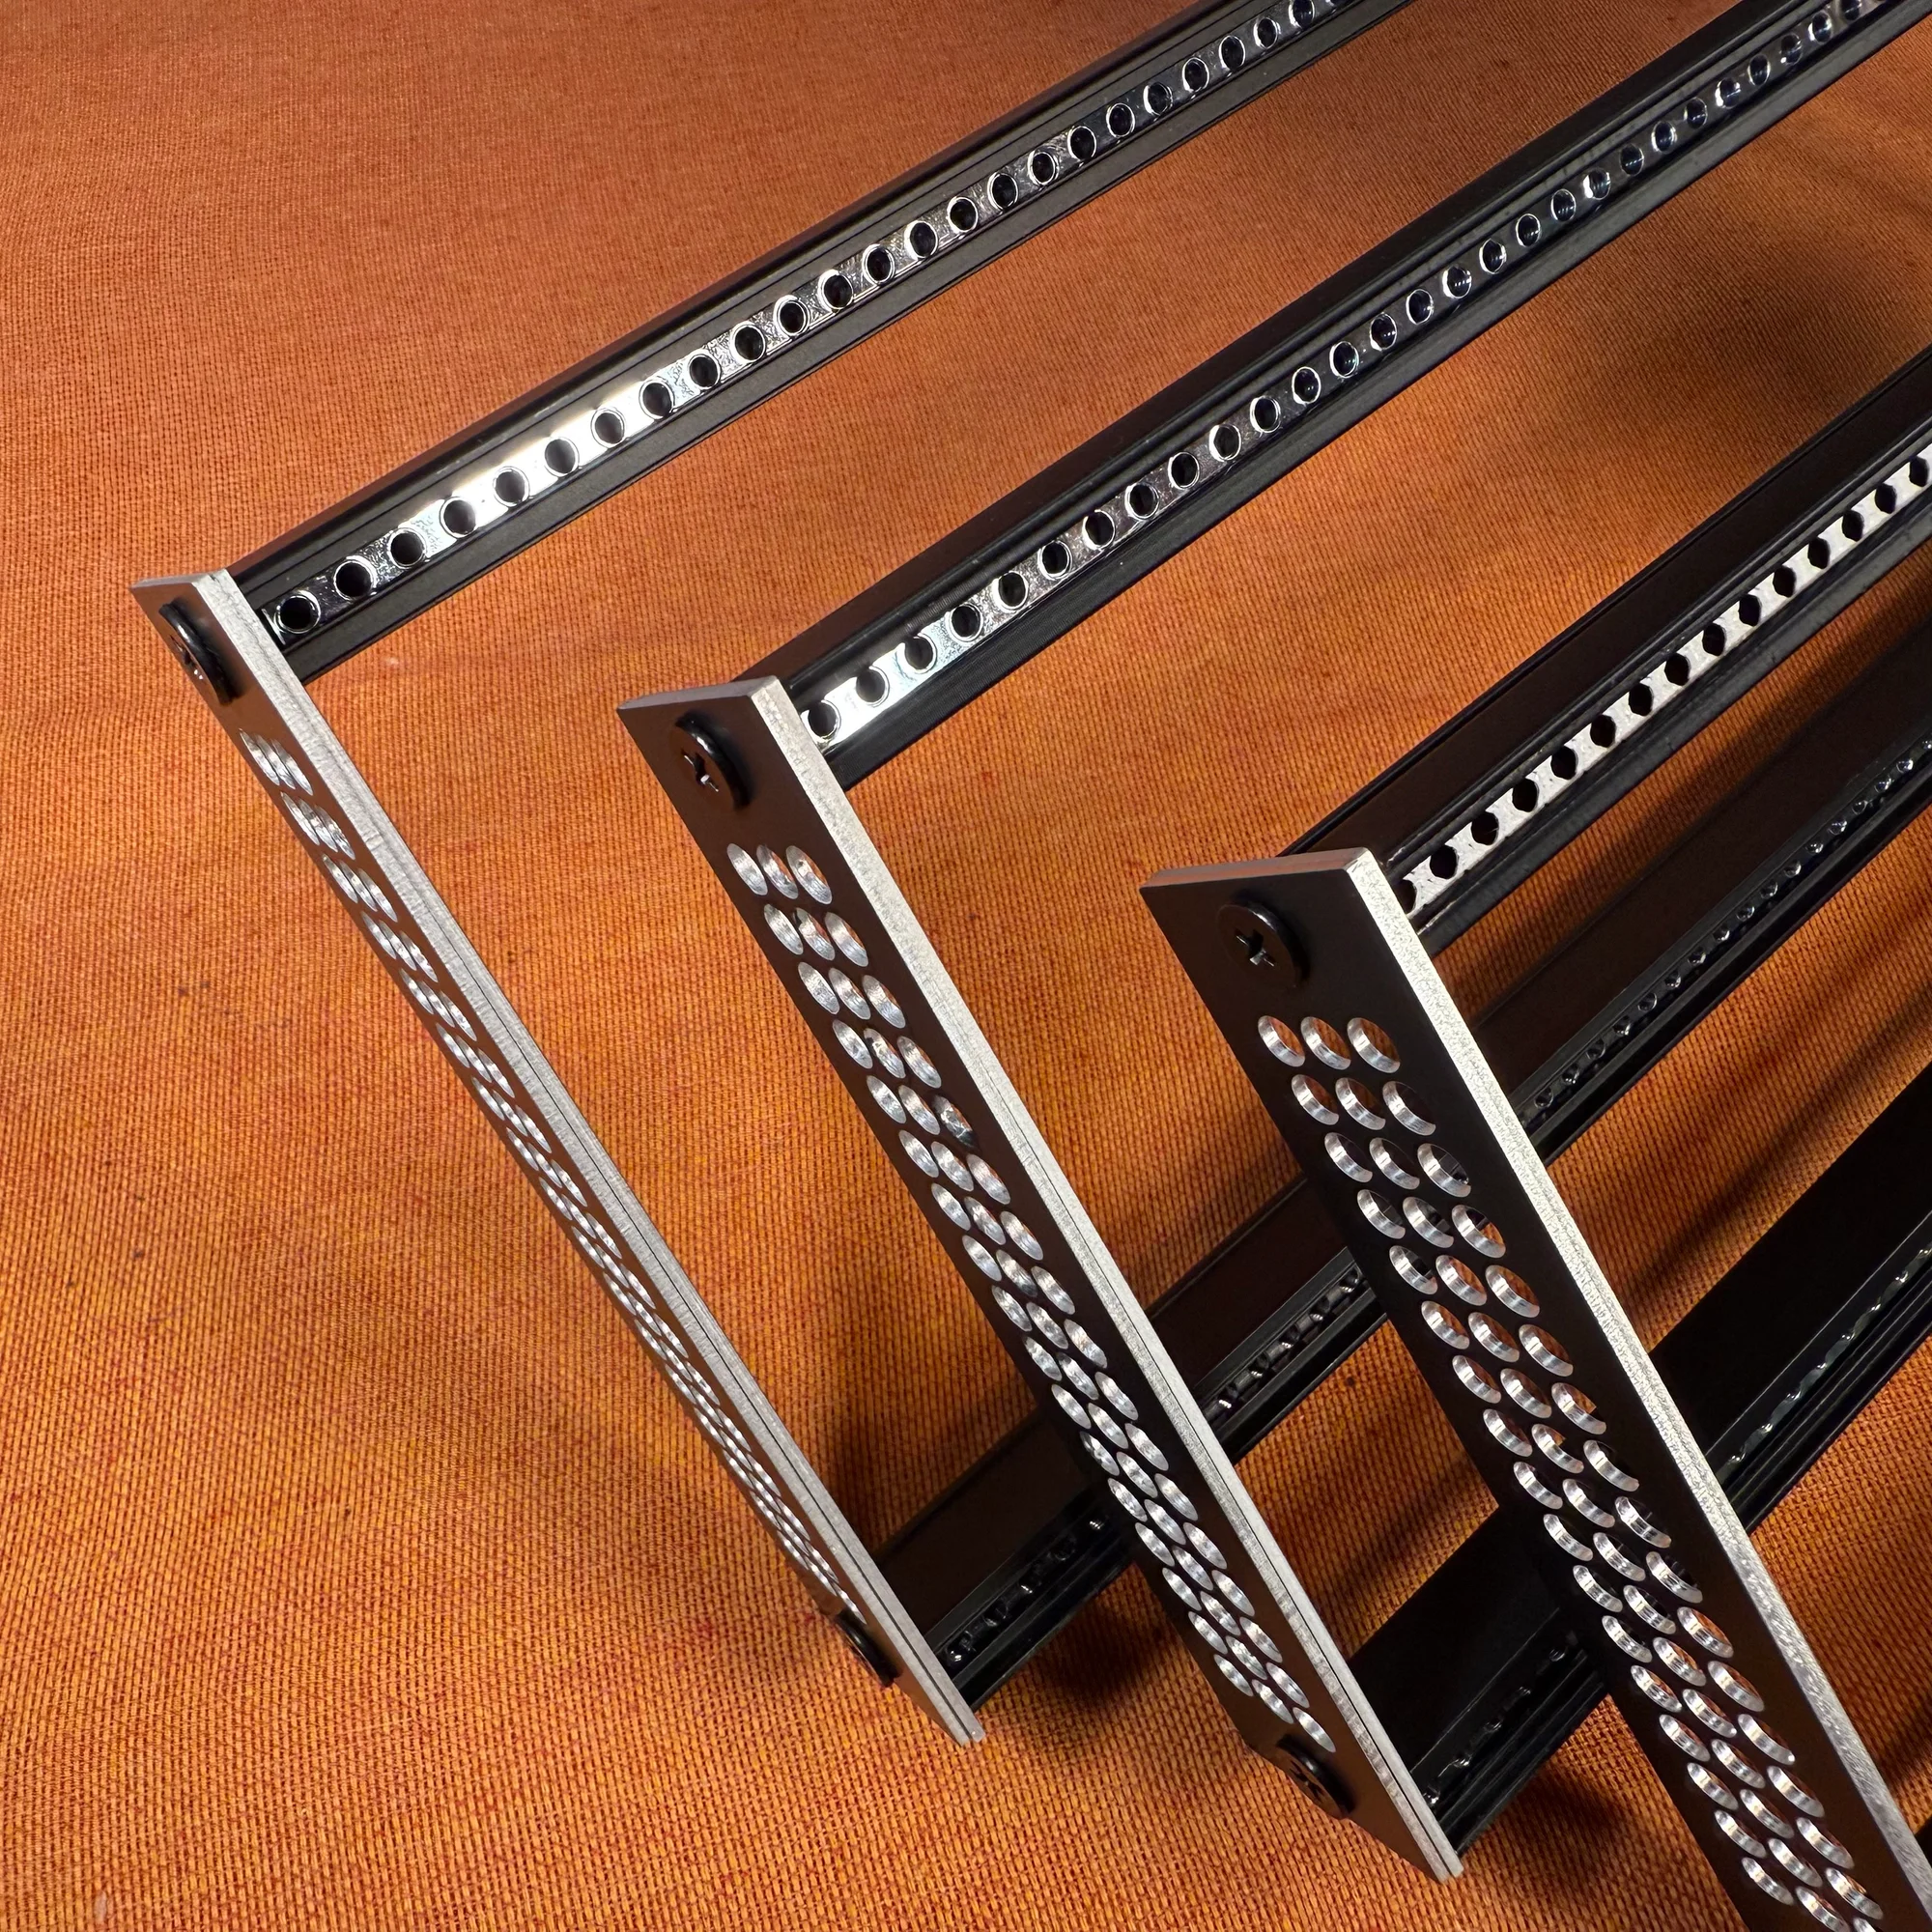
The middle option is Dual, combining ASA resin mounting rails with the Metal version’s bar nuts. It aims to keep prices down while maintaining the convenience of metal bar nuts. This is Takazudo’s recommended rail.
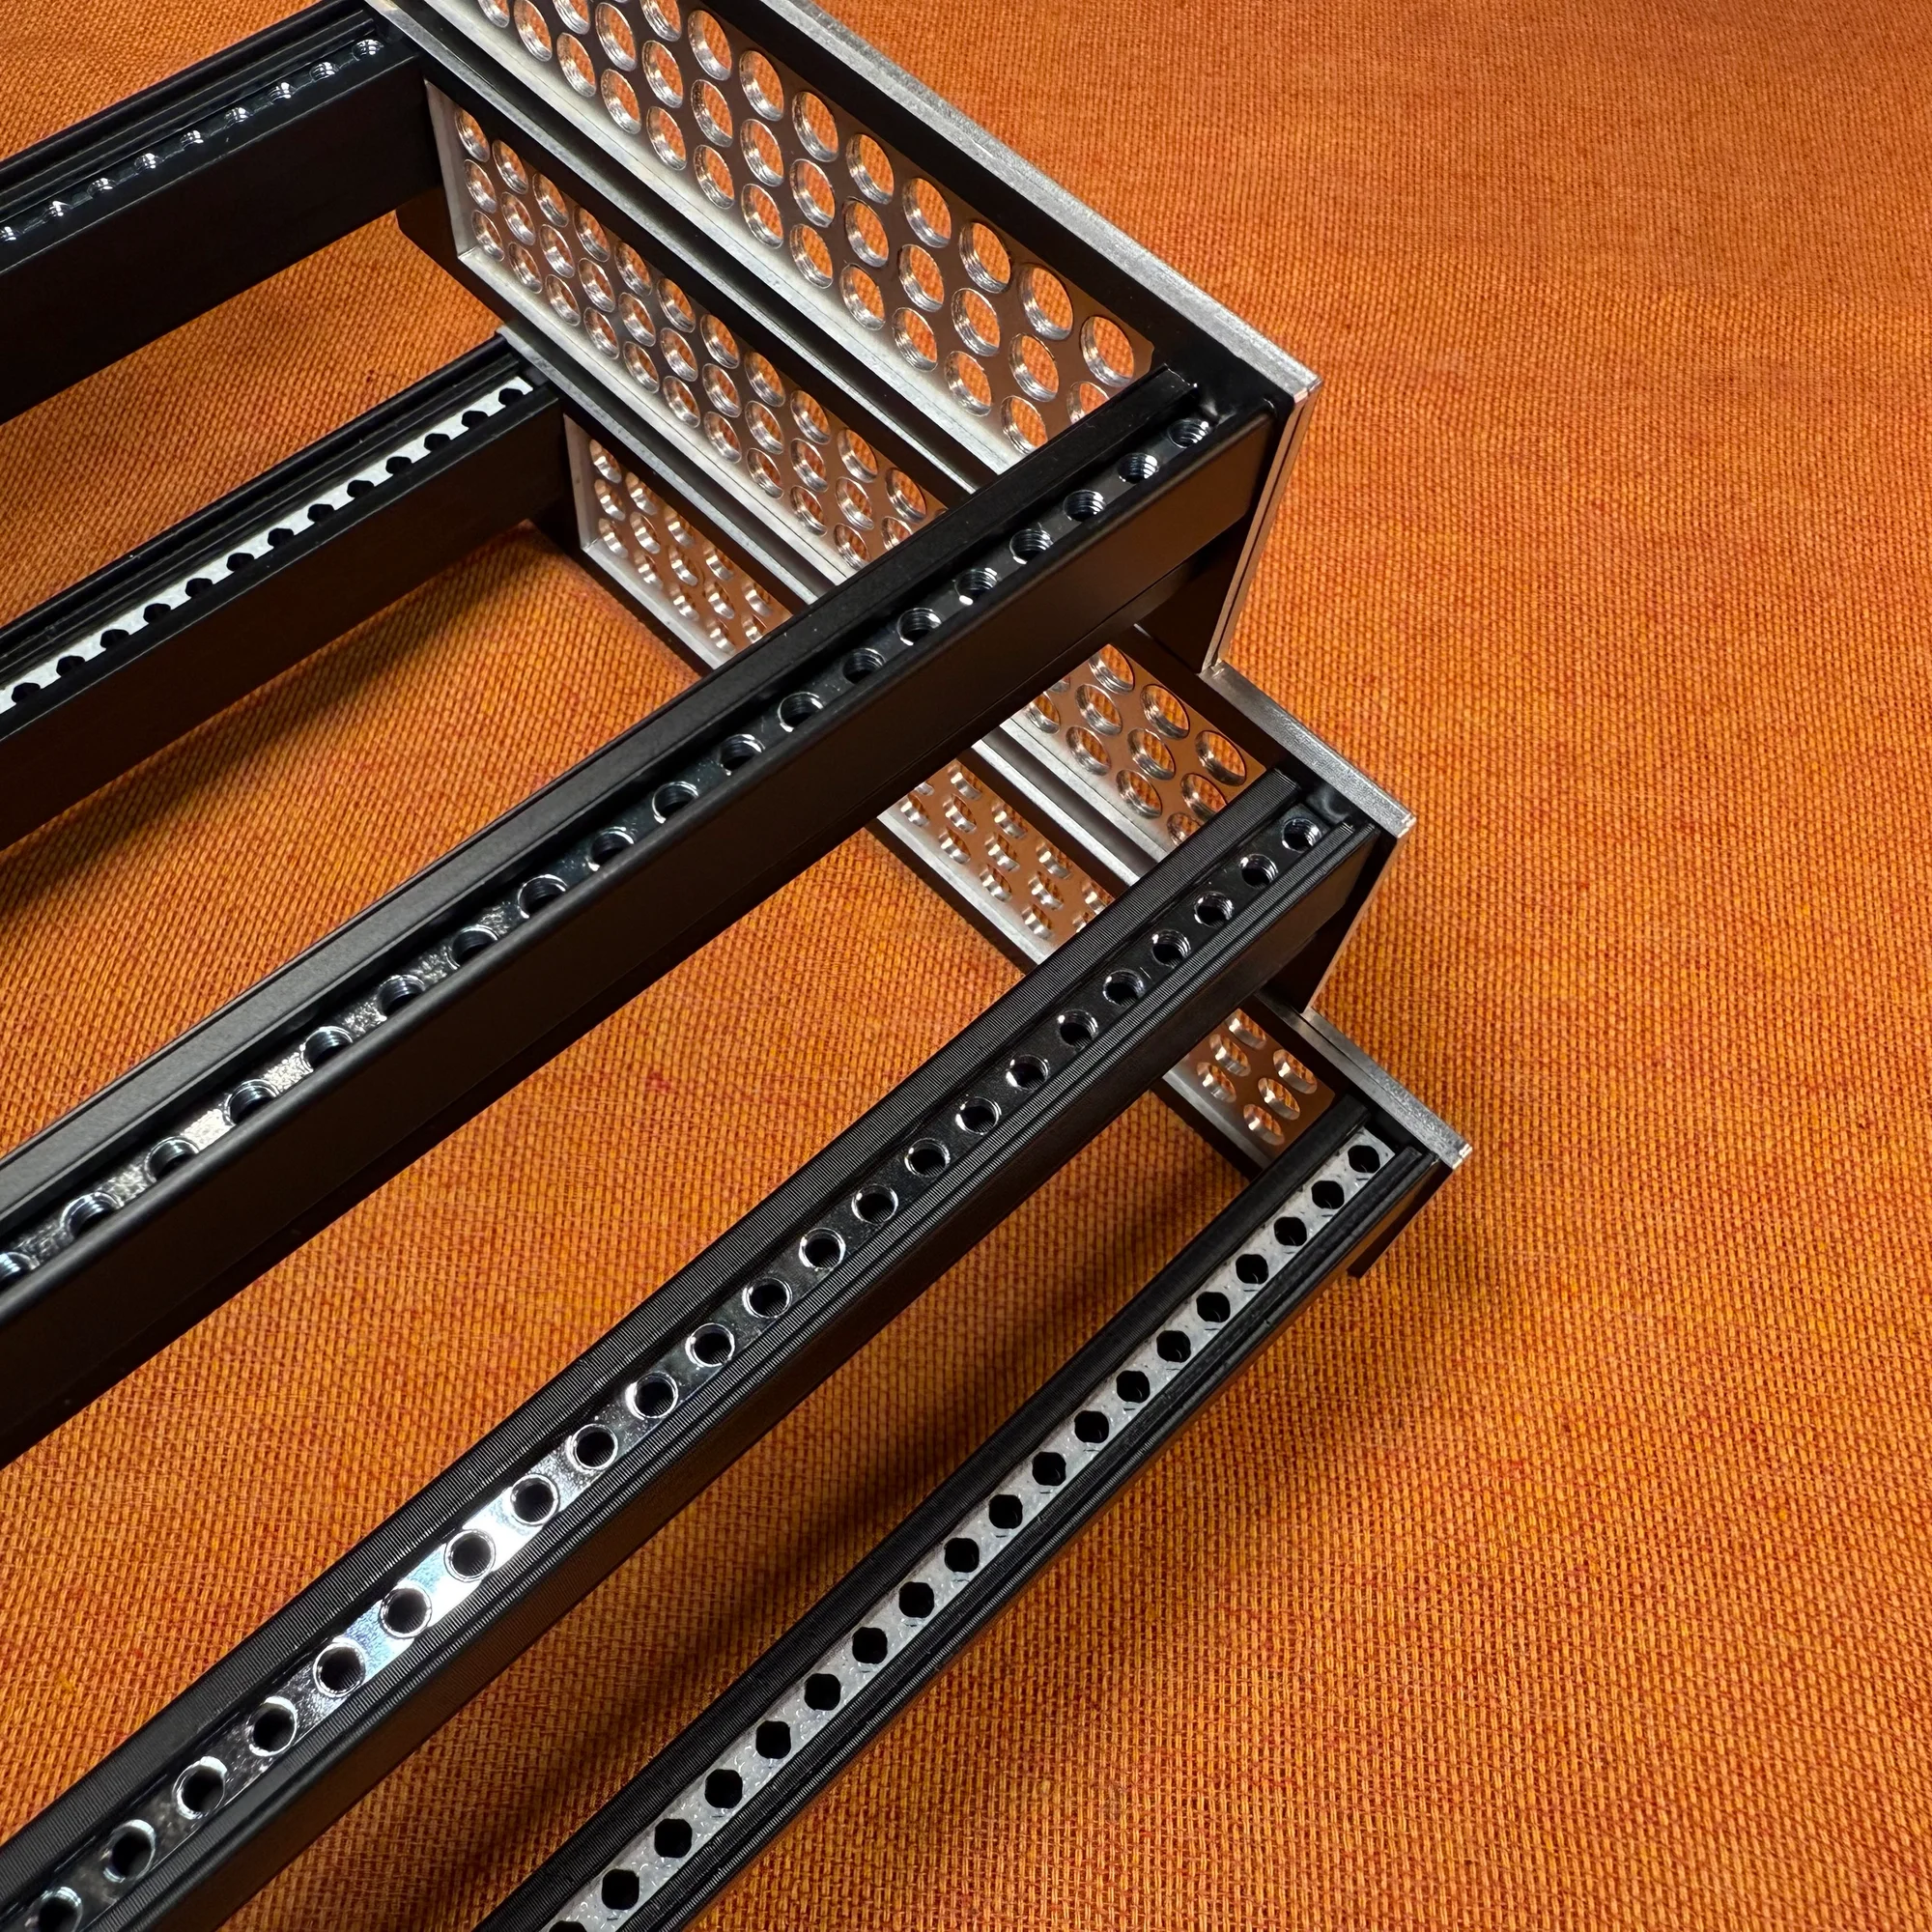
*Photos are in Lite, Dual, Metal order.
Purchasing on Mercari Shops
These products are sold on Mercari Shops as 9 variations (3 colors x 3 rail types). Including side panel shape differences would make 18 variations (9 x 2), but the side panel shape (A-type or B-type) is selected at the time of purchase, so please take note.
For this case, panel color and side panel shape do not affect the price; only the rail type determines the price difference. Tax-included, shipping-included prices are as follows:
- Lite: ¥7,980
- Dual: ¥11,980
- Metal: ¥15,980
Case Development Background
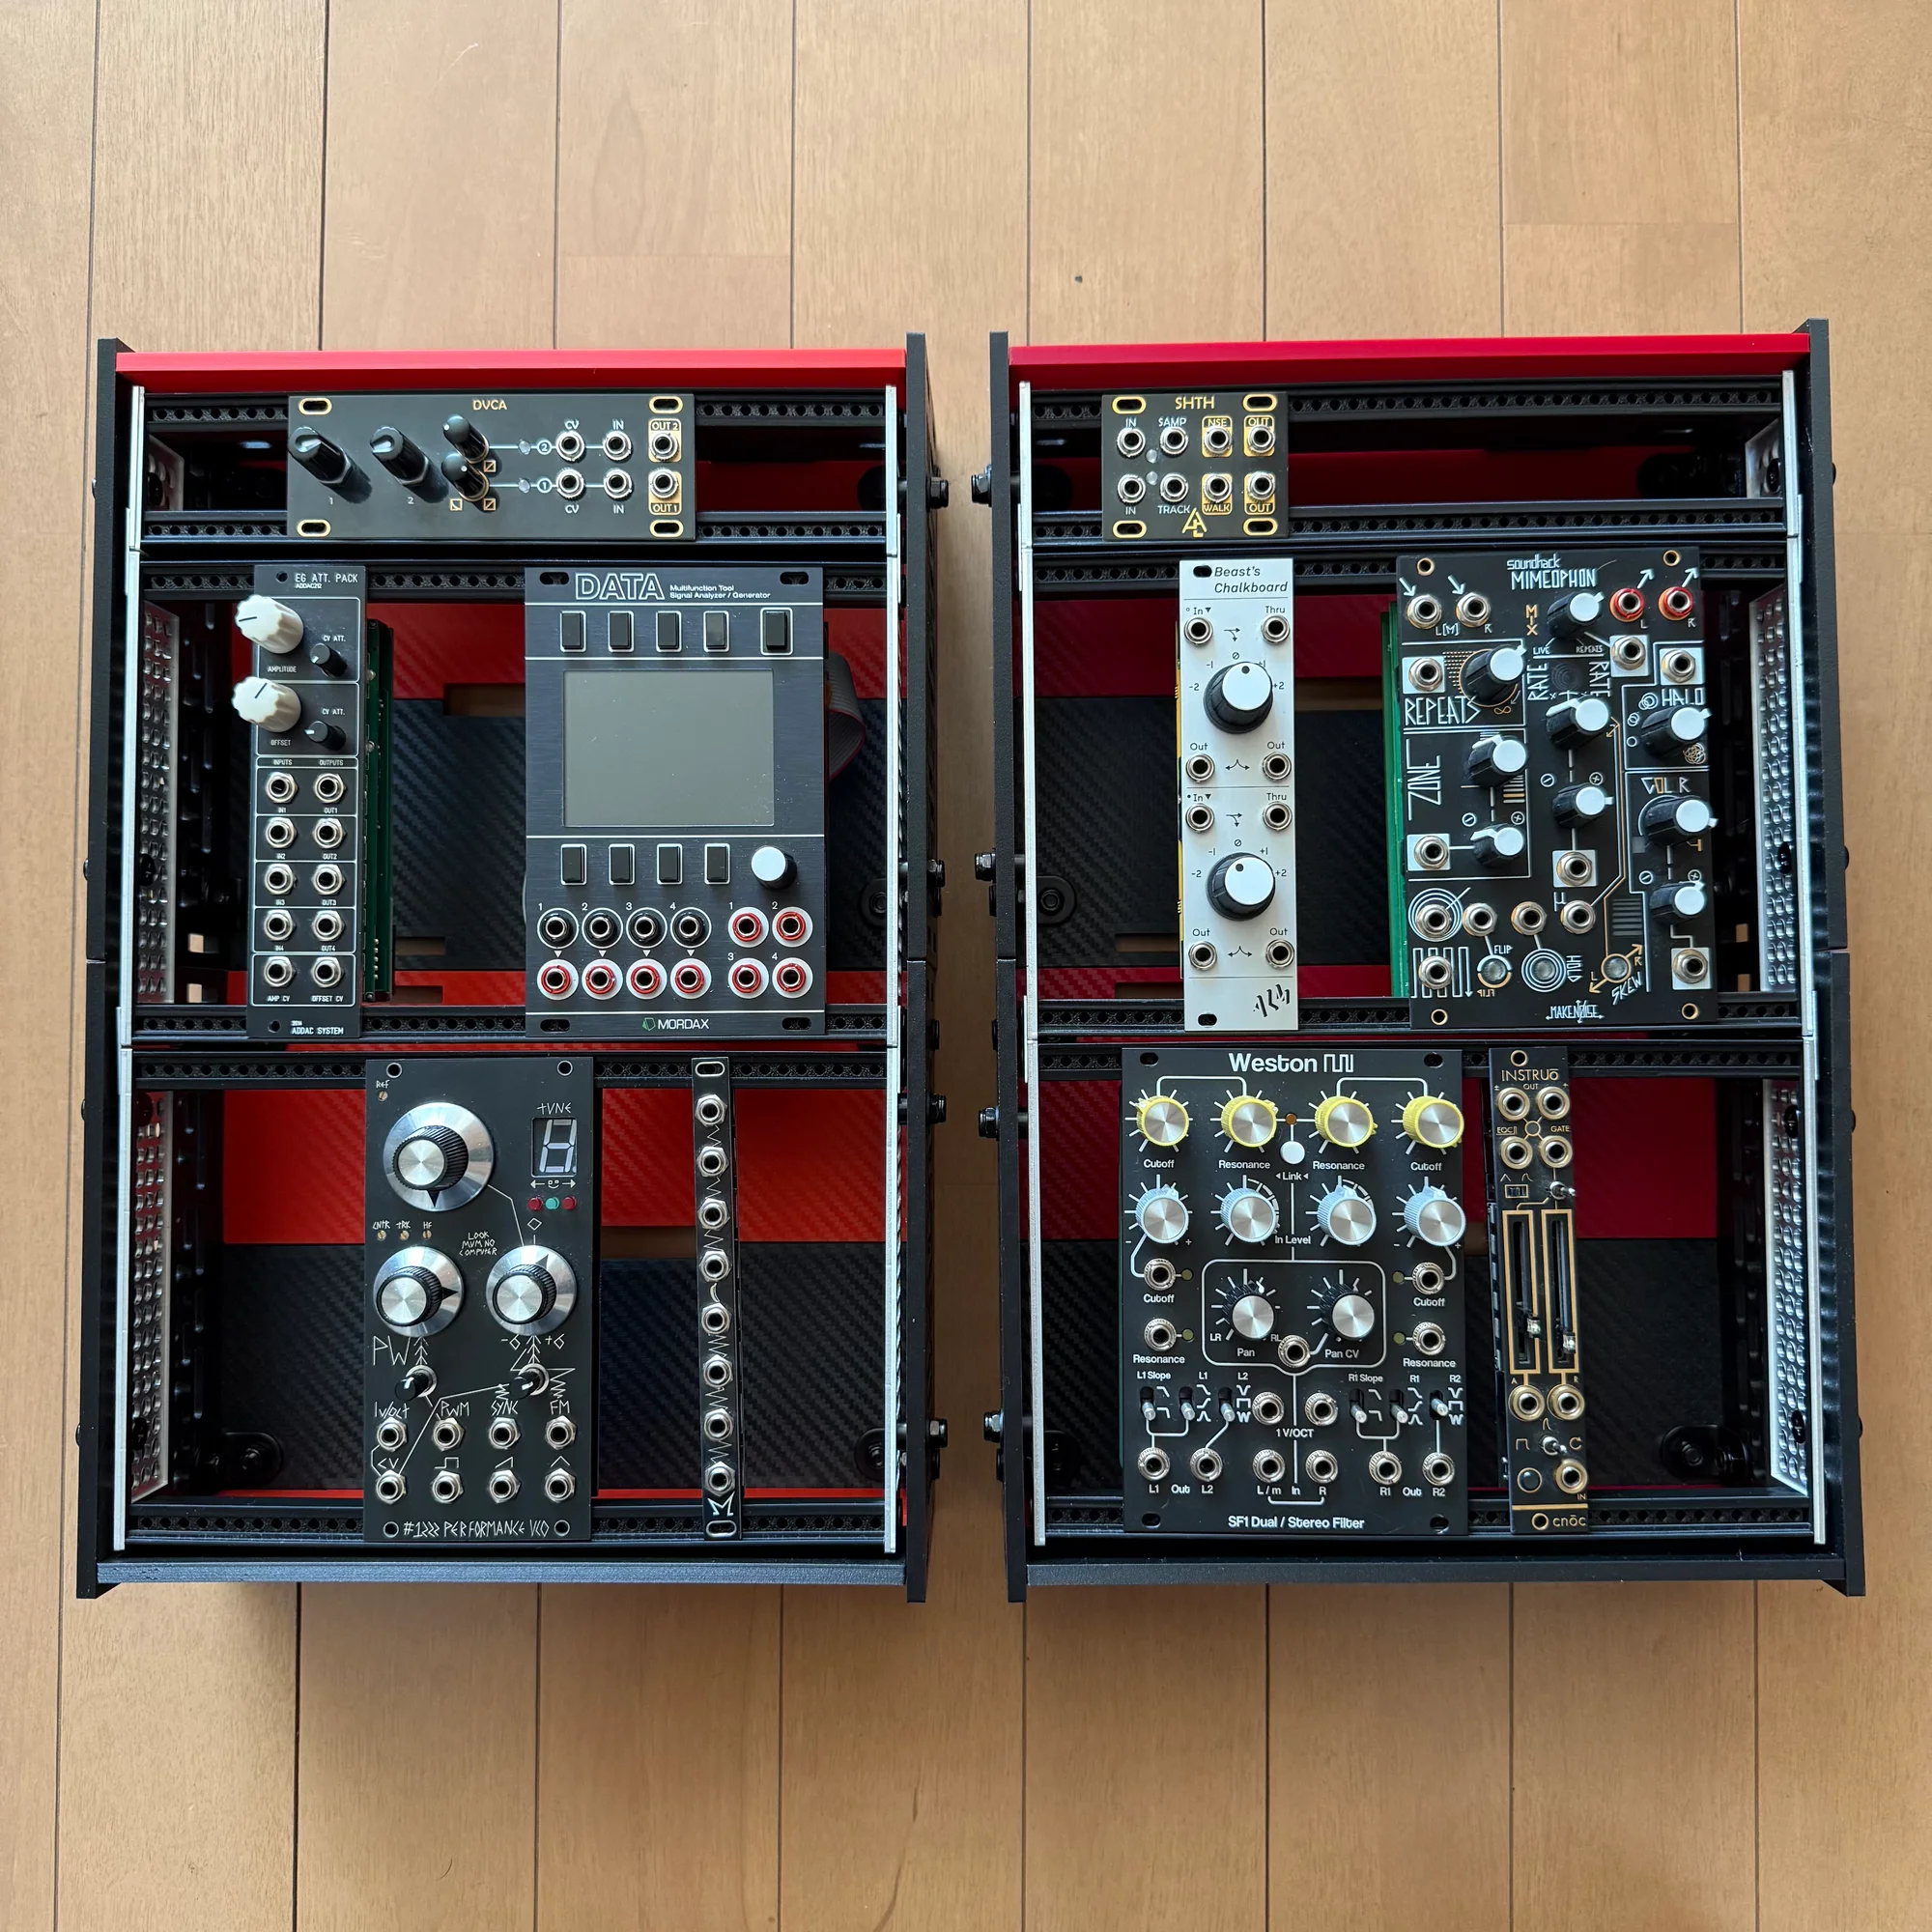
I personally use multiple small modular synth cases and combine them differently depending on the day. For example, a melody-making case filled with quantizers like the ADDAC207 Intuitive Quantizer plus ADDAC215 Dual S&H+ and ADDAC203 REV.02 CV Mapping, an Envelope case packed with SE1 Shaped VC Envelope, and a case dedicated to oscillators.
But as I used them, I kept thinking “I want to tilt it a bit” or “I want it a bit deeper/shallower.” That’s when I bought a 3D printer and thought, “Maybe I can actually make my own case?” After days of printing panels and refining the design, this case was finally born.
Since most cases are metal, you might think “acrylic panels?” But once you actually build one, it feels surprisingly solid. It’s more vulnerable to strong impacts than metal cases, so care is needed during shipping, but for home use, it’s a perfectly functional case.
While selling these cases, the cost of the rails kept nagging at me. So I wondered if I could make those too, and after much 3D printer experimentation, I completed the ASA resin rails. I launched the zudo-block-60 Open as an entry model using these rails, and it was well received, partly due to its more accessible price point. Following that success, I revamped the zudo-block-40 lineup as well to include more affordable rail options.
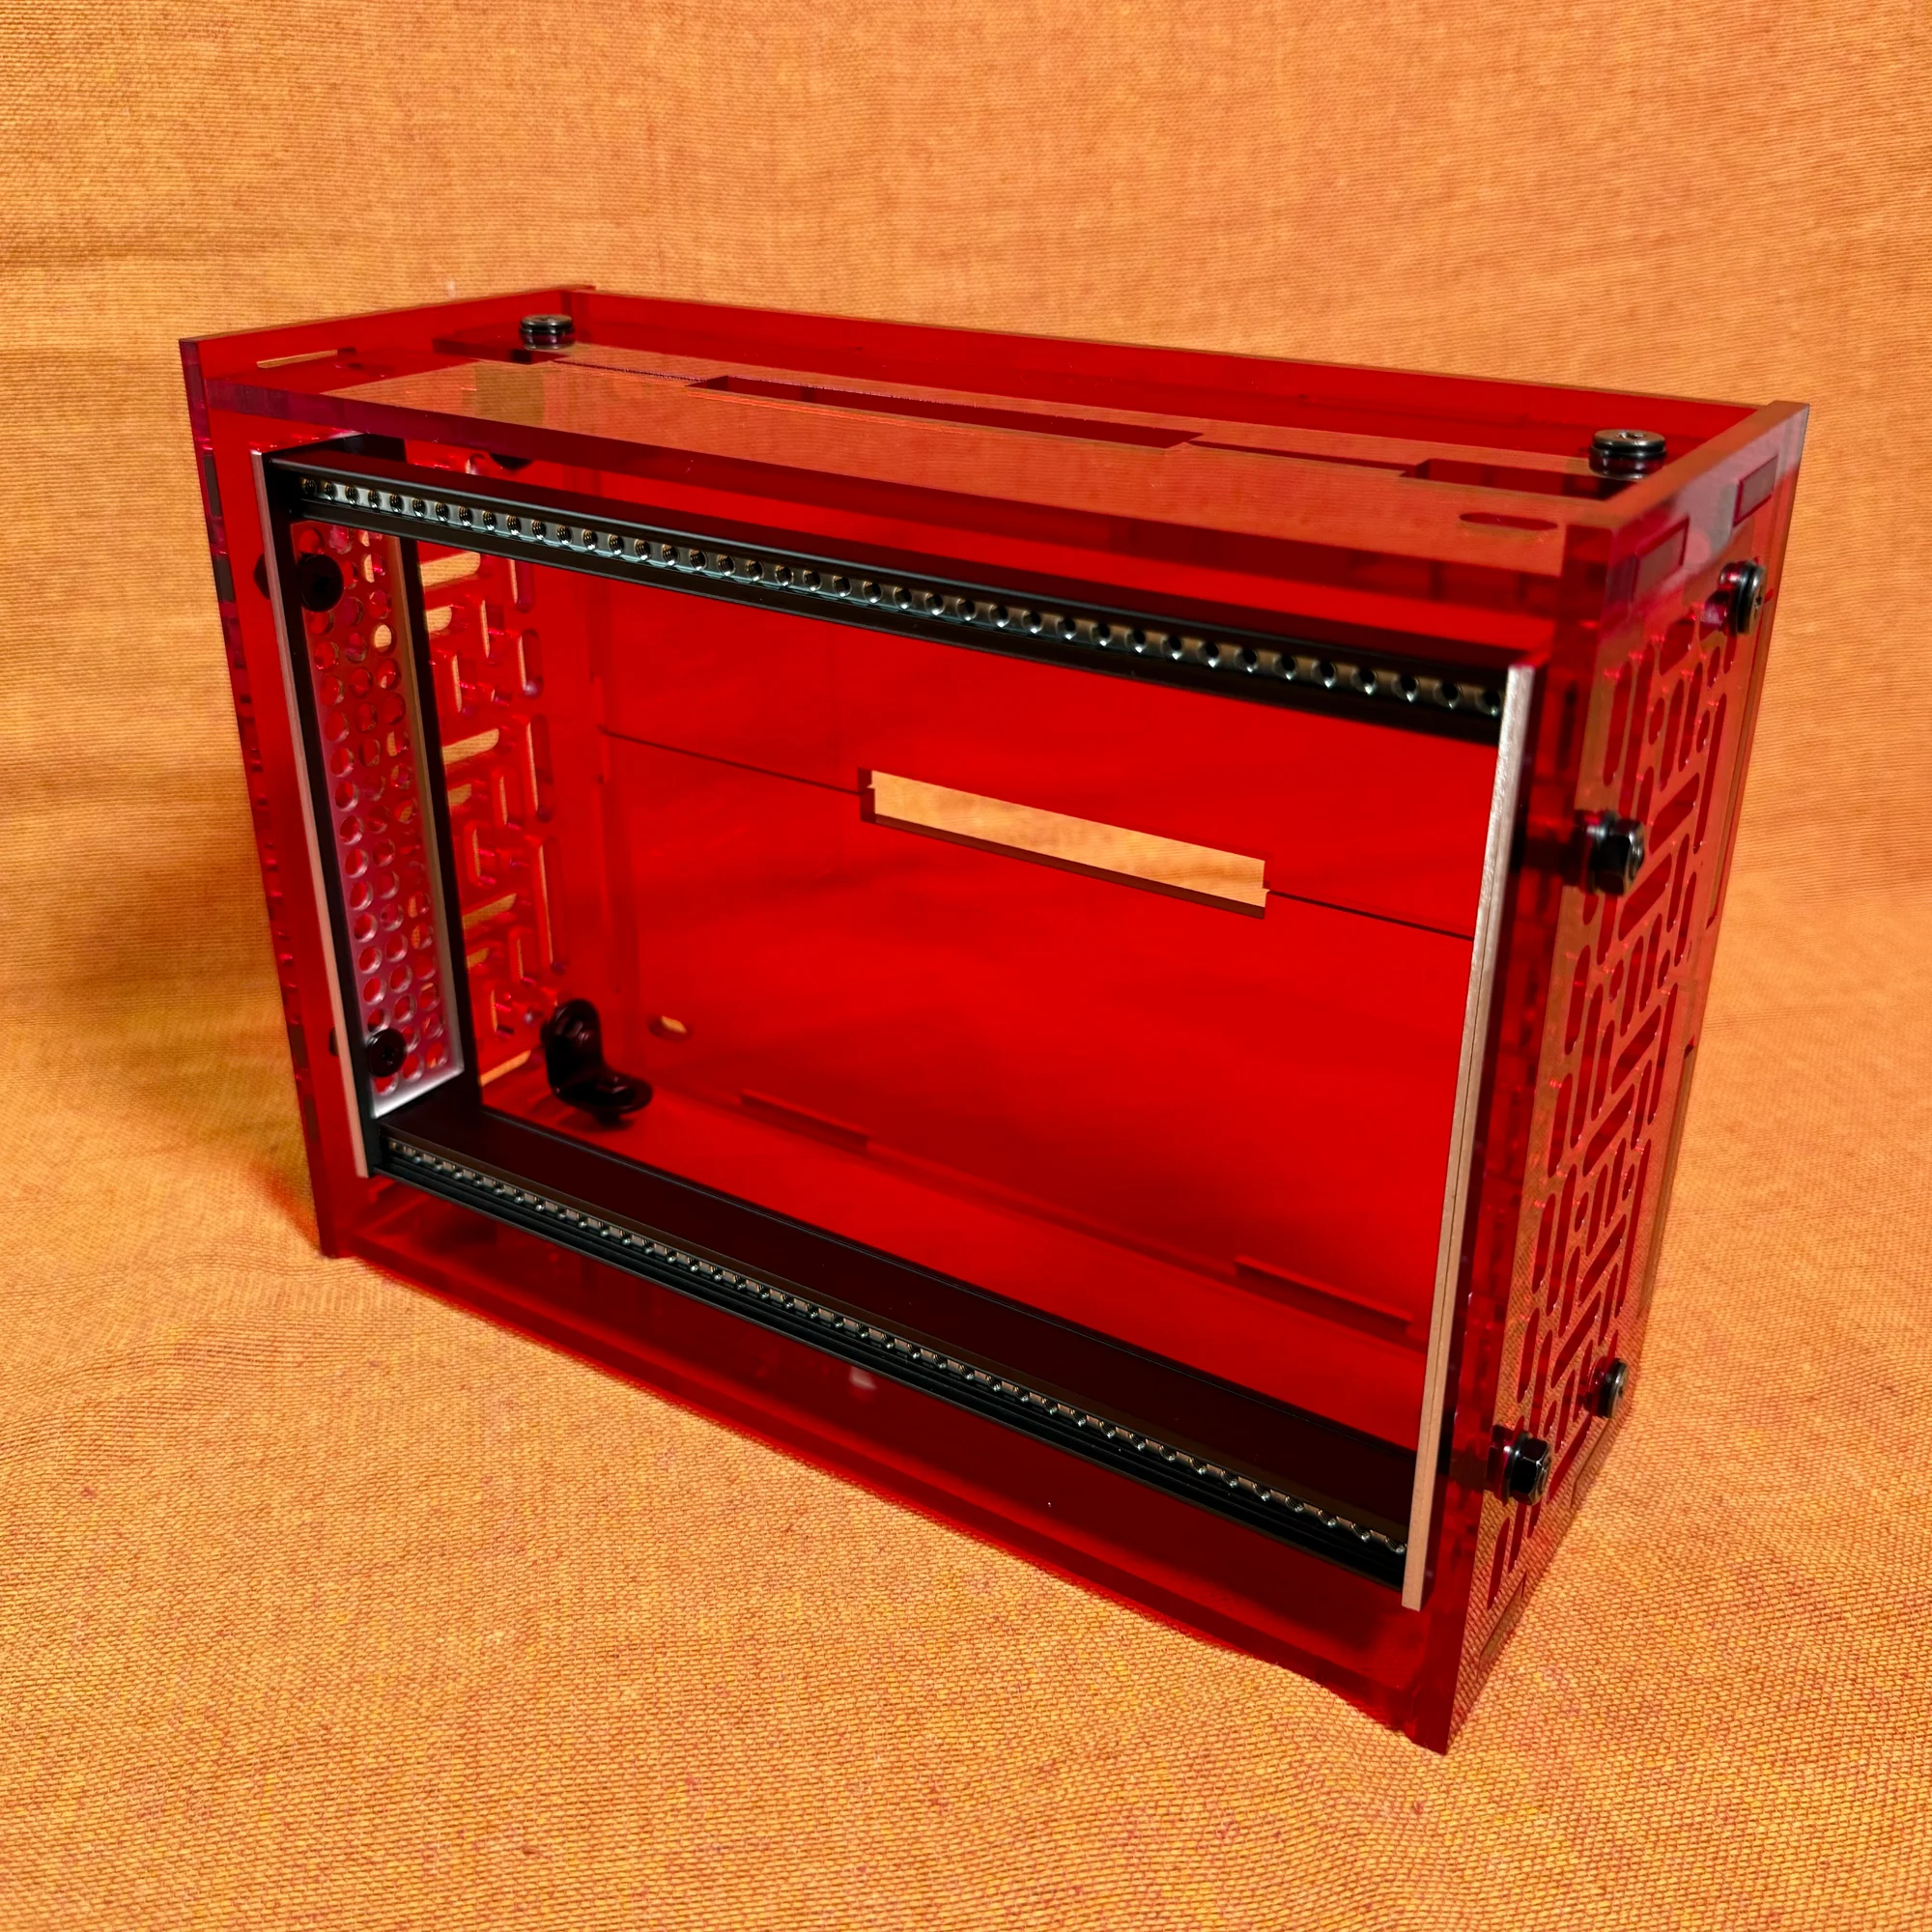
Tiltable Design
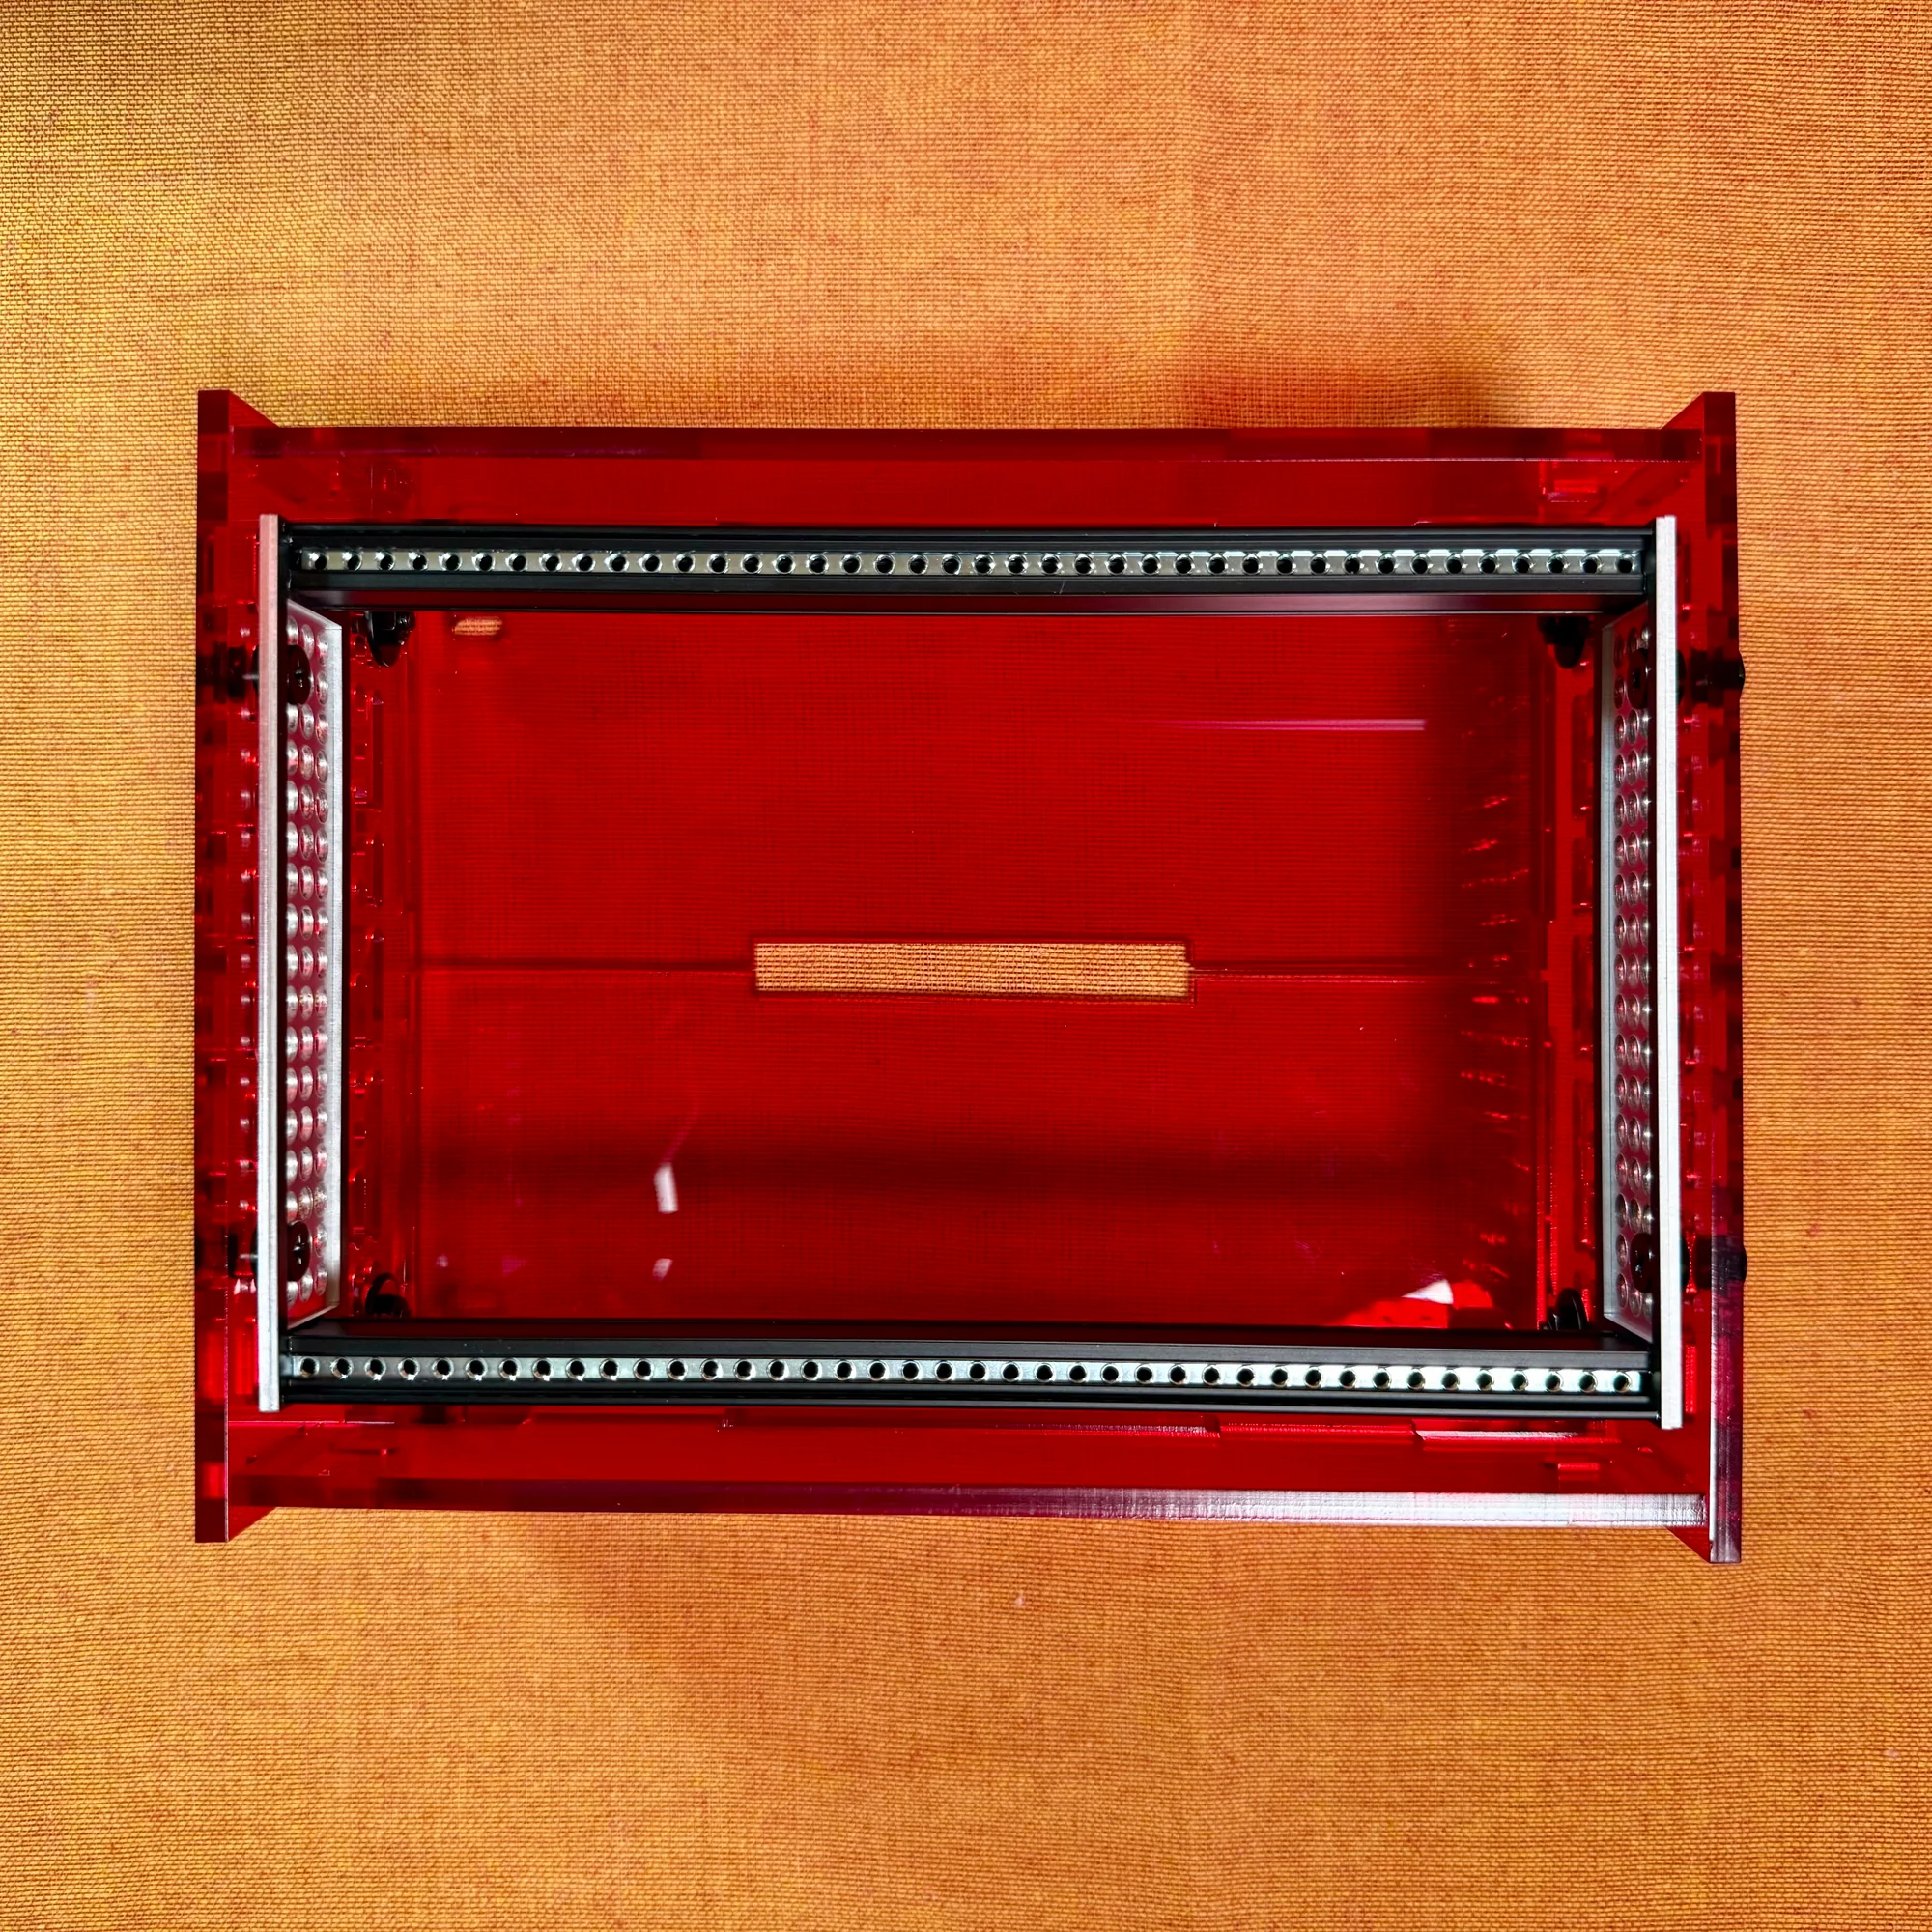
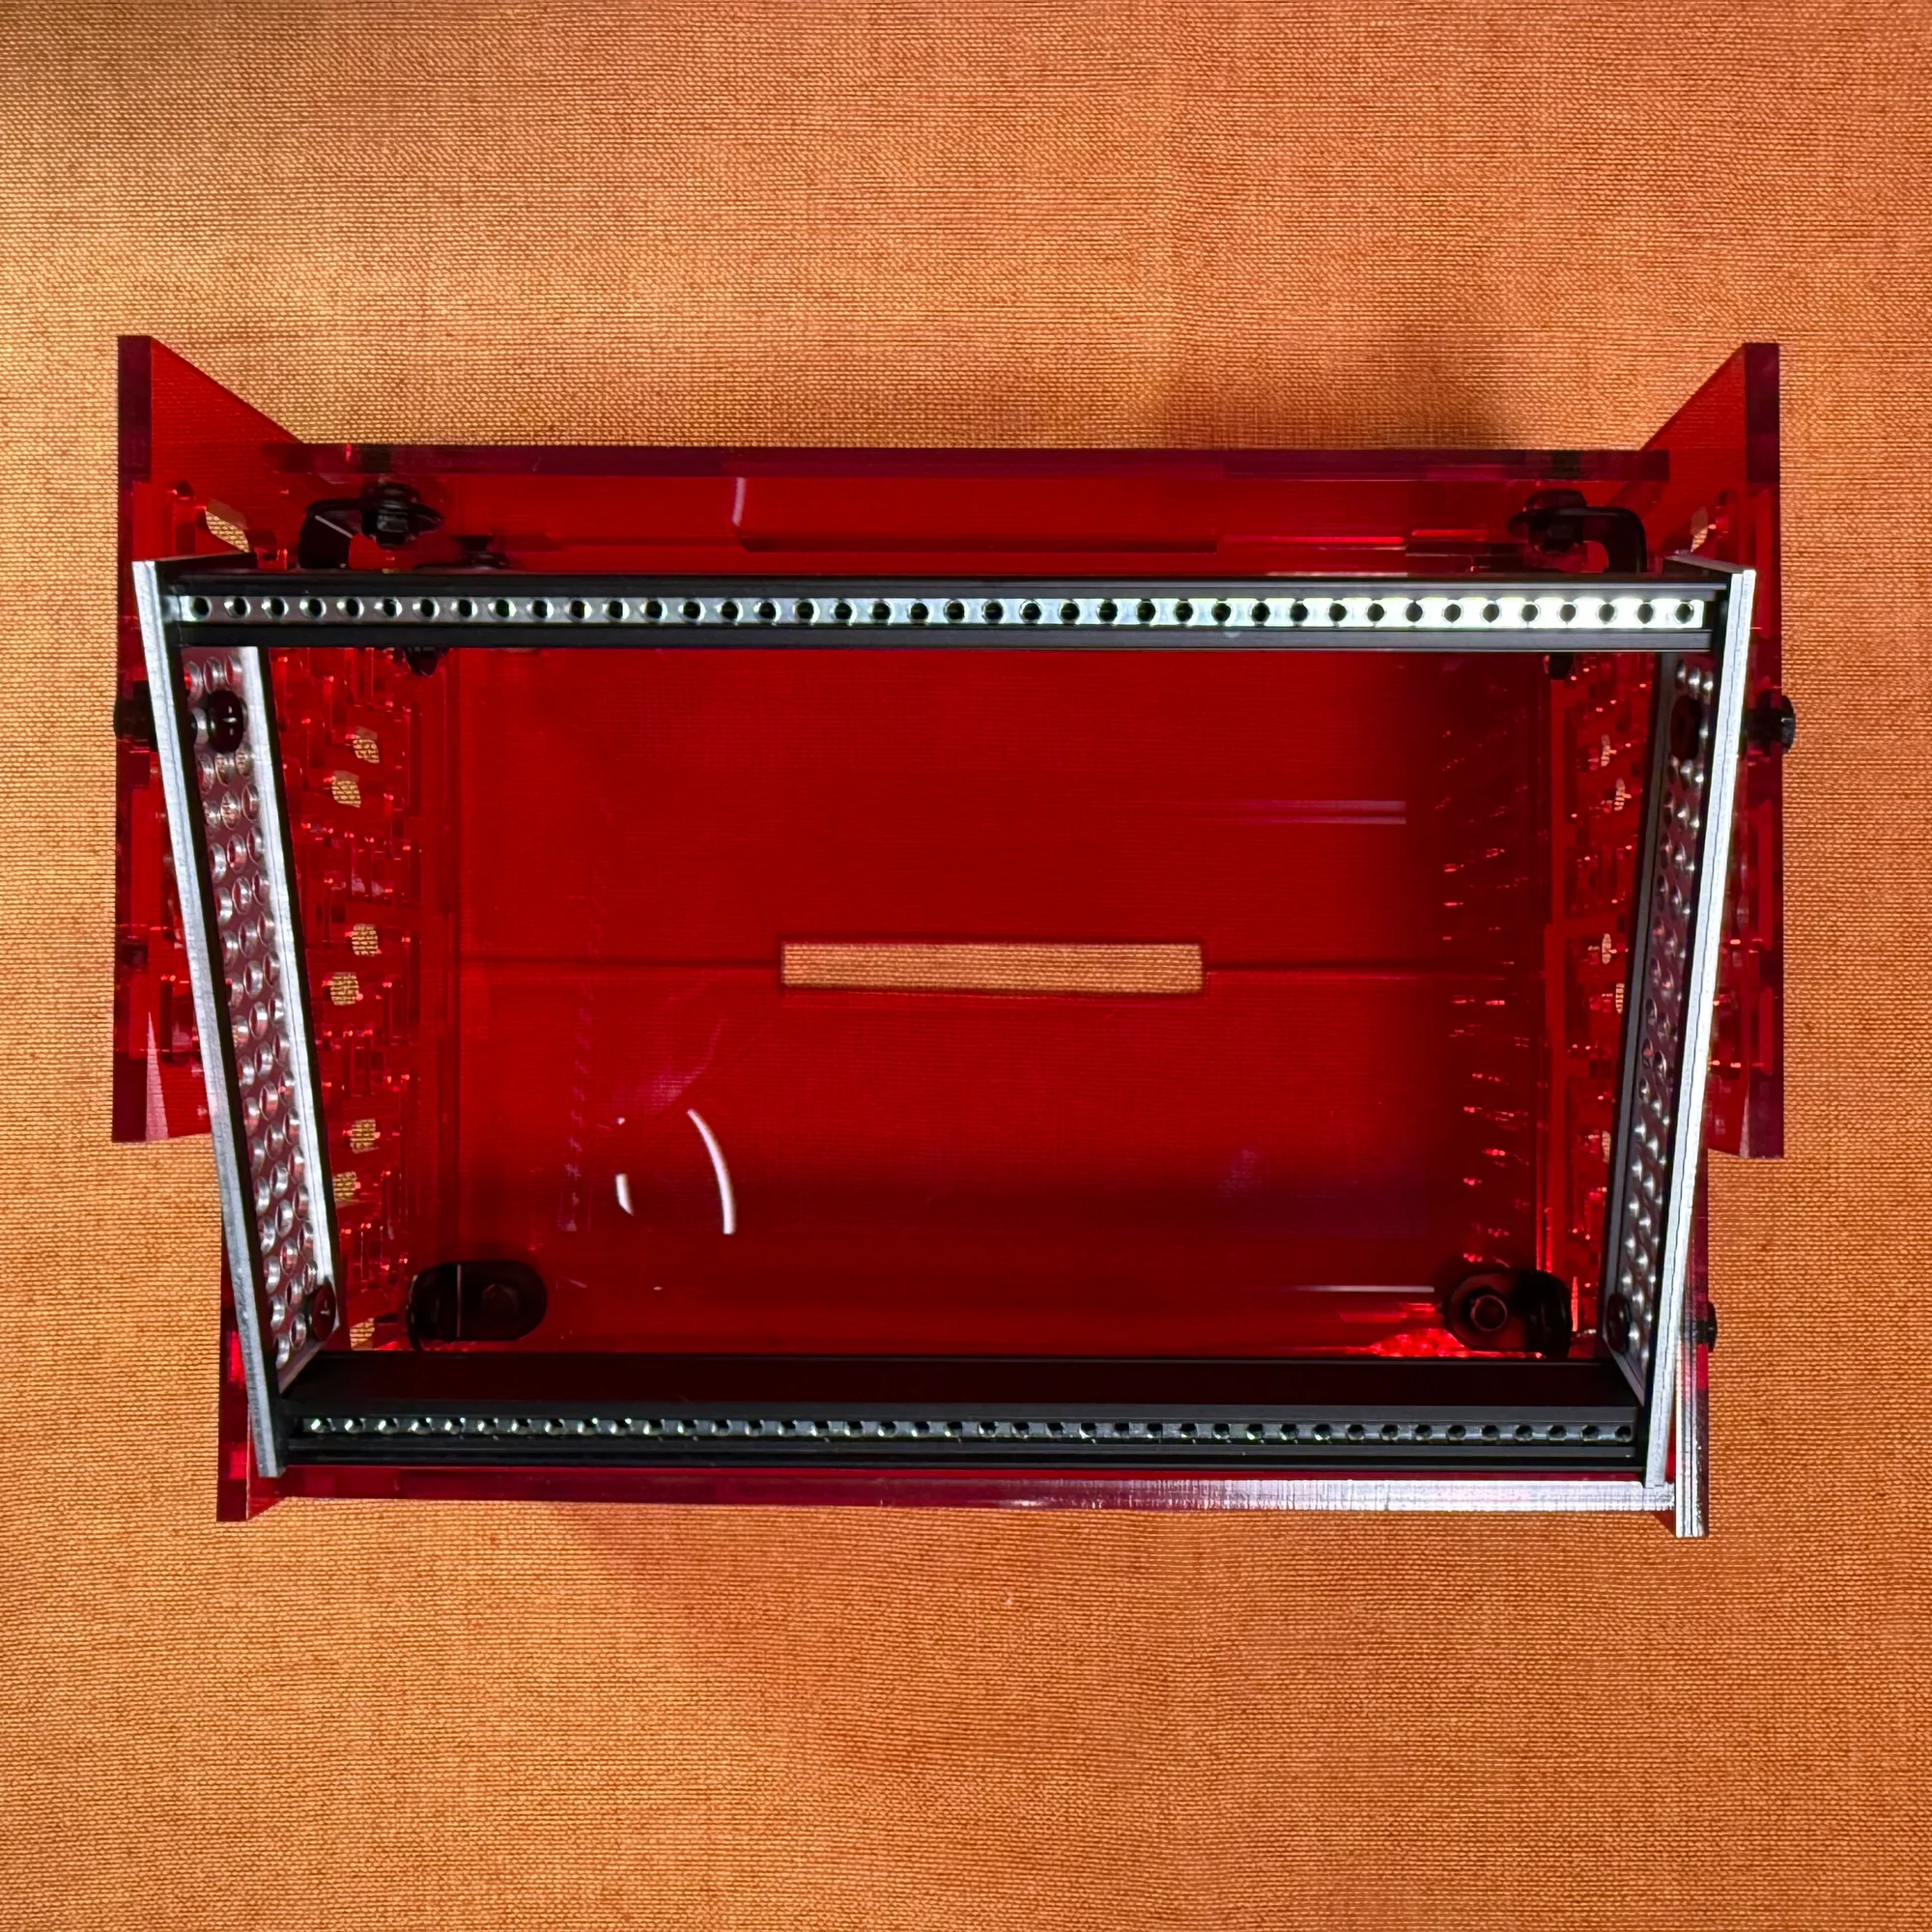
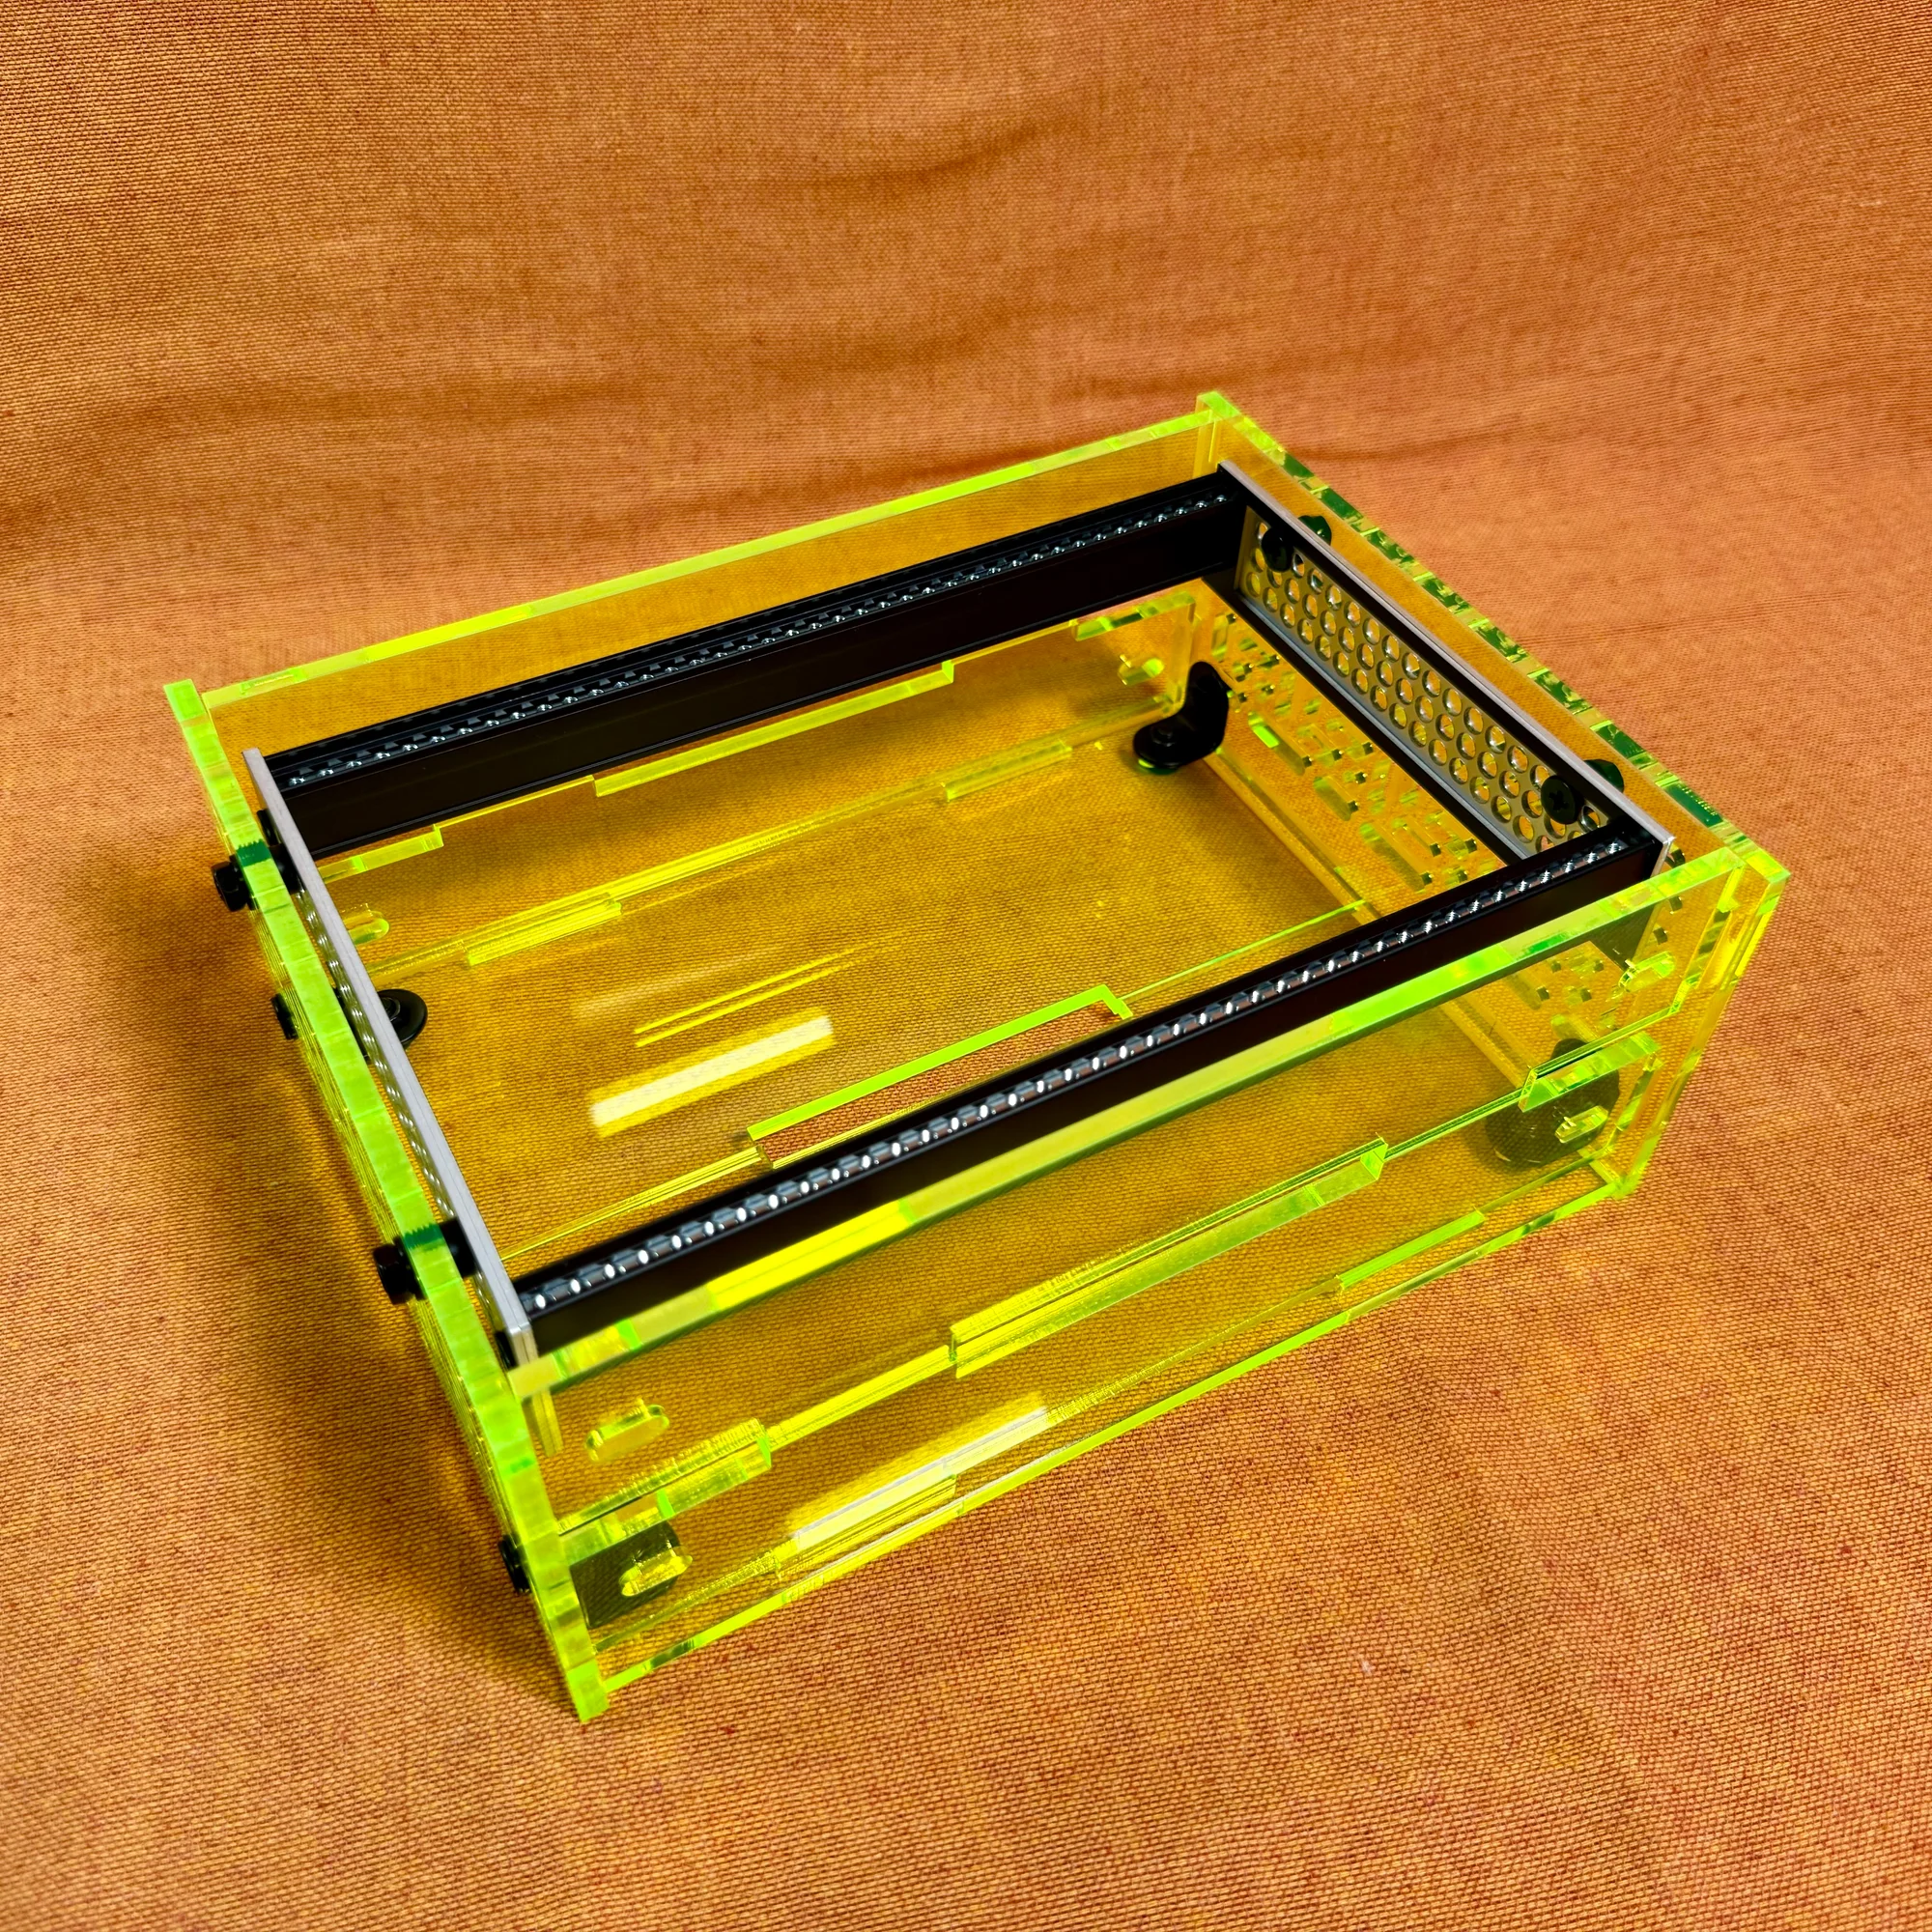
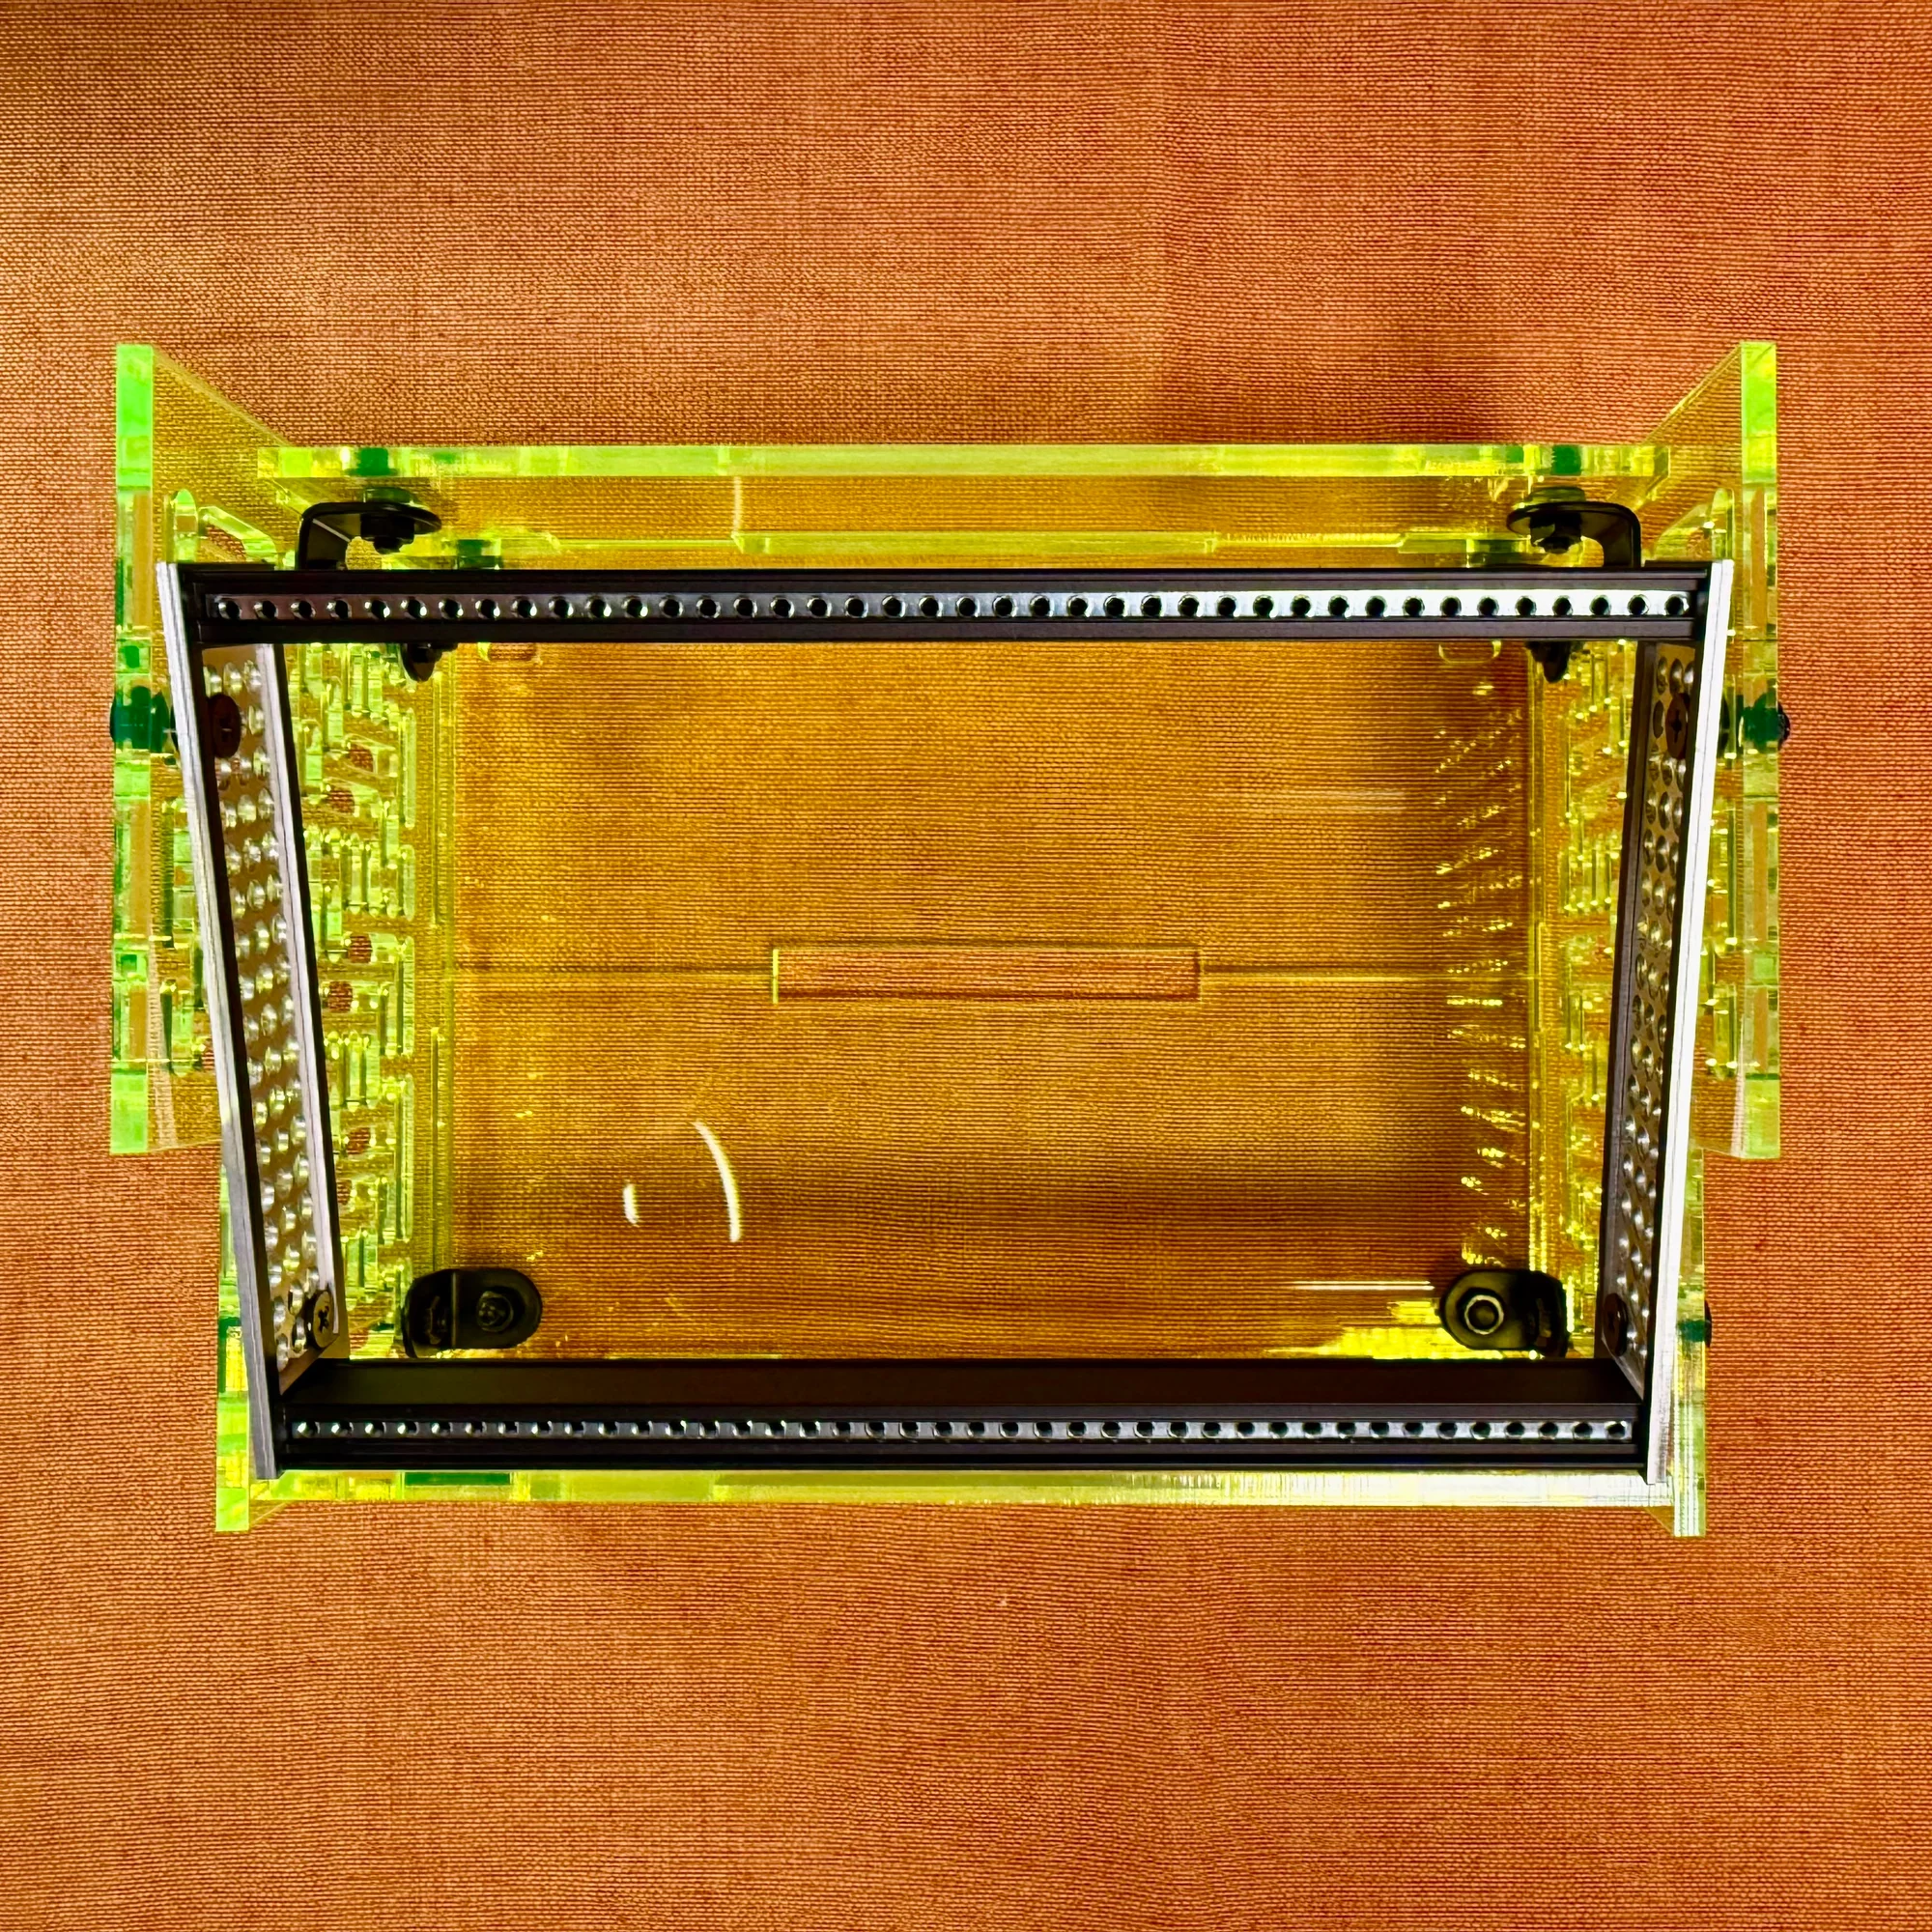
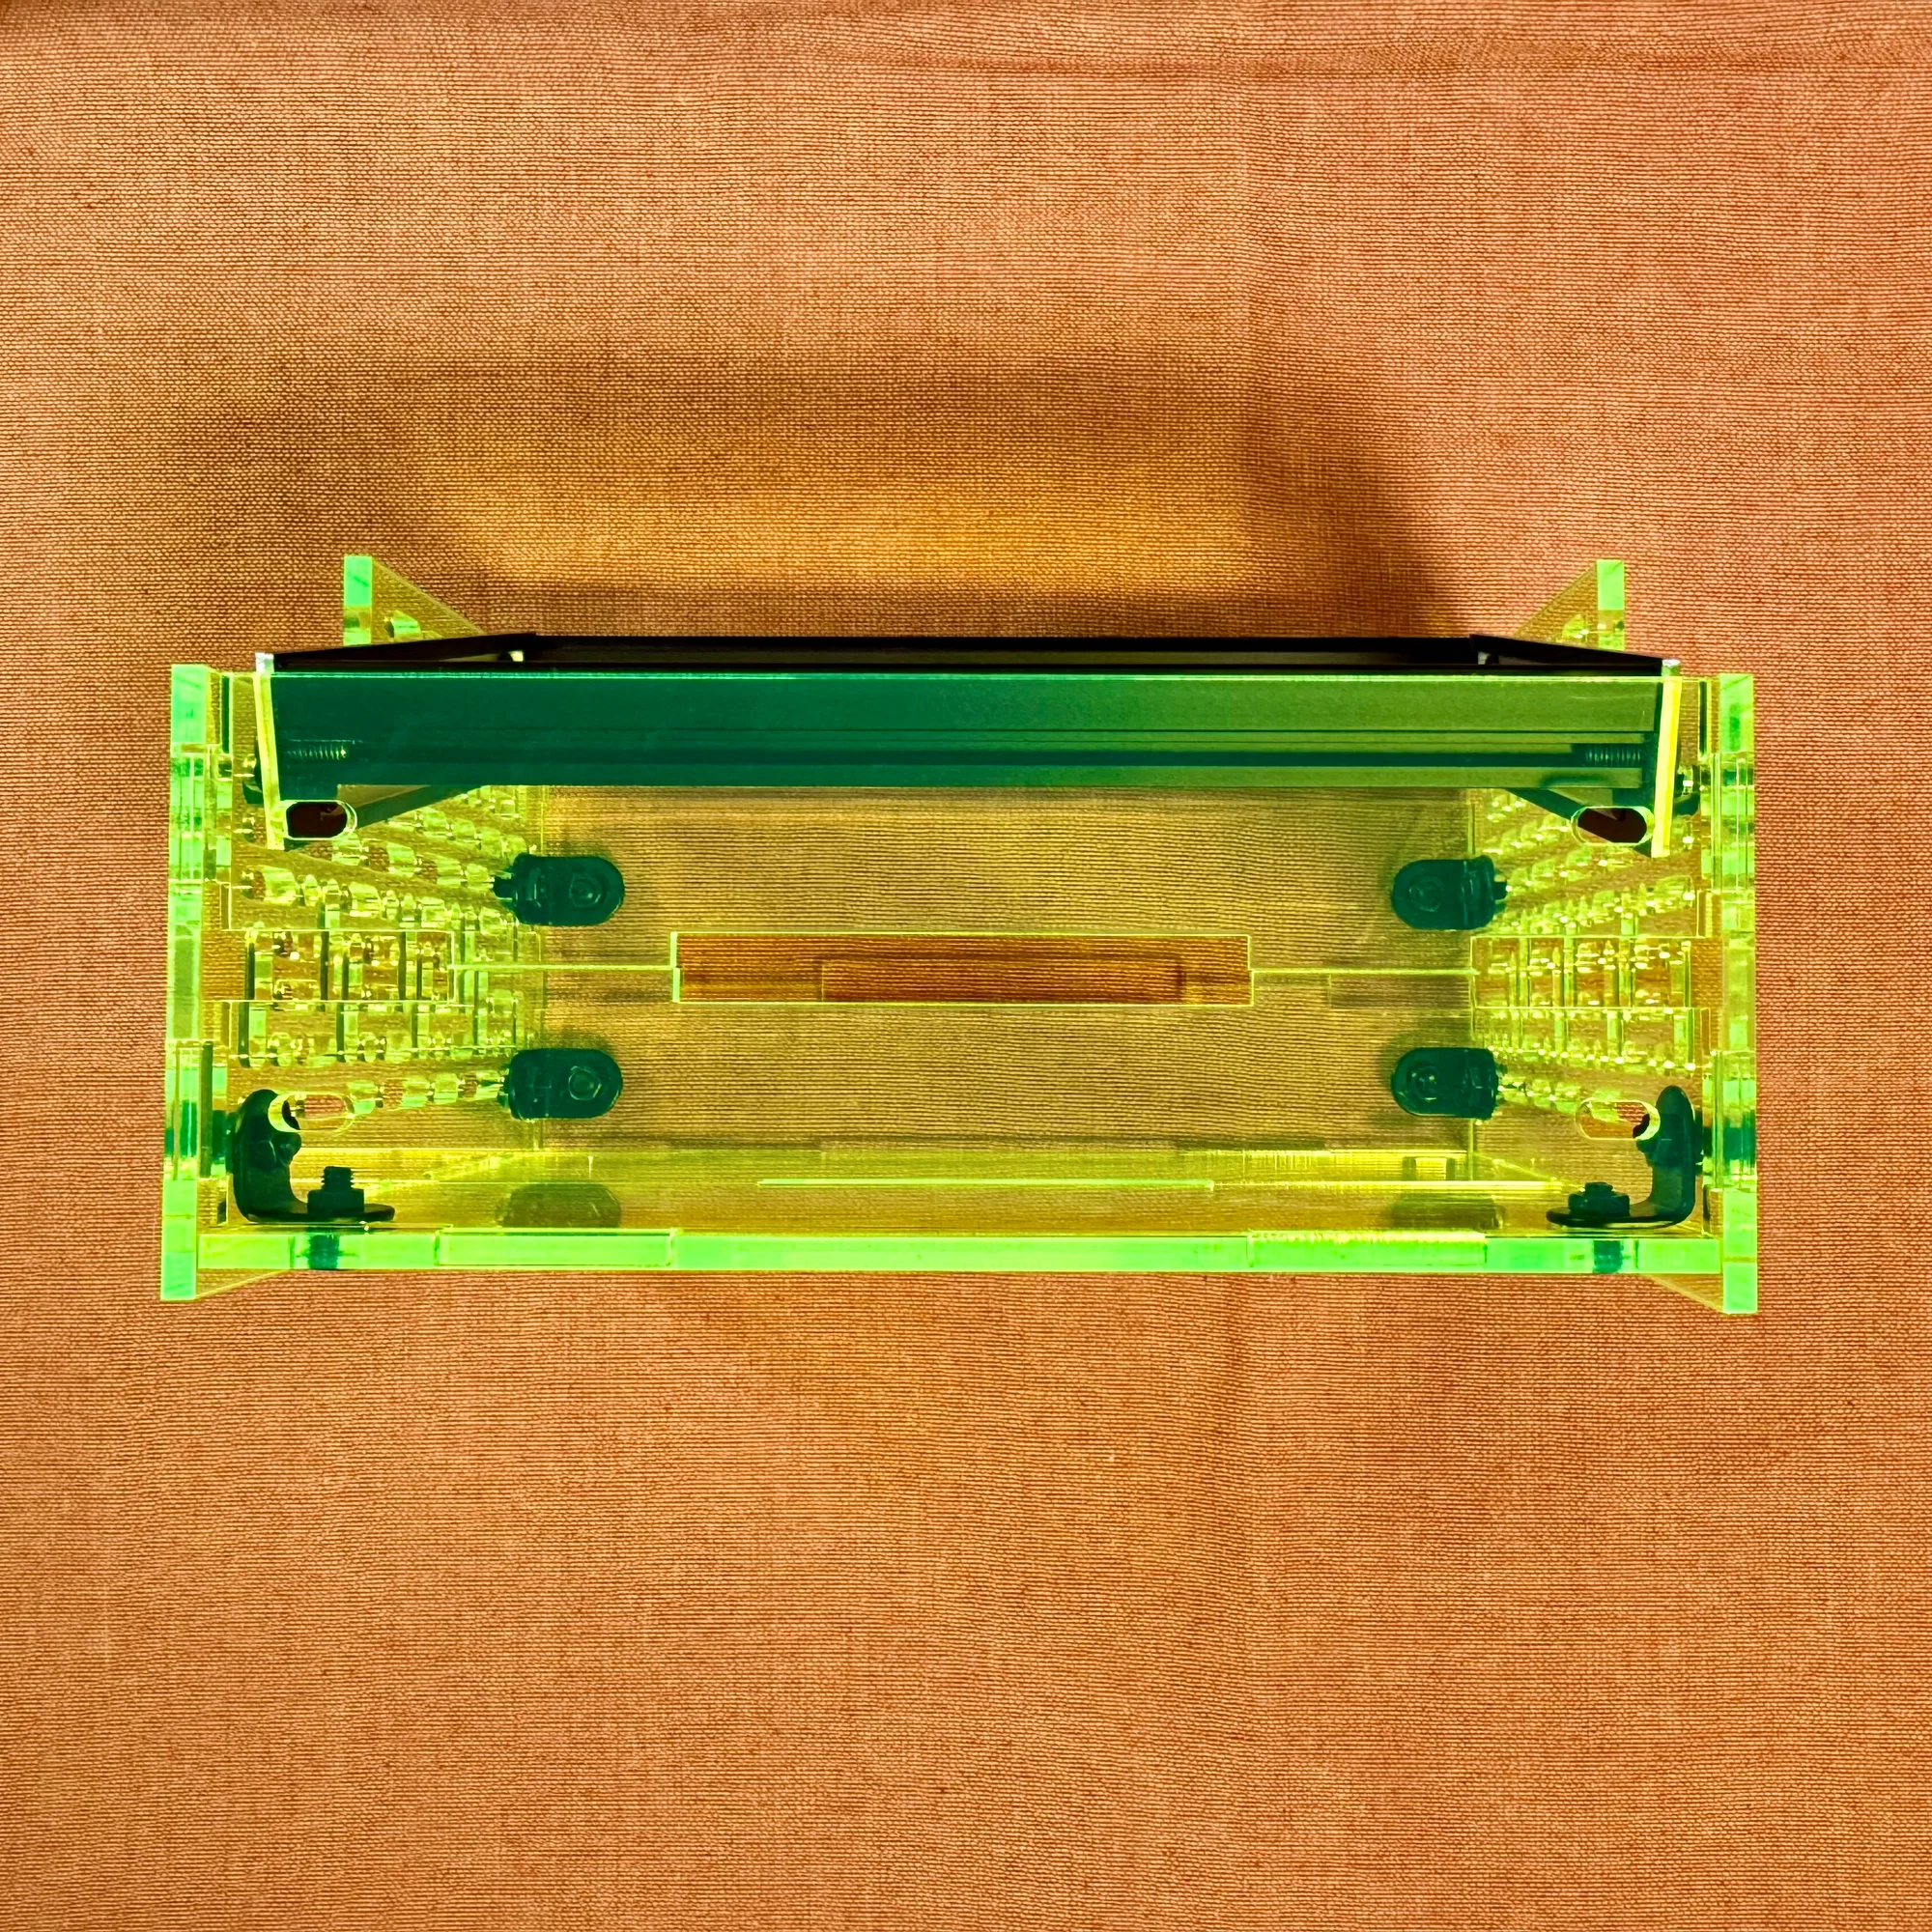
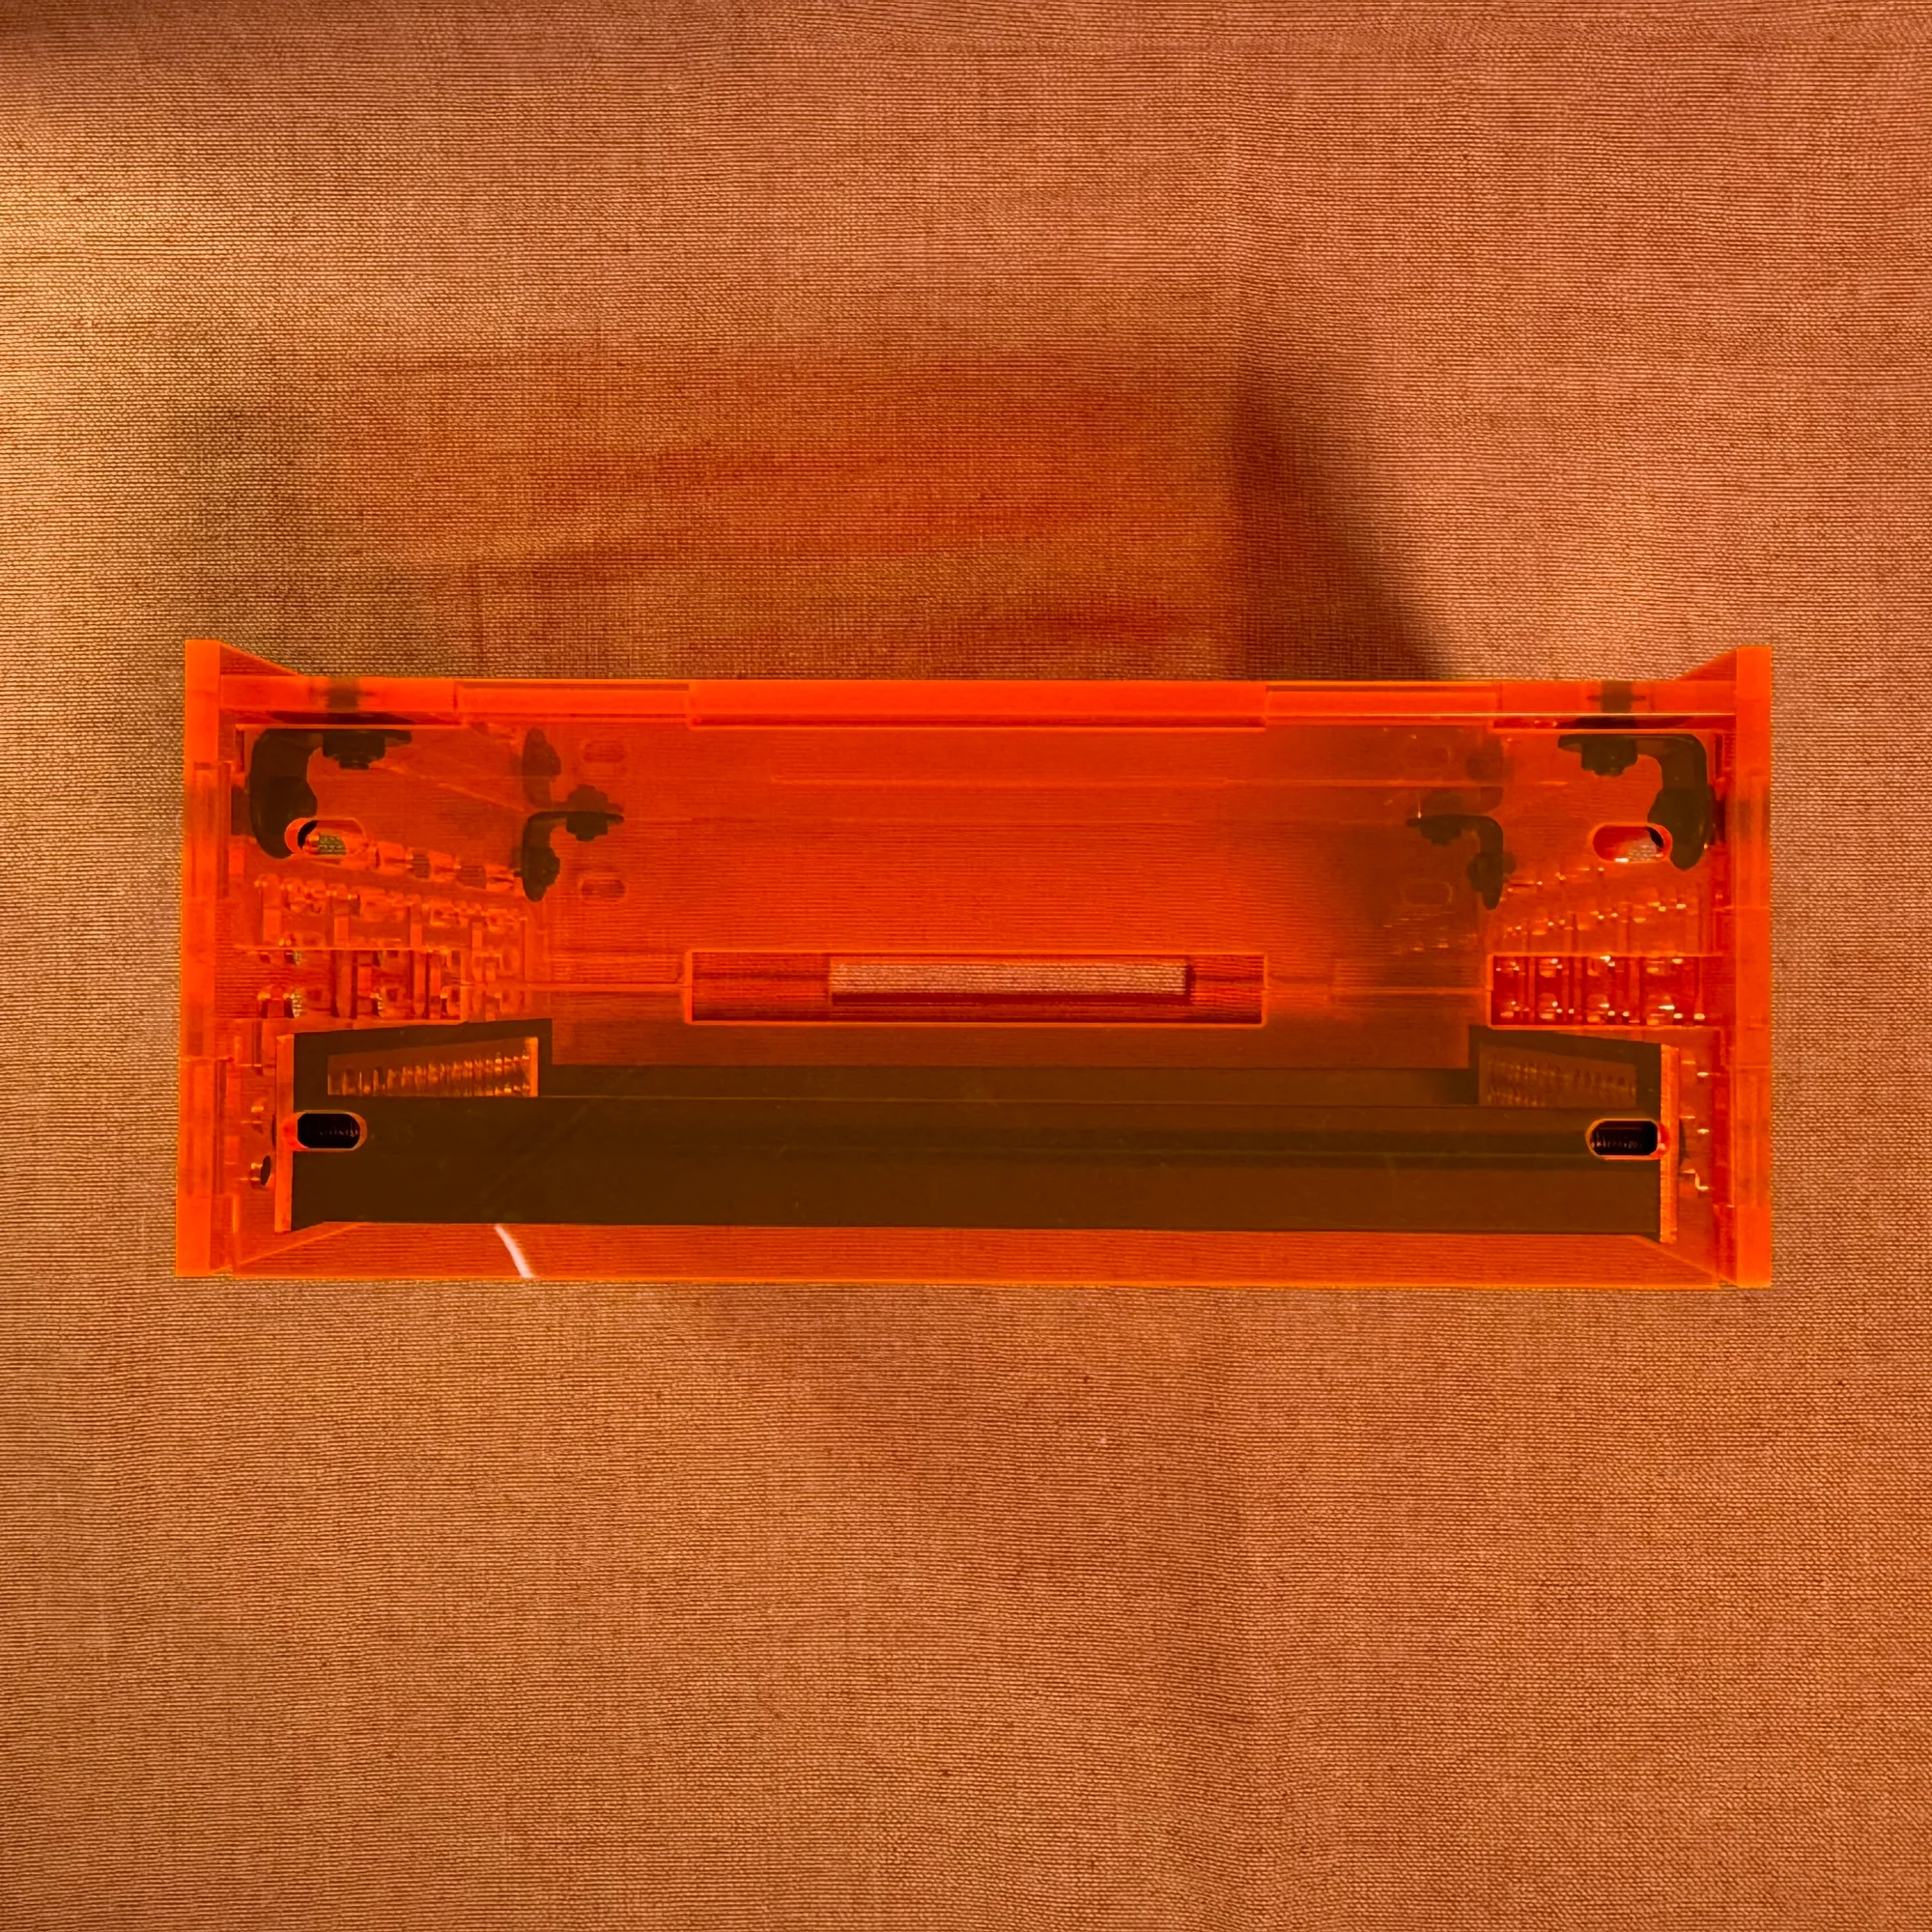
This case is assembled by first building the module-mounting frame section. Below is the assembled state:
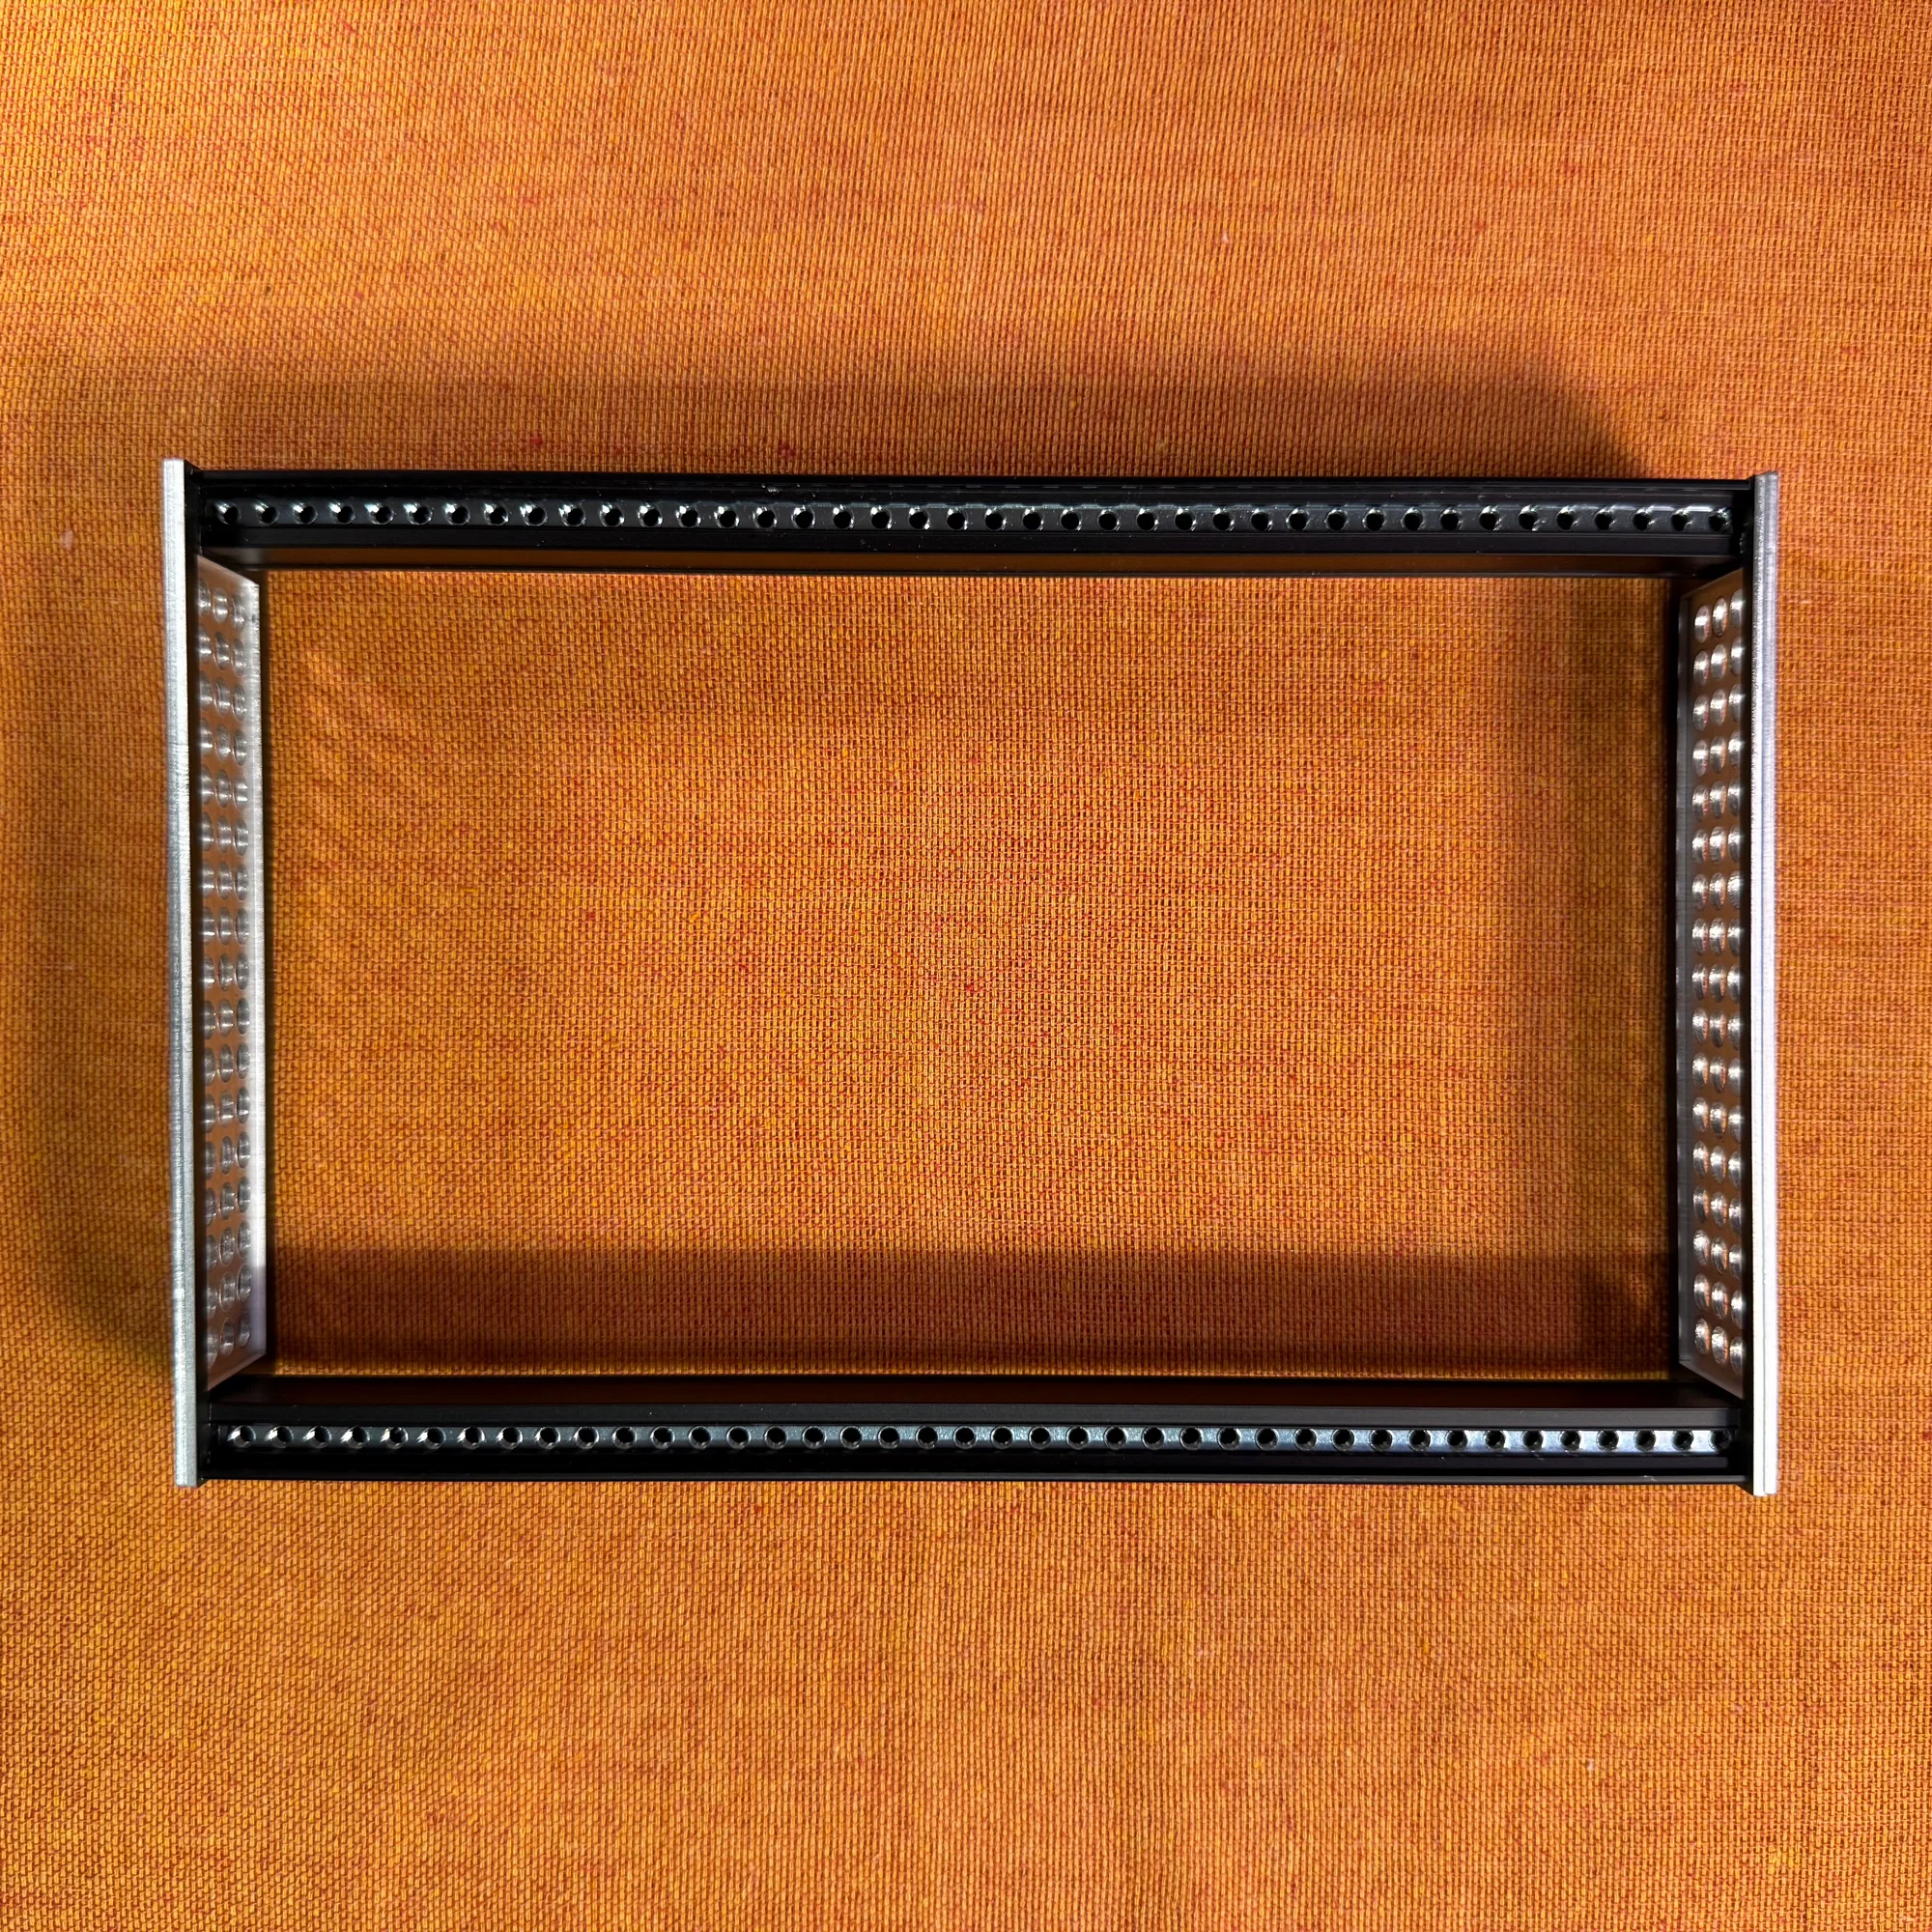
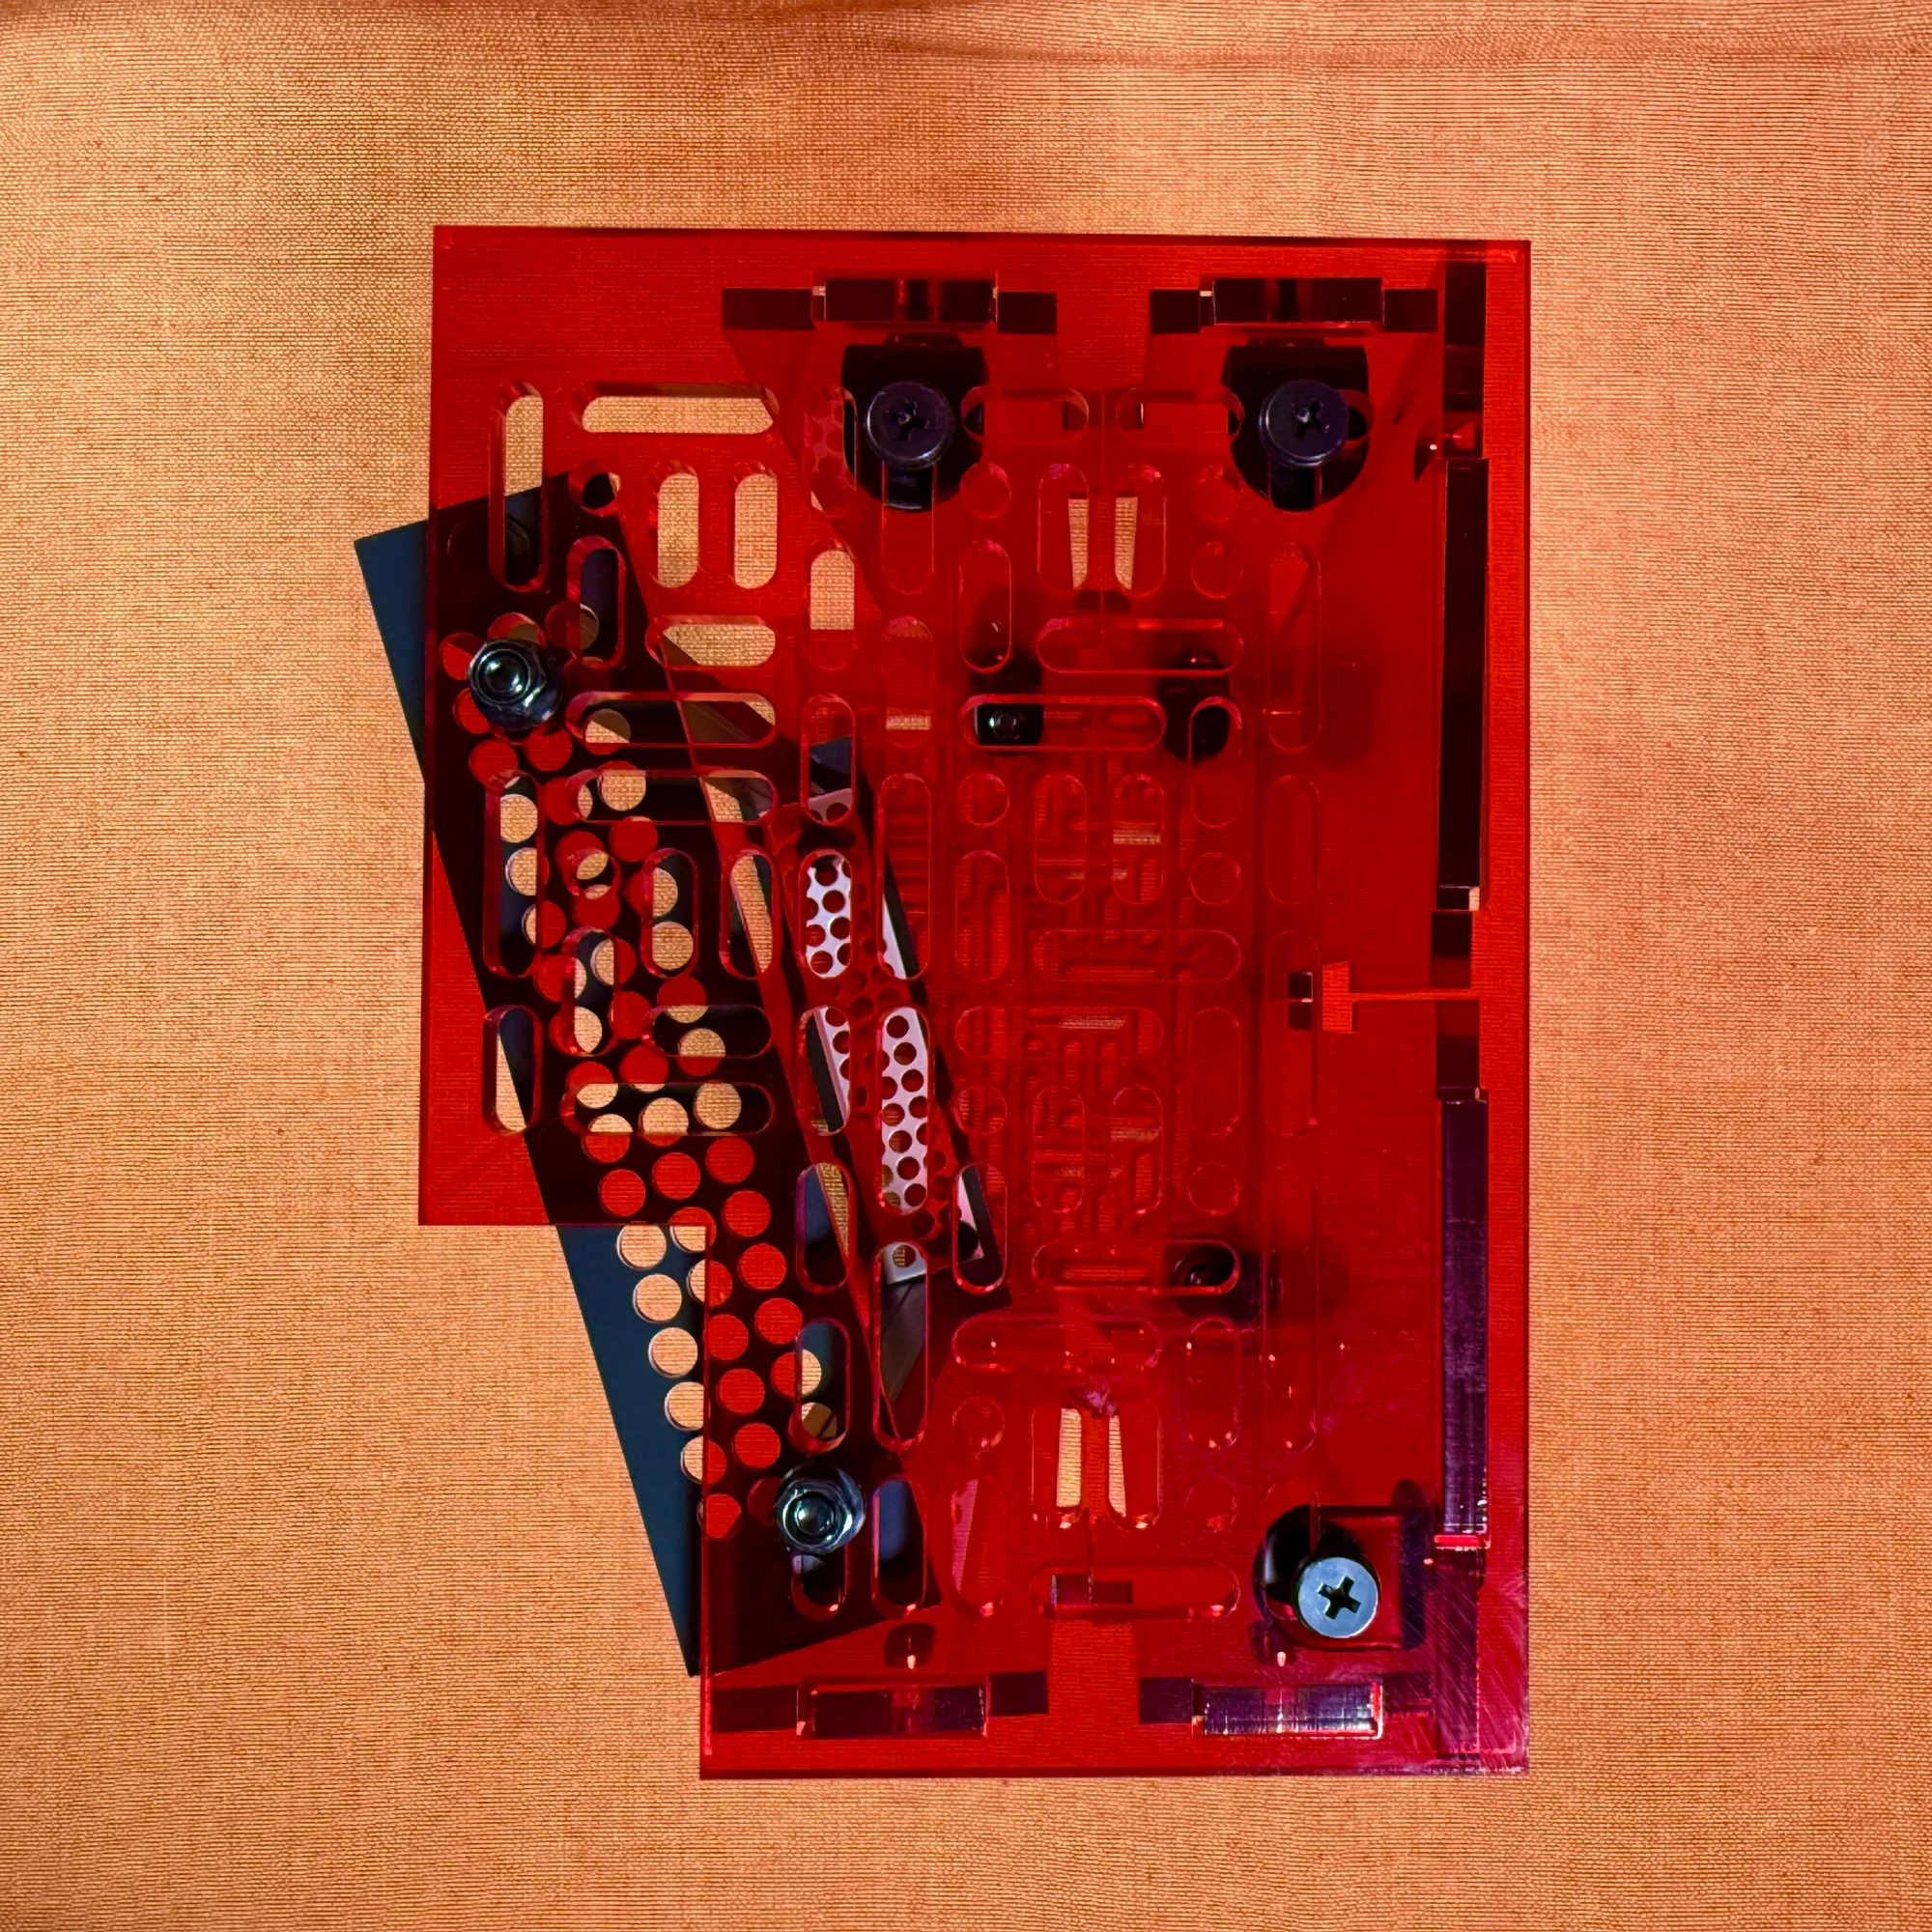
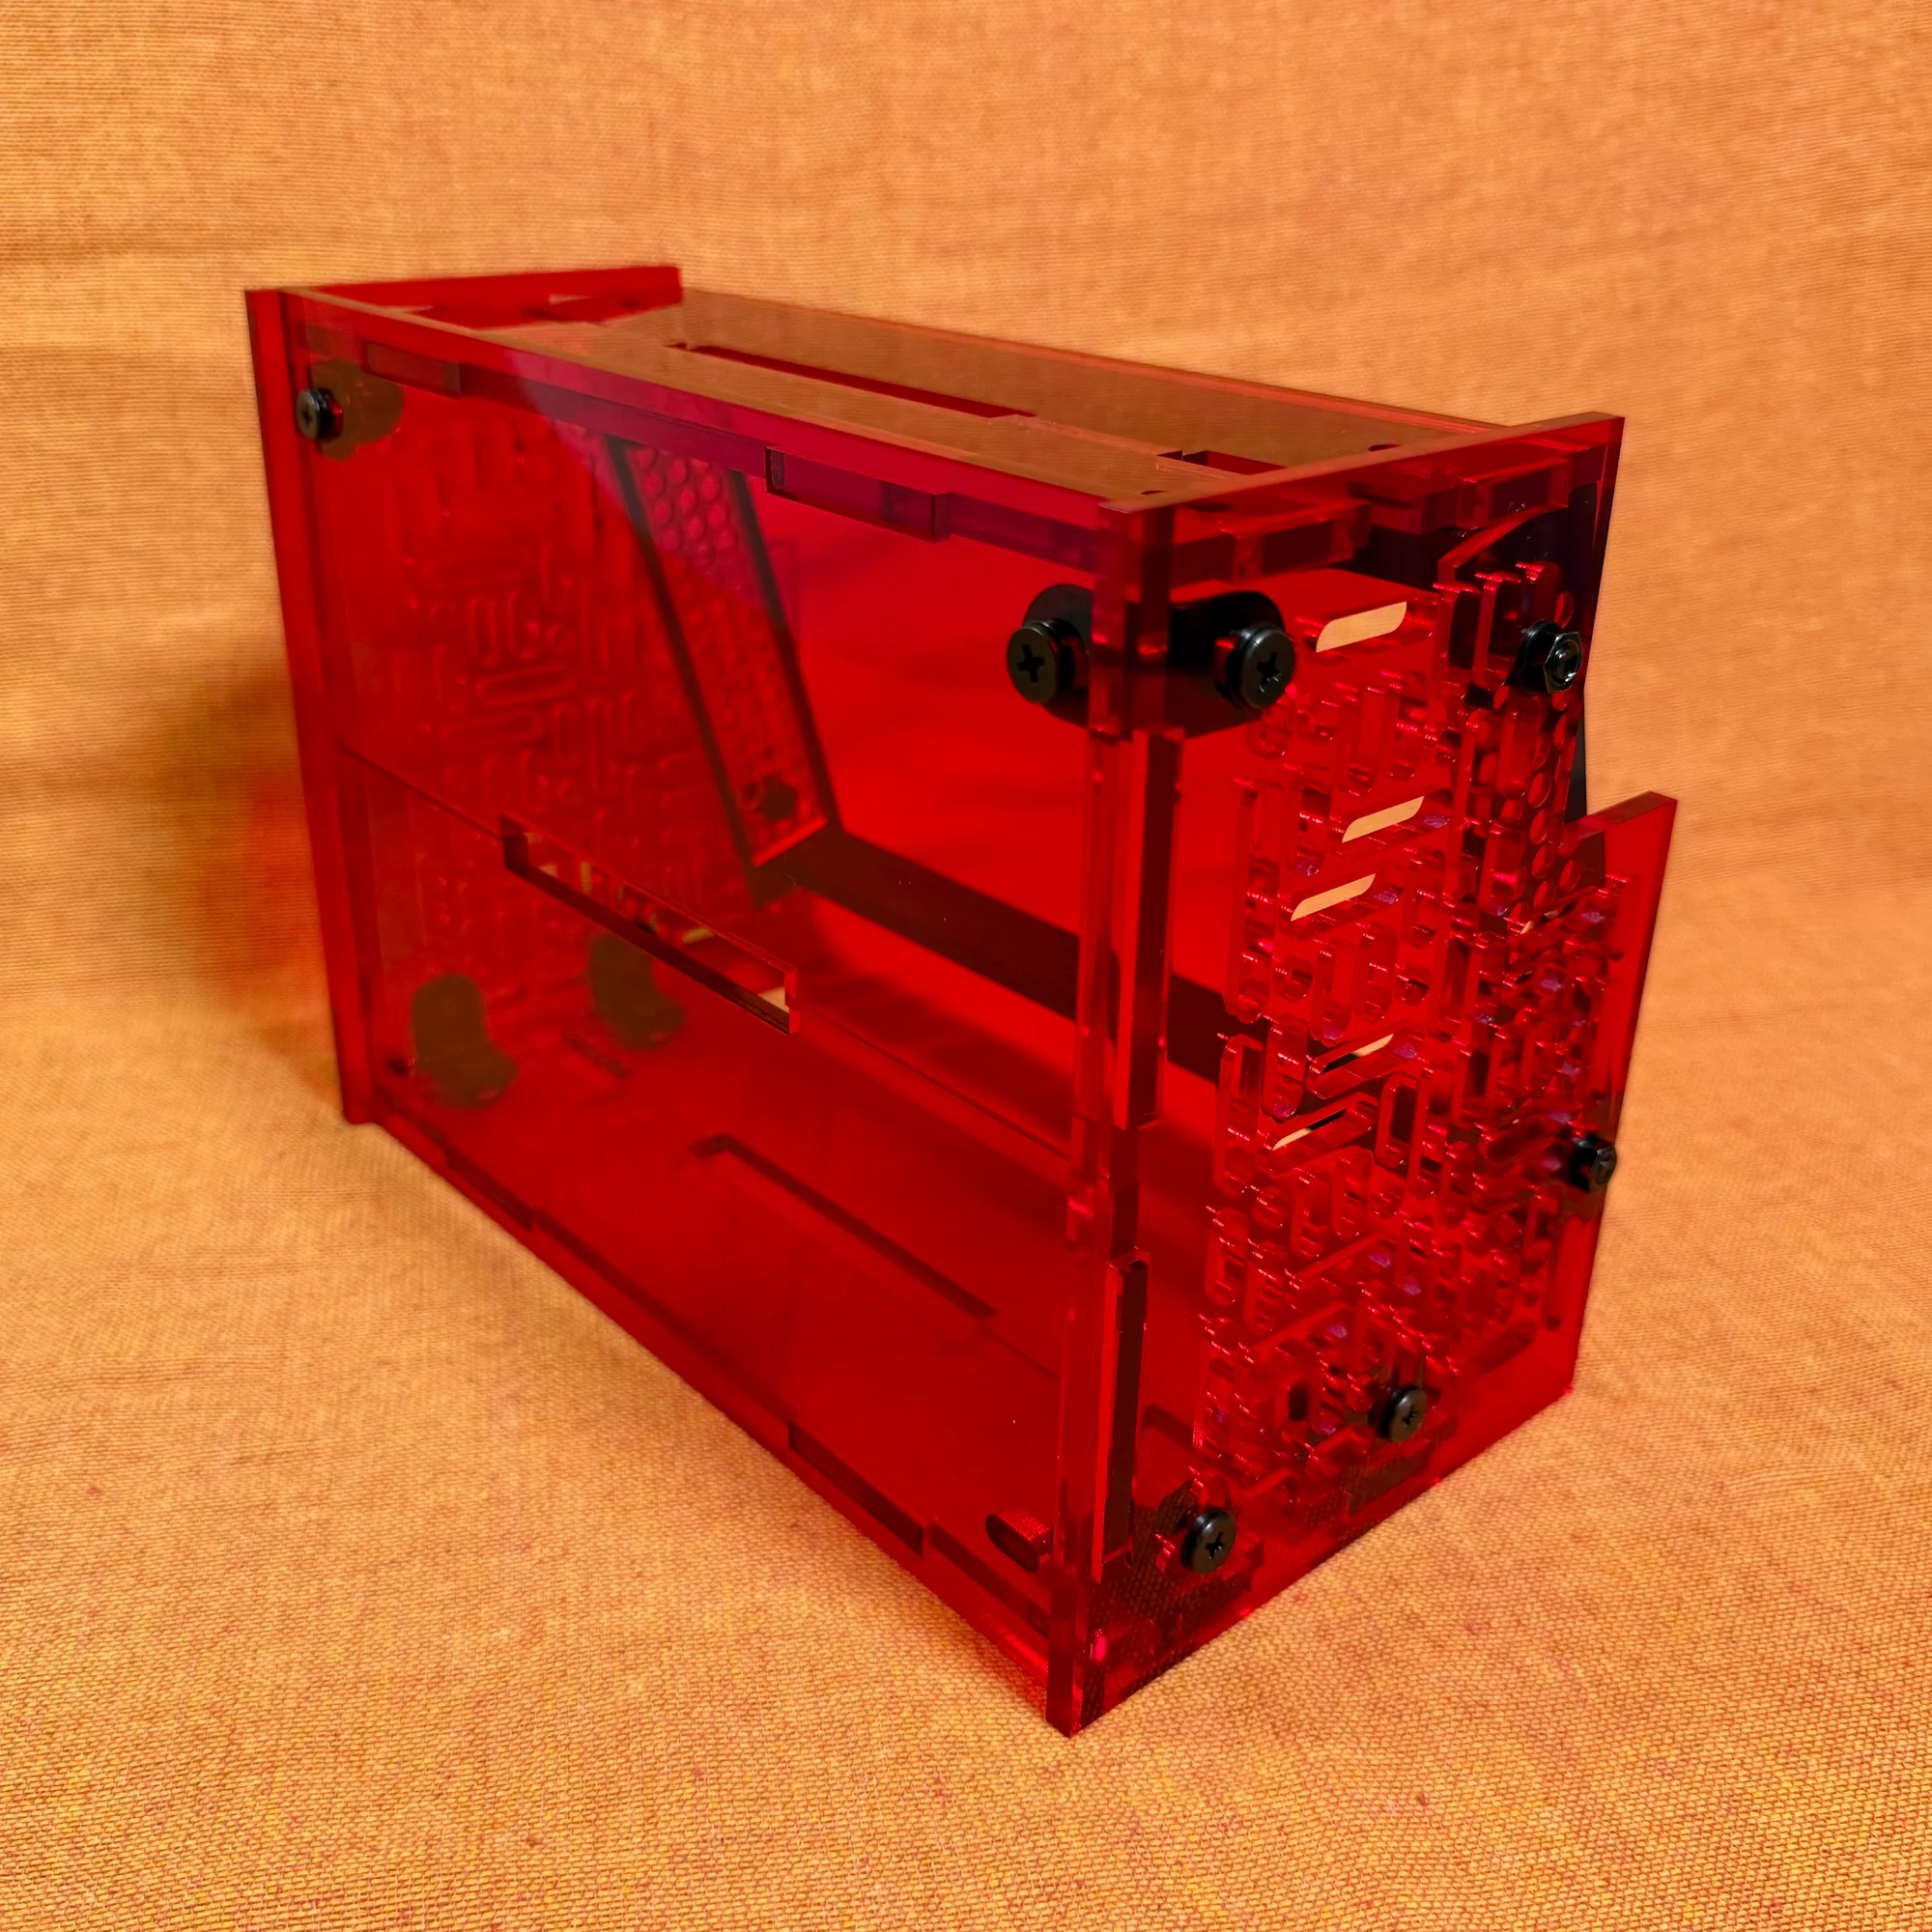
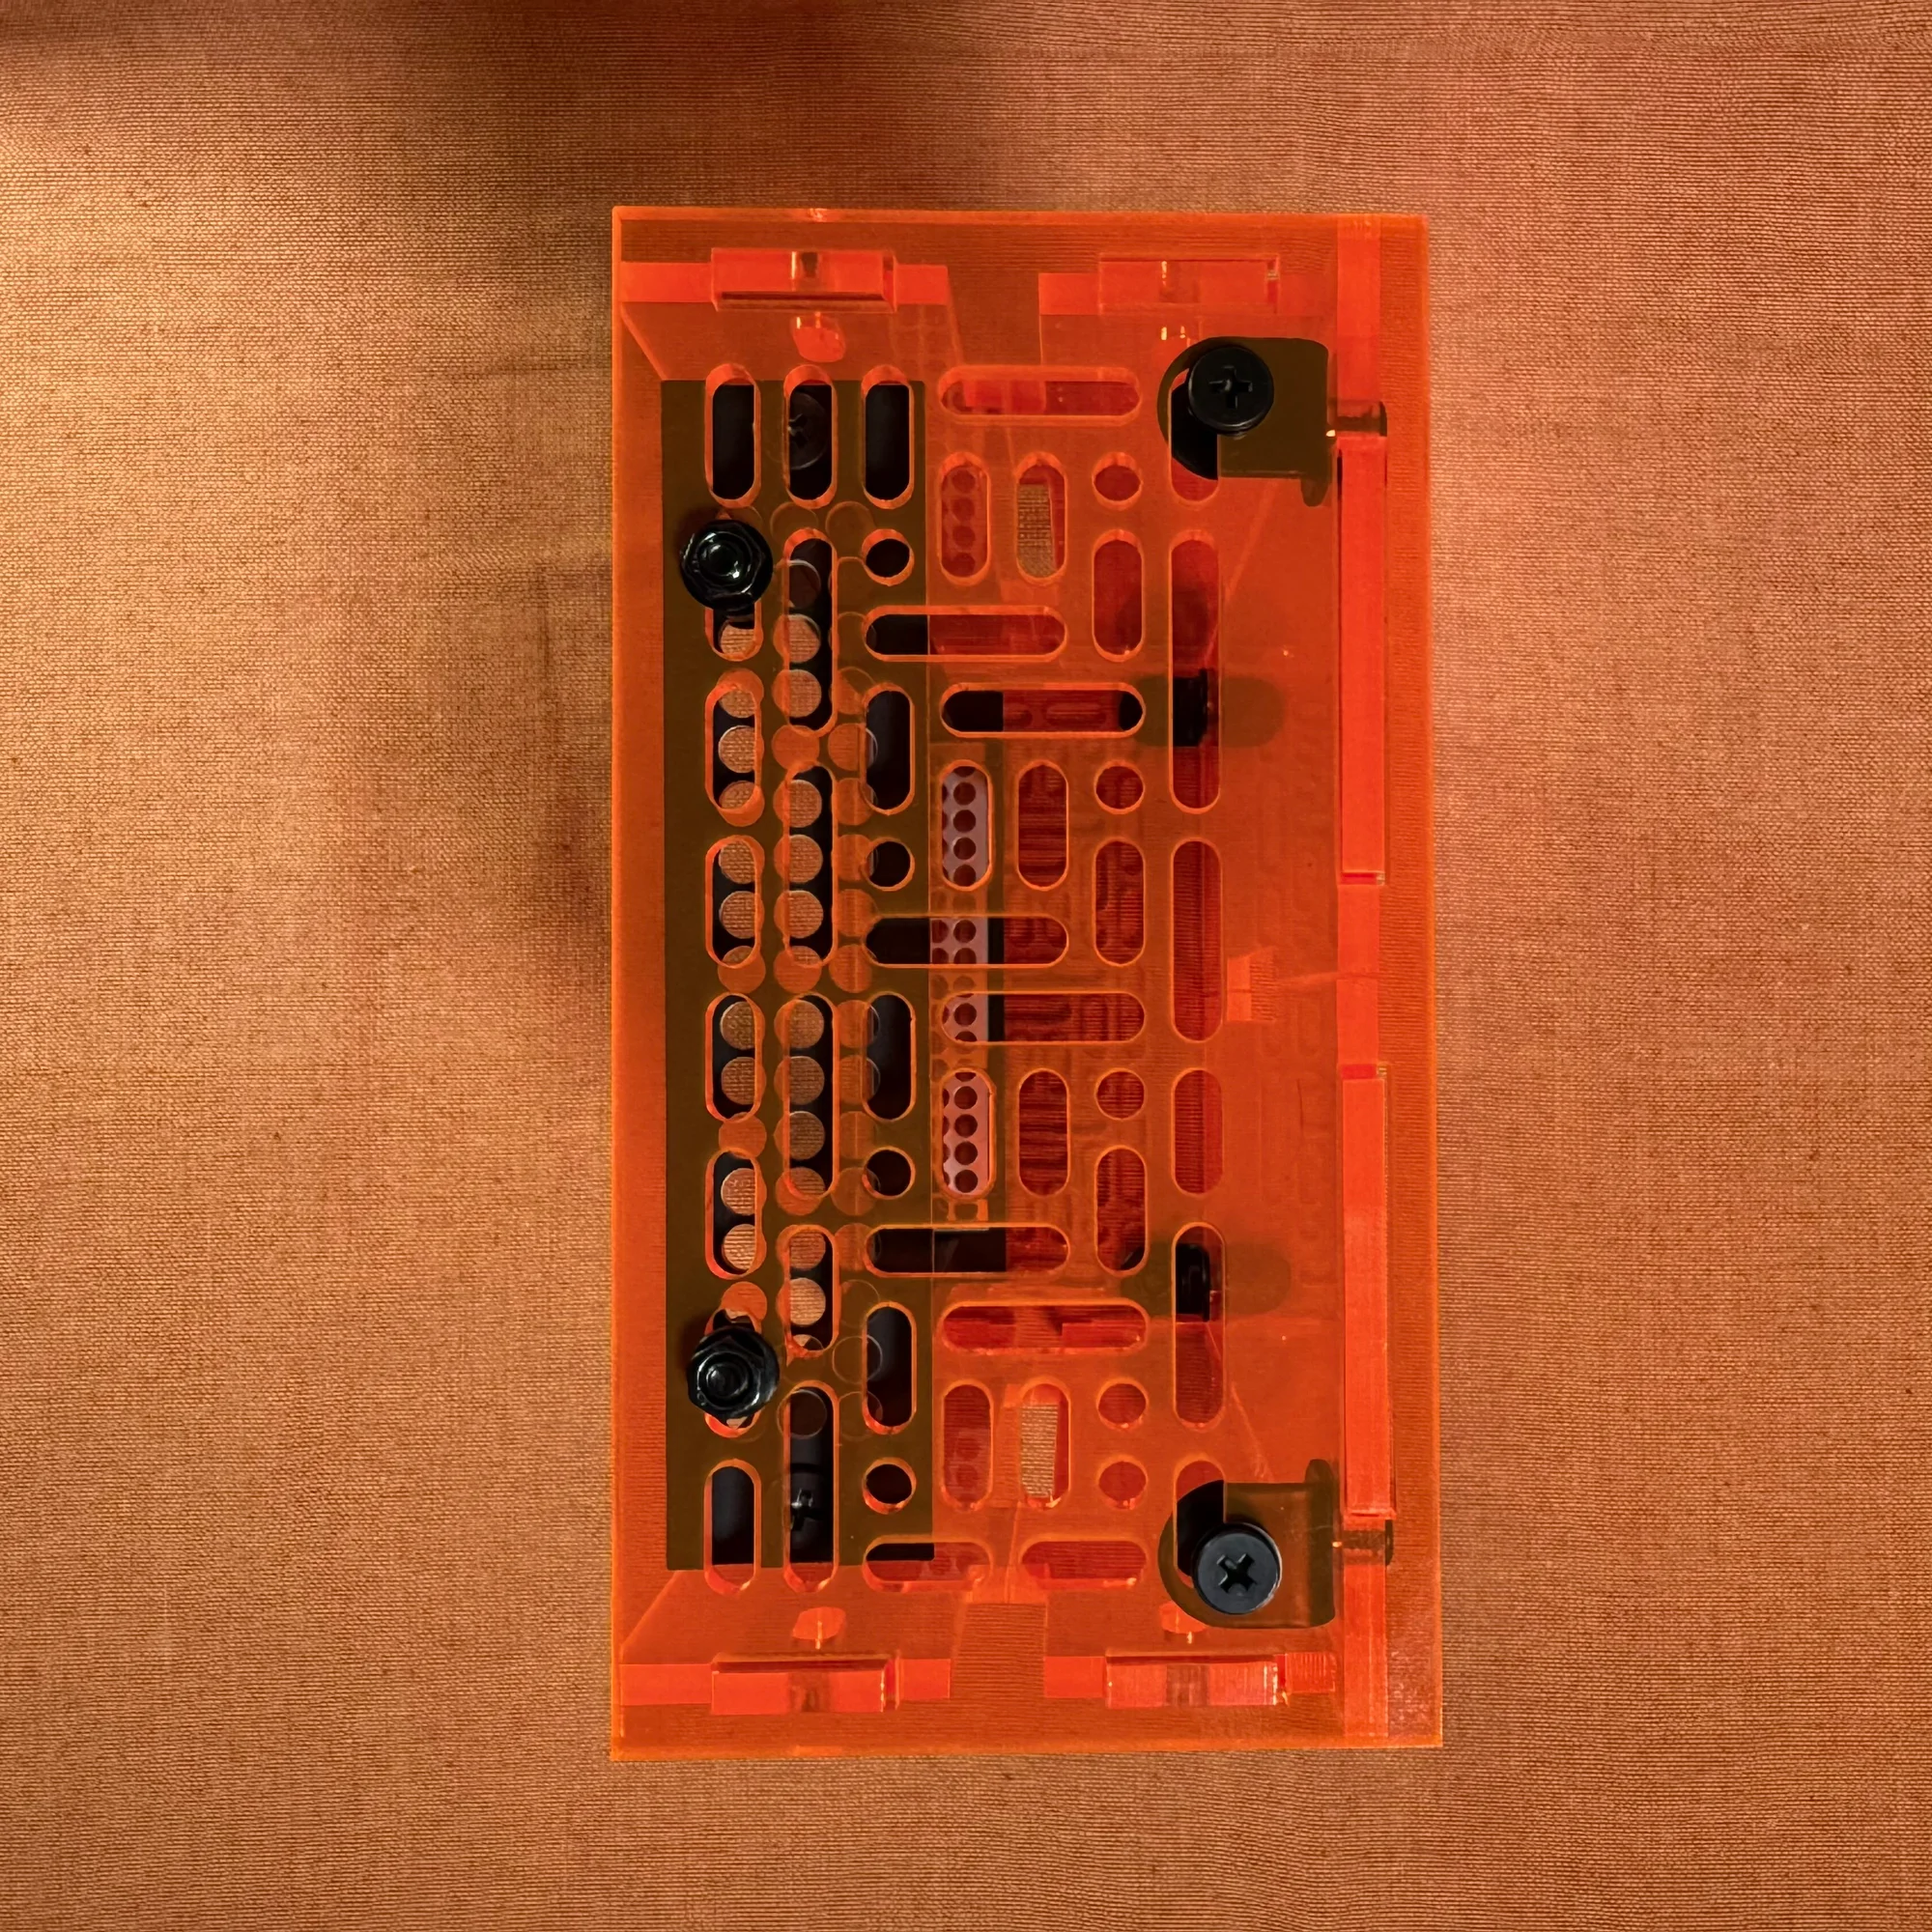
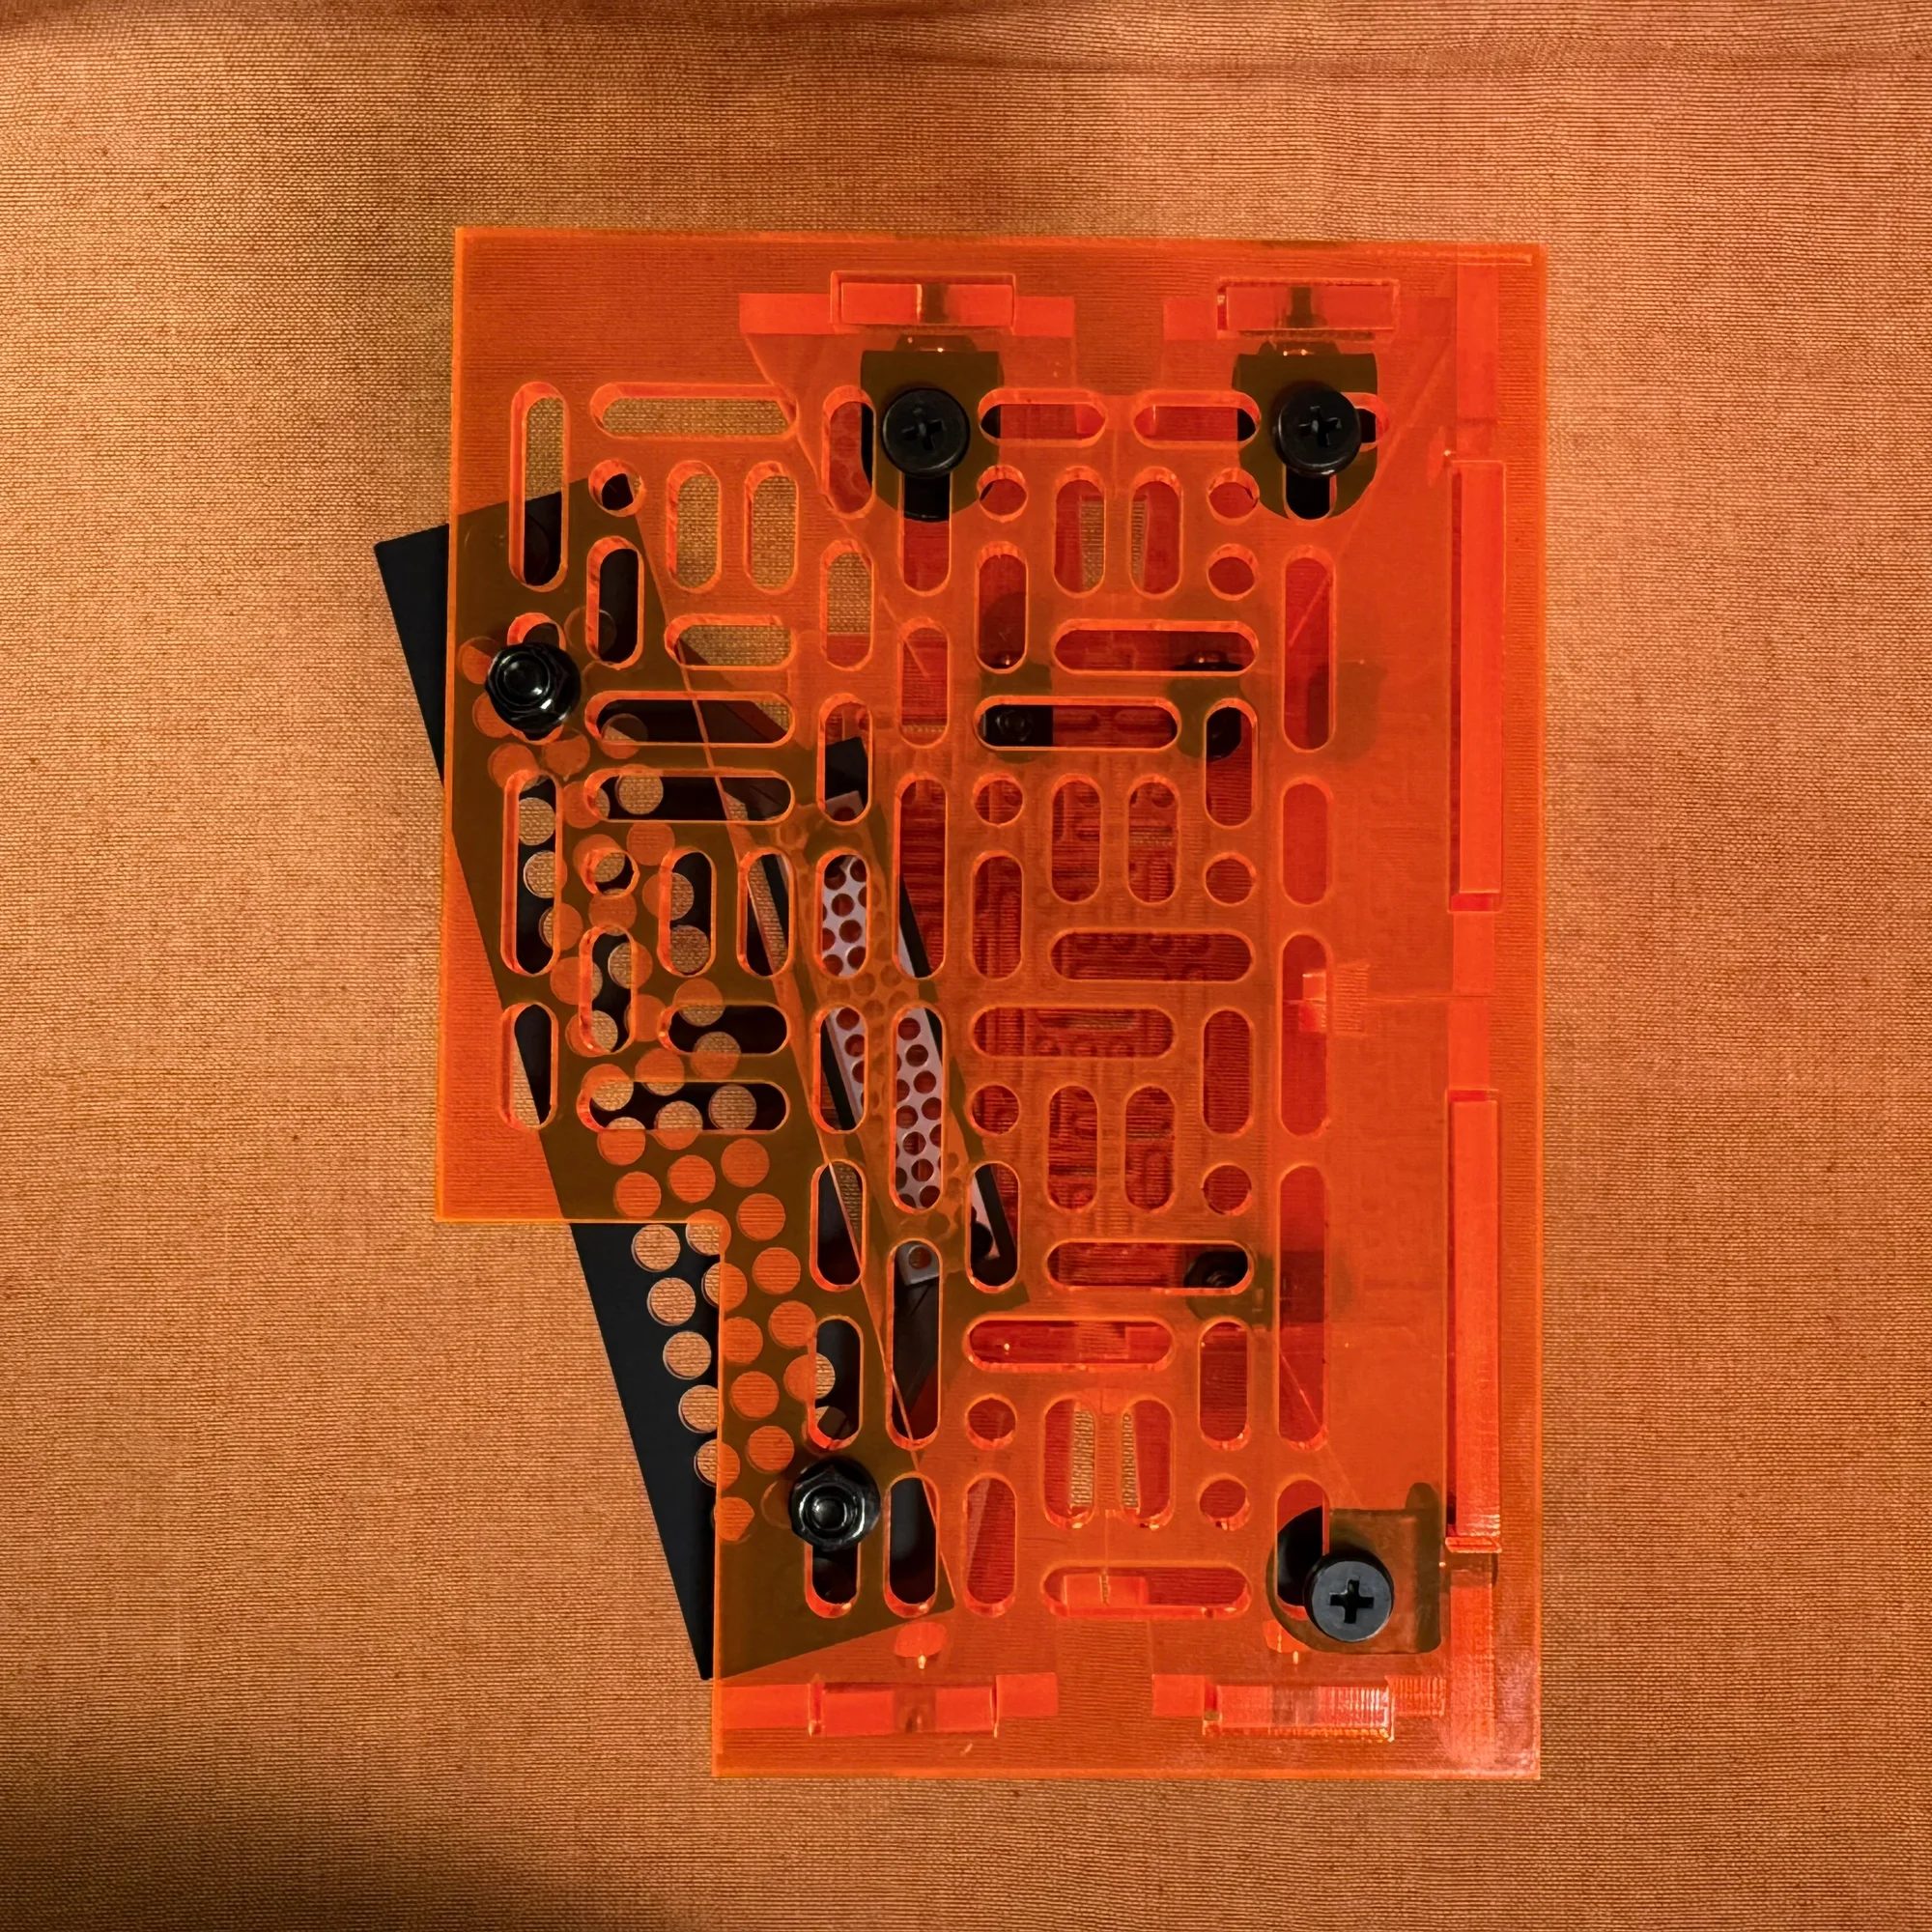
Next, the outer box section is assembled. The box sides have many holes, as shown below:
These holes are sized for M5 screws. Using the included M5 screws, washers, and nuts, align the holes on the frame side with the box side and fasten them together.
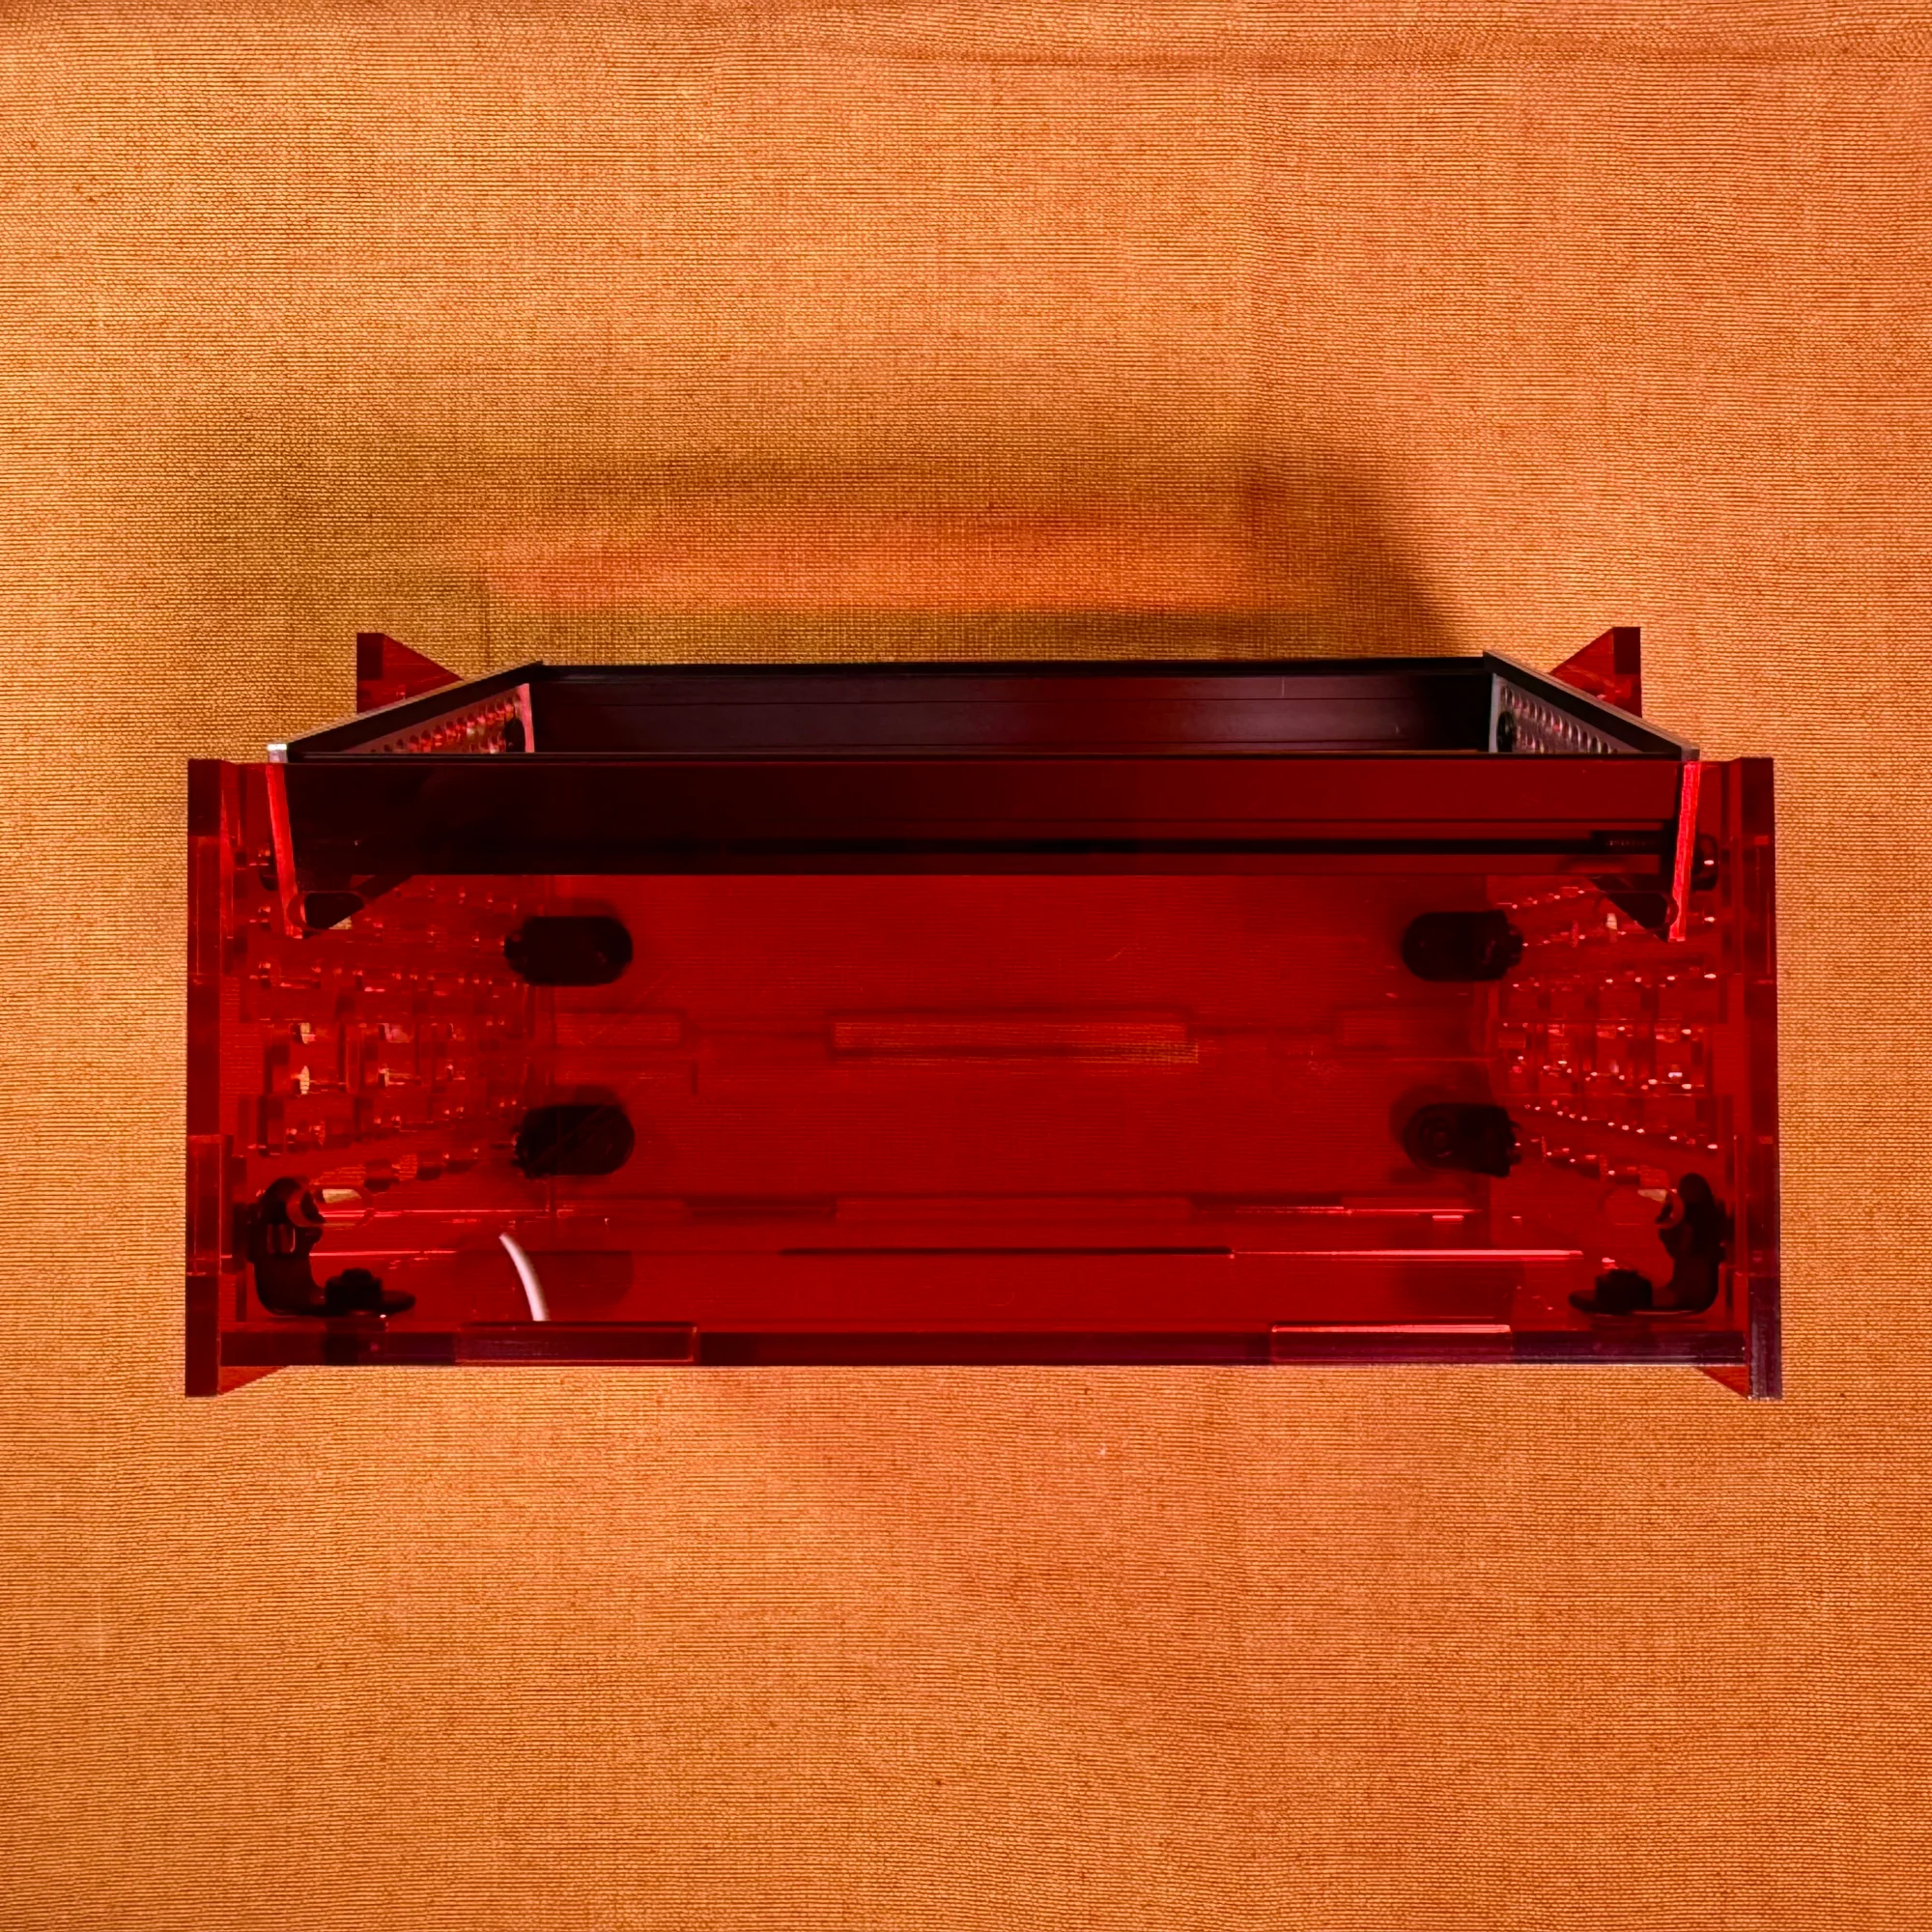
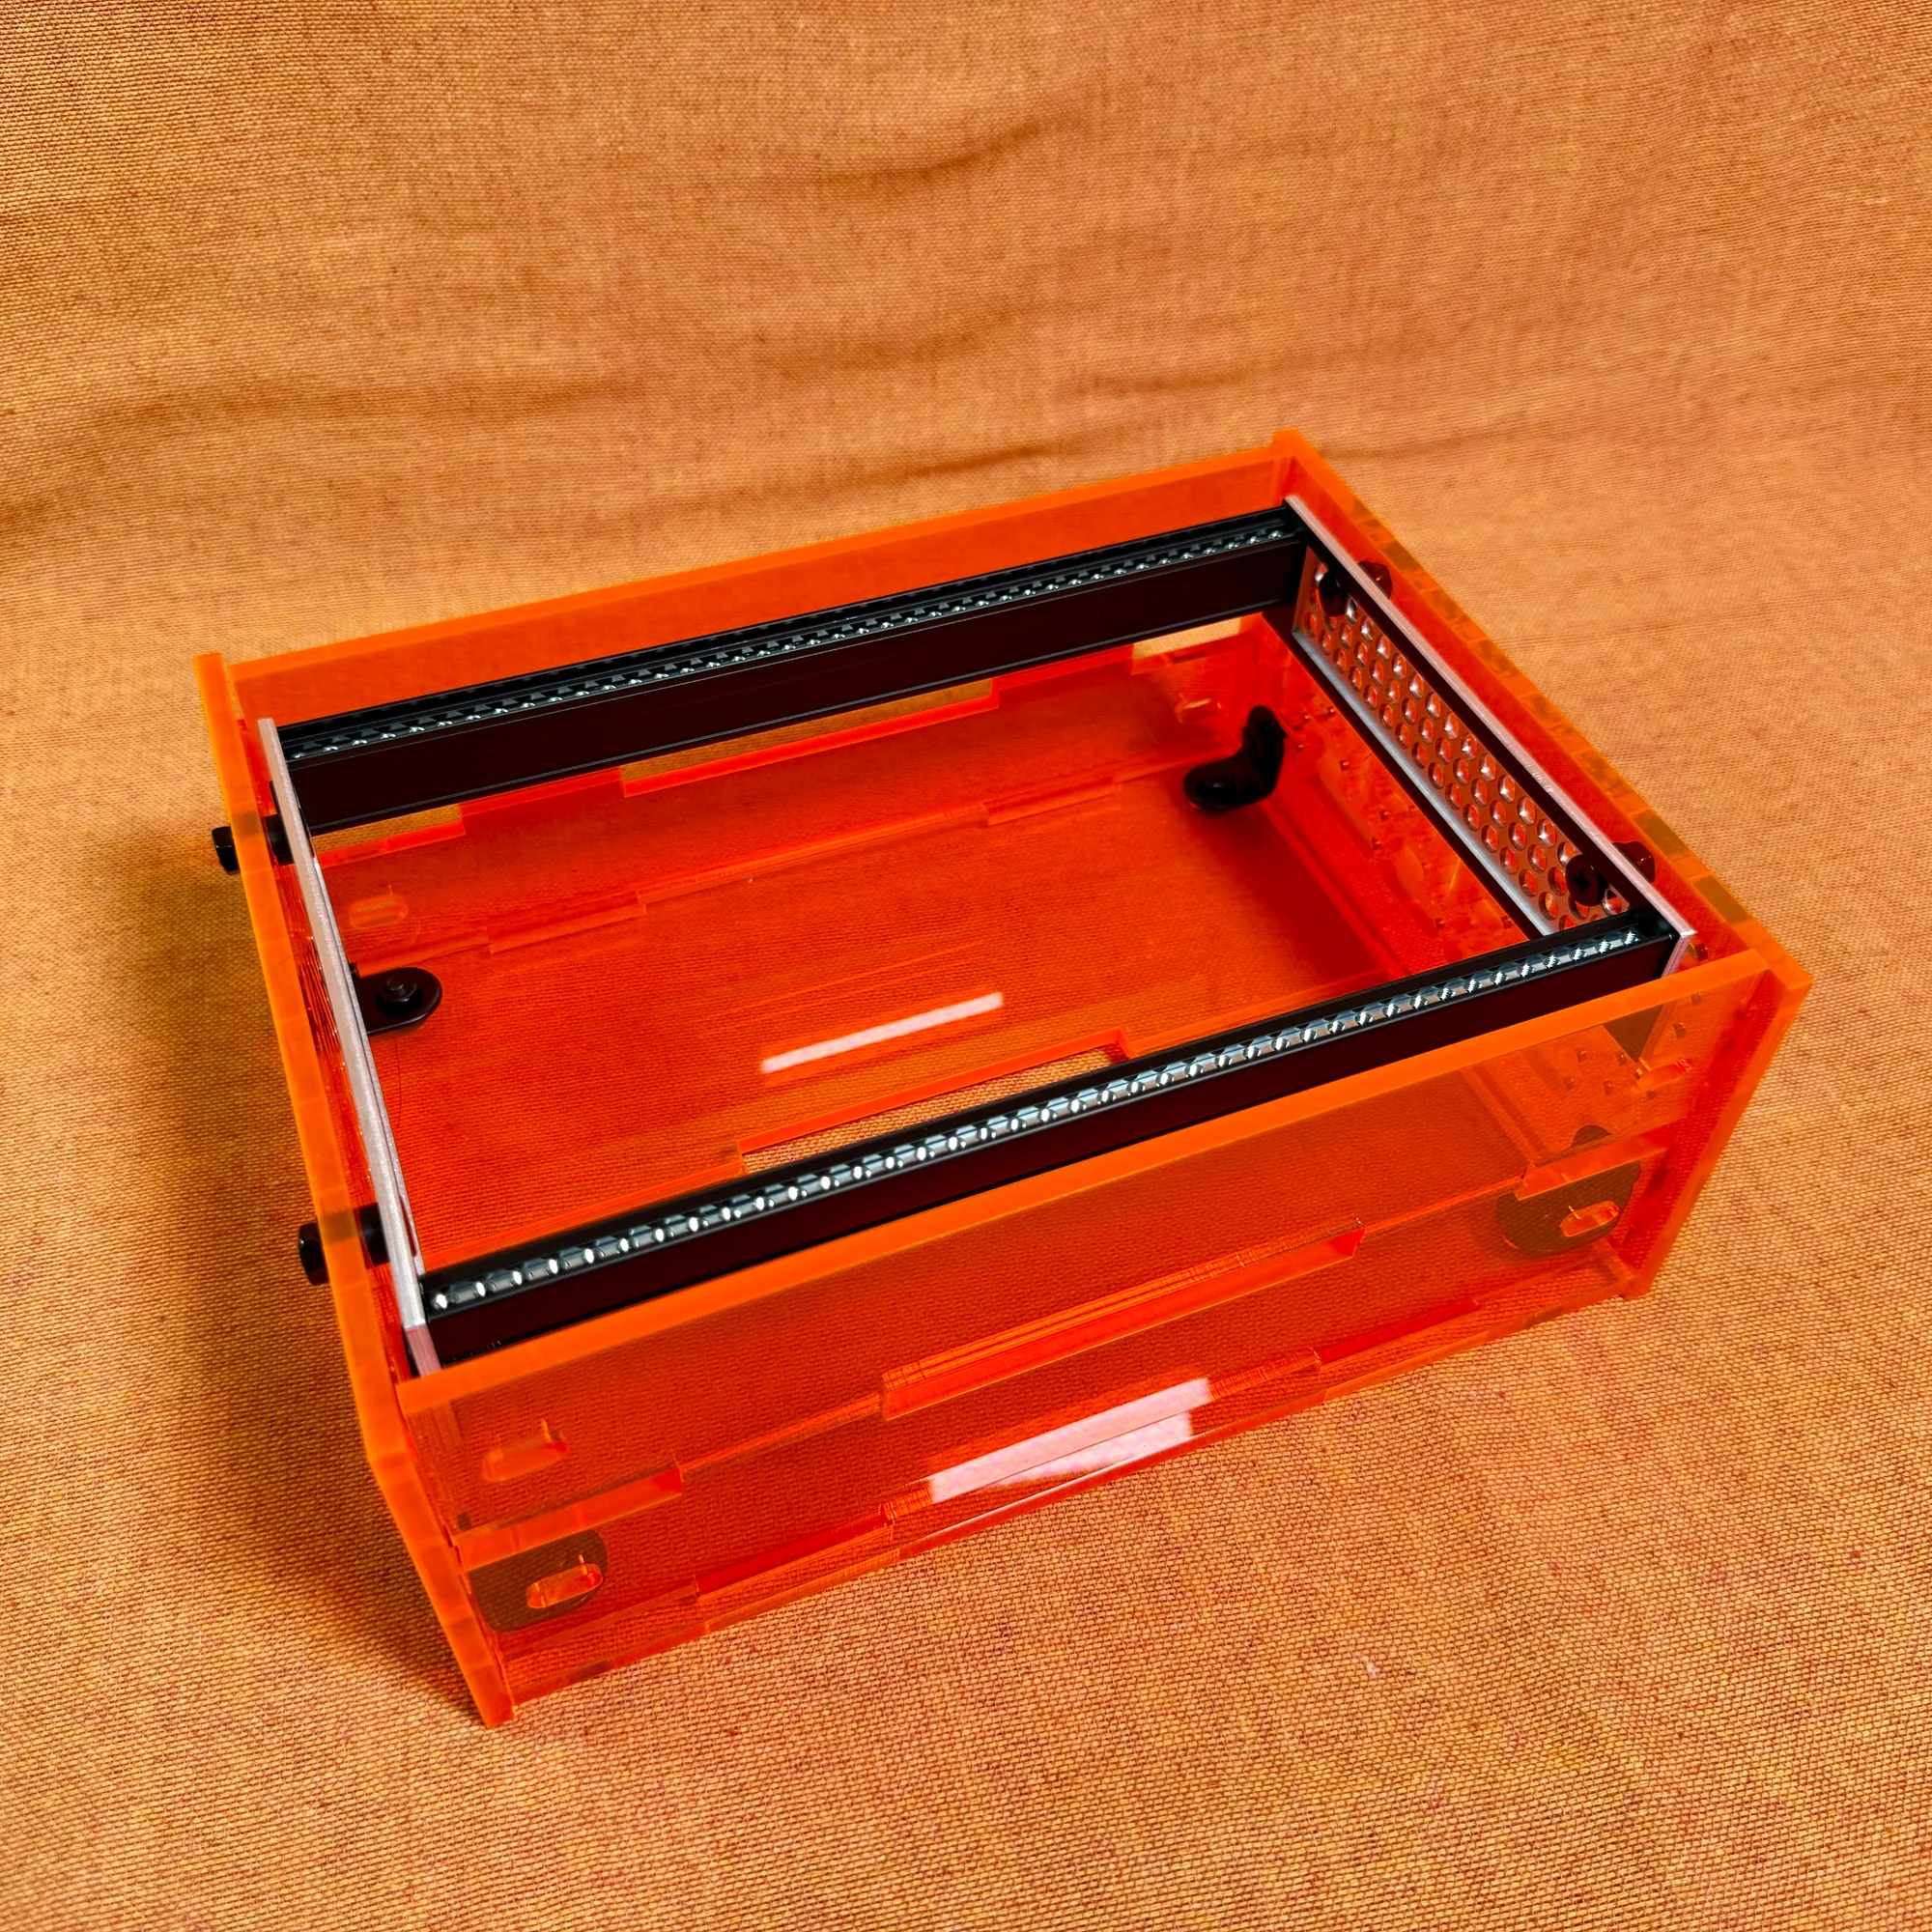
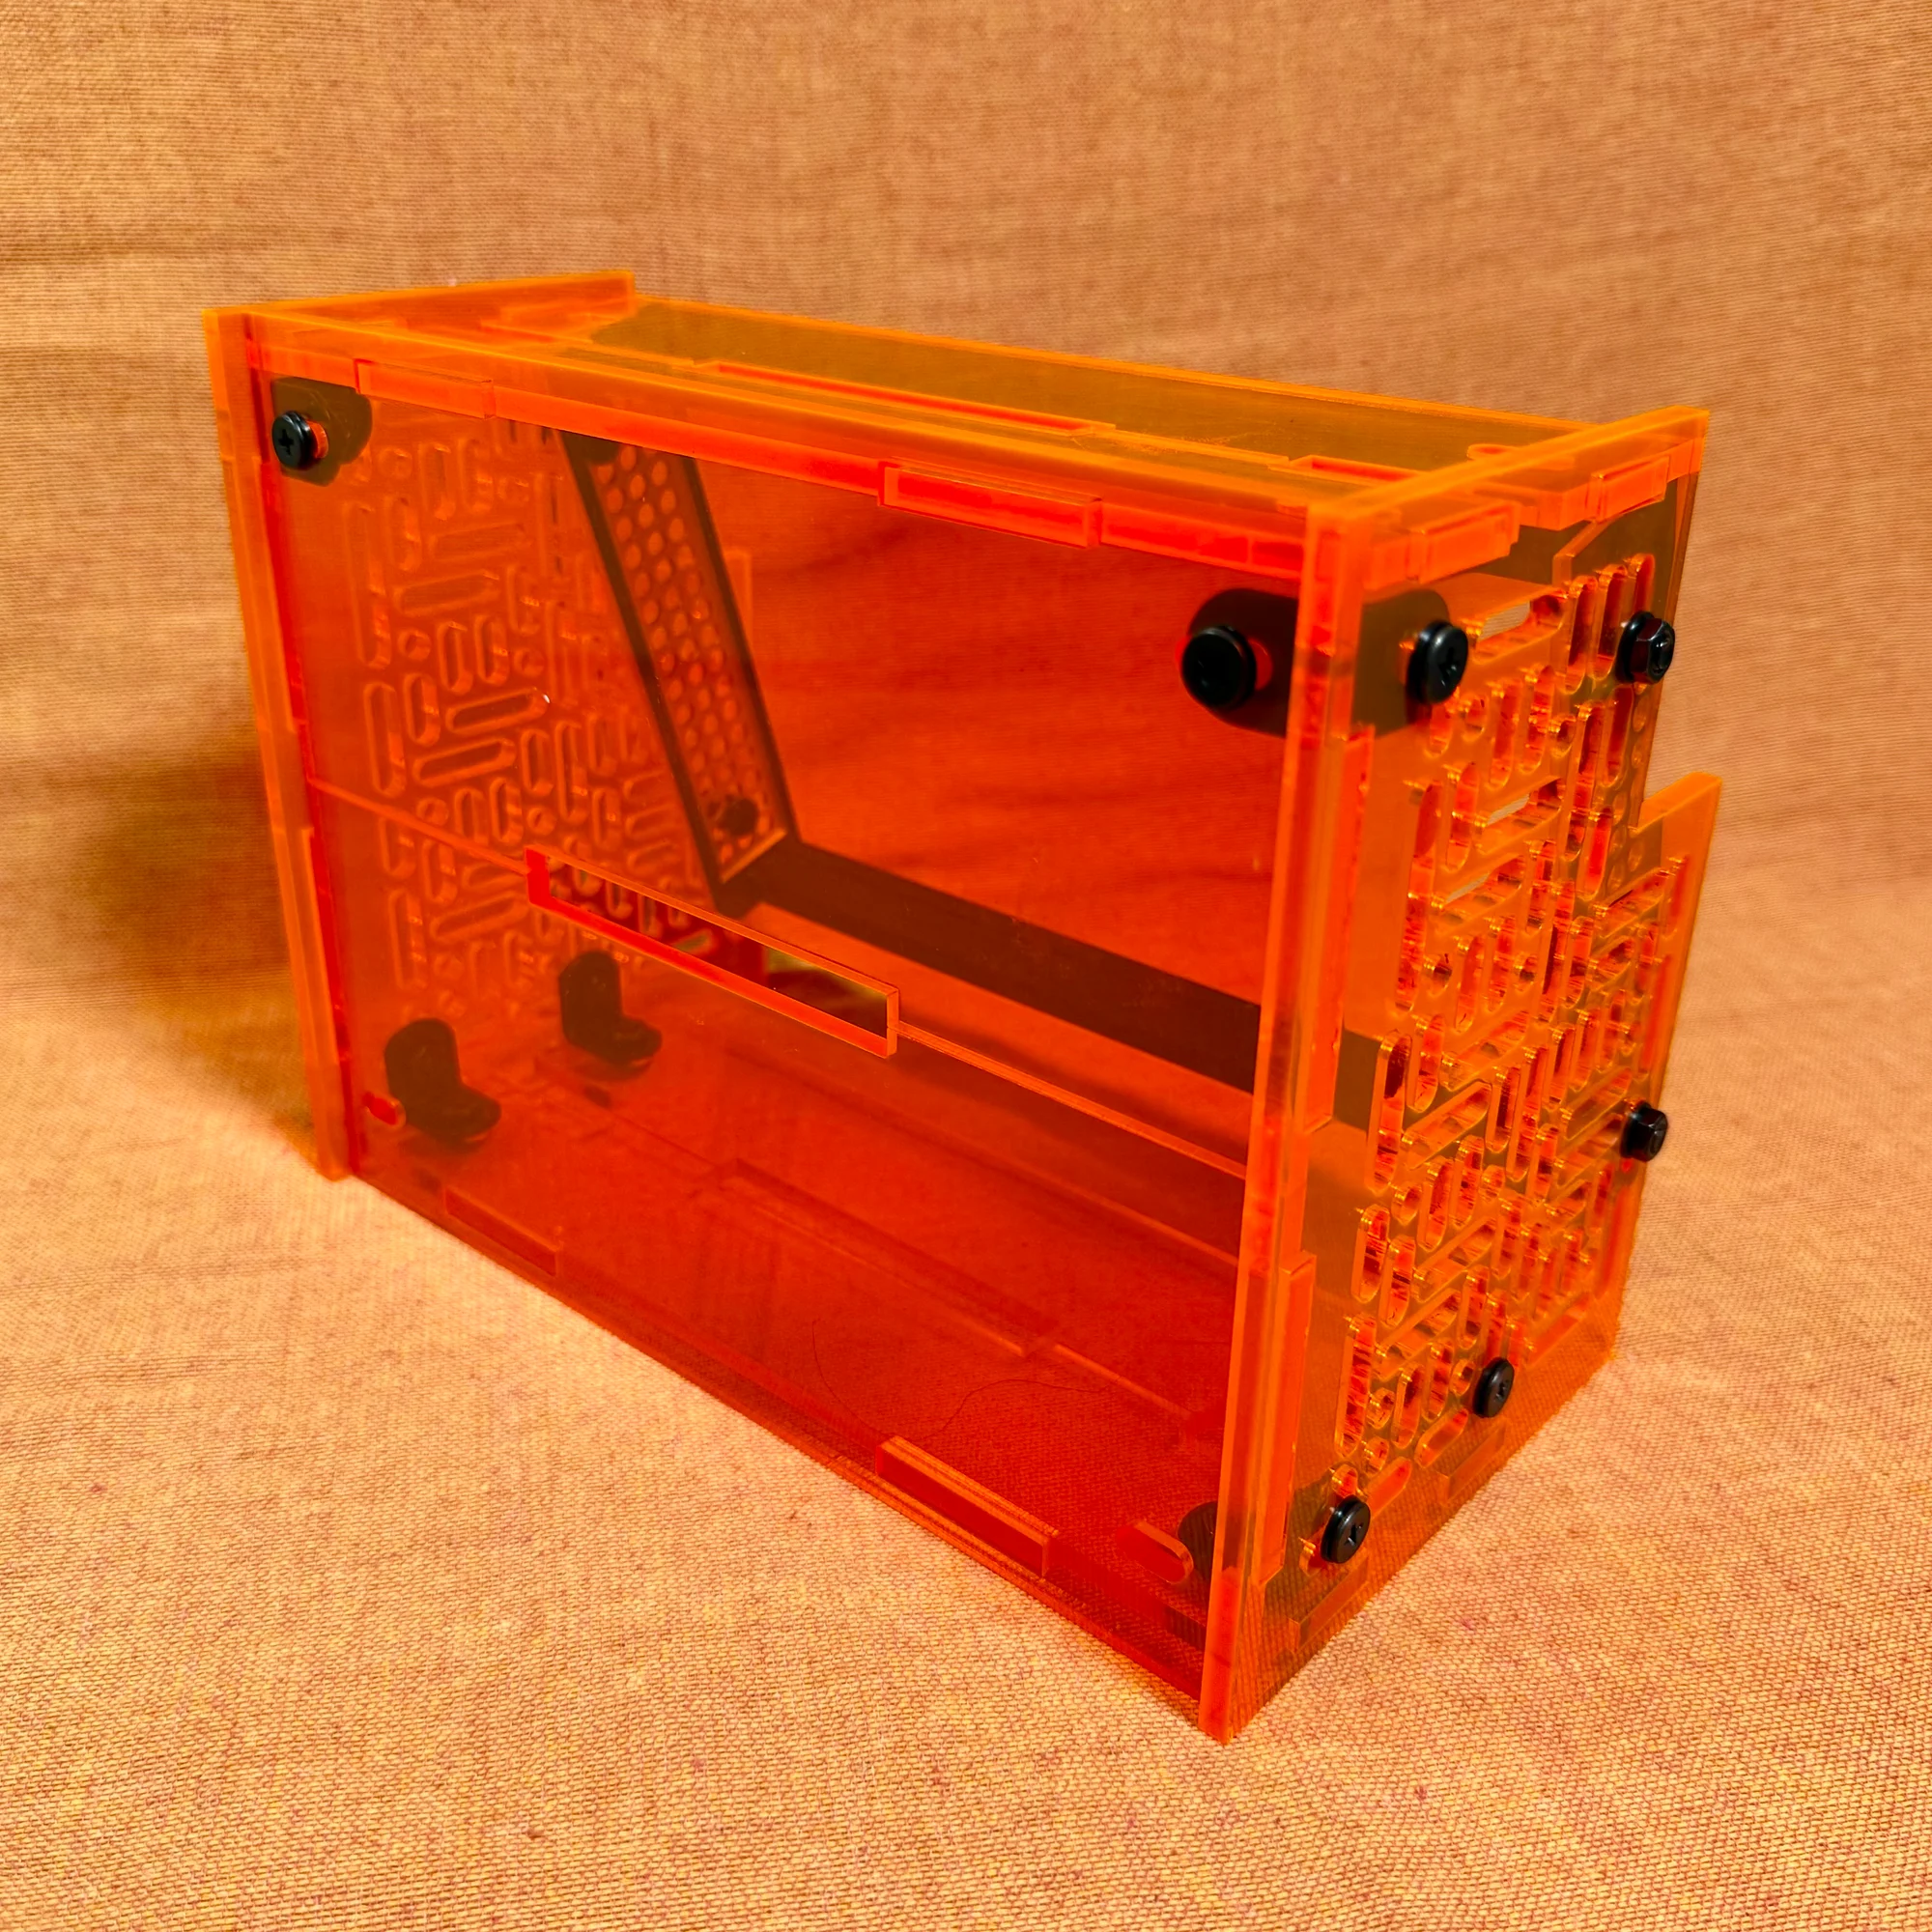
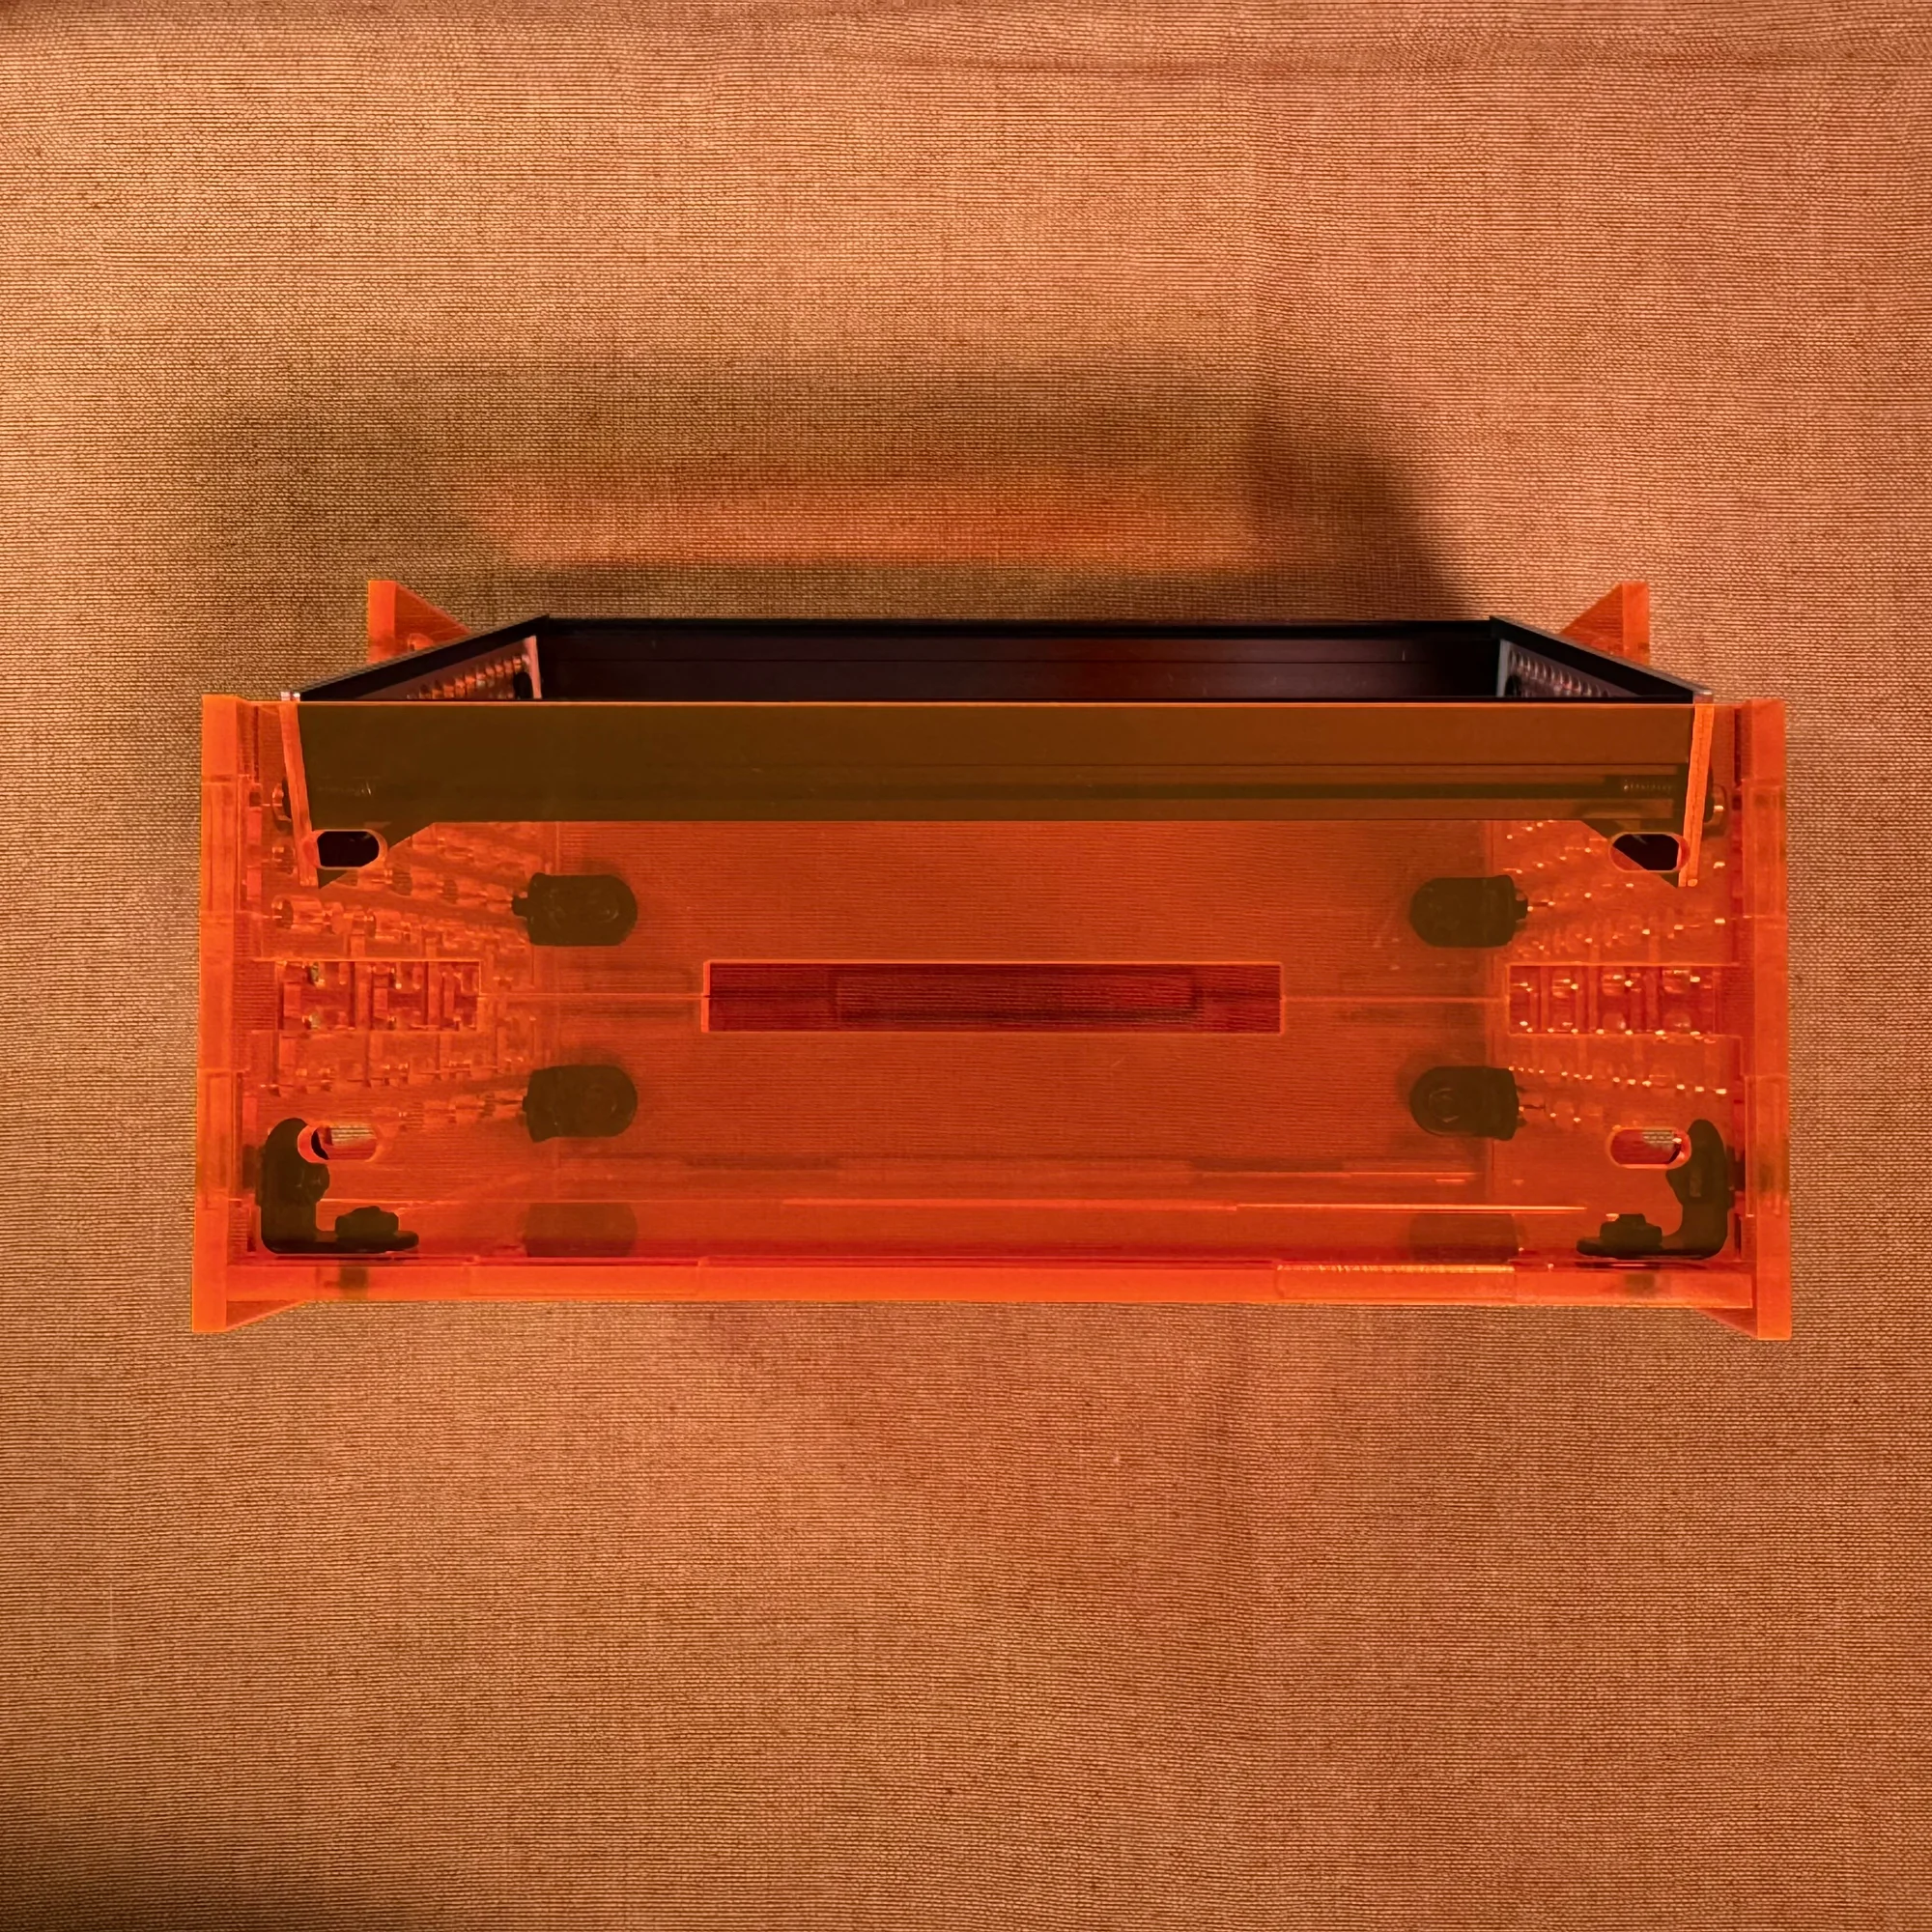
Even the A-type box has about 8cm of depth, providing ample room for mounting a bus board on the bottom. Four front/back panels are included, but you don’t need to use all of them. If you’re tilting the frame and want to use it with less depth, they may get in the way, so use only as many as you need.
My personal recommendation is to remove one front panel and use the frame at a slight tilt. Since the case has reasonable depth, even with thin modules, you can angle the frame quite a bit and the modules will still fit comfortably.
About Lite and Dual Rails
This product offers three rail types. The Lite rail among them is all-plastic, with both advantages and disadvantages. The advantage is affordability. The disadvantages are susceptibility to wear and the need for a screwdriver to tighten screws. To prevent wear and ensure long-term use, please avoid overtightening screws. Please keep these points in mind.
The rail pricing was quite a challenge. Metal rails are undeniably excellent and solid. However, whether purchasing directly from manufacturers that other case makers use, or getting quotes for custom metal cutting based on my own drawings, solidly built metal rails inevitably come at a certain price. At the same time, I personally didn’t like slide nuts.
After much trial and error, I tried making plastic rails with a 3D printer and they turned out surprisingly usable. Since these are overwhelmingly more affordable, I refined the design and added them to the zudo-block-40 lineup as a selectable option.
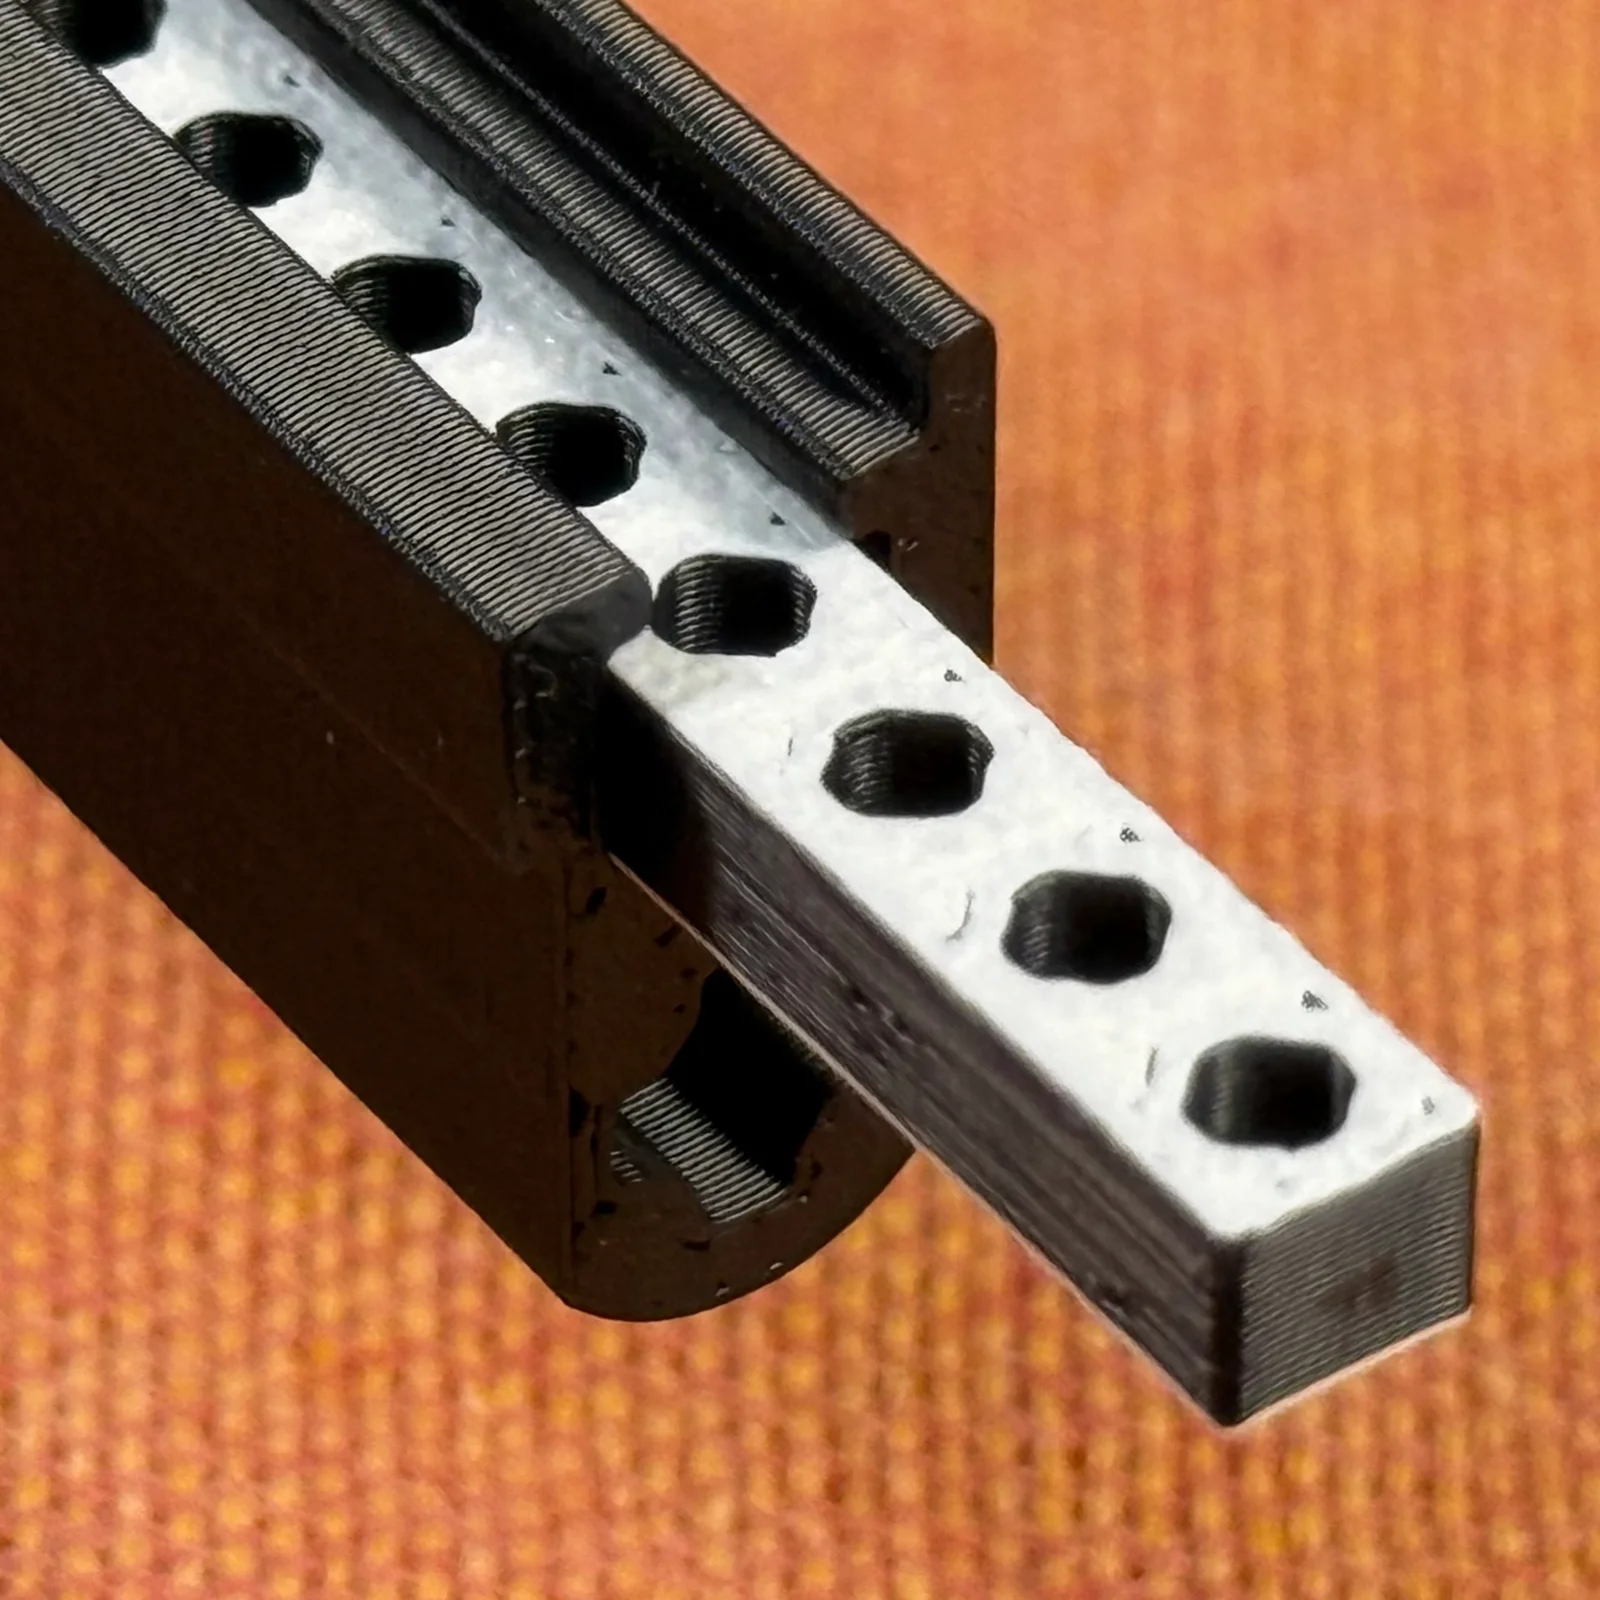
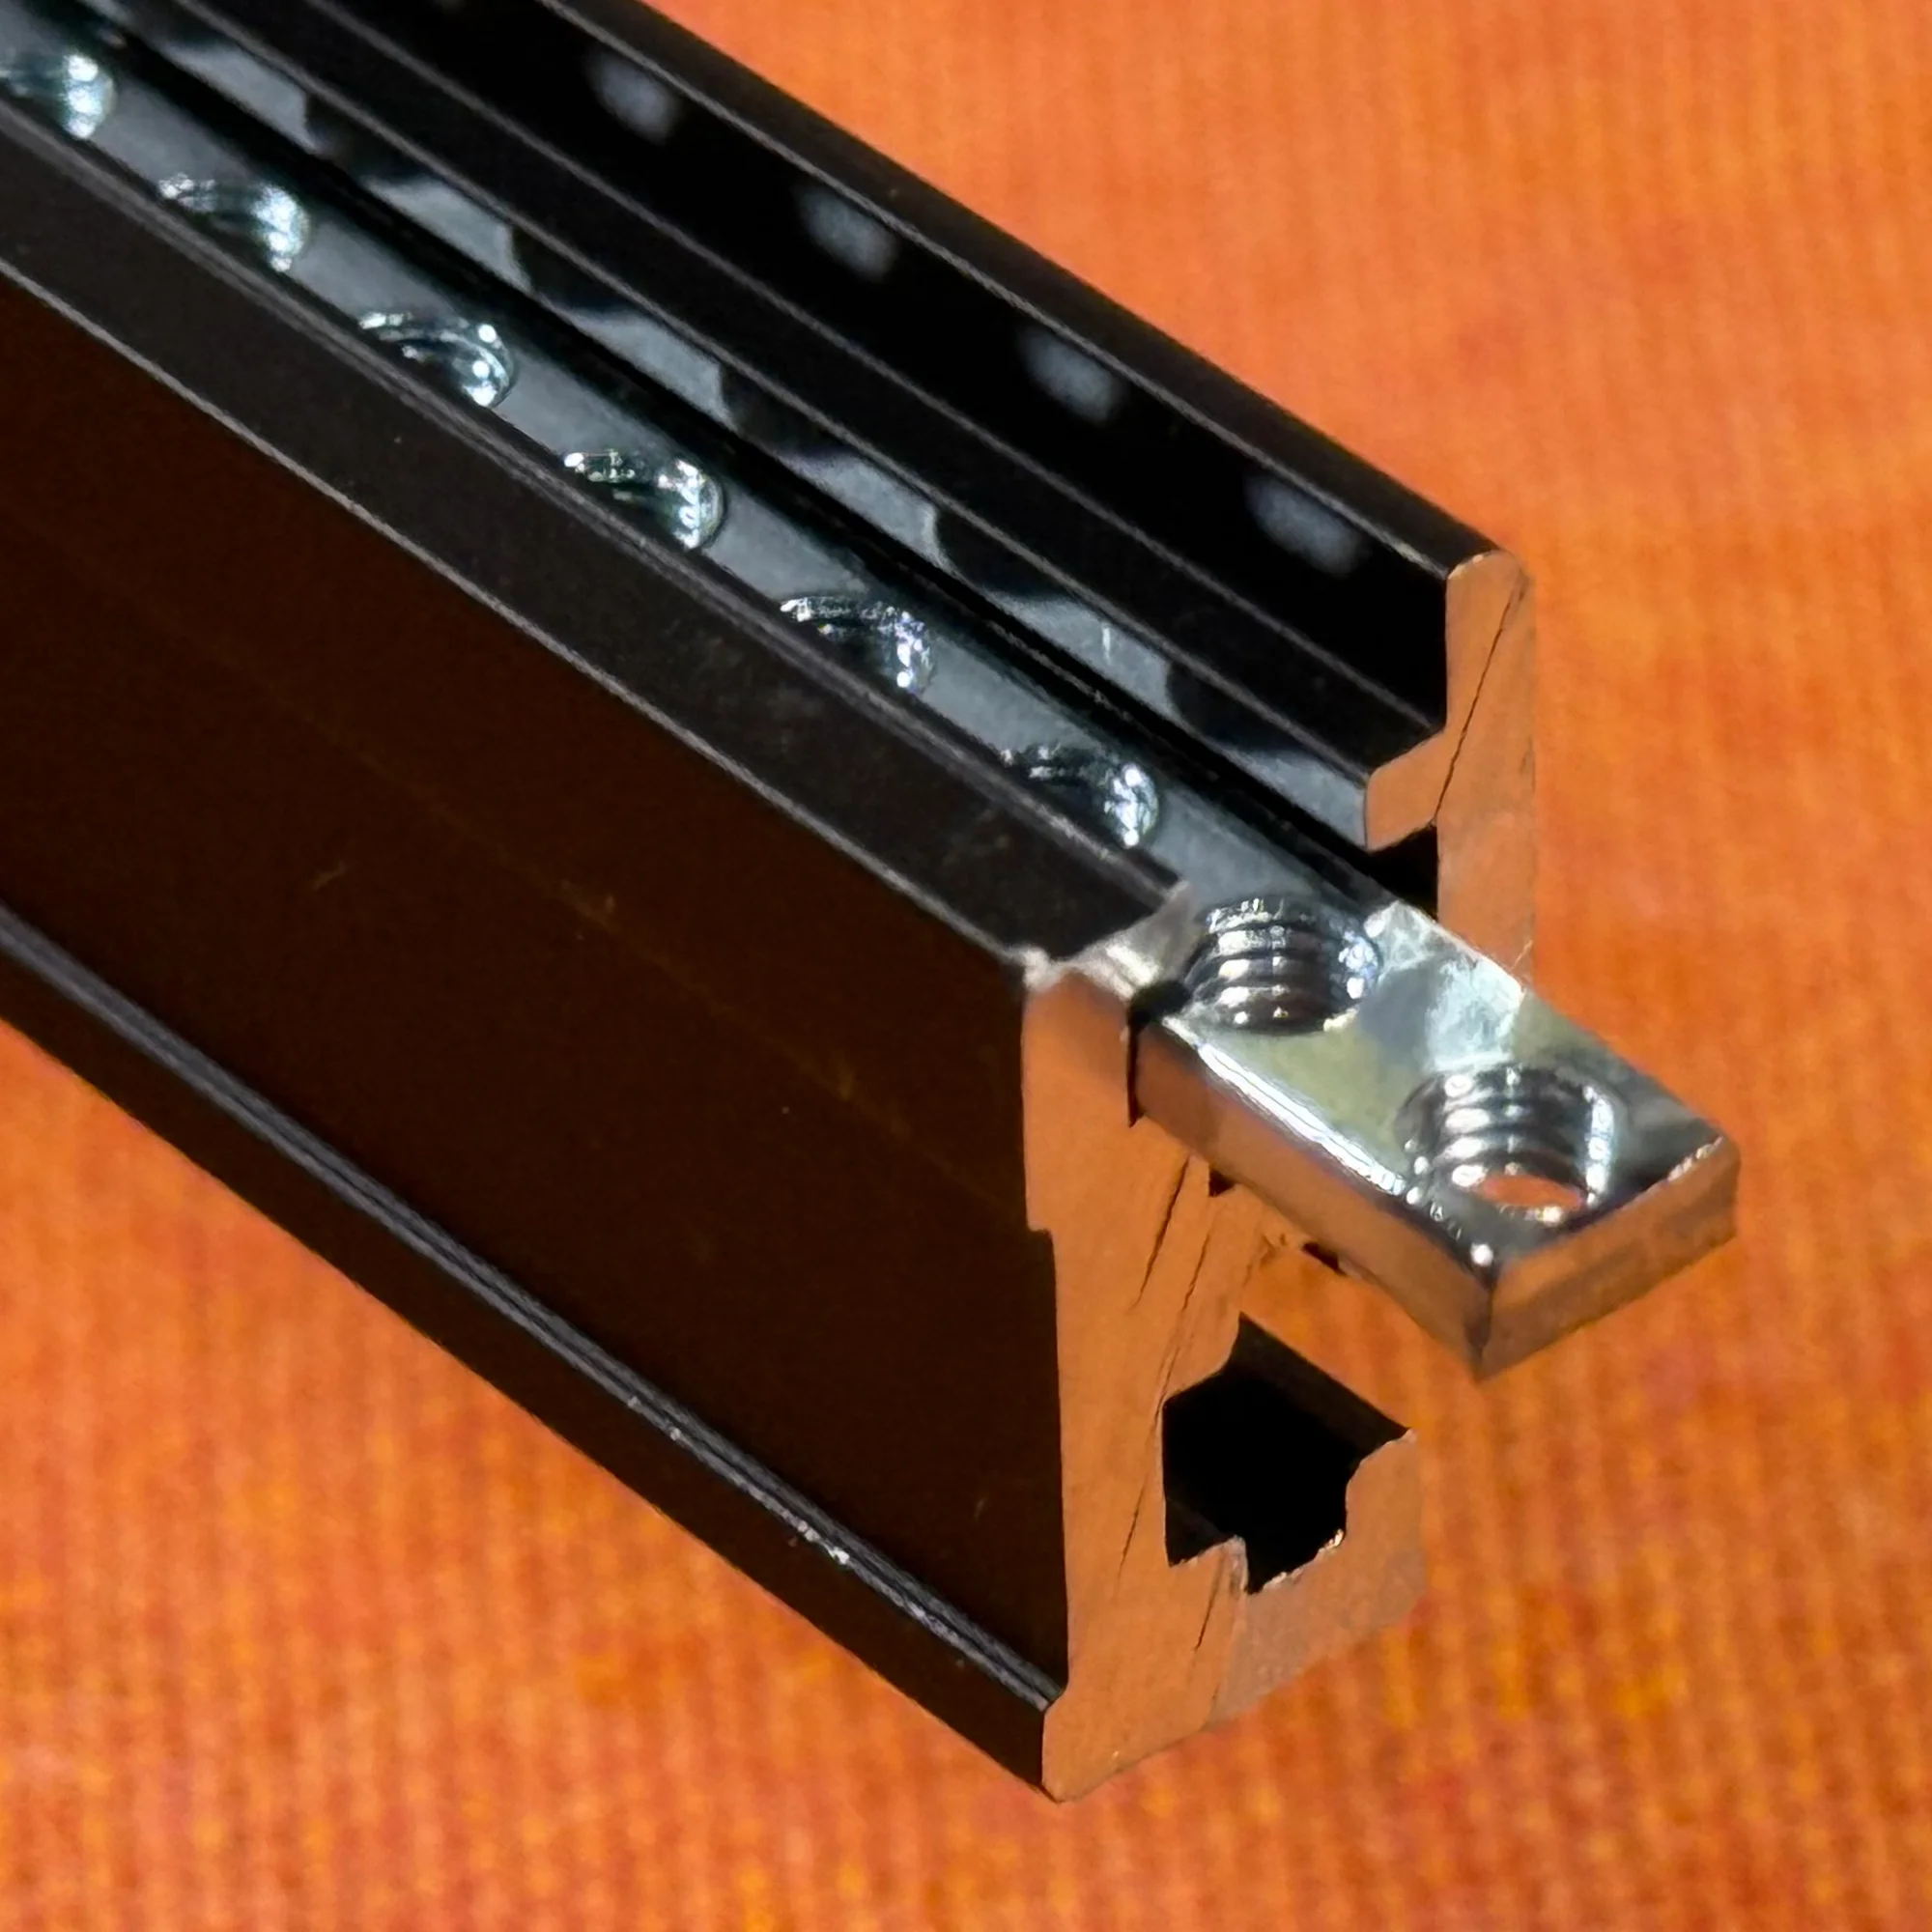
These Lite rails, particularly the bar nut portion, have been carefully engineered despite being plastic.
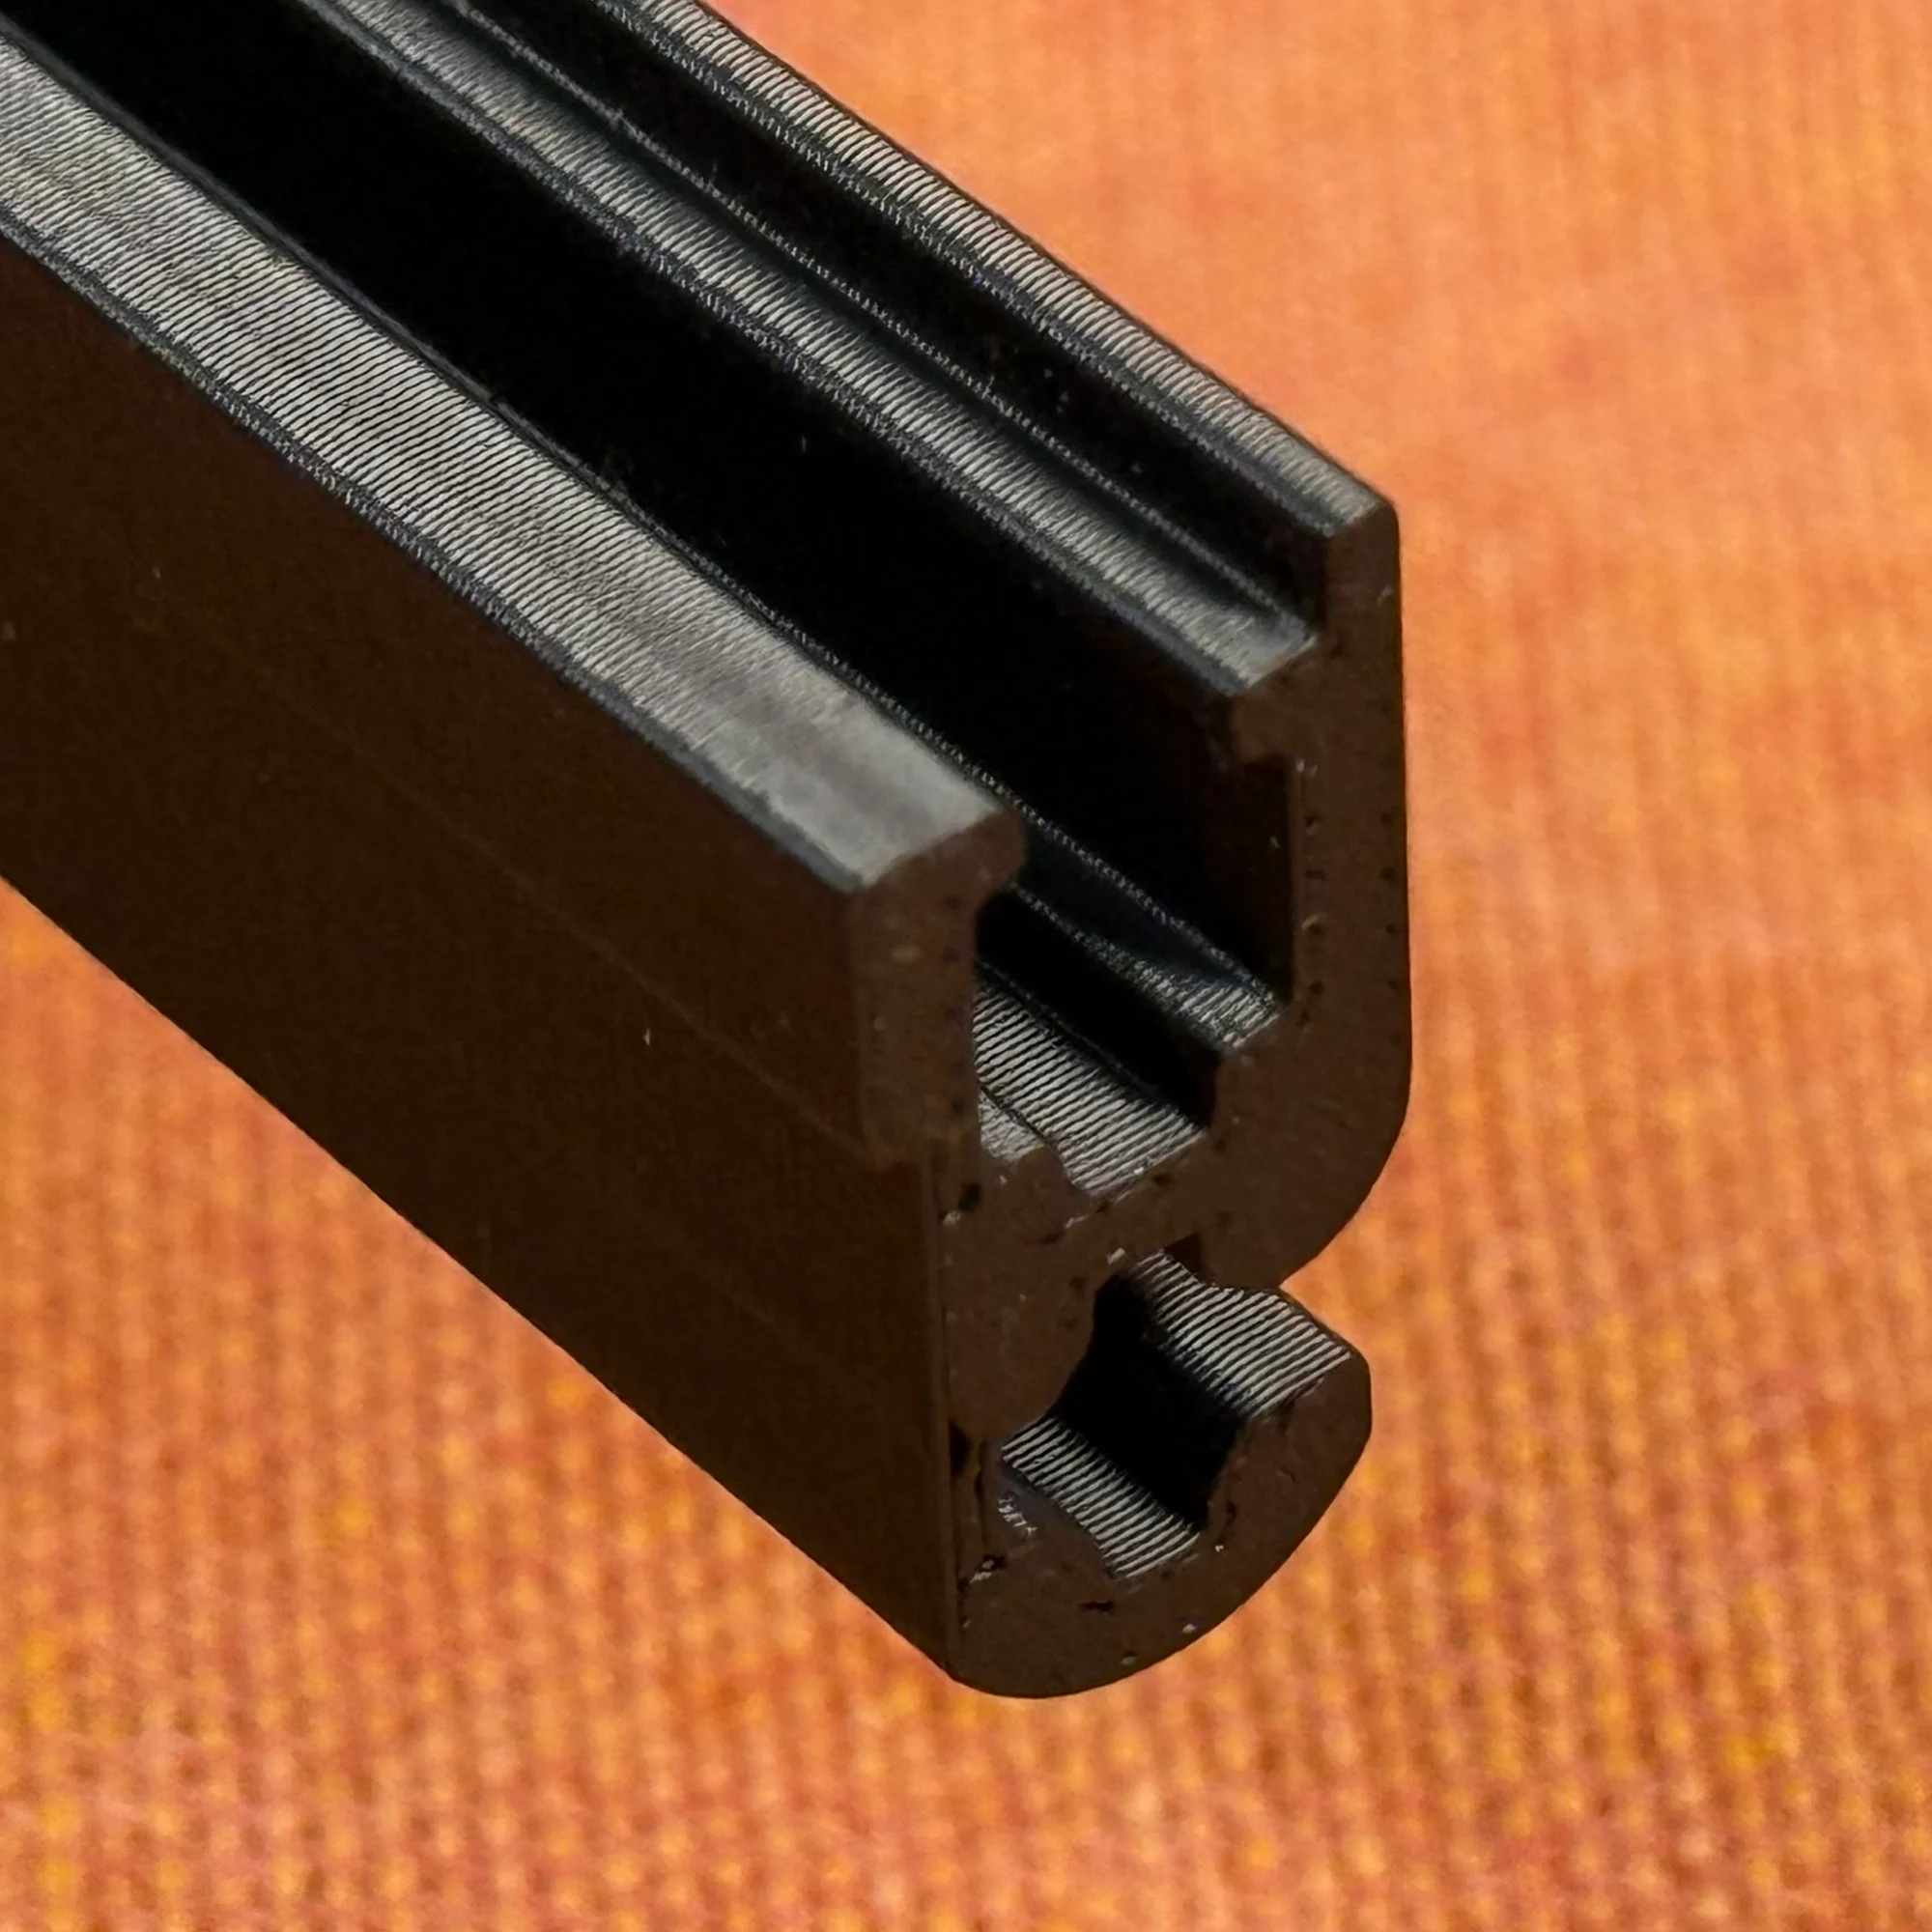
First, as you can see, the bar nuts are considerably taller than standard metal bar nuts. This design was settled on to ensure screws can be securely fastened. Since plastic is softer, if the bar nuts were the same height as metal ones, the holes would wear out quickly and screws would no longer hold.
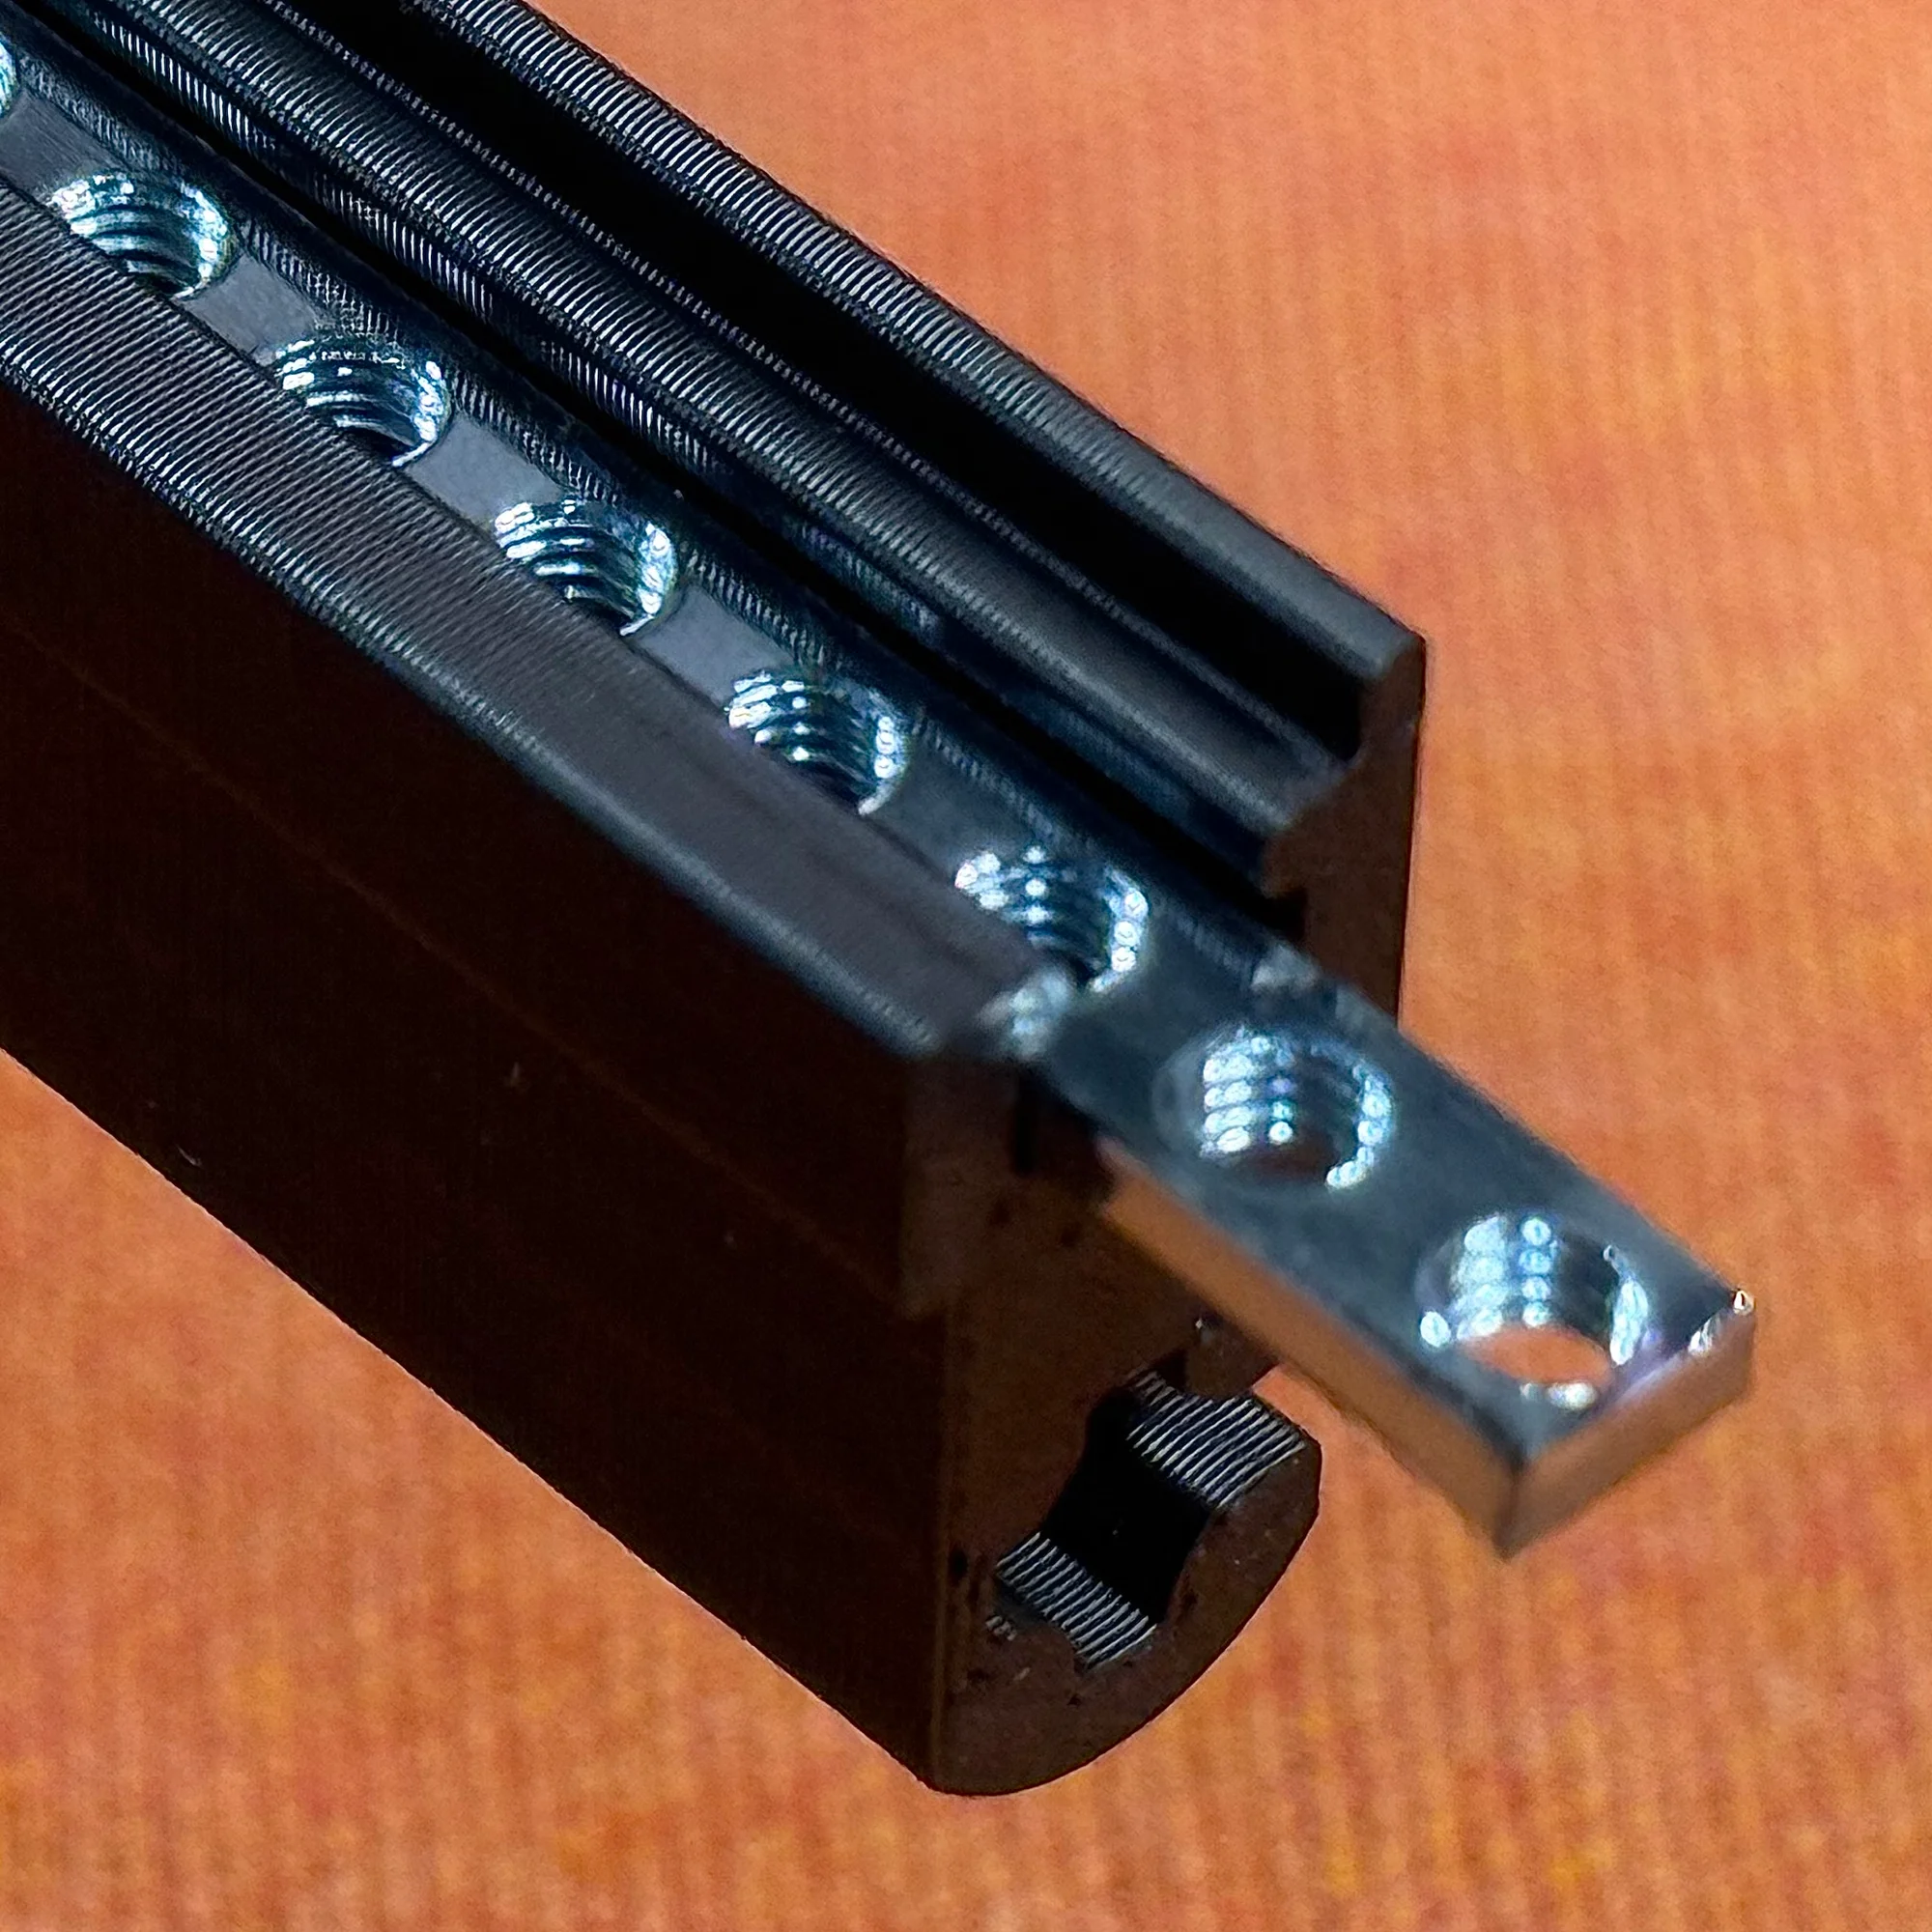
Additionally, the screw holes are made slightly smaller than the M3 screw diameter and with a slightly irregular shape. This is so that when you drive a screw in, threads are naturally formed in the plastic. Because of this design, hand-tightened screws require considerable force. Therefore, when using these rails, you’ll generally need to use a screwdriver. We appreciate your understanding.
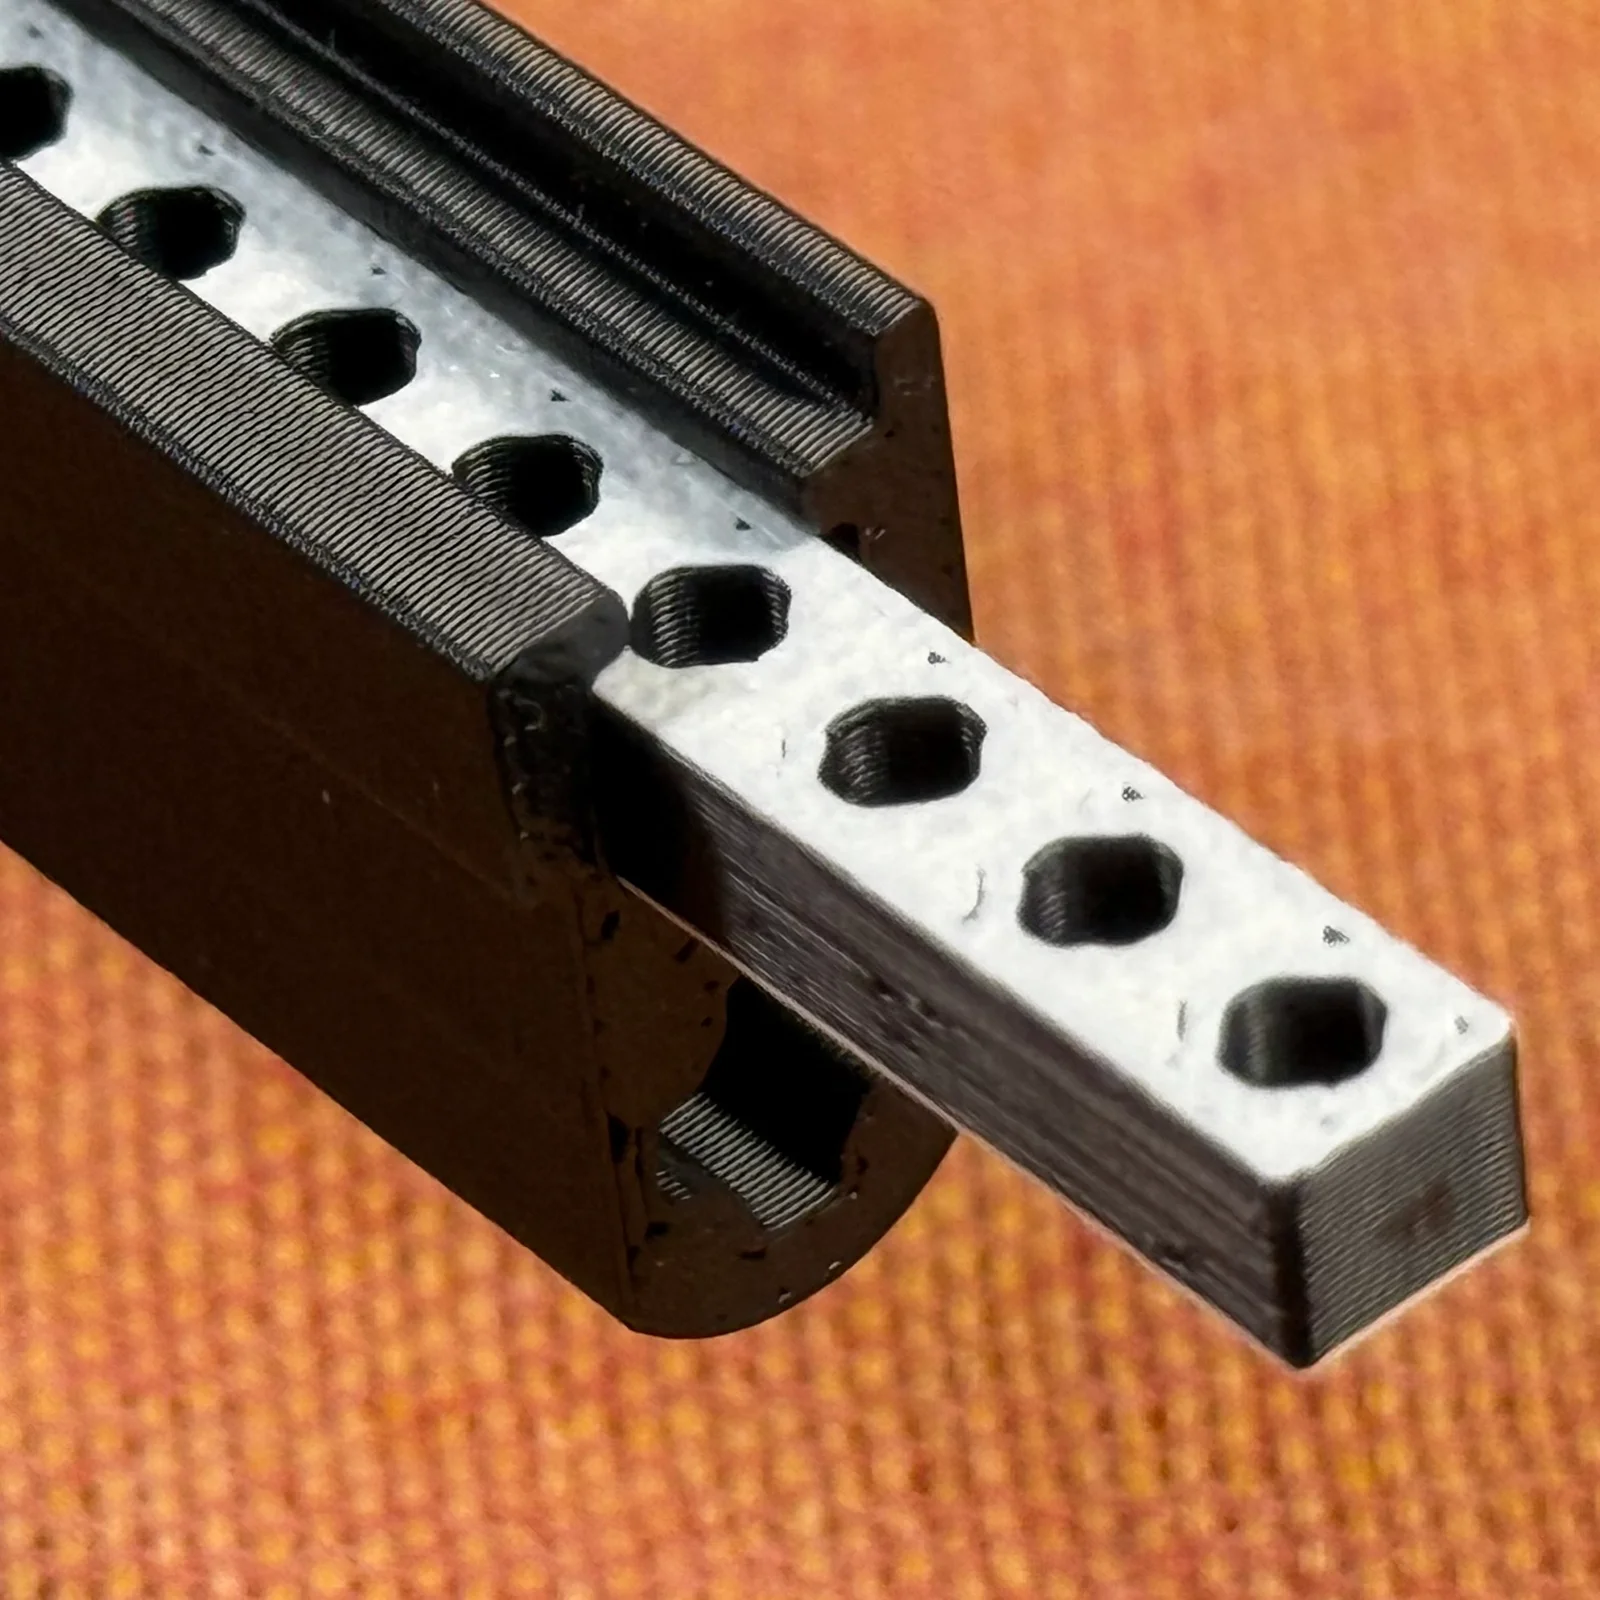
After testing various plastic materials, I settled on ASA (Acrylonitrile Styrene Acrylate). If the material is too hard, making the holes smaller would prevent screws from going in, and even if they did, the holes would chip. If it’s too soft, screws would pull out easily. After extensive testing, ASA proved to be the right balance of hardness with sufficient flexibility.
The bar nut color is white on the top and bottom surfaces only. While all-black looks sleeker, making everything black makes it difficult to see the screw holes unless in a well-lit environment. So the top and bottom are white to make the screw holes visible.
However, for frequent module swapping, metal bar nuts are undeniably more convenient. This is why the Dual rail was created. With the Dual version, only the mounting rail portion is ASA resin, while the screw-fastening part is metal, giving you the convenience of metal bar nuts and compatibility with hand-tightened screws at a lower price. Please choose based on your budget and preferences.
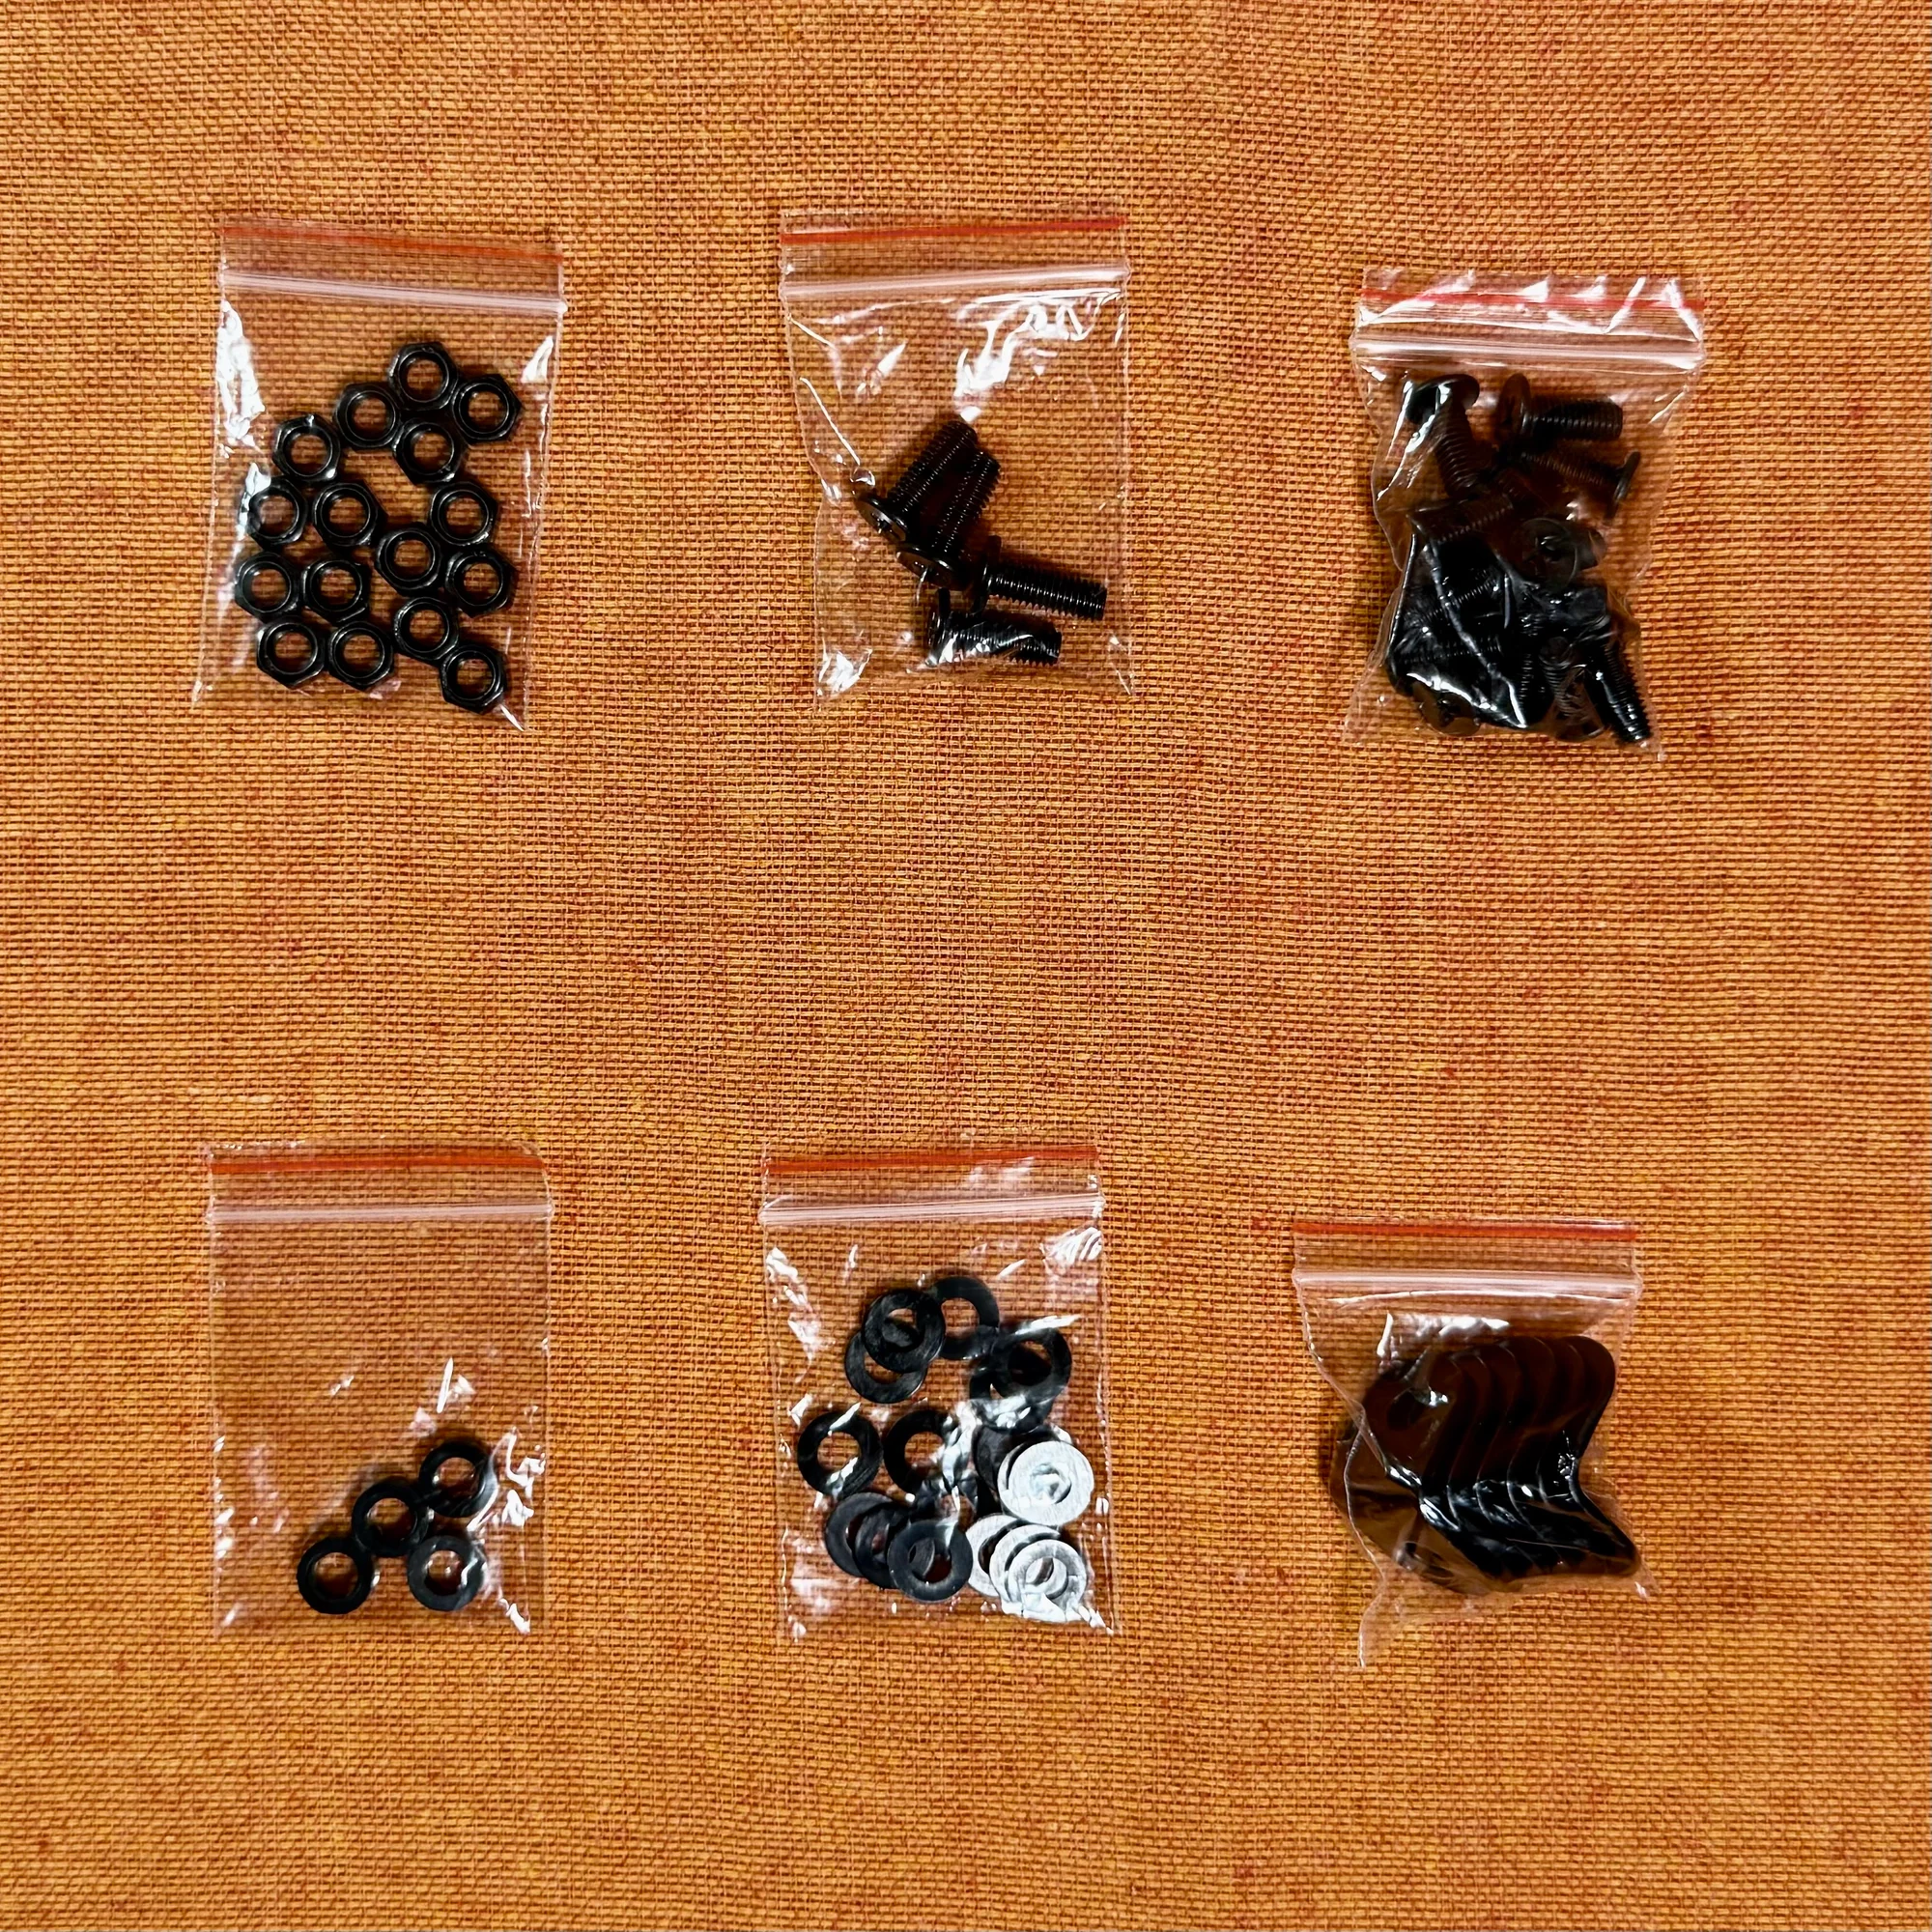
Included Items
The product includes cut acrylic board panels, rails, and hardware.
Common to All Rail Types
- Bottom panels: 2
- Side panels: 2
- Front/back upper panels: 2
- Front/back lower panels: 2
- Rail mounting panels: 1 set
- 1mm spacer washers: 16
- 3mm spacer washers: 4
- Panel joining brackets: 6
- M5 screws 12mm: 12 (for bracket fastening)
- M5 screws 14mm: 4 (for rail x side panel fastening)
- M5 lock nuts: 16

Metal Rail
- Aluminum mounting rail 40HP (204mm): 2
- Aluminum bar nut 40HP (204mm / M3 holes): 2
- M5 screws 12mm: 4
Dual Rail
- ASA mounting rail 40HP (204mm): 2
- Aluminum bar nut 40HP (204mm / M3 holes): 2
- M5 screws 40mm: 4
Lite Rail
- ASA mounting rail Lite 40HP (204mm): 2
- ASA bar nut 40HP (204mm / M3 holes): 2
- M5 screws 40mm: 4
Required Tools
The following tools are needed for assembly. Please prepare these yourself.
- Hex key wrench set (e.g., Amazon: Hex Key Wrench 9-Piece Set)
- Wrench (e.g., Amazon: Mini Wrench Set)
- Phillips screwdriver (e.g., Amazon: Screwdriver Set)
- Pliers (optional) (e.g., Amazon: Pliers Set)
Assembly Instructions
For detailed assembly instructions, please refer to the following guide:
Assembly requires tools such as a hex key wrench, wrench, and Phillips screwdriver. Please refer to the guide above for details.
Related Products
Below are products related to this item.
zudo-block Series
This is a 40HP case, but a 60HP version, zudo-block-60, is also available. The 60HP version is a wider version of this product. Choose based on your setup needs.
Additionally, the more affordable frame kit zudo-block-60 Open mentioned in the text is also available. Please check it out as well.
Bus Board
A bus board designed for mounting in this case has been developed separately. Details are available on the following page. If you’re interested, please check it out.
About Power Supply
このケースには電源が内蔵されていないため、別途電源をご用意頂く必要があります。電源用のモジュールとして、以下の3つを国内で入手しやすいものとしてご紹介しておきます。
また、電源ってどう考えれば良いのかよく分からないという方向けに、以下コラムを別途用意してあります。こちらも併せてご参照頂けますと幸いです。
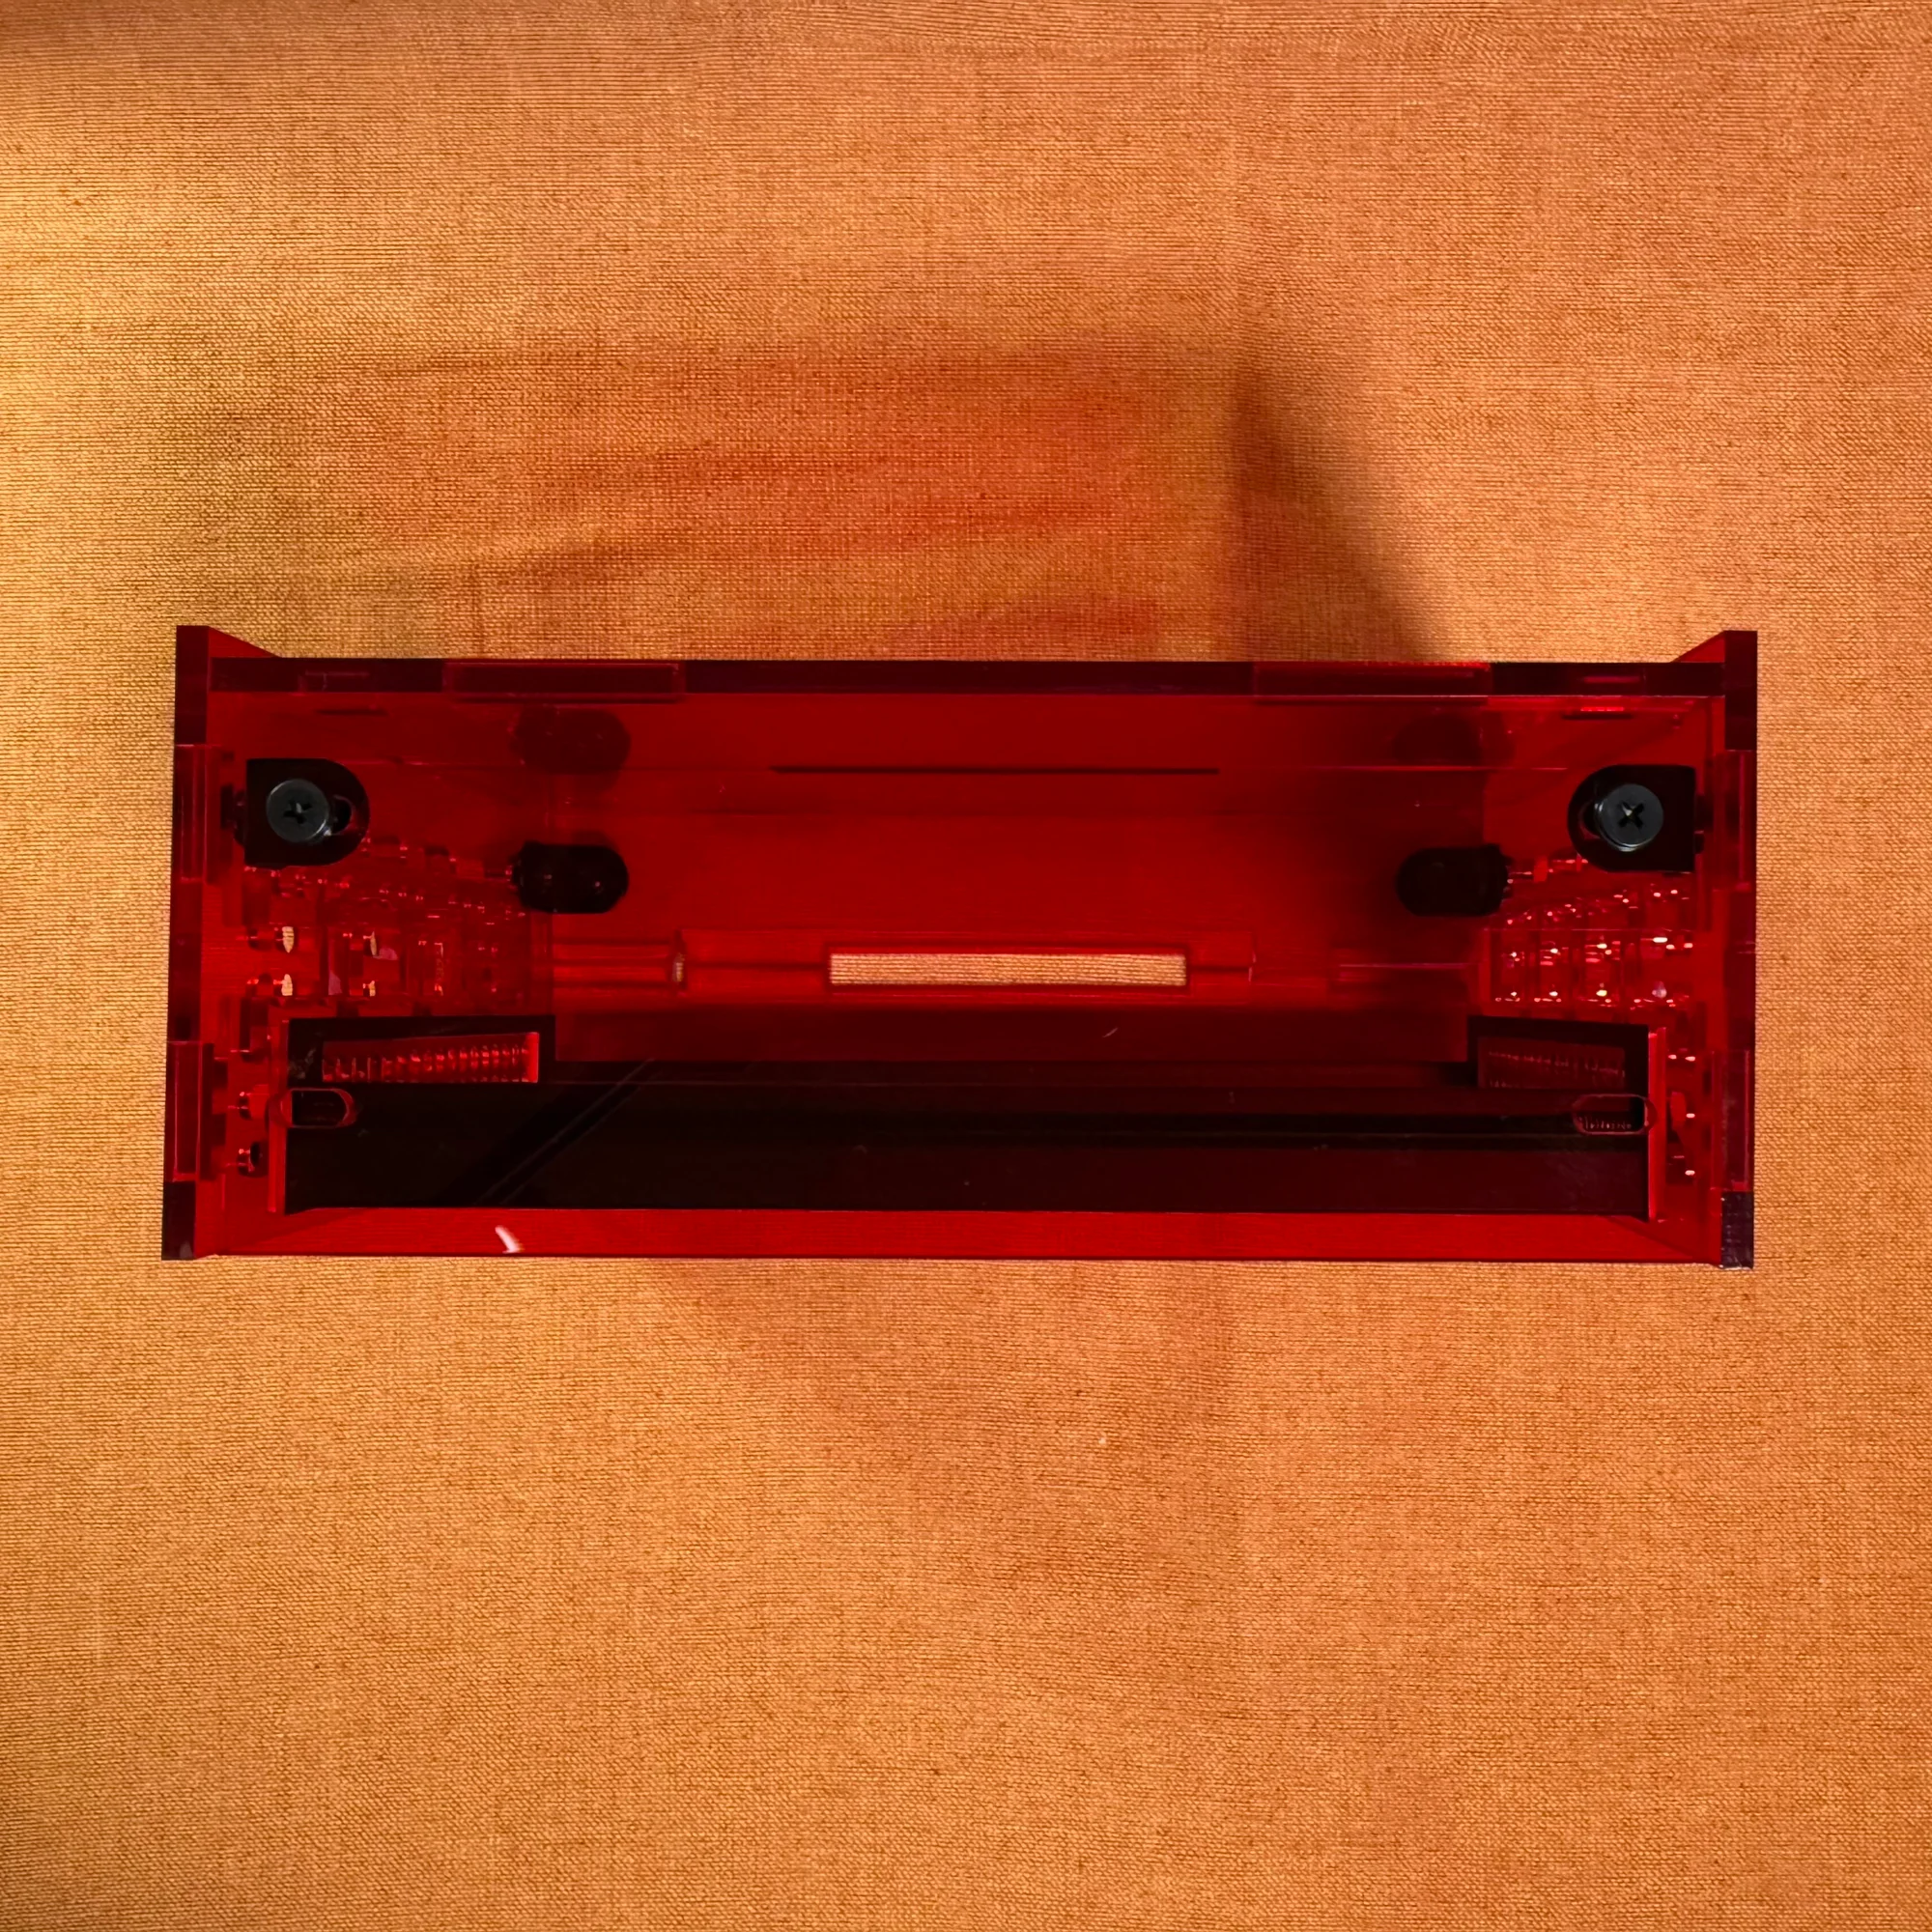
Additional Product Photos
Here are various additional photos. Due to the large number, they are compiled below.
Red: A-Type

Red: B-Type
Green: A-Type
Green: B-Type

Orange: A-Type
Orange: B-Type
Rails
Dimensions / Data
細かい寸法のデータが必要な場合、以下データをご参照ください。
That concludes our introduction of the zudo-block-40.
We hope you find this helpful.