This is an introduction to Takazudo’s DIY series product, zudo-rail.
The zudo-rail is a rail and frame set for Eurorack modular synthesizer cases. At our shop, we sell the zudo-block series of DIY case kits for modular synths, and the zudo-rail is essentially the rail portion extracted and sold separately.
The zudo-rail comes in two main sizes: 40HP zudo-rail-40 and 60HP zudo-rail-60. It features diverse variations and affordable pricing, making it ideal for DIY case building. It can also be used as an expansion part for combining multiple zudo-blocks into a larger case.
Purchase links are available at the bottom of this page.
Please review the variations and included items carefully before purchasing.
- About zudo-block and zudo-rail
- zudo-rail and DIY
- Variation Guide
- Rail Assembly Instructions
- Purchasing
- Notes for Each Rail Type
- Attaching Rails to an Outer Case
- Expanding zudo-block
About zudo-block and zudo-rail
First, for those who found this zudo-rail page before seeing the zudo-block, here’s a brief introduction to zudo-block.
The zudo-block is a Eurorack modular synthesizer DIY case kit designed and produced by Takazudo. It comes in two sizes, 40HP and 60HP, and features selectable variations to match your system and budget.
- Takazudo Modular: zudo-block-40
- Takazudo Modular: zudo-block-60
- Takazudo Modular: zudo-block-40 Lite
The zudo-rail series is the rails from these cases made available as standalone products. So if you’re looking for a complete case rather than just rails, please consider the zudo-block series.
Additionally, the zudo-rail can be used to connect and extend zudo-blocks together. More on this later in this page.
Just to be clear, the zudo-rail is the rail portion only, so please keep that in mind.
zudo-rail and DIY
The motivation behind selling the zudo-rail came from observing that quite a few people enjoy building modular synth cases as DIY projects. Among visitors to our site, I’ve noticed a fair number arriving through search terms like “modular synth case DIY.” However, those people don’t necessarily buy the zudo-block itself (ha!).
What they want is to build their own case, and among modular synth hobbyists, many enjoy the DIY case-building process. While many of them start out thinking “cases are expensive…” I personally feel the desire to build something yourself is the stronger motivation.
Ultimately, sourcing wood and gathering small parts can end up costing a fair amount in both money and effort, but the joy of building something yourself is understandable. After all, the zudo-block and zudo-rail I sell are products born from that same impulse.
So the zudo-rail is a rail set that we’d love you to use for DIY projects as well.
Variation Guide
The zudo-rail product consists of the rails themselves plus the panels and screws needed to mount them. Since various small parts combine to create a rail, simply saying “pick whatever quantities you want!” would make selection impossibly confusing for newcomers. I spent a while figuring out the best approach.
After much consideration, I settled on selling them as sets based on the following key points:
- Rail type
- Rail width
- Number of sets
- Rail height
- Rail combinations
- Rail connector panels
This is a bit lengthy, but let me explain each variation.
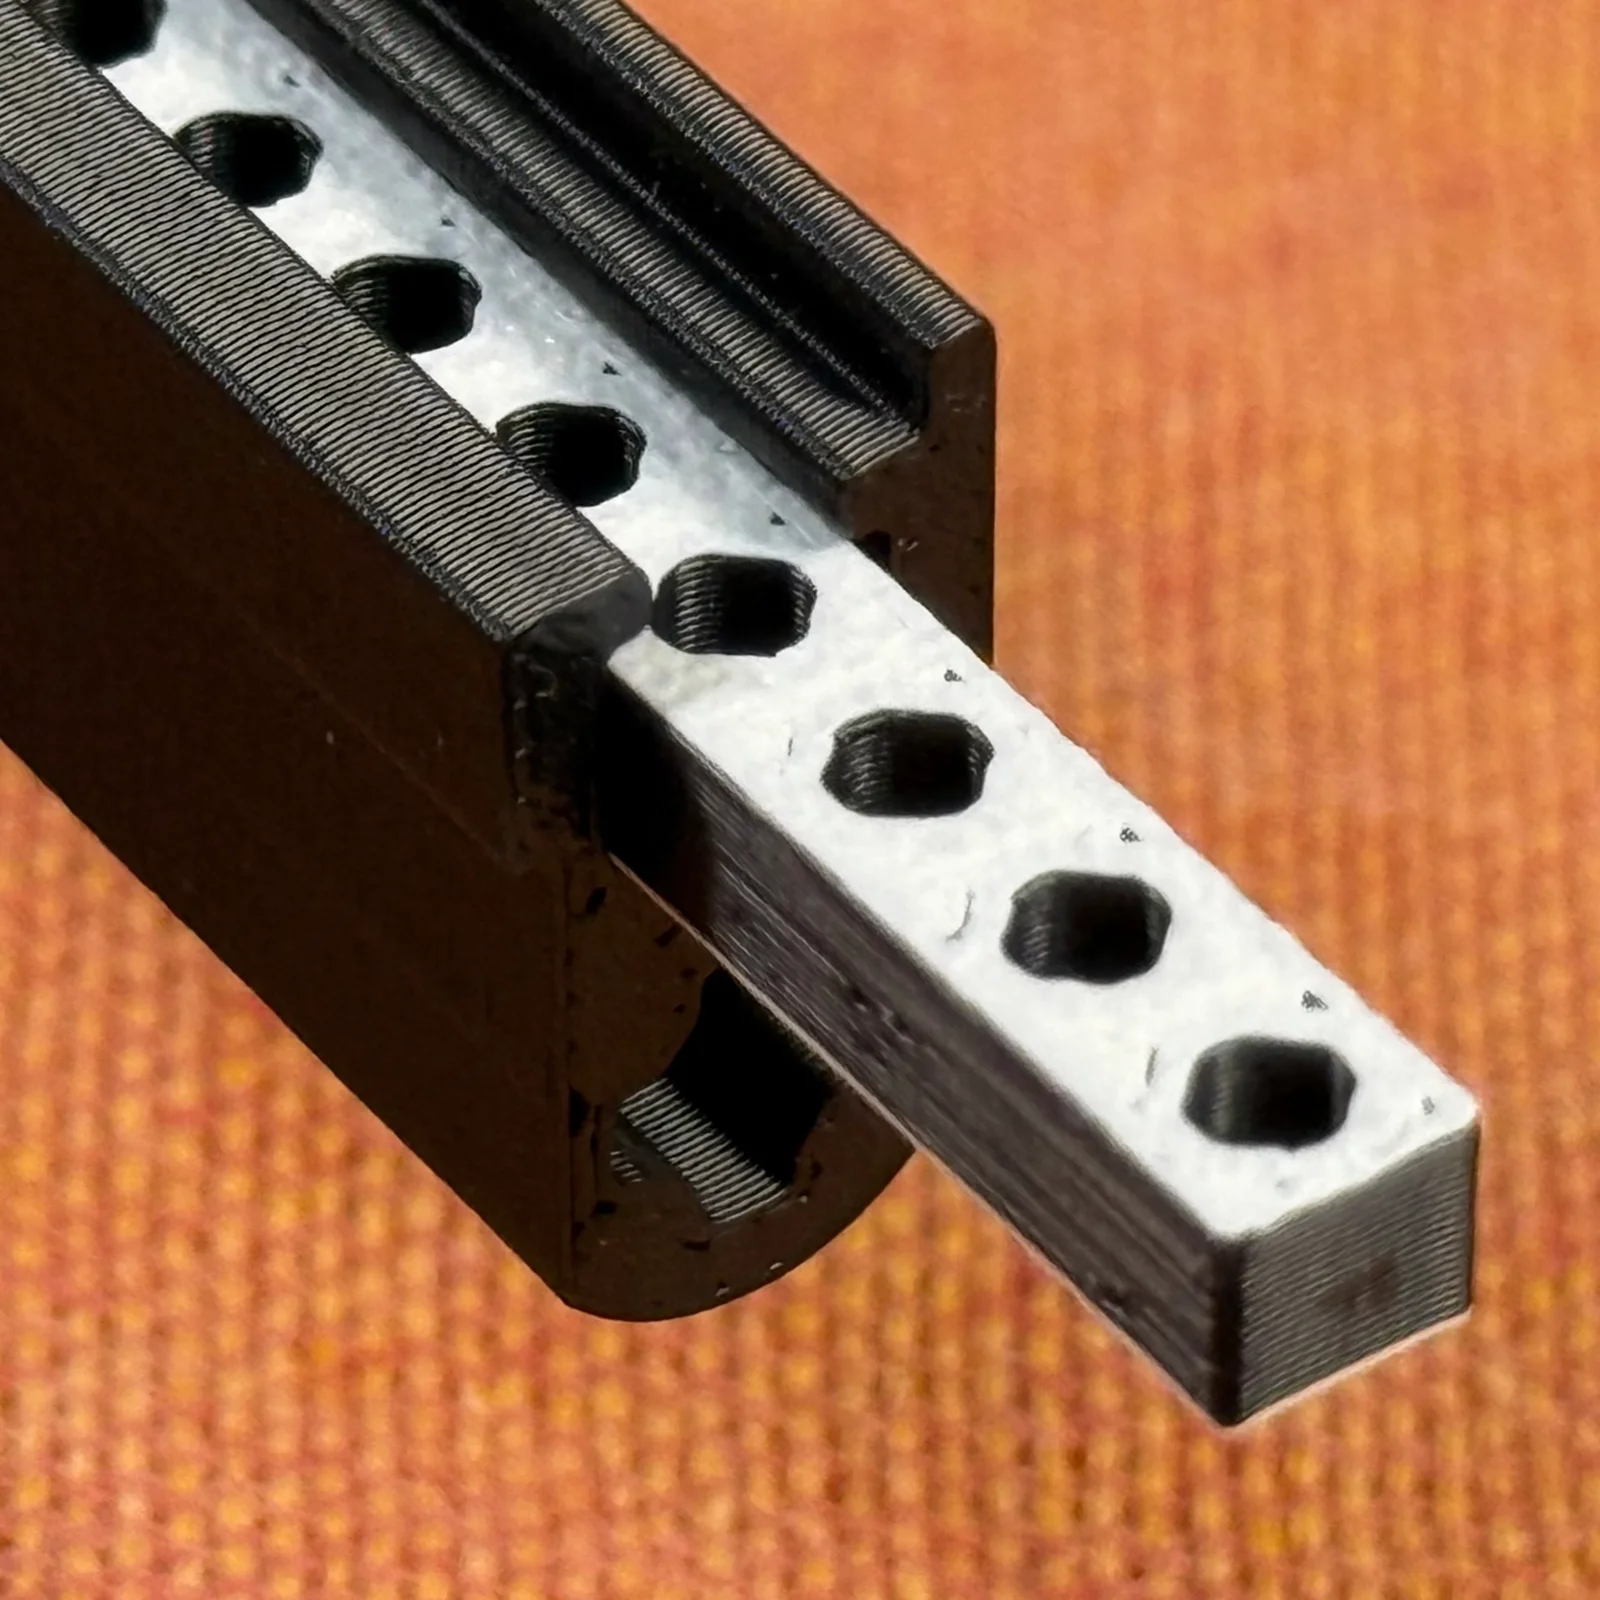
1. Rail Type
First, the rail types themselves. There are four varieties:
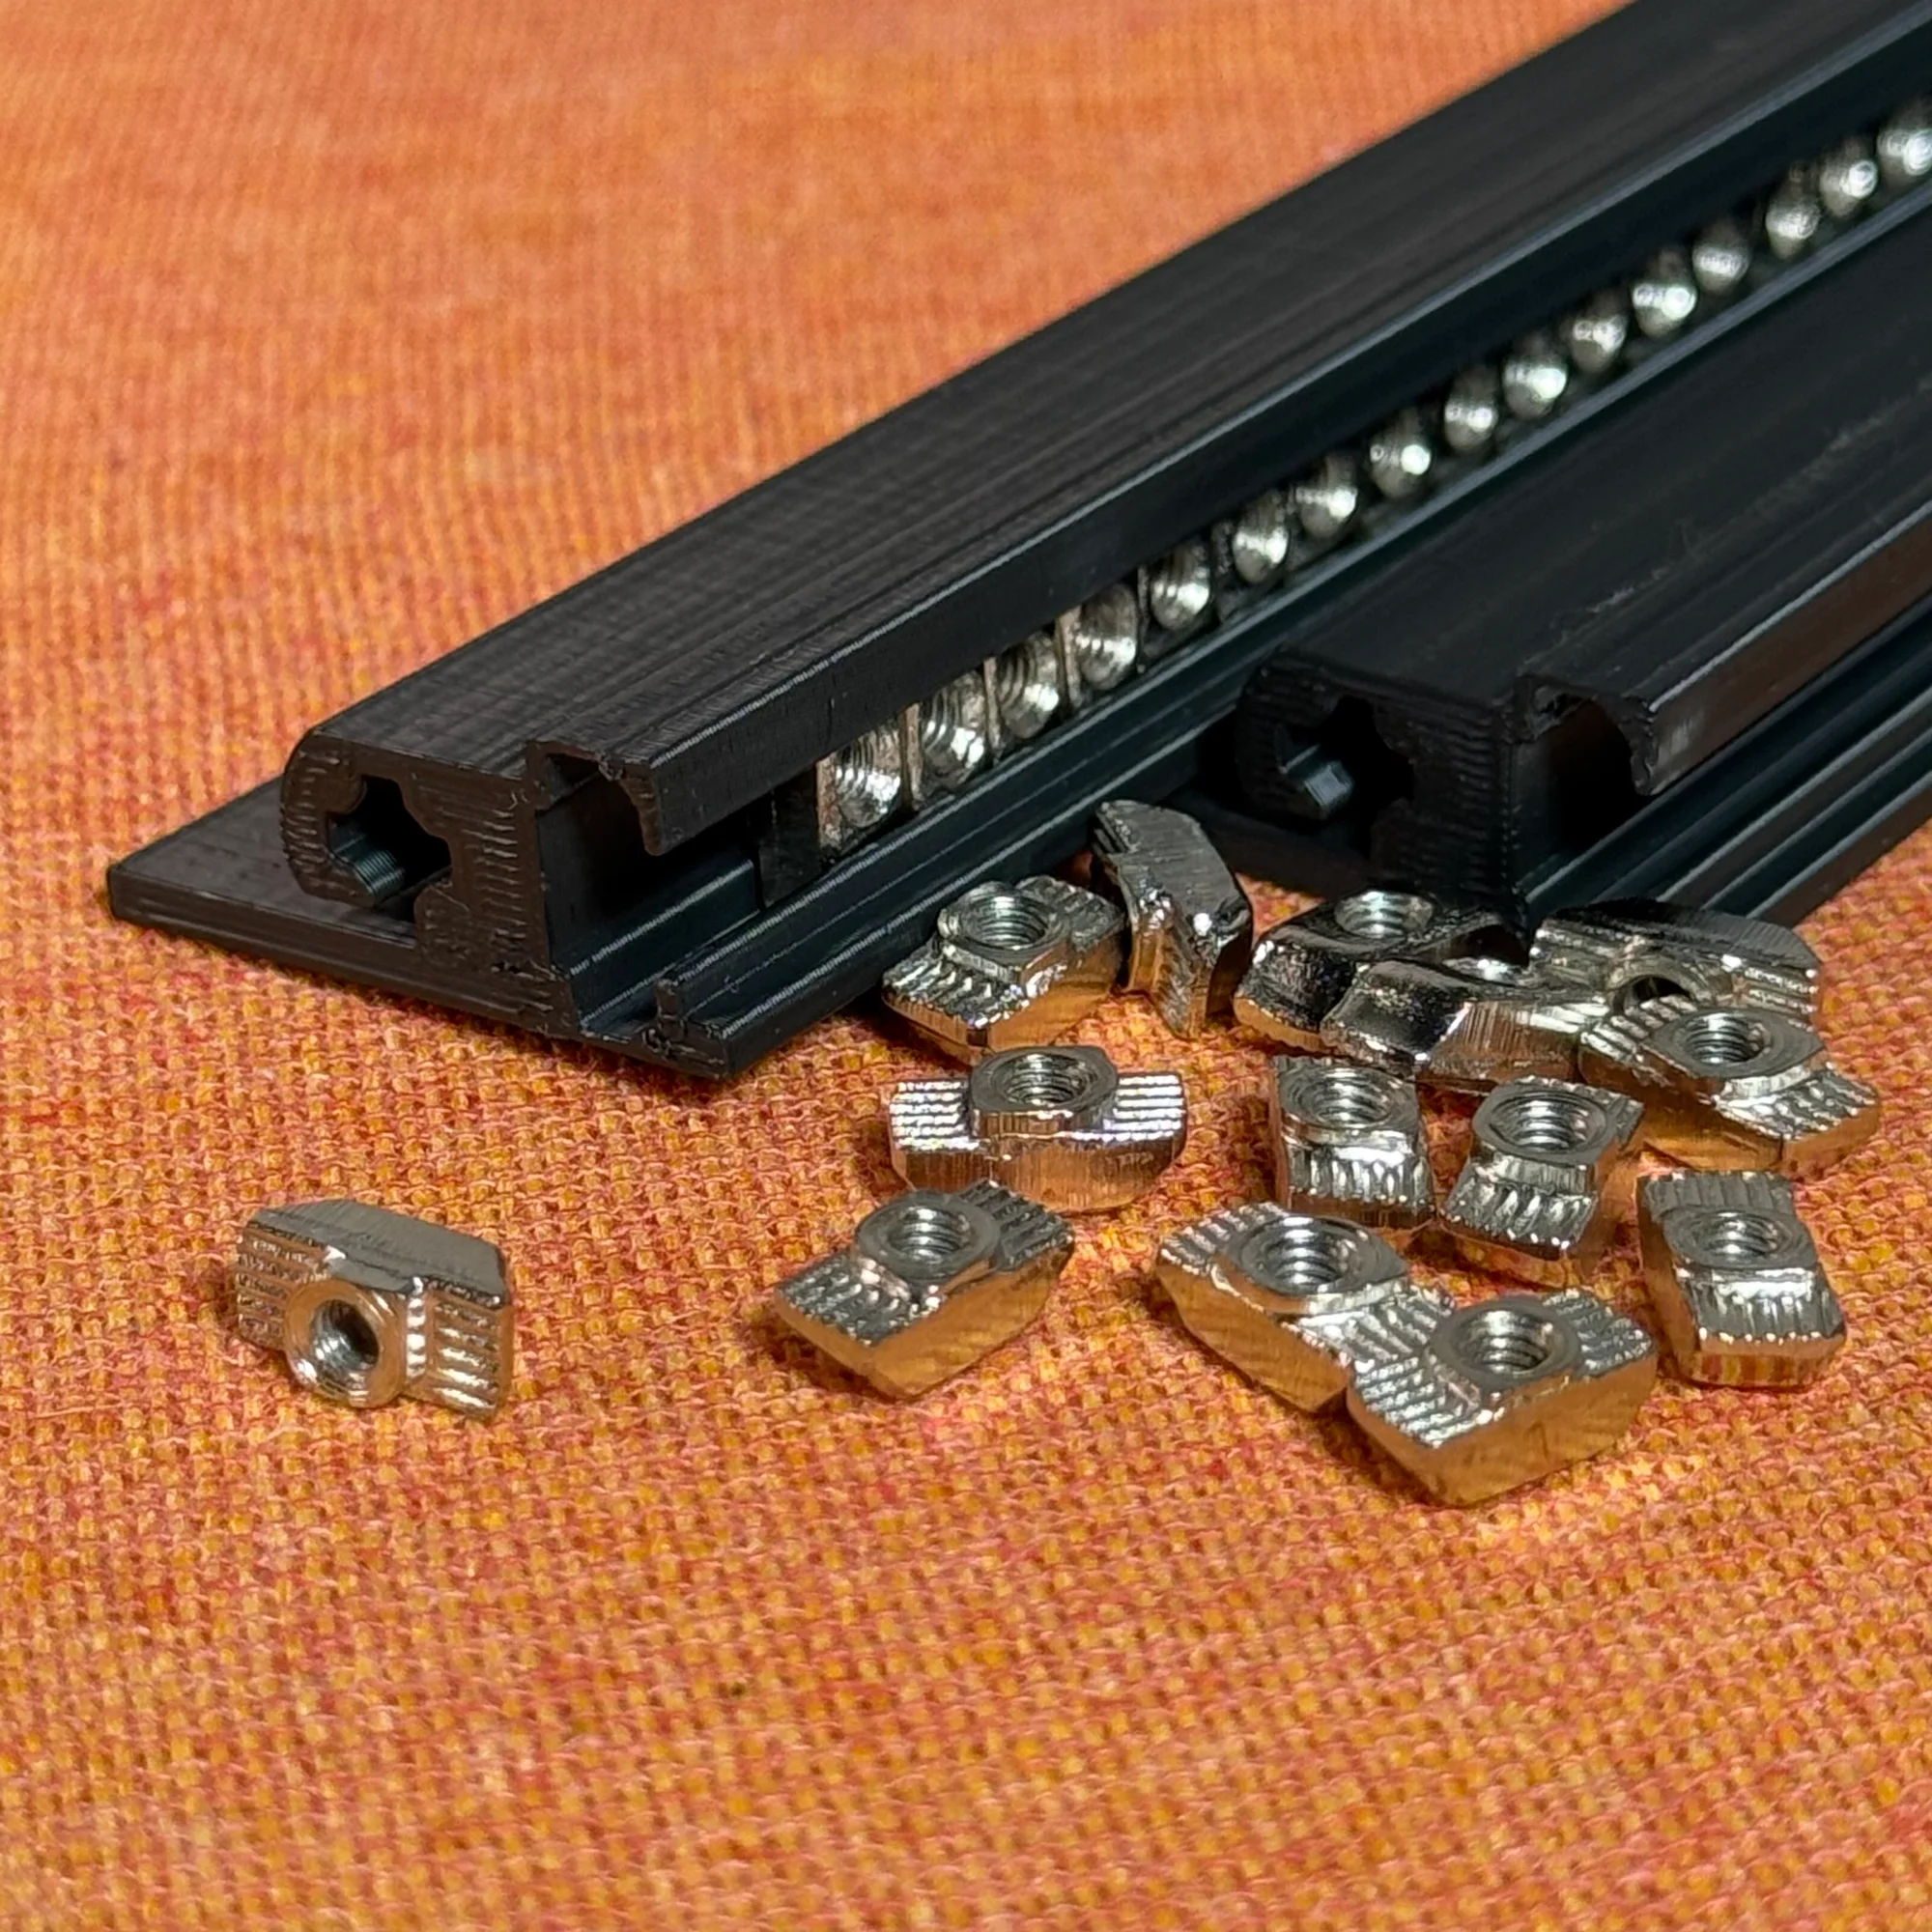
- Lite: ASA mounting rail + ASA bar nut
- Nuts: ASA mounting rail + slide nut
- Dual: ASA mounting rail + metal bar nut
- Metal: metal mounting rail + metal bar nut
These are: the affordable all-plastic Lite version, the Nuts version with slide nuts, the Dual version with metal bar nuts, and the full-metal Metal version.
The Lite and Dual versions were born from trial and error aimed at reducing the high cost of metal rails, while the Nuts version was developed after finding slide nuts optimally sized for modular dimensions.
For detailed information about each rail type’s features and design philosophy, please refer to the zudo-block series product pages mentioned earlier.

Personally, I recommend the Nuts version. However, I believe the price difference of a few thousand yen can be significant for someone just getting started with modular. For such people, I think starting with the Lite version and considering upgrades when you want to expand is the best approach.
2. Rail Width
Two rail widths are available: 40HP and 60HP.
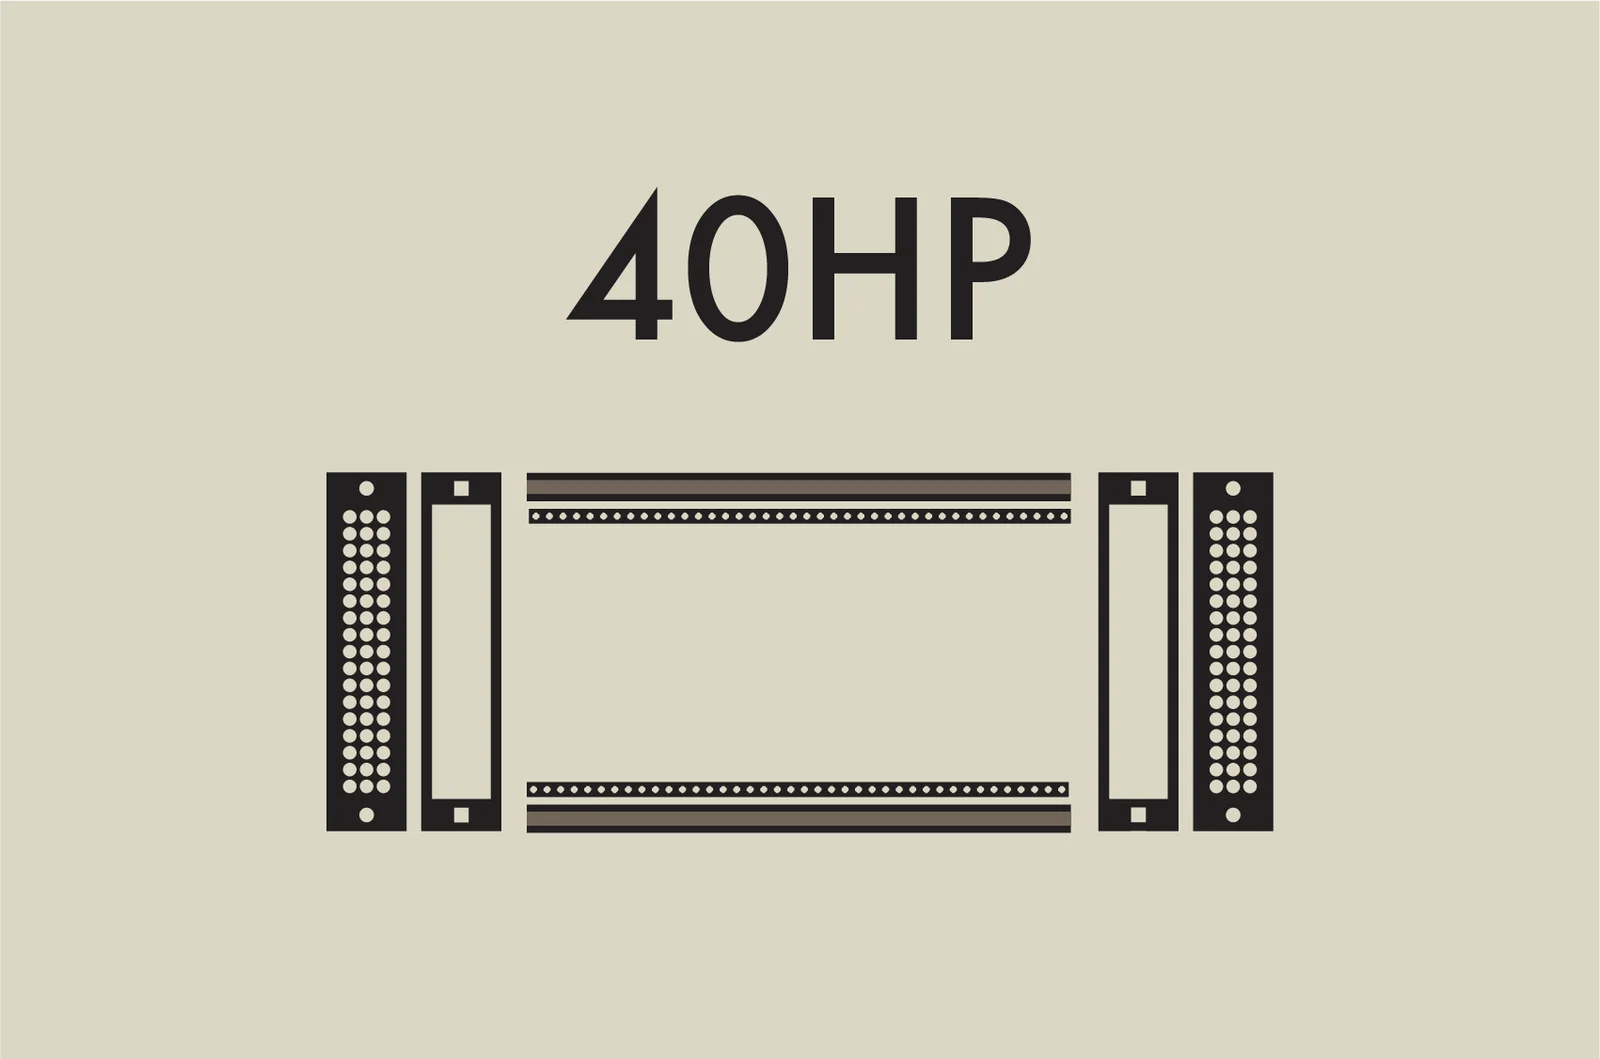
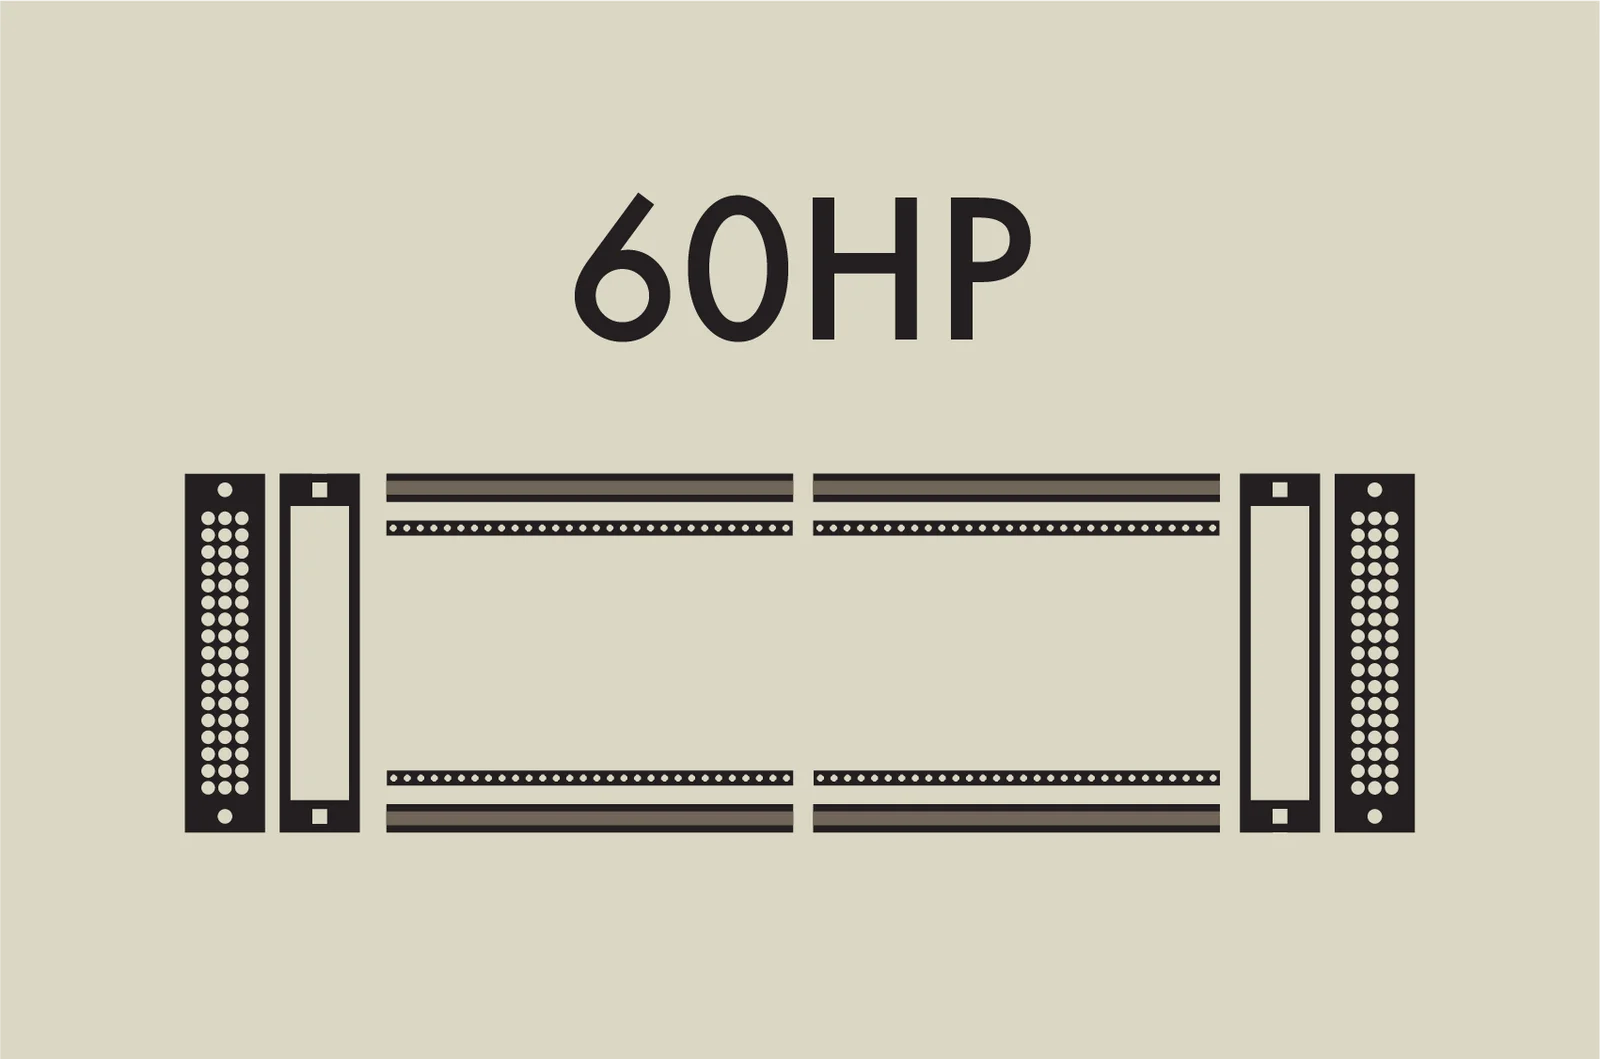
For building a small case, 40HP is recommended. For a mid-size case, 60HP is the way to go.
For the Nuts/Lite/Dual 60HP rails, two 30HP rail segments are joined together with a set screw to form the 60HP length.
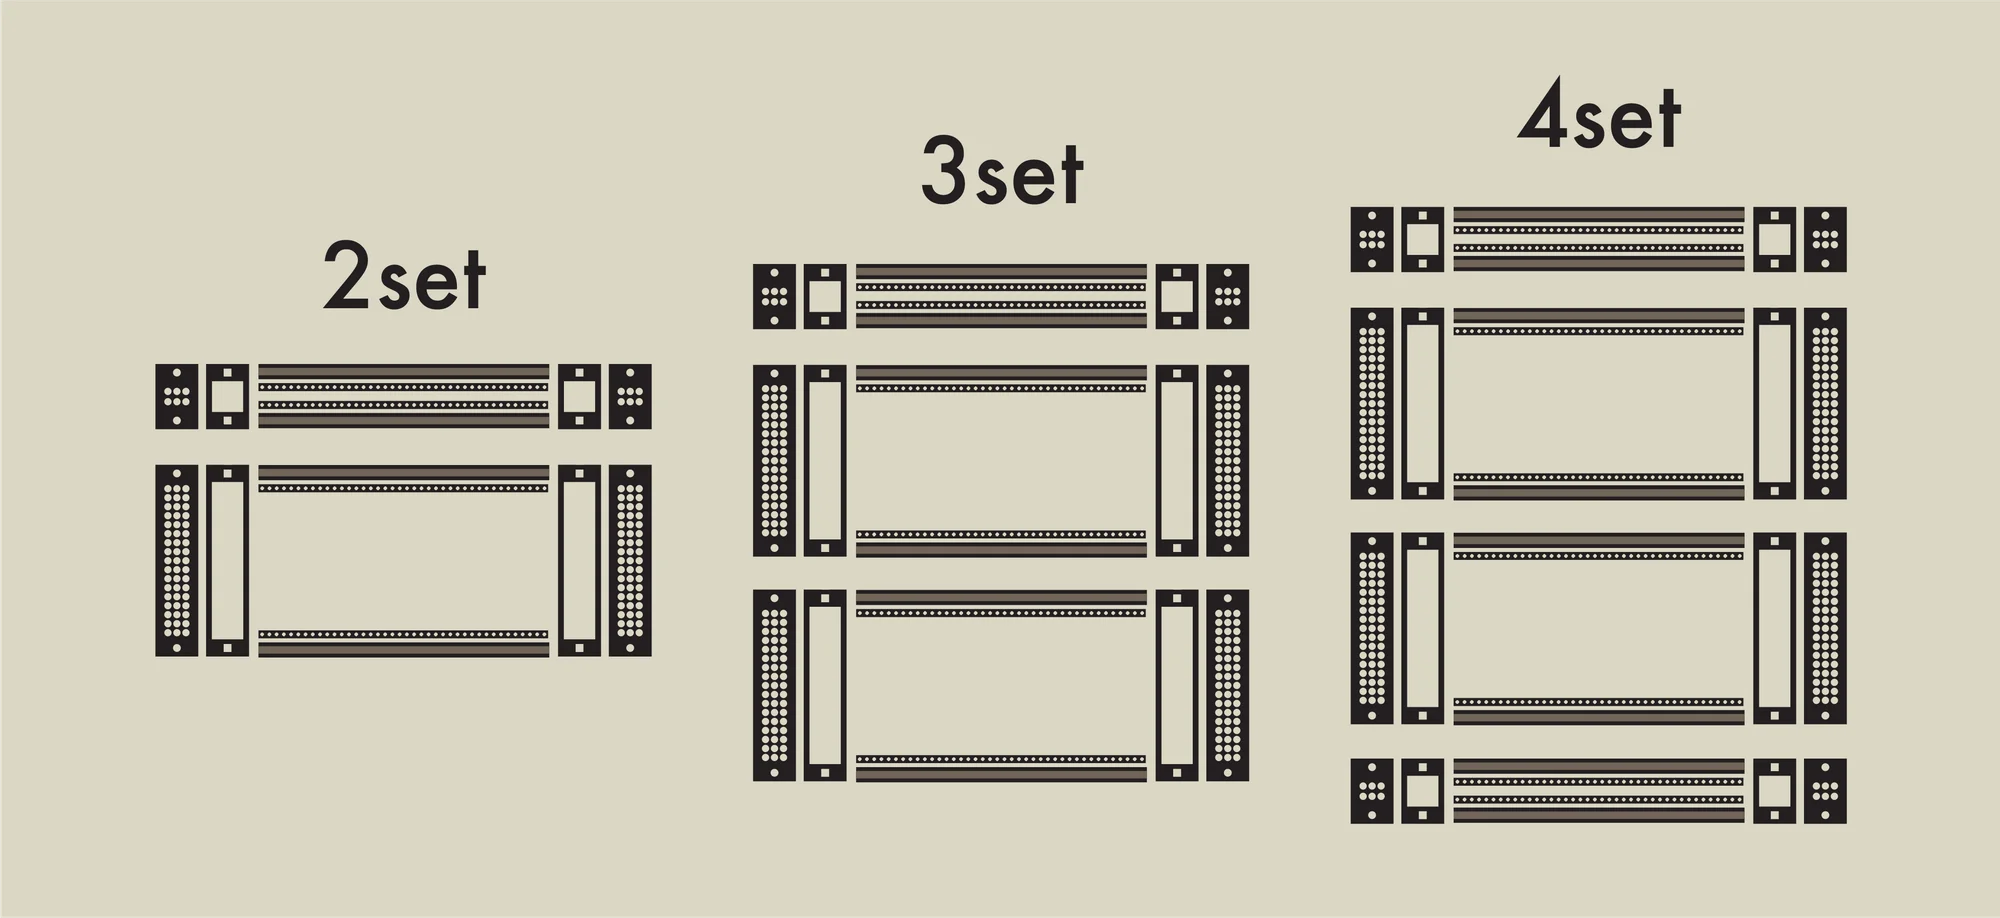
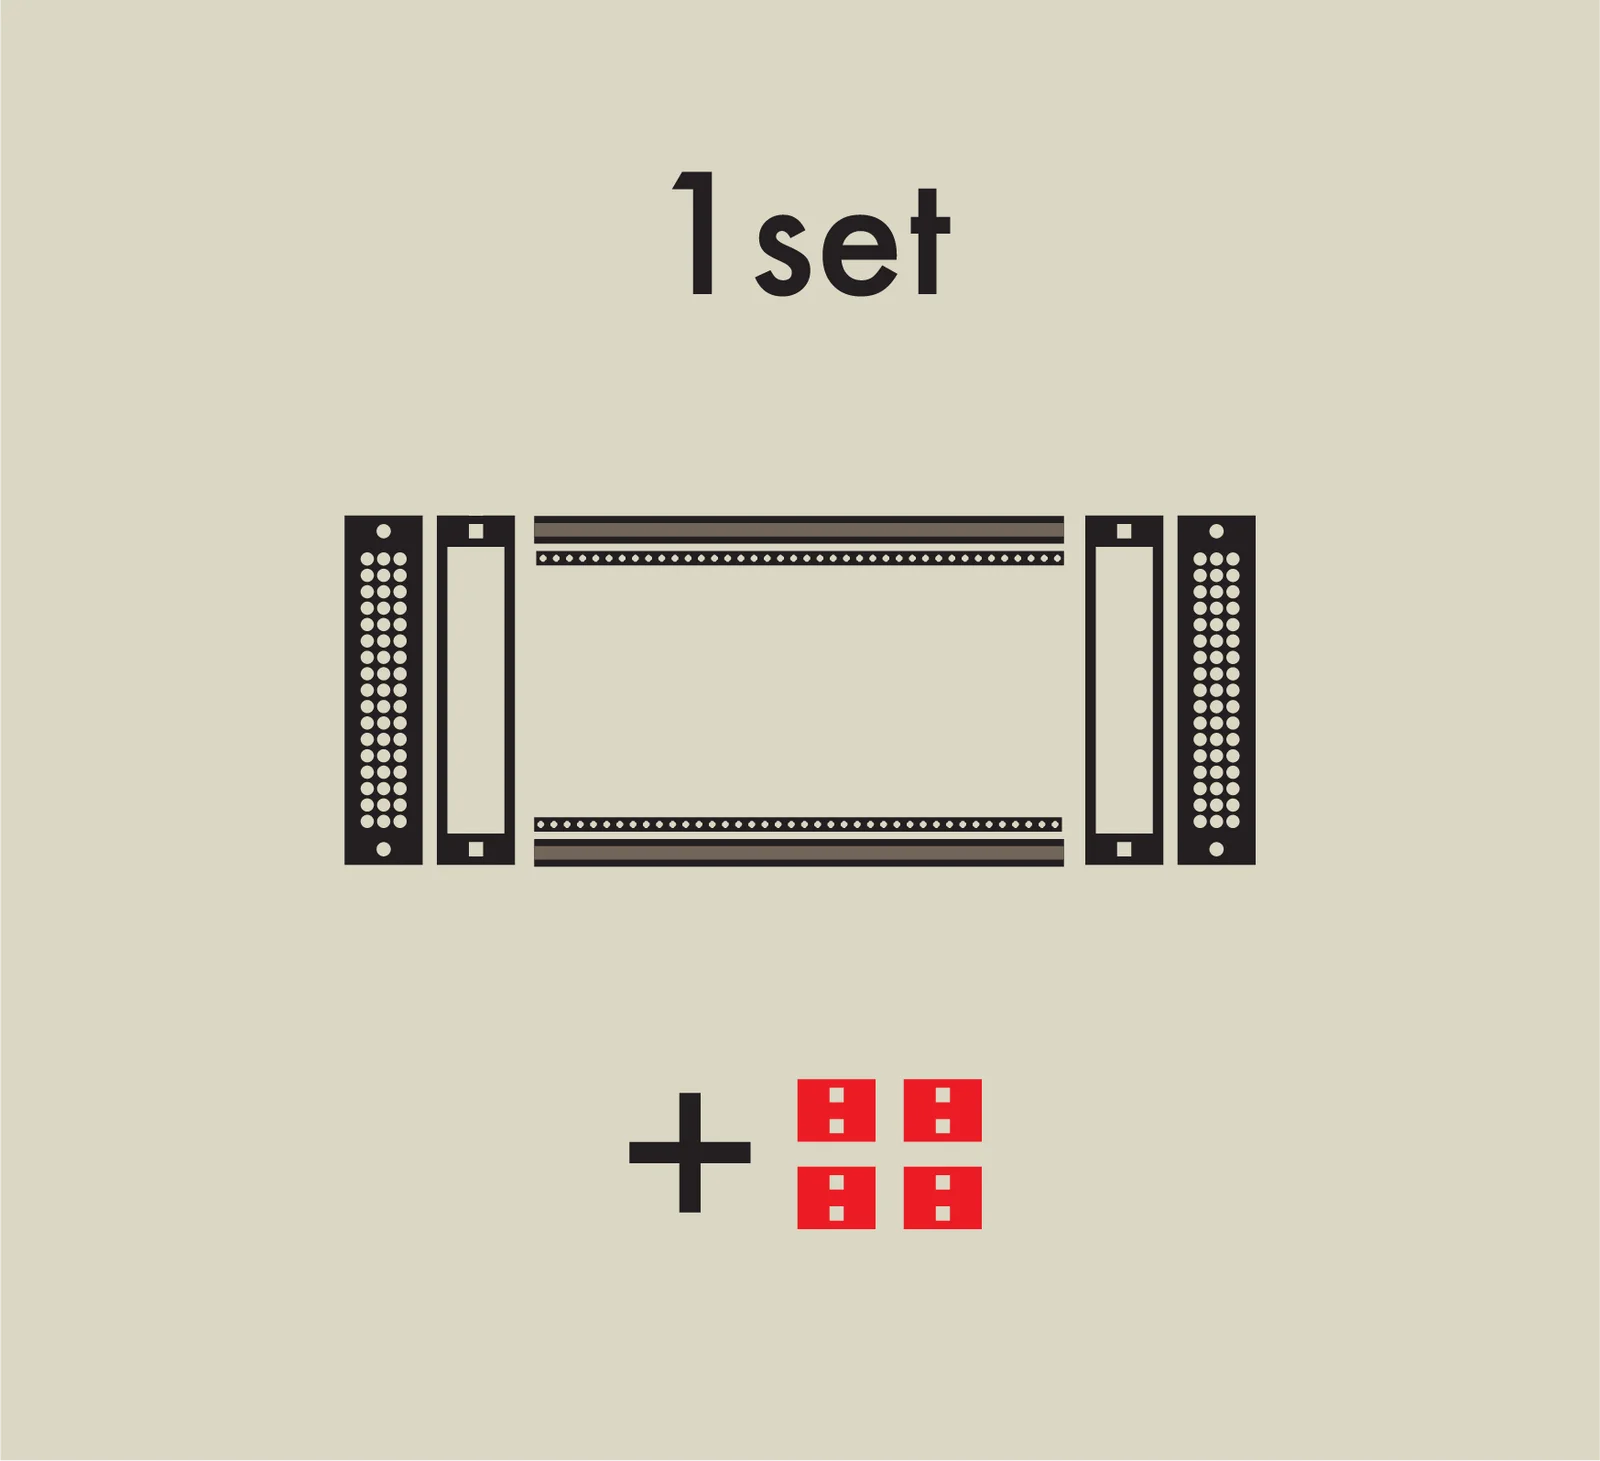
3. Number of Sets
These rails are sold with two rails and their mounting frames as one set.
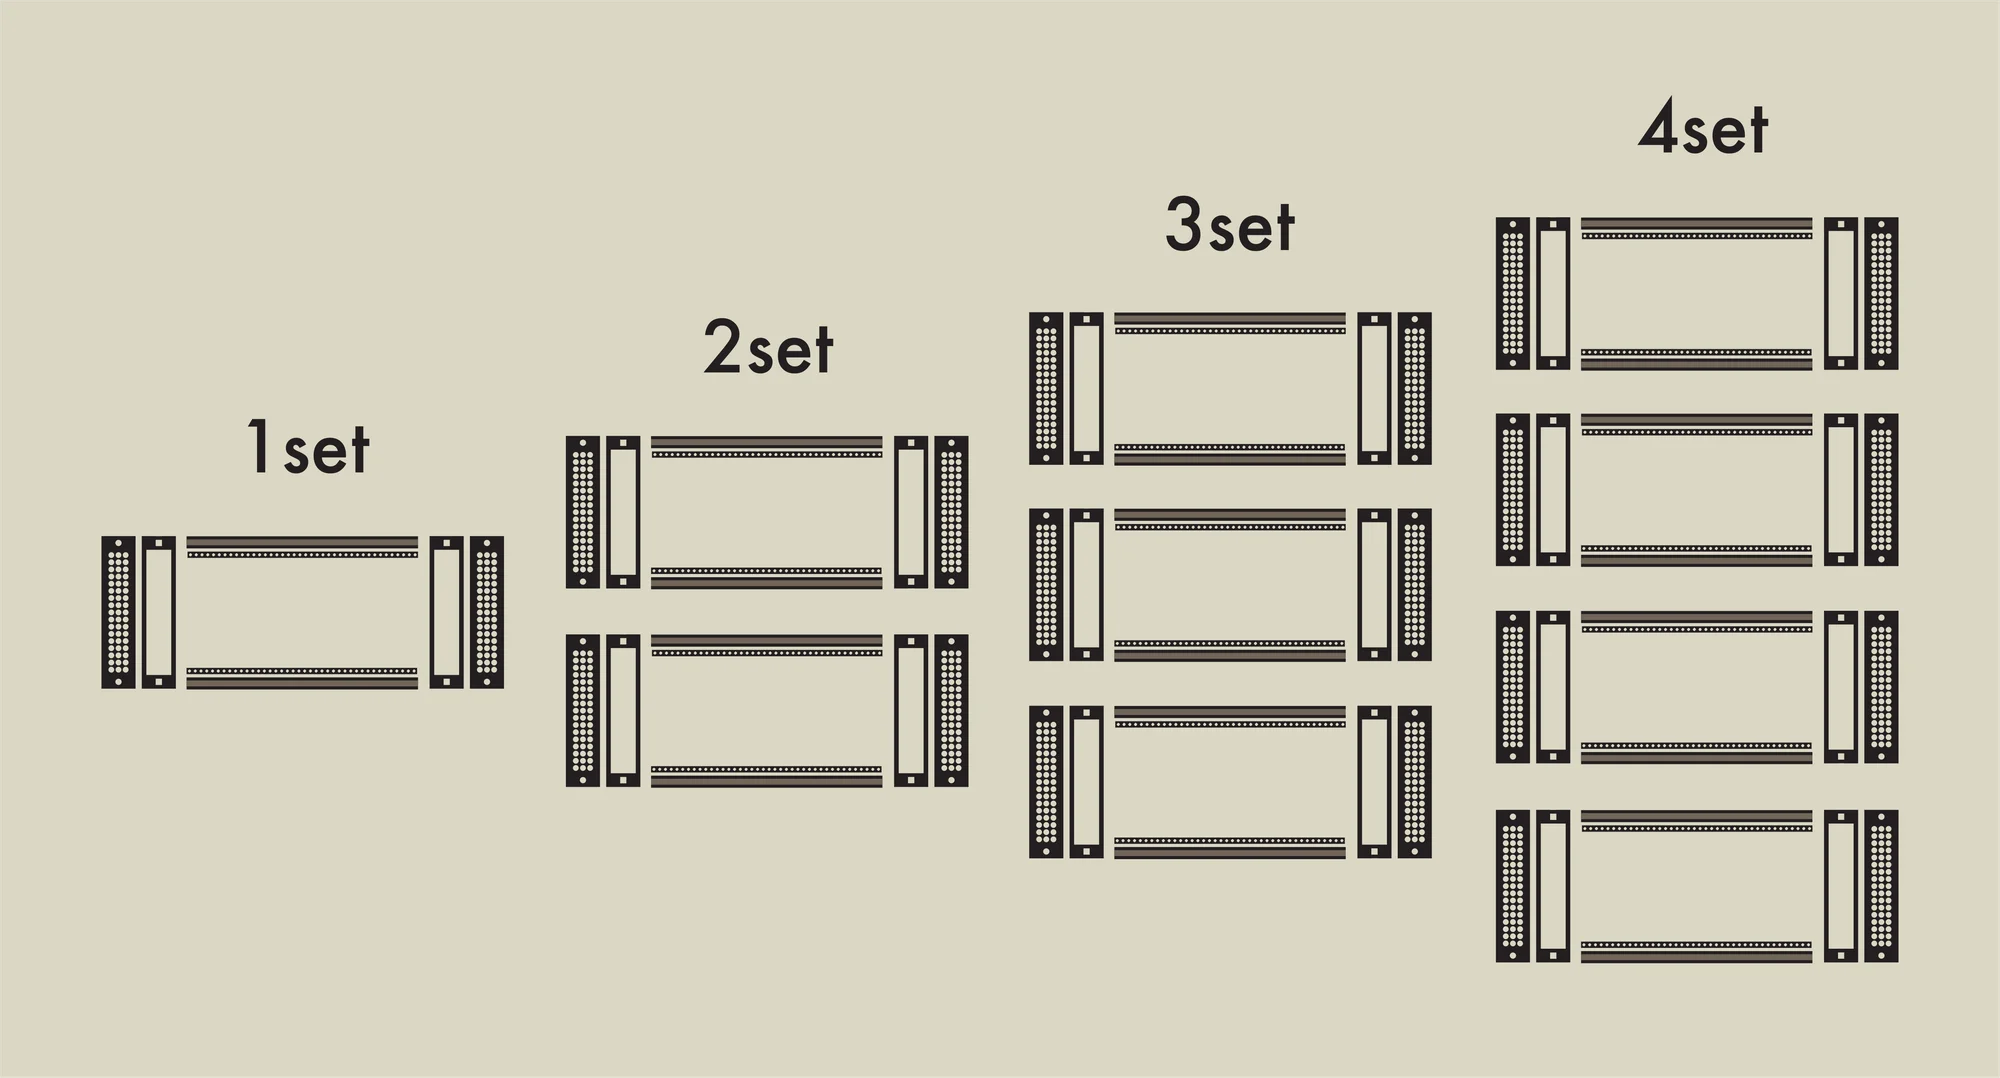
While we’d love to let you choose any quantity, to accommodate Mercari Shops specifications, the following four options are available:
- 1 set
- 2 sets
- 3 sets
- 4 sets
Choose the number of sets you need based on your case size and purchase them together.
4. Rail Height
Two rail heights are available: 3U and 1U.
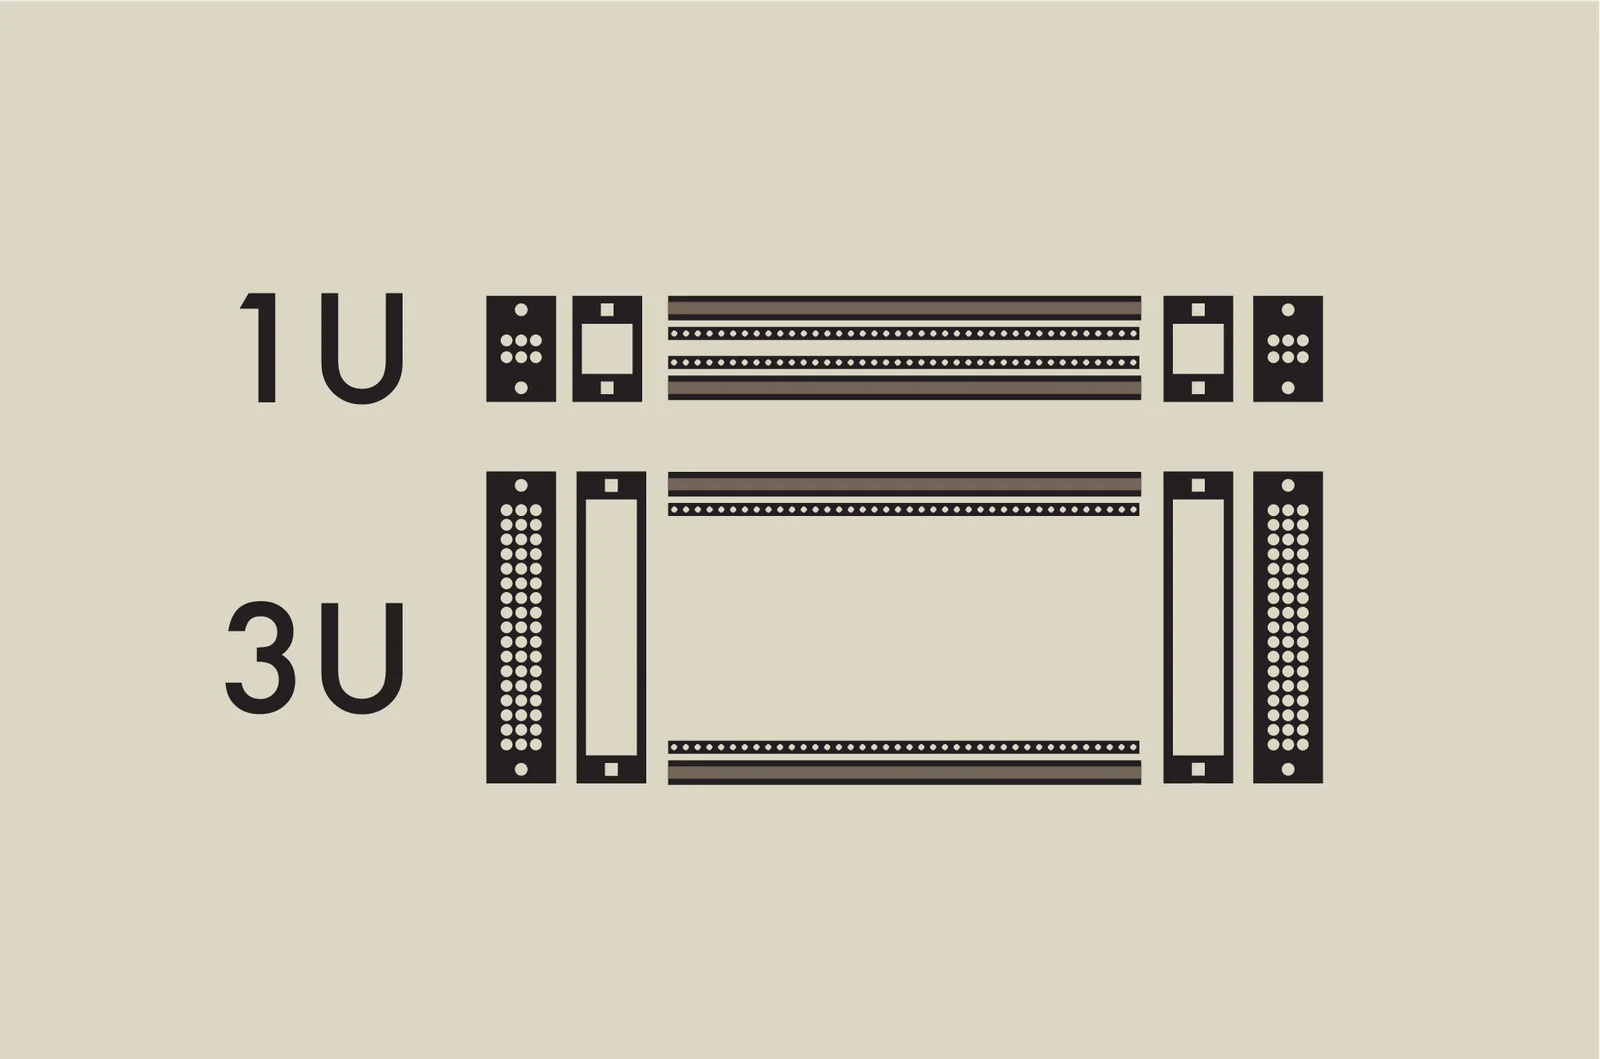
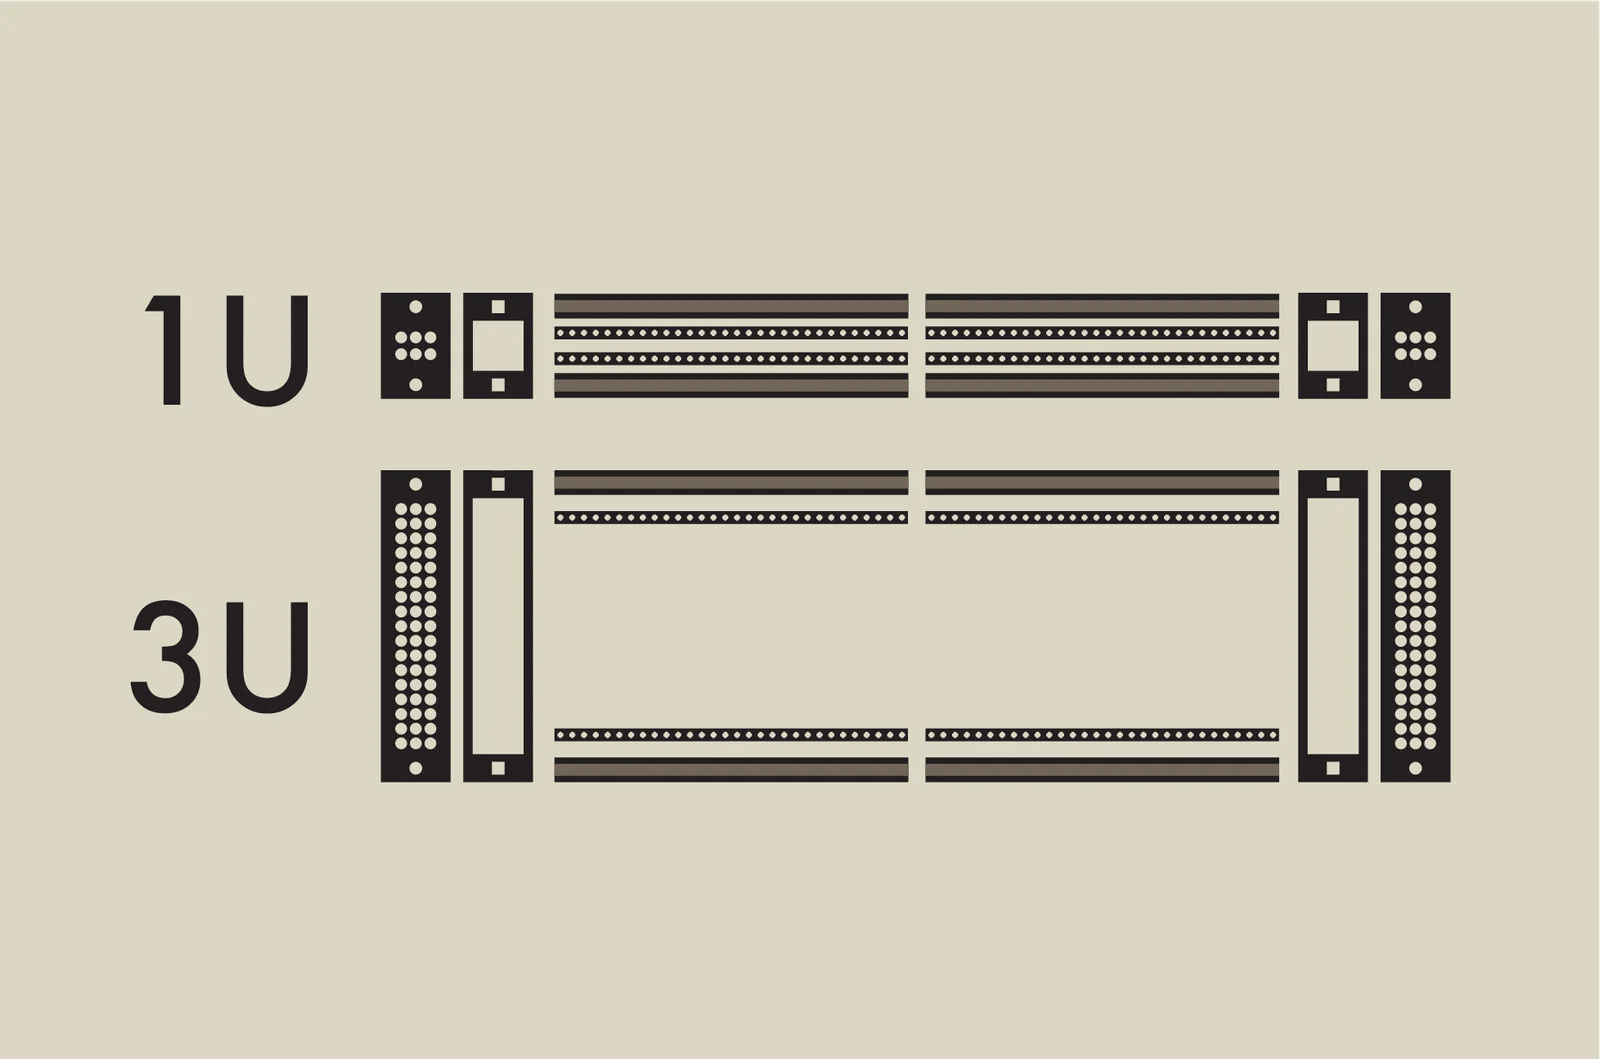
The standard 3U size is the default, with 1U modules also supported. The 1U rail set simply has a different side panel height; everything else is identical.
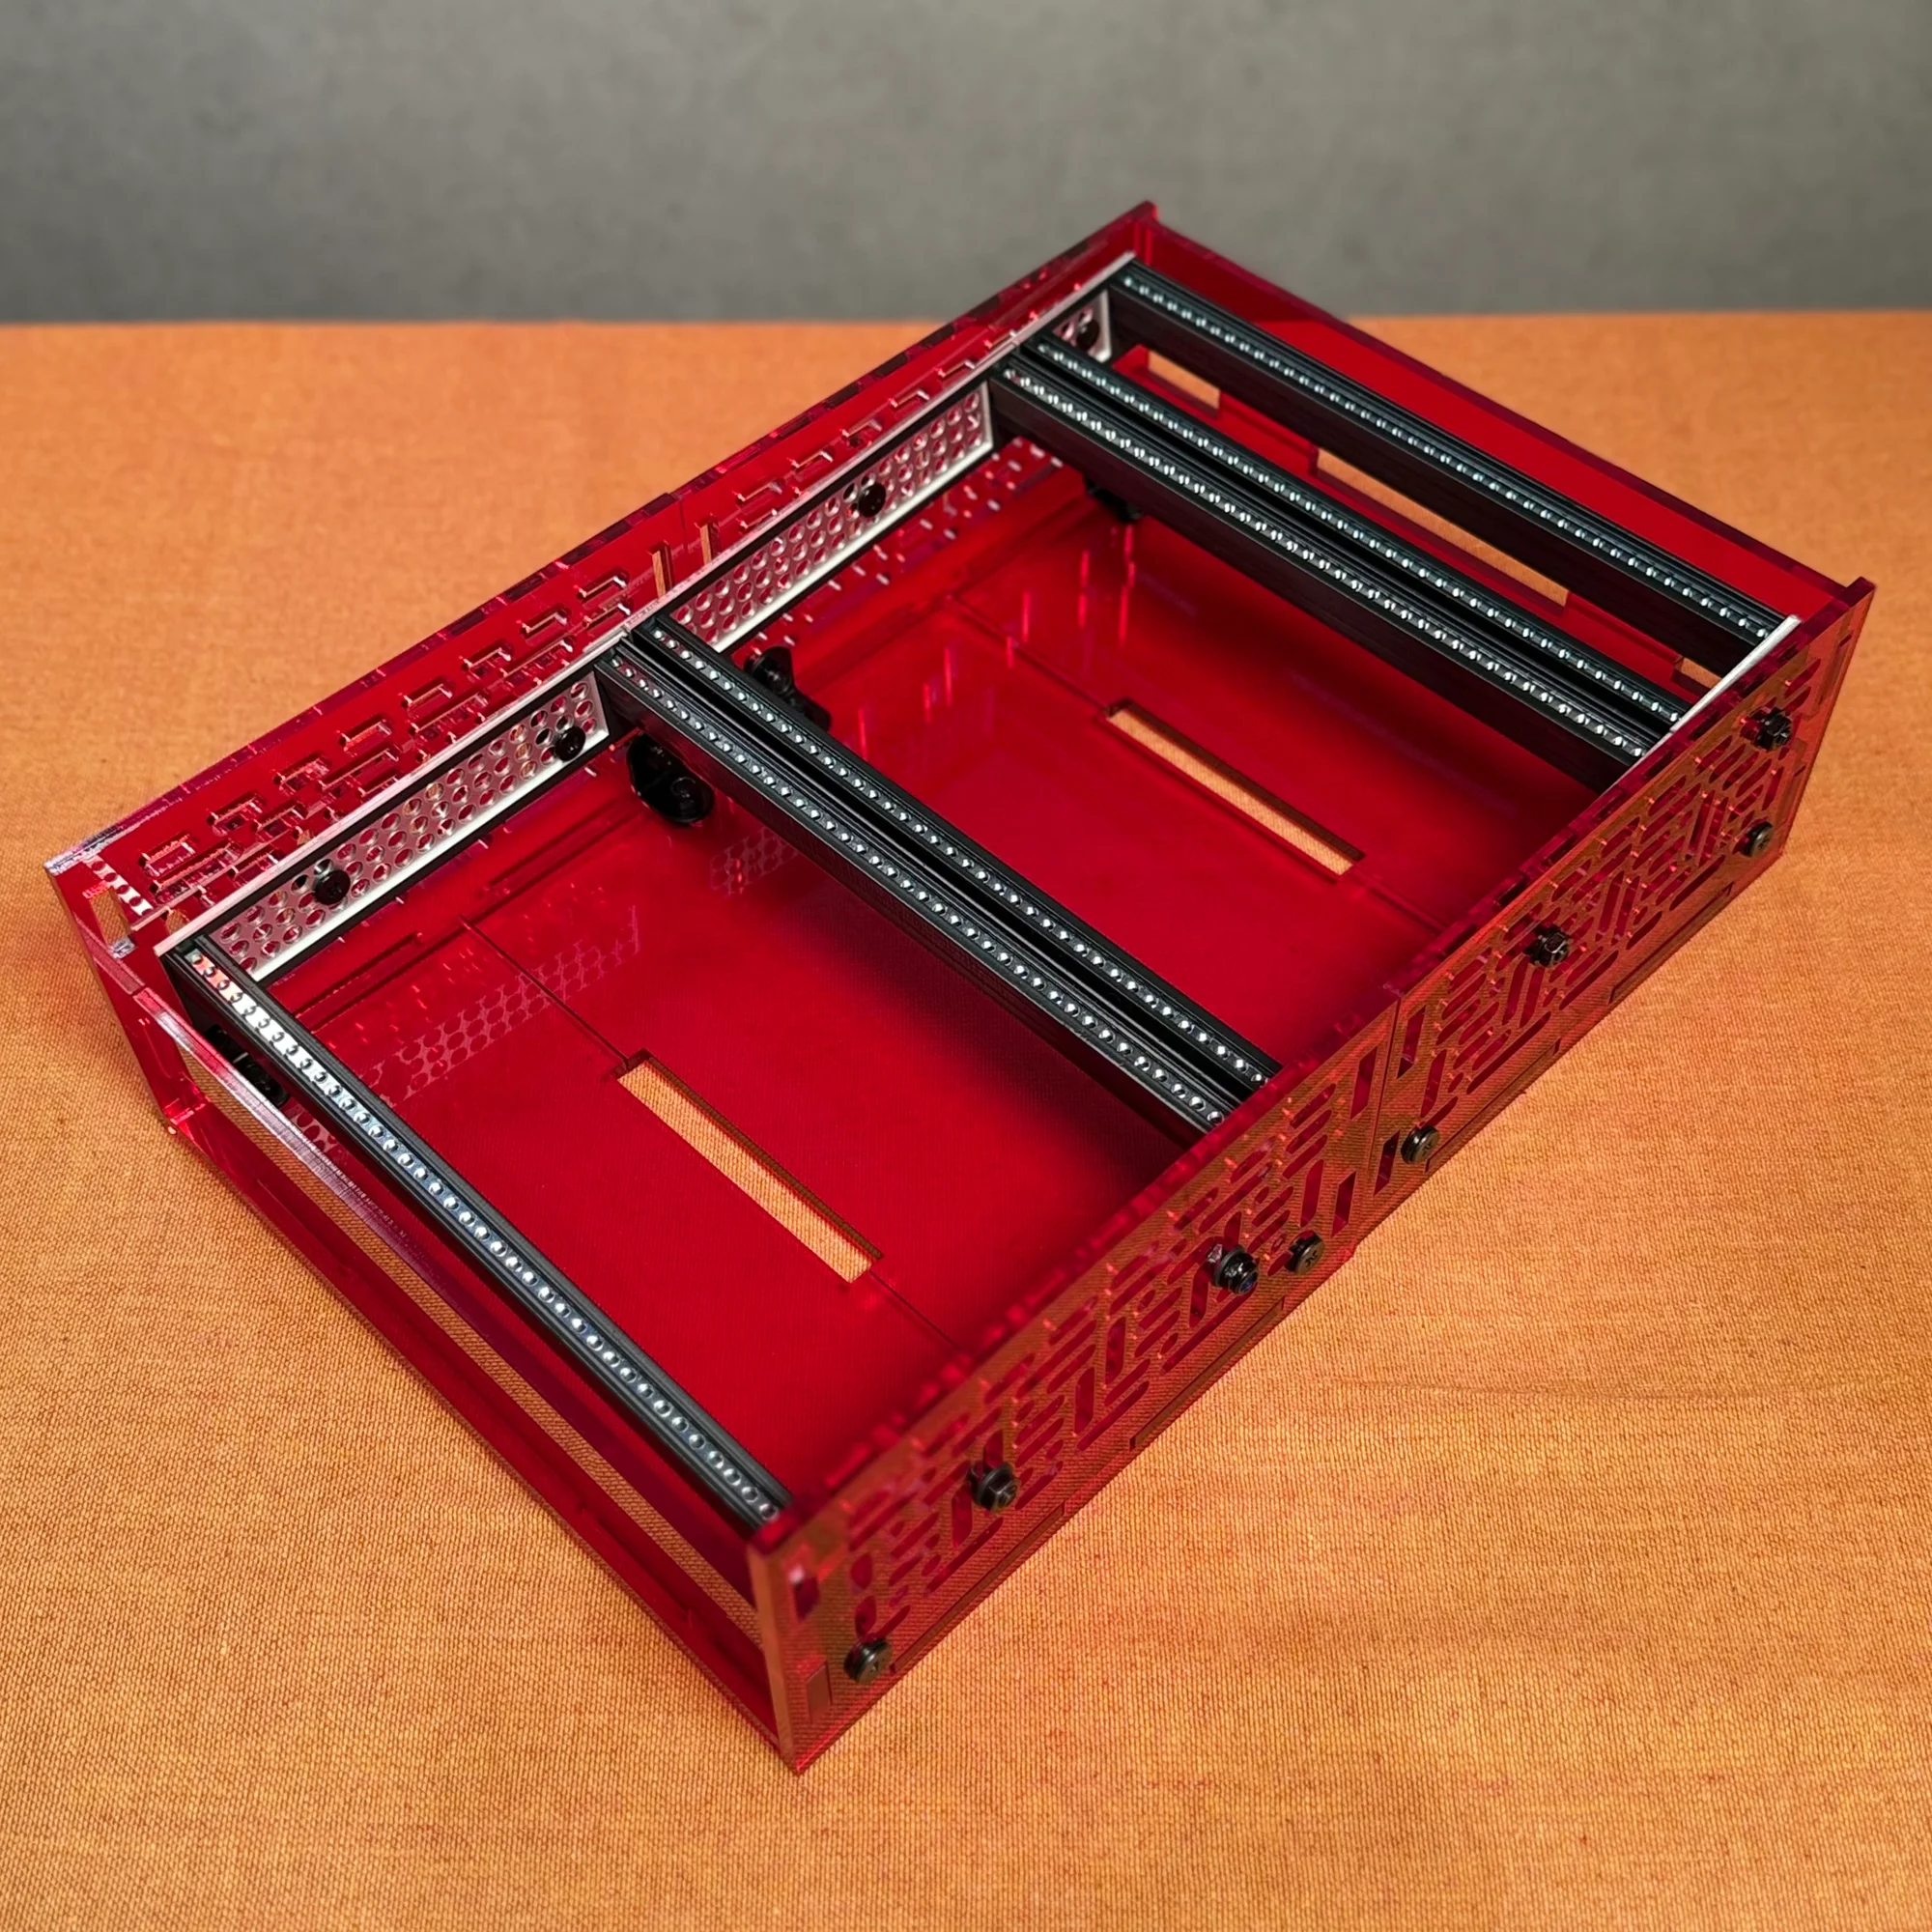
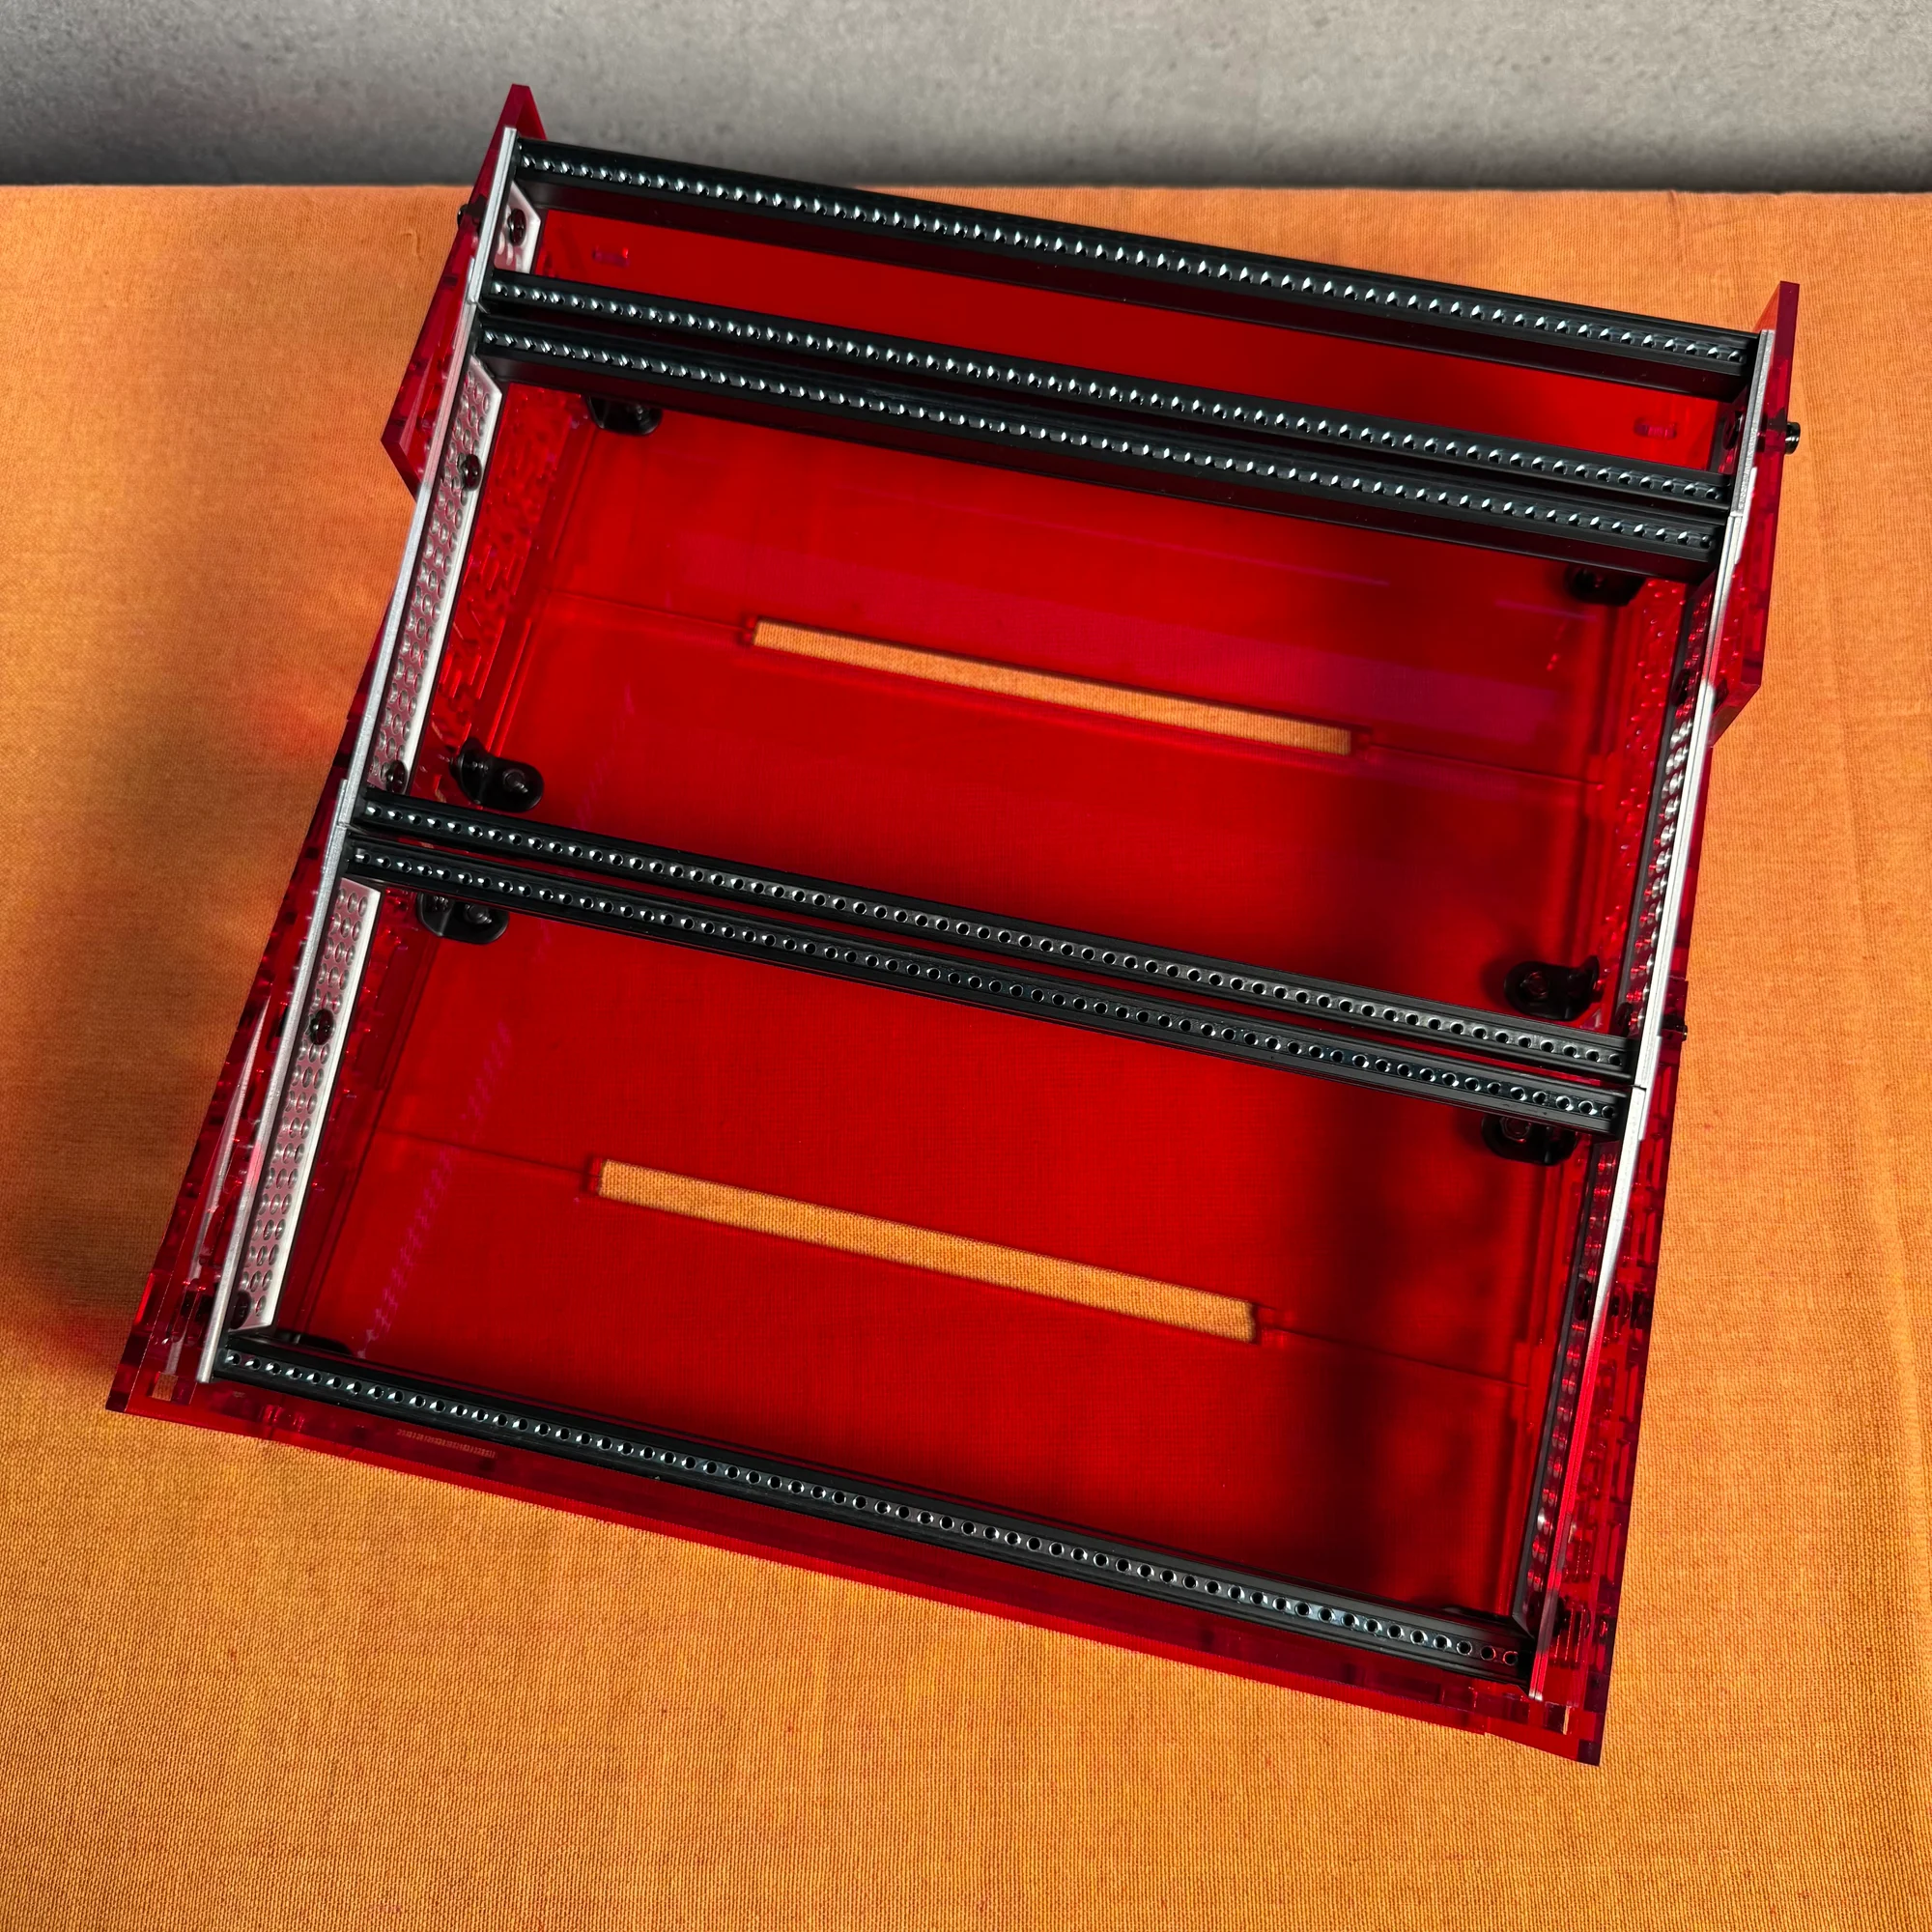
5. Rail Combinations
For each set you purchase, you can choose between 3U or 1U frame height.
For example, if you want a two-tier case with one 3U rail and one 1U rail, purchase 2 sets and select the 3U + 1U combination.
If you want two 3U tiers plus one 1U tier, purchase 3 sets and select the 3U + 3U + 1U combination.
If you want two 3U tiers with one 1U tier above and below, purchase 4 sets and select the 3U + 3U + 1U + 1U combination.
Flexible combinations are possible to match your case size.
Note: The price per set is the same for 3U and 1U.
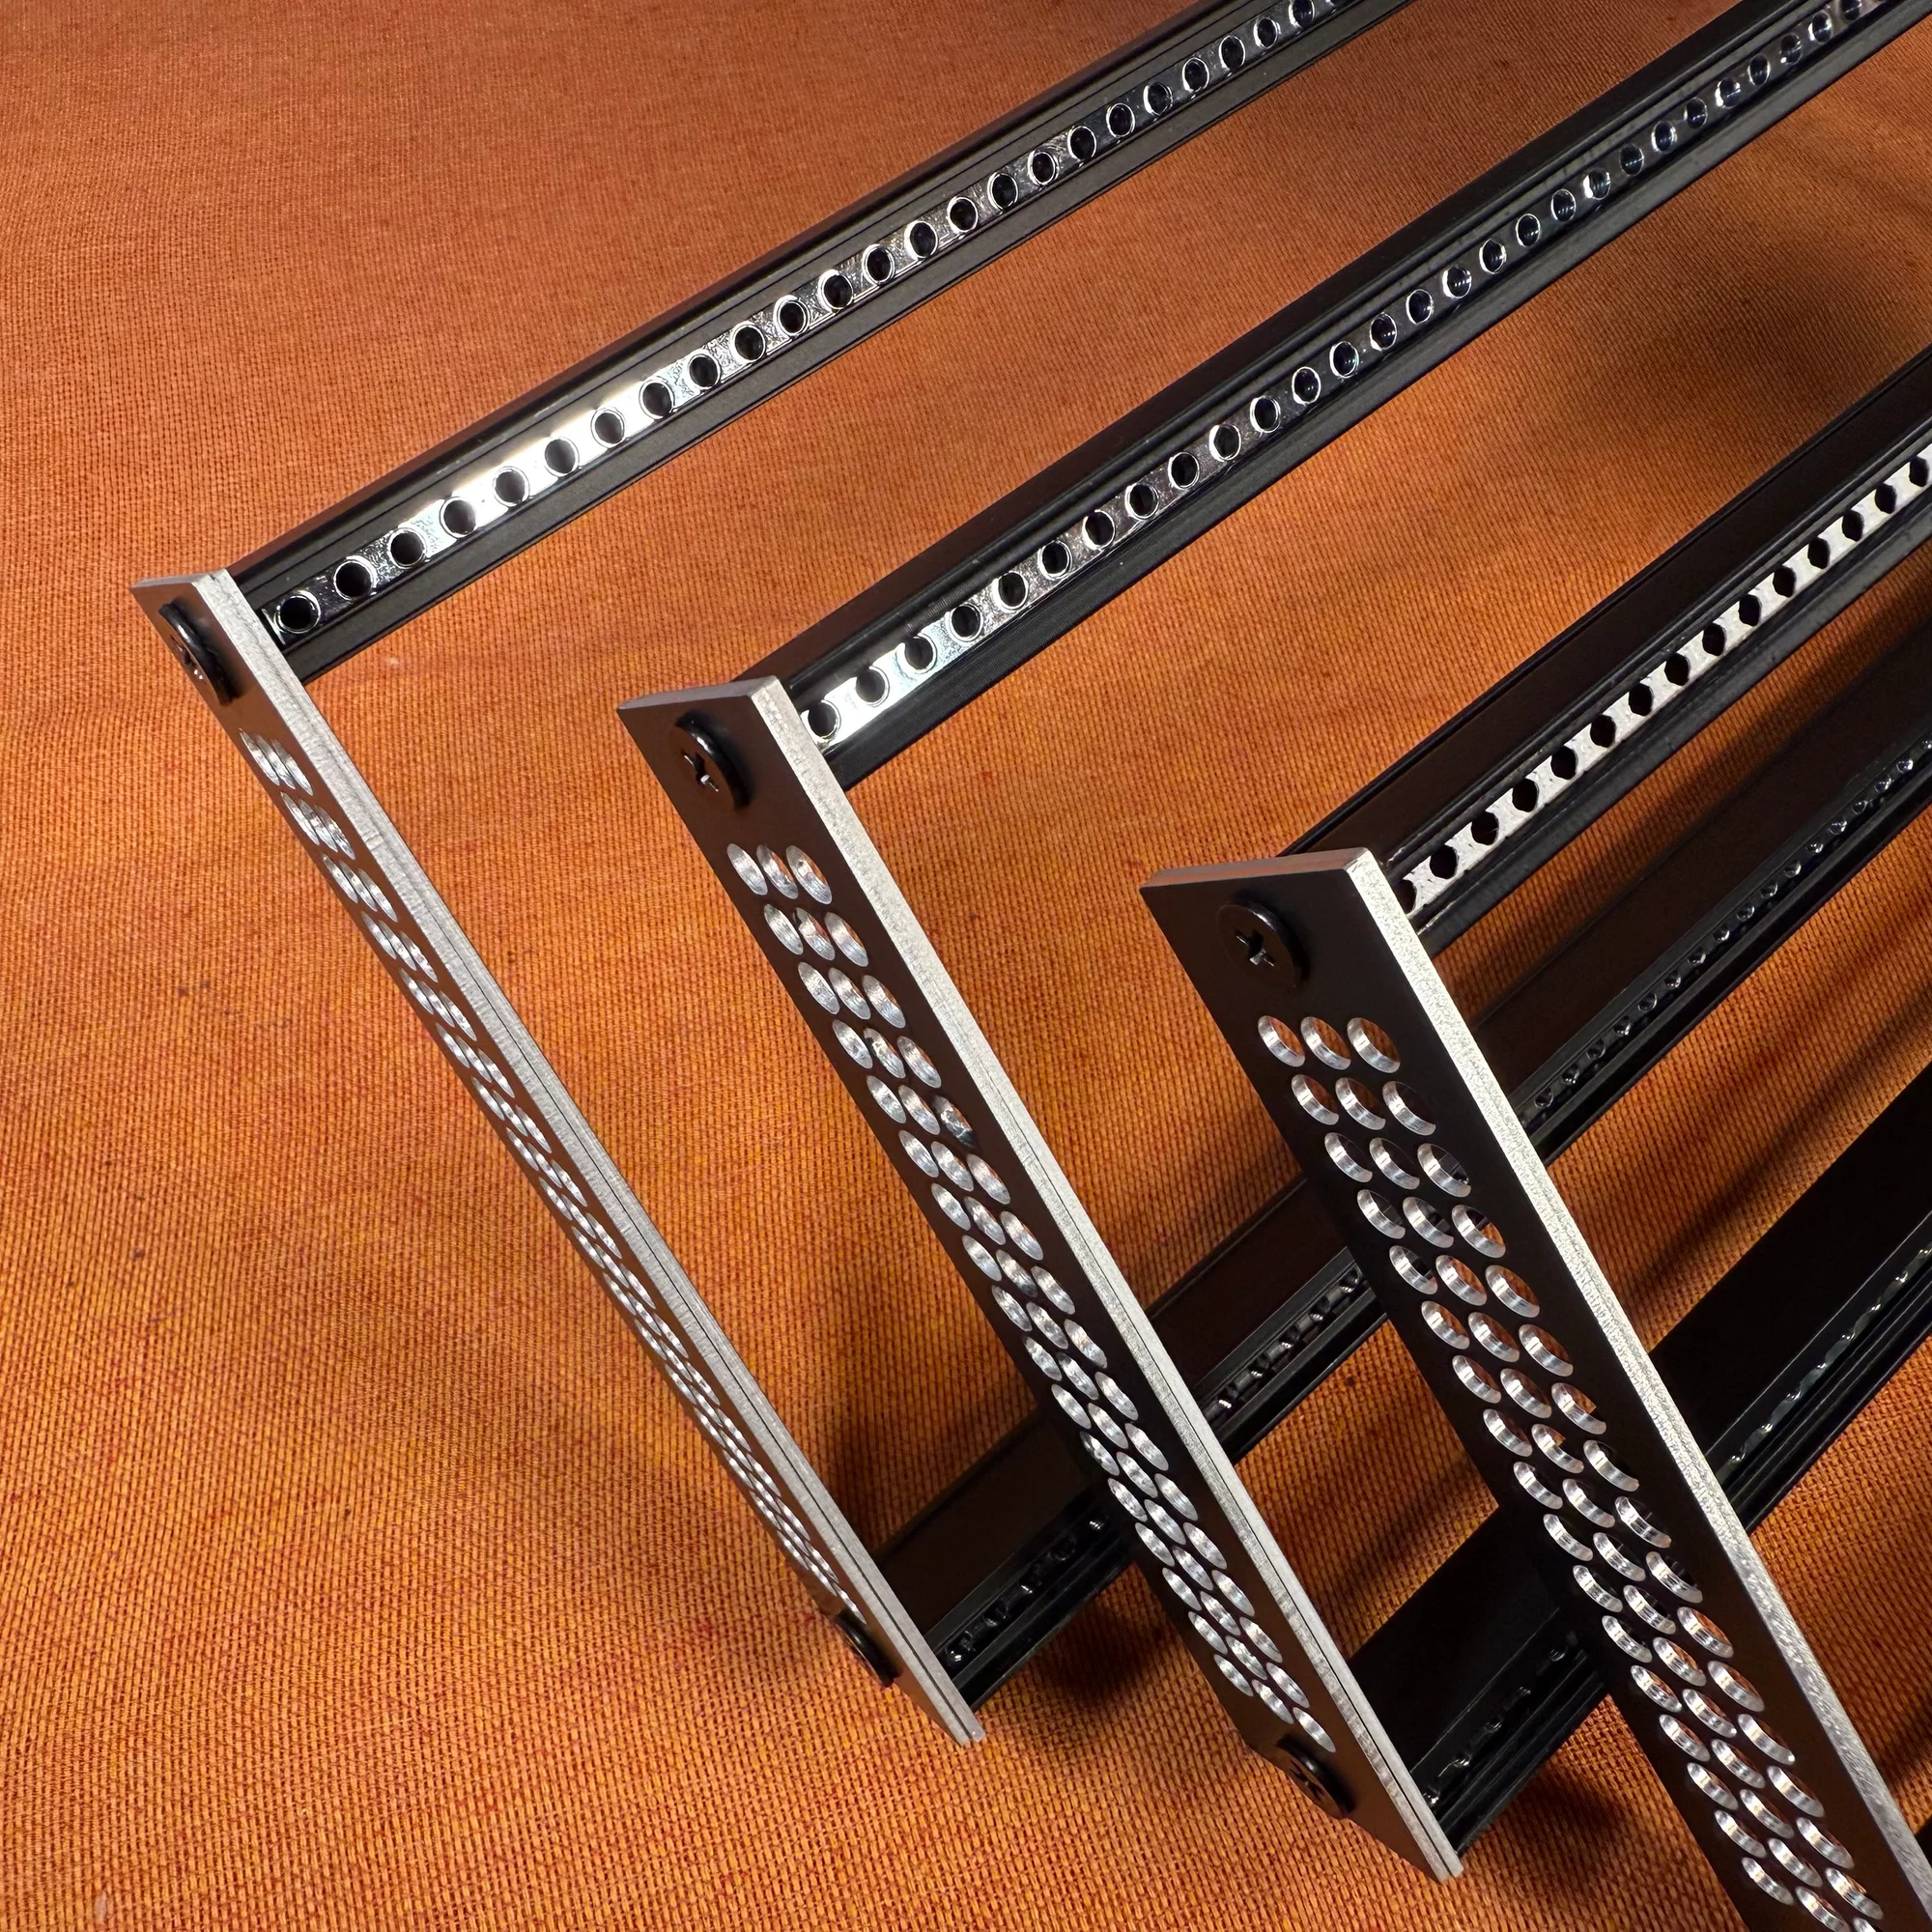
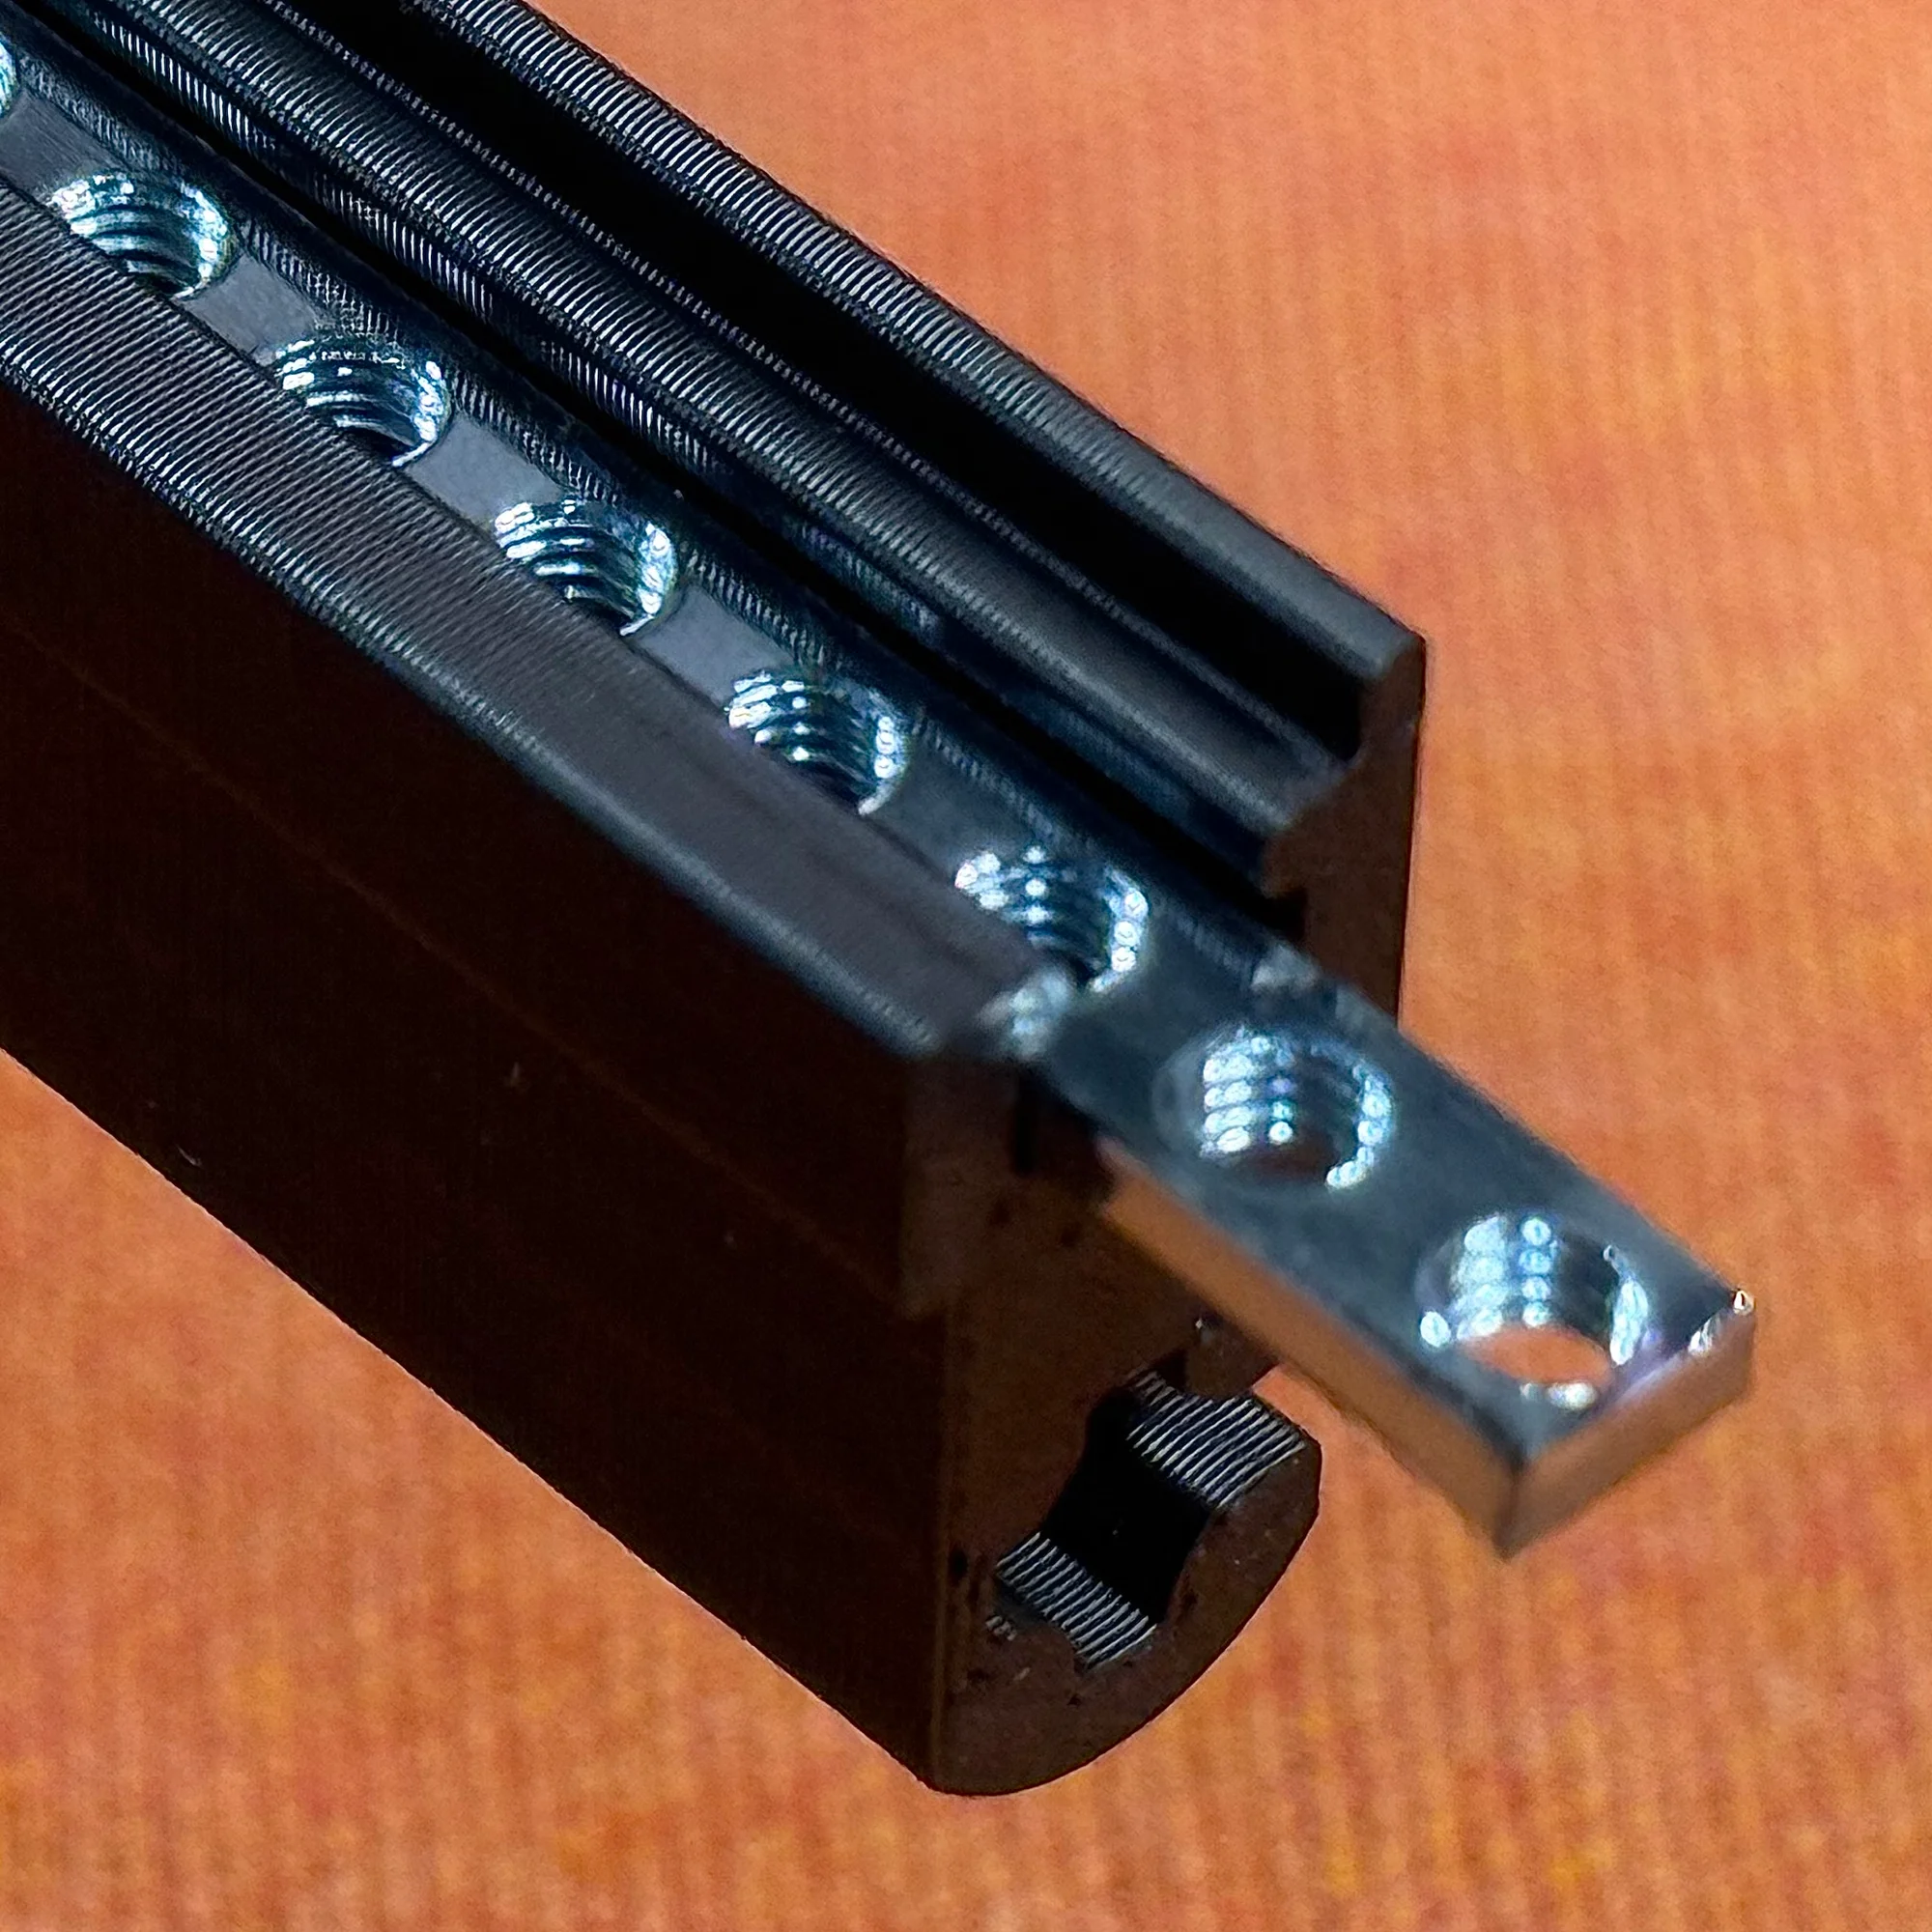
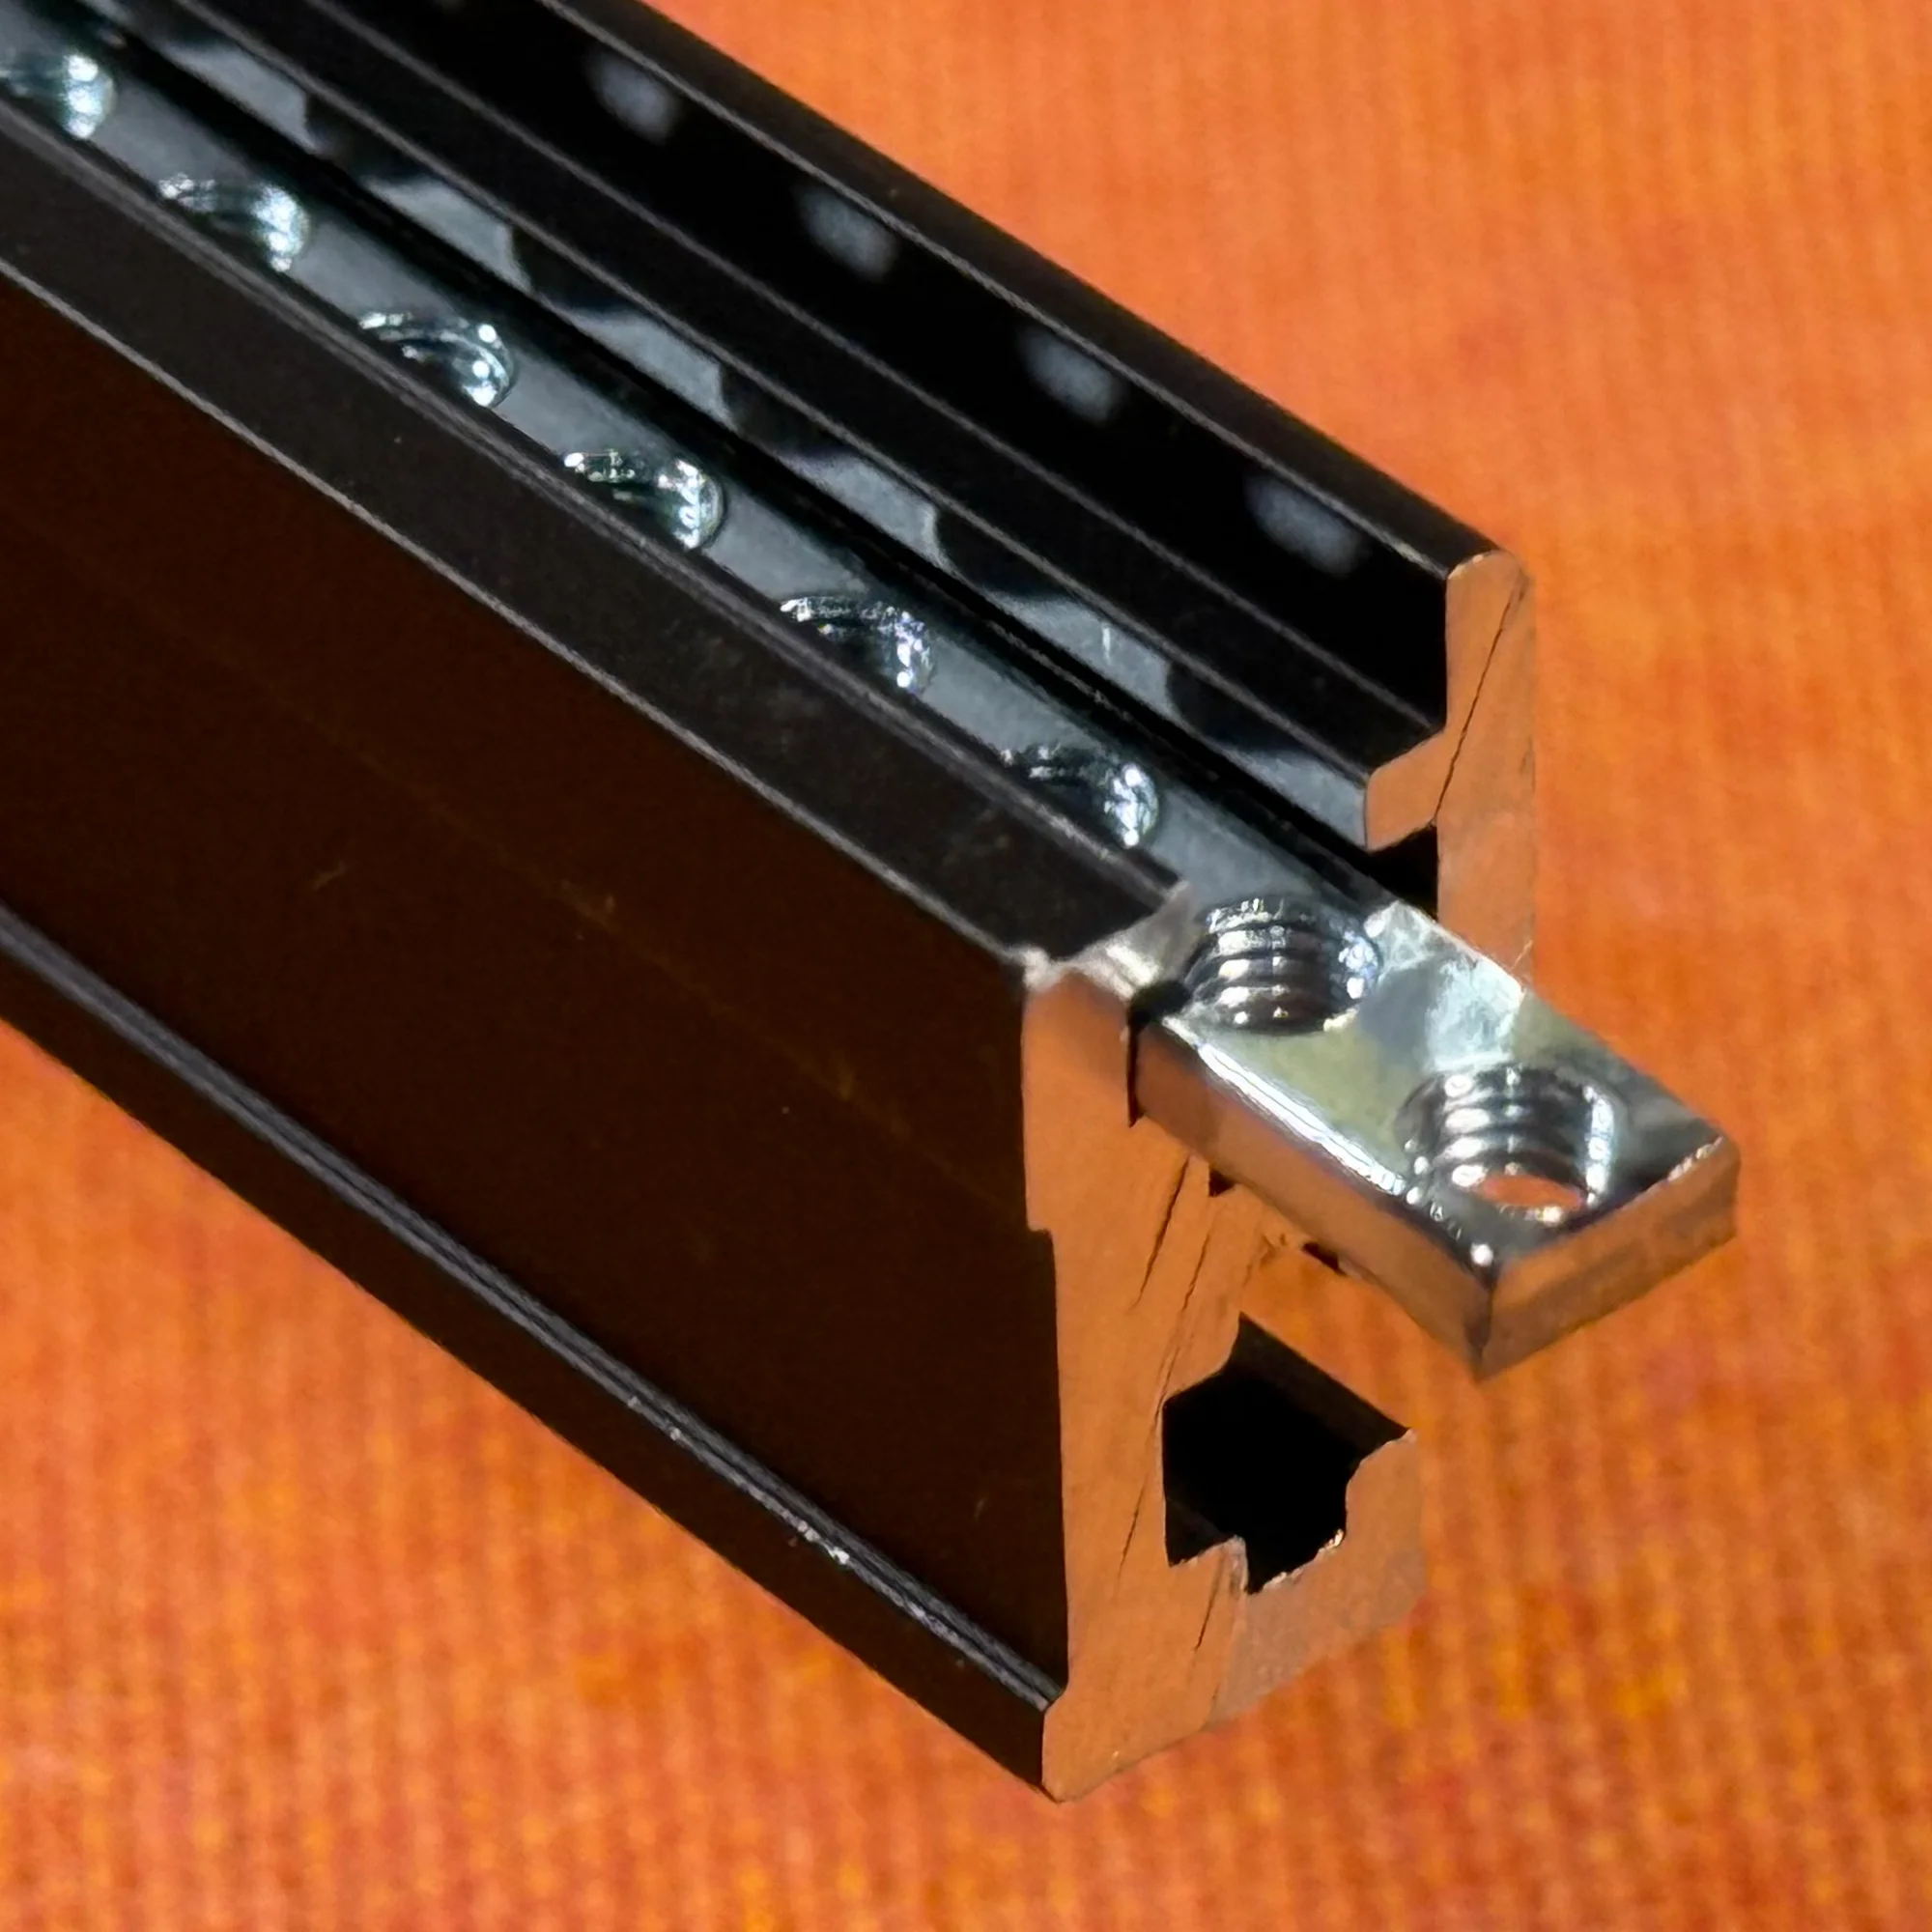
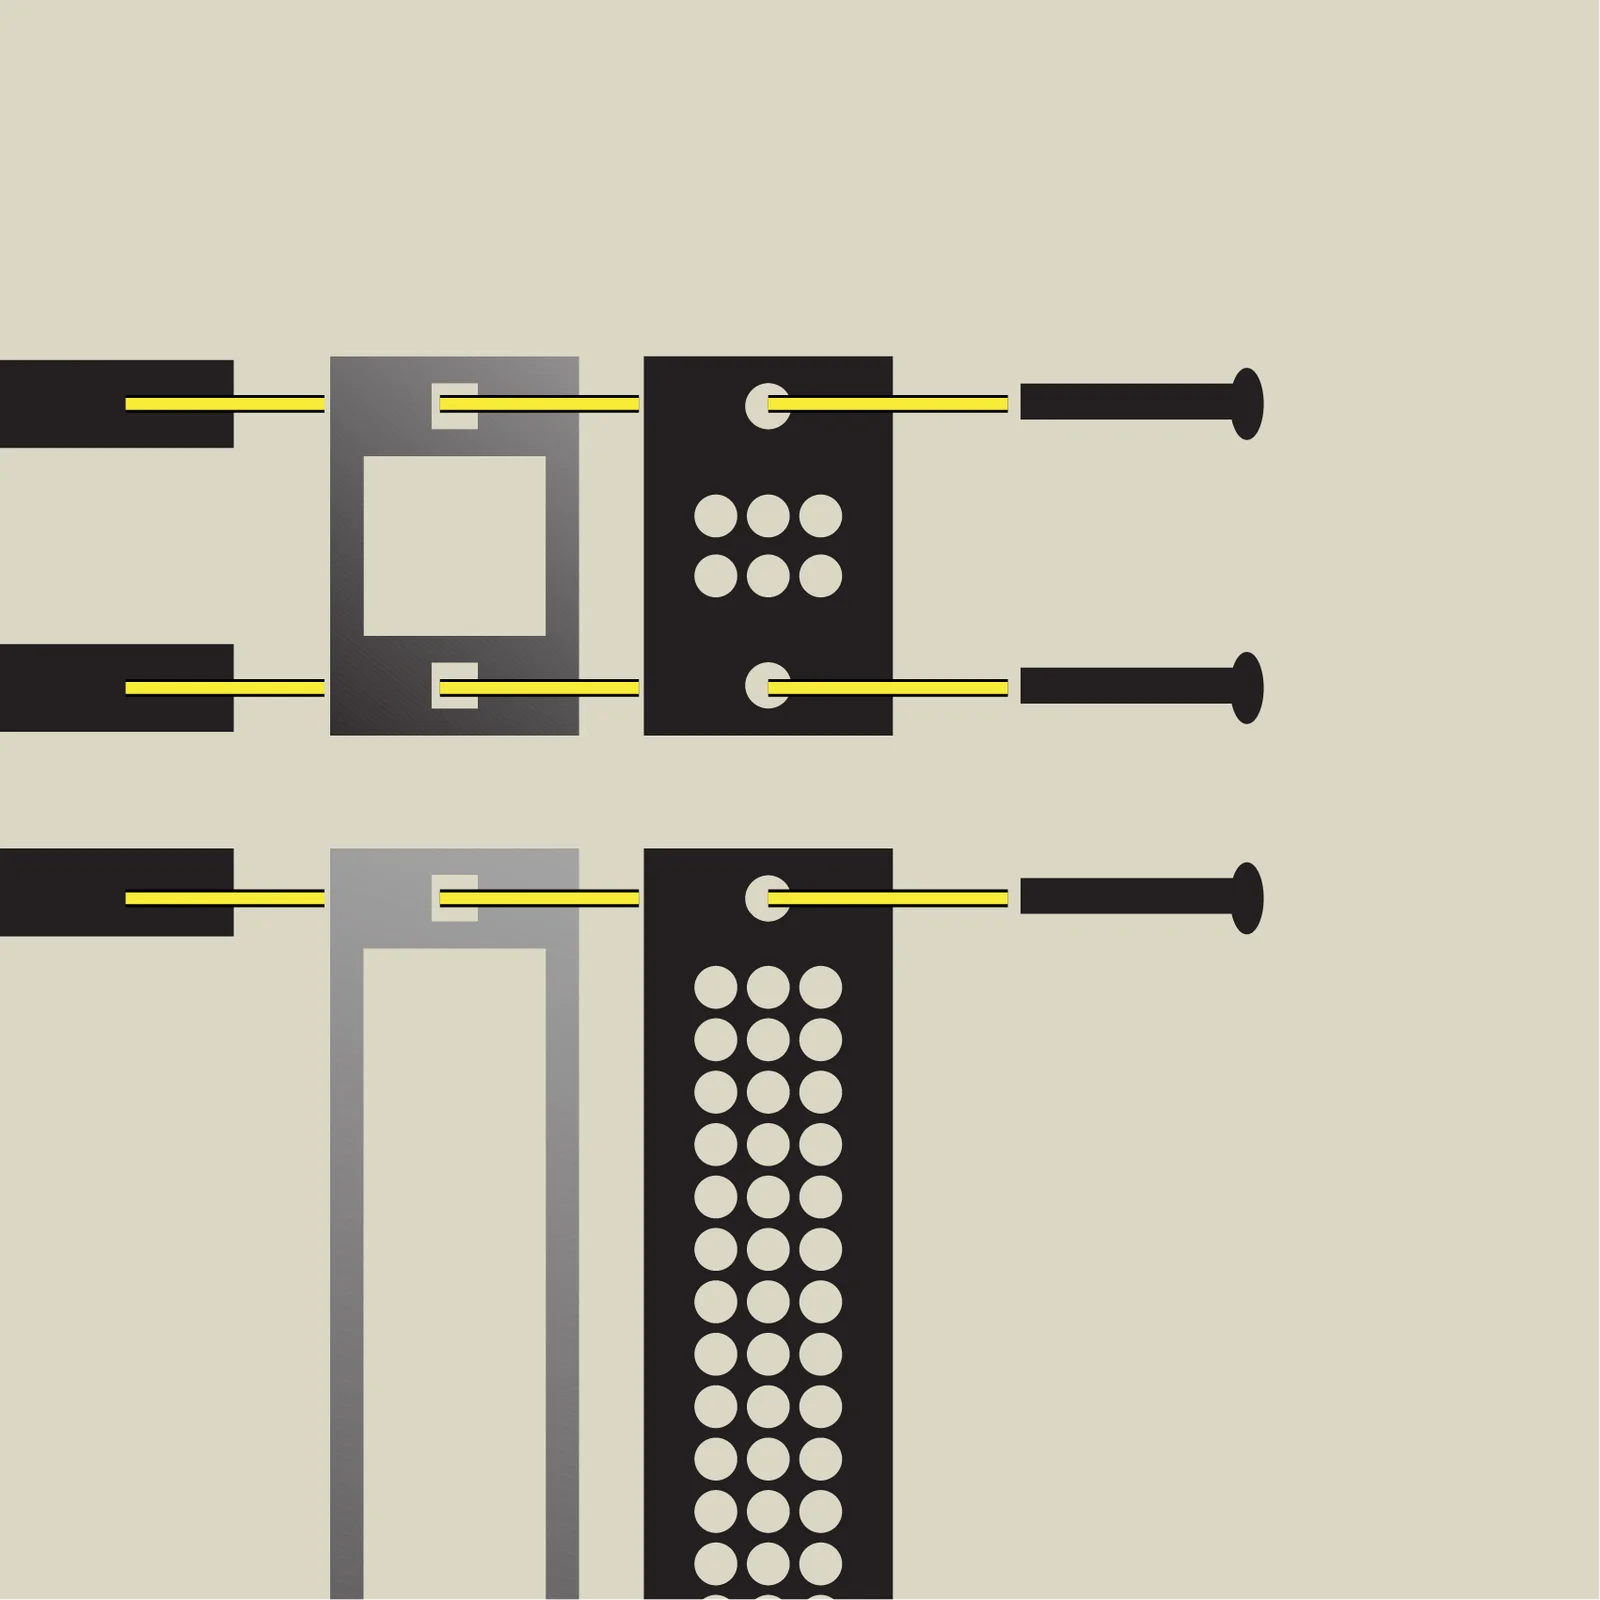
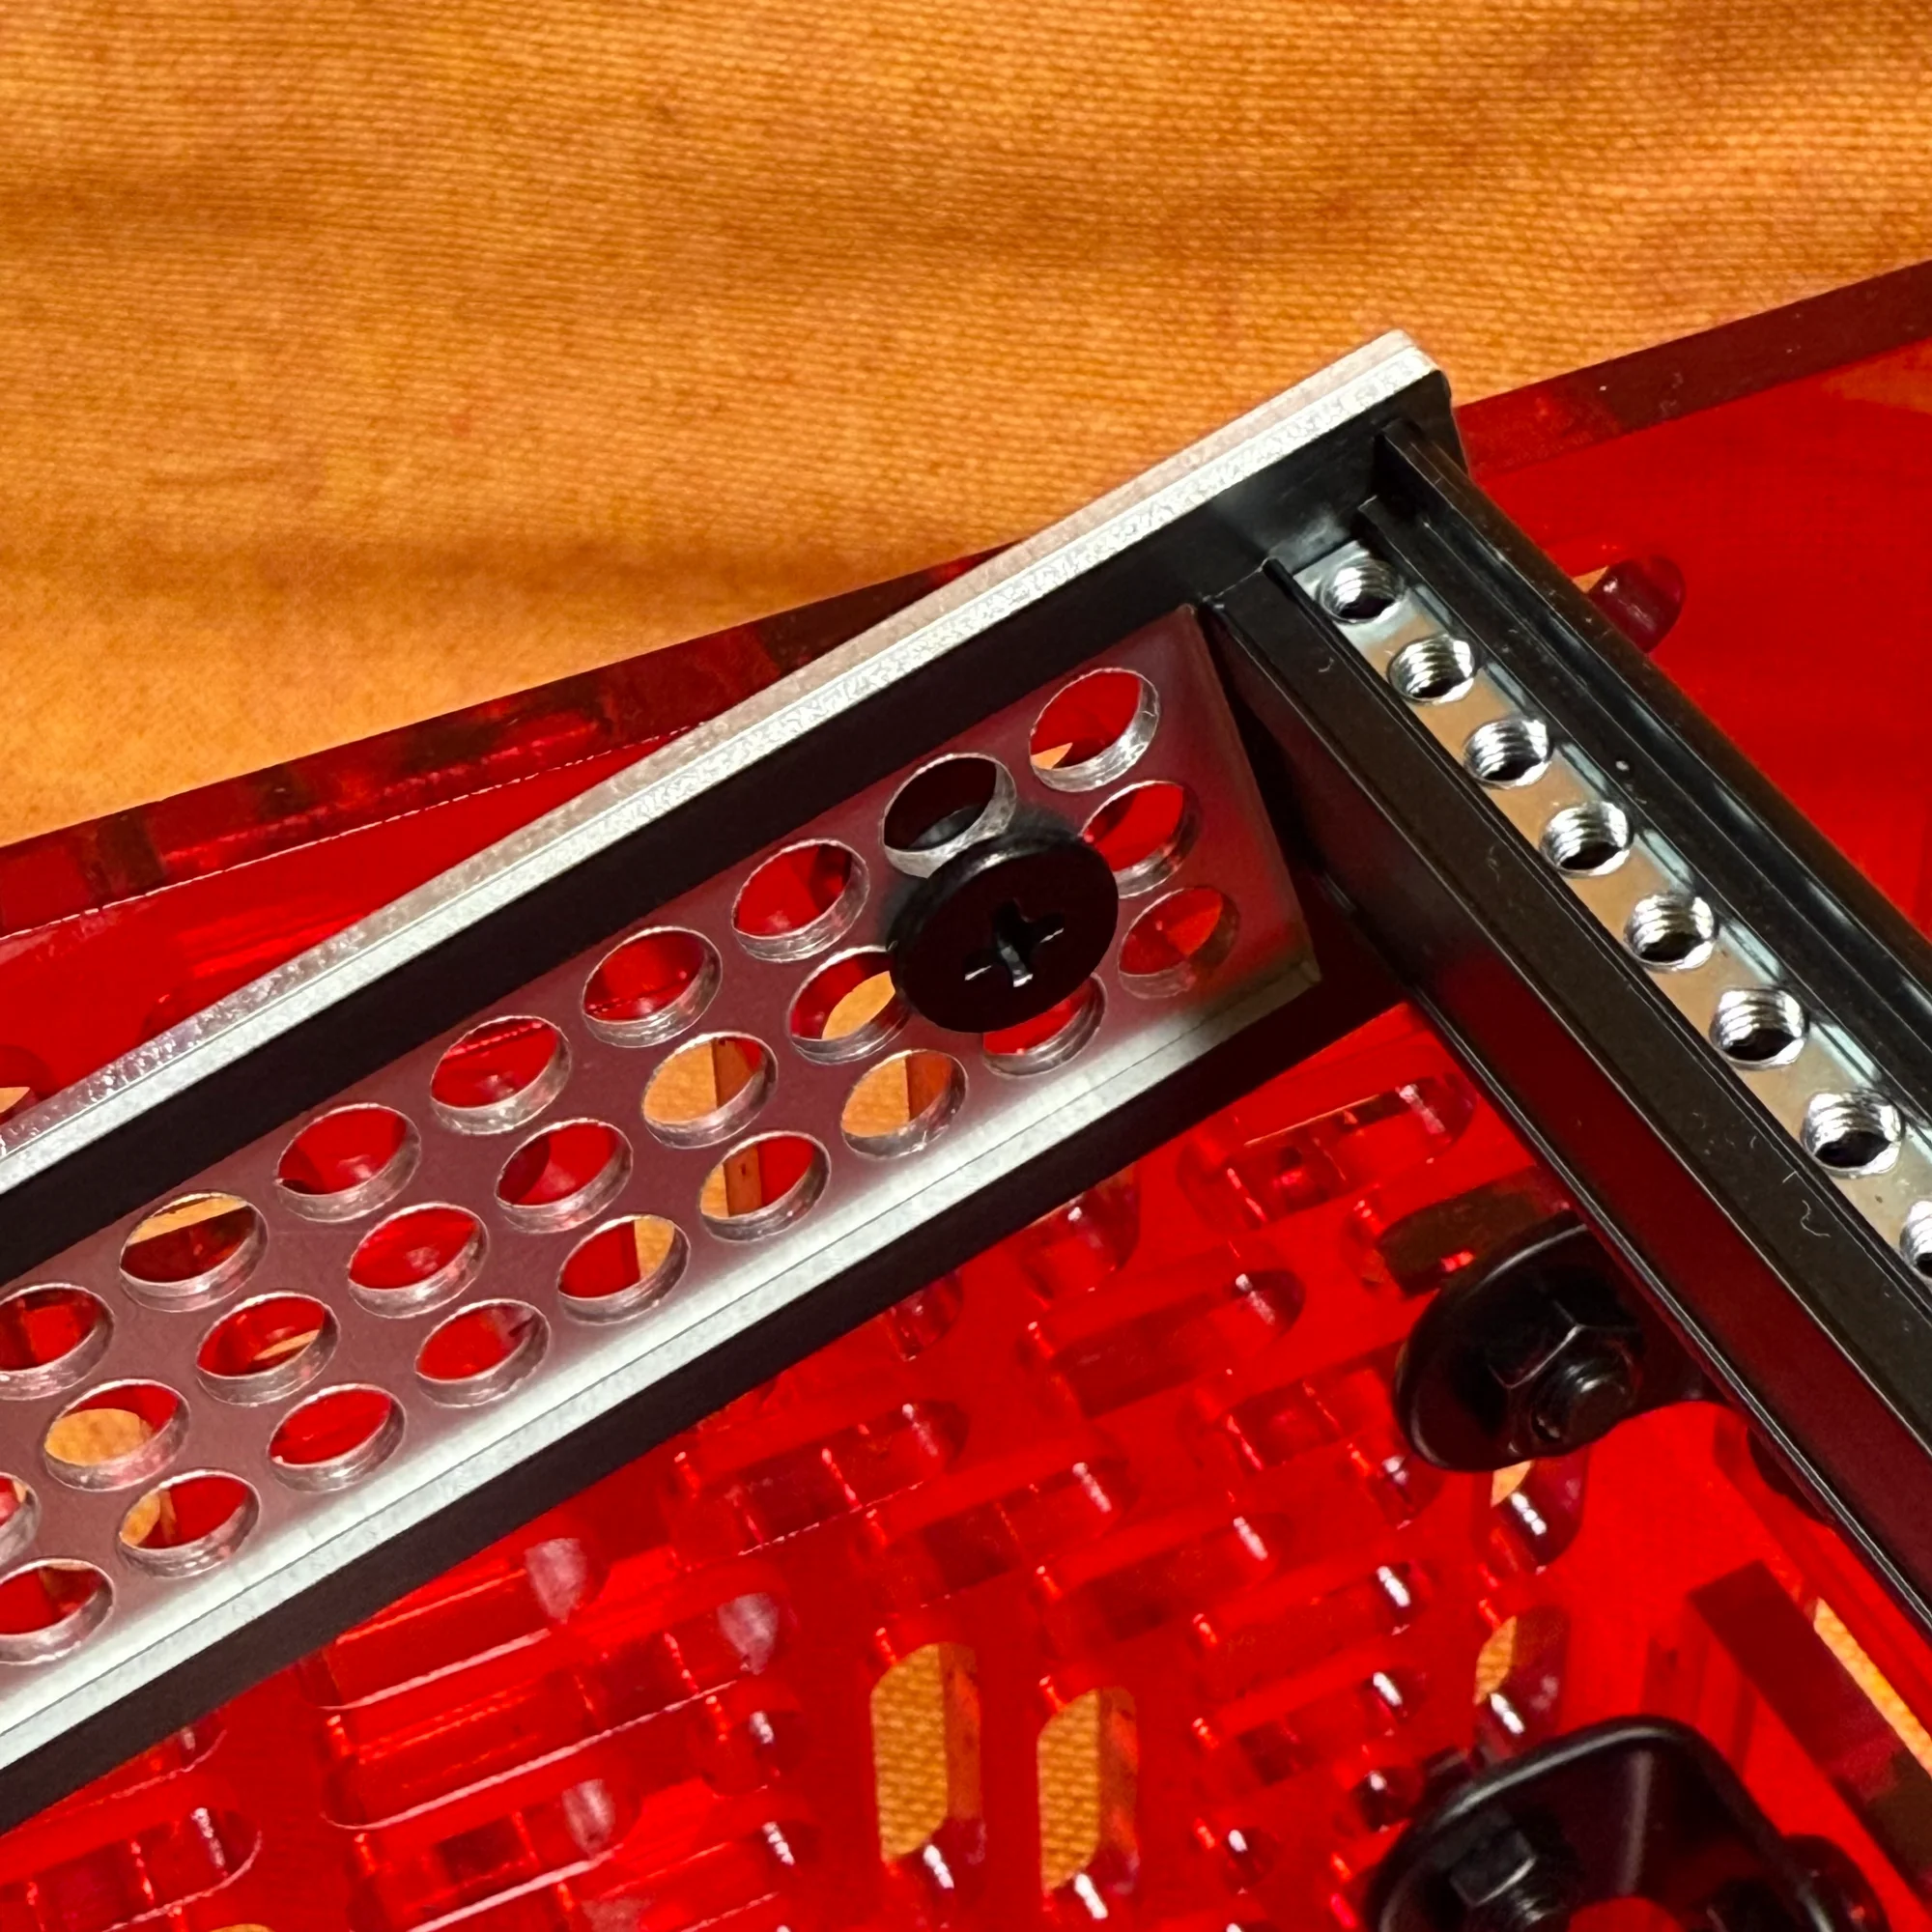
6. Rail Connector Panels
The zudo-rail comes with connector panels. These allow you to vertically expand rail sets. (The 40HP/60HP width itself cannot be changed.)
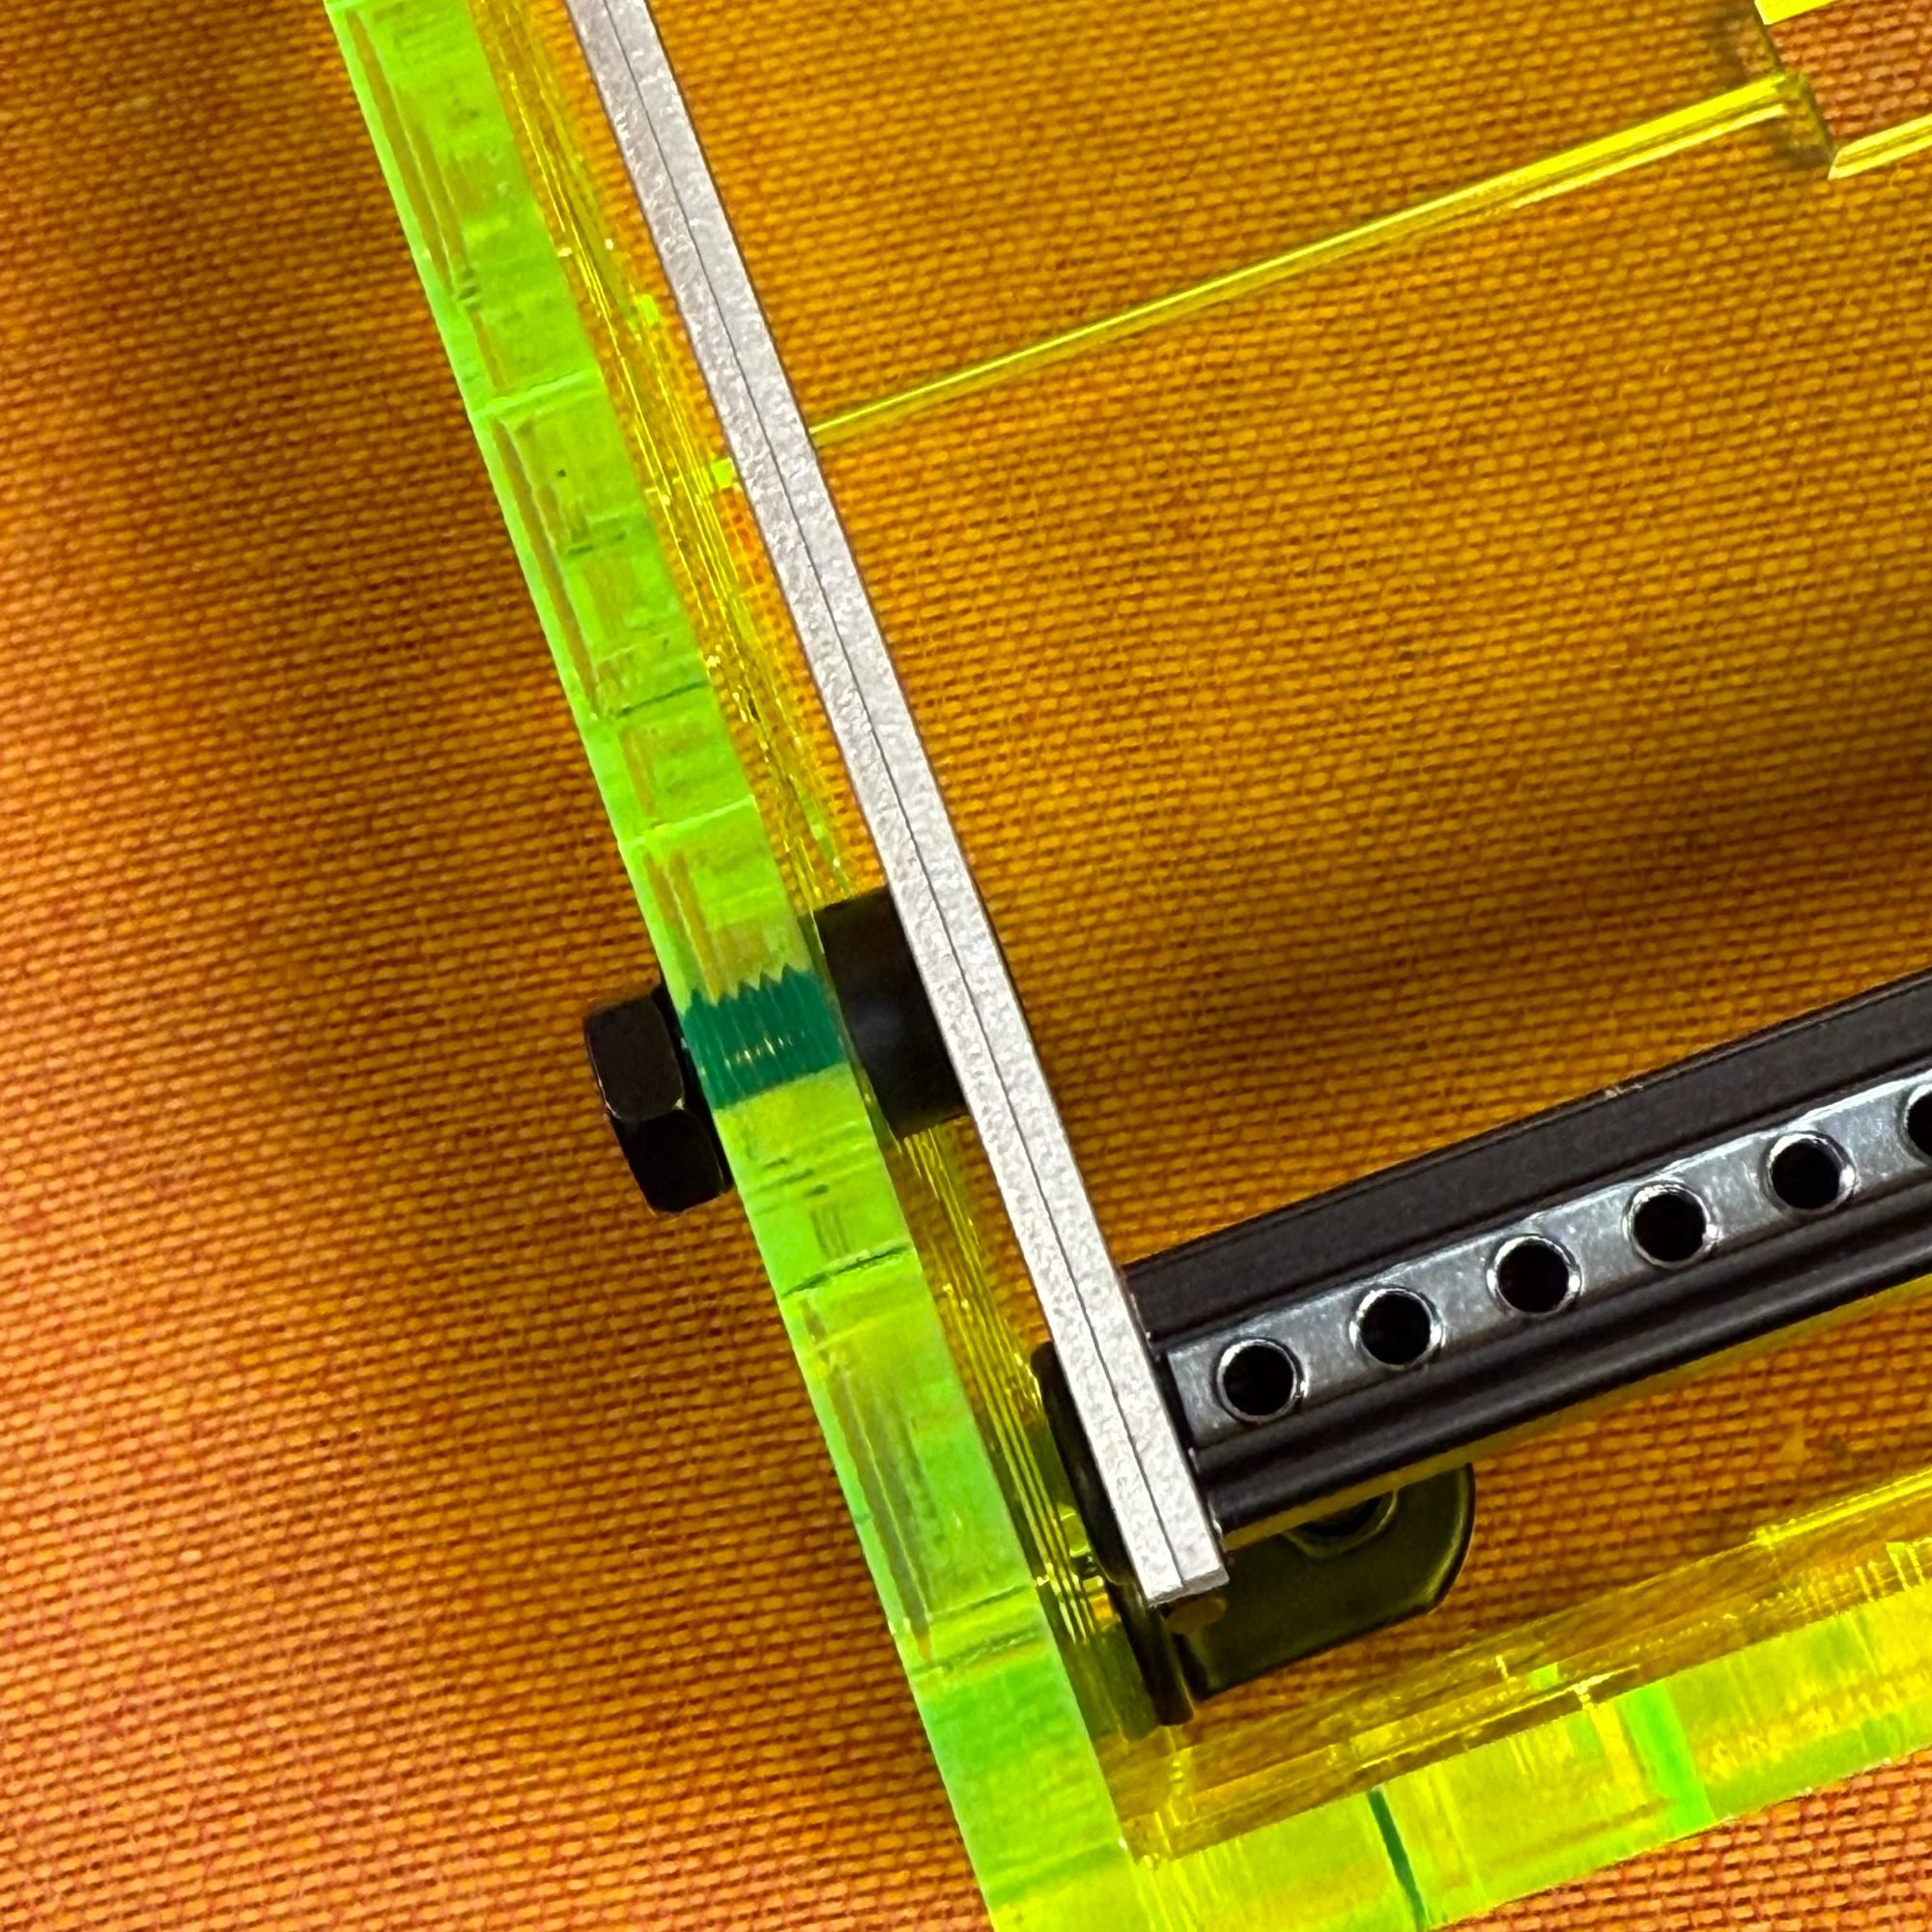
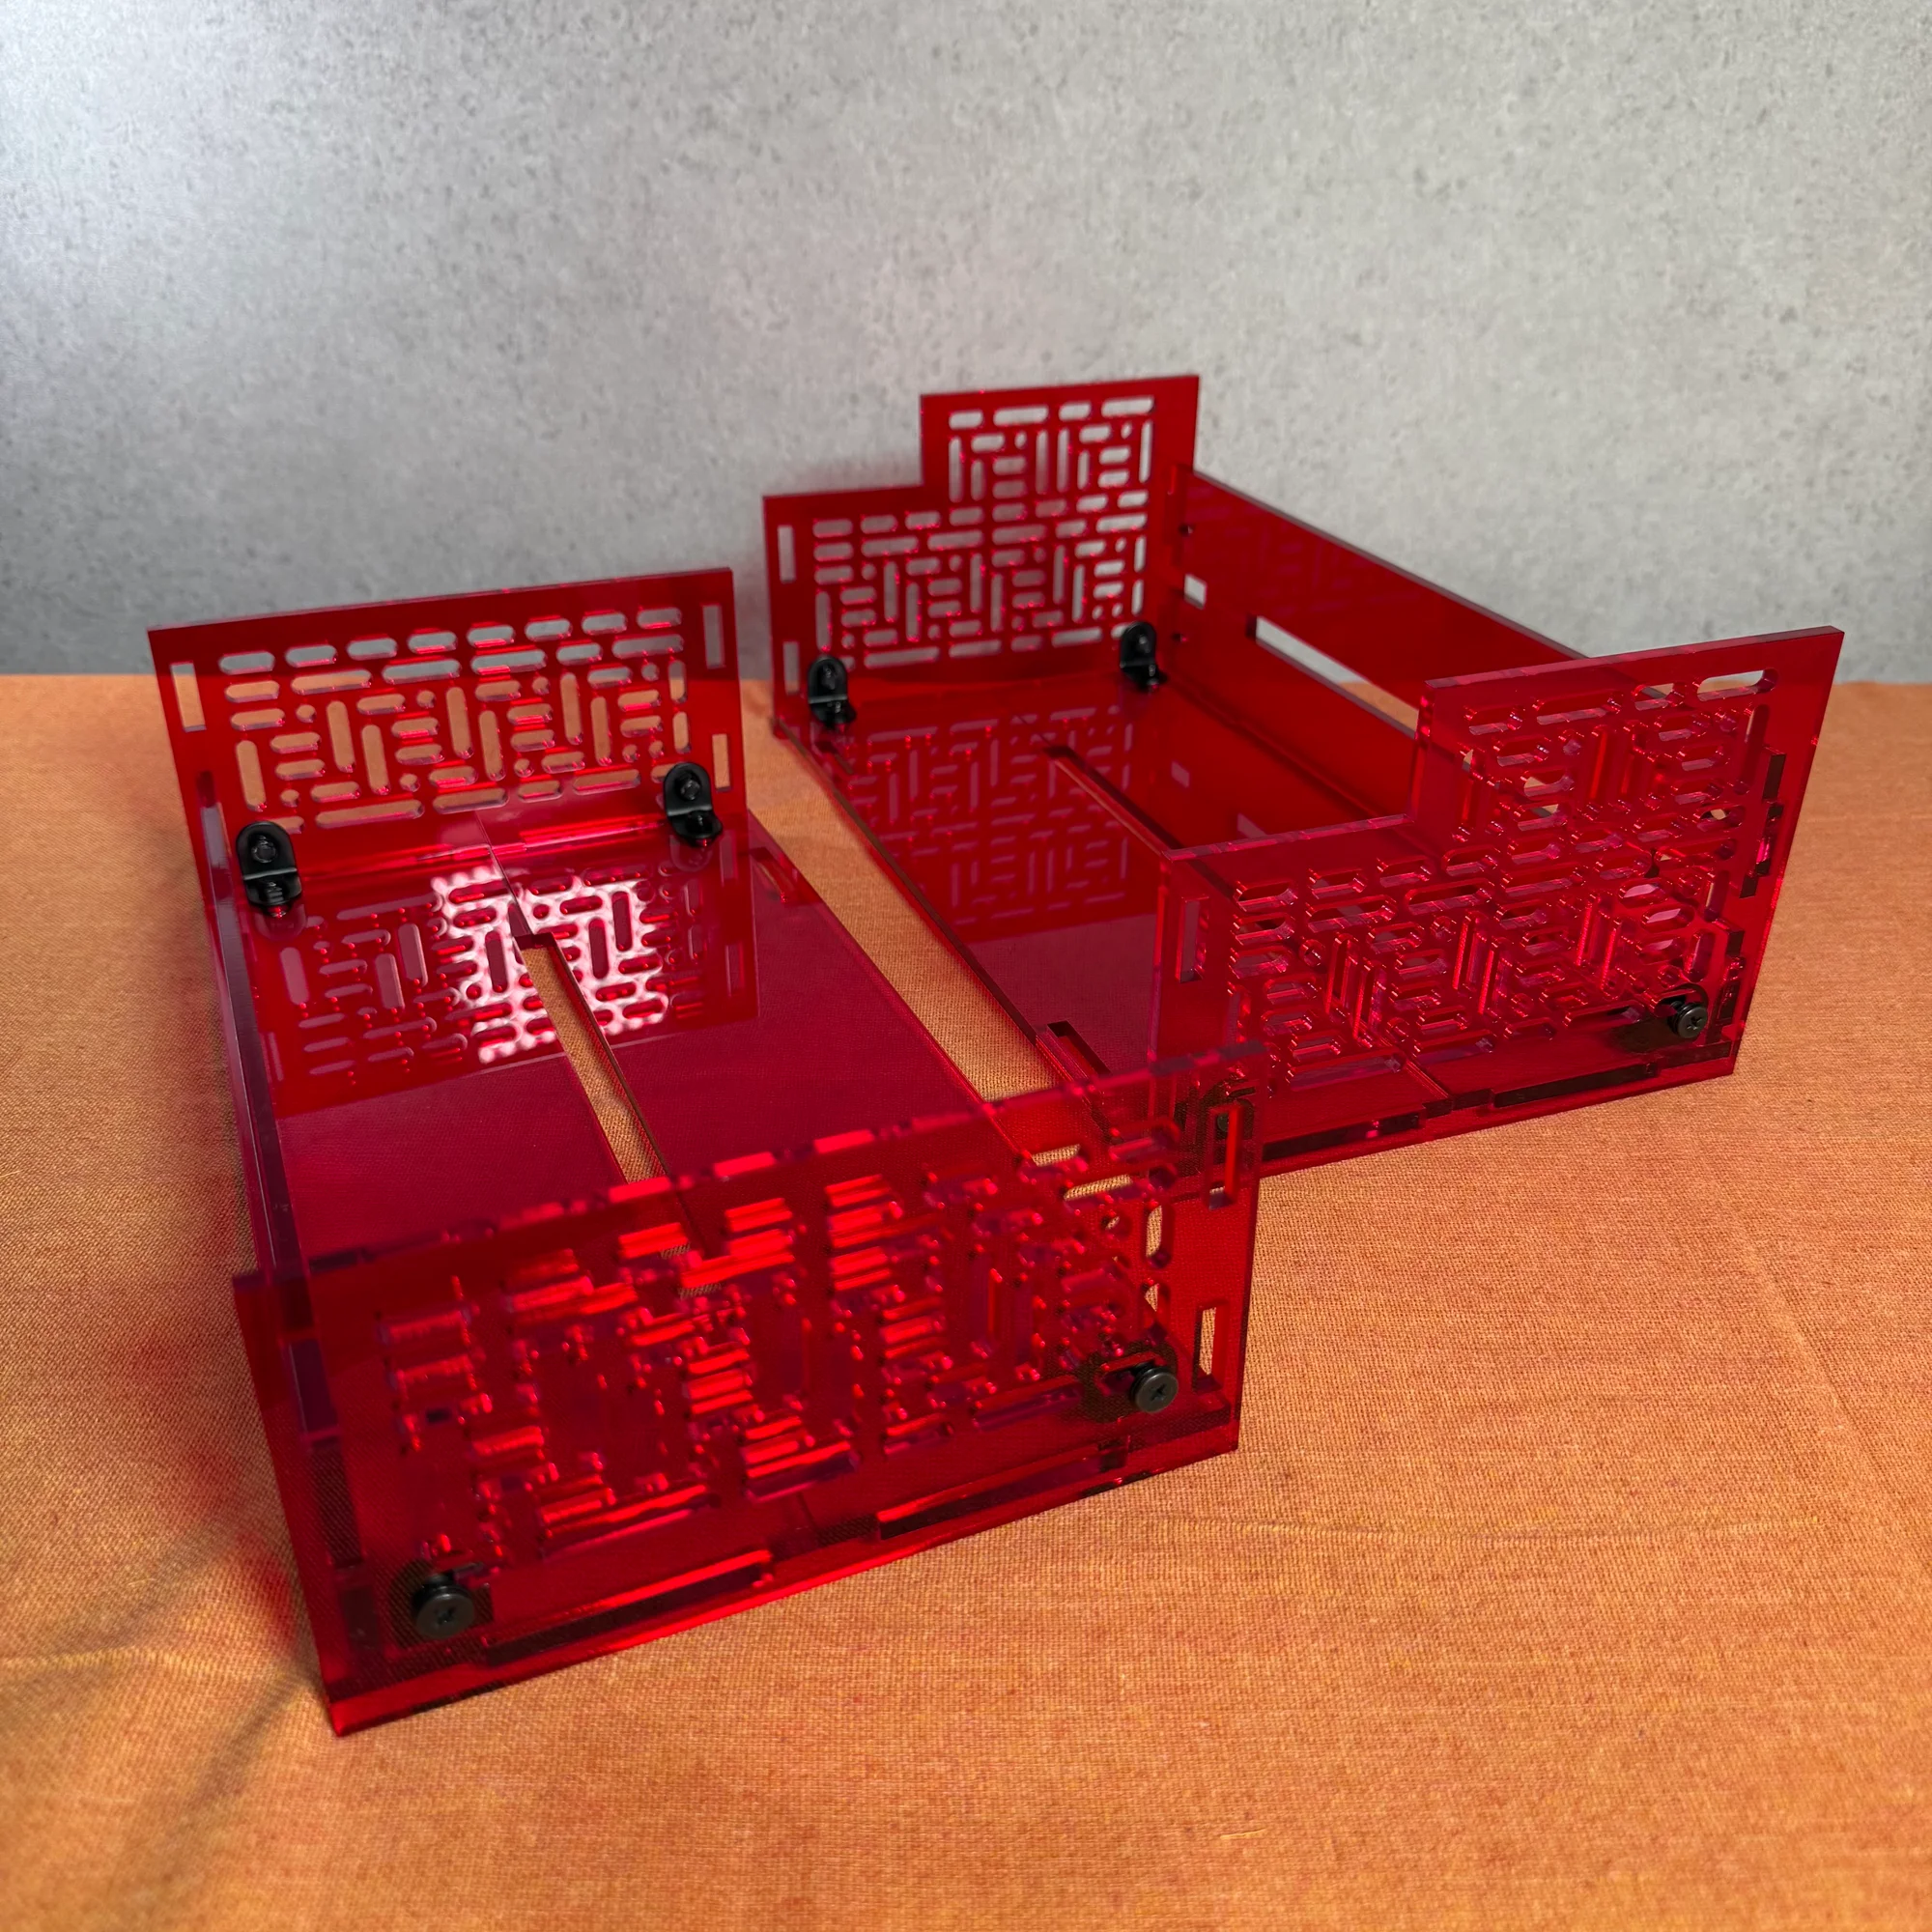
These connector panels are small panels that are sandwiched between rail frames, as shown below.

Using these panels is simple. When using a single set without connecting, the rail and side panels are fastened with screws. When connecting frame sets together, you add the connector panels on the outermost side and screw them in.
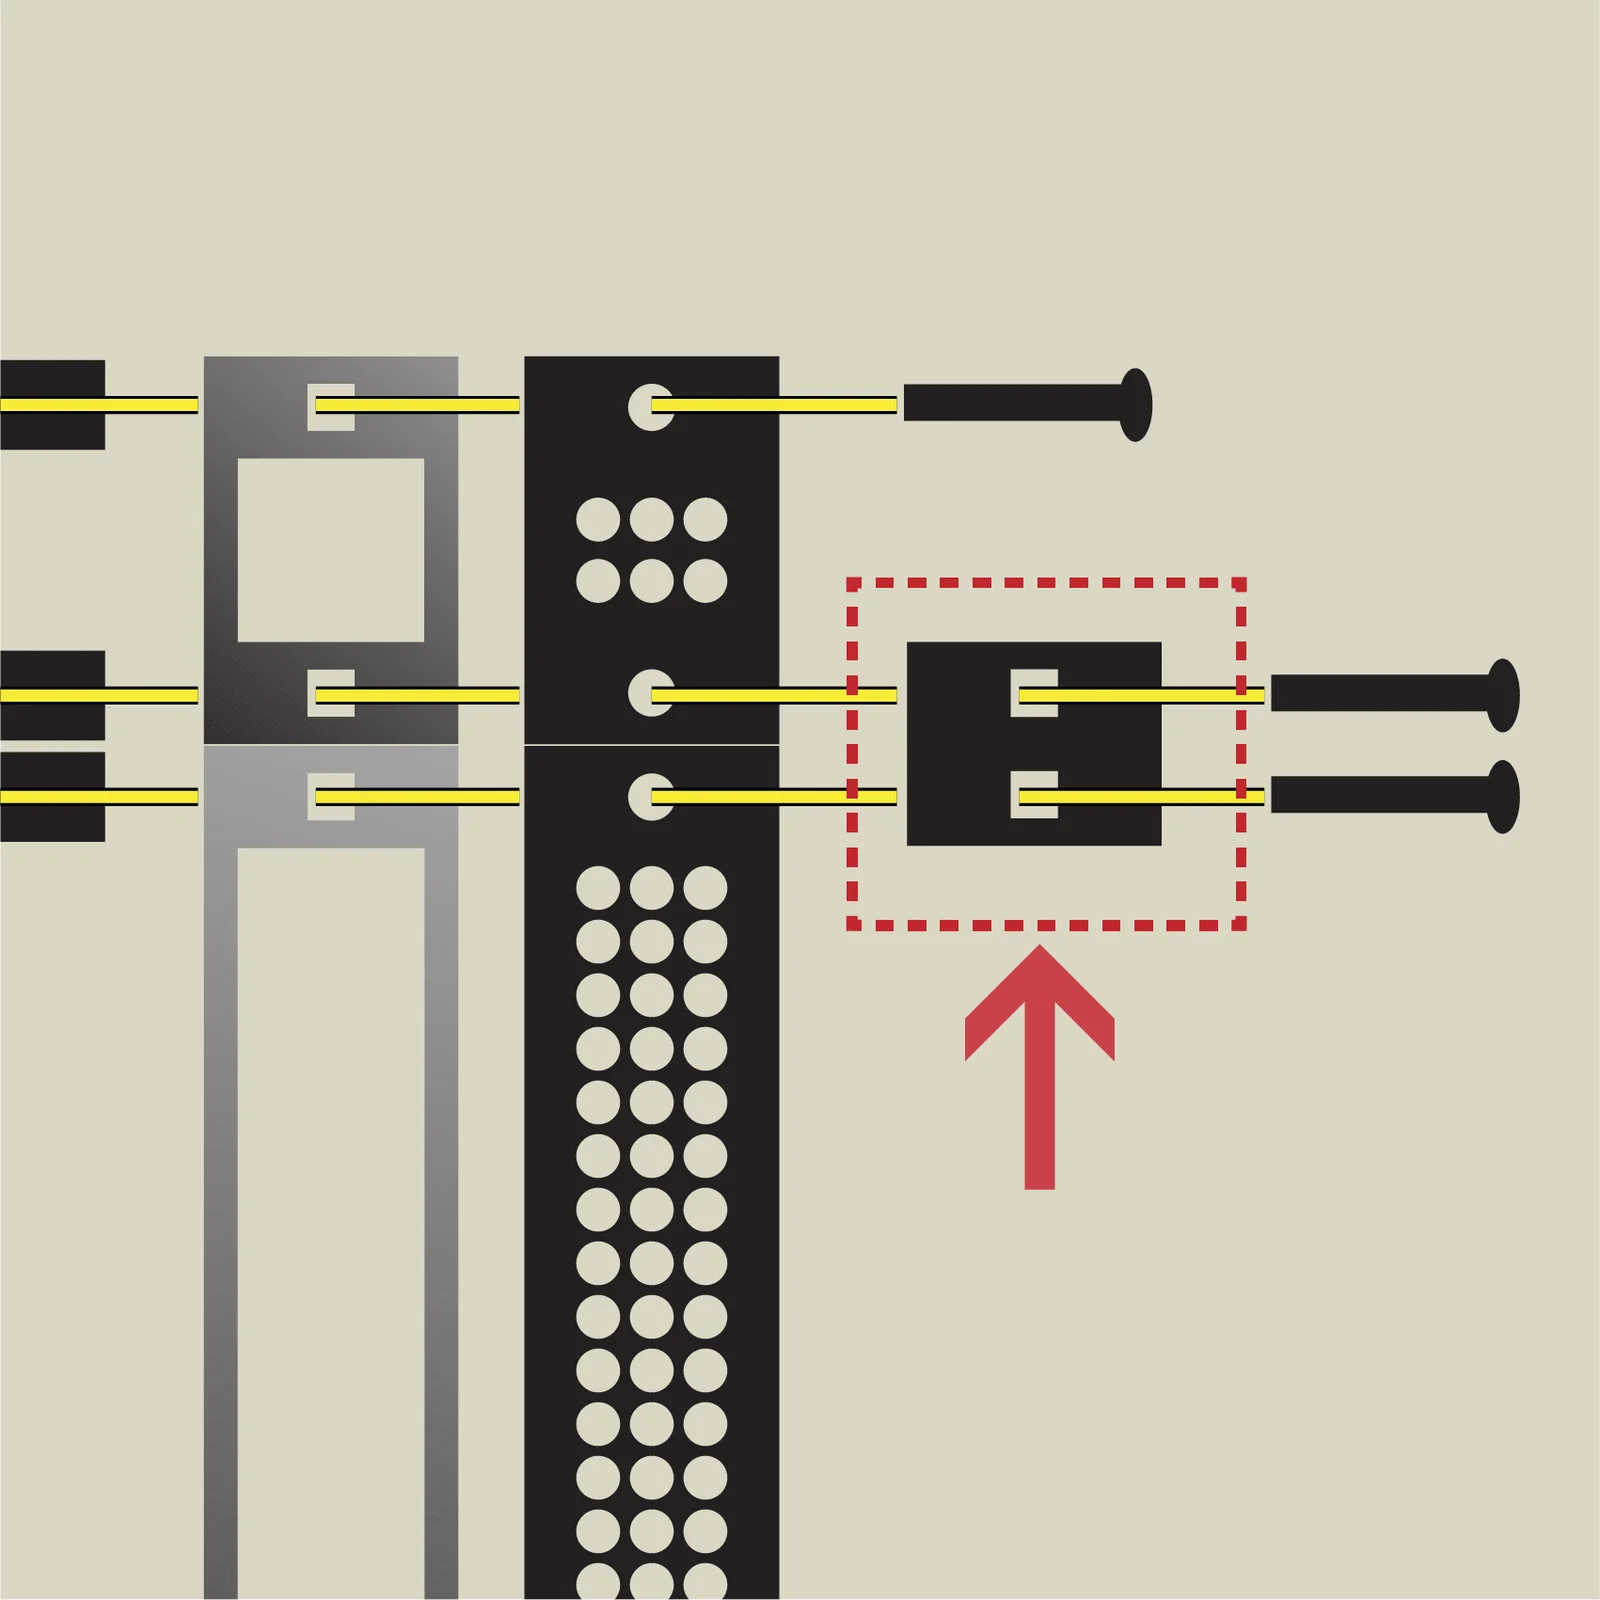
The connector panels are included in quantities of enough to connect all sets + 4 extra. The number of connector panels included per set count is as follows:
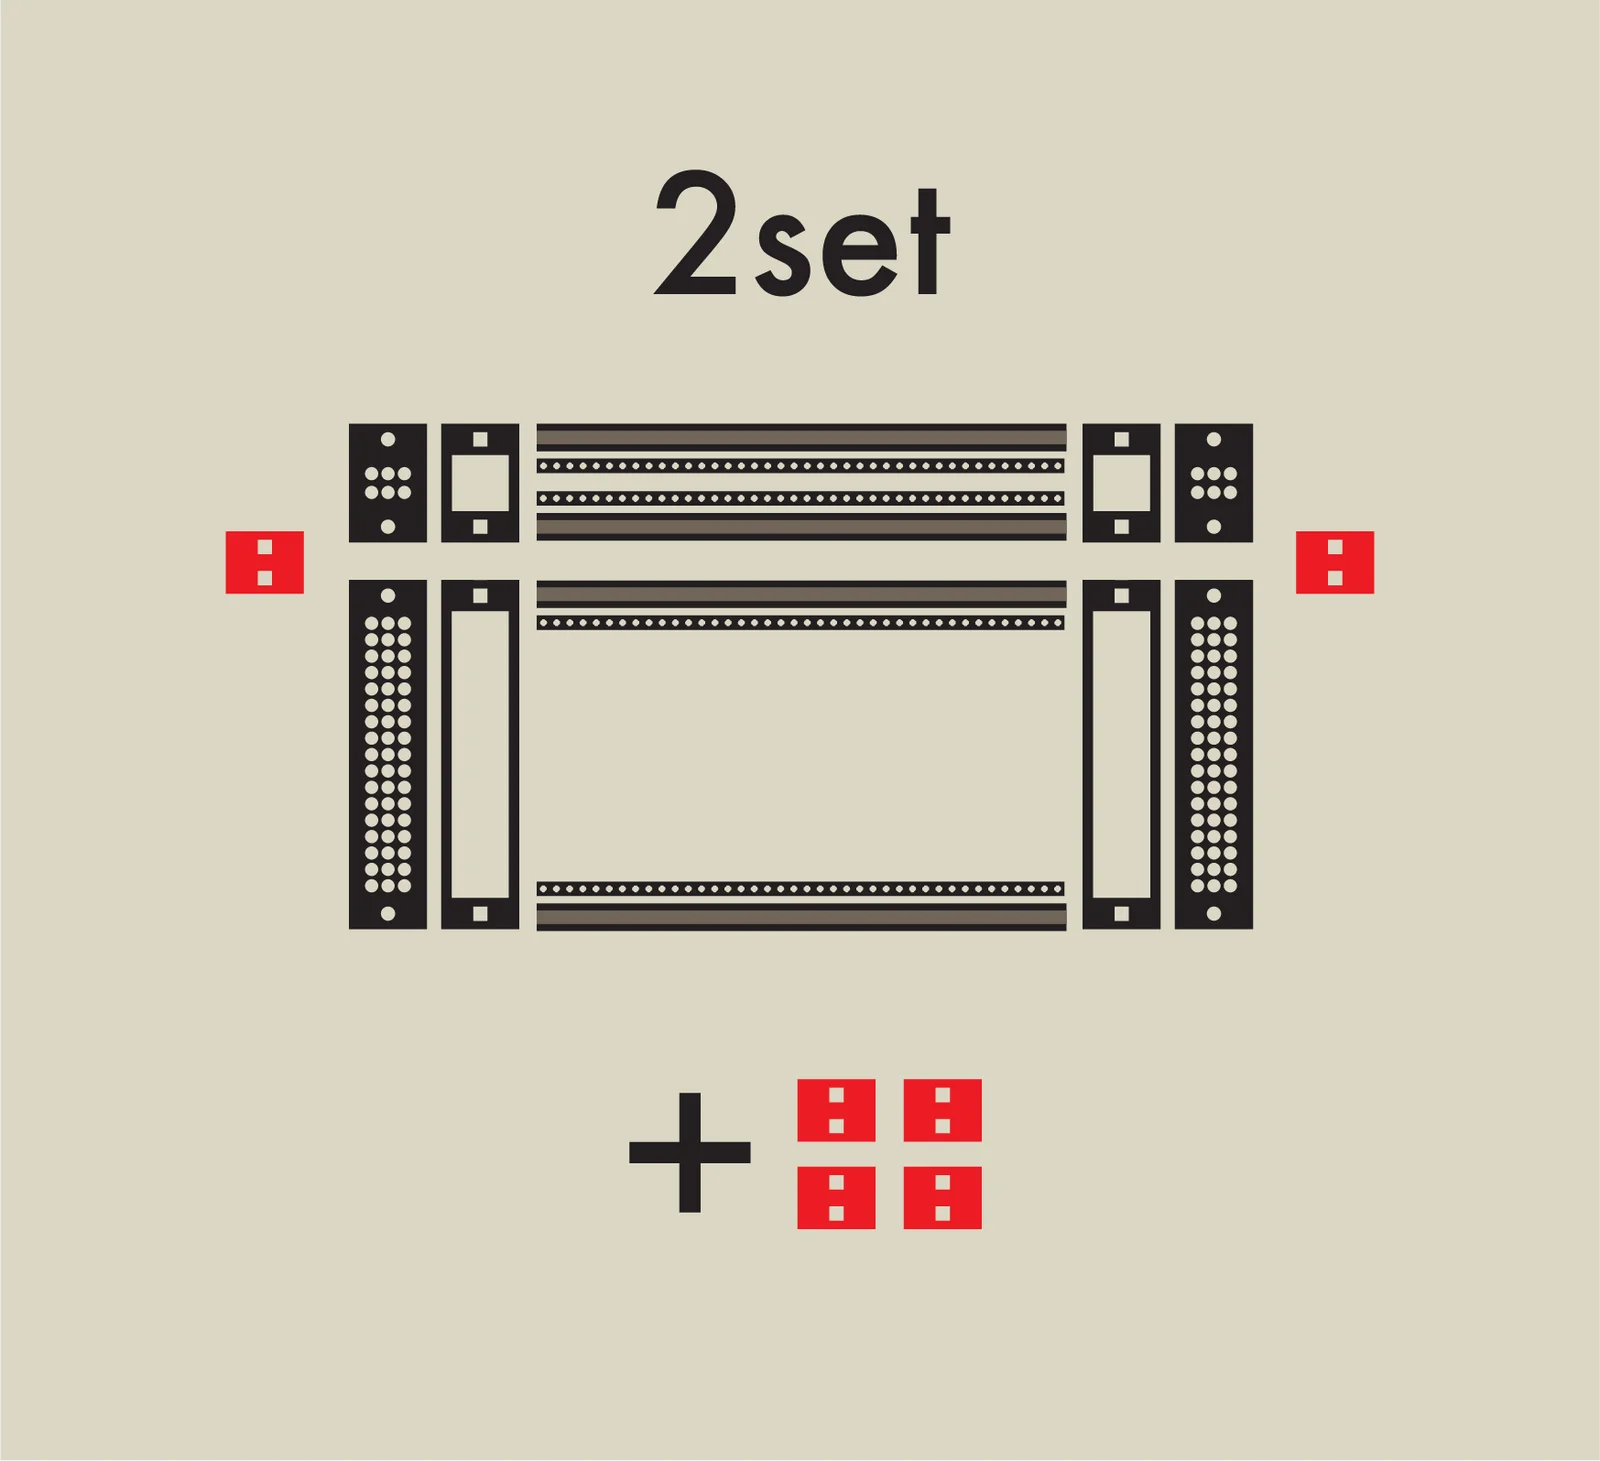
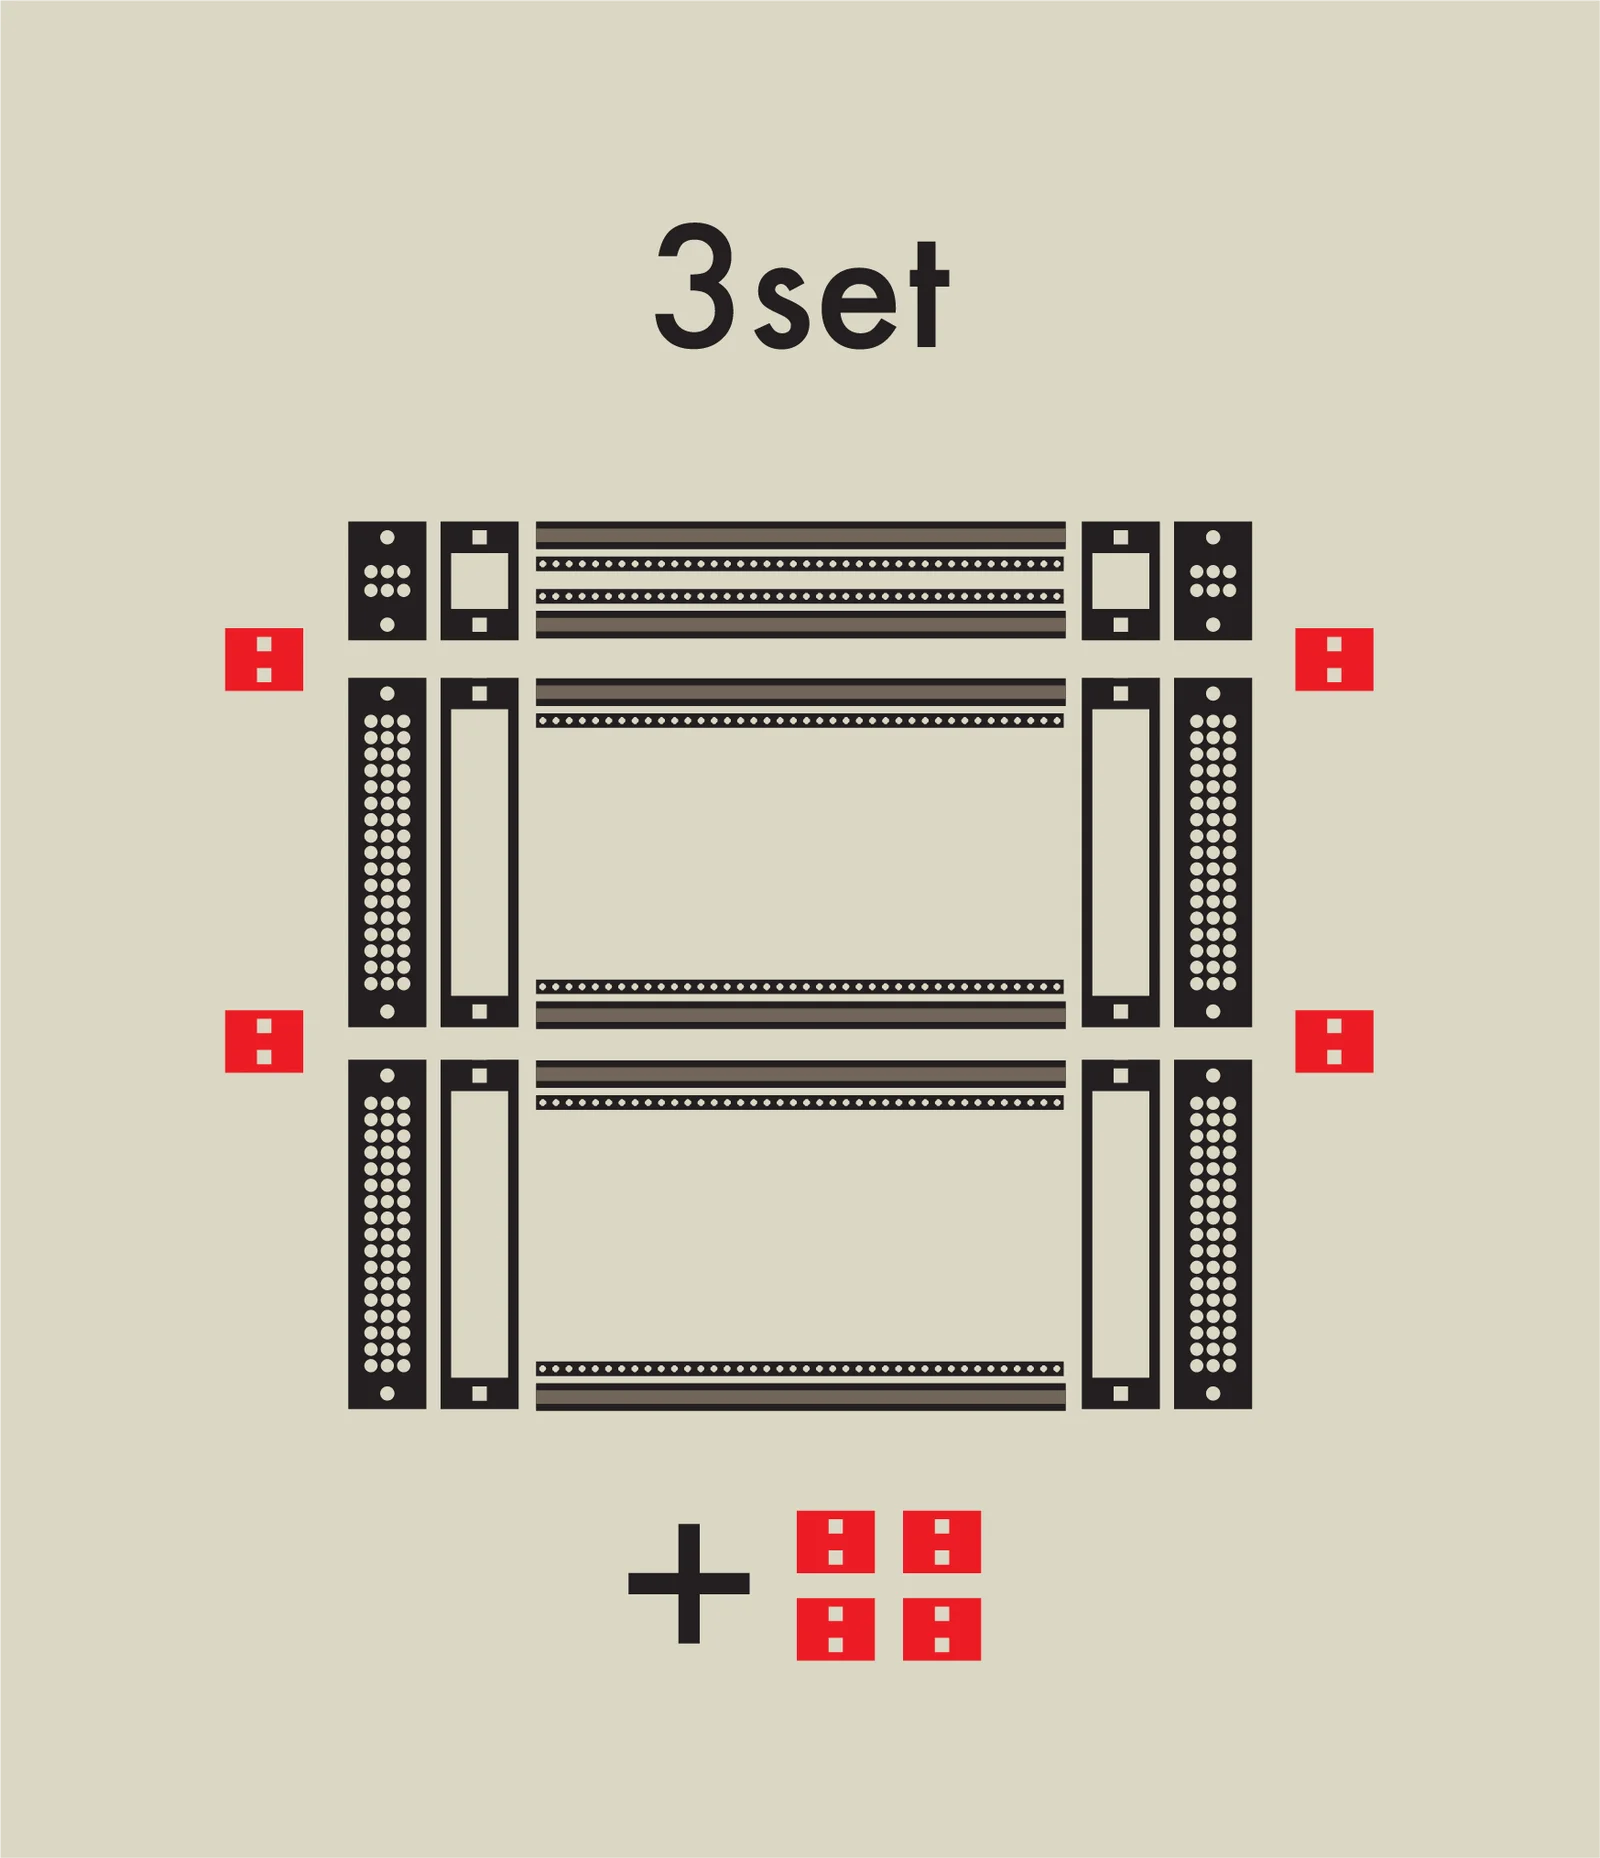

The extra 4 panels are included for customers who already own zudo-block series cases and need connector panels to extend their case with zudo-rails. Case expansion details will be covered in a separate article.
Rail Assembly Instructions
For detailed rail assembly instructions, please refer to the following guide:
Purchasing
To summarize the above, the rail selection process is as follows:
- 40HP or 60HP
- Lite / Nuts / Dual / Metal
- 1 set / 2 sets / 3 sets / 4 sets
- Height combination (e.g., 3U + 3U + 1U)
Items 1 through 3 determine the product listing on Mercari Shops. The 4th item, “height combination,” is selected at the time of purchase.
Below are links to all products with their prices.
zudo-rail-40
| 1 Set | 2 Sets | 3 Sets | 4 Sets | |
|---|---|---|---|---|
| Lite |  |  | 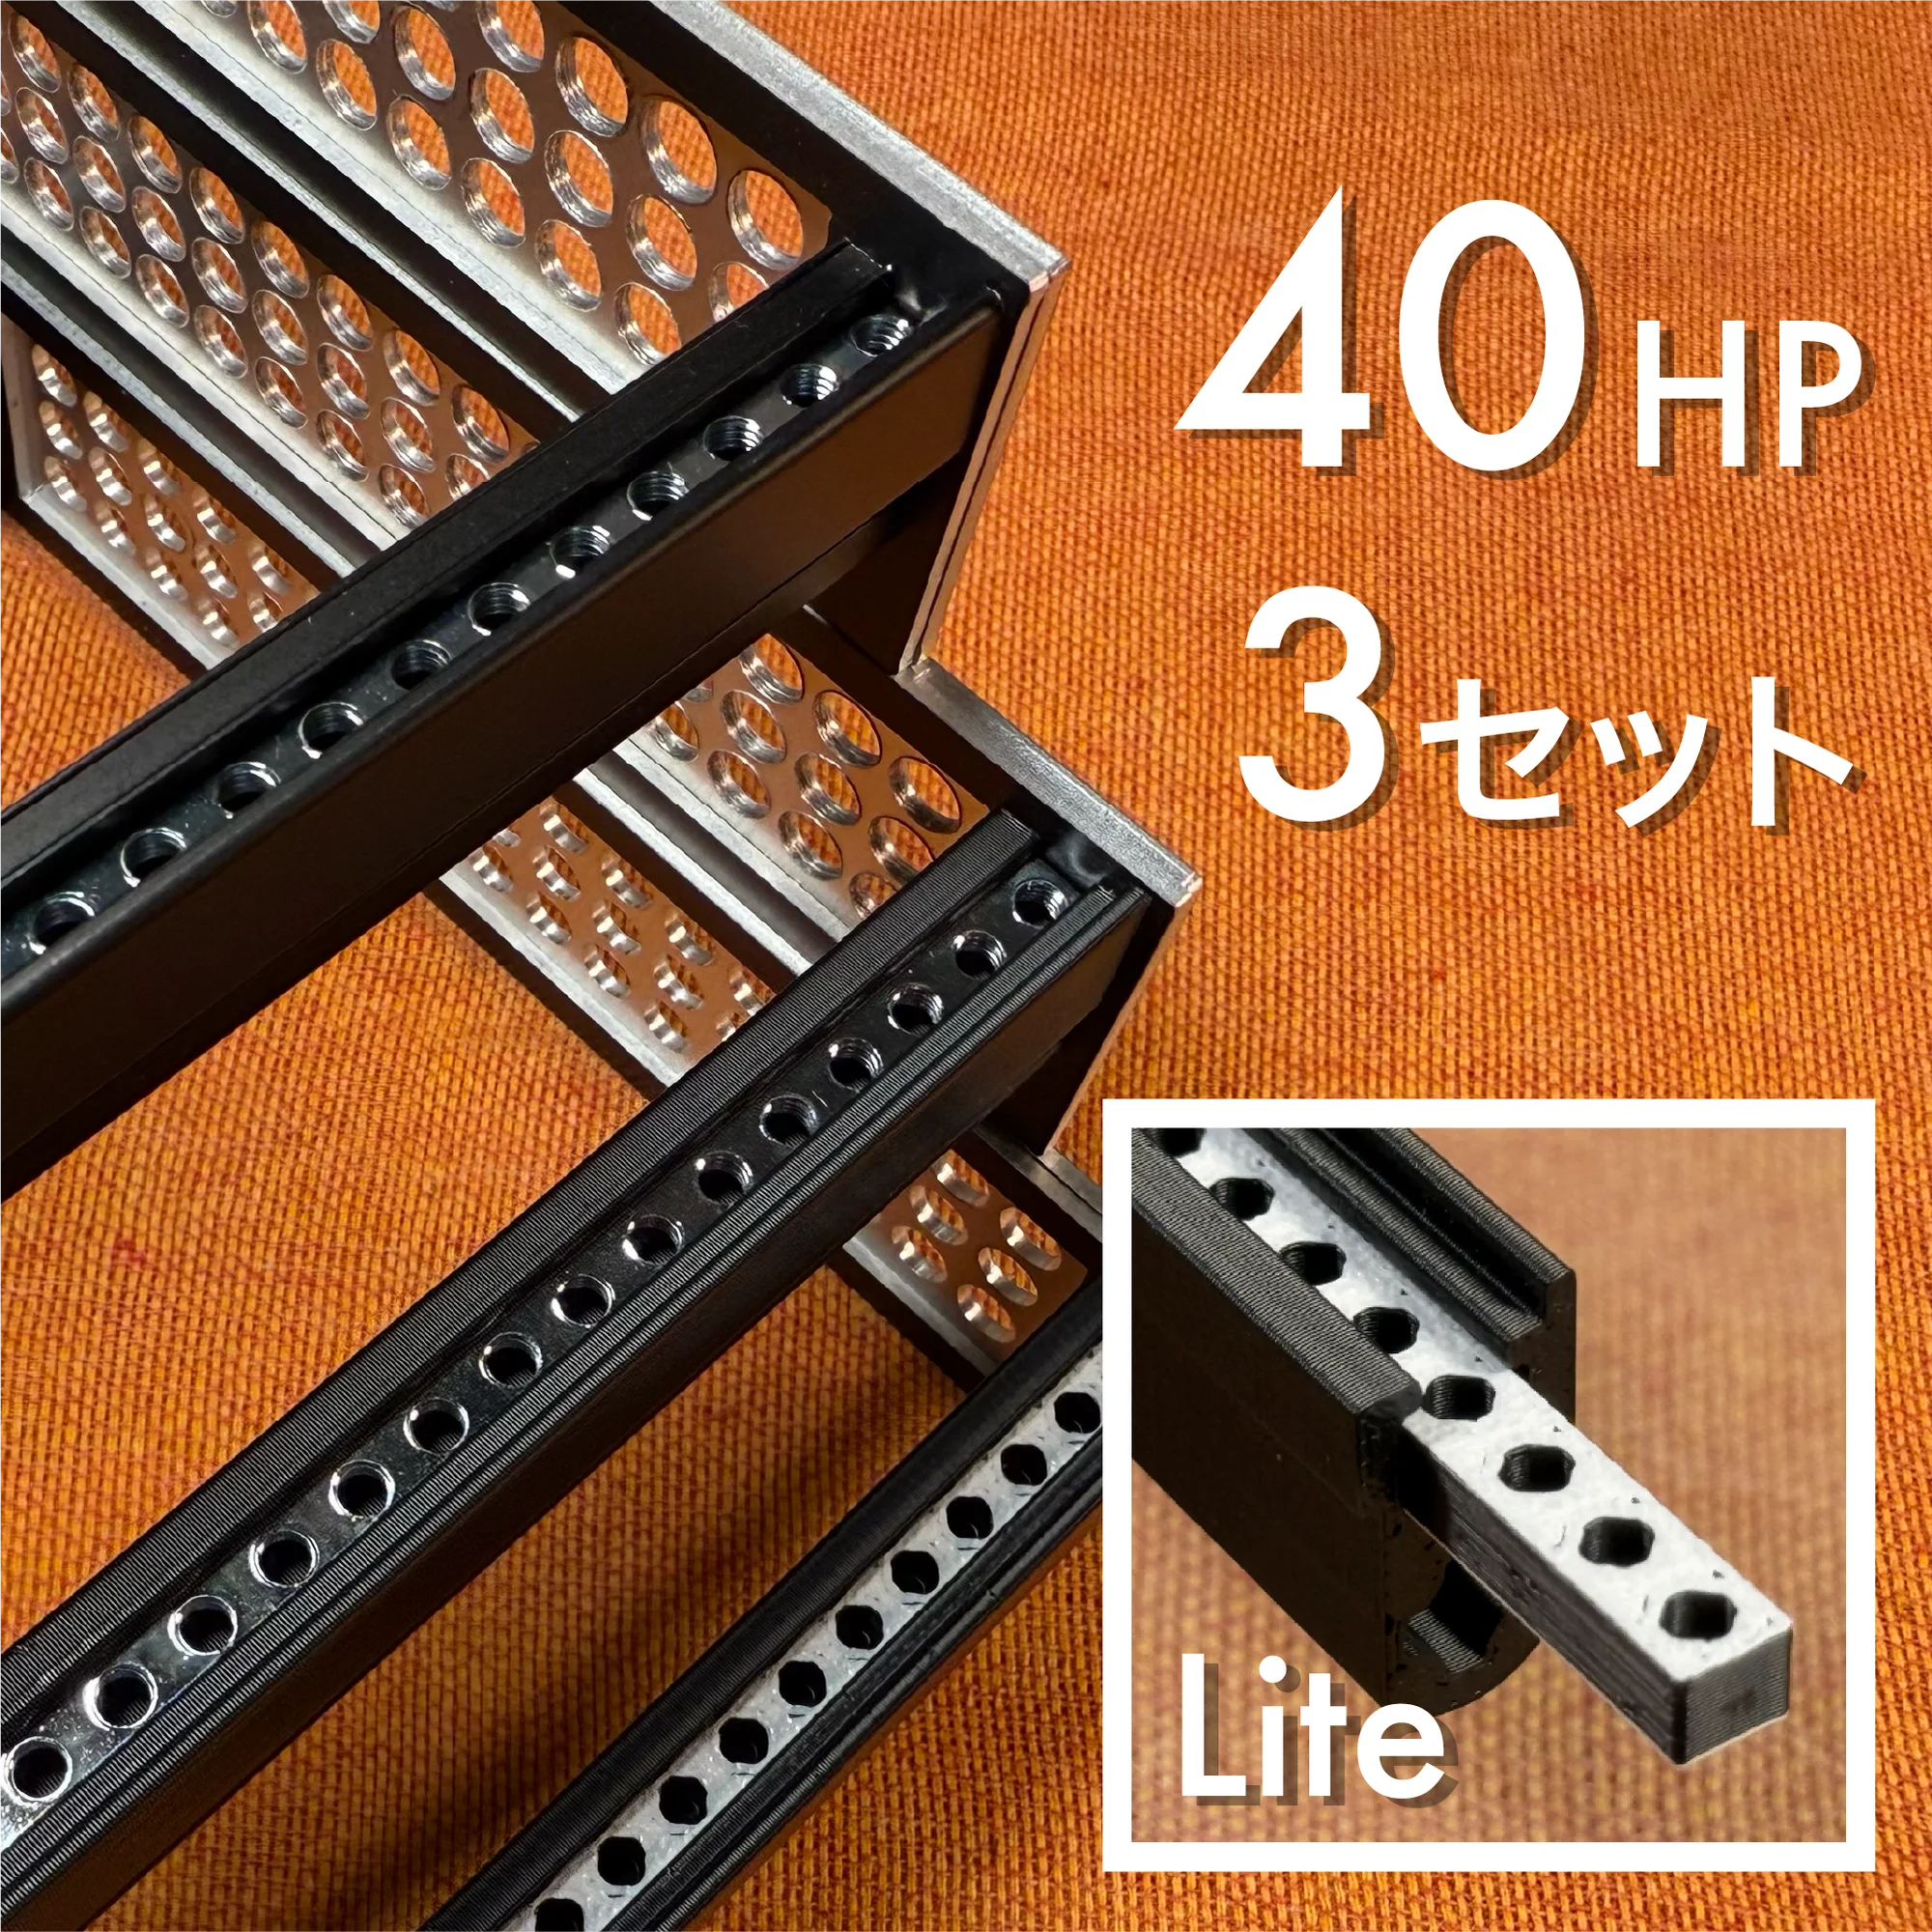 |  |
| Nuts |  |  | 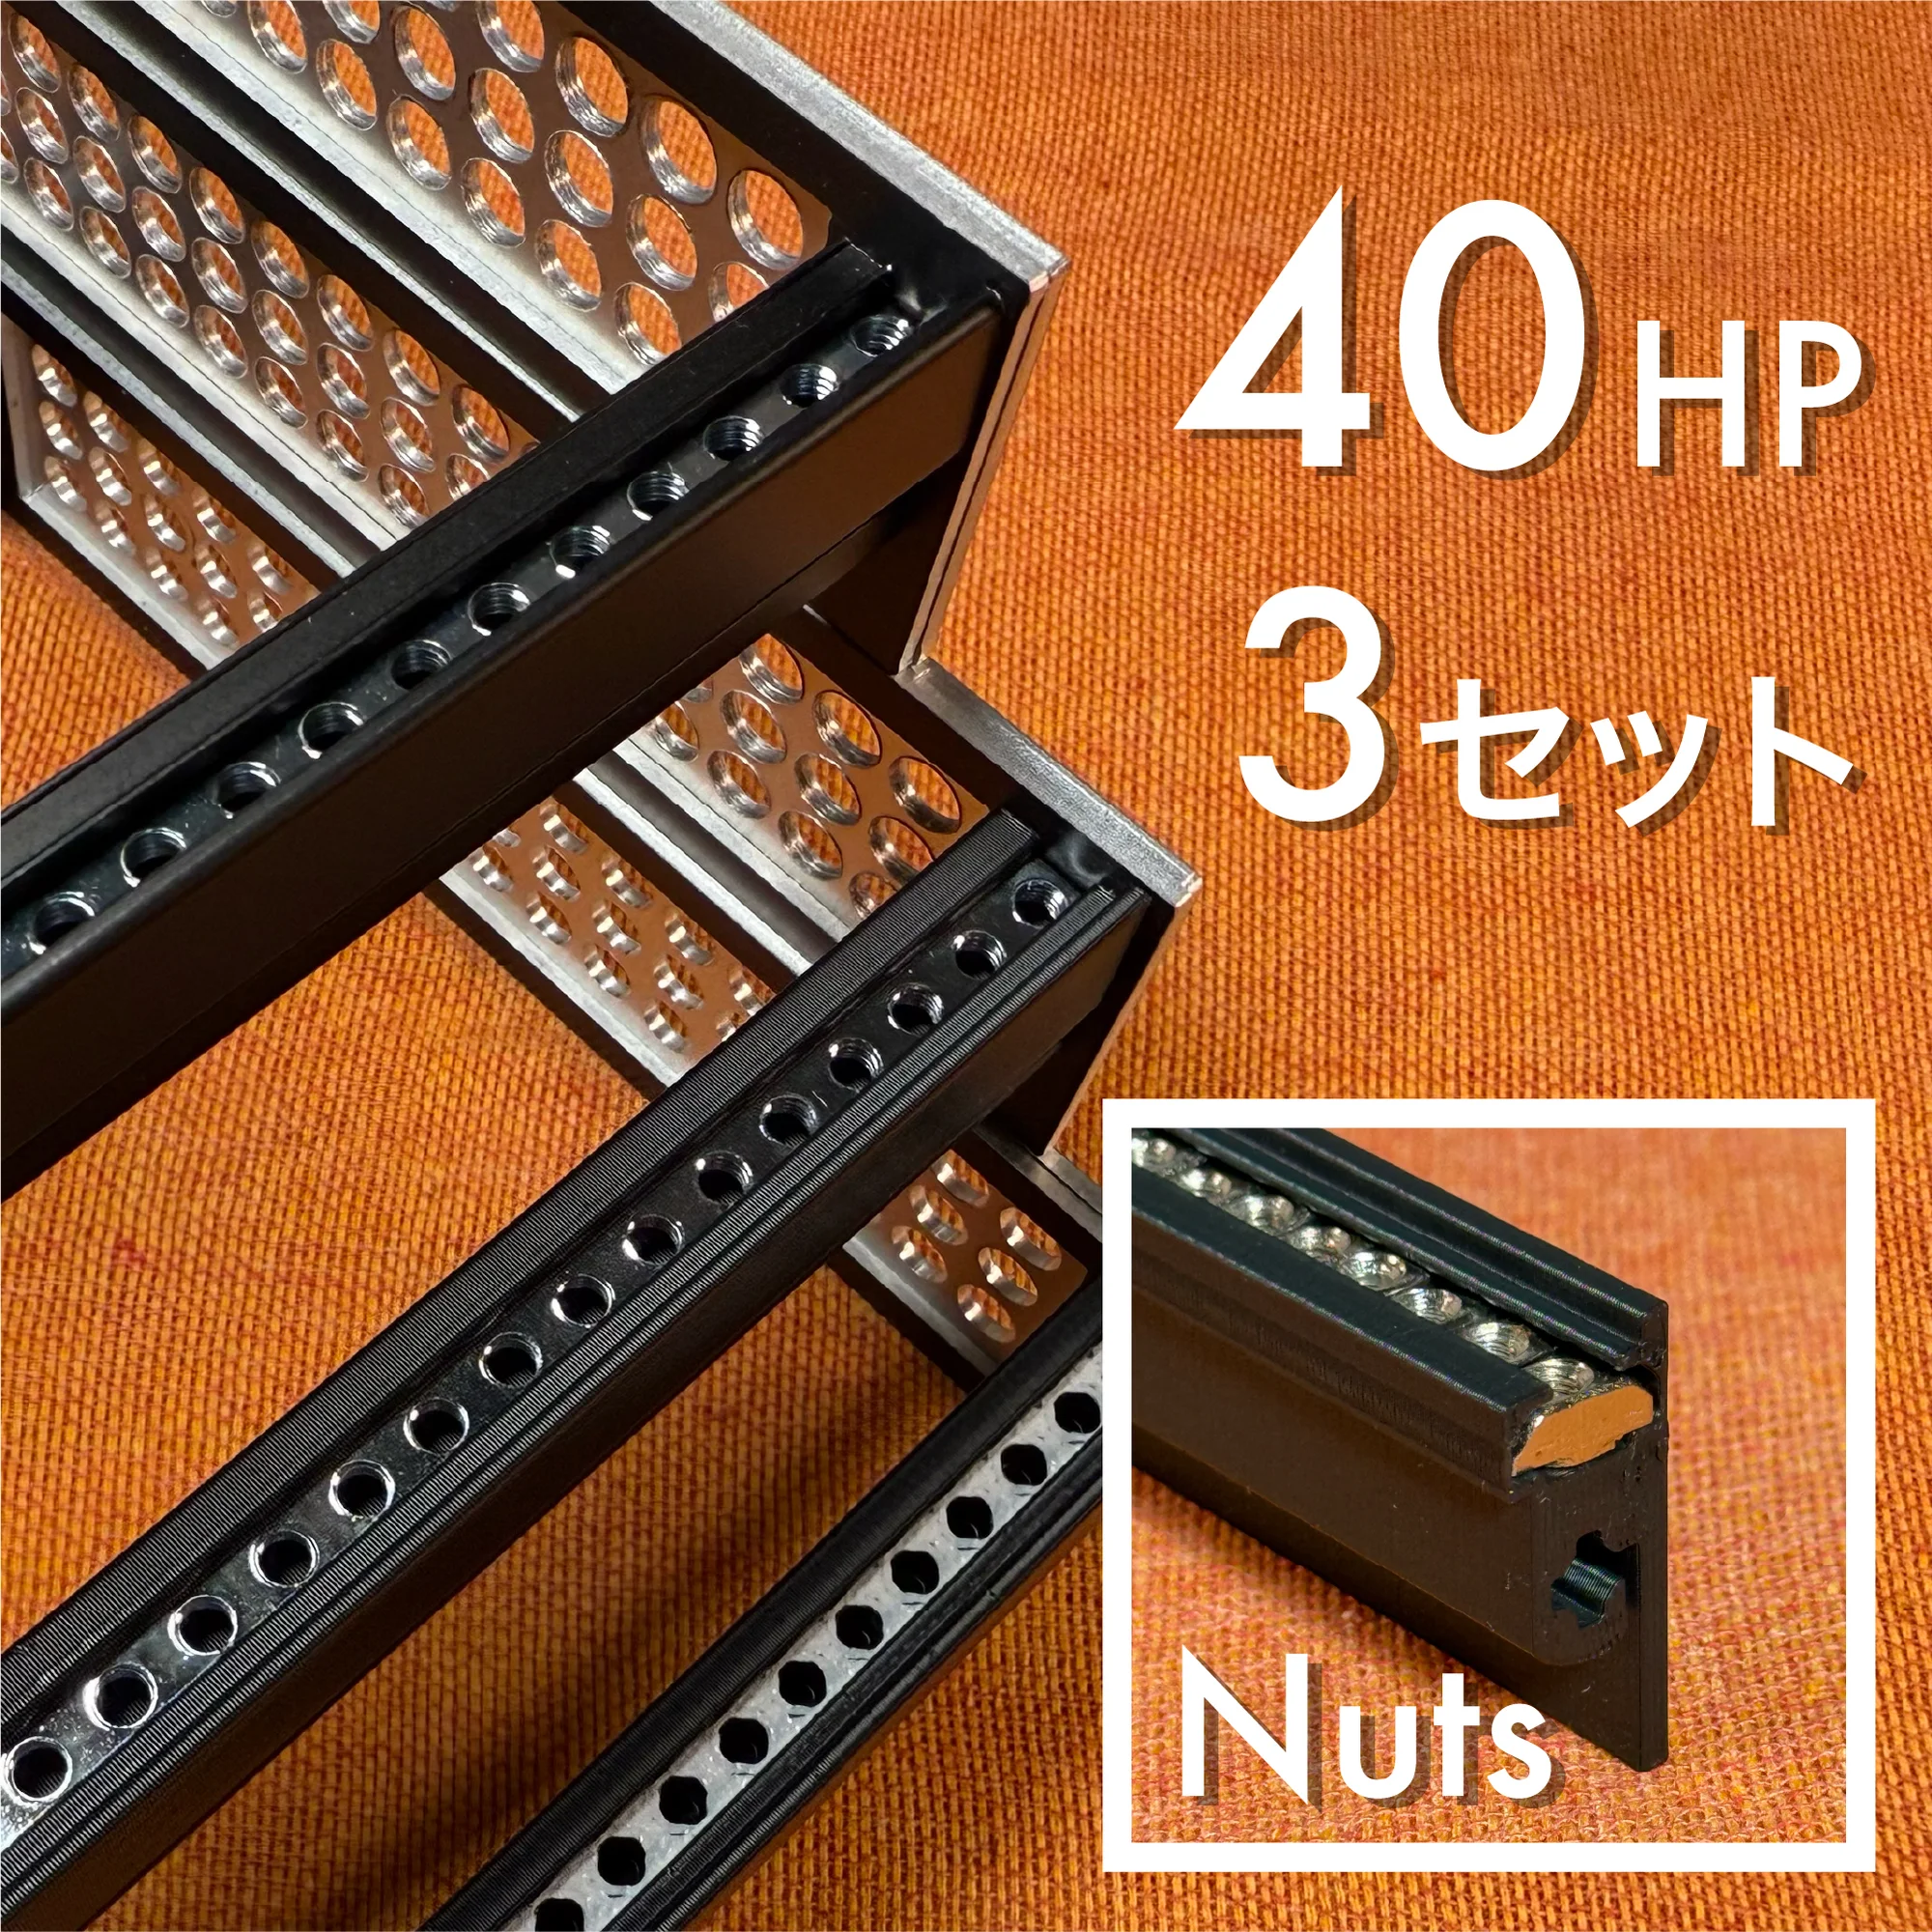 |  |
| Dual | 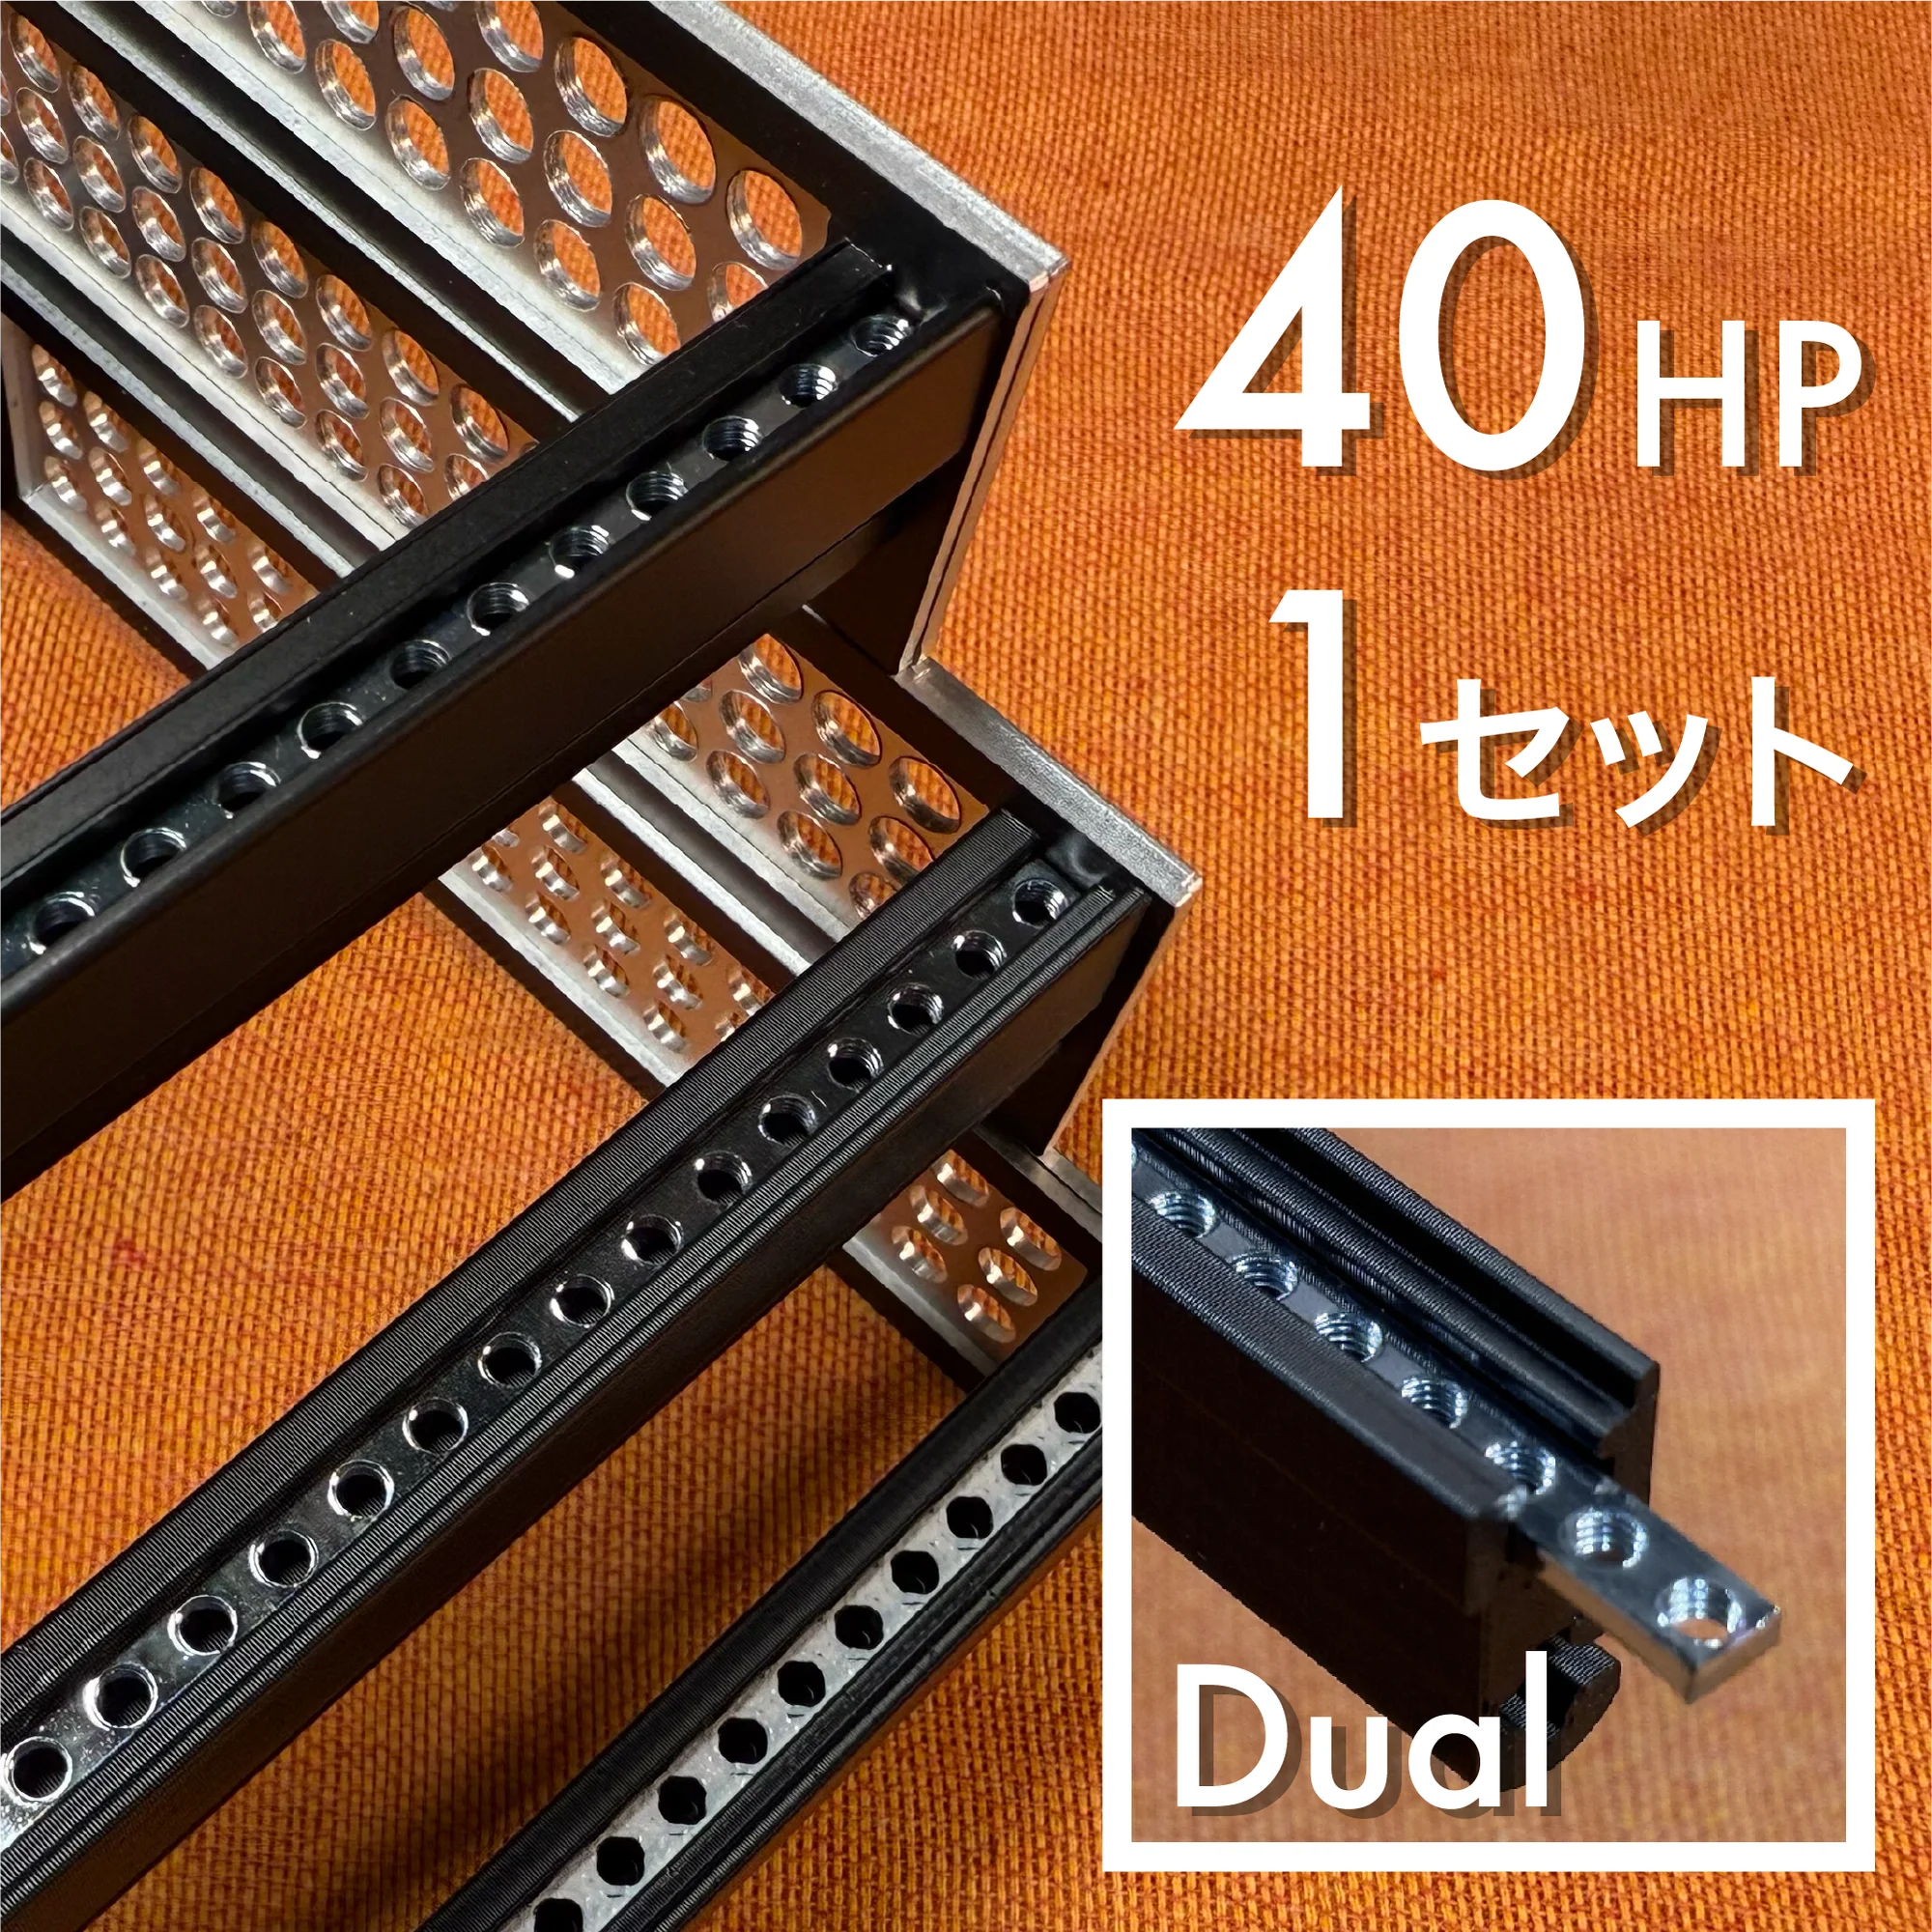 |  |  |  |
| Metal | 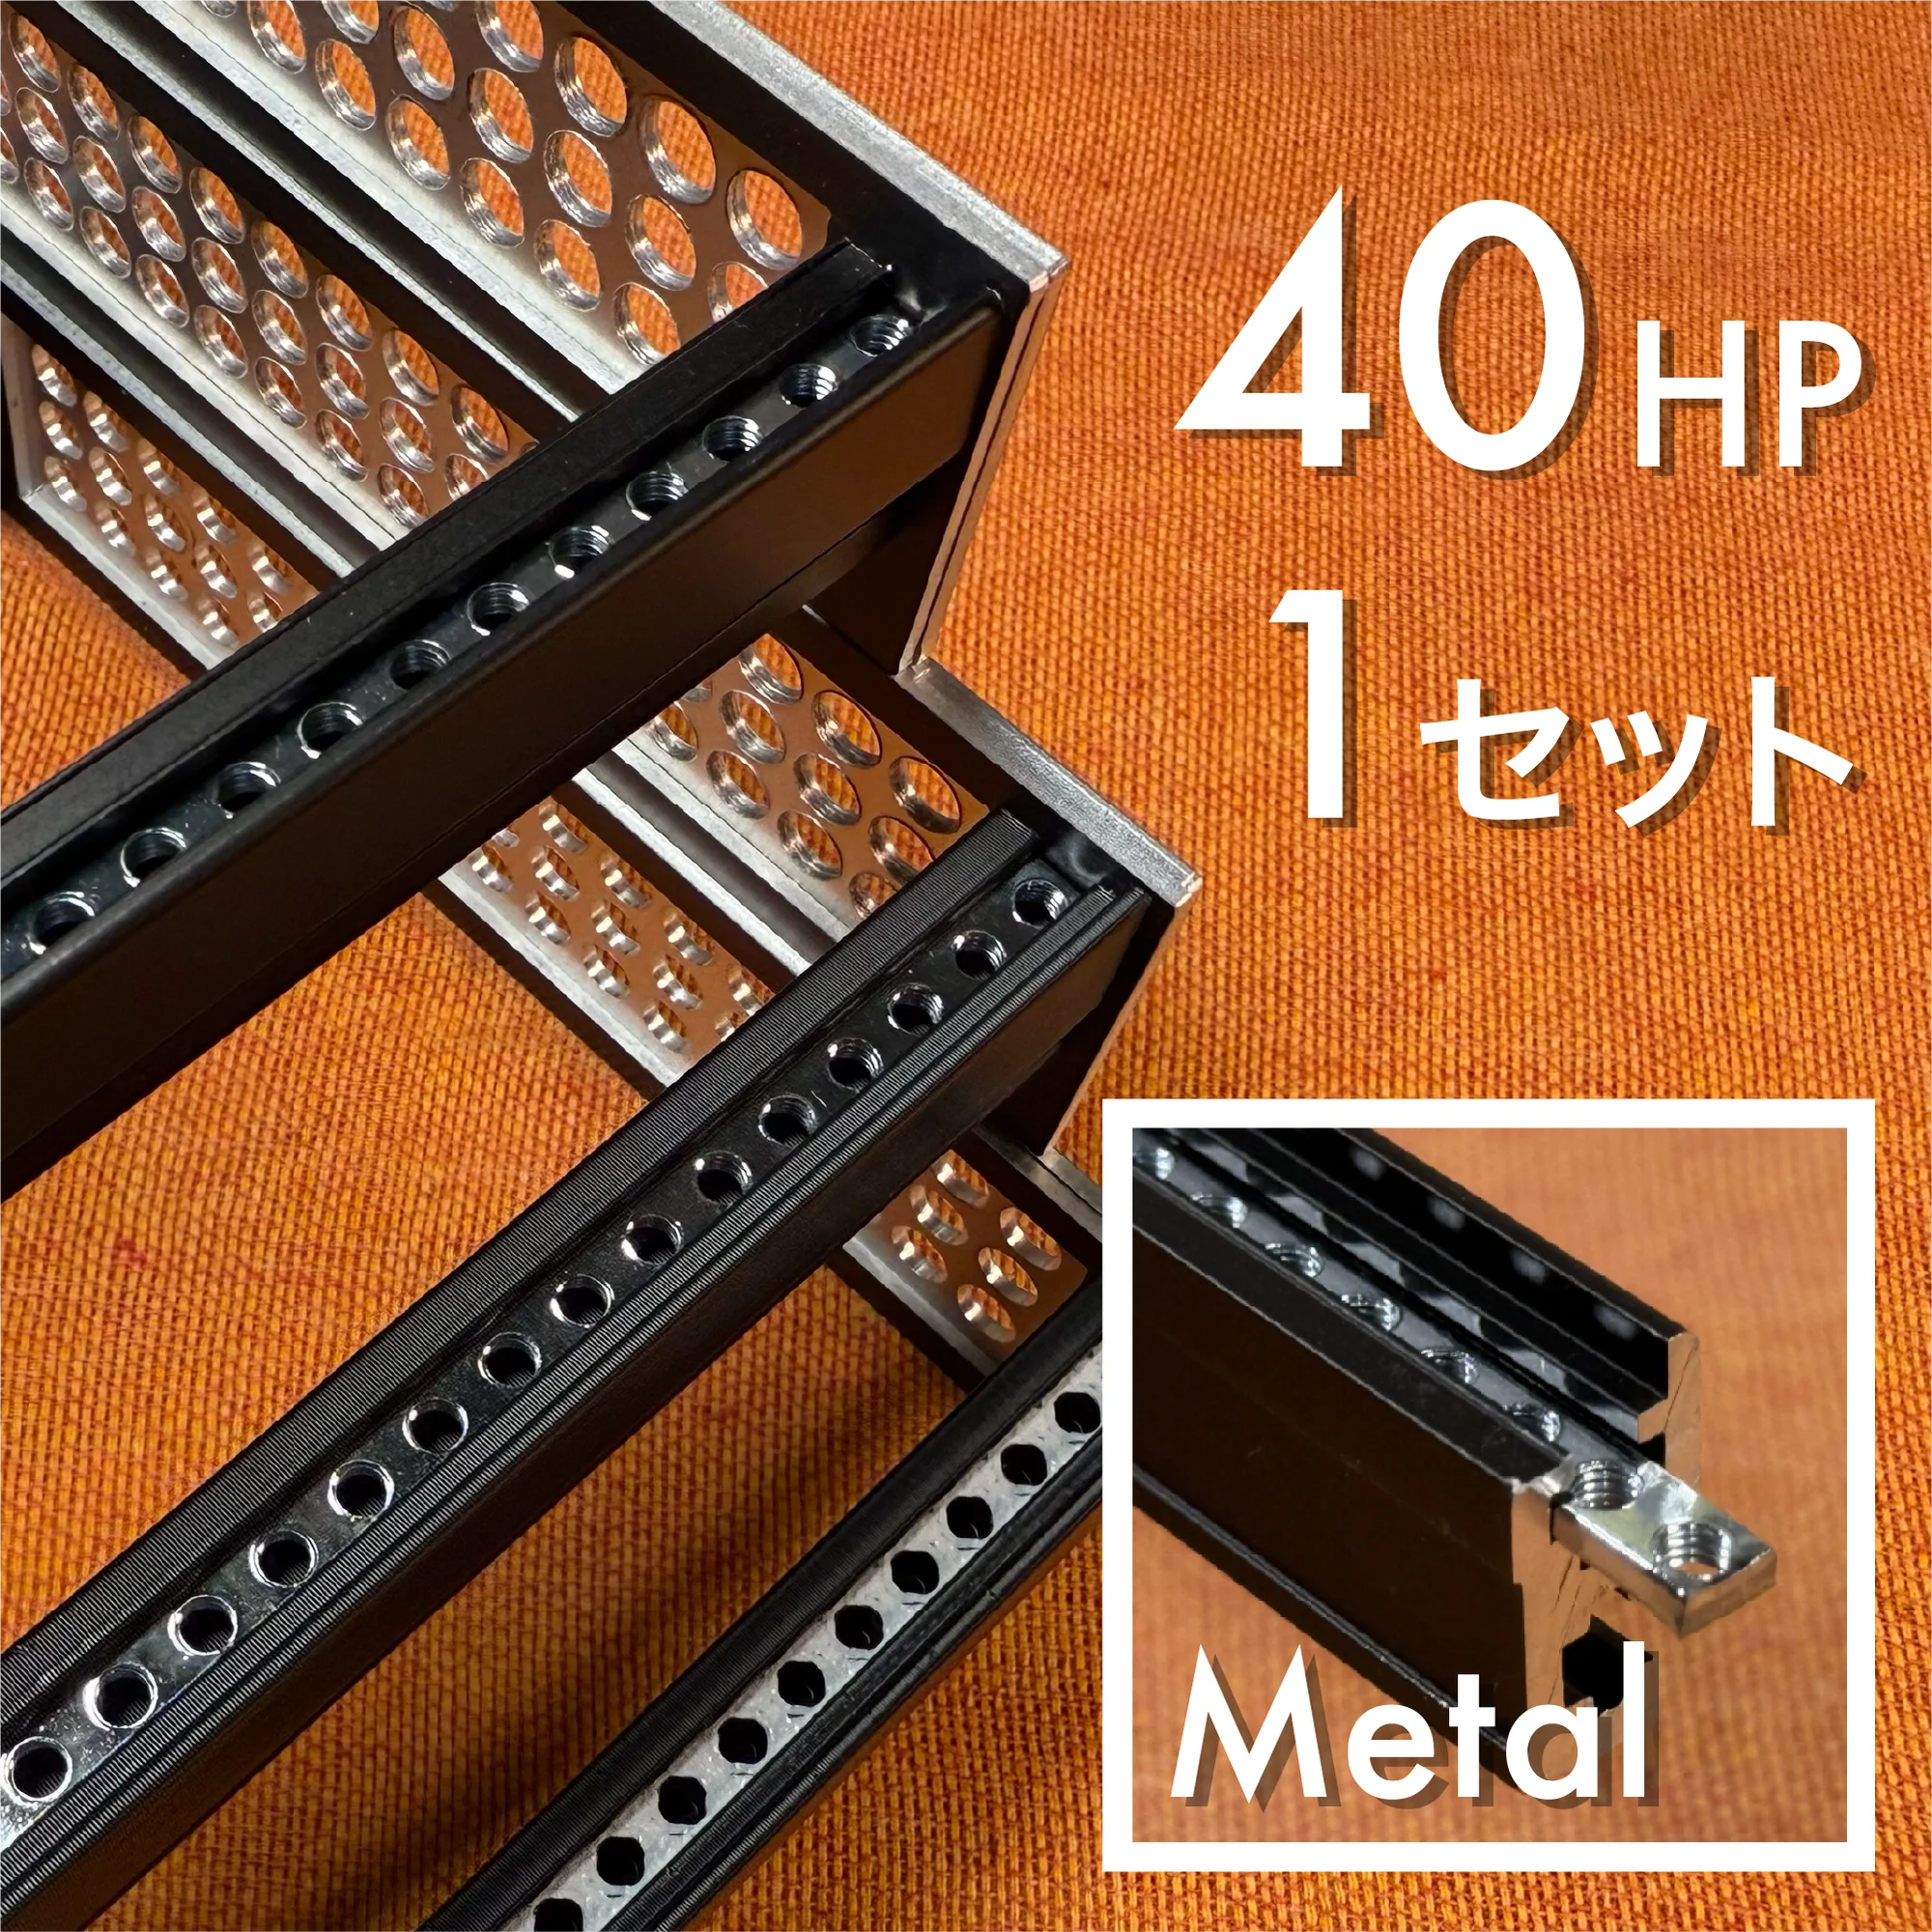 |  |  | 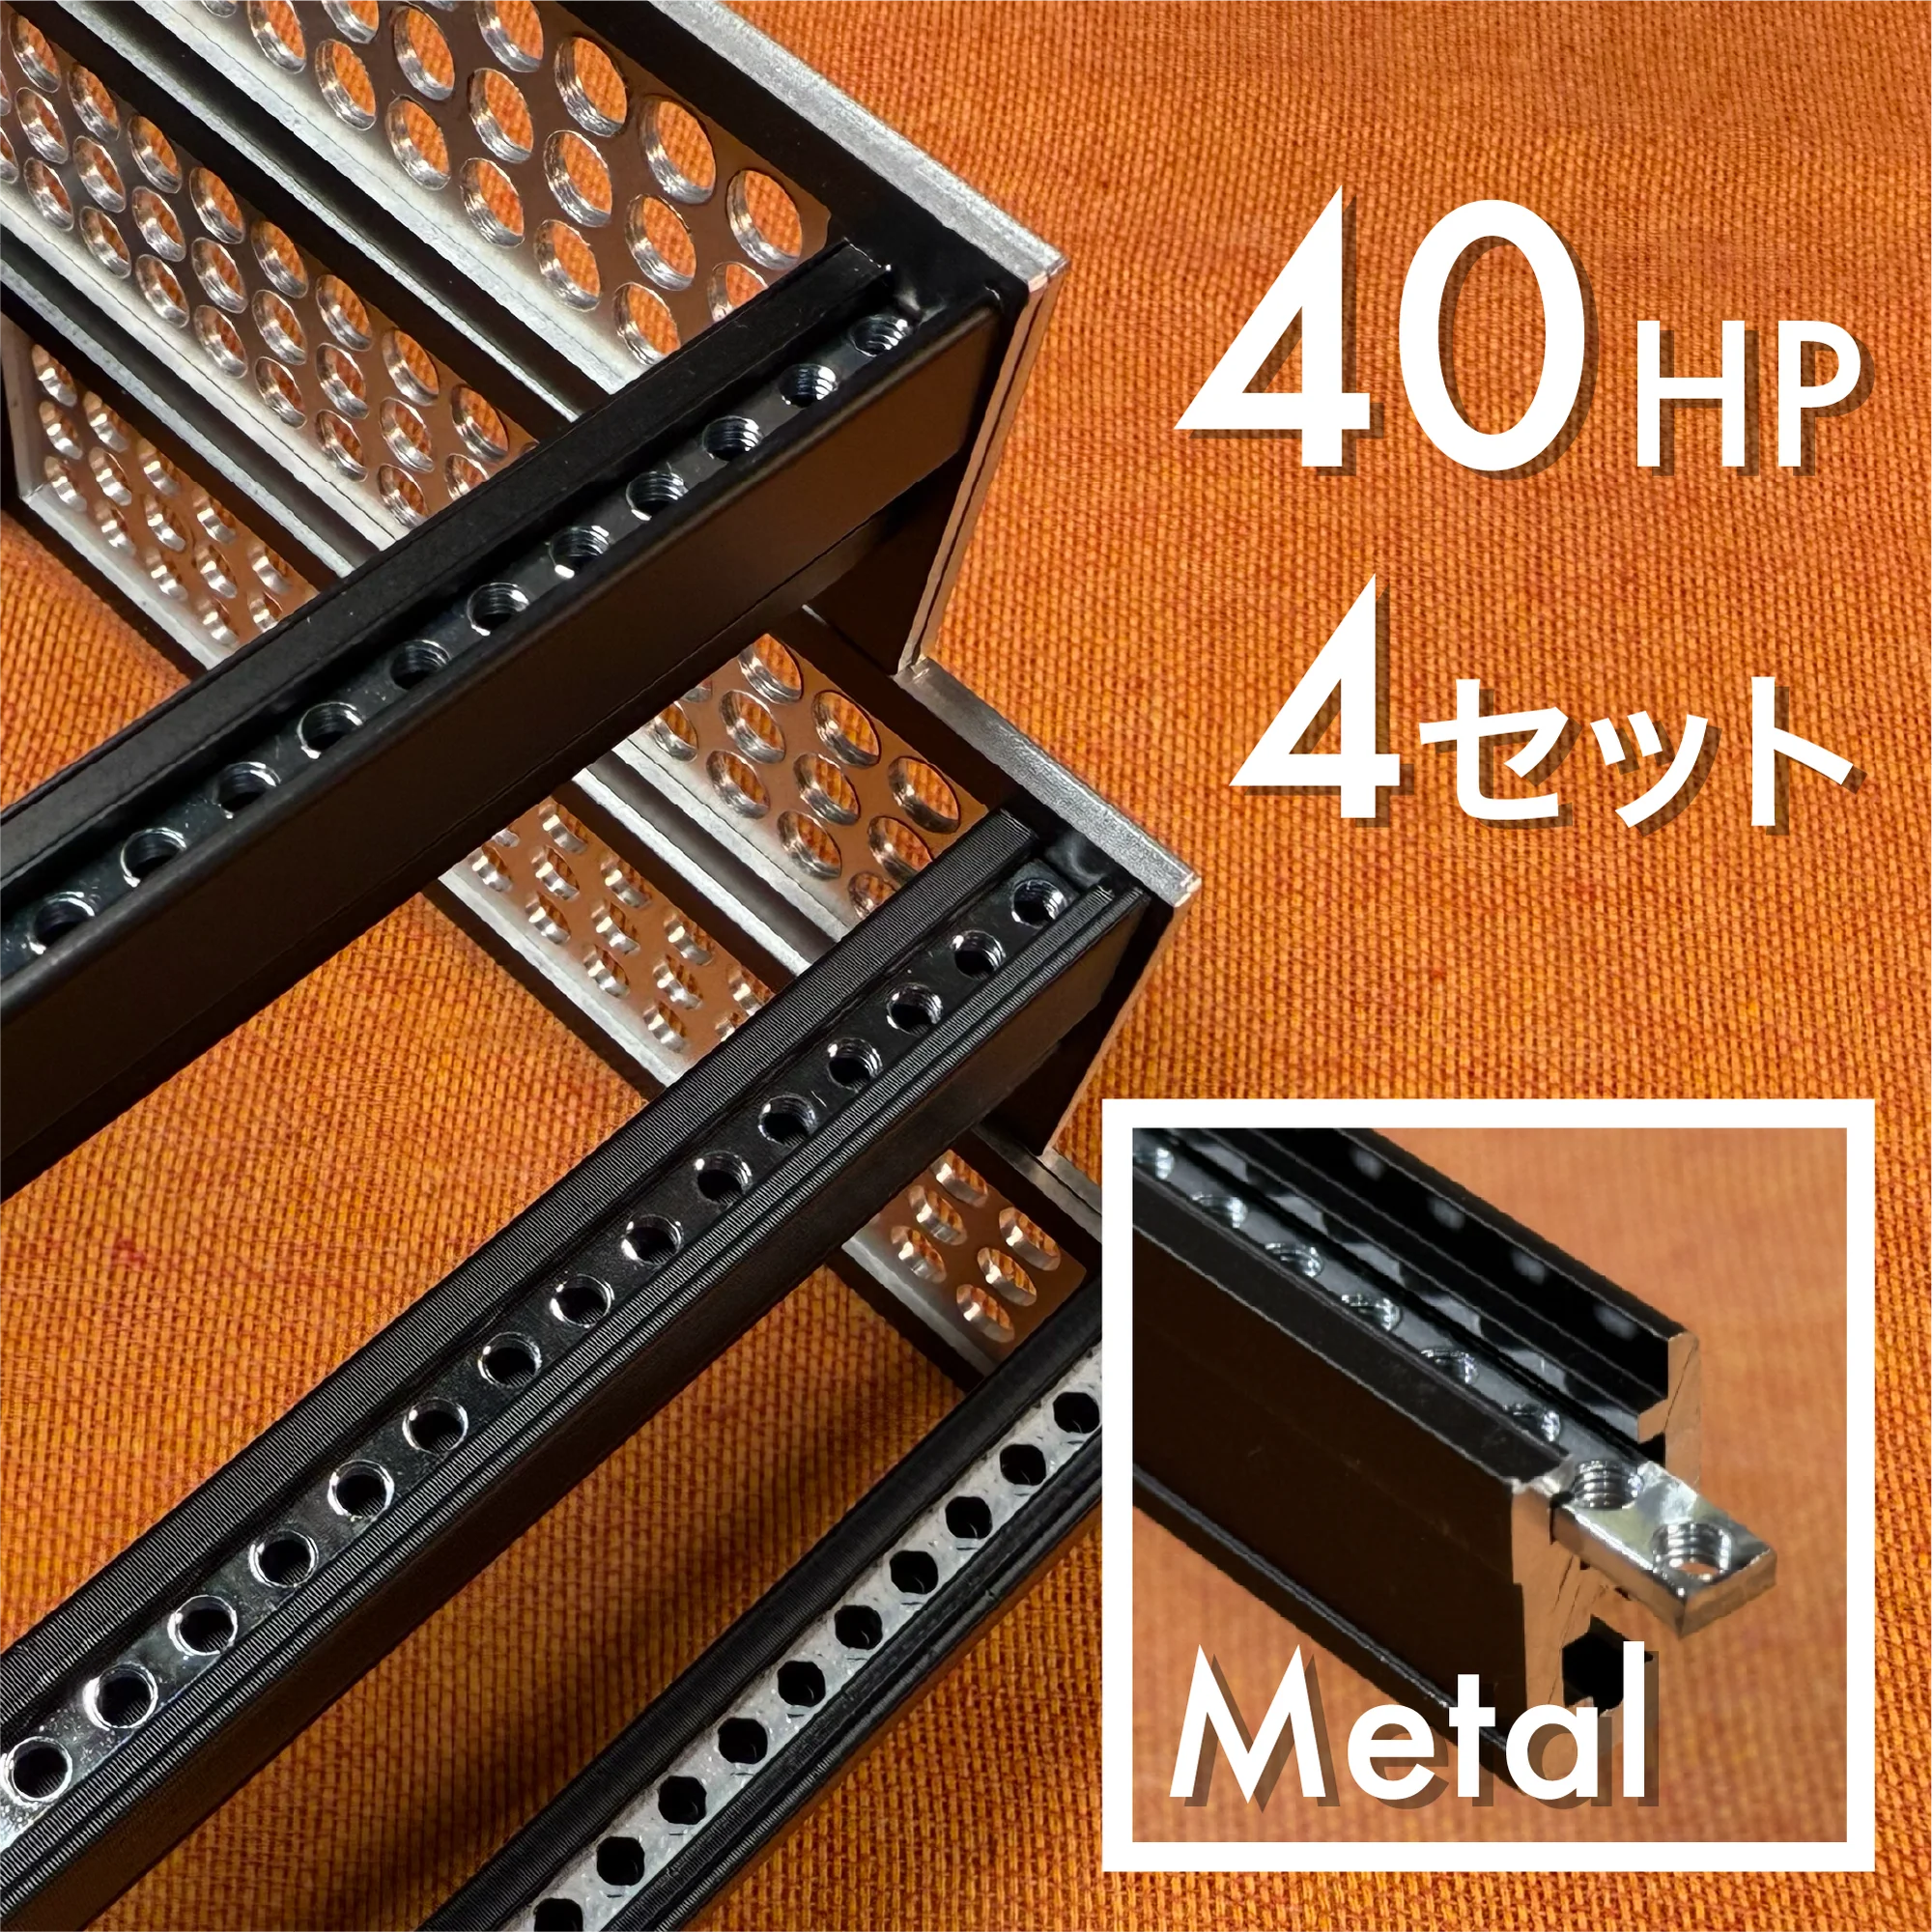 |
zudo-rail-60
| 1 Set | 2 Sets | 3 Sets | 4 Sets | |
|---|---|---|---|---|
| Lite | 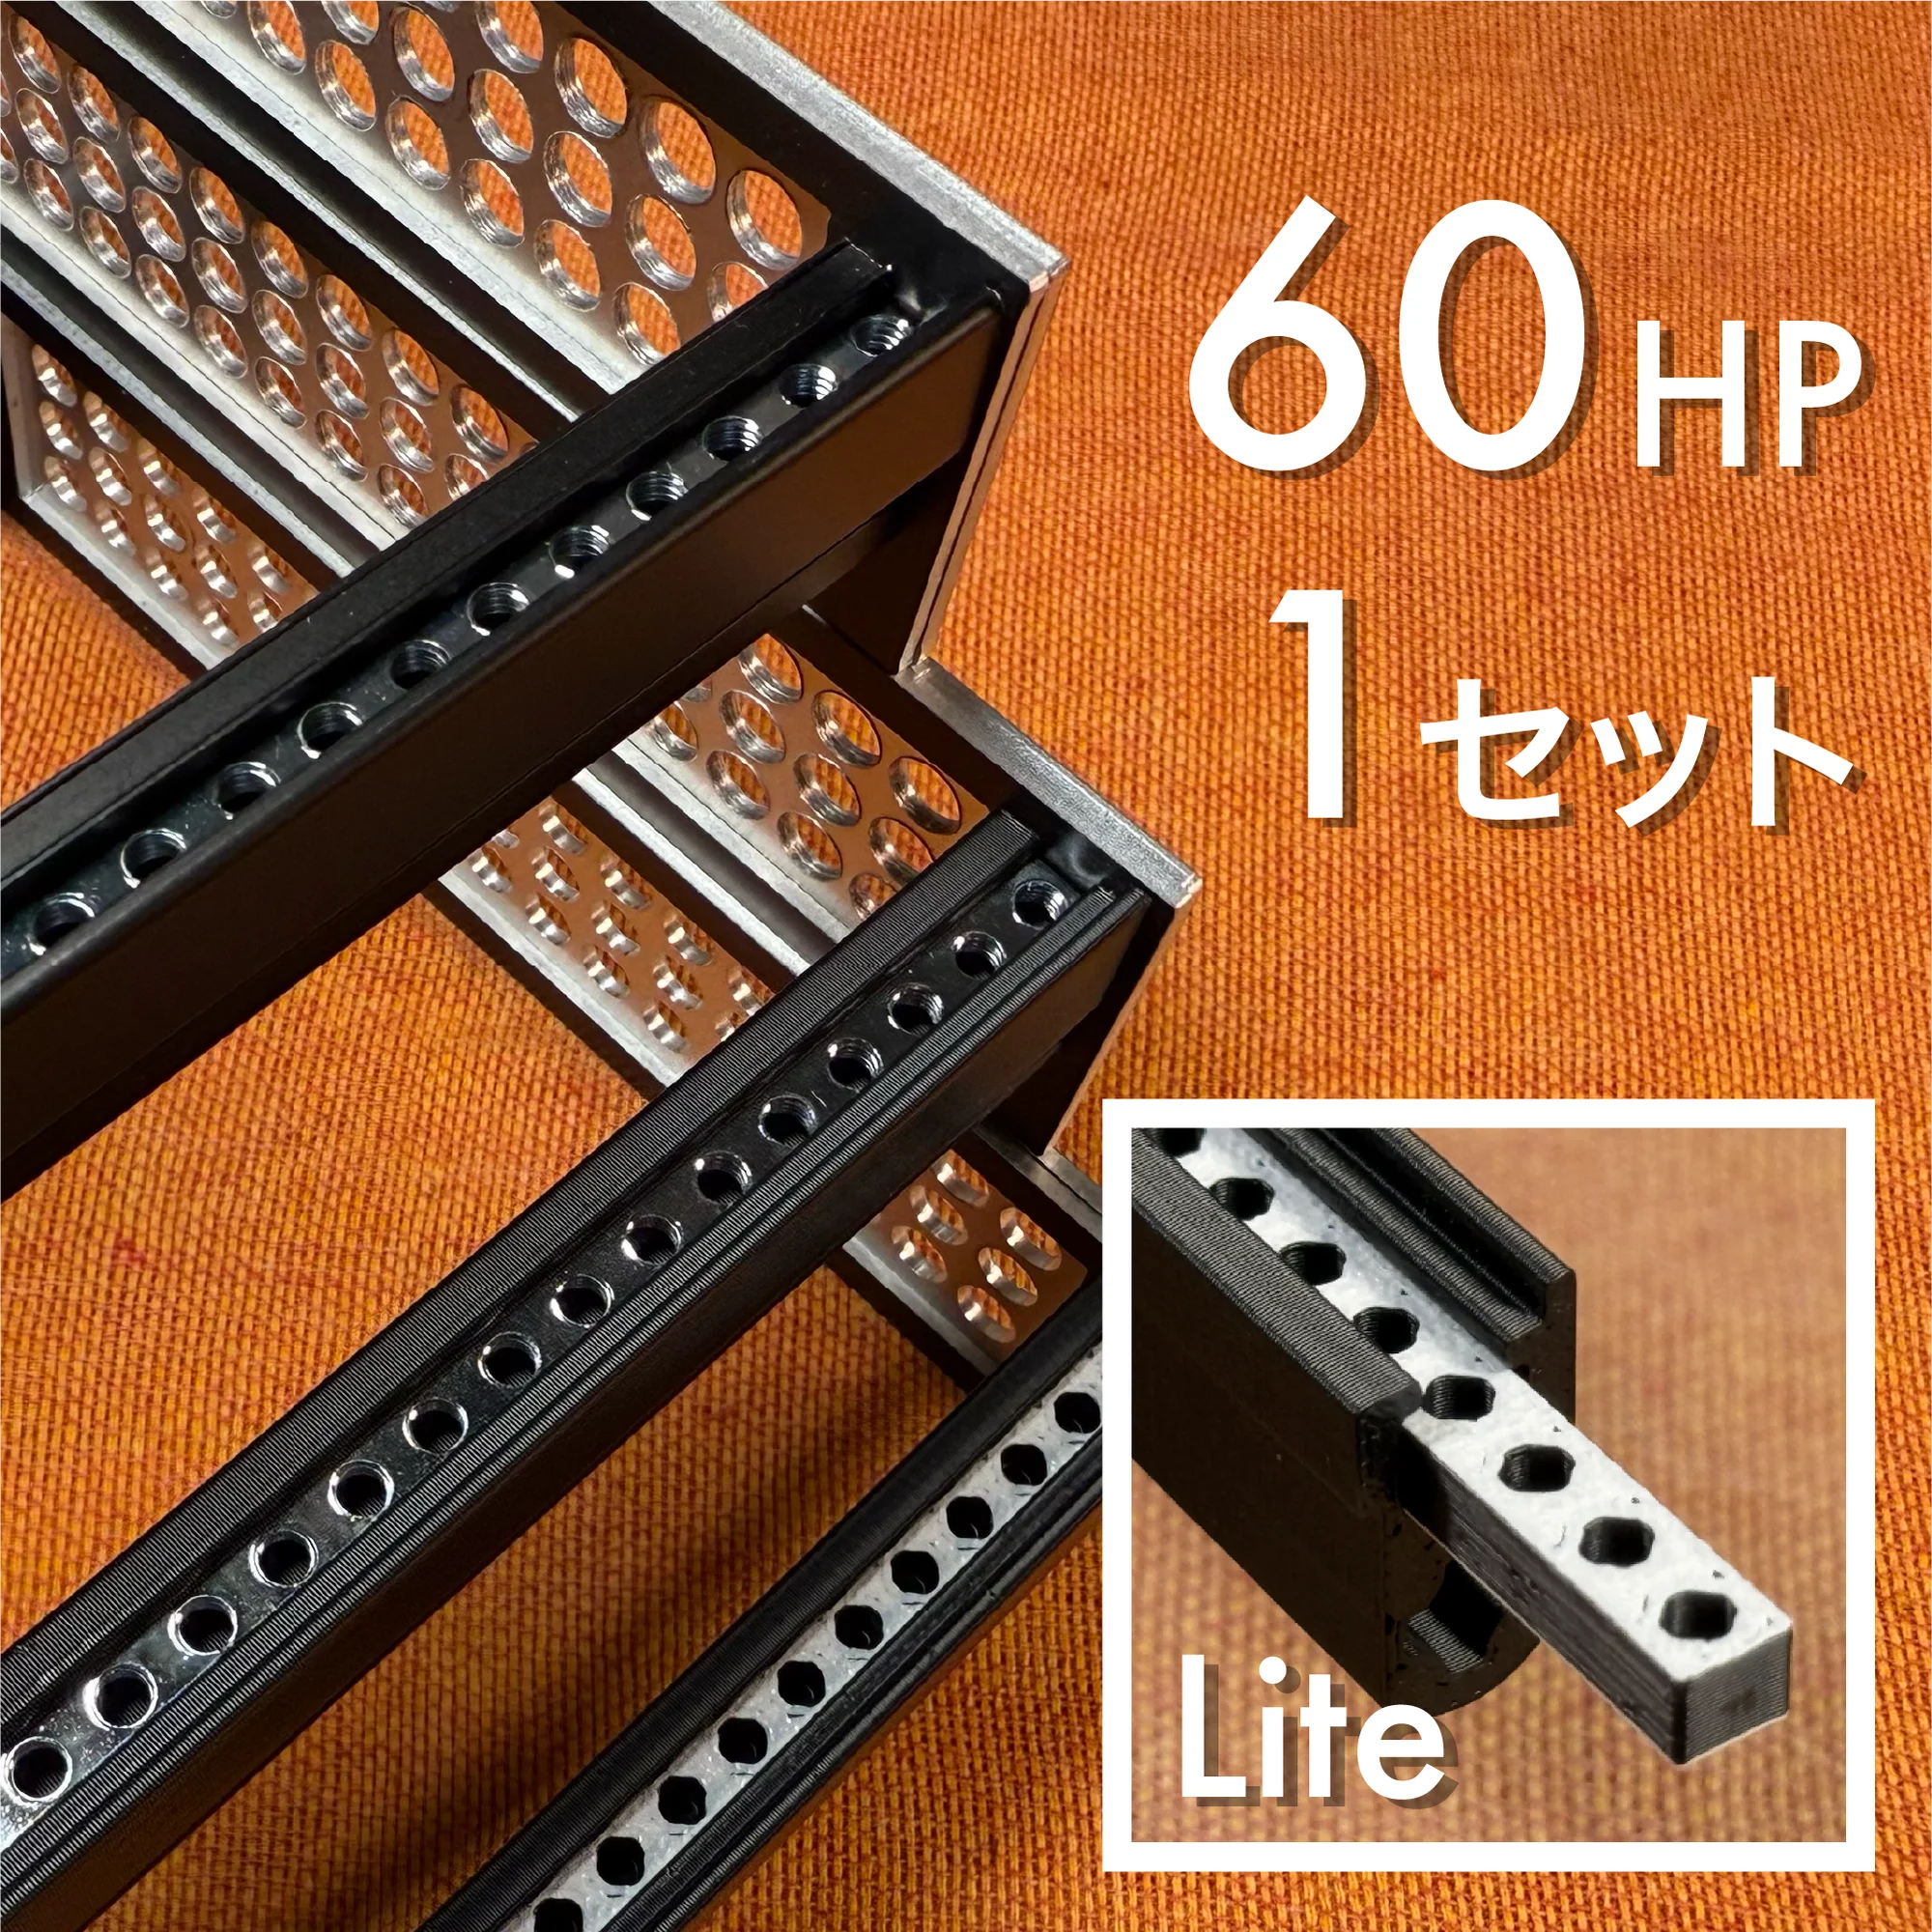 |  |  | 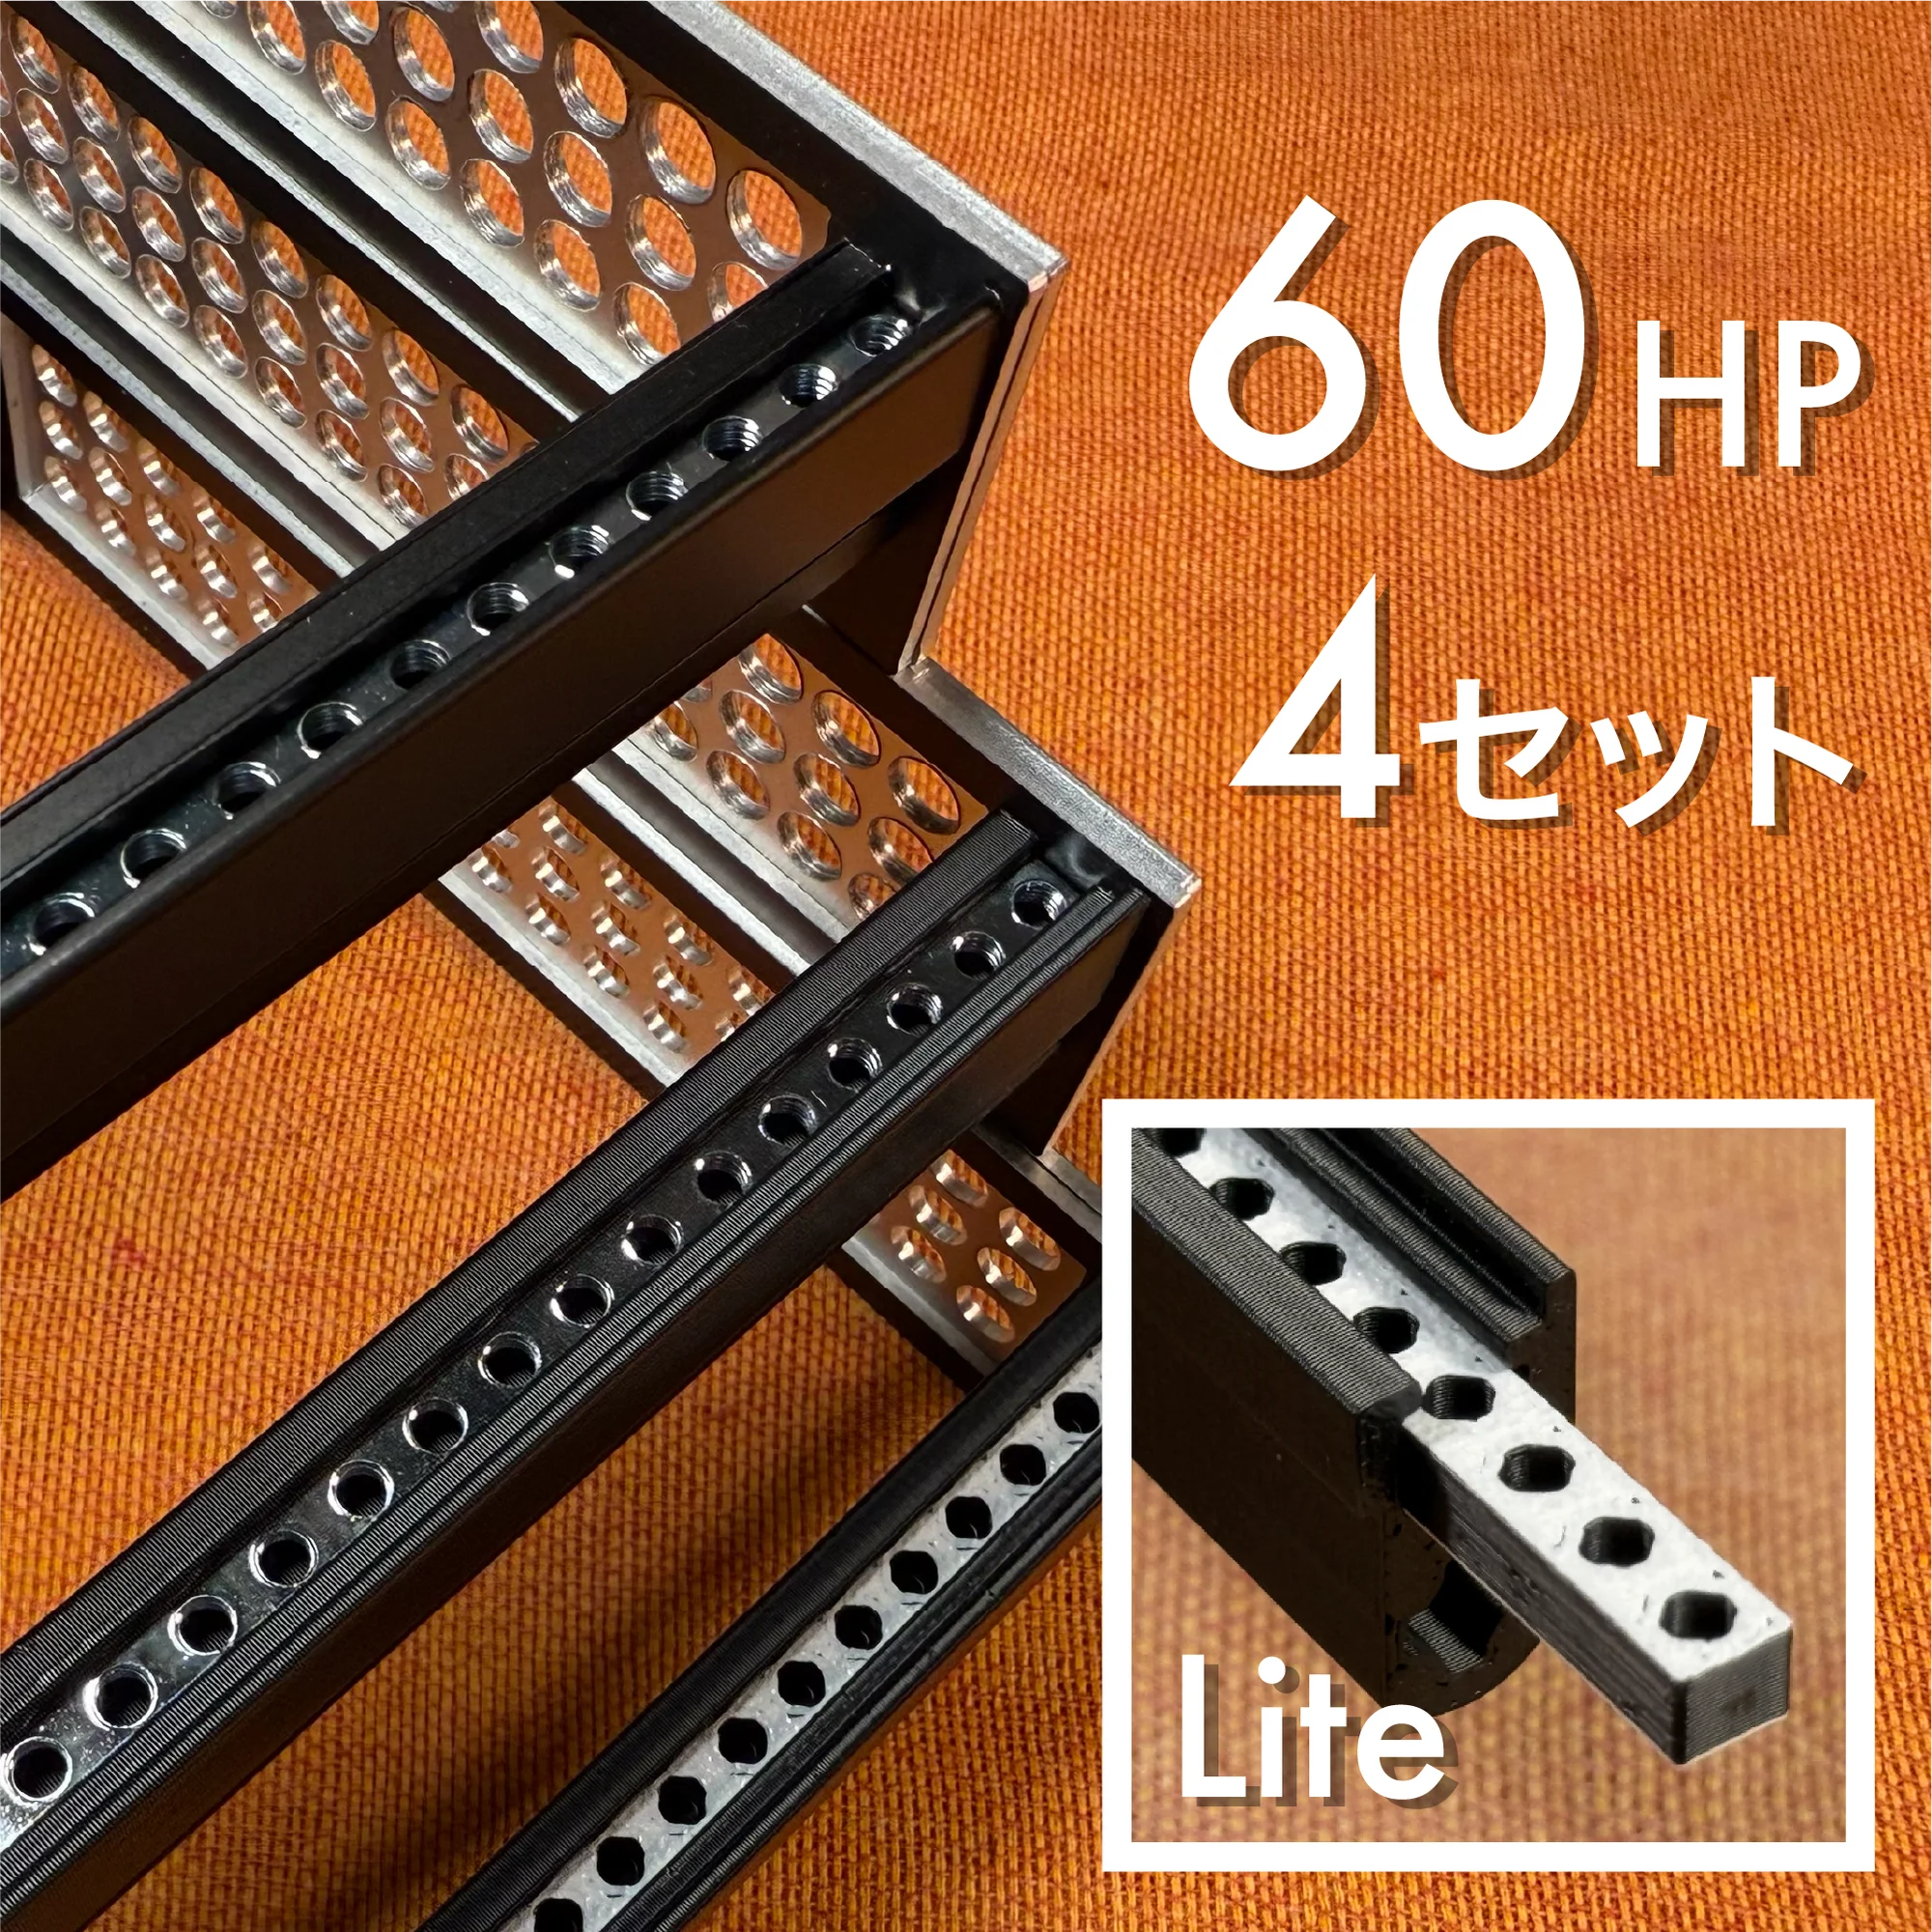 |
| Nuts | 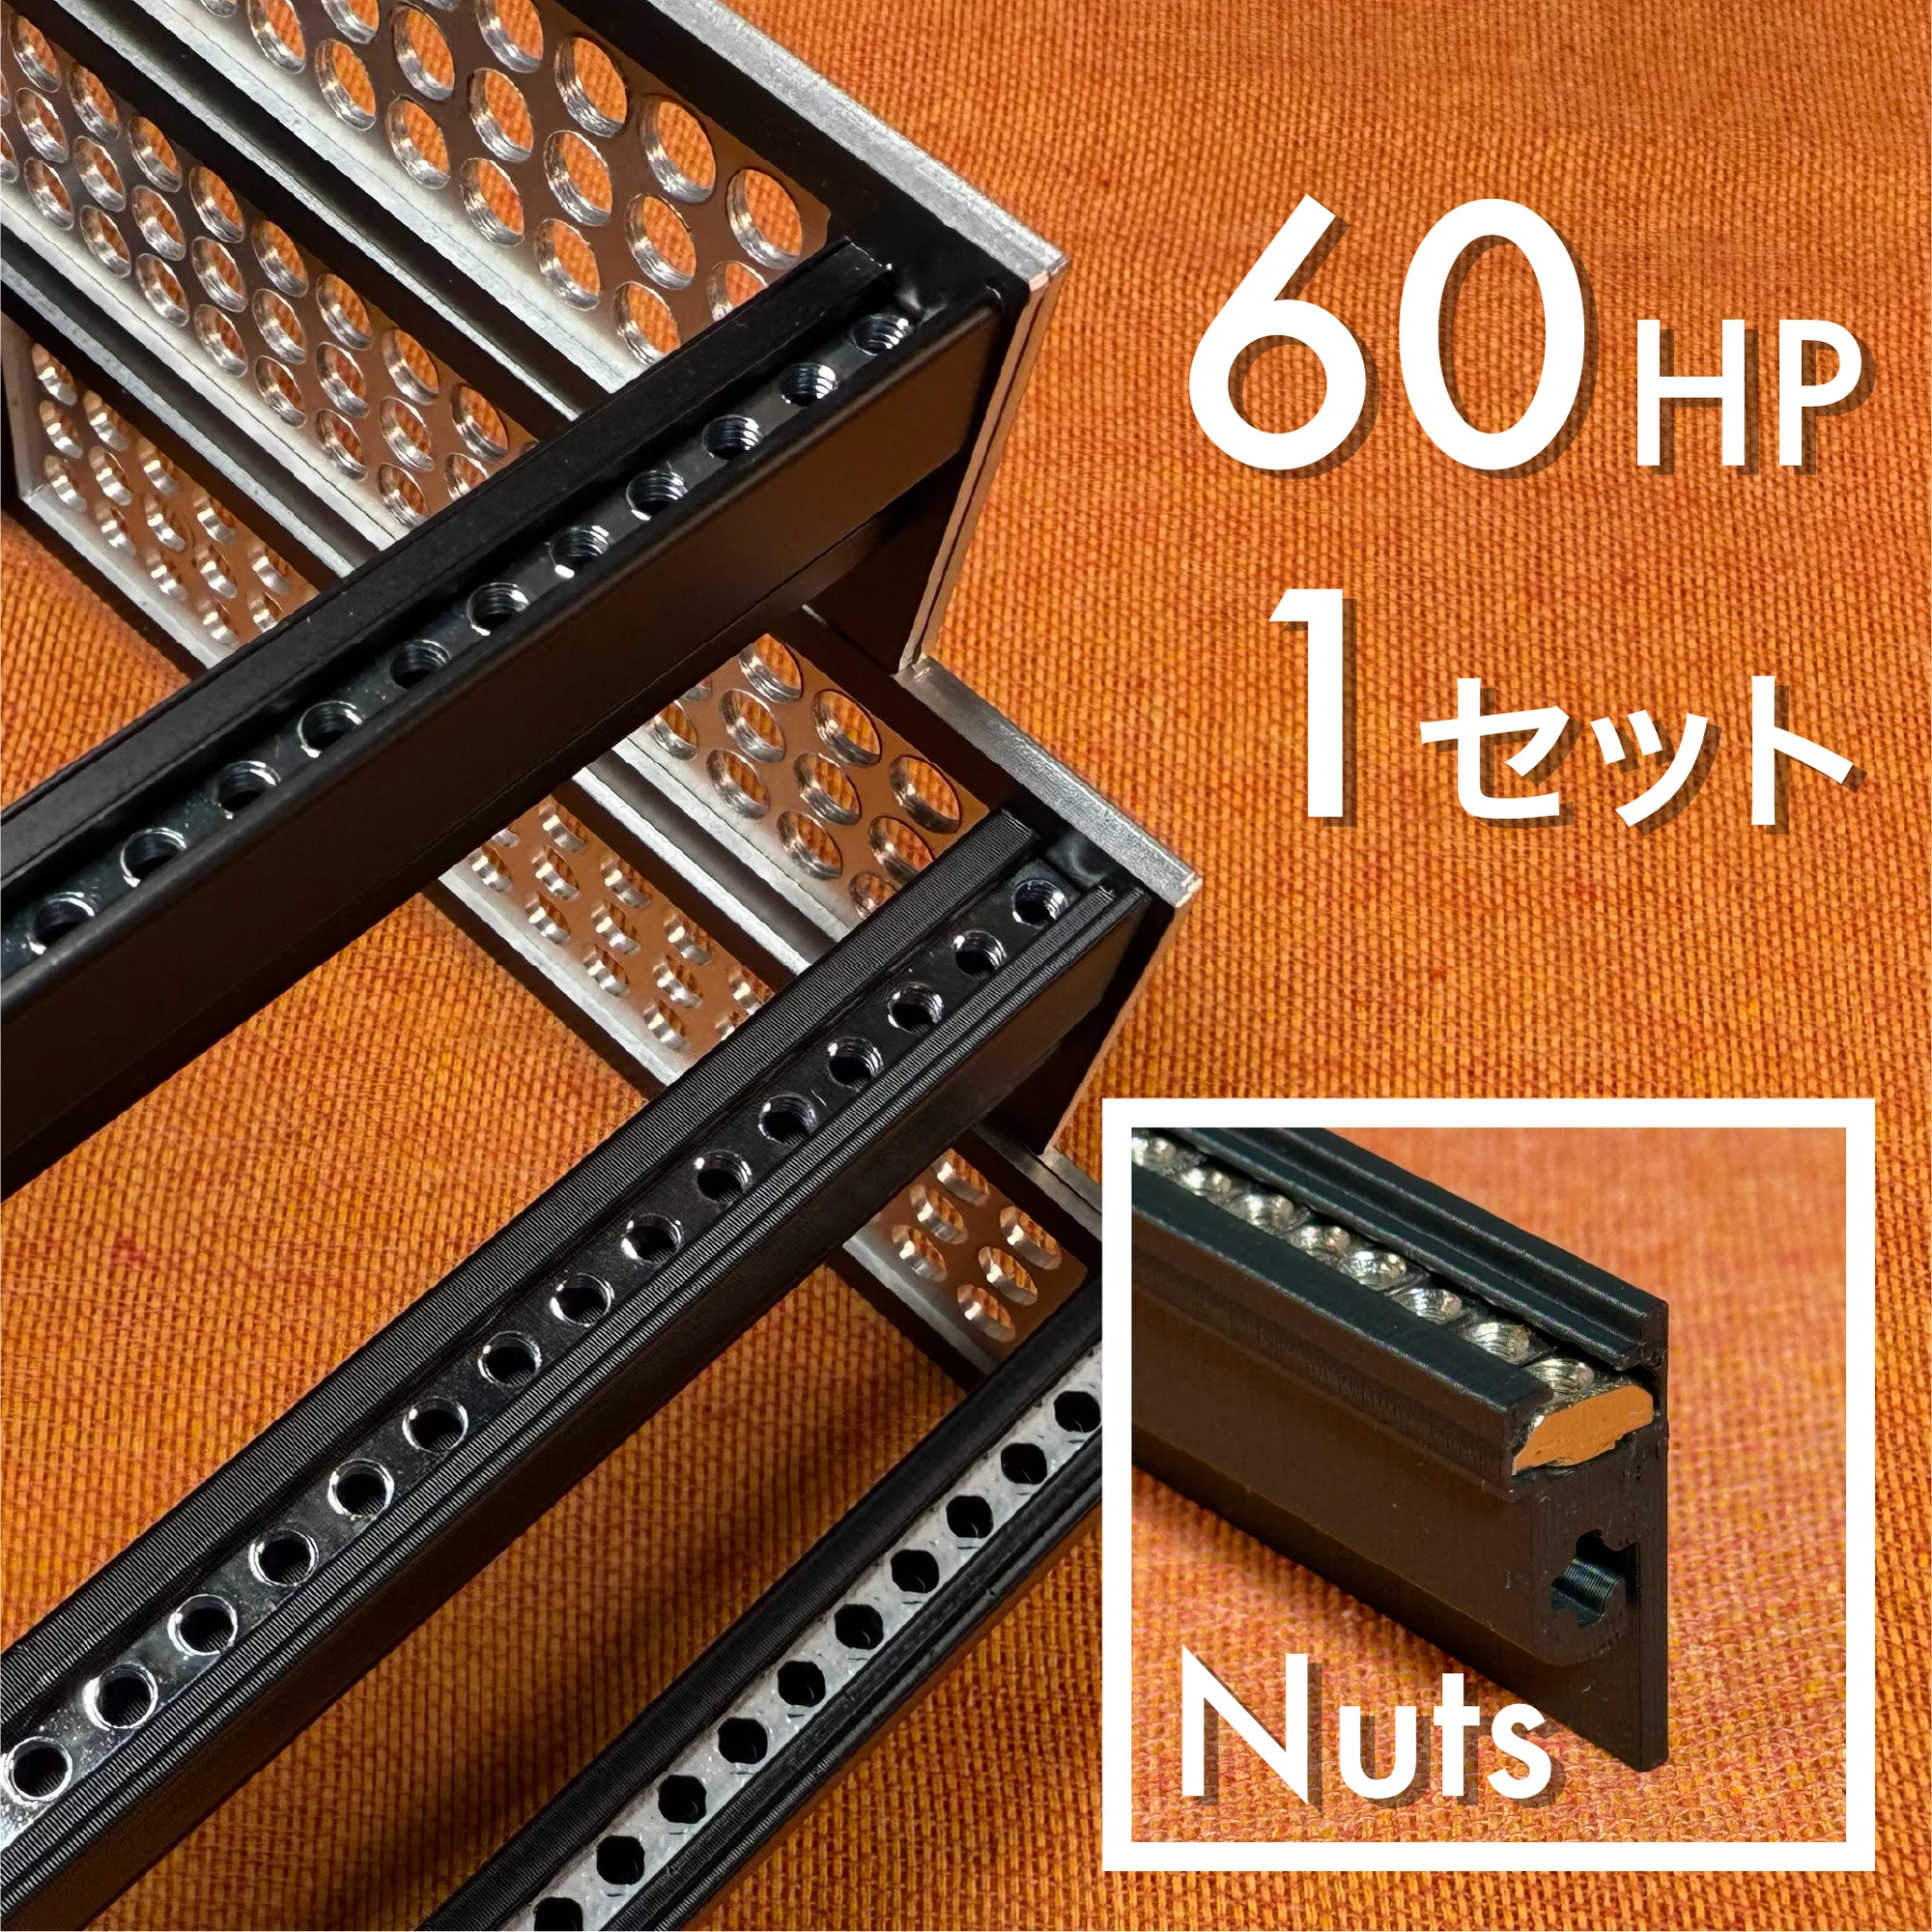 |  |  |  |
| Dual |  |  |  |  |
| Metal |  | 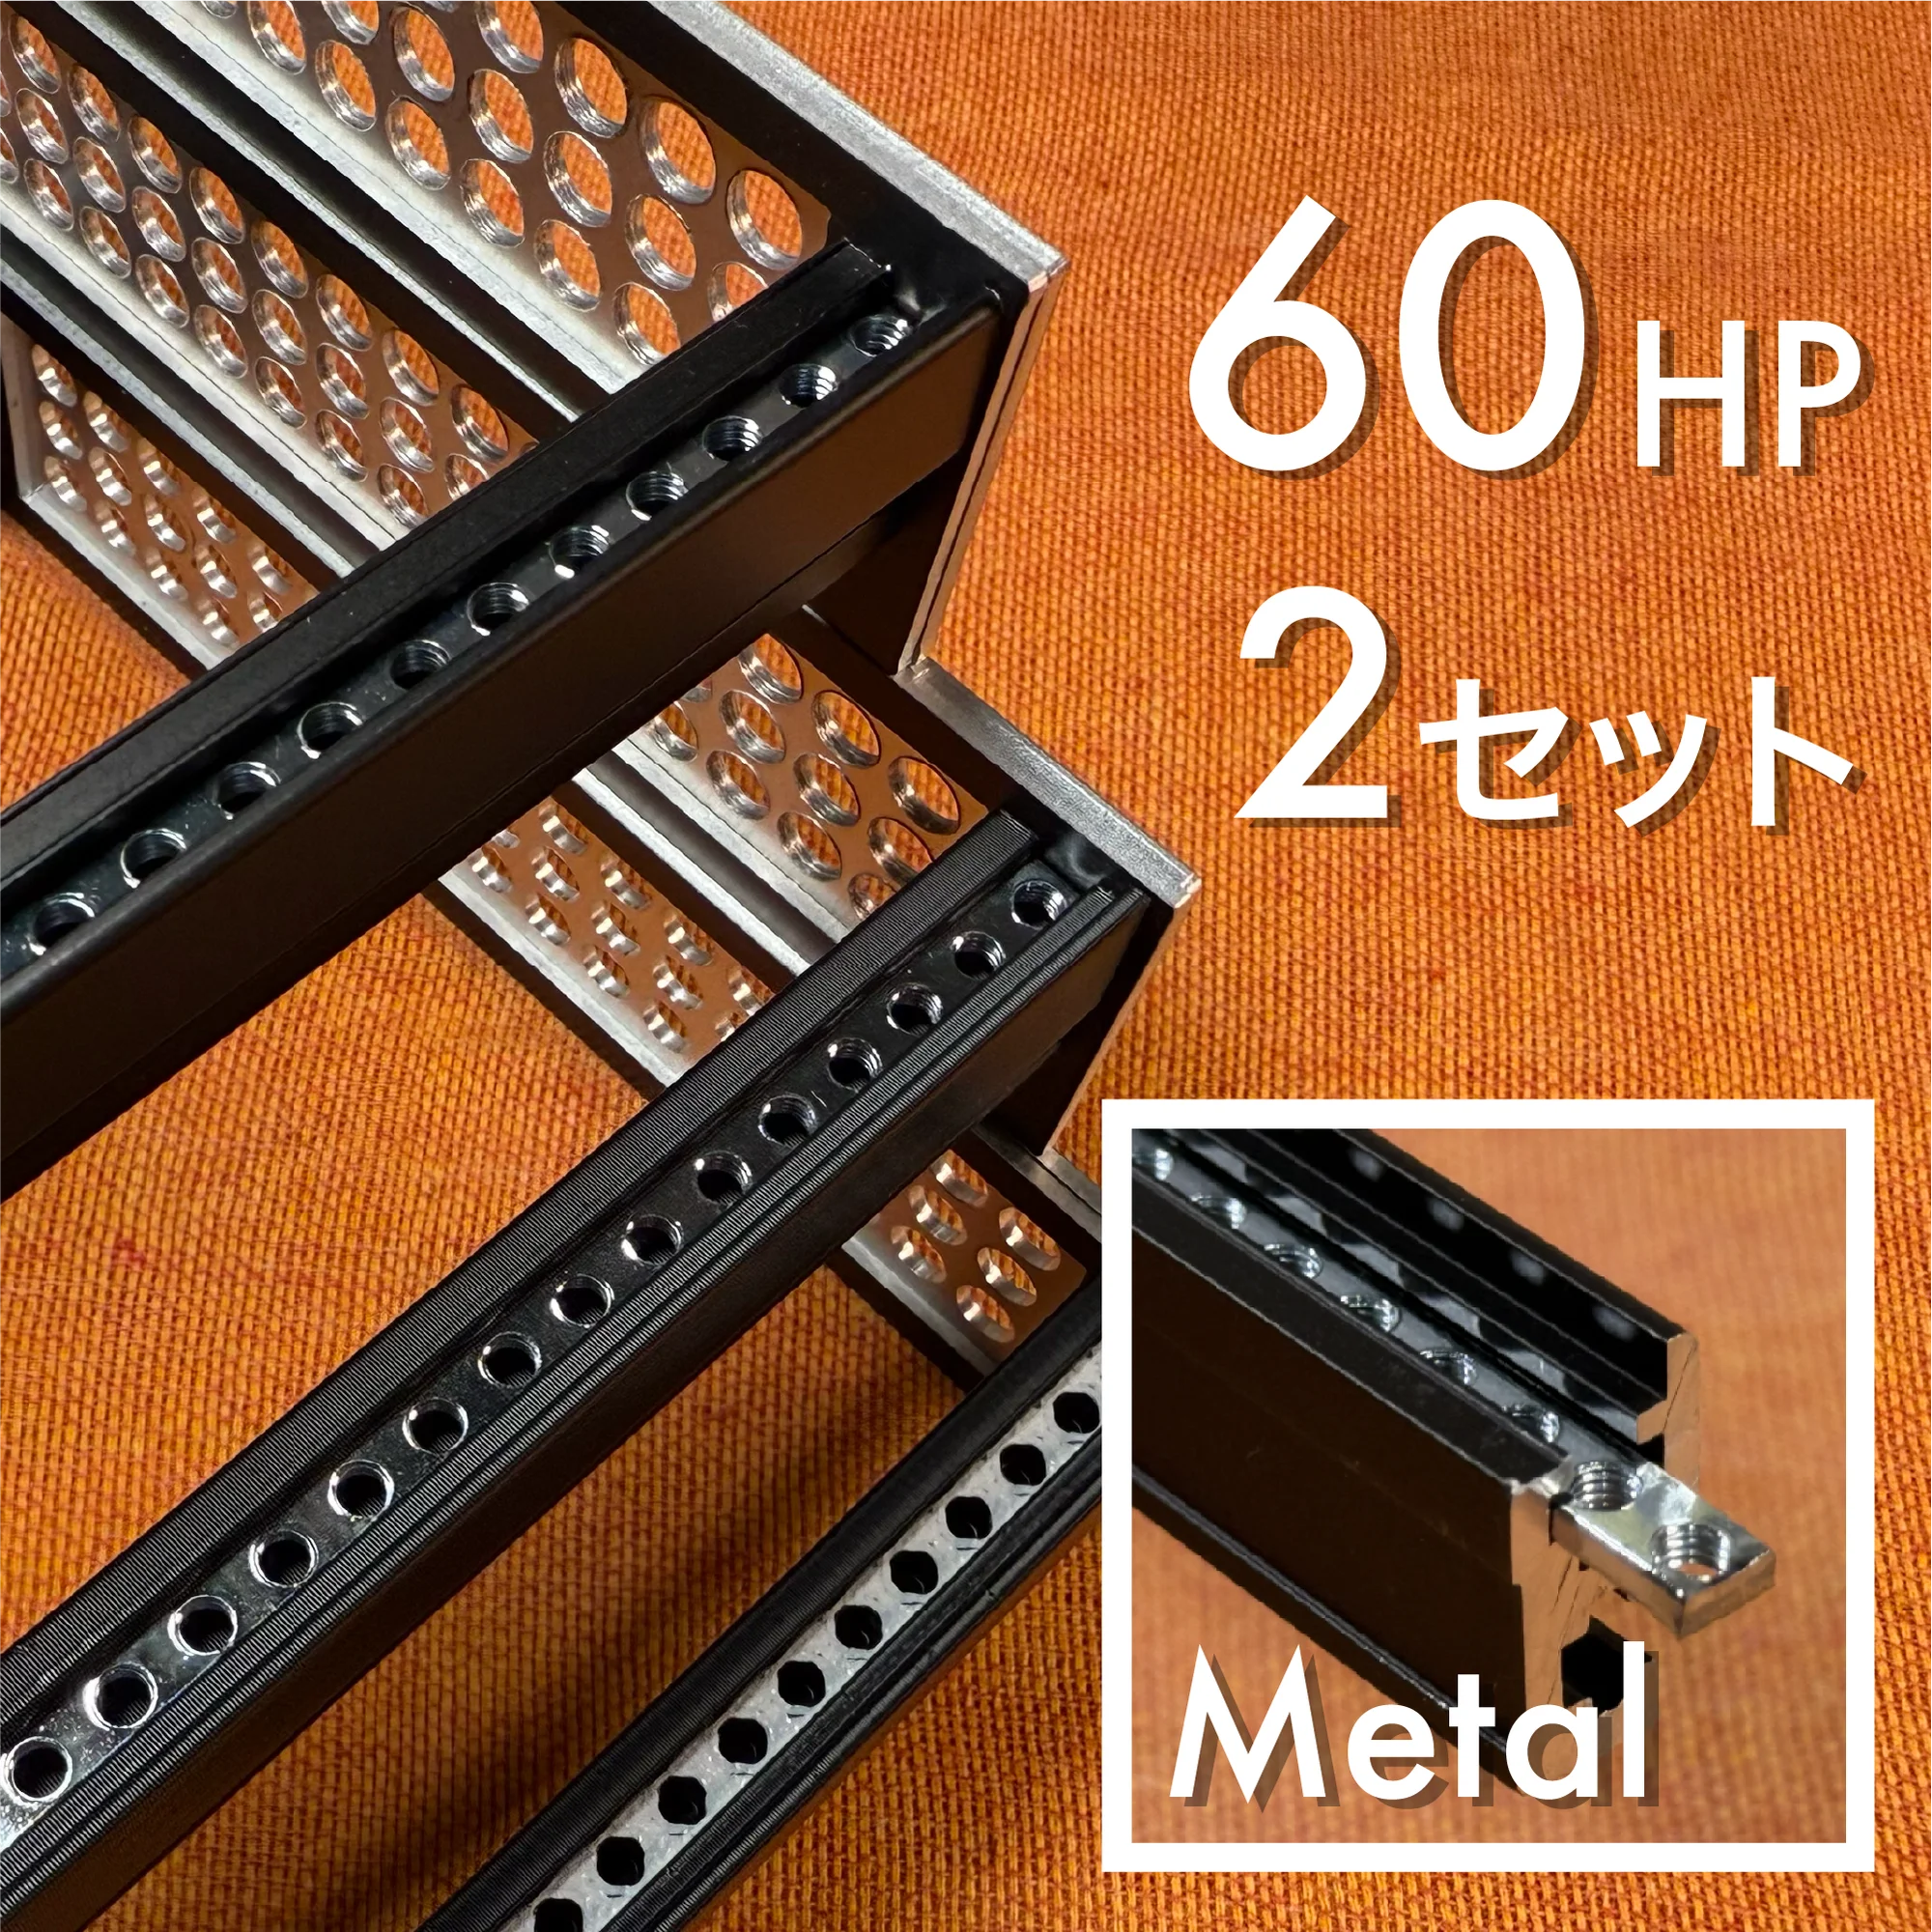 | 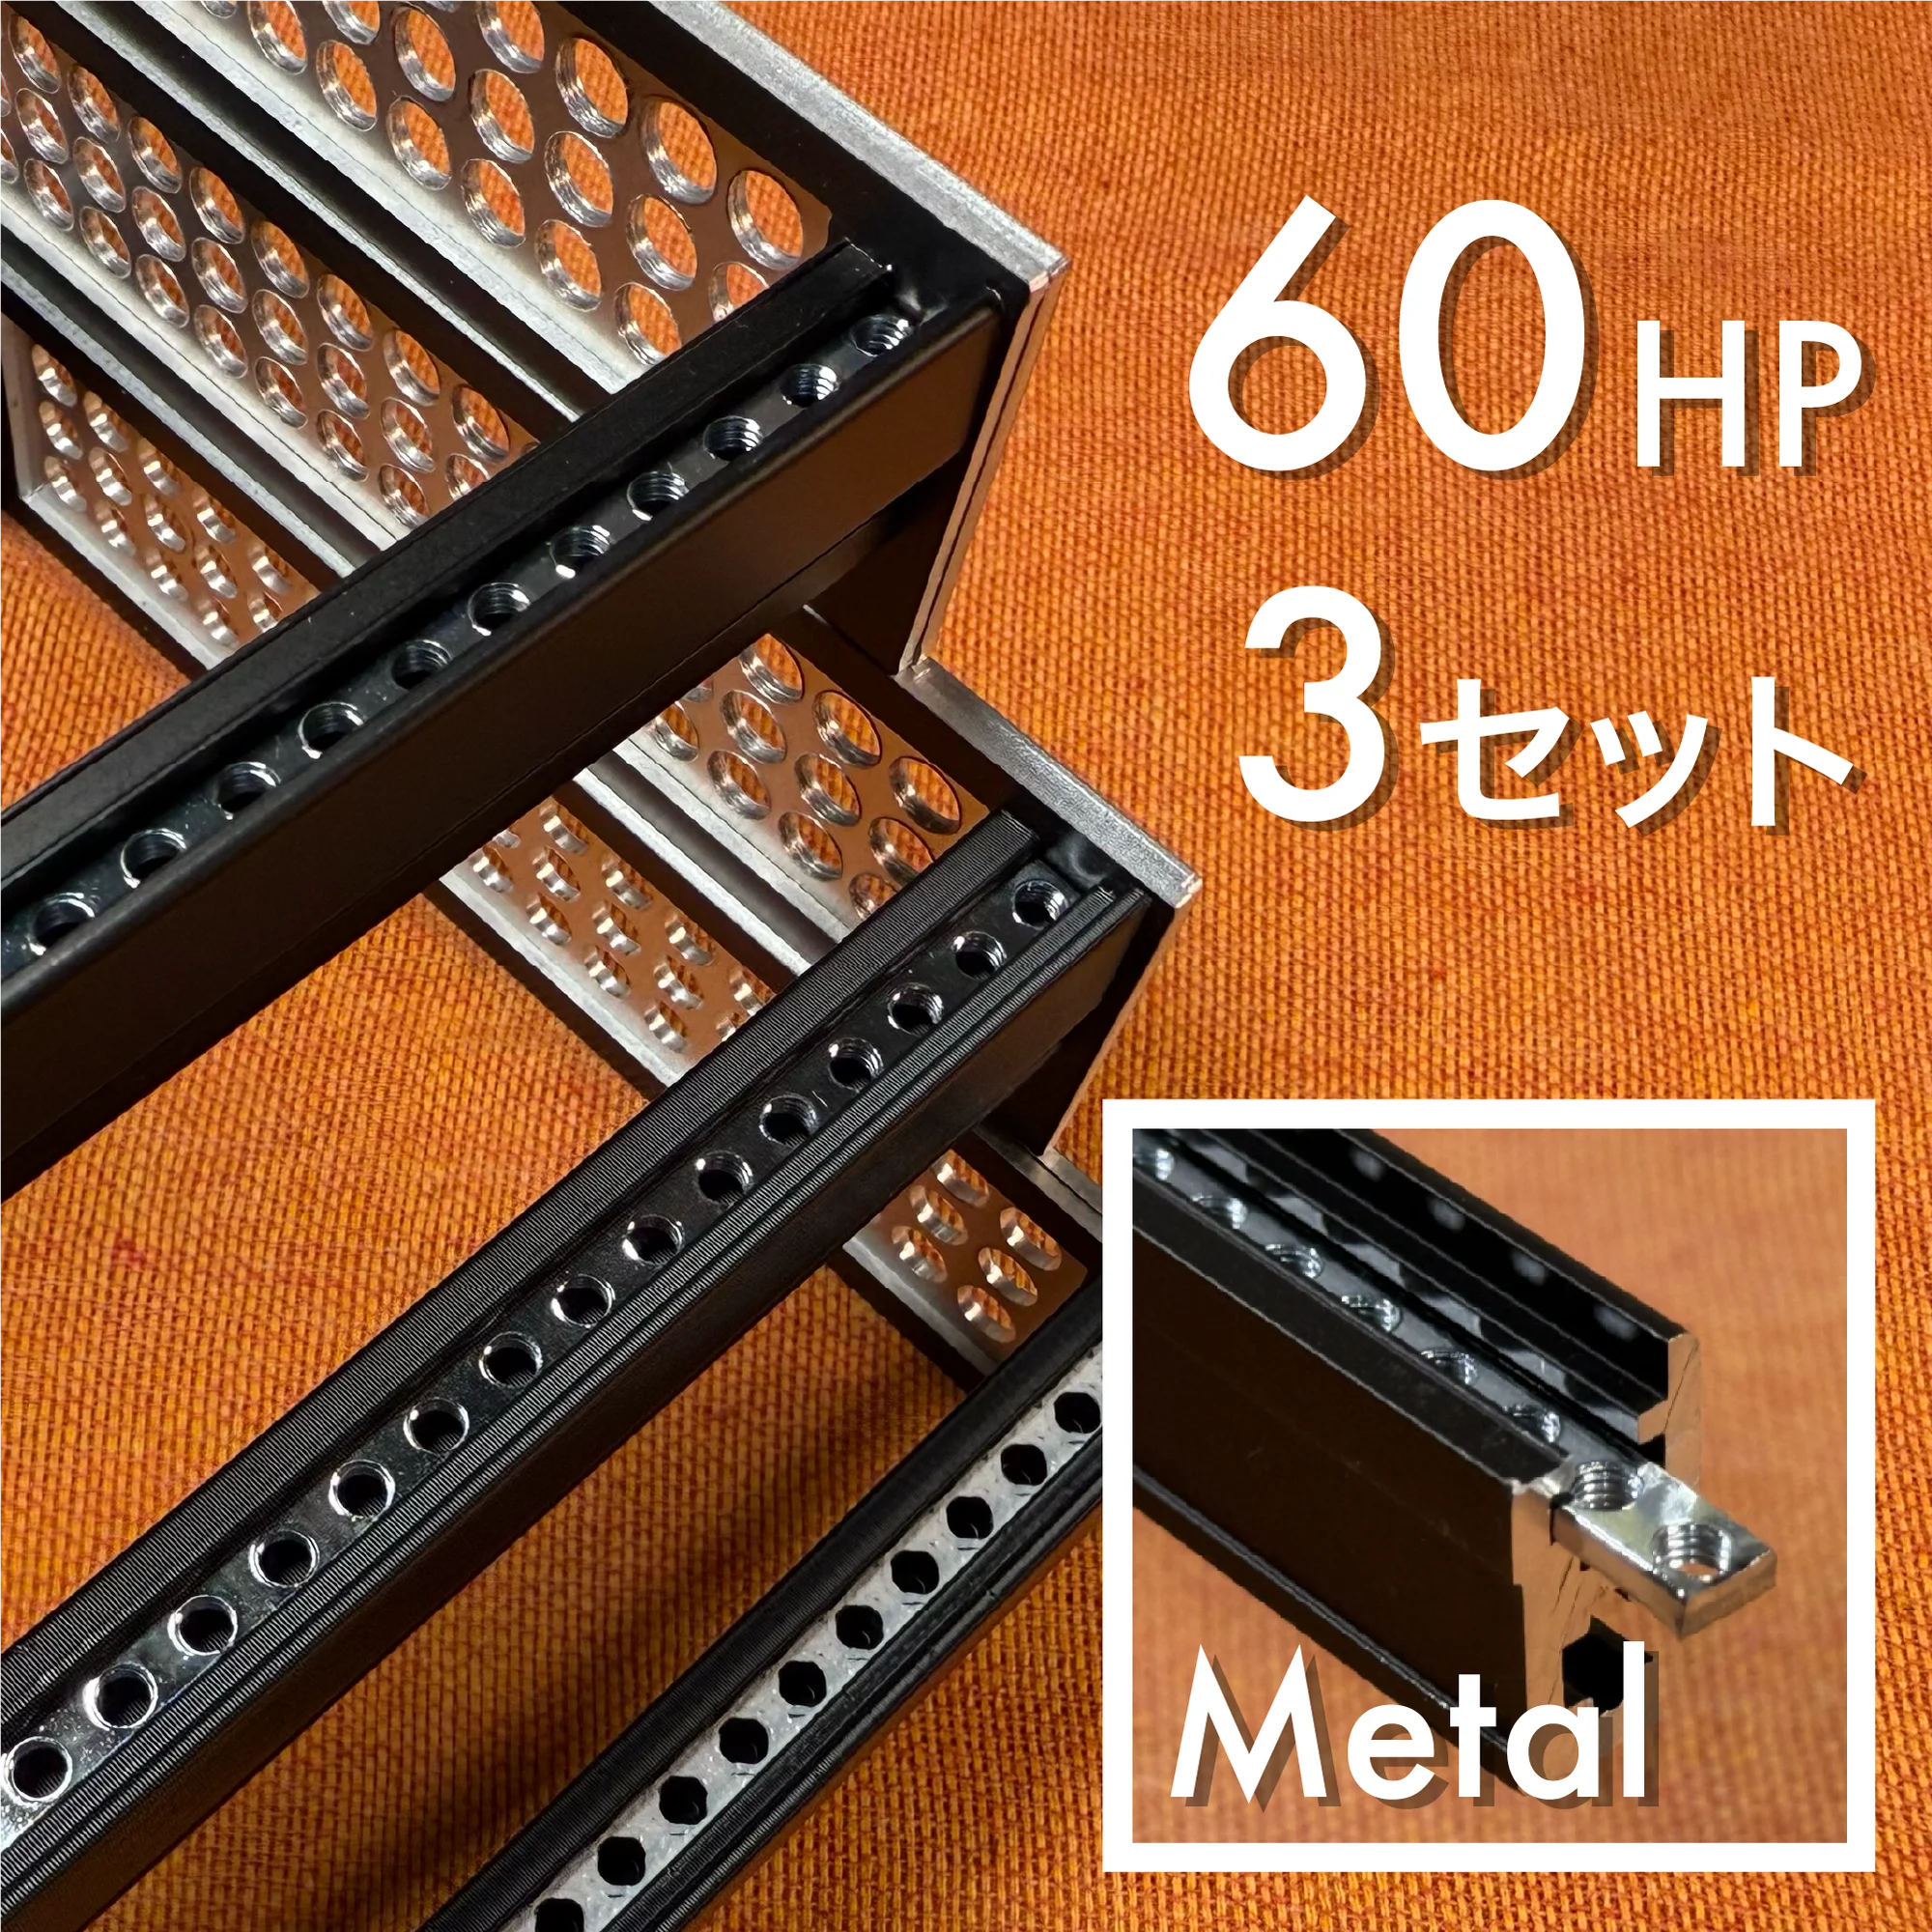 |  |
Notes for Each Rail Type
Please keep the following notes in mind for each rail type:
- All rail types except Metal use ASA resin rails. While they perform fine under normal use, they can break if bent with excessive force, so please avoid applying strong pressure such as leaning on them.
- Lite rails also have plastic bar nuts. The design features extra depth for wear resistance, but overtightening screws will strip the threads and cause them to loosen. Avoid overtightening for long-term durability.
- Nuts rails have a slightly thicker nut section on the inside compared to other rails. While there’s no fixed specification for the depth below the panel in Eurorack modular synths, some modules have PCBs or components that extend relatively high above and below. For such modules, the top or bottom edges may contact the rail. In these cases, gently spread the rails apart when mounting the module. The ASA resin rails have some flexibility, so slight spreading won’t cause issues.
Attaching Rails to an Outer Case
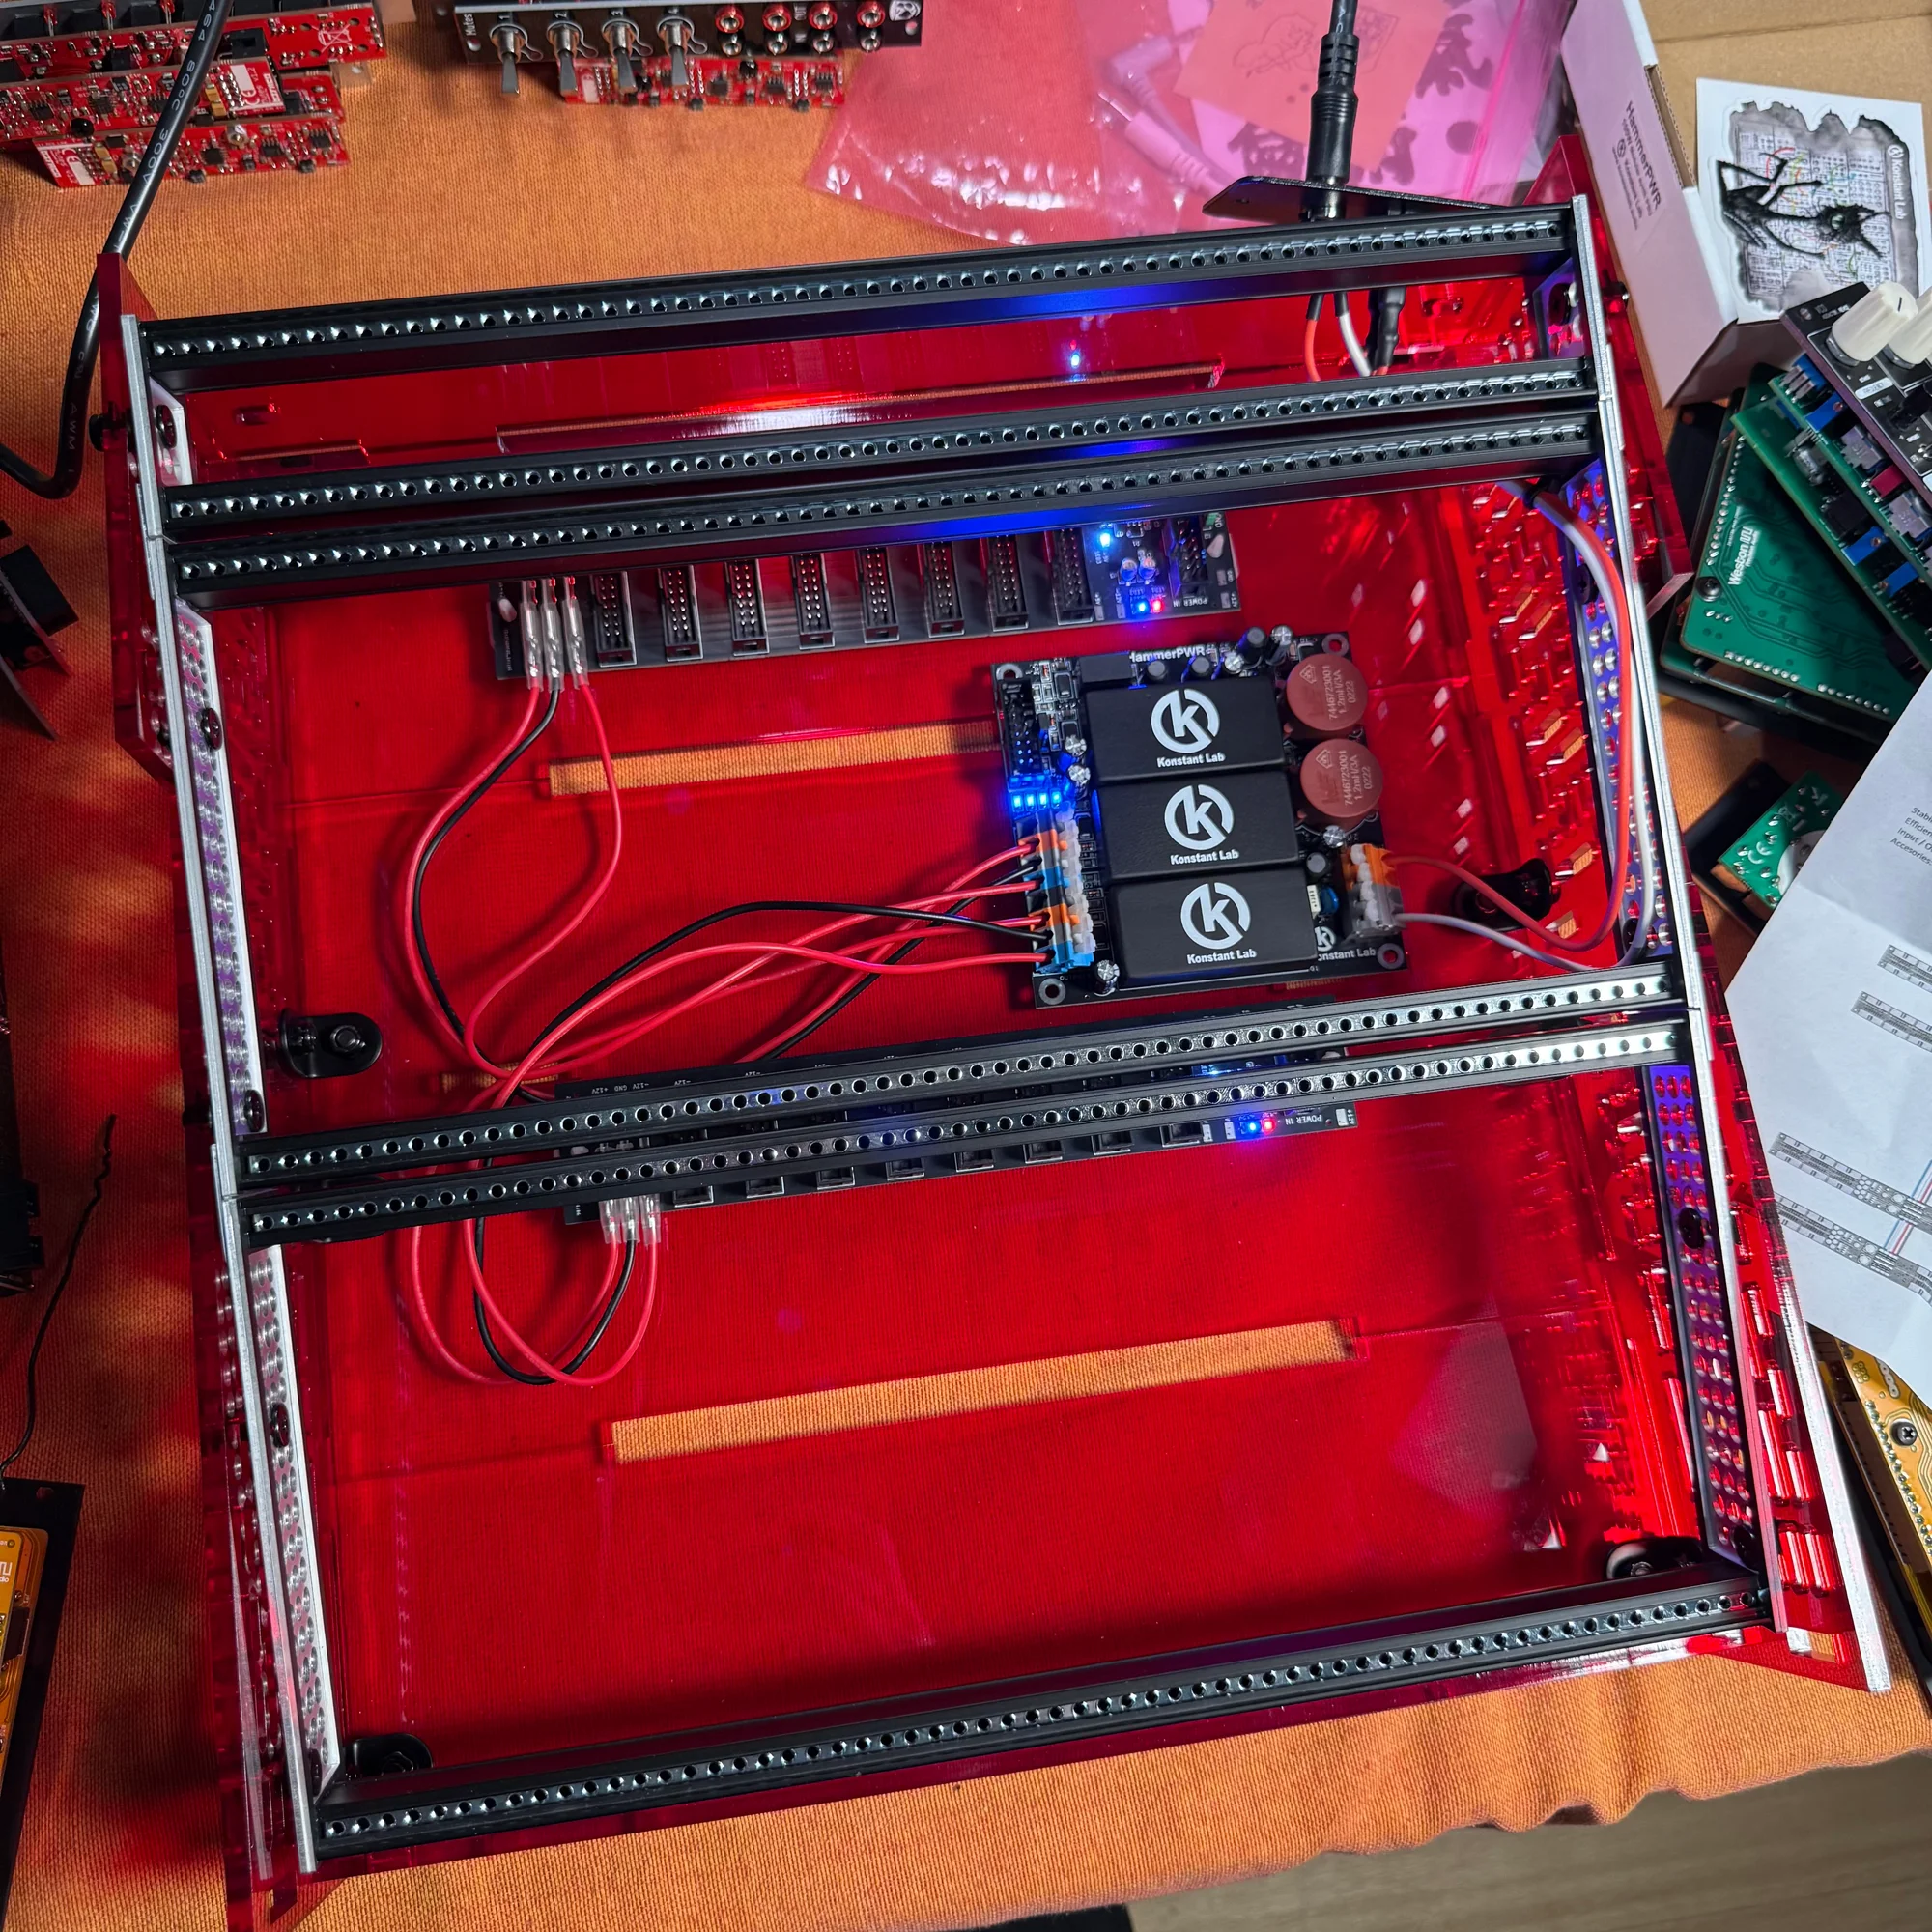
This product is sold as rails only, but if you’re building your own modular synth case, the question of how to attach these rails to an outer enclosure arises. While this product alone doesn’t solve that problem, each set includes the following fasteners as a bonus, sized for zudo-block series cases:
For zudo-block, the assembly order from inside out is: screw head -> rail mounting panel -> 3mm spacer washer -> side panel -> nut, using M5 14mm screws to fasten all parts together. This is done at two points per side. The 3mm spacer washer sits in the gap between the frame and side panel.
If you’re building your own case, these dimensions may not match, so please prepare screws of the appropriate size separately.
If the distance between your frame and enclosure differs, adjusting the 14mm screws and the spacers placed between them should help achieve a good fit. This is up to your own design preferences, but we recommend flat-head type screws for mounting. Screws with protruding heads may interfere with PCBs of modules placed at the edges.
Expanding zudo-block
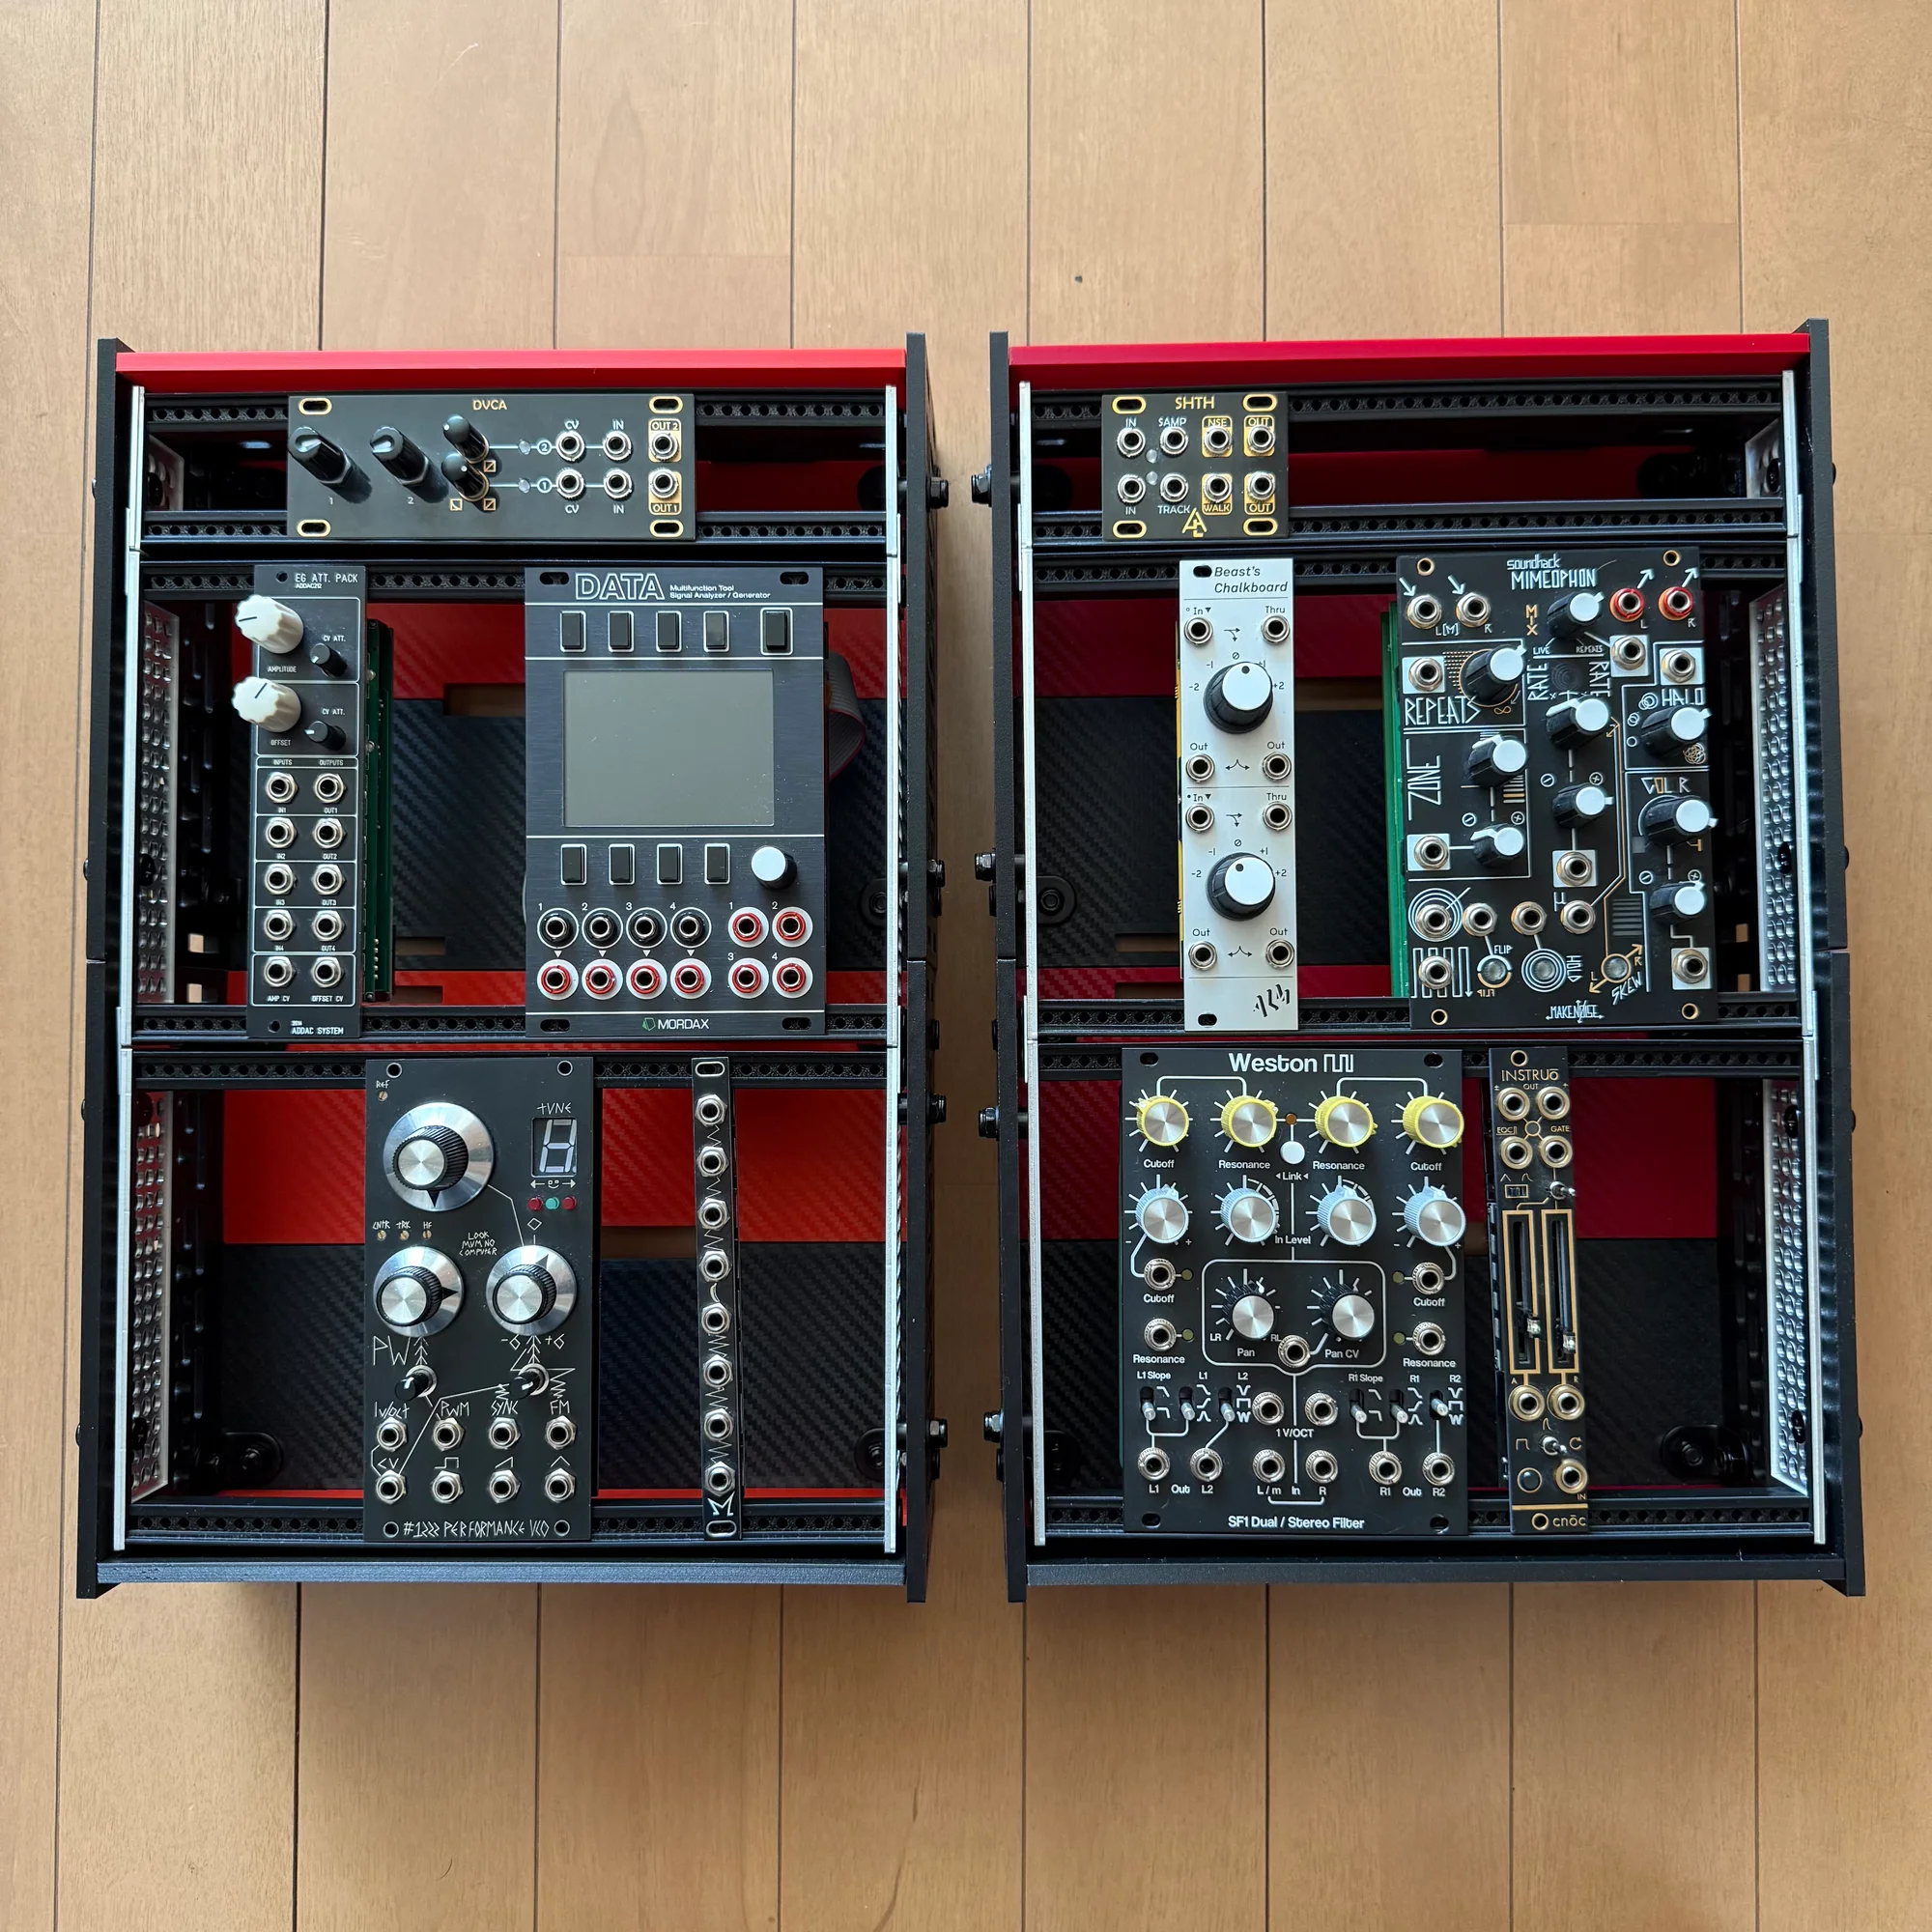
As mentioned earlier, the zudo-rail can also be used to expand zudo-block series cases.
Below are examples of:
- Two zudo-block-40s + zudo-rail 40HP 1U combination
- Two zudo-block-60s + zudo-rail 60HP 1U combination
The 3D-printed Lite versions share the same dimensions, so they can be combined with acrylic versions, or two Lite versions can be connected together. This powers up your setup to a mid-size case, making it easier to mount your own power supply on the bottom.
If you’re building your own case, these dimensions may not match, so please prepare screws of the appropriate size separately.
If the distance between your frame and enclosure differs, adjusting the 14mm screws and the spacers placed between them should help achieve a good fit. This is up to your own design preferences, but we recommend flat-head type screws for mounting. Screws with protruding heads may interfere with PCBs of modules placed at the edges.
I’ve only tried the two-case combination method so far, but in principle, the zudo-block side panels and frames can be secured wherever the holes align. The connector panels have some tolerance built in, so the fit isn’t so tight that you need precise measurements to make it work. It might be fun to try creating your own original case setup.
That concludes our introduction of the zudo-rail.
We hope you find this helpful.